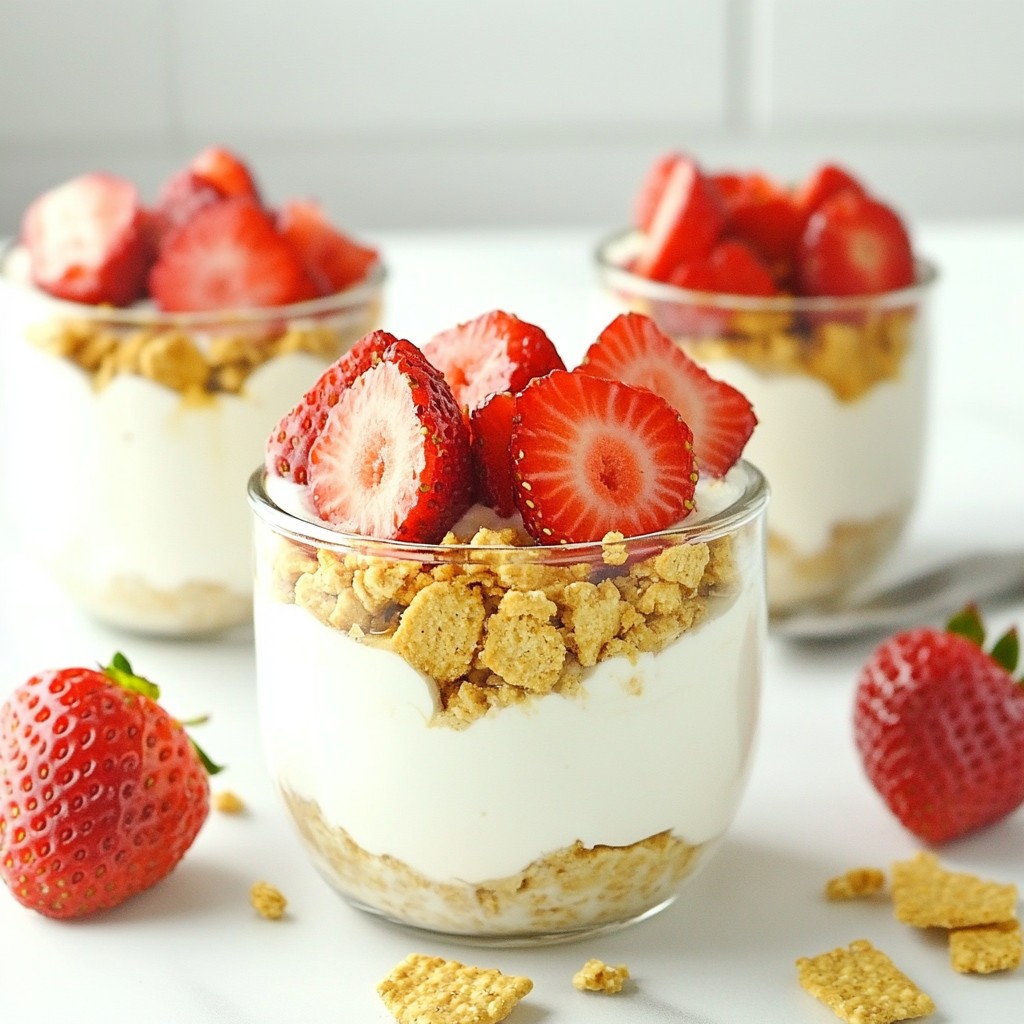
Strawberry Cheesecake Overnight Oats Simple Delight
A delicious and healthy breakfast option featuring rolled oats, Greek yogurt, and fresh strawberries, reminiscent of che...
8h
2 servings
Learn more →
From quick weeknight dinners to special celebration meals, find delicious recipes that bring joy to your kitchen and your table.

Indulge in our collection of irresistible dessert recipes! From decadent chocolate treats to light and fruity delights, discover sweet creations that will satisfy every craving and make every occasion special!
More Desserts 


Explore our collection of recipes organized by meal type and cuisine

Discover delicious dinner recipes that bring joy to your table! From quick weeknight meals to impressive family feasts, explore our collection of savory dishes that make every dinner time memorable!
More Dinners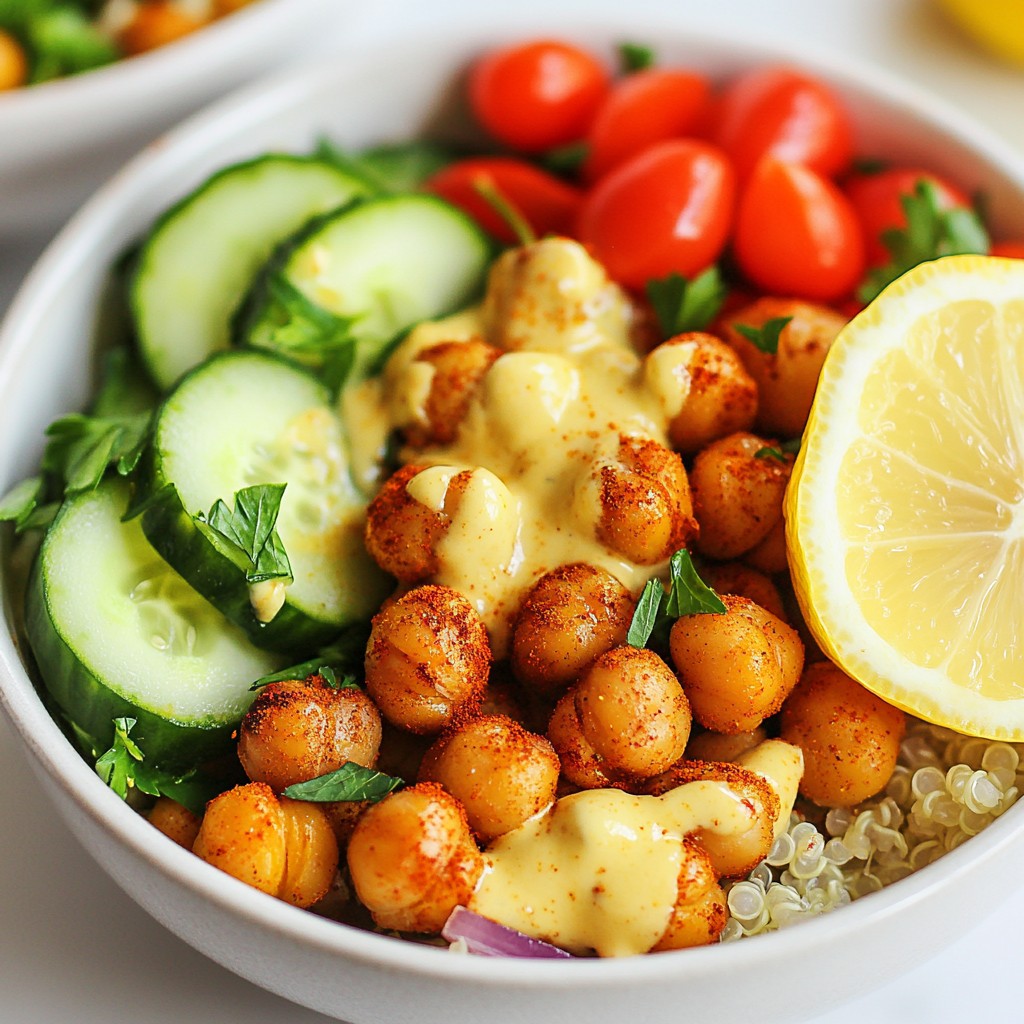


welcome
Savanna is the creator of MySavedRecipe.com, where she shares comforting, flavorful recipes inspired by her love for cooking. Her mission is simple: to bring joy to your table, one delicious dish at a time.
Fresh recipes added to our collection
A delicious and healthy breakfast option featuring rolled oats, Greek yogurt, and fresh strawberries, reminiscent of che...
A delicious and healthy bowl featuring roasted chickpeas, fresh vegetables, and a flavorful tahini drizzle.
A rich and creamy butter chicken made effortlessly in the Instant Pot.
A delicious and creamy soup made with red lentils, carrots, and coconut milk, perfect for a comforting meal.
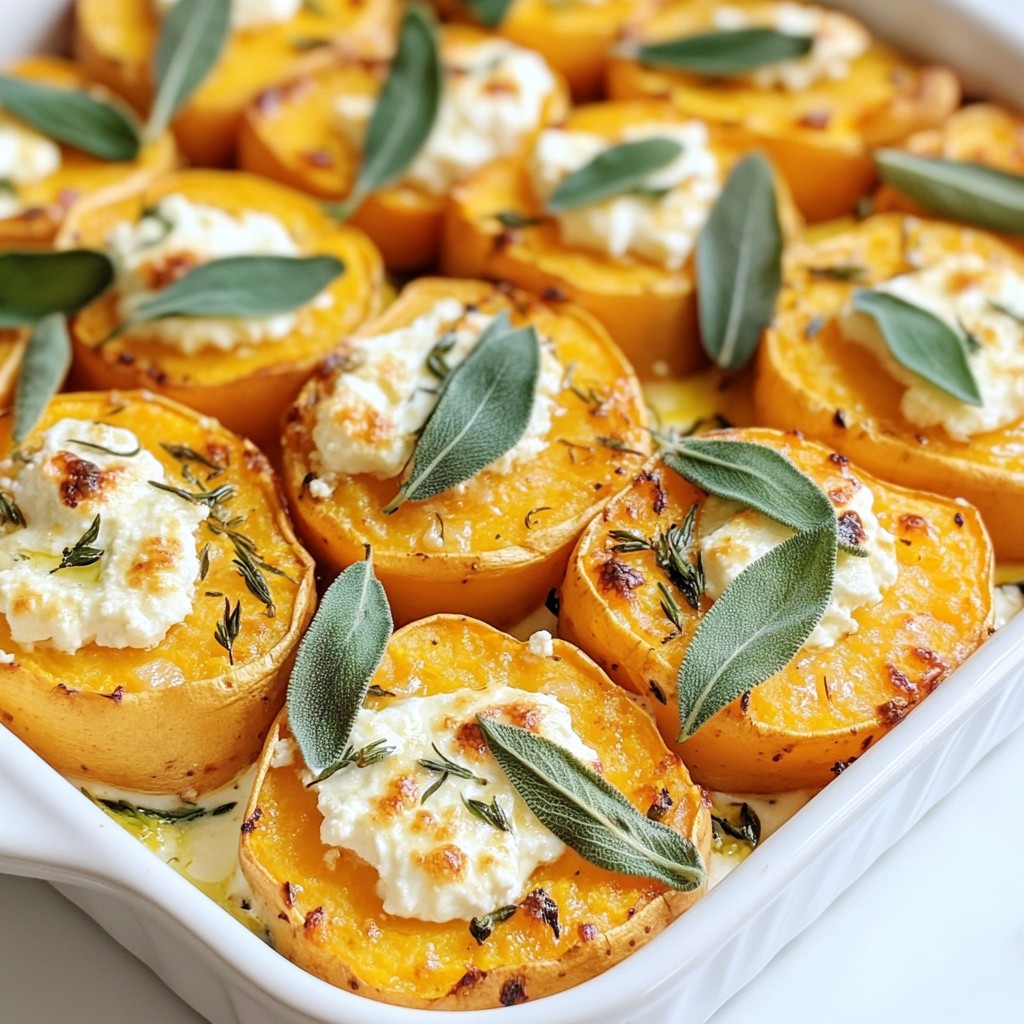
A delicious and creamy bake featuring sweet potatoes, goat cheese, and fresh sage.
A delicious and crispy chicken dish filled with ham and Swiss cheese, served with a creamy Dijon sauce.
A moist and flavorful pound cake infused with lemon and cream cheese, perfect for any occasion.
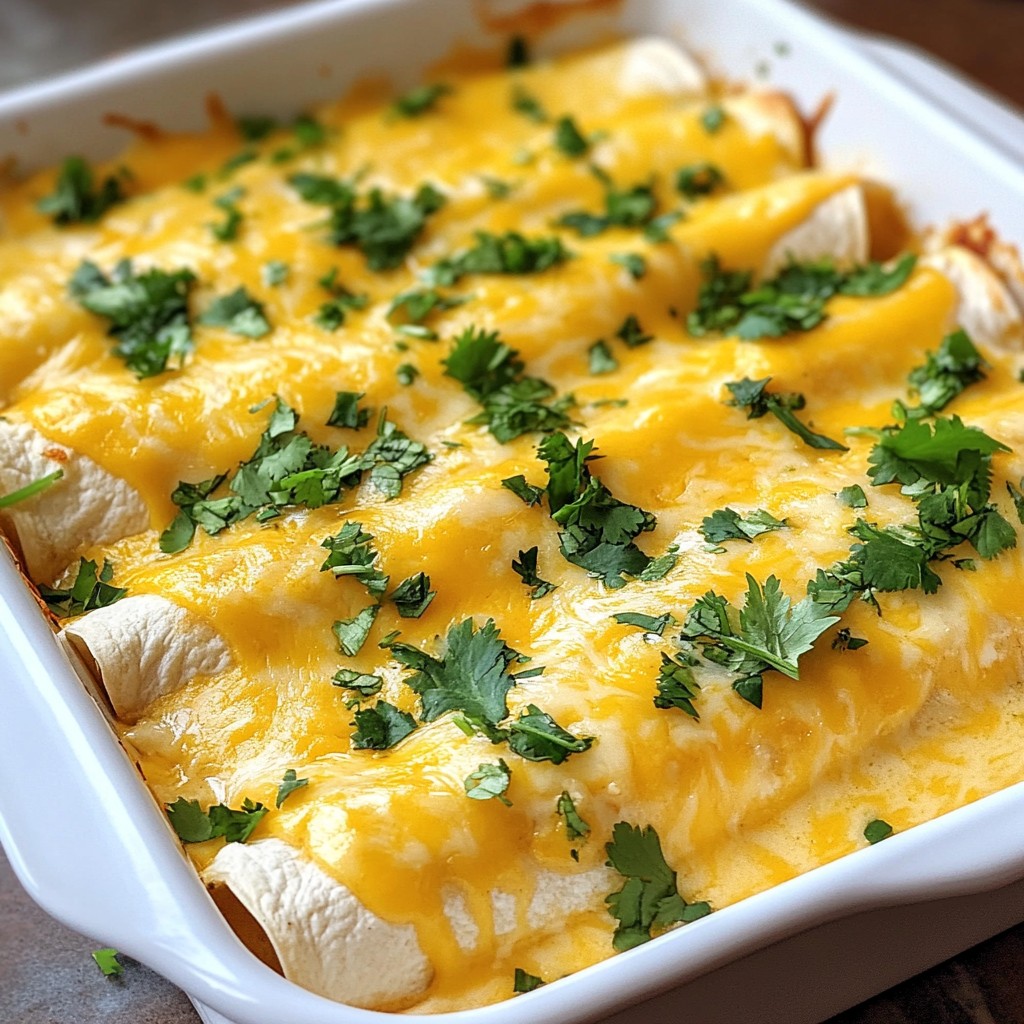
Delicious and creamy chicken enchiladas topped with melted cheese and garnished with fresh cilantro.
Deliciously marinated chicken thighs cooked to perfection in an air fryer.

A rich and flavorful soup featuring shredded chicken, enchilada sauce, and a creamy base, topped with cheese and garnish...

Delicious and crispy wonton tacos filled with savory ground chicken and fresh vegetables.
A delicious and indulgent breakfast bake made with chocolate croissants, eggs, and milk, perfect for a special morning.