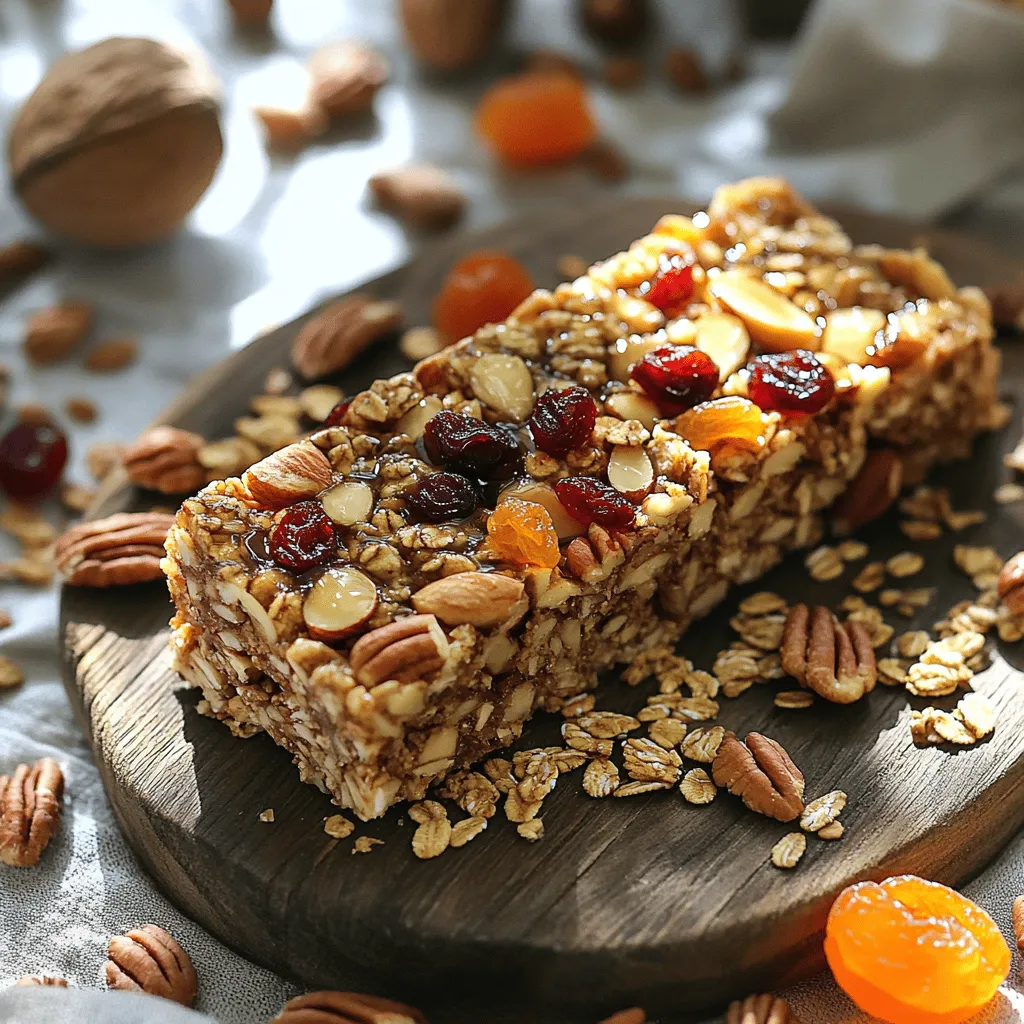
Looking for a quick, tasty snack that’s also healthy? You’ve come to the right place! Homemade granola bars are simple to make and packed with nutrition. I’ll walk you through easy steps, show you fun flavor combos, and share storage tips. Whether you’re in need of a midday boost or a sweet treat for your kids, these bars deliver. Let’s dive into making your new favorite snack!
Ingredients
Main Ingredients for Homemade Granola Bars
To make homemade granola bars, you need a few key items. Here’s what you will need:
– 2 cups rolled oats
– 1 cup mixed nuts (almonds, walnuts, and pecans), chopped
– ½ cup honey or maple syrup
– ½ cup natural nut butter (peanut or almond butter)
– ½ cup dried fruits (cranberries, raisins, or apricots), chopped
– ¼ cup seeds (pumpkin or sunflower seeds)
– 1 teaspoon vanilla extract
– ½ teaspoon cinnamon
– Pinch of salt
These ingredients create a tasty and chewy bar packed with flavor and nutrition.
Healthy Options and Substitutions
You can easily swap out some ingredients for healthier choices. If you want to reduce sugar, use less honey or maple syrup. You can also try unsweetened applesauce instead. For nut butter, choose a light option like sunflower seed butter if you have nut allergies.
Instead of dried fruits, use fresh fruits for more vitamins. Just remember that fresh fruits have more moisture, so adjust the other ingredients accordingly. You can also add spices like nutmeg or ginger for extra flavor without extra calories.
Nutritional Information per Serving
Each serving of these homemade granola bars gives you great nutrition. Here’s what you can expect:
– Calories: About 150
– Protein: 5 grams
– Carbohydrates: 20 grams
– Fiber: 3 grams
– Fat: 6 grams
These bars are a smart choice for a snack or on-the-go breakfast. They keep you full and energized. For the complete recipe, check out the Full Recipe.
Step-by-Step Instructions
Preparing the Baking Dish
Start by preheating your oven to 350°F (175°C). This heat helps the bars cook evenly. Grab an 8×8 inch baking dish. Line it with parchment paper, leaving some paper hanging over the sides. This makes it easy to lift the bars out later.
Mixing Dry Ingredients
In a large mixing bowl, combine the rolled oats, chopped mixed nuts, and seeds. Add the cinnamon and salt. Use a spoon to stir these ingredients until they mix well. This step is key for even flavor.
Combining Wet Ingredients and Baking
Now, take a small saucepan. Warm the honey or maple syrup and nut butter on low heat until they melt together. Stir in the vanilla extract. Pour this warm mixture over your dry ingredients. Mix everything until the oats and nuts are fully coated. Then, fold in the chopped dried fruits gently.
Transfer the mixture into your prepared baking dish. Press it down firmly with your hands or a spatula. This helps the bars stick together. Bake for about 20-25 minutes, until the edges turn golden brown. Let the granola cool in the pan for about 30 minutes. Once cool, lift it out using the parchment paper and cut it into bars or squares. Store any leftovers in an airtight container at room temperature. Enjoy your homemade granola bars! For the full recipe, check out the earlier section.
Tips & Tricks
Ensuring Perfect Texture and Flavor
To get the best texture in your granola bars, use rolled oats. They hold together well. Mix in chopped nuts for crunch. I love using almonds, walnuts, and pecans. They add great flavor and good fats. A pinch of salt helps balance the sweetness of honey or maple syrup. Don’t skip the cinnamon; it brings warmth to each bite. Press the mixture tightly in the baking dish. This helps the bars stick together.
Customizations for Different Dietary Needs
You can make these bars fit your diet. For a nut-free option, swap nuts for seeds. Use sunflower seeds or pumpkin seeds instead. If you need gluten-free bars, choose certified gluten-free oats. For a vegan version, use maple syrup and a plant-based nut butter. Dried fruits add natural sweetness. Use cranberries, raisins, or apricots, depending on your taste. You can also add dark chocolate chips for a treat.
Presentation Ideas for Serving
Serving your granola bars can be fun! Cut them into neat squares or rectangles. For a special touch, arrange them on a colorful platter. Drizzle a little honey on top for shine. You can wrap each bar in parchment paper. Secure with twine for a cute gift. This makes them perfect for sharing at parties or picnics. These simple ideas will make your homemade granola bars look as good as they taste.

Variations
Flavor Combinations to Try
You can mix flavors to make your granola bars exciting. Try adding chocolate chips or coconut flakes for a sweet twist. You can also use spices like nutmeg or ginger for a warm touch. Want a fruity bite? Add banana chips or diced apple. Each flavor change gives a new taste!
Ingredient Swaps for Healthier Bars
Make simple swaps for a healthier bar. Use agave nectar instead of honey for a lower-glycemic option. Swap mixed nuts for seeds if you need nut-free bars. You can also use unsweetened applesauce instead of nut butter. This will cut extra fat while keeping it moist.
Seasonal Ingredients for Unique Versions
Using seasonal ingredients can enhance your bars. In fall, add pumpkin puree and pumpkin spice for a cozy flavor. In summer, mix in fresh berries or peaches for a fruity burst. Winter is great for dried fruits like figs or dates. Each season offers fresh ideas!
For the full recipe, check the “Nutty Bliss Homemade Granola Bars” section.
Storage Info
Best Ways to Store Homemade Granola Bars
To keep your homemade granola bars fresh, use an airtight container. This helps to prevent them from getting stale. You can store them at room temperature for up to a week. If you want to keep them longer, the fridge is a better option. Just make sure to wrap each bar in parchment paper or plastic wrap for extra protection. This keeps them moist and tasty.
Shelf Life and Signs of Freshness
Homemade granola bars can last about one week at room temperature. In the fridge, they may last up to two weeks. If you notice any changes in smell or texture, it’s time to toss them. Fresh bars should feel firm yet chewy. If they become hard or crumbly, they may be past their best.
Freezing Granola Bars for Long-Term Storage
Freezing is a great way to store granola bars for a long time. To freeze, wrap each bar tightly in plastic wrap. Then, place them in a freezer-safe bag. You can keep them in the freezer for up to three months. When you want to eat one, just take it out and let it thaw at room temperature. This way, you can enjoy a healthy snack whenever you like! For the complete recipe, refer to the Full Recipe section.
FAQs
How do I make granola bars without nuts?
You can make granola bars without nuts easily. Simply skip the nuts in the recipe. Use extra seeds instead, like sunflower or pumpkin seeds. You can also add more dried fruits. This gives your bars flavor and texture without the nuts.
Can I use sweeteners other than honey or maple syrup?
Yes, you can use other sweeteners in your granola bars. Agave syrup or brown rice syrup work well. For a low-sugar option, try mashed bananas or apple sauce. Each sweetener gives a unique taste, so choose one you like best.
What are the best toppings for homemade granola bars?
Toppings add fun and flavor to your granola bars. Here are some ideas:
– Chocolate chips
– Shredded coconut
– Chia seeds
– Extra dried fruits
– A drizzle of nut butter
Feel free to mix and match these toppings. They make your bars even more tasty and fun to eat. For the complete recipe, refer to the Full Recipe section.
Making homemade granola bars is simple and rewarding. We reviewed key ingredients, prep steps, and storage tips to ensure success. You can customize your bars with flavors, swap ingredients for health, and serve them in fun ways. Remember to check the freshness as you store them.
In summary, these tasty bars are easy to make, healthy, and fun to enjoy. You now have the tools to create your perfect granola bar! Enjoy experimenting with new flavors and sharing them with friends and family.


