Craving a sweet treat but short on time? No-Bake Chocolate Oatmeal Cookies are the answer! These quick and easy goodies combine rich chocolate and wholesome oats for a delightful snack. Plus, you won’t need an oven to whip them up! I’ll walk you through the simple steps, share tips, and offer fun variations to make this recipe your own. Let’s dive into the delicious world of no-bake cookies!
Ingredients
When making No-Bake Chocolate Oatmeal Cookies, you need a few simple ingredients. Having everything ready makes the process quick and fun. Here’s what you need:
– 1 cup rolled oats
– 1/2 cup unsweetened cocoa powder
– 1/2 cup natural peanut butter
– 1/2 cup honey or maple syrup
– 1/4 cup almond milk (or any milk of choice)
– 1/4 cup shredded coconut (unsweetened)
– 1/2 teaspoon vanilla extract
– A pinch of sea salt
– Optional toppings: crushed nuts, chocolate chips, or sea salt flakes
These ingredients come together to create a rich and chewy treat. Each one plays a key role. The oats provide a hearty base, while the cocoa powder gives a deep chocolate flavor. Peanut butter adds creaminess and protein, making each bite satisfying. Honey or maple syrup brings natural sweetness.
Almond milk keeps the mixture smooth, while shredded coconut adds a nice texture. Vanilla extract enhances the flavor, making it even more delicious. A pinch of sea salt balances the sweetness. You can even get creative with toppings! Add crushed nuts or chocolate chips for extra crunch. Enjoy experimenting with these ingredients in your kitchen. For the full recipe, check out the details above.
Step-by-Step Instructions
Preparation of the Chocolate Mixture
First, grab a medium saucepan. Add the peanut butter, honey (or maple syrup), cocoa powder, almond milk, vanilla extract, and a pinch of sea salt. Heat this mixture over low heat. Stir continuously as it warms up. Keep stirring for about 3 to 5 minutes. You want it to be smooth and well combined. This chocolate mixture is the base for your cookies.
Mixing in the Oats and Coconut
Once the chocolate mixture is smooth, remove the saucepan from heat. Now, it’s time to add the rolled oats and shredded coconut. Pour them in and stir well. Make sure every oat and coconut flake gets coated in the chocolate. This step is key for flavor and texture.
Shaping and Chilling the Cookies
Allow the mixture to cool for a little bit. Then, use a tablespoon to scoop out portions. Shape each scoop into a round cookie and place them on a parchment-lined baking sheet. If you want, sprinkle crushed nuts or chocolate chips on top. After shaping, put the cookies in the fridge. Chill them for at least 30 minutes to firm up. This helps hold their shape. Enjoy your no-bake cookies soon after! For the Full Recipe, check the earlier section.
Tips & Tricks
Achieving the Perfect Texture
To get the right texture for your cookies, start with the mixture. You want it to be thick but still sticky. If it seems too dry, add a bit more almond milk. If it’s too wet, add more oats. Finding that balance is key for great cookies.
Next, adjust the sweetness level to your taste. Honey and maple syrup are sweet, so taste the mixture before you shape the cookies. You can always add a little more sweetener if you like them sweeter.
Presentation Tips
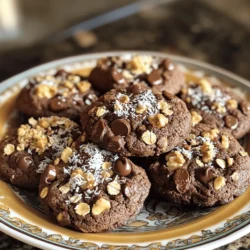
For a fun presentation, arrange the cookies on a colorful plate. You can sprinkle shredded coconut around them for extra flair. This adds a nice touch and makes the cookies pop.
Pair your cookies with a glass of cold almond milk. This classic combo makes for a delightful snack. You can also serve them with a hot cup of coffee or tea for a warm treat.
Common Mistakes to Avoid
One common mistake is overheating the mixture. If you cook it too long, the cookies can become hard. Always keep the heat low and stir gently until smooth.
Another mistake is neglecting to chill the cookies. If you skip the fridge step, they might fall apart. Make sure to chill them for at least 30 minutes to help them set. For the full recipe, check the details above!

Variations
Healthy Alternatives
You can make your cookies even healthier by swapping out the peanut butter. Try using almond or cashew butter instead. These nut butters add unique flavors and healthy fats. They also change the texture slightly, making the cookies creamier.
Another easy swap is to use low-calorie sweeteners. If you want fewer calories, try using stevia or monk fruit instead of honey or maple syrup. This keeps your cookies sweet but helps reduce sugar intake.
Flavor Enhancements
Adding spices is a fun way to boost flavor. A dash of cinnamon or nutmeg can give your cookies a warm, cozy taste. Just a little goes a long way, so start small and adjust to your liking.
You can also use flavored extracts. Add a drop of mint or orange extract for a fresh twist. This small change can transform your cookies from simple to gourmet!
Fun Mix-ins
Mix-ins can make your cookies extra special. Consider adding dried fruits like raisins or cranberries. They provide natural sweetness and a chewy texture that pairs well with the chocolate.
You can also experiment with different types of chocolate. Use dark chocolate for a richer taste or white chocolate for a sweet contrast. Each option brings its own flavor and can change your cookie experience.
Try out these variations to create your own unique batch of no-bake chocolate oatmeal cookies! For the complete recipe, check out the Full Recipe section.
Storage Info
Best Storage Practices
To keep your no-bake chocolate oatmeal cookies fresh, store them in an airtight container. This helps prevent moisture from making your cookies soggy. I recommend using a glass or plastic container with a tight seal. If you prefer, you can also layer parchment paper between the cookies to avoid sticking. Keep them in the refrigerator for best results. This way, they stay firm and tasty.
Freezing Options
You can freeze these cookies for later enjoyment. First, let them cool completely. Then, place them in a single layer on a baking sheet. Freeze them for about an hour until firm. After that, transfer the cookies to an airtight container or freezer bag. Be sure to separate layers with parchment paper. To thaw, simply take them out and let them sit at room temperature for about 30 minutes. You can also pop them in the fridge overnight.
Shelf Life
For optimal freshness, these cookies last about one week in the fridge. If frozen, they can stay good for up to three months. Look for signs of spoilage to know if they are still okay. If you see any mold or smell an off odor, it’s best to throw them away. Enjoying them while they are fresh ensures you get the best flavor and texture.
FAQs
How long do No-Bake Chocolate Oatmeal Cookies last?
No-Bake Chocolate Oatmeal Cookies stay fresh for about a week. Store them in an airtight container in the fridge. This keeps them firm and tasty. If you want them to last longer, you can freeze them. Just make sure to wrap them well to prevent freezer burn.
Can I substitute ingredients in the recipe?
Yes, you can! Here are some common substitutions:
– Peanut butter: Use almond or cashew butter instead.
– Sweeteners: Maple syrup or agave syrup can replace honey.
– Milk: Any milk works, like oat or soy milk.
– Coconut: If you don’t have shredded coconut, skip it or use nuts.
These swaps won’t change the taste too much. They make the cookies fit your needs.
Why are my cookies too crumbly?
If your cookies crumble, there are a few fixes.
– Too much dry ingredient: Add a bit more peanut butter or honey.
– Not enough moisture: Mix in a little more almond milk.
– Overmixing: Stir just until combined. This keeps the texture right.
These tips should help you make perfect cookies every time. For the full recipe, check out the detailed instructions.
You can make delicious no-bake chocolate oatmeal cookies with a few simple steps. We discussed key ingredients, like oats and cocoa, and shared easy instructions to help you. Tips on texture and presentation ensure your cookies impress everyone. Consider fun mix-ins for extra flavor and know how to store them properly for freshness.
These cookies are quick, tasty, and perfect for sharing. Enjoy creating your own treats!