Skip to content
DisclaimerTerms Of UseGDPR PolicyCookie Policy

My Saved Recipe

  • Home
  • Drinks
  • Appetizers
  • Dinner
  • Dessert
  • About
  • Contact
  • Privacy Policy
DisclaimerTerms Of UseGDPR PolicyCookie Policy

Savannah

- 1 ½ cups all-purpose flour - 1 teaspoon baking powder - 1 teaspoon baking soda - ½ teaspoon salt - 1 teaspoon ground cinnamon - ½ teaspoon ground nutmeg - ½ teaspoon ginger powder - 1 cup canned pumpkin puree - ½ cup vegetable oil - 2 large eggs - 1 teaspoon vanilla extract - 4 oz cream cheese, softened - 1 tablespoon powdered sugar - ¼ cup flour - ¼ cup brown sugar, packed - 2 tablespoons softened butter - ½ cup chopped pecans (optional) To make these Streusel Pumpkin Cream Cheese Muffins, you need a mix of dry and wet ingredients. The dry ingredients include flour, baking powder, baking soda, salt, and warm spices like cinnamon, nutmeg, and ginger. These spices add warmth and flavor to the muffins. For the wet ingredients, canned pumpkin puree is key. It keeps the muffins moist and brings that classic pumpkin taste. Vegetable oil adds richness, while eggs and vanilla extract help bind everything together. Next, we prepare the cream cheese filling and streusel topping. The cream cheese and powdered sugar create a sweet, creamy center that contrasts nicely with the spiced muffin. The streusel topping, made from flour, brown sugar, butter, and pecans, adds a crunchy texture. If you like nuts, toss in some chopped pecans for extra flavor. You can find the full recipe and detailed steps to bring these delightful muffins to life. Enjoy the blend of flavors and the joy they bring to any occasion! First, preheat your oven to 350°F (175°C). This step gets your oven ready for baking. Next, line a muffin tin with paper liners or lightly grease it. This keeps your muffins from sticking. Now, let’s mix the dry ingredients. In a medium bowl, whisk together: - 1 ½ cups all-purpose flour - 1 teaspoon baking powder - 1 teaspoon baking soda - ½ teaspoon salt - 1 teaspoon ground cinnamon - ½ teaspoon ground nutmeg - ½ teaspoon ginger powder Set this bowl aside. In a large mixing bowl, combine: - ½ cup granulated sugar - ½ cup brown sugar, packed - 1 cup canned pumpkin puree - ½ cup vegetable oil - 2 large eggs - 1 teaspoon vanilla extract Mix all these until well blended and smooth. Gradually add the dry mix to the wet mix. Stir gently until just combined. A few lumps are okay. Now, let's fill the muffin liners. Fill each liner halfway with the pumpkin batter. Add about 1 teaspoon of the cream cheese mixture in the middle of each muffin. Top it with the remaining batter until the liners are about ¾ full. For the streusel topping, mix together in a small bowl: - ¼ cup flour - ¼ cup brown sugar - 2 tablespoons softened butter Use a fork or your fingers to mix until crumbly. If you want, mix in ½ cup chopped pecans for crunch. Sprinkle this topping over each muffin. Bake your muffins in the preheated oven for about 20-22 minutes. Check for doneness by inserting a toothpick in the center. It should come out clean. Once baked, allow the muffins to cool in the tin for 5 minutes. After that, transfer them to a wire rack to cool completely. Enjoy these delightful muffins warm or at room temperature. To bake perfect muffins, always check your oven temperature. An oven thermometer helps ensure accuracy. Preheat your oven to 350°F (175°C) before you start mixing. This step is key for proper rising. Avoid overmixing the batter. Mix just until combined. A few lumps are okay. Overmixing can make muffins dense and tough. Stir gently to keep them light and fluffy. For a lovely touch, serve your muffins warm. A drizzle of honey or maple syrup adds sweetness and shine. You can also sprinkle a bit of cinnamon on top for extra flavor and visual appeal. Garnish the muffins with chopped pecans or a dusting of powdered sugar. These small touches make a big difference in how they look on the plate. Store your muffins in an airtight container. This keeps them fresh for up to three days. For longer storage, freeze them. Wrap each muffin in plastic wrap, then place them in a freezer bag. To reheat, simply microwave for 15-20 seconds. This warms them up without drying them out. Enjoy your delicious treats any time! {{image_2}} You can change up the flavors in your muffins for fun. Adding chocolate chips brings a sweet twist. Try using dark chocolate for a rich taste. Dried fruits, like raisins or cranberries, add chewiness and a hint of tartness. They pair well with the pumpkin flavor. You could also add different nuts or seeds to the batter. Walnuts or sunflower seeds add crunch and healthy fats. If you want gluten-free muffins, swap the all-purpose flour with a gluten-free mix. Many options exist, and they work well in this recipe. For a vegan twist, you can replace the eggs. Use flax eggs made from ground flaxseed and water. You can also use vegan cream cheese in place of regular cream cheese. These changes help everyone enjoy this treat. Make your muffins special for the season by adding cranberries or apple chunks. These fruits add freshness and flavor. You can also use fall spices, like allspice or cardamom, to enhance the taste. Mixing in these seasonal items makes the muffins exciting and new. It’s a great way to celebrate the flavors of autumn. For the full recipe, check out the details above. To enjoy your Streusel Pumpkin Cream Cheese Muffins, I suggest pairing them with drinks like coffee or tea. The warm spices in the muffins blend well with both beverages. For brunch, serve these muffins with a light fruit salad or yogurt. This adds freshness and contrast to the rich muffins. These muffins shine at many occasions. They are perfect for holidays like Thanksgiving or Halloween. You can also serve them at family gatherings or cozy brunches. If you want to prep meals, these muffins make a great breakfast or snack. They are easy to grab and satisfying to eat. Get creative with how you serve these muffins! You can make muffin parfaits by layering chopped muffins with yogurt and fruit. This is a fun twist that adds color and texture. You can also use leftover muffins in recipes like crumbles. Just crumble them on top of fruit and bake for a delicious dessert. For more details, check out the Full Recipe. How to make Streusel Pumpkin Cream Cheese Muffins? To make these muffins, you start by mixing dry and wet ingredients. Combine flour, baking powder, baking soda, salt, and spices in one bowl. In another bowl, mix pumpkin puree, sugars, oil, eggs, and vanilla. Then, blend these two mixtures together gently. Next, prepare the cream cheese filling by mixing softened cream cheese with powdered sugar until smooth. Fill muffin liners halfway with pumpkin batter, add the cream cheese mix, and top with more batter. Finish with a streusel topping made from flour, brown sugar, and butter. Bake at 350°F (175°C) for about 20-22 minutes. Can I freeze these muffins for later? Yes, you can freeze these muffins! Allow them to cool completely first. Wrap each muffin tightly in plastic wrap or aluminum foil. Then, place them in a freezer-safe bag or container. They can stay fresh for about three months. When ready to eat, thaw them in the fridge or microwave. What’s the secret to moist muffins? The secret lies in using the right balance of wet and dry ingredients. The pumpkin puree adds moisture, while not overmixing the batter keeps the muffins light. Additionally, using fresh ingredients can make a big difference. Why are my muffins dense? Dense muffins can result from overmixing the batter. When you mix too much, you activate gluten, making the muffins tough. Also, using too much flour can lead to density. Always measure flour correctly by spooning it into the measuring cup and leveling it off. How can I adjust sweetness in the recipe? To adjust sweetness, you can either reduce the sugar amount or add extra spices. If you prefer less sugar, cut the granulated and brown sugars by a quarter. For more sweetness without sugar, consider adding applesauce or mashed bananas. Where to find high-quality muffin tins? You can find high-quality muffin tins at kitchen supply stores, online shops, or major retailers. Look for non-stick options or silicone molds for easy release. Recommended cookbooks or blogs for DIY baking For great baking tips, check out cookbooks like "Baking: From My Home to Yours" by Dorie Greenspan. Blogs like "Sally's Baking Addiction" and "Joy the Baker" also offer fantastic recipes and ideas for home bakers. In this blog post, we explored how to make delicious Streusel Pumpkin Cream Cheese Muffins. We covered essential ingredients, from dry spices to a rich cream cheese filling. I provided step-by-step instructions, helpful baking tips, and creative serving ideas. You can also tweak the recipe for dietary needs or seasonal flavors. Remember, baking is fun and allows you to be creative. Enjoy every bite of your freshly baked muffins!

Streusel Pumpkin Cream Cheese Muffins Delightful Treat

If you love pumpkin flavors, you will adore these Streusel Pumpkin Cream Cheese Muffins. They mix rich pumpkin with creamy
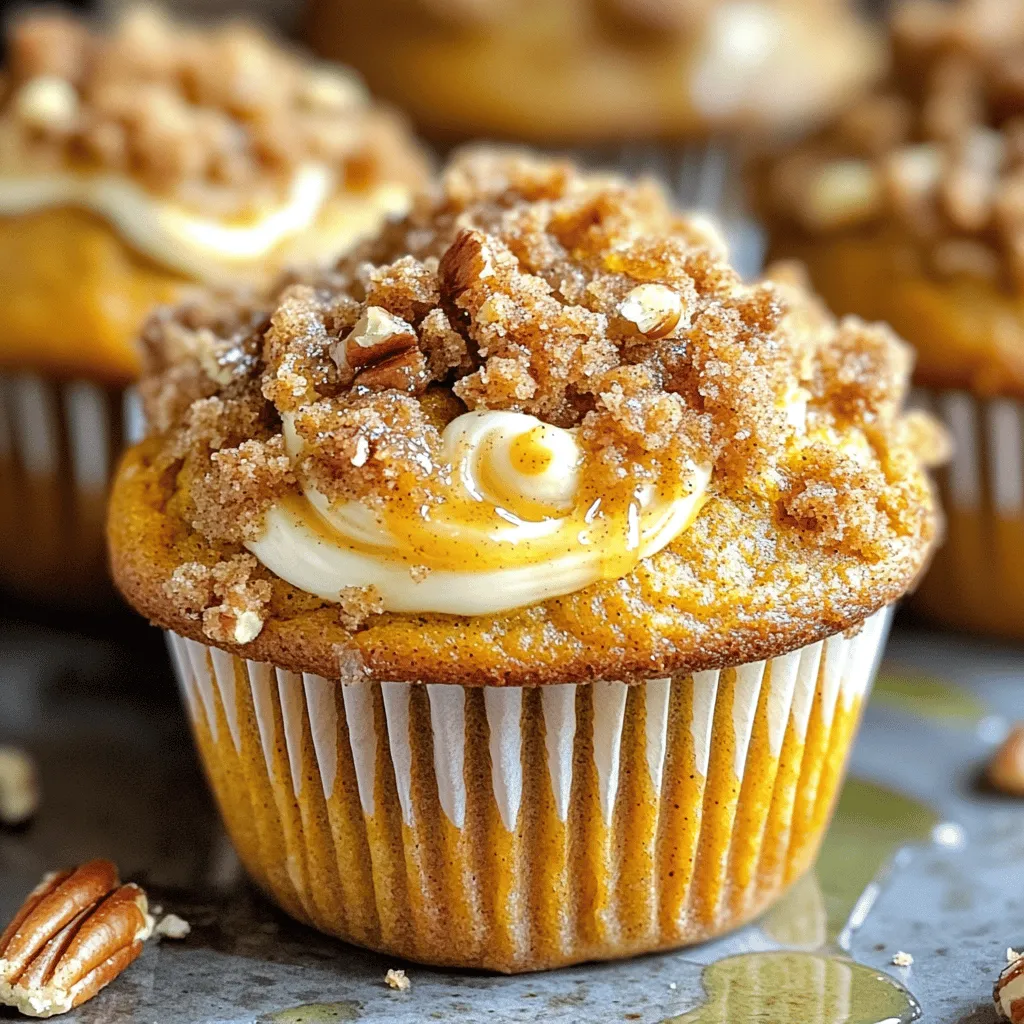
To make Easy Pumpkin Cream Cheese Muffins, you need the following ingredients: - 1 cup pumpkin puree - 1/2 cup cream cheese, softened - 1/2 cup granulated sugar - 1/2 cup brown sugar, packed - 2 large eggs - 1/2 cup vegetable oil - 1 teaspoon vanilla extract - 1 1/2 cups all-purpose flour - 1 teaspoon baking powder - 1 teaspoon baking soda - 1 teaspoon ground cinnamon - 1/2 teaspoon ground nutmeg - 1/4 teaspoon salt For a twist, consider these optional ingredients: - 1/2 cup chopped walnuts or pecans - 1/2 cup chocolate chips Adding nuts or chocolate can enhance flavor and texture. Feel free to mix and match! Accurate measurements are key to great muffins. Here are some best practices: - Use dry measuring cups for flour and sugar. Fill them lightly, then level off with a knife. - Use liquid measuring cups for oil and pumpkin puree. Pour to the marked line for accuracy. - Use a kitchen scale for flour and sugar when possible. This gives the most precise measurement. Tools you may need include: - Measuring cups (dry and liquid) - Measuring spoons - A kitchen scale for precision Getting the measurements right will help you bake muffins that are fluffy and delicious! To start making your Easy Pumpkin Cream Cheese Muffins, gather your ingredients. You need pumpkin puree, cream cheese, sugars, eggs, oil, vanilla, flour, baking powder, baking soda, spices, and salt. Here’s how to prepare the batter: 1. Beat the Cream Cheese: In a medium bowl, beat the softened cream cheese until it is smooth and creamy. This step is key for a rich filling. 2. Mix Wet Ingredients: Add the pumpkin puree, granulated sugar, brown sugar, eggs, vegetable oil, and vanilla extract to the cream cheese. Mix until everything is well blended. 3. Combine Dry Ingredients: In another bowl, whisk together the flour, baking powder, baking soda, cinnamon, nutmeg, and salt. You want these dry ingredients to be evenly mixed. 4. Combine Wet and Dry Mixtures: Gradually add the dry mix to the wet mix. Stir until just combined. Be careful not to overmix. Overmixing can make your muffins tough. 5. Add Optional Nuts: If you want some crunch, gently fold in the chopped walnuts or pecans. This adds flavor and texture. Tips for mixing: Always mix gently and use a spatula to fold ingredients. This helps keep the muffins light and fluffy. Now, it’s time to bake! Follow these steps for perfect muffins: 1. Preheat the Oven: Set your oven to 350°F (175°C). This temperature is crucial for even baking. 2. Prepare the Muffin Tin: Line a muffin tin with paper liners or grease it with cooking spray. This prevents the muffins from sticking. 3. Fill the Muffin Cups: Use a scoop or spoon to fill each muffin cup about 2/3 full with batter. This allows space for the muffins to rise. 4. Bake: Place the muffin tin in the preheated oven. Bake for 18-22 minutes. To check for doneness, insert a toothpick into the center of a muffin. If it comes out clean, they are ready. 5. Cool Down: Let the muffins cool in the tin for 5 minutes. After that, transfer them to a wire rack to cool completely. Proper oven temperature and timing are essential. Too hot can burn the muffins, while too cool may leave them soggy. Enjoy your delicious Easy Pumpkin Cream Cheese Muffins! For the full recipe, check the link above. To make moist and fluffy muffins, follow these tips: - Use fresh ingredients. Fresh pumpkin puree gives the best flavor and moisture. - Don’t overmix. Stir the batter until just combined. Overmixing makes muffins dense. - Check oven temperature. An accurate oven ensures even baking. Use an oven thermometer if needed. Common mistakes to avoid include: - Skipping the cream cheese step. Make sure to beat it until smooth. This adds creaminess. - Filling cups too high. Fill them only 2/3 full. This helps muffins rise properly. - Not testing for doneness. Insert a toothpick. If it comes out clean, your muffins are ready! You can easily change the flavor of your muffins. Here are some ideas: - Spices: Add ginger, cloves, or allspice for a warm kick. - Add-ins: Try adding chocolate chips, raisins, or dried cranberries for extra sweetness. - Nuts: Chopped walnuts or pecans add crunch and flavor. To adjust sweetness or texture: - Sweetness: Reduce sugar by 1/4 cup if you prefer less sweetness. - Texture: For a lighter muffin, use half all-purpose flour and half whole wheat flour. Check out the Full Recipe for more ideas! {{image_2}} You can make these muffins healthier with a few easy swaps. Use whole wheat flour instead of all-purpose flour. Whole wheat adds fiber and nutrients without losing taste. For a low-sugar option, try using applesauce or mashed bananas. These fruits add sweetness and moisture. You can also reduce the sugar by a third. This keeps the flavor rich but cuts calories. If you want creaminess, try Greek yogurt instead of cream cheese. It keeps the muffins moist and adds protein. You can even include a mix of seeds and nuts for added crunch. This will also boost the nutrition of your muffins. Fall is the perfect time to play with flavors. You can mix in spices like ginger or cloves for a warm kick. Try adding dried cranberries or chopped apples for a fruity twist. These fruity additions complement pumpkin well. If you have leftover pumpkin puree, use it in pancakes or smoothies. You can also make pumpkin bread or even soup. As for cream cheese, whip it into dip or spread. This way, nothing goes to waste. These ideas will keep your fall baking fun and fresh. For the full recipe, check out the [Full Recipe]. To keep your Easy Pumpkin Cream Cheese Muffins fresh, store them in an airtight container. This helps keep moisture in and prevents them from drying out. Place a paper towel at the bottom of the container. This will absorb any extra moisture. You can store them at room temperature for up to three days. If you want to save muffins for later, freezing is a great option. Wrap each muffin tightly in plastic wrap or aluminum foil. Then, place them in a freezer-safe bag. They can last up to three months in the freezer. When you’re ready to enjoy them, simply thaw them in the fridge overnight. To reheat your muffins, the oven is the best method. Preheat your oven to 350°F (175°C). Place the muffins on a baking sheet and heat for about 10 minutes. This helps restore their soft texture and warmth. If you are in a hurry, you can use the microwave. Heat one muffin for about 15-20 seconds. Check if it’s warm enough, and add more time if needed. However, be careful! Microwaving too long can make muffins tough. Enjoy your muffins warm for the best taste. How can I ensure my muffins rise properly? To help your muffins rise, use fresh baking powder and baking soda. Make sure your oven is preheated to the right temperature. Fill the muffin cups about two-thirds full. This gives the muffins room to rise without spilling over. Can I make the batter ahead of time? Yes, you can make the batter ahead of time. Store it in the fridge for up to 24 hours. Just remember to stir it gently before filling the muffin cups. This helps keep the batter fresh and ready to bake. What to do if my muffins are too dry or too dense? If your muffins are dry, you might have overbaked them. Make sure to check for doneness with a toothpick. If they are dense, try adding a bit more liquid, like oil or an egg. This can help create a lighter texture. How to tell when muffins are fully baked? To check if your muffins are done, insert a toothpick into the center. If it comes out clean or with a few crumbs, they are ready. If the toothpick has wet batter, bake them a few more minutes. This ensures they are perfectly baked. You now know how to make Easy Pumpkin Cream Cheese Muffins. We covered every key step, from gathering essential ingredients to baking and storage tips. Remember to measure accurately for the best results. Don't forget to personalize your muffins with fun add-ins or healthy swaps. With these straightforward methods, you’ll bake muffins everyone loves. Enjoy your baking and share these tips with friends to spread the joy of homemade treats!

Easy Pumpkin Cream Cheese Muffins Tasty Fall Treat

Fall is here, and that means it’s time for warm, cozy treats! You’ll love these Easy Pumpkin Cream Cheese Muffins.

- 1 cup canned pumpkin puree - 1/2 cup cream cheese, softened - 1/2 cup granulated sugar - 1/2 cup brown sugar, packed - 1/4 cup vegetable oil - 2 large eggs - 1 teaspoon vanilla extract - 1 1/2 cups all-purpose flour - 1 teaspoon baking powder - 1 teaspoon baking soda - 1/2 teaspoon ground cinnamon - 1/4 teaspoon ground nutmeg - 1/4 teaspoon salt - 1/4 cup chopped walnuts or pecans (optional) Gathering the right ingredients is key for great pumpkin cream cheese muffins. I love using canned pumpkin puree because it saves time. Make sure your cream cheese is soft. This will help it blend well with the sugars. You need granulated sugar and brown sugar for sweetness and depth. Vegetable oil keeps the muffins moist. Then, you’ll need large eggs for binding. Vanilla extract adds a nice touch of flavor. For the dry mix, you’ll need all-purpose flour, baking powder, and baking soda for rise. Ground cinnamon and nutmeg bring warmth. A pinch of salt enhances all these flavors. If you like nuts, add walnuts or pecans for crunch. This recipe is simple and perfect for fall. You can find the full recipe for more details on how to prepare these tasty treats. - Step 1: Preheat oven and prepare muffin tin First, set your oven to 350°F (175°C). This temperature is perfect for baking. Next, line your muffin tin with paper liners or grease it well. This helps the muffins come out easily. - Step 2: Mix wet ingredients In a large bowl, mix the softened cream cheese, granulated sugar, and brown sugar. Use an electric mixer to beat them until smooth. This mix gives the muffins a rich flavor. Then, add the canned pumpkin, vegetable oil, eggs, and vanilla extract. Mix well until it looks creamy and smooth. - Step 3: Combine dry ingredients In another bowl, whisk together the flour, baking powder, baking soda, cinnamon, nutmeg, and salt. This step is key to making sure your muffins rise well. Mixing these dry ingredients evenly helps create a fluffy texture. - Step 4: Incorporate dry and wet mixtures Gradually add the dry mix to the wet mix. Use a spatula to fold it in gently. Be careful not to overmix; a few lumps are okay. If you want some crunch, fold in the walnuts or pecans now. - Step 5: Fill muffin tin and bake Spoon the batter into the muffin tin. Fill each liner about two-thirds full. This gives the muffins room to rise. Bake them for about 18-20 minutes. To check if they are done, insert a toothpick into the center. If it comes out clean, they are ready! - Step 6: Cooling and serving suggestions Let the muffins cool in the tin for about 5 minutes. After that, transfer them to a wire rack. This helps them cool evenly. Serve the muffins warm. You can sprinkle them with powdered sugar or add a dollop of whipped cream cheese frosting for a special treat. - Prep time: 15 minutes - Cook time: 20 minutes - Total time: 35 minutes For the full recipe, check the ingredients section above. Enjoy your baking! - Avoid overmixing the batter: Mix until just combined. Overmixing makes muffins tough. - Choosing the right pumpkin puree: Use canned pumpkin puree. It has a smooth texture. Fresh pumpkin can be watery and change the taste. - Vegan or gluten-free alternatives: Substitute eggs with flaxseed meal. Use gluten-free flour instead of all-purpose flour. - Flavor variations (spices, nuts, chocolate chips): Try adding ginger or cloves for warmth. Mix in chocolate chips or nuts like pecans for crunch. - Ideal serving suggestions: Serve muffins warm for the best flavor. Pair them with coffee or tea for a delightful treat. - Garnishing ideas for a festive look: Dust with powdered sugar. Top with cream cheese frosting or a sprinkle of cinnamon. For a special touch, add some fall-themed decorations around the plate. {{image_2}} The traditional recipe for pumpkin cream cheese muffins is a true delight. It combines sweet pumpkin with rich cream cheese. This mix creates a soft, moist treat. You can enjoy these muffins warm or cold. Each bite bursts with flavor, making it a favorite for many. If you prefer a vegan version, you can swap out a few ingredients. Use plant-based cream cheese instead of regular cream cheese. Replace eggs with flaxseed meal or applesauce. These changes keep the muffins tasty and soft. You won't miss the original version at all! Want to add a little extra fun? Add chocolate chips to the batter. The sweet chocolate pairs well with the pumpkin flavor. You can also use nuts like walnuts or pecans. These nuts add a nice crunch and earthy flavor. Just fold them in gently before baking. You can get creative with seasonal themes. For the holidays, try adding spices like ginger or cloves. These spices will warm up your muffins. You can also decorate them with festive toppings. In summer, you might want a fruity twist. Consider adding fresh berries or diced peaches. This gives a bright, fresh taste to your muffins. Try these variations to keep your baking exciting! For the full recipe, check out the [Full Recipe]. To keep your muffins fresh, store them in an airtight container. This helps keep moisture in and air out. You can also line the container with paper towels. This way, the towels absorb any extra moisture. If you want to store them in the refrigerator, place the muffins in a sealed bag or container. The fridge can help them stay fresh longer, but they may dry out. Enjoy them within a week for the best taste. You can freeze these muffins for later. First, let them cool completely. Wrap each muffin in plastic wrap. Then, place them in a freezer-safe bag. This keeps them tasty and safe from freezer burn. When you want to eat one, take it out and let it thaw. You can leave it on the counter or thaw it in the fridge overnight. To reheat, pop it in the microwave for about 20-30 seconds. This warms it up nicely. At room temperature, these muffins last about 2-3 days. Keep them in a cool, dry place. If they stay in a warm area, they may spoil faster. Look for signs of spoilage. If the muffins smell off or have visible mold, throw them away. Enjoy your tasty Pumpkin Cream Cheese Muffins while they are fresh! For the full recipe, check out the earlier section. Can I use fresh pumpkin instead of canned? Yes, you can use fresh pumpkin! Just cook and puree it first. Fresh pumpkin gives a nice taste. Make sure to remove excess water to avoid a wet batter. What can I use instead of cream cheese? You can swap cream cheese with Greek yogurt or silken tofu. Both add creaminess. They also reduce fat while keeping your muffins moist. Can I lower the sugar content? Yes, you can reduce the sugar! Cut down by a quarter or use a sugar substitute. Just remember that this may change the taste slightly. How can I make these muffins healthier? To make them healthier, use whole wheat flour instead of white flour. You can also add in some oats for fiber. Adding applesauce can replace some oil too! Why is my batter too thick? If your batter is thick, it could be due to too much flour. Measure carefully! Adding a bit of milk can help make it smoother if needed. What can I do if the muffins are too dense? Dense muffins can happen if you overmix the batter. Mix just until combined. If they are still dense, check your baking powder and baking soda for freshness. You learned about making Pumpkin Cream Cheese Muffins. We covered ingredients, steps, and tips. I shared how to customize your muffins for your taste and dietary needs. Remember to store them for freshness and ask any questions as you bake. Enjoy your delicious muffins! They are perfect for sharing or enjoying alone. Happy baking!

Pumpkin Cream Cheese Muffins Delightful and Simple Recipe

Get ready to enjoy a treat that combines the warmth of pumpkin with creamy cheese! This simple recipe for pumpkin

- 1 cup pumpkin puree - 1/2 cup vegetable oil - 1 cup brown sugar - 1/2 cup granulated sugar The main ingredients form the base of your cookies. Pumpkin puree gives them a moist texture and rich flavor. I love using vegetable oil because it keeps the cookies soft. The blend of brown sugar and granulated sugar creates a perfect sweetness and a nice chew. - 2 cups all-purpose flour - 2 teaspoons baking powder - 1 teaspoon ground cinnamon - 1/2 teaspoon ground nutmeg - 1/4 teaspoon ground ginger The dry ingredients help balance the wet ones. All-purpose flour provides structure. Baking powder makes the cookies rise just right. The spices, like ground cinnamon, nutmeg, and ginger, bring out that warm, cozy flavor of fall. - 1 large egg - 1 teaspoon vanilla extract - 1/4 teaspoon salt - 1/2 cup powdered sugar for dusting The egg binds everything together, while vanilla extract enhances the taste. A pinch of salt balances the sweetness. Finally, powdered sugar adds a lovely finish, giving these cookies their crinkle look. For the full recipe, check it out in the linked section. To start, grab a large bowl. Combine 1 cup pumpkin puree and 1/2 cup vegetable oil. Mix well until smooth and creamy. This step adds moisture and flavor to your cookies. Next, add 1 cup brown sugar and 1/2 cup granulated sugar to the bowl. Beat until everything blends nicely. Then, stir in 1 large egg and 1 teaspoon vanilla extract. Mix until fully combined. This will give your cookies a rich taste. In a separate bowl, whisk together 2 cups all-purpose flour, 2 teaspoons baking powder, 1 teaspoon ground cinnamon, 1/2 teaspoon ground nutmeg, 1/4 teaspoon ground ginger, and 1/4 teaspoon salt. This mixture brings warmth and spice to your cookies. Gradually add the dry ingredients to the wet mixture. Stir gently until just combined. Be careful not to overmix; this keeps your cookies soft and chewy. Cover the dough with plastic wrap and refrigerate for at least 30 minutes. Chilling helps firm up the dough, making it easier to shape. While the dough chills, preheat your oven to 350°F (175°C) and line a baking sheet with parchment paper. Once the dough is ready, scoop tablespoon-sized portions. Roll them into balls and coat each one with 1/2 cup powdered sugar. Place them on the baking sheet, leaving about 2 inches between each ball. Bake for 10-12 minutes. The edges should be set, while the centers remain soft. After baking, cool the cookies on the sheet for 5 minutes before moving them to a wire rack. Enjoy the charm of these cookies with every bite! To make perfect Pumpkin Pie Crinkle Cookies, avoid overmixing the dough. Overmixing can lead to tough cookies. Mix until just combined to keep them soft and chewy. Cooling times are also important. Let the cookies cool on the baking sheet for five minutes. This helps them set and keeps the centers soft. After that, move them to a wire rack. This cooling method gives you the best texture. You can boost the flavor with extra spices. Try adding allspice or cloves for a warm touch. A pinch of cardamom can also add depth. Each spice can make your cookies unique and exciting. Using different sugars can change the sweetness. Brown sugar adds moisture and a hint of caramel. You can mix in some coconut sugar for a lighter flavor. Each sugar type can change the cookie's taste and texture. For serving, arrange the cookies on a festive plate. A nice touch is to dust them with more powdered sugar. This gives a lovely snowy look. Serve with a warm drink for a cozy vibe. For a fun display, stack them high or use a tiered stand. This makes your cookies stand out at any gathering. The bright orange and white colors pop on the table. Enjoy sharing these delightful treats! {{image_2}} You can make these cookies gluten-free by swapping all-purpose flour for gluten-free flour blends. Look for blends that include a mix of rice flour, potato starch, and tapioca flour. They mimic the texture of wheat flour well. When using gluten-free flour, watch the baking time closely. These cookies may bake a bit faster, so check them at 8 to 10 minutes. To make these cookies vegan, you can replace the egg with a flax egg. To do this, mix one tablespoon of ground flaxseed with three tablespoons of water. Let it sit for about five minutes until it thickens. For dairy-free options, use almond milk or coconut milk instead of regular milk. You can also use plant-based butter in place of vegetable oil. For a fun twist, add chocolate chips to your dough. Semi-sweet or dark chocolate chips work great. You can also try adding nuts like walnuts or pecans for a crunchy texture. Dried fruits like cranberries or raisins can add a sweet bite. These variations bring more depth to your Pumpkin Pie Crinkle Cookies and make them extra delightful. To keep your Pumpkin Pie Crinkle Cookies fresh, store them in an airtight container. This method helps maintain their soft texture and flavor. You can keep them at room temperature for up to five days. For longer storage, you can freeze these delightful cookies. Place them in a single layer on a baking sheet and freeze until solid. Then, transfer the cookies to a freezer-safe bag or container. They will last for up to three months in the freezer. When you want to enjoy them, take them out and let them thaw at room temperature. You can also reheat them in an oven at 350°F for about 5 minutes for that fresh-baked taste. The shelf life of your cookies depends on the ingredients used. The pumpkin puree and oil help keep the cookies moist. If stored properly, they can last about a week at room temperature and up to three months in the freezer. Remember, cookies with dairy or eggs will have a shorter shelf life than those without. Enjoy your cookies at their best for a lovely autumn treat! For the full recipe, check my earlier section. The texture of these cookies is soft and chewy. They have a slight crisp on the outside. The inside stays moist and has a cake-like feel. When you bite in, you’ll enjoy a burst of pumpkin flavor and spices. The powdered sugar on top adds a nice sweetness. This contrast makes each cookie a delightful treat. Yes, you can use homemade pumpkin puree! Fresh puree has a vibrant flavor. It also lets you control the texture. However, be cautious. Homemade puree can be more watery than canned. Drain any excess liquid to ensure the right dough consistency. Overall, using fresh pumpkin can enhance the taste of your cookies. You can prepare the dough a day in advance. Just chill it in the fridge. This step develops the flavors and makes the dough easier to handle. When ready to bake, scoop and roll the dough in powdered sugar. Bake the cookies fresh for the best taste. For detailed instructions, check the Full Recipe. Pumpkin Pie Crinkle Cookies are a tasty treat combining pumpkin puree, spices, and sugar. We covered the main ingredients, mixed dough, and baking tips. I shared variations for gluten-free and vegan options, plus storage advice. These cookies are simple and fun to make. With easy steps and personal touches, you can impress everyone. Enjoy your baking adventure, and savor each bite of these delightful cookies!

Pumpkin Pie Crinkle Cookies Charming Autumn Treat

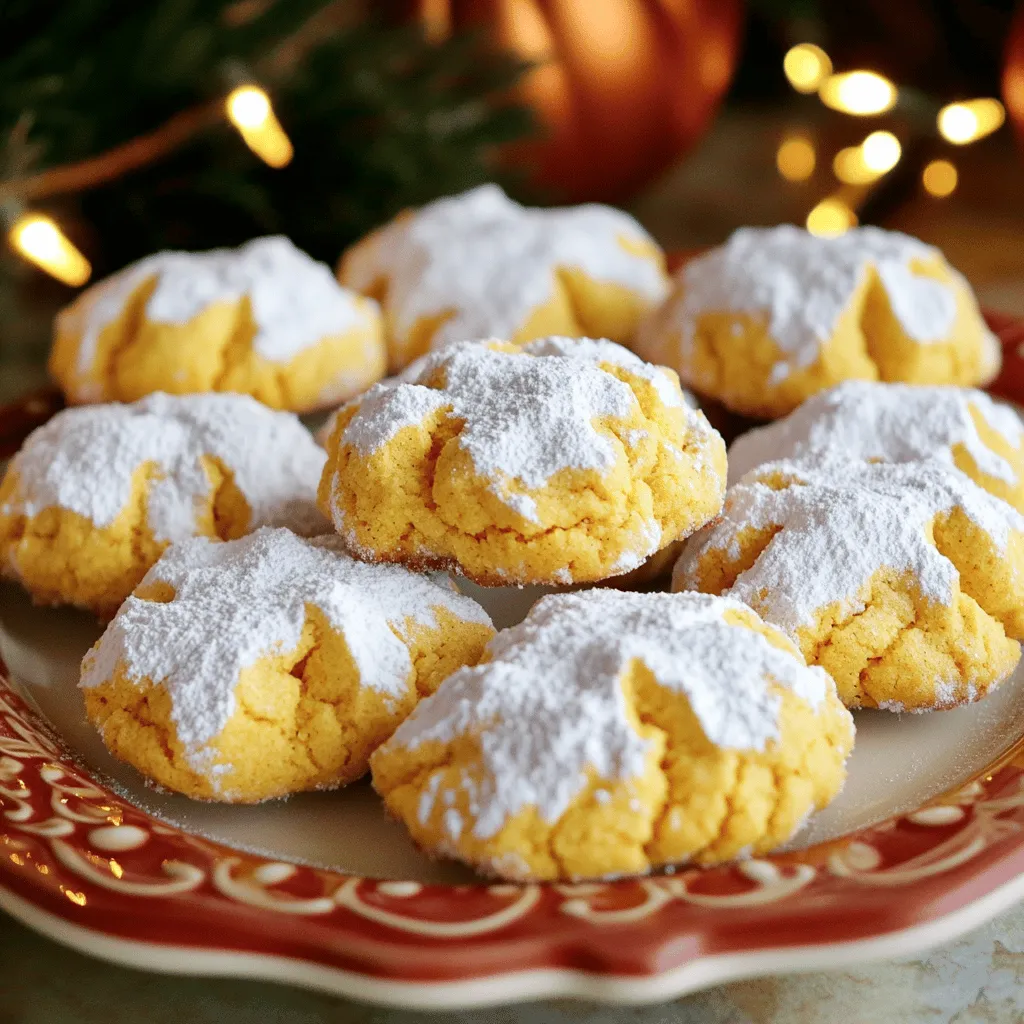
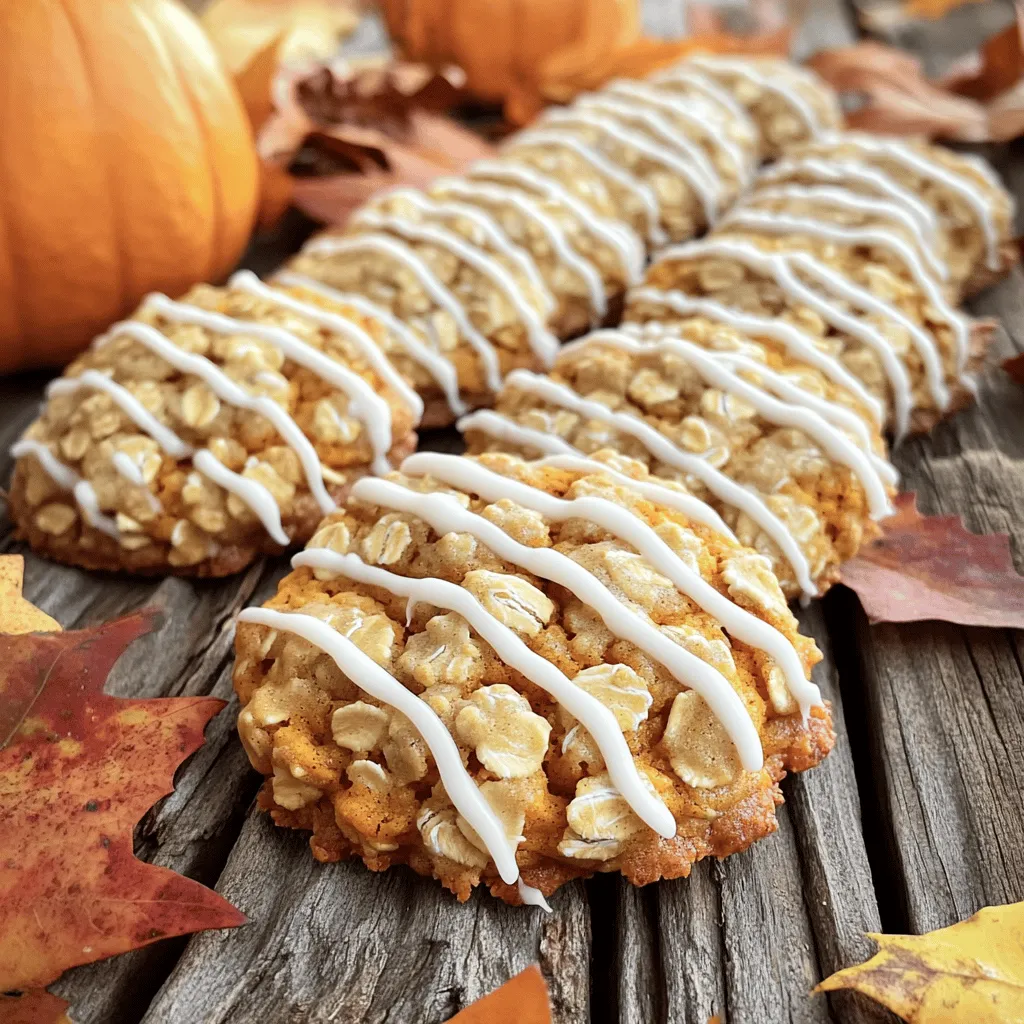
Get ready to embrace autumn with a delightful twist on a classic favorite! Pumpkin Pie Crinkle Cookies combine the warm

To make the perfect pumpkin cheesecake cookies, gather these key ingredients. Each one plays a vital role in creating that delightful blend of pumpkin and cheesecake flavors. - 1 cup all-purpose flour - 1/2 teaspoon baking soda - 1/2 teaspoon baking powder - 1/4 teaspoon salt - 1 teaspoon ground cinnamon - 1/2 teaspoon ground nutmeg - 1/4 teaspoon ground ginger - 1/2 cup unsalted butter, softened - 1/2 cup granulated sugar - 1/4 cup brown sugar, packed - 1 large egg - 1 teaspoon vanilla extract - 1/2 cup pure pumpkin puree - 1/2 cup cream cheese, softened - 1/4 cup powdered sugar - 1 teaspoon vanilla extract (for the filling) - Optional: 1/2 cup chocolate chips or chopped nuts for added crunch These ingredients come together to create a cookie that is rich and creamy. The spices bring warmth and flavor, while the pumpkin provides moisture. The cream cheese filling adds that cheesecake goodness we all crave. For the full recipe, check out the details on how to mix and bake these delicious treats! 1. Preparing the dough and cheesecake filling Start by mixing the dry ingredients. In a medium bowl, whisk together the flour, baking soda, baking powder, salt, cinnamon, nutmeg, and ginger. Set this aside. In a large mixing bowl, beat the softened butter with granulated sugar and brown sugar. Mix until it becomes creamy and smooth. Then, add the egg and vanilla extract. Stir in the pumpkin puree until everything blends well. 2. Creating the cookie shape with filling Gradually add the dry mix to the wet mixture. Stir until just combined. If you like, fold in chocolate chips or nuts now. In a small bowl, mix cream cheese, powdered sugar, and vanilla extract for the filling. Scoop a tablespoon of dough onto the baking sheet. Use your thumb to make a small dip in the center. Fill each dip with a teaspoon of cream cheese mixture. Top it off with another tablespoon of dough. 3. Baking and cooling the cookies Preheat your oven to 350°F (175°C). Bake the cookies for 12-15 minutes, or until they turn light golden brown. Once baked, let them cool on the sheet for 5 minutes. Then, move them to a wire rack to cool completely. - Recommended temperature for perfect cookies Bake your cookies at 350°F (175°C). This temperature helps the cookies cook evenly without burning. - How to check for doneness Look for a light golden brown color on the edges. If they feel firm yet soft to the touch, they are done. If uncertain, you can check the bottom of a cookie; it should be golden too. Remember to check out the Full Recipe for all the details! To prevent cookies from spreading, chill your dough for at least 30 minutes before baking. This helps the butter firm up. Another tip is to use a cookie scoop for even portions. This keeps your cookies uniform in size. For the perfect texture, mix your dough just until combined. Overmixing can make cookies tough. If you want softer cookies, take them out of the oven just before they are fully set. They will continue to cook on the pan. For special occasions, serve your cookies on a festive platter. You can dust them with powdered sugar for a sweet touch. A sprinkle of cinnamon adds a nice autumn flavor and makes them look appealing. For added flavor, consider topping the cookies with a dollop of whipped cream or a drizzle of caramel sauce. You can also use chocolate chips or nuts in the dough for extra crunch. These toppings make your cookies even more irresistible. For the full recipe, check out the Pumpkin Cheesecake Cookies section! {{image_2}} You can give your pumpkin cheesecake cookies a twist. Try adding spices like allspice or cloves for more warmth. A dash of vanilla bean extract can also bring out the pumpkin flavor. If you want a sweet surprise, mix in chocolate chips or chopped nuts. These additions add crunch and richness. They can change the whole cookie experience, making each bite unique. If you want a different taste, consider cream cheese replacements. Mascarpone cheese works well, giving a creamy texture. You can also try flavored icing. A maple or caramel icing can make the cookies stand out. For a chocolate lover's delight, drizzle melted chocolate ganache on top after baking. Each option offers a new way to enjoy these cookies. The full recipe provides all the steps to create these delicious variations, so don’t hesitate to explore! To keep your pumpkin cheesecake cookies fresh, use an airtight container. A glass or plastic container works well. Line the bottom with parchment paper to absorb moisture. Store cookies at room temperature for up to five days. If you want them to last longer, refrigerate them. Just be sure to keep them covered. To freeze your cookies, let them cool completely first. Then, place them in a single layer on a baking sheet. This step prevents them from sticking together. Freeze for about two hours. After that, transfer cookies to a freezer-safe bag. Squeeze out excess air and seal the bag tightly. They can stay in the freezer for up to three months. When you’re ready to enjoy them, take out the number of cookies you want. Let them thaw on the counter for about 30 minutes. If you want them warm, pop them in the oven for a few minutes. Enjoy your delicious pumpkin cheesecake cookies! For the full recipe, check back to ensure you don’t miss a step. Can I use fresh pumpkin instead of canned puree? Yes, you can use fresh pumpkin. Just cook and puree it first. Make sure to remove excess water. This will help your cookies stay fluffy and moist. How to make pumpkin cheesecake cookies gluten-free? To make them gluten-free, swap all-purpose flour for a gluten-free blend. Look for blends that work well for baking. They will help your cookies hold their shape. Are these cookies suitable for freezing? Yes, these cookies freeze well. Once baked and cooled, place them in an airtight container. They will last up to three months in the freezer. What to do if cookies turn out flat? If your cookies are flat, check if you used enough flour. Also, make sure the butter is softened, not melted. Chilling the dough for 30 minutes can help, too. How to fix overcooked cookies? If cookies are overcooked, they might be dry. You can try adding a small amount of frosting or cream to moisten them. Another option is to use them in a dessert trifle. Just layer them with whipped cream and pumpkin puree for a tasty treat. This blog covered everything you need for delicious pumpkin cheesecake cookies. We explored the key ingredients, steps to prepare and bake, and even tips for perfect texture and presentation. We discussed fun variations to make your cookies unique and how to store them to keep them fresh. Baking these cookies brings joy and flavor to your kitchen. Use these tips to impress your friends and family with your tasty treats. Enjoy the process and have fun experimenting!

Pumpkin Cheesecake Cookies Irresistible Fall Treat

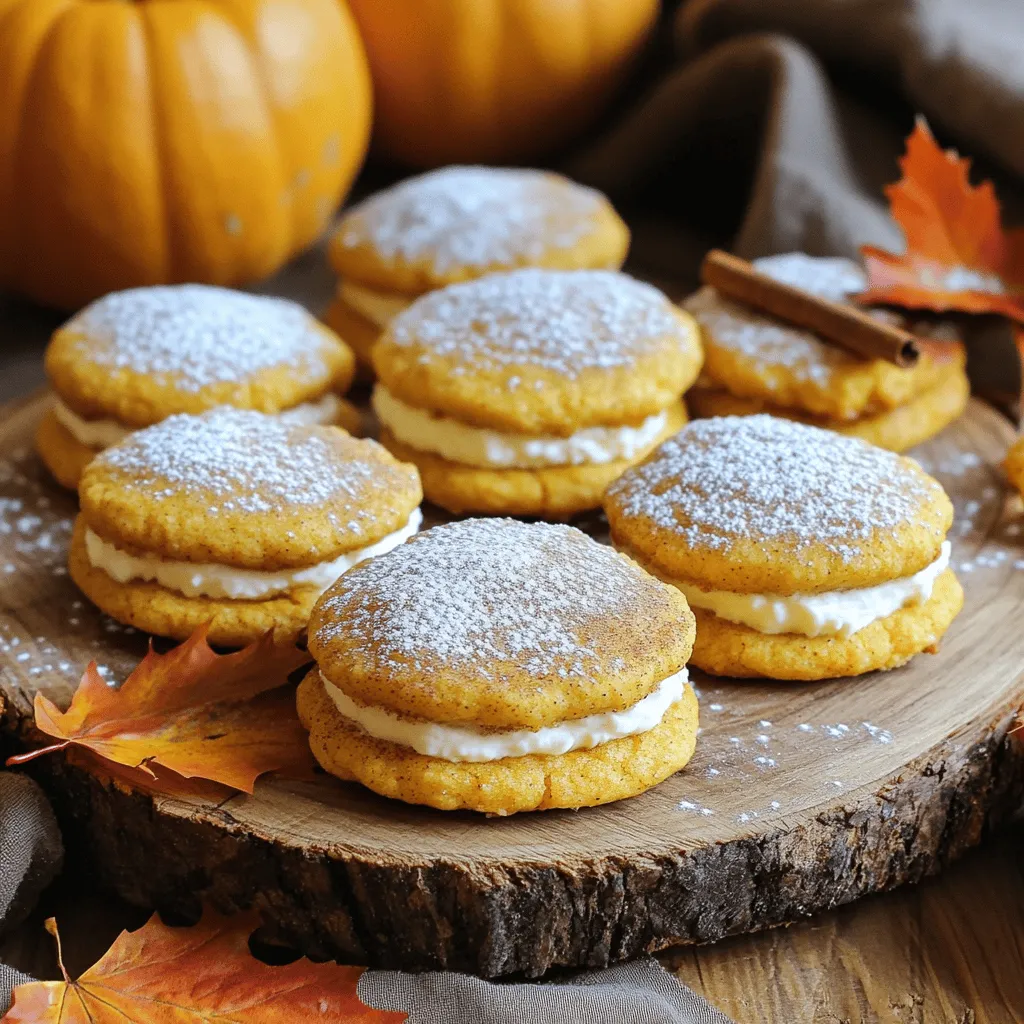
Welcome to the season of cozy flavors and pumpkin delights! If you crave a treat that combines the rich taste

To make chocolate chip pumpkin cookies, you need a few key ingredients. Each one plays an important role in flavor and texture. Here’s what you will need: - 1 cup pumpkin puree (canned or fresh) - 1/2 cup unsalted butter, softened - 1 cup brown sugar, packed - 1/2 cup granulated sugar - 1 large egg - 1 teaspoon vanilla extract - 2 cups all-purpose flour - 1/2 teaspoon baking soda - 1/2 teaspoon baking powder - 1 teaspoon ground cinnamon - 1/2 teaspoon ground nutmeg - 1/4 teaspoon ground ginger - 1/2 teaspoon salt - 1 cup chocolate chips (semi-sweet or dark) - 1/2 cup pecans or walnuts (optional, chopped) Each ingredient adds to the delicious taste of these cookies. Pumpkin gives them moisture and flavor. The sugars add sweetness, while the butter keeps them soft and chewy. I recommend using Libby's for pumpkin puree. It has a smooth texture and rich flavor. For chocolate chips, Ghirardelli is my go-to choice. Their chips melt well and taste great in cookies. These brands help make your cookies extra special. If you need to make changes, that’s okay! Here are some easy swaps: - Use coconut oil instead of butter for a dairy-free option. - Replace brown sugar with coconut sugar for a healthier choice. - Try gluten-free flour for a gluten-free version. - You can skip nuts if you want a nut-free cookie. These substitutions will still give you tasty cookies, even if they change the flavor slightly. Enjoy exploring these options! For the full recipe, check out the details above. Start by preheating your oven to 350°F (175°C). This step ensures that your cookies bake evenly. While the oven heats, grab a large mixing bowl. Cream together 1/2 cup of softened butter, 1 cup of brown sugar, and 1/2 cup of granulated sugar. Mix until the mixture is light and fluffy. This should take about 2-3 minutes. Next, add in 1 cup of pumpkin puree, 1 large egg, and 1 teaspoon of vanilla extract. Mix these ingredients well until they blend nicely. In another bowl, whisk together the dry ingredients. You will need 2 cups of all-purpose flour, 1/2 teaspoon of baking soda, 1/2 teaspoon of baking powder, 1 teaspoon of ground cinnamon, 1/2 teaspoon of ground nutmeg, 1/4 teaspoon of ground ginger, and 1/2 teaspoon of salt. Gradually add this dry mix to your wet mixture. Stir until just combined. Be careful not to overmix, or your cookies might turn out tough. Finally, fold in 1 cup of chocolate chips and chopped nuts if you like. Once your dough is ready, use a spoon or cookie scoop to drop rounded tablespoons onto a lined baking sheet. Space them about 2 inches apart. This space helps them spread without sticking together. Place the baking sheet in the oven and bake for 12-15 minutes. Keep an eye on them. You want the edges to be golden while the centers remain soft. After baking, take the cookies out of the oven. Let them cool on the baking sheet for about 5 minutes. This time allows them to set. Then, transfer the cookies to a wire rack to cool completely. For a fun presentation, serve them on a festive plate lined with parchment paper. You can sprinkle extra chocolate chips and nuts on top for a nice touch. A glass of cold milk pairs perfectly with these tasty treats! If you want to see the full recipe, you can check it out above. To get soft and chewy cookies, use room temperature butter. Cream it well with sugars. Mix until fluffy, about three minutes. This step adds air and lightness. Don’t overmix the dough once you add dry ingredients. Overmixing leads to tough cookies. Also, chill the dough for 30 minutes before baking. Chilling helps cookies keep their shape. When baking more than one batch, keep an eye on the time. Bake the cookies on the center rack for even heat. If you have two trays, rotate them halfway through. This way, both trays bake evenly. Always use parchment paper to prevent sticking. If you have leftover dough, store it in the fridge. You can bake the next day for fresh cookies! Spices make your cookies shine. Ground cinnamon adds warmth. Try nutmeg for a sweet touch and ginger for spice. You can also add mix-ins like chopped nuts or dried fruit. For a twist, use white chocolate chips or butterscotch chips. A pinch of sea salt on top before baking boosts the flavor. Don't forget to check the Full Recipe for even more ideas! {{image_2}} You can make these cookies without nuts and dairy. For a nut-free version, skip the nuts entirely. Replace the butter with a dairy-free alternative, like coconut oil or vegan butter. This way, everyone can enjoy these tasty treats. Mix-ins can change the flavor and texture of your cookies. Try adding nuts like pecans or walnuts for a nice crunch. Dried fruits, like cranberries or raisins, can add sweetness and chewiness. You can even add white chocolate chips for a fun twist. Just remember to keep the total mix-ins to about a cup. Fall brings so many flavors to explore. You can add a dash of maple syrup for a richer taste. Consider mixing in chopped apples or pears for a fruity touch. Adding a pinch of allspice or cloves can give your cookies an even warmer flavor. These small changes can make your cookies unique and special for the season. You can find the full recipe for these delicious Chocolate Chip Pumpkin Cookies above. Enjoy experimenting with these variations! To keep your chocolate chip pumpkin cookies fresh, store them in an airtight container. Place parchment paper between layers to prevent sticking. Keep the container at room temperature. This method keeps your cookies soft and chewy. You can freeze these cookies for later. Let the cookies cool completely first. Place them in a single layer on a baking sheet and freeze for about two hours. Once frozen, transfer the cookies to a freezer bag. Be sure to label it with the date. They will stay fresh for up to three months. When stored properly, these cookies last up to one week at room temperature. If you freeze them, they can last for three months. This makes them perfect for making ahead of time or for sharing with friends. For the full recipe, check the section above. Yes, you can use fresh pumpkin. Fresh pumpkin gives a nice flavor. To prepare, cook the pumpkin until soft. Then, mash it into a smooth puree. Make sure to measure it just like you would with canned pumpkin. This swap adds a fun twist to your cookies! I recommend semi-sweet chocolate chips for balance. They melt nicely and add rich flavor. Dark chocolate chips work well too if you prefer less sweetness. Some people even mix both types for a delightful treat. Choose what you love most! To make these cookies gluten-free, swap regular flour with gluten-free flour. Look for a blend that works for baking. Keep in mind that the texture may change slightly. You might need to add more pumpkin puree to keep them moist. Enjoy your tasty cookies without worry! - Full Recipe Details: For the complete recipe, check out the Chocolate Chip Pumpkin Bliss Cookies section. In this post, I covered how to make chocolate chip pumpkin cookies. We explored essential ingredients, including top brands and substitutions. You learned step-by-step how to prepare, bake, and serve these treats. I shared tips for the best texture and ways to add flavor. We also discussed fun variations and smart storage methods. Now, you have all the tools to bake delicious cookies your friends and family will love. Enjoy the process and share these tasty cookies with others!

Chocolate Chip Pumpkin Cookies Flavorful Fall Treat

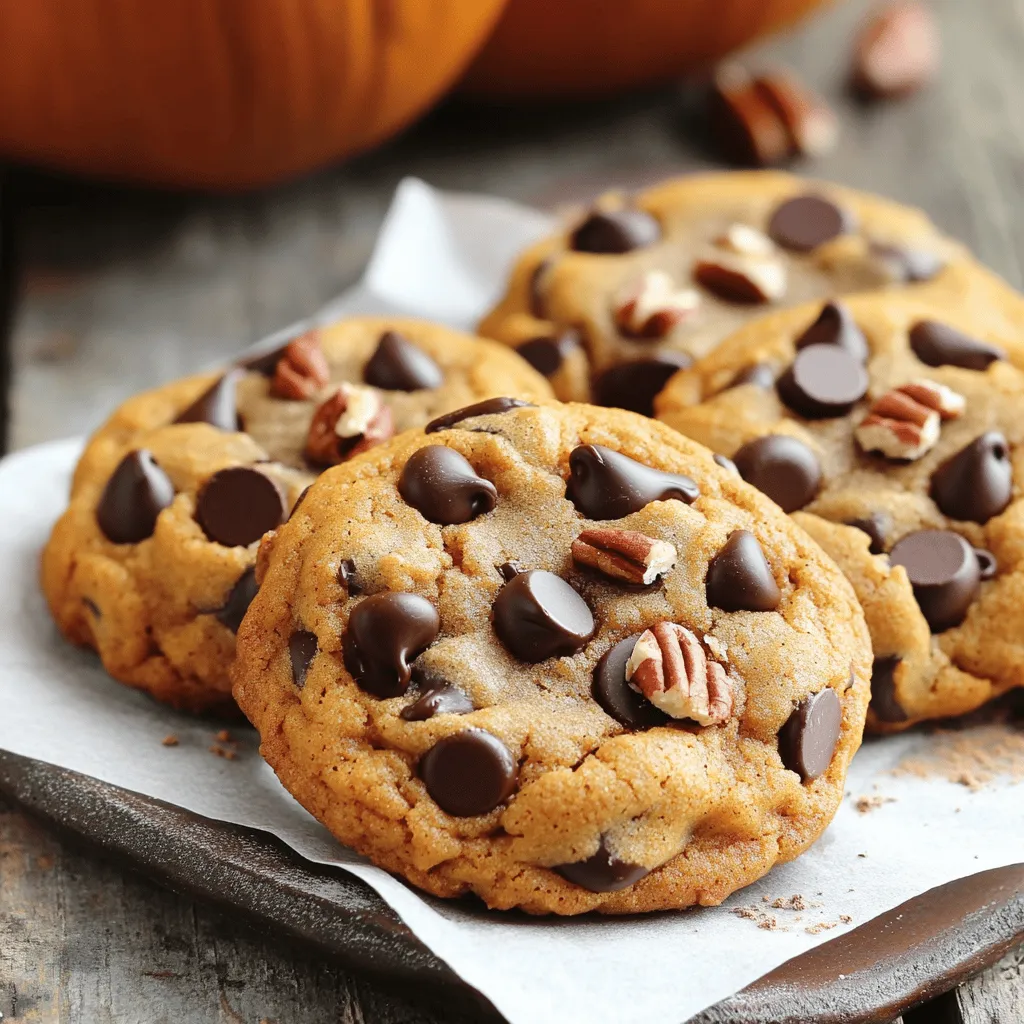
Are you ready to bake something special this fall? Chocolate chip pumpkin cookies blend sweet chocolate with warm pumpkin spice

- Pumpkin Butter (1 cup) - Unsalted Butter (1 cup, softened) - Granulated Sugar (1 cup) - Brown Sugar (1 cup, packed) - All-Purpose Flour (3 ½ cups) - Cream of Tartar (2 teaspoons) - Baking Soda (1 teaspoon) - Ground Cinnamon (2 teaspoons + 2 tablespoons for rolling) - Ground Nutmeg (1 teaspoon) - Vanilla Extract (1 teaspoon) In this recipe, pumpkin butter is the star. It gives these cookies a soft texture and rich flavor. You can find pumpkin butter in stores or make your own. Just blend cooked pumpkin with sugar and spices. The unsalted butter brings creaminess and helps the cookies spread just right. Next, granulated sugar and brown sugar add sweetness. Brown sugar gives a slight chewiness. The all-purpose flour provides structure, while cream of tartar helps create the classic snickerdoodle tang. Baking soda gives the cookies a nice lift. For flavor, we use ground cinnamon and nutmeg. They create that warm, cozy taste we love in fall. Vanilla extract rounds out the flavors, making each bite delicious. This blend of ingredients makes Pumpkin Butter Snickerdoodles truly special. For the full recipe, check out the instructions. - Preheat the oven to 350°F (175°C). - Line two baking sheets with parchment paper. - In a large bowl, cream together pumpkin butter, unsalted butter, granulated sugar, and brown sugar until smooth. - Add in the eggs and vanilla extract. Mix until everything blends well. - In another bowl, whisk together all-purpose flour, cream of tartar, baking soda, salt, ground cinnamon, and nutmeg. - Gradually mix the dry ingredients into the wet mixture. Stir until just combined. Do not overmix; this keeps the cookies soft. - In a small bowl, mix the sugar and 2 tablespoons of cinnamon for rolling. - Use a cookie scoop or your hands to form balls of dough, about 1.5 inches wide. Roll each ball in the cinnamon-sugar mixture until fully coated. - Place the coated cookie balls on the lined baking sheets, spacing them about 2 inches apart. - Bake for 10-12 minutes. The edges should set while the centers remain soft. - After baking, cool the cookies on the sheets for 5 minutes. Then, transfer them to wire racks to cool completely. For the full recipe, check out Pumpkin Butter Snickerdoodles! - Avoid Overmixing the Dough: When you mix the dough, do it gently. Overmixing makes cookies tough. Stop mixing as soon as the flour disappears. This keeps them soft and chewy. - Ensure Ingredients are at Room Temperature: Let your butter and eggs warm up. Room temperature ingredients blend better. This helps the cookies rise and gives them a nice texture. - Substitute Ideas for Pumpkin Butter: If you can't find pumpkin butter, try using applesauce or butternut squash puree. These can work well, but the flavor will change a bit. You can also mix pumpkin puree with some spices to mimic pumpkin butter. - Choosing Quality Pumpkin Butter: Look for pumpkin butter with real pumpkin and less sugar. Brands that use natural ingredients often taste best. Read labels and choose one with spices like cinnamon and nutmeg for extra flavor. - Presentation Tips and Ideas: Stack the cookies on a nice plate. Dust some extra cinnamon on top for a pretty look. You can also add small gourds or colorful leaves around the plate for a cozy fall touch. - Pairing Ideas with Beverages: These cookies go great with coffee or chai tea. The spices in the cookies match well with warm drinks. You could also serve them with a glass of cold milk for a classic treat. Enjoy them fresh from the oven for the best taste. For the full recipe, check the [Full Recipe]. {{image_2}} You can easily change the flavor of your Pumpkin Butter Snickerdoodles. Here are two great options: - Adding Chocolate Chips: Mix in 1 cup of chocolate chips into the dough. This adds a rich, sweet twist to your cookies. The chocolate pairs well with the warm spices and pumpkin butter, making each bite even more delightful. - Incorporating Nuts or Dried Fruits: Consider adding 1 cup of chopped nuts or dried fruits. Pecans, walnuts, or cranberries can add crunch and a hint of tartness. This gives your cookies a unique texture and flavor that stands out. You can make these cookies fit special diets. Here are some simple swaps: - Gluten-Free Options: Use a gluten-free flour blend in place of all-purpose flour. Look for a blend that has xanthan gum to help with structure. Your cookies will still be soft and delicious. - Vegan Alternatives: Replace the eggs with 1/4 cup of unsweetened applesauce or a flax egg. Just mix 1 tablespoon of ground flaxseed with 2.5 tablespoons of water. Let it sit for a few minutes to thicken. This will keep your cookies moist and tasty. Add a seasonal flair to your cookies with these ideas: - Spiced Pumpkin Butter Snickerdoodles: Boost the spices! Add 1/2 teaspoon of allspice or ginger to the dough. This gives your cookies a deeper, more complex flavor. It enhances that cozy fall vibe. - Holiday-Inspired Variations: During the holidays, consider adding peppermint extract or orange zest. This brings a festive flavor that is perfect for special occasions. You can even top the cookies with a drizzle of white chocolate for added sweetness. These variations let you make the Pumpkin Butter Snickerdoodles truly your own. Try a few and see which ones you love best! Check out the Full Recipe to get started. To keep your Pumpkin Butter Snickerdoodles fresh, store them in an airtight container. This helps prevent them from drying out. You can stack the cookies in layers, using parchment paper between each layer. This way, they won’t stick together. You can freeze unbaked cookie dough easily. Just scoop the dough balls and place them on a baking sheet. Freeze them until firm, then transfer them to a freezer bag. This way, you can bake fresh cookies later. To store baked cookies, place them in an airtight container. They can last for up to three months in the freezer. These cookies stay fresh for about one week at room temperature. If you see any signs of spoilage, such as a strange smell or mold, it’s best to throw them away. Always check for freshness before enjoying your cookies. How to make Snickerdoodles from Scratch? To make Snickerdoodles, start by creaming butter and sugar. Mix in eggs and vanilla. In another bowl, combine flour, cream of tartar, baking soda, and salt. Slowly mix dry with wet. Shape into balls, roll in cinnamon-sugar, and bake. You can find the full recipe above. Can I use pumpkin puree instead of pumpkin butter? Yes, you can use pumpkin puree. However, pumpkin butter has added spices and sweetness. This means your cookies may taste different. You might need to adjust sugar and spice amounts to match pumpkin butter’s flavor. Why are my cookies flat? Flat cookies may happen if your butter is too soft. Use cold or room temperature butter. Also, check if you measured flour correctly. Too little flour can cause flatness. Lastly, make sure your baking soda is fresh. How can I enhance the spice flavor? To boost spice flavor, add more ground cinnamon or nutmeg. You can also mix in ginger or allspice. A pinch of cloves can add warmth. Experiment with your spice blend for a richer taste. Best way to serve Pumpkin Butter Snickerdoodles? Serve these cookies warm for the best taste. Stack them on a plate and sprinkle some extra cinnamon on top. You can also add small pumpkins or leaves for a cozy fall mood. What drinks pair well with these cookies? These cookies go great with warm apple cider or a cup of chai tea. Coffee also makes a nice match, especially with a splash of cream. For something cool, try pumpkin spice lattes or vanilla milkshakes. In this blog post, we explored how to make delicious Pumpkin Butter Snickerdoodles. We covered the key ingredients, step-by-step instructions, and helpful tips for perfecting your cookies. I shared variations so you can adapt to any taste or diet. Finally, we discussed storage methods to keep your cookies fresh and tasty. Enjoy baking these cookies and impressing your family and friends with your skills! Simple recipes like this bring joy and warmth to every occasion.

Pumpkin Butter Snickerdoodles Irresistible Cookie Treat

Looking for a new fall favorite? These Pumpkin Butter Snickerdoodles are the perfect cookie treat! With soft centers and a

For these tasty cookies, you will need: - 1 cup canned pumpkin puree - 1/2 cup brown sugar - 1/4 cup granulated sugar - 1/2 cup unsalted butter, softened - 1 large egg - 1 teaspoon vanilla extract - 1 1/2 cups rolled oats - 1 cup all-purpose flour - 1 teaspoon baking soda - 1 teaspoon baking powder - 1 teaspoon ground cinnamon - 1/2 teaspoon nutmeg - 1/2 teaspoon ginger - 1/4 teaspoon salt These ingredients mix well to create a soft, chewy texture. To make the sweet icing, gather: - 1 cup powdered sugar - 2 tablespoons milk - 1/4 teaspoon vanilla extract This icing adds a nice touch of sweetness and a lovely shine. You might not have all the ingredients. Here are some swaps: - Use coconut oil instead of butter. - Swap brown sugar for white sugar if needed. - You can use gluten-free flour for a gluten-free option. - Applesauce can replace the egg for a vegan twist. These options help you adapt the recipe to what you have at home. For the full recipe, check out the details above. Start by preheating your oven to 350°F (175°C). Line a baking sheet with parchment paper. In a large bowl, cream the softened butter, brown sugar, and granulated sugar. Mix until it feels light and fluffy. This step makes your cookies soft. Next, add the canned pumpkin puree, one egg, and vanilla extract. Stir until everything is smooth and combined. In another bowl, whisk together rolled oats, all-purpose flour, baking soda, baking powder, cinnamon, nutmeg, ginger, and salt. Mix them well. Now, slowly add the dry mixture to the wet mixture. Stir just until everything is combined. Don’t overmix; this keeps the cookies tender. Use a cookie scoop or spoon to drop tablespoon-sized amounts of dough onto the baking sheet. Make sure to leave space between each cookie, so they have room to spread. Place the baking sheet in the preheated oven. Bake for 12 to 15 minutes. Look for light golden edges and set centers. If the cookies look too soft, give them a minute more. They will harden as they cool. Once baked, take them out and let them cool for a few minutes on the baking sheet. Then, transfer them to a wire rack to cool completely. While the cookies cool, prepare the icing. In a small bowl, whisk together the powdered sugar, milk, and vanilla extract. Mix until it is smooth and drizzle-able. If it feels too thick, add a bit more milk. Once your cookies are cool, drizzle the icing over the top. This adds a sweet touch to your pumpkin and oatmeal cookies. For the full recipe, refer to the earlier section. Enjoy these treats! To make your cookies soft and chewy, use the right amount of pumpkin. Too much can make them too wet. For best results, measure your pumpkin puree carefully. Also, avoid overmixing the dough. Mix until just combined to keep the cookies light. For a little crunch, try adding rolled oats. They add a nice texture that pairs well with the pumpkin flavor. Store your cookies in an airtight container. This keeps them fresh for days. If you want to save some for later, freeze them. Just wrap each cookie in plastic wrap before placing them in a freezer bag. They can last up to three months in the freezer. When ready to eat, let them thaw at room temperature. These cookies shine with a drizzle of icing. Serve them warm or at room temperature. Pair them with a warm cup of tea or coffee. You can also add a scoop of vanilla ice cream on top for a special treat. For a festive touch, sprinkle some cinnamon on the icing. This adds extra flavor and makes them look beautiful. Enjoy making these delightful cookies with the full recipe! {{image_2}} You can make your cookies even tastier by adding chocolate chips or nuts. I love using semi-sweet chocolate chips. Just mix in about 1 cup when you combine your dry ingredients. If you prefer nuts, try walnuts or pecans. Chop them into small pieces. Add about 1/2 cup to the dough. This gives the cookies a nice crunch and rich flavor. If you need gluten-free cookies, use gluten-free flour. Substitute the all-purpose flour with a cup of your favorite gluten-free blend. You can also use almond flour, but it may change the texture slightly. Make sure your oats are certified gluten-free as well. This way, you can enjoy these cookies without worry. You can spice up your cookies to match your taste. Add more cinnamon for warmth. If you like a kick, try adding a pinch of cayenne pepper. For a sweeter touch, mix in some allspice or cardamom. Experiment with different spices to find your perfect blend. Each change can create a unique flavor that keeps you coming back for more. For the full recipe, check out the recipe details earlier in the article. You can store these cookies at room temperature. Place them in an airtight container. They stay fresh for up to five days. Keep them away from direct sunlight or heat. This helps maintain their soft texture and flavor. For longer storage, you can refrigerate these cookies. They will last about a week in the fridge. If you want to save them longer, freeze the cookies. Wrap each one in plastic wrap. Place them in a freezer-safe bag. They can last up to three months in the freezer. To enjoy, just thaw them at room temperature or heat them in the oven. Reheating cookies is easy. Preheat your oven to 300°F (150°C). Place the cookies on a baking sheet. Heat them for about 5 to 10 minutes. This warms them up and keeps them soft. You can also use a microwave. Heat for about 10-15 seconds. Enjoy your warm cookies with icing again! For a complete guide, check out the Full Recipe. Yes, you can use fresh pumpkin. Just make sure to cook and puree it first. Fresh pumpkin adds a nice flavor. You should drain any excess water to keep the cookies from getting too wet. This can help your cookies stay soft and chewy. These cookies can stay fresh for about five days at room temperature. Keep them in an airtight container. If you want them to last longer, refrigerate them for up to a week. You can also freeze them for up to three months. Just thaw them before you eat. The best way to decorate these cookies is with icing. Drizzle the icing over the cooled cookies for a nice look. Use a spoon or a piping bag for better control. You can also sprinkle some cinnamon or chopped nuts on top for added flair. This makes each cookie unique and fun! For the full recipe, check the section above. In this post, we explored how to make delicious pumpkin and oatmeal cookies. We discussed key ingredients, simple steps for baking, and tips to get the best texture. You learned about tasty variations and the best ways to store your cookies. Remember, using fresh pumpkin can add flavor, and serving them warm enhances the taste. Try these ideas and enjoy your baking adventure. You'll impress your friends and family with these treats!

Pumpkin & Oatmeal Cookies with Icing Delight

If you’re looking for a delightful treat that combines the warm flavors of fall, you’re in the right place! In

To make delicious pumpkin churro bites, you need the right ingredients. Here’s what you will need: - 1 cup all-purpose flour - 1/2 cup pumpkin puree - 1/4 cup brown sugar - 1/2 teaspoon ground cinnamon - 1/2 teaspoon baking powder - 1/4 teaspoon salt - 1/4 cup unsalted butter, melted - 1/2 teaspoon vanilla extract - 1/2 cup sugar (for rolling) - 1 tablespoon ground cinnamon (for rolling) - Oil for frying Each ingredient plays a key role in flavor and texture. Here are the exact amounts you need: - All-purpose flour: 1 cup gives the dough structure. - Pumpkin puree: 1/2 cup adds moisture and flavor. - Brown sugar: 1/4 cup sweetens and adds depth. - Ground cinnamon: 1/2 teaspoon spices up the mix. - Baking powder: 1/2 teaspoon helps the churros rise. - Salt: 1/4 teaspoon enhances all the flavors. - Unsalted butter: 1/4 cup, melted, adds richness. - Vanilla extract: 1/2 teaspoon brings warmth. - Sugar (for rolling): 1/2 cup makes them sweet and crunchy. - Ground cinnamon (for rolling): 1 tablespoon adds a cozy touch. - Oil for frying: Enough to fill the pan for frying. You can make your churro bites even better with some fun add-ins. Consider these options: - Nutmeg: Just a pinch can bring a warm flavor. - Allspice: A little can add a nice twist. - Orange zest: A teaspoon brightens the taste. - Chocolate chips: Add a few for sweetness in the dough. These optional ingredients let you customize your pumpkin churro bites. Feel free to experiment and find your favorite mix! For the complete recipe, check out the Full Recipe. To make pumpkin churro bites, start by mixing the dry ingredients. In a large bowl, combine 1 cup of all-purpose flour, 1/4 cup of brown sugar, 1/2 teaspoon of ground cinnamon, 1/2 teaspoon of baking powder, and 1/4 teaspoon of salt. Stir these well to blend them. In another bowl, mix together 1/2 cup of pumpkin puree, 1/4 cup of melted unsalted butter, and 1/2 teaspoon of vanilla extract. Stir until smooth. Slowly add the wet mix to the dry mix. Combine them until a dough forms. It should feel slightly sticky but still easy to handle. Next, heat oil in a deep frying pan over medium heat. Use enough oil to cover the dough balls when frying. To check if the oil is ready, drop a small piece of dough in it. If it sizzles and rises, you’re ready to fry! Scoop out tablespoon-sized portions of the dough. Roll them into small balls, about 1 inch in size. Carefully drop the dough balls into the hot oil in batches, making sure not to overcrowd the pan. Fry them for about 2-3 minutes. They should turn golden brown. Use a slotted spoon to remove them and let them drain on a paper towel. While the churro bites are still warm, prepare to coat them in sugar. In a shallow bowl, mix 1/2 cup of sugar with 1 tablespoon of ground cinnamon. Roll each churro bite in this mixture. Make sure they are evenly coated. This step adds a sweet and spicy finish to your bites. Serve them warm for the best taste. If you want, you can check out the Full Recipe for more details. Frying can be tricky. Here are some mistakes to avoid: - Overcrowding the pan: Placing too many churro bites in at once lowers the oil's heat. This leads to soggy churros. - Not testing the oil: Always check if the oil is hot enough. Use a small piece of dough to test. If it sizzles and rises, you're good to go. - Using cold dough: Cold dough can lead to uneven cooking. Let your dough sit at room temperature for a bit before frying. To cook churros to perfection: - Maintain the right heat: Keep your oil at medium heat. Too hot will burn the churros; too low will make them greasy. - Flip carefully: Use a slotted spoon to turn the churros gently. This helps cook them evenly. - Fry in batches: Fry only a few churros at a time. This allows each one to cook properly and become golden. A crispy texture is key for churros. Here’s how to get it: - Roll in cinnamon-sugar immediately: As soon as you remove them from the oil, roll the churros in the sugar mix. This adds a nice crunch. - Drain properly: Use paper towels to drain excess oil. This helps keep them crispy. - Serve warm: Churros taste best when they are warm and fresh. Enjoy them right after frying for the best texture. For all the details, check out the Full Recipe. {{image_2}} You can add fun flavors to your pumpkin churro bites. Try adding nutmeg for warmth. A little allspice can bring a unique kick. Just mix a pinch into the dry ingredients. You’ll find these spices lift the flavor and make them special. Want a gluten-free option? Use gluten-free flour instead of all-purpose flour. This change keeps the bites tasty and soft. For a vegan version, swap out the butter for coconut oil. Use a flax egg instead of a regular egg if you choose. Just mix 1 tablespoon of flaxseed meal with 2.5 tablespoons of water. Let it sit until it thickens, then add it to your dough. Presentation makes a big difference! Serve your pumpkin churro bites warm with a festive touch. Place them in a cute basket lined with parchment paper. You can also add a small bowl of chocolate or caramel sauce on the side. This makes a fun dipping option. You can even sprinkle some extra cinnamon sugar on top for added flair. For a twist, serve them with whipped cream or ice cream. Enjoy making these treats your own! Check out the Full Recipe for more details. To keep your pumpkin churro bites fresh, let them cool completely first. Then, place them in an airtight container. You can also layer them with parchment paper to prevent sticking. Store the container in the fridge for the best results. This helps keep their flavor and texture. When you want to enjoy your churro bites again, reheating is key. Preheat your oven to 350°F (175°C). Place the churro bites on a baking sheet lined with parchment paper. Heat them for about 5 to 7 minutes. This keeps them warm and slightly crispy. Avoid using the microwave, as it can make them soggy. Pumpkin churro bites can last for about 3 to 4 days in the fridge. If you want to keep them longer, consider freezing them. They can last up to 2 months in the freezer. Just remember to use a freezer-safe container. Thaw them in the fridge before reheating for the best taste. For the full recipe, check out the detailed guide. Yes, you can make pumpkin churro bites ahead of time. Prepare the dough and shape it into balls. Store them in the fridge for up to a day. When ready to eat, fry them fresh. This keeps them warm and crispy. You could also fry them and then store them. Just keep in mind they will lose some crispiness. For frying pumpkin churro bites, use oils with high smoke points. Good options are vegetable oil or canola oil. These oils heat well and won’t burn easily. Olive oil is not ideal for frying at high heat. It can create a burnt taste and smoke. You can check the oil’s heat easily. Drop a small piece of dough into the oil. If it sizzles and rises, the oil is ready. Another method is to use a thermometer. The oil should reach around 350°F (175°C). This helps cook the churro bites perfectly. If the oil is too cool, they will absorb too much oil. If it's too hot, they might burn. Keeping an eye on the temperature helps you fry them just right. In this article, I covered how to make delicious pumpkin churro bites. I shared ingredients, measurements, and optional flavors for a unique twist. You also learned step-by-step instructions for preparing and frying the churros. I offered tips to avoid mistakes and achieve a crisp texture. Finally, I discussed variations, storage methods, and answered common questions. Enjoy creating these tasty treats! You can make them your own and impress everyone. Now, it’s time to fry up some churros and enjoy every bite!

Pumpkin Churro Bites Tasty and Easy Dessert Treat

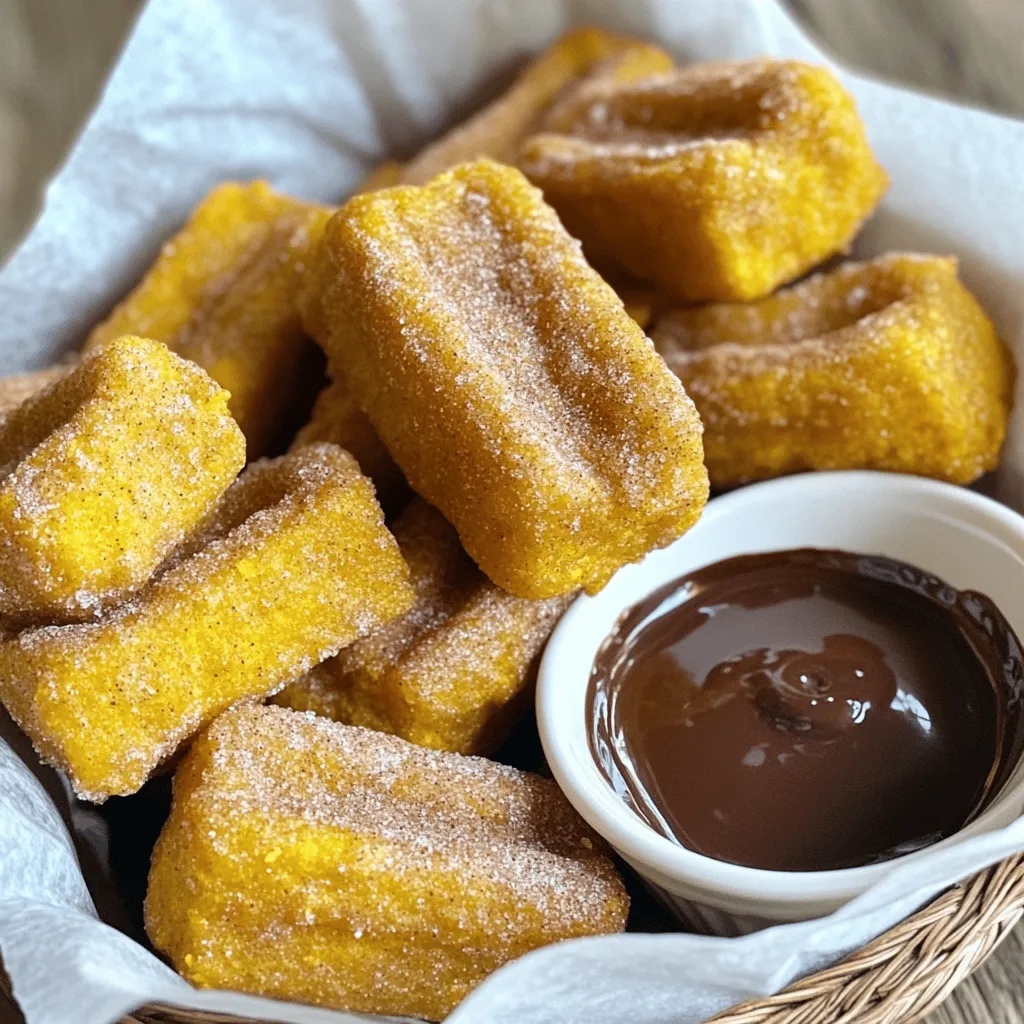
Are you ready to take your dessert game to the next level? These Pumpkin Churro Bites are here to impress!

- 1 cup canned pumpkin puree - 1/2 cup granulated sugar - 1/4 cup brown sugar - 2 large eggs - 1/4 cup vegetable oil - 1/4 cup buttermilk - 1 teaspoon vanilla extract - 1 3/4 cups all-purpose flour - 1 teaspoon baking powder - 1 teaspoon baking soda - 1 teaspoon ground cinnamon - 1/2 teaspoon ground nutmeg - 1/2 teaspoon salt These main ingredients create a rich and moist donut. Canned pumpkin puree gives a smooth texture and a lovely fall flavor. The mix of granulated and brown sugar adds sweetness and depth. Eggs bind everything together, while vegetable oil keeps the donuts soft. Buttermilk adds a little tang and moisture. Each spice, especially cinnamon and nutmeg, adds warmth to the flavor. - 1 cup powdered sugar - 3 tablespoons maple syrup - 1-2 tablespoons milk (as needed for consistency) The glaze is simple yet delicious. Powdered sugar makes it sweet and smooth. Maple syrup gives it that classic maple flavor we all love. Milk helps you get the right texture for dipping. You want it thick but pourable. - Nuts or chocolate chips - Extra spices for flavor depth Feel free to customize your donuts! Chopped nuts or chocolate chips add a nice crunch. Extra spices like ginger or cloves can deepen the flavor. When you mix in these add-ins, you create a new twist on the classic recipe. You can also check the Full Recipe to explore more ideas! - Preheat your oven to 350°F (175°C) and grease a donut pan. - In a large bowl, mix the wet ingredients. Combine 1 cup of pumpkin puree, 1/2 cup of granulated sugar, 1/4 cup of brown sugar, 2 large eggs, 1/4 cup of vegetable oil, 1/4 cup of buttermilk, and 1 teaspoon of vanilla extract. Whisk until smooth. - In another bowl, combine 1 3/4 cups of all-purpose flour, 1 teaspoon of baking powder, 1 teaspoon of baking soda, 1 teaspoon of ground cinnamon, 1/2 teaspoon of ground nutmeg, and 1/2 teaspoon of salt. - Gradually incorporate the dry ingredients into the wet mixture. Stir gently until just combined. A few lumps are fine. - Pour the batter into a piping bag or zip-lock bag. Snip off the corner to pipe the batter into the donut pan. Fill each cavity about 2/3 full. - Bake for 12-15 minutes. Check doneness by inserting a toothpick; it should come out clean. Let the donuts cool in the pan for 5 minutes before moving them to a wire rack. - For the glaze, whisk 1 cup of powdered sugar with 3 tablespoons of maple syrup. Add 1-2 tablespoons of milk for the right consistency. - Once cooled, dip the tops of the donuts into the glaze. Let them rest on the wire rack to set. For the full recipe, check the complete instructions above. To make the best maple glazed pumpkin donuts, start by mixing your batter gently. Overmixing can make your donuts tough. Stir just until the dry and wet ingredients blend. A few lumps are fine. After baking, let your donuts cool in the pan for five minutes. This helps them set and makes them easier to remove. The glaze should be thick yet pourable. Mix powdered sugar, maple syrup, and milk until smooth. If it’s too thick, add a bit more milk. For even coating, dip the tops of the donuts into the glaze. Make sure to let the excess drip off before placing them on a wire rack. For a stunning display, arrange your glazed donuts on a nice plate. You can sprinkle a bit of cinnamon on top for flair. Consider serving them with a small dish of maple syrup for extra dipping. This adds both taste and visual appeal. {{image_2}} You can spice up your maple glaze. Consider adding ground ginger or allspice for a warm kick. You can also use vanilla extract or almond extract in the glaze for a twist. If you want more fun, try toppings like colorful sprinkles or crushed nuts. Each choice adds a new layer of flavor and fun! If you need gluten-free donuts, swap all-purpose flour with a gluten-free blend. Ensure the mix works for baking. For a vegan option, use flax eggs instead of real eggs. Mix one tablespoon of ground flaxseed with three tablespoons of water. Let it sit for five minutes to thicken. Use plant-based milk in place of buttermilk for a perfect swap. To give your donuts a seasonal feel, add dried cranberries or orange zest to the batter. They add a burst of flavor that brightens your bites. You can also transform your donuts into pumpkin spice treats. Just add extra cinnamon, ginger, and nutmeg to the batter. Enjoy the cozy, fall flavors that make these donuts special! For the full recipe, check out the ingredients and instructions above. To keep your maple glazed pumpkin donuts fresh, store them in an airtight container. This helps to lock in moisture and flavor. You can place parchment paper between layers to prevent sticking. Store them at room temperature for up to three days. If you want them to last longer, refrigerate them. They can last up to a week in the fridge. Freezing is a great way to save your donuts for later. To freeze, let them cool completely first. Wrap each donut tightly in plastic wrap or foil. Then, put them in a freezer-safe bag. This keeps them fresh for up to three months. When you're ready to eat, thaw them overnight in the fridge. You can also let them sit at room temperature for a few hours. To reheat your donuts, use the oven or microwave. The oven is best for keeping them soft. Preheat it to 350°F (175°C). Heat them for about 5-7 minutes. If using a microwave, heat for 10-15 seconds. Be careful not to overheat, as this can dry them out. After reheating, you can add a bit more glaze for extra flavor. Enjoy them warm with a cup of coffee or tea for a cozy treat! You can use fresh pumpkin in place of canned. Fresh pumpkin gives a great taste. However, it requires more work. You need to cook and puree the pumpkin first. This can take time, but it's worth it! Use about 1 ¼ cups of fresh puree to replace 1 cup of canned. Drain excess moisture from fresh puree. This keeps the donuts from becoming too wet. Yes, you can! If you don’t have a donut pan, use a muffin tin. Just grease the tin well. Fill each cup halfway with batter. Bake for about 15-18 minutes. Check with a toothpick for doneness. Muffins will be a bit thicker, but still tasty! Leftover glaze can be a fun treat! You can use it on pancakes or waffles. It’s also great on cakes and cookies. Store any extra glaze in an airtight container. Keep it in the fridge for up to a week. You can also reheat it gently in the microwave if it thickens too much. These maple glazed pumpkin donuts are simple and fun to make. From choosing the ingredients to baking, I’ve shared steps for success. Remember, you can customize flavors and toppings to fit your taste. Store them properly or freeze for later enjoyment. These treats are great for any season. Enjoy your baking journey and delight in these delicious donuts!

Maple Glazed Pumpkin Donuts Tasty Homemade Treat

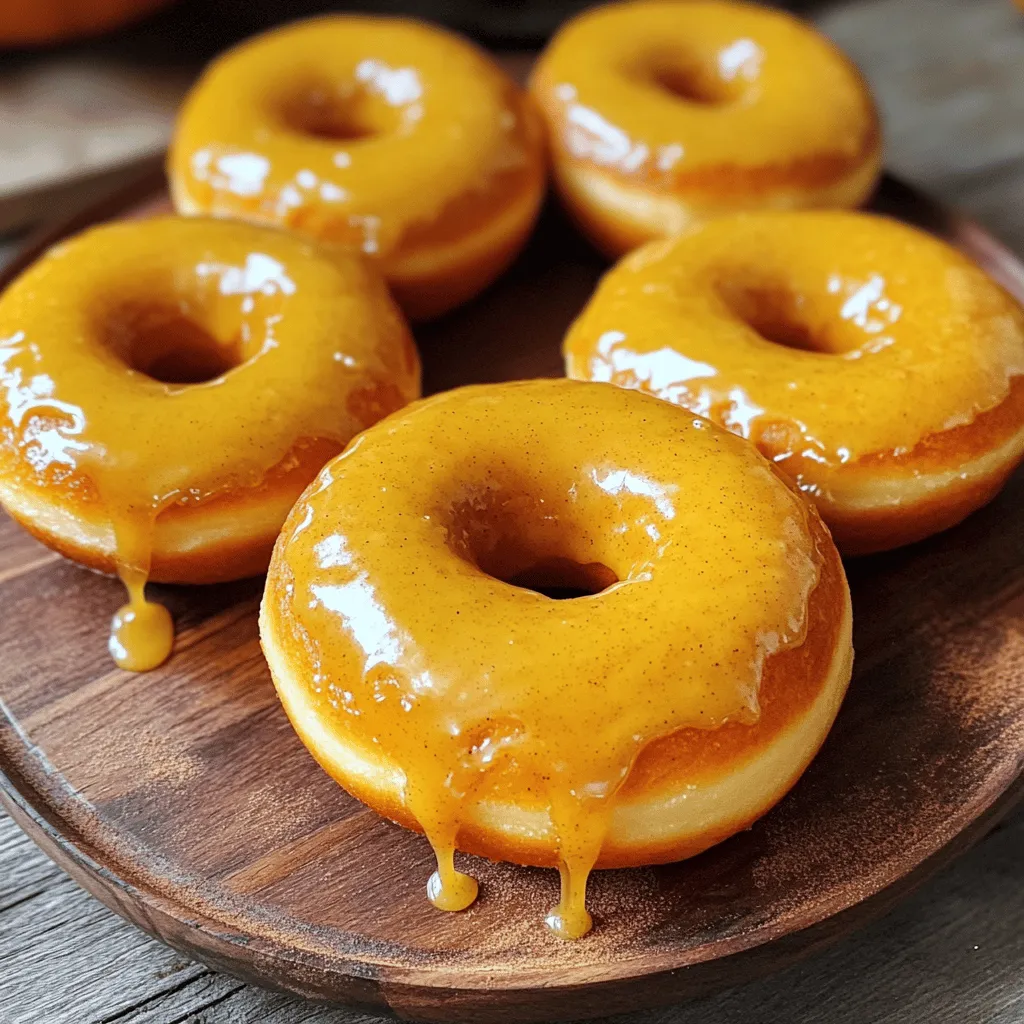
Craving a sweet fall treat? Maple glazed pumpkin donuts are your answer! These easy-to-make donuts bring together the warm flavors

Older posts
Newer posts
← Previous Page1 … Page9 Page10 Page11 … Page80 Next →

dsad

© 2025 My Saved Recipe • Built with GeneratePress

Our Policies

  • Copyright Policy
  • Cookie Policy
  • GDPR Policy
  • Privacy Policy
  • Disclaimer
  • Terms Of Use

More Information

  • Home
  • About
  • Contact
  • Appetizers
  • Dessert
  • Dinner
  • Drinks
©2025, My Saved Recipe About Back To Top