Skip to content
DisclaimerTerms Of UseGDPR PolicyCookie Policy

My Saved Recipe

  • Home
  • Drinks
  • Appetizers
  • Dinner
  • Dessert
  • About
  • Contact
  • Privacy Policy
DisclaimerTerms Of UseGDPR PolicyCookie Policy

Savannah

To make a great iced pumpkin spice latte, gather these key ingredients: - 1 cup brewed coffee, cooled - 1/2 cup milk (dairy or non-dairy) - 1/4 cup pumpkin puree - 2 tablespoons maple syrup (or to taste) - 1 teaspoon pumpkin spice mix - 1/2 teaspoon vanilla extract - Ice cubes These ingredients create a rich and creamy drink with that warm pumpkin flavor. You can modify your iced pumpkin spice latte to fit your taste. Here are some optional ideas: - Whipped cream for topping - Additional pumpkin spice for garnish - Sweeteners like honey or sugar - Flavored syrups, such as caramel or vanilla Feel free to experiment! Each change can lead to a unique drink. Choosing the right pumpkin and spices makes a big difference. Look for: - Pumpkin puree: Choose 100% pure pumpkin, not pie filling. - Pumpkin spice mix: Check that it has cinnamon, nutmeg, and ginger for the best flavor. - Freshness: Spices lose flavor over time. Buy fresh when possible. Quality ingredients lead to a better iced pumpkin spice latte experience. For the full recipe, check out the instructions above. Enjoy making your own delicious drink! To start, gather your ingredients. You will need: - 1 cup brewed coffee, cooled - 1/2 cup milk (dairy or non-dairy) - 1/4 cup pumpkin puree - 2 tablespoons maple syrup (or to taste) - 1 teaspoon pumpkin spice mix - 1/2 teaspoon vanilla extract - Ice cubes - Whipped cream (optional) - Additional pumpkin spice for garnish First, brew your coffee and let it cool. This step is key for a refreshing drink. Next, in a medium bowl or blender, mix the cooled coffee, milk, pumpkin puree, maple syrup, pumpkin spice, and vanilla. Blend on high for about 30 seconds. You want a smooth mixture. If you don’t have a blender, you can whisk the ingredients by hand until well combined. When blending, ensure all items mix well. If you notice lumps, blend longer. A smooth drink is more enjoyable. If you prefer a thicker texture, add more pumpkin puree. For those who like it sweeter, adjust the maple syrup to your taste. The key is to create a blend that feels rich and creamy. Now, it’s time to serve! Fill a tall glass with ice cubes. Pour your pumpkin spice mixture over the ice. This will chill it even more. If you like, add a dollop of whipped cream on top. Finish with a sprinkle of additional pumpkin spice for a nice touch. Serve immediately with a straw or a long spoon. Enjoy your iced pumpkin spice latte, and savor every sip! To make a great iced pumpkin spice latte, start with good coffee. Use strong, brewed coffee for a rich flavor. Cool the coffee before mixing it with other ingredients. The milk should be cold too, so chill it in the fridge. Blend everything well to get a smooth texture. I recommend a blender for the best results. If you want, taste and adjust the sweetness with more maple syrup. A common mistake is using hot coffee. Hot coffee can melt the ice too quickly, making your drink watery. Another mistake is not blending enough. If you don't blend well, the pumpkin may clump together. This can ruin the drink's creamy texture. Also, don’t skip the whipped cream unless you want less richness. Finally, watch the spice; too much can overpower your drink. If you want to boost the flavor, try adding a dash of chocolate syrup. This adds a nice touch of sweetness. You can also mix in a splash of caramel for a sweet twist. For extra spice, try a pinch of cinnamon or nutmeg. If you like it creamier, use half-and-half instead of milk. Don’t forget to top it with extra pumpkin spice for that perfect finish! For the full recipe, check out the Chilled Pumpkin Spice Delight section above. {{image_2}} You can easily make a dairy-free iced pumpkin spice latte. Use almond, soy, or oat milk instead of regular milk. These options add their own flavor. They also keep the drink creamy. If you want a nut-free choice, go for oat milk. It has a nice, smooth texture. You can switch up your iced pumpkin spice latte with seasonal flavors. For winter, try adding peppermint. Just a drop of peppermint extract can bring a fresh twist. You can also swap in some chocolate syrup for a mocha version. Each season has its own tastes. Make your drink reflect that! Cold brew coffee can give your iced drink a smoother taste. It has less acidity than regular brewed coffee. If you want a bolder flavor, stick with brewed coffee. Both work well in this recipe. Choose the one you love best for your iced pumpkin spice latte. For all the details on making this delightful drink, check out the Full Recipe. You might not use all the pumpkin spice mixture at once. To store it, pour any leftover mix into an airtight container. Keep it in the fridge for up to five days. This way, you can enjoy it later without losing flavor. For the best taste, drink your iced latte right away. If you need to store it, put it in the fridge. However, keep in mind that the ice will melt and water it down. If you can, make fresh servings instead. The main ingredients of the iced latte have different shelf lives. Brewed coffee lasts about a week in the fridge. Pumpkin puree stays good for a week if opened, and milk lasts about a week as well. Always check for freshness before using any ingredient. An Iced Pumpkin Spice Latte has a few key nutrients. It typically has around 200-300 calories per serving. This depends on the amount of milk and sweetener you use. You’ll find about 8-12 grams of protein in it, mostly from the milk. It also contains healthy fats, vitamins, and minerals. The pumpkin puree adds fiber, which is great for digestion. If you want to check more specific values, you can use a nutrition calculator with the Full Recipe. Yes, you can make an Iced Pumpkin Spice Latte ahead of time! Just prepare the mixture as described in the Full Recipe. After blending, store it in the fridge for up to 2 days. When ready to serve, pour it over fresh ice. The taste remains great, and you save time when you need it most. You can find store-bought versions at many coffee shops and grocery stores. Brands like Starbucks and Dunkin’ offer ready-to-drink options. You can also find them in the refrigerated section. Look for ones with real pumpkin puree and natural flavors for the best taste. Checking online reviews can help you decide which one to try. Making an Iced Pumpkin Spice Latte is fun and simple. We covered the key ingredients to use, plus tips for choosing the best pumpkin and spices. I shared easy steps for prep and blending to get that perfect smooth drink. Remember, customizing your latte with different flavors can elevate your coffee game. Store leftovers correctly to keep them fresh and tasty. Enjoy this delicious treat any time of year! You now have the tools to make the best iced latte at home.

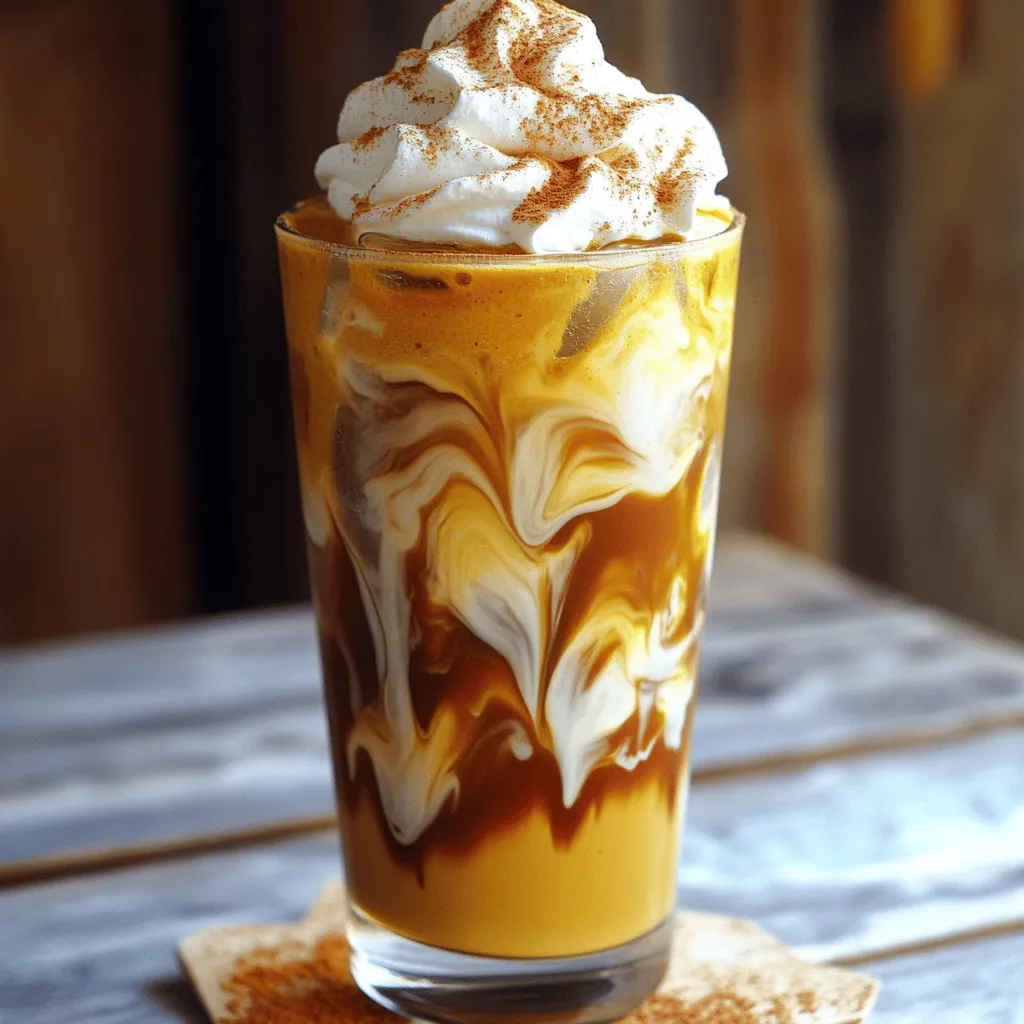
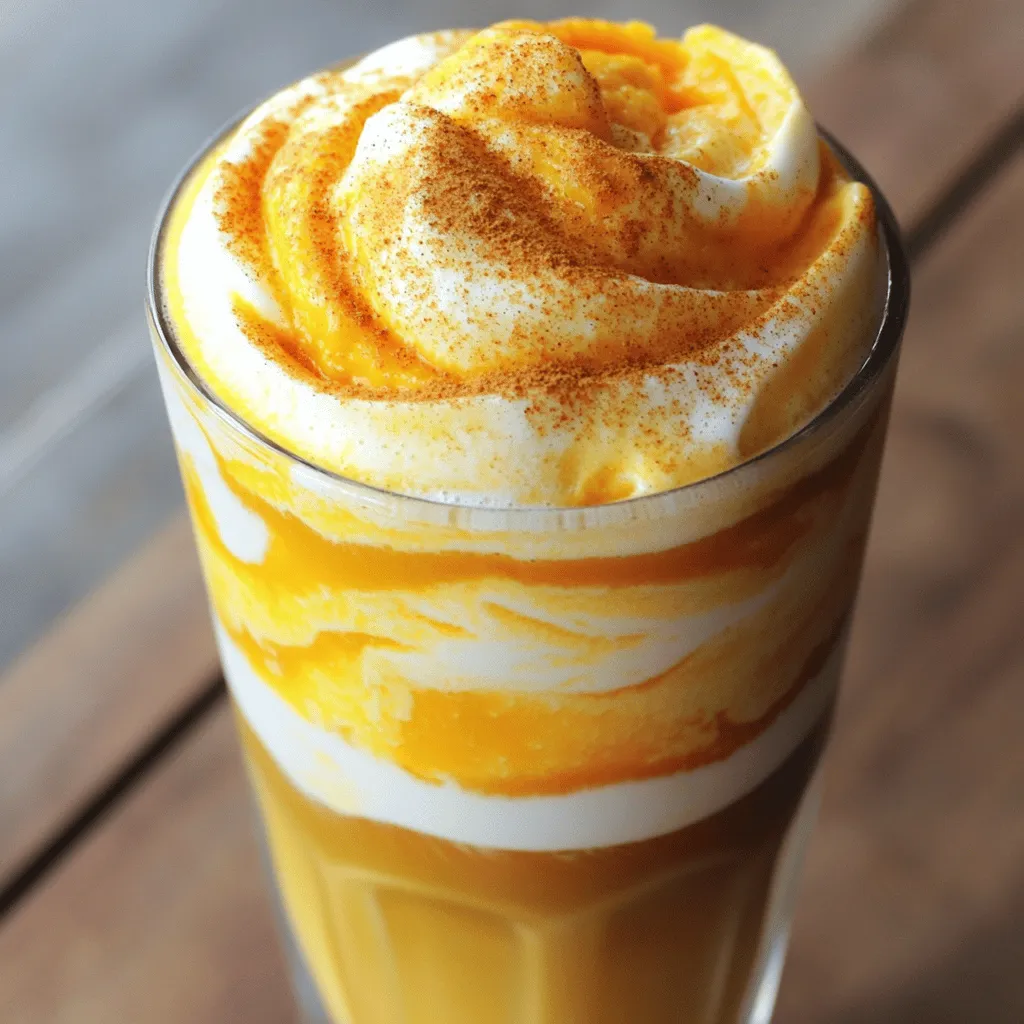
Iced Pumpkin Spice Latte Simple and Tasty Recipe

If you love the cozy taste of autumn, you’ll adore my Iced Pumpkin Spice Latte recipe. It’s simple, tasty, and

To make No-Bake Pumpkin Cheesecake Bars, you need a few key ingredients: - 1 ½ cups graham cracker crumbs - ½ cup unsalted butter, melted - 1 cup cream cheese, softened - 1 cup pumpkin puree (not pumpkin pie filling) - ½ cup powdered sugar - 1 teaspoon vanilla extract - 1 teaspoon pumpkin pie spice - 1 cup whipped cream (for topping) Using fresh pumpkin puree is key. It gives a real pumpkin taste and smooth texture. Pumpkin pie filling has added sugar and spices, which can change the flavor of your bars. Stick with pure pumpkin for the best results. Toppings can make your bars even better. Here are some ideas: - Whipped cream for a light, creamy finish - Chopped pecans or walnuts for a crunchy bite To make your dessert look great, you can sprinkle a little cinnamon on top. A drizzle of caramel sauce can also add a sweet touch. These toppings not only boost flavor but also make the dessert look more appealing. For the full recipe, check out the complete guide. To start, you need to make the crust. In a medium bowl, combine 1 ½ cups of graham cracker crumbs and ½ cup of melted unsalted butter. Mix these until the crumbs look like wet sand. This step is key for a tasty crust. Now, press the crumb mixture firmly into the bottom of a greased 9x9-inch baking pan. Use the back of a measuring cup to ensure it’s even. This helps the crust hold together later. After pressing, put the pan in the fridge while you prepare the filling. Next is the cheesecake filling. In a large mixing bowl, beat 1 cup of softened cream cheese with an electric mixer until it's smooth. This makes the filling creamy and rich. Then, add 1 cup of pumpkin puree, ½ cup of powdered sugar, 1 teaspoon of vanilla extract, and 1 teaspoon of pumpkin pie spice to the cream cheese. Mix on low speed. Mixing slowly helps keep the texture light and fluffy. Now it's time to put it all together. Gently fold in 1 cup of whipped cream into the pumpkin mixture. This step is crucial for a light texture. Pour the cheesecake filling over the chilled crust in the baking pan. Use a spatula to spread it evenly. Smooth the top with the spatula for a nice finish. Cover the pan with plastic wrap and refrigerate for at least 4 hours. For the best taste, chill overnight. After chilling, you can slice the cheesecake into bars. Enjoy the creamy, pumpkin goodness! For the complete instructions, check out the Full Recipe. You can prepare these cheesecake bars a day or two early. This makes life easier on busy days. Just follow the steps and chill them in the fridge. For best texture, let them set for at least four hours. If you can, let them chill overnight. The longer they chill, the firmer and tastier they become. When it's time to serve, cut the bars into squares. Place them on a nice platter. You can add a sprinkle of cinnamon or drizzle caramel sauce on top. These small touches make the dessert pop. For drinks, pair them with hot cider or coffee. The warm flavors match perfectly with the creamy bars. Enjoy sharing this treat at gatherings or holidays! {{image_2}} You can easily change the flavor of your no-bake pumpkin cheesecake bars. If you love chocolate, mix in some cocoa powder. This adds a rich taste and pairs well with pumpkin. You can also try adding different spices. Cinnamon and nutmeg are classic choices, but ginger or cardamom can bring a new twist. For those with dietary needs, this recipe is adaptable. You can make it vegan by using dairy-free cream cheese and whipped cream. Just make sure your graham crackers are vegan too. If you need it gluten-free, use gluten-free graham crackers or almond flour for the crust. Your guests will love these tasty options. Scaling the recipe is simple if you have a big crowd. Just double the ingredients and use a larger pan. A 9x13-inch pan works well for this. You can also make mini versions. Use a muffin tin to create bite-sized cheesecakes. Simply fill each cup with the crust and filling, then chill as usual. These small treats are perfect for parties! Serve them on a platter for a fun touch. Don't forget to add extra toppings like whipped cream or nuts for extra flair. To keep your no-bake pumpkin cheesecake bars fresh, use airtight containers. This helps lock in flavor and moisture. Place the bars in a single layer if possible. If you stack them, add parchment paper between layers to prevent sticking. Stored this way, the cheesecake bars can last up to five days in the fridge. Just be sure to keep them chilled until you are ready to serve. If you want to save some bars for later, freezing is a great option. Cut the bars into squares before freezing. Wrap each one tightly in plastic wrap. Then, place them in a freezer-safe container or bag. This helps prevent freezer burn. They can stay fresh for up to three months in the freezer. When you are ready to enjoy them, thaw the bars in the fridge overnight. This keeps their texture nice. Serve them cold for a refreshing treat! No-Bake Pumpkin Cheesecake Bars last about 5 to 7 days in the fridge. To keep them fresh, cover them tightly with plastic wrap or store them in an airtight container. This helps prevent them from absorbing other fridge odors. Enjoy them cold for the best taste! Yes, you can use low-fat cream cheese. However, it may change the texture and flavor. Low-fat cream cheese can make the bars a bit less creamy and rich. They might also be less firm than those made with full-fat cream cheese. If you want a lighter option, it's a good trade-off. If you need a substitute for graham cracker crumbs, try using crushed cookies or nuts. For a gluten-free option, you can use almond flour or gluten-free cookie crumbs. These options can give a nice flavor and texture to the crust. They are perfect for those with dietary restrictions. To tell if the cheesecake is set, check the edges first. They should feel firm and the center should be slightly soft but not wobbly. You can also gently press the top with your finger. If it springs back, it is ready. Chill it longer if it feels too soft. No-Bake Pumpkin Cheesecake Bars are easy to make with fresh pumpkin puree and a tasty crust. You can customize the flavors and toppings to suit your taste. Follow my tips for making, storing, and serving these bars for any occasion. These delicious treats are perfect for gatherings or cozy nights at home. Enjoy creating this dessert that brings warmth and joy to your table. You can impress others, too, while making great memories!

No-Bake Pumpkin Cheesecake Bars Easy and Delicious Treat

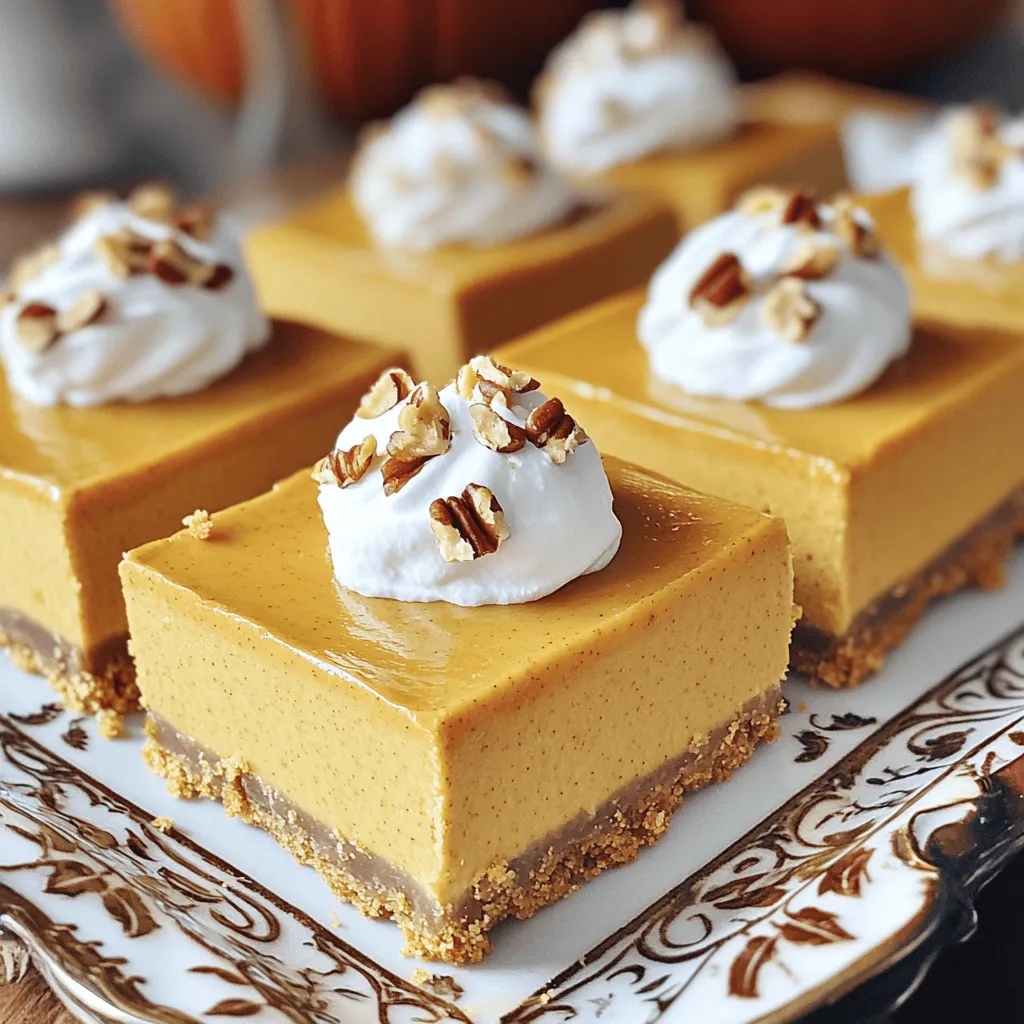
Craving a sweet treat that screams fall but requires zero baking? You’re in the right place! These No-Bake Pumpkin Cheesecake

To make these delicious pumpkin spice latte cookies, gather these items: - 1 cup pumpkin puree (not pumpkin pie filling) - 1 cup brown sugar, packed - 1/2 cup granulated sugar - 1/2 cup unsalted butter, softened - 1 large egg - 2 teaspoons vanilla extract - 2 cups all-purpose flour - 1 teaspoon baking soda - 1 teaspoon baking powder - 2 teaspoons pumpkin spice (a mix of cinnamon, nutmeg, and ginger) - 1/2 teaspoon salt - 1/2 cup semi-sweet chocolate chips - Whipped cream for topping (optional) - Extra pumpkin spice for sprinkling (optional) You can change some ingredients if needed. Here are some ideas: - Use maple syrup instead of brown sugar for a unique flavor. - For a dairy-free option, use coconut oil instead of butter. - Substitute gluten-free flour for all-purpose flour to make these cookies gluten-free. - Instead of chocolate chips, try nuts or dried fruit for different tastes. You'll need a few tools to make these cookies. Gather these: - A large mixing bowl for combining ingredients - A whisk for mixing dry ingredients - An electric mixer or a sturdy spoon for creaming butter and sugars - A baking sheet lined with parchment paper for easy cleanup - A measuring cup and spoons for accurate measurements - A cooling rack to let the cookies cool properly These ingredients and tools will help you bake the best pumpkin spice latte cookies! For the complete recipe, check the Full Recipe section. First, gather your ingredients. You will need pumpkin puree, brown sugar, granulated sugar, butter, egg, and vanilla. Make sure you have flour, baking soda, baking powder, pumpkin spice, salt, and chocolate chips too. 1. Preheat your oven to 350°F (175°C). Line a baking sheet with parchment paper. 2. In a large mixing bowl, cream the softened butter, brown sugar, and granulated sugar. Mix until light and fluffy. 3. Add the pumpkin puree, egg, and vanilla extract. Beat the mixture until it is well combined. 4. In another bowl, whisk together the flour, baking soda, baking powder, pumpkin spice, and salt. 5. Gradually mix the dry ingredients into the wet mixture. Stir gently until just combined. Avoid overmixing to keep cookies soft. 6. Fold in the chocolate chips. This adds sweetness and a nice texture to the cookies. 7. Scoop tablespoon-sized portions of dough onto the prepared baking sheet. Space them about 2 inches apart. 8. Bake for 12-15 minutes. The edges should be lightly golden, and the centers should look set. 9. Once baked, remove the cookies from the oven. Let them cool on the baking sheet for 5 minutes. 10. Transfer cookies to a wire rack to cool completely. 11. For serving, consider topping with whipped cream and a sprinkle of pumpkin spice. This step adds a fun touch! To get the right texture for your cookies, use room-temperature butter. This helps mix well with sugars, making a nice base. Cream the butter and sugars until light and fluffy. This step is key for soft cookies. When adding flour, mix just until combined. Overmixing will make the cookies tough. One common mistake is using pumpkin pie filling instead of pumpkin puree. The filling has extra spices and sugars. Also, don’t skip the baking soda or baking powder. These ingredients help your cookies rise and stay soft. Lastly, watch the baking time. Remove them when the edges are golden. This keeps the centers chewy. To boost the flavor, use fresh spices like cinnamon and nutmeg. They give a nice kick. Try adding a pinch of sea salt to balance the sweetness. If you want a stronger coffee flavor, mix in a teaspoon of instant coffee granules. For a fun twist, drizzle melted chocolate on top after cooling. For the full recipe, check the earlier section. {{image_2}} You can make these cookies gluten-free. Use a gluten-free flour blend instead of all-purpose flour. Look for blends that include xanthan gum, which helps hold the cookies together. These cookies will still have that warm, fall flavor, making them a hit for everyone. To make vegan pumpkin spice latte cookies, swap the egg for a flax egg. Mix one tablespoon of ground flaxseed with three tablespoons of water and let it sit until it thickens. Use vegan butter in place of regular butter. This way, you keep the cookies soft and tasty without dairy or eggs. Mix-ins can change your cookie game! Add chopped nuts like walnuts or pecans for crunch. You can also try dried fruit like cranberries or raisins for a sweet twist. If you want extra chocolate flavor, throw in more chocolate chips or even white chocolate chunks. Each mix-in will bring a new flavor and texture to your cookies. For the full recipe, check out the Pumpkin Spice Latte Cookies section. To keep your Pumpkin Spice Latte Cookies fresh, place them in an airtight container. This will help maintain their soft texture. You can layer parchment paper between cookies to prevent sticking. Store them at room temperature for the best taste. If you want to save some for later, freezing is a great option. First, let the cookies cool completely. Then, place them in a single layer on a baking sheet. Freeze until they are solid. After that, transfer the cookies to a freezer-safe bag or container. They can last up to three months in the freezer. When stored properly, these cookies will stay fresh for about a week at room temperature. If you freeze them, they remain tasty for three months. Just remember to let them thaw before enjoying. You can also warm them in the microwave for a few seconds for that fresh-baked taste. These cookies stand out because they blend fall flavors with coffee. The pumpkin puree adds moisture and flavor. The pumpkin spice brings warmth, and the chocolate chips add sweetness. Together, they create a cookie that feels cozy and festive. Each bite is a hug on a plate, perfect for fall. Yes, you can use fresh pumpkin! Just cook and mash the pumpkin until smooth. Make sure it is not watery. Fresh pumpkin has a vibrant flavor that can enhance your cookies. However, canned pumpkin puree is easier to use and saves time. Serve these cookies warm for the best taste. You can place them on a decorative platter. A drizzle of icing sugar makes them even prettier. Pair them with a warm cup of coffee or tea. Whipped cream on top adds a nice touch, too! To reheat, place cookies in the microwave for 10-15 seconds. This warms them up without drying them out. You can also use an oven at 350°F for 5-7 minutes. This method keeps them soft and fresh. For the complete recipe, check out the Pumpkin Spice Latte Cookies section above. In this blog post, we explored the must-have ingredients for pumpkin spice latte cookies and how to achieve the perfect texture. I shared tips to avoid common mistakes and enhance flavor. You learned about variations, including gluten-free and vegan options, as well as proper storage methods. As you bake these cookies, remember they are not just treats; they bring warmth and joy. Enjoy the process and share your creations with others!

Pumpkin Spice Latte Cookies Irresistible Fall Treat

Fall is here, and that means it’s time to indulge in cozy flavors! Imagine sinking your teeth into a warm

When making the best pumpkin chocolate chip cookies, you need a few simple ingredients. Each one plays a special role in making these cookies soft and tasty. Here’s what you’ll need: - 1 cup pumpkin puree - 1/2 cup unsalted butter, softened - 1 cup brown sugar, packed - 1/2 cup granulated sugar - 1 large egg - 2 teaspoons vanilla extract - 2 cups all-purpose flour - 1 teaspoon baking soda - 1 teaspoon baking powder - 1 teaspoon ground cinnamon - 1/2 teaspoon ground nutmeg - 1/4 teaspoon ground ginger - 1/4 teaspoon salt - 1 cup semi-sweet chocolate chips Pumpkin puree gives the cookies moisture and a lovely flavor. Using softened unsalted butter helps create a nice texture. Brown sugar adds a rich taste and keeps the cookies chewy. Granulated sugar gives a bit of crunch. The egg helps bind everything together. Vanilla extract adds warmth and depth. The dry ingredients are just as important. All-purpose flour is the base for the cookies. Baking soda and baking powder help them rise. Spices like cinnamon, nutmeg, and ginger bring warmth and fall flavors. Lastly, salt balances the sweetness and enhances the taste. Don’t forget the chocolate chips! They add sweetness and contrast to the pumpkin flavor. You can find the full recipe for making these delicious cookies in the next section. - Preheat oven to 350°F (175°C). - Line a baking sheet with parchment paper. Start by heating your oven. This ensures even baking. Next, take a baking sheet and line it with parchment paper. This step helps with easy cleanup and prevents sticking. - Cream butter and sugars until fluffy. - Incorporate pumpkin puree, egg, and vanilla extract. In a big bowl, mix softened butter with brown sugar and granulated sugar. Use a mixer for a fluffy texture. Once it’s light and creamy, add the pumpkin puree, egg, and vanilla extract. This mixture adds moisture and flavor. - Whisk together flour, baking soda, and spices. - Gradually add to wet ingredients. In another bowl, whisk flour, baking soda, cinnamon, nutmeg, ginger, and salt. This blend gives our cookies a warm spice flavor. Slowly mix this dry blend into your wet ingredients. Stir gently; overmixing can make the cookies tough. - Gently fold in chocolate chips. - Drop spoonfuls on prepared baking sheet. - Bake for 10-12 minutes until edges are golden. Now, fold in the chocolate chips carefully. This step is crucial for those gooey bites of chocolate. Use a spoon or cookie scoop to drop dough balls onto the lined baking sheet. Space them about 2 inches apart. Bake in your preheated oven for 10 to 12 minutes. Look for golden edges and set centers. Let them cool briefly before transferring to a wire rack. For the full recipe, check the previous section. Enjoy the delightful blend of pumpkin and chocolate in each bite! To make the best pumpkin chocolate chip cookies, start with room temperature ingredients. This helps them mix better. Keep an eye on your dough as well. Do not overmix the dough. Mixing too much can make the cookies tough. When serving these cookies, presentation is key. Arrange them in a festive stack on a wooden platter. Dust them lightly with powdered sugar. You can add some fall leaves or small pumpkins around the cookies for a seasonal touch. These cookies pair nicely with coffee or tea. The warm spices and chocolate go great with a hot drink. To keep your cookies fresh, store them in an airtight container. This will help them stay soft and chewy. If you want to save some for later, try freezing them. Place the cookies in a freezer-safe bag or container. They can last for up to three months in the freezer. Just thaw them at room temperature when you crave a treat! For the full recipe, check above. {{image_2}} You can swap regular sugar for coconut sugar or agave syrup. Coconut sugar gives a caramel flavor. It can make your cookies taste richer. Agave syrup is a liquid sweetener that adds moisture. Use about 2/3 cup of agave for every cup of sugar. This change can still keep your pumpkin chocolate chip cookies sweet and tasty. Try adding nuts or dried fruit for extra texture. Walnuts or pecans add a nice crunch. They pair well with the soft pumpkin. Dried fruit like raisins can add sweetness too. Mix in about 1/2 cup of nuts or fruit when combining your dough. This makes each bite more interesting. If you need a gluten-free choice, use a gluten-free flour blend. Many blends work well in cookies. They can replace all-purpose flour cup for cup. Just make sure to check the package instructions. This way, everyone can enjoy these delicious pumpkin chocolate chip cookies. For the full recipe, you can refer back and see how easy it is to make these variations! This recipe for pumpkin chocolate chip cookies is simple and fun. You will need a few key ingredients: - 1 cup pumpkin puree - 1/2 cup unsalted butter, softened - 1 cup brown sugar, packed - 1/2 cup granulated sugar - 1 large egg - 2 teaspoons vanilla extract - 2 cups all-purpose flour - 1 teaspoon baking soda - 1 teaspoon baking powder - 1 teaspoon ground cinnamon - 1/2 teaspoon ground nutmeg - 1/4 teaspoon ground ginger - 1/4 teaspoon salt - 1 cup semi-sweet chocolate chips You start by preheating your oven to 350°F. Cream the butter and sugars until light and fluffy. Mix in the pumpkin, egg, and vanilla. In another bowl, whisk the dry ingredients and add them to the wet mix. Finally, fold in chocolate chips and drop spoonfuls onto a baking sheet. Bake for 10-12 minutes and enjoy! Each cookie contains about: - Calories: 120 - Fats: 5g - Sugars: 8g This treat offers a balance of flavors and a touch of sweetness, making it a perfect fall snack. Enjoy these cookies knowing they are both delicious and satisfying! Yes, you can use fresh pumpkin. To prepare fresh pumpkin puree, first, choose a sugar pumpkin. These are smaller and sweeter than regular pumpkins. Cut it in half, remove the seeds, and roast the halves in the oven at 400°F (200°C) for about 45 minutes. Once soft, scoop out the flesh and blend it until smooth. Use this puree in your cookies for a fresh taste. You want to look for a few signs. The edges should be golden brown. The centers will look set but may still be soft. If you lightly press the top, it should spring back. This means they are ready to come out of the oven. Keep an eye on the time; baking too long will make them dry. These cookies can stay fresh for up to a week if stored properly. Keep them in an airtight container at room temperature. If you want them to last longer, you can freeze them. Just place them in a freezer bag, and they will stay good for about three months. When ready to eat, let them thaw at room temperature. In this blog post, we covered how to make delicious pumpkin chocolate chip cookies. We went over the ingredients, step-by-step instructions, and baking tips. You learned about variations and how to store your cookies. Make these cookies for a cozy treat this fall. You can impress friends and family with your baking skills. Enjoy the warm flavors and delightful textures, perfect for any gathering or a simple snack.

Pumpkin Chocolate Chip Cookies Irresistible Fall Treat

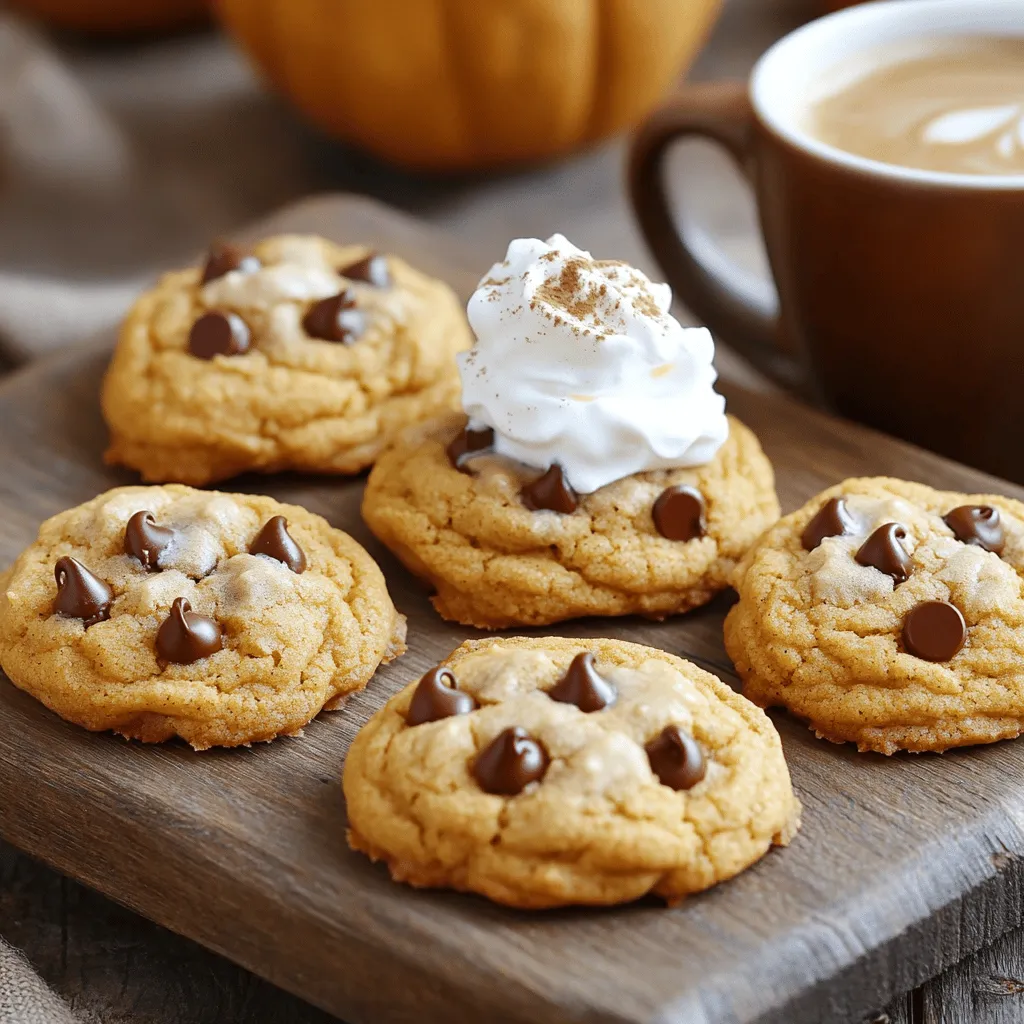
As the leaves turn and the air cools, nothing says fall like warm Pumpkin Chocolate Chip Cookies. These treats blend

- Water - Granulated sugar - Pure pumpkin puree - Vanilla extract - Ground cinnamon - Ground nutmeg - Ground ginger - Ground cloves - Salt Choosing the right pumpkin puree When picking pumpkin puree, look for products with just pumpkin. Avoid those with added sugar or spices. Canned puree is easy to find and often works well. If you want fresh, roast your own pumpkin and puree it. This gives a rich, fresh flavor. Alternatives for granulated sugar If you want to cut sugar, try using honey or maple syrup. These sweeteners add unique flavors. You can also use a sugar substitute like stevia. Just remember to adjust the amount since they can be sweeter. Importance of using pure vanilla extract Always use pure vanilla extract for the best taste. I recommend avoiding imitation vanilla, as it lacks depth. Pure vanilla brings warmth and richness to your syrup. It makes a big difference in the final flavor. 1. Dissolving sugar in water Start by mixing 1 cup of water and 1 cup of granulated sugar in a medium saucepan. Place it on medium heat. Stir the mixture until the sugar fully dissolves. This step is key to a smooth syrup. 2. Adding and blending pumpkin puree Once the sugar dissolves, add 1/2 cup of pure pumpkin puree. Whisk it in until it blends well with the sugar-water mix. This adds that rich pumpkin flavor we all love. 1. Simmering the mixture After blending, stir in 1 teaspoon of vanilla extract, 1 teaspoon of ground cinnamon, 1/2 teaspoon of ground nutmeg, 1/4 teaspoon of ground ginger, 1/4 teaspoon of ground cloves, and a pinch of salt. Bring the mixture to a gentle simmer. Let it cook for about 10 minutes. 2. Stirring to avoid sticking As it simmers, stir it occasionally. This prevents the mixture from sticking to the bottom of the pan. You want a nice, smooth syrup without any burnt bits. 1. Importance of straining Once cooked, remove the saucepan from heat and let it cool for a few minutes. Strain the syrup through a fine mesh sieve or cheesecloth into a clean container. This step removes any pumpkin solids and ensures your syrup is smooth. 2. Best storage practices Transfer your syrup into a glass bottle or jar with a tight lid. Store it in the fridge, where it will last for up to 2 weeks. You can use it in lattes, drizzled over pancakes, or even in desserts. Enjoy the taste of fall! - Adjusting sweetness levels: If you like it sweeter, add more sugar. Stir in a bit at a time until it tastes right. If it’s too sweet, try adding more pumpkin puree. This balances the flavor nicely. - Infusing additional flavors: Want something special? Add a dash of cardamom or allspice for more warmth. You can also mix in a splash of maple syrup for a richer taste. Experiment and find what you love best! - Overcooking the syrup: Watch the heat! Cooking too long can make the syrup thick and sticky. It should simmer gently for about 10 minutes. This helps the flavors blend without making it too thick. - Skipping the straining process: Always strain your syrup! This step removes any pumpkin bits, giving you a smooth texture. Use a fine mesh sieve or cheesecloth. It makes a big difference in how your syrup pours and tastes. {{image_2}} You can make your pumpkin syrup even better by adding extra spices. Cardamom adds a warm, sweet taste. You can try a pinch for a new twist. Experimenting with sweeteners can also change the flavor. Use honey or maple syrup instead of granulated sugar. These options may give you a different taste profile. This syrup works great in lattes. Just add a few pumps to your coffee, and you have a fall treat. It brings warmth and flavor to your drink. You can also use it as a dessert topping. Drizzle it over pancakes or ice cream for a sweet touch. It adds a lovely fall vibe to any dish. To keep your pumpkin syrup fresh, use a clean glass bottle or jar. A tight-fitting lid helps keep air out and flavor in. Always let the syrup cool before sealing it. If you see any mold or a strange smell, it has gone bad. Toss it out if you notice these signs. In the fridge, your pumpkin syrup lasts about two weeks. If you want it to last longer, freezing is a good choice. Pour the cooled syrup into an ice cube tray. Once frozen, transfer the cubes to a freezer bag. This way, you can use just what you need later. You can add pumpkin syrup to many drinks. It works great in coffee. You can make a pumpkin spice latte at home. Just mix the syrup with hot coffee and milk. You can also use it in chai tea for a fall twist. Try drizzling it over iced coffee for a refreshing treat. Don't forget to add it to smoothies for a fun flavor boost! Absolutely! Pumpkin syrup adds a nice flavor to baked goods. Use it in muffins or pancakes for a sweet touch. You can also stir it into cake batter for added moisture and taste. It works well in cookies, too. Just reduce the sugar in your recipe since the syrup is sweet. You can even use it in frostings for an extra flavor kick! Yes, you can make a sugar-free pumpkin syrup! Use sugar substitutes like stevia or erythritol. These options can give you the sweetness without the calories. Just remember to adjust the amount based on the substitute's sweetness level. You can also try using maple syrup or honey for a natural sweetness. Check the labels to ensure they meet your needs. Now you know how to make pumpkin syrup with simple steps and quality ingredients. You can pick the best pumpkin puree and try new flavors. Remember to avoid common mistakes like overcooking. Store your syrup right so it lasts longer. Enjoy using it in drinks and desserts. Making your own syrup lets you control flavors and sweetness. Have fun experimenting with this tasty addition to your recipes!

Copycat Starbucks Pumpkin Syrup Simple and Tasty Recipe

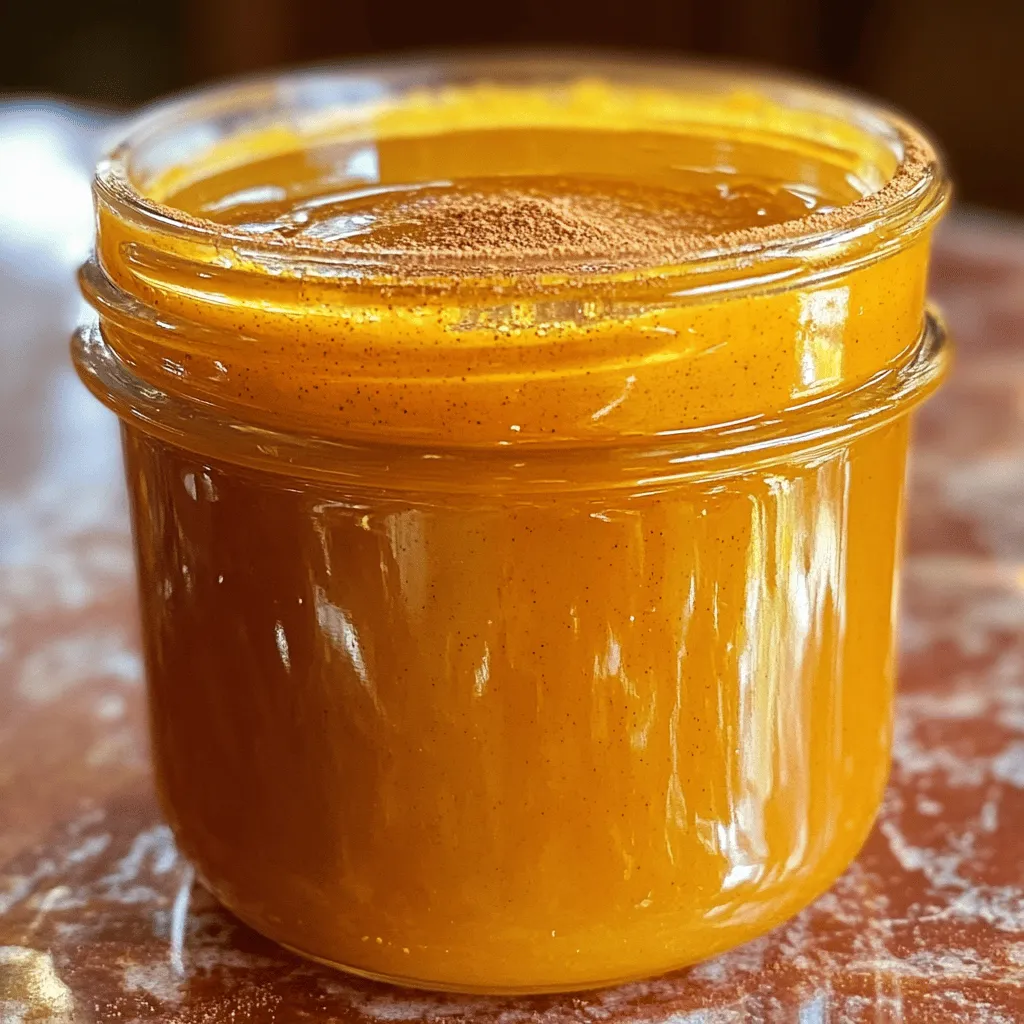
Fall flavors are calling, and you can bring them home with this Copycat Starbucks Pumpkin Syrup recipe. This simple and

For the best keto veggie sticks, I love using a mix of colorful veggies. Here are my top picks: - 1 cup cucumber, sliced into sticks - 1 cup celery, sliced into sticks - 1 cup bell peppers (red, yellow, and green), sliced into sticks - 1 cup carrot sticks (or zucchini for a keto-friendly option) These veggies are crunchy and low in carbs. They also provide great color and flavor. The ranch dressing adds creaminess and tang to the veggie sticks. To whip up a tasty dip, you'll need: - 1/2 cup sour cream - 1/4 cup mayonnaise (full-fat for keto) - 1 tablespoon lemon juice - 1 teaspoon garlic powder - 1 teaspoon onion powder - Salt and pepper to taste This combo creates a rich dip that pairs perfectly with the fresh veggies. Want to take your veggie sticks to the next level? Consider these extras: - 1 tablespoon olive oil - 1 teaspoon dried dill (or fresh if available) The olive oil helps with the seasoning, while dill gives your ranch dip a fresh twist. You can mix and match for a flavor that excites your taste buds. For the full recipe, check out the detailed instructions. First, wash the veggies. Clean them well to remove any dirt. Next, slice the cucumber, celery, bell peppers, and carrots (or zucchini) into sticks. Try to make them all the same size. This way, they cook evenly. Uniform sticks also look nice on the plate. In a big bowl, add the veggie sticks. Pour in one tablespoon of olive oil. Then, sprinkle salt, pepper, garlic powder, onion powder, and dried dill over the sticks. Toss everything together until the veggies are well coated. This step adds great flavor. You can choose to bake or chill your veggie sticks. If you want a crunchy texture, spread them on a baking sheet. Bake at 400°F (200°C) for about 15 minutes. They should turn a little crisp. If you prefer a fresh taste, chill the veggie sticks in the fridge for 30 minutes. Both methods work well! For the full recipe, check out the complete guide to making Keto Crunchy Veggie Sticks with Creamy Ranch Dip. To make sure your veggie sticks stay crunchy, consider these simple steps: - Slice your vegetables into even sticks. This helps them cook at the same rate. - Toss them gently with olive oil and seasonings. Too much oil can make them soggy. - Bake them at a high temperature of 400°F (200°C). This creates a nice crisp. - If you prefer, chill them in the fridge for 30 minutes. This gives a fresh crunch. You can change the flavors of your veggie sticks easily. Try these ideas: - Use different herbs like thyme or rosemary for a new taste. - Swap out the olive oil for avocado oil for a richer flavor. - Add spices like paprika or cayenne for a kick. - For the ranch dip, use Greek yogurt instead of sour cream for tanginess. A beautiful presentation makes snacks more fun. Here are some tips: - Use a colorful platter to show off the veggie sticks. Arrange them by color for a vibrant look. - Serve the ranch dip in a small bowl in the center. Garnish it with fresh herbs or a lemon slice. - Add some whole veggies like cherry tomatoes or radishes for extra color. Try these tips to elevate your Keto Veggie Sticks with Ranch. Enjoy the crunch! For the complete recipe, check the Full Recipe section. {{image_2}} You can mix different veggies for variety. Try using radishes or asparagus sticks. Both add unique flavors and crunch. You can even add broccoli florets or cauliflower for a fun twist. Just make sure the sizes are even. This helps with cooking and presentation. Aim for bright colors for a more appealing dish. Your guests will love the visual feast! Ranch dressing is classic, but you can switch it up! Try Greek yogurt instead of sour cream for a lighter version. This swap keeps it creamy and adds protein. You might also use avocado for a rich and creamy dip. It pairs well with the crunch of the veggies. Add fresh herbs like parsley or chives for extra flavor. You can also try adding a bit of hot sauce for a kick! If you like bold flavors, spice things up! Add cayenne pepper or crushed red pepper flakes to the ranch dip. This will give your snack a nice heat. You can also mix in some lemon zest for a zesty twist. For an even bolder taste, try adding horseradish to the ranch. This gives a nice bite that pairs well with the veggies. Don't be afraid to experiment! Each flavor change can create a new favorite. To store your leftover veggie sticks, place them in an airtight container. You want to keep them fresh and crunchy. Make sure to separate the ranch dip from the veggies. This keeps the sticks from getting soggy. Store them in the fridge for up to three days. The ranch dip can last longer. If you store it in a sealed container, it stays fresh for about one week. Always check for any signs of spoilage before using it. If it smells off or shows any change, toss it out. If you want to reheat the veggie sticks, the oven works best. Preheat your oven to 350°F (175°C). Place the veggie sticks on a baking sheet and heat for about 5-7 minutes. This keeps them crunchy. Avoid the microwave, as it can make them soft. Enjoy your crunchy snack! For keto diets, low-carb veggies work best. I love using cucumber, celery, bell peppers, and zucchini. These veggies are crunchy and full of flavor. They fit well into a keto plan. Stick to non-starchy vegetables. Avoid high-carb options like potatoes and corn. Remember, fiber is important too. It helps with digestion and keeps you full. Keto veggie sticks with ranch are low in carbs. Each serving has about 5-7 grams of carbs. The ranch dip adds minimal carbs, around 1-2 grams per serving. Most of the carbs come from the veggies. This makes them a great snack for your keto diet. Always check labels for specific brands to know exact carb counts. Yes, you can make veggie sticks ahead of time! Prepare them a day in advance. Keep them in an airtight container in the fridge. This keeps them fresh and crunchy. If you want extra crunch, chill them for 30 minutes before serving. Just remember to store the ranch dip separately to maintain its creaminess. The best ranch dressing for keto is homemade. Use full-fat sour cream and mayonnaise. This keeps the carb count low. Store-bought ranch may have added sugars. Always read the label before buying. You want ranch that has no hidden carbs. My homemade ranch recipe pairs perfectly with the veggie sticks. For the full recipe, check out my detailed guide above. We discussed keto veggie sticks and their yummy ranch dip. You learned the best vegetables to use, how to prepare them, and ways to keep them crunchy. We explored fun flavor ideas and storage tips to ensure they taste great later. Whether you bake or chill, these snacks will please you. Enjoy customizable flavors and a nutritious treat with every bite. Your keto journey just got tastier!

Keto Veggie Sticks with Ranch for Crunchy Snack

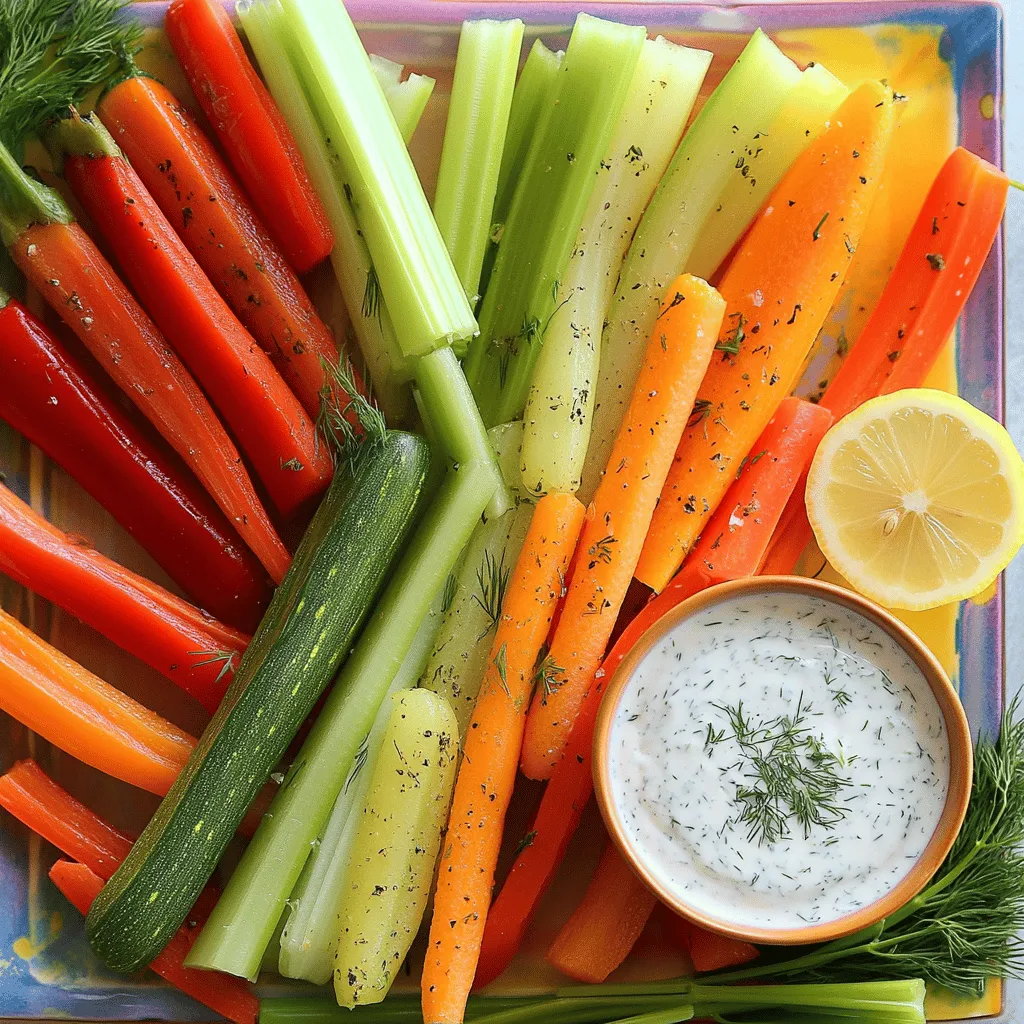
Looking for a tasty snack that fits your keto diet? You’re in the right place! These Keto Veggie Sticks with

To make the best cheeseburger sliders, you need some key ingredients. Here’s what you need: - 1 lb ground beef (80/20) - 1 tsp garlic powder - 1 tsp onion powder - 1 tsp smoked paprika - Salt and pepper to taste - 12 slider buns - 6 slices of cheddar cheese, halved These ingredients create a tasty base for your sliders. The ground beef gives the sliders their rich flavor. Garlic powder, onion powder, and smoked paprika add depth. You can customize your sliders with fun toppings. Here are some great options: - 1 cup shredded lettuce - 1 cup diced tomatoes - 1/2 cup dill pickles, sliced - Ketchup and mustard for serving Feel free to mix and match. Add crispy bacon, jalapeños, or avocado for extra flavor! Each topping adds its own twist. Pair your sliders with sides that complement them well. Here are my favorites: - French fries - Sweet potato fries - Onion rings - Coleslaw These sides are easy to make and pair perfectly. They also add crunch and color to your meal. For the full recipe, check out the earlier section. Enjoy your cooking! Start with a large bowl. Add 1 pound of ground beef to the bowl. Use beef that is 80% lean and 20% fat for the best flavor. Next, sprinkle in 1 teaspoon of garlic powder, 1 teaspoon of onion powder, and 1 teaspoon of smoked paprika. Add salt and pepper to taste. Mix everything together gently. Be careful not to overwork the meat. You want tender patties, not tough ones. When it's mixed, you are ready for the next step. Now, divide the beef mixture into 12 equal parts. Each part should be about the size of your palm. Shape each part into a small patty. Make the patties slightly larger than the slider buns. This helps them fit perfectly after cooking. Heat your grill or skillet to medium-high. Cook the patties for about 3-4 minutes on one side. Then flip them and cook for another 2 minutes. When the patties are nearly done, place half a slice of cheddar cheese on each one. Cover the grill or skillet to melt the cheese for about a minute. While the patties cook, lightly toast the slider buns. This adds a nice crunch. Once the patties are ready, place a cheesy patty on the bottom half of each bun. Top with shredded lettuce, diced tomatoes, and sliced pickles. Drizzle ketchup and mustard on top. Finally, add the top bun. Your sliders are now ready to serve! Enjoy them warm, and feel free to keep extra toppings nearby for fun! To make juicy sliders, use ground beef with a fat content of 80/20. This ratio keeps the meat moist. Do not overmix the beef when you combine it with seasonings. Form each patty gently and make a small indent in the center. This helps the patties cook evenly and stay flat. Grilling gives sliders a nice smoky flavor. Heat the grill to medium-high and cook the patties for 3-4 minutes on one side. Flip and cook for another 2 minutes. If you use a skillet, preheat it over medium-high heat. Cook the patties the same way. The skillet can give you a great sear. To melt cheese perfectly on your sliders, place a half-slice of cheddar on each patty. Cover the pan with a lid to trap the heat. This will melt the cheese in about a minute. For extra flavor, try different cheeses like Swiss or pepper jack. Enjoy experimenting with these tips to make your cheeseburger sliders shine! For the complete recipe, check the Full Recipe section. {{image_2}} You can elevate cheeseburger sliders with gourmet ingredients. Try using grass-fed beef or Wagyu for a richer flavor. Add toppings like caramelized onions or truffle aioli for a fancy touch. You can also swap cheddar for a sharp blue cheese or creamy goat cheese. Each of these choices adds depth and excitement to your sliders. Vegetarian or vegan sliders can be just as tasty. Use black beans, lentils, or chickpeas as a base. Mix in spices like cumin and chili powder for flavor. Use a plant-based cheese to keep it vegan. Portobello mushrooms make great patties, too. Grill them for a smoky taste. These options fit any diet while still being delicious. Get creative with flavors in your sliders. Try a BBQ bacon cheeseburger slider with smoky sauce and crispy bacon pieces. A Mediterranean twist can include feta cheese, olives, and tzatziki sauce. For a spicy kick, add jalapeños and pepper jack cheese. Pineapple and teriyaki sauce create a fun Hawaiian slider. Experiment and find your favorite combinations! To keep your leftover sliders fresh, place them in an airtight container. This helps avoid drying out. Make sure to separate each slider with parchment paper. This way, they don’t stick together. Store them in the fridge for up to three days. If you plan to keep them longer, consider freezing. To reheat sliders, use your oven for the best flavor. Preheat your oven to 350°F (175°C). Place sliders on a baking sheet and cover them with foil. Heat for about 10-15 minutes. This keeps the bread soft and the meat warm. If you're in a hurry, a microwave works too. Just heat for 30 seconds and check. Add more time if needed. Freezing cheeseburger sliders is easy. First, let them cool completely. Then, wrap each slider in plastic wrap. After that, place them in a freezer bag. Remove as much air as possible before sealing. You can freeze them for up to three months. When ready to enjoy, thaw them in the fridge overnight and reheat. For a fun twist, try adding new toppings after reheating. Enjoy your sliders whenever you want with these simple steps! The best meat ratio for cheeseburgers is 80/20. This means 80% lean meat and 20% fat. The fat adds flavor and moisture. Leaner meat can dry out during cooking. A good mix helps keep sliders juicy and tasty. Yes, you can make cheeseburger sliders ahead of time. Prepare the patties and store them in the fridge. You can also cook them and store in an airtight container. Just reheat them when you are ready to serve. This saves you time during busy days. Cheddar cheese is a classic choice for sliders. It melts well and adds rich flavor. Other great options include American cheese and Swiss cheese. You can also try pepper jack for a little heat. Experiment with different cheeses to find your favorite. To find delicious cheeseburger sliders nearby, check local restaurants and food trucks. Many pubs and diners serve sliders. Online apps can help you search for sliders in your area. You can also ask friends for their favorite spots. Enjoy exploring different flavors! This blog covered how to make delicious cheeseburger sliders. You learned about essential ingredients, optional toppings, and sides to serve. The step-by-step guide helped you prepare, cook, and assemble your sliders. I shared tips for juicy sliders and melting cheese just right. We explored variations, including gourmet and vegetarian options. Finally, we discussed storage and reheating tips for leftovers. Enjoy crafting these tasty sliders at your next gathering or meal!

Cheeseburger Sliders Tasty and Easy Recipe Guide

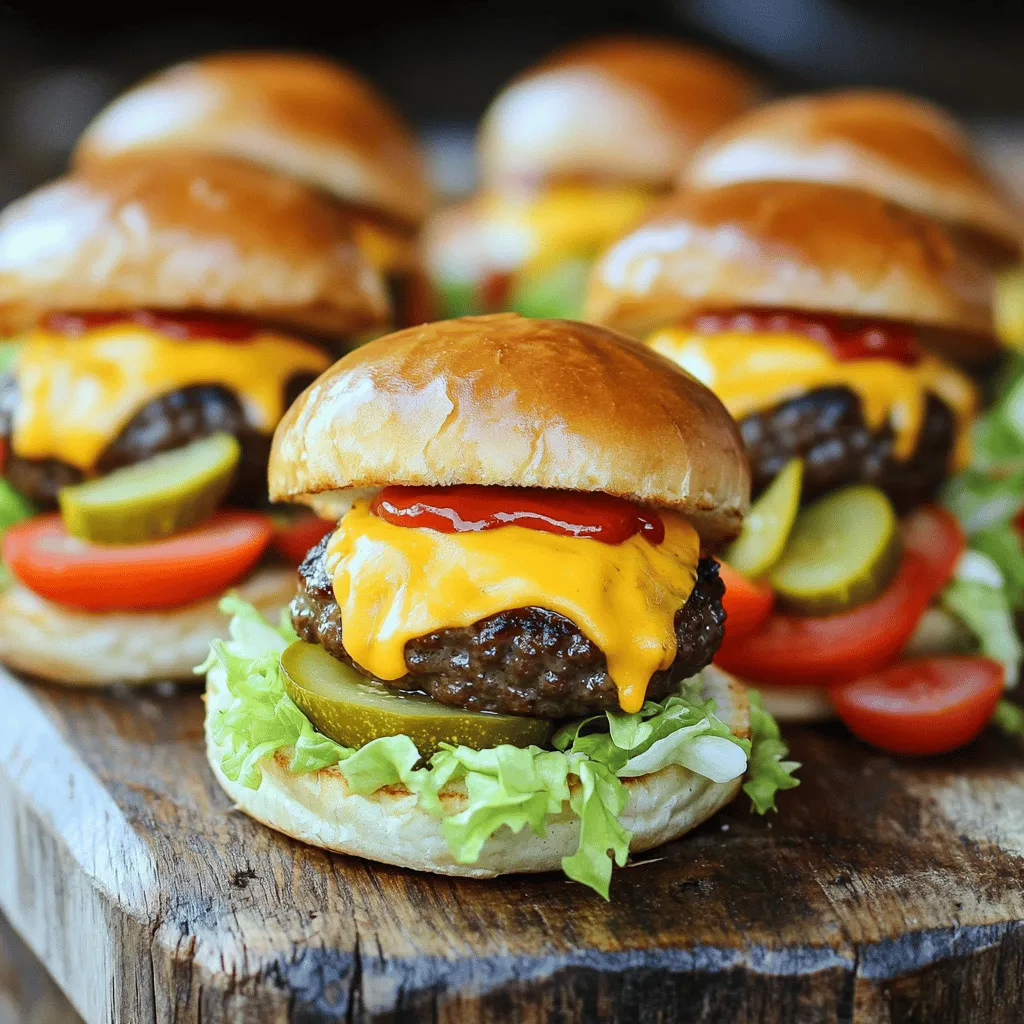
If you love a good bite-sized burger, you’re in for a treat! This cheeseburger sliders recipe is tasty, easy, and

- 1 cup heavy cream - 1/2 cup milk (whole or 2%) - 1/4 cup pumpkin puree - 2 tablespoons maple syrup (adjust for sweetness) - 1 teaspoon vanilla extract - 1 teaspoon pumpkin pie spice - Pinch of salt These ingredients create a rich and creamy foam. The heavy cream gives it a thick texture. Milk adds lightness, and pumpkin puree brings that fall flavor. Maple syrup sweetens the mix, while vanilla extract and pumpkin pie spice add depth. A pinch of salt enhances all these tastes. - Calories per serving: Approximately 120 - Breakdown of macronutrients: - Fat: 10g - Carbohydrates: 8g - Protein: 2g Each serving packs a good amount of flavor without too many calories. This treat is a great way to enjoy fall without guilt. - Substituting lighter options: You can use half-and-half instead of heavy cream. This will make it lighter but still creamy. - Choosing the best pumpkin puree: Look for 100% pure pumpkin with no added sugars. Avoid pumpkin pie filling, as it contains extra sugar and spices. To make your pumpkin cream cold foam, start by mixing the pumpkin cream base. In a mixing bowl, add: - 1/4 cup pumpkin puree - 2 tablespoons maple syrup - 1 teaspoon vanilla extract - 1 teaspoon pumpkin pie spice - A pinch of salt Whisk these ingredients together until smooth. This creamy blend gives your foam that rich pumpkin flavor. Next, it's time to whip the cream and milk. In another bowl, combine: - 1 cup heavy cream - 1/2 cup milk (whole or 2%) Using an electric mixer, whip the cream and milk until soft peaks form. This step is key for a light, airy texture that makes the foam enjoyable. Now, you need to fold the mixtures together. Gently add the pumpkin cream base into the whipped cream. Use a spatula to fold them together carefully. Be mindful to keep the foam light. You want to maintain air in the cream for that perfect texture. For the best drinks to pair with your pumpkin cream cold foam, iced coffee or cold brew works wonders. Serve your drink in a clear glass. This way, you can show off the beautiful layers. To achieve the perfect foam layer, top your drink generously with the pumpkin cream cold foam. A sprinkle of pumpkin pie spice adds a festive touch. Enjoy this tasty fall treat! For the full recipe, check the detailed instructions above. To make great foam, you need the right tools. A hand mixer or frother works best. These tools help create a light and airy foam. Keep an eye on the texture. If you whip too long, the cream may turn into butter. Stop when you see soft peaks. You can boost the flavor with extra spices like cinnamon or nutmeg. A dash of these spices adds warmth and depth. If you want it sweeter, try using more maple syrup. Adjust it to fit your taste. A little goes a long way! You can easily scale this recipe for more servings. Just double or triple the ingredients as needed. If you have dietary needs, swap heavy cream for coconut cream. You can also use almond milk instead of regular milk. These changes keep the flavor without losing creamy texture. {{image_2}} You can try different flavors with your cold foam. Here are two options: - Caramel cream cold foam: Mix in some caramel sauce. This adds a sweet, buttery taste. - Vanilla bean cream foam: Stir in vanilla bean paste. This gives a classic, sweet flavor. As the seasons change, you can change your foam too. Think about these fun twists: - Holiday variations: Add peppermint extract for a festive touch. This creates a fresh, minty flavor, perfect for winter. - Summer fruit-infused options: Blend in pureed fruits like strawberries or mangoes. This adds a fruity kick for hot days. You can make this foam dairy-free. Here are some tasty swaps: - Using coconut or almond milk: These milks create a lighter foam. They also add a unique flavor. - Vegan cream foam alternatives: Try coconut cream instead of heavy cream. It's rich and creamy while being vegan-friendly. To keep your pumpkin cream cold foam fresh, use an airtight container. Glass jars work well, but any sealable container will do. Store it in the fridge right after making it. The foam stays good for about 3 days. If you notice any change in smell or texture, it’s best to toss it. If you have leftover foam, you can bring it back to life. Just use a hand mixer to re-whip it until it’s fluffy again. You can also mix it into pancakes, waffles, or even oatmeal for a tasty twist. This way, nothing goes to waste. You can freeze the foam for up to a month. Pour it into an ice cube tray for easy portions. When you’re ready to use it, simply let the cubes thaw in the fridge overnight. You’ll have a cool treat ready to top your drinks! To make the Starbucks Pumpkin Cream Cold Foam at home, follow these simple steps: 1. In a bowl, mix together: - 1/4 cup pumpkin puree - 2 tablespoons maple syrup - 1 teaspoon vanilla extract - 1 teaspoon pumpkin pie spice - A pinch of salt Whisk until smooth. 2. In another bowl, combine: - 1 cup heavy cream - 1/2 cup milk (whole or 2%) Use an electric mixer to beat until soft peaks form. 3. Gently fold the pumpkin mixture into the whipped cream. Mix until just combined. 4. Chill the foam for about 15 minutes before using. It helps the flavors blend. 5. Serve it over your favorite iced coffee or cold brew. Top it generously with the pumpkin cream cold foam. This process takes about 25 minutes, and you can enjoy this tasty fall treat at home. For a detailed recipe, check the Full Recipe section. Pumpkin cream cold foam tastes great with different drinks. Here are some good pairings: - Iced coffee: The cold foam adds a creamy, sweet layer. - Cold brew: The rich coffee flavor balances the foam's sweetness. - Chai tea: The spices in chai blend well with pumpkin flavors. You can mix and match to find your favorite drink with this fall treat. Pumpkin cream cold foam is a seasonal treat. Starbucks usually offers it during fall, starting in late August or early September. It often lasts until Thanksgiving. Special promotions may happen, but it’s not available all year. Keep an eye on your local Starbucks for any updates! This article detailed how to make pumpkin cream cold foam, covering ingredients, instructions, and tips. I shared ways to customize flavors and alternatives for different diets. You can create a delicious foam with simple steps at home. Don’t forget to store and reheat it properly for the best results. Enjoy experimenting with this treat all year long. With these ideas, you’re ready to impress friends and family.

Starbucks Pumpkin Cream Cold Foam Tasty Fall Treat

Fall is here, and that means it’s time for Starbucks’ delicious Pumpkin Cream Cold Foam! This sweet, creamy treat captures

- 1 lb ground beef - 12 slider buns - 6 slices cheddar cheese, halved - Worcestershire sauce, garlic powder, onion powder, salt, and pepper - Shredded lettuce, sliced tomato, dill pickles, ketchup, and mustard - Grill or skillet - Mixing bowl - Spatula - Platter The key to amazing Cheeseburger Game Day Sliders lies in the ingredients. I use 1 pound of ground beef for a juicy base. This beef creates 12 sliders, perfect for sharing. Each slider gets a half slice of cheddar cheese, which melts beautifully on top. For the seasoning, I mix Worcestershire sauce, garlic powder, onion powder, salt, and pepper into the beef. This blend adds deep flavor that makes each bite a delight. Toppings take these sliders to the next level. I love the crunch of shredded lettuce, juicy slices of tomato, and the tang of dill pickles. Don’t forget the ketchup and mustard; they add a classic touch. You will need a grill or skillet to cook the patties. A mixing bowl helps blend the ingredients. Use a spatula to flip the patties and a platter for serving. To make the full experience even better, check out the Full Recipe for more details. To start, take 1 pound of ground beef. In a large bowl, mix the beef with 1 tablespoon of Worcestershire sauce. Add in 1 teaspoon of garlic powder and 1 teaspoon of onion powder. Season with salt and pepper to taste. Make sure to mix well until all the ingredients blend nicely. This mixture brings rich flavors to your sliders. Next, divide the beef mixture into 12 equal portions. Shape each portion into small patties. They should be slightly larger than the slider buns. Heat a grill or skillet over medium-high heat. Once hot, place the patties on the grill. Cook for about 3 minutes on one side, then flip them. Place half a slice of cheddar cheese on each patty. Cook for an additional 2-3 minutes until the cheese melts and the patties are done. While the patties cook, split the slider buns. Lightly toast them on the grill or in a skillet until golden brown. To assemble, spread ketchup and mustard on the bottom half of each bun. Place the cooked patty with melted cheese on top. Add a layer of shredded lettuce, a slice of tomato, and a few dill pickle slices. Finally, place the top half of the bun on each slider. Arrange your sliders on a platter and enjoy! For the full recipe, check out the complete instructions above. To make game day easier, you can prepare the patties ahead of time. Just shape the beef mixture into patties and store them in the fridge. Use parchment paper between each patty to avoid sticking. You can make the patties up to a day in advance. When game day arrives, you’ll have less to do. To store, place the patties in an airtight container. If you need to reheat, do it gently. You can use a skillet or grill to warm them. Keep the heat low to avoid drying them out. This way, they stay juicy and tasty. Checking doneness is key for juicy sliders. Use a meat thermometer to ensure they reach 160°F. If you want to prevent dryness, do not overcook them. Flip the patties only once. Cook them for about three minutes on each side. This method helps keep them moist. Another trick is to let the patties rest for a few minutes after cooking. This helps the juices redistribute. You’ll have a tender and flavorful slider every time. Presentation makes a big difference. Arrange the sliders on a large platter for a fun display. You can also add colorful garnishes, like extra lettuce or tomatoes, around the sliders. This adds visual interest. Adjust the serving size if you have a big crowd. You can easily double the recipe. This way, everyone gets a taste. Plus, leftovers are always a win. You can enjoy them later or serve them to unexpected guests. For the full recipe, refer to the beginning of the article. {{image_2}} You can boost flavor with different cheeses. Try pepper jack for a kick. Blue cheese adds a strong taste. You can also layer on toppings like crispy bacon or creamy avocado. Each choice brings a unique twist to your sliders. If you want something lighter, use turkey or chicken. Both have great taste and cook well. For a plant-based option, try black bean or lentil patties. These options still taste great and keep everyone happy. Switch up your buns for a fun change. Whole wheat buns add a nutty flavor. Gluten-free buns are perfect for those with allergies. You can even use lettuce wraps for a low-carb choice. Each bun type can change the whole slider experience. To keep leftover sliders fresh, store them in the fridge. Place them in an airtight container. Make sure to separate the sliders with parchment paper. This helps prevent sogginess. Enjoy them within three days for the best taste. For longer storage, you can freeze the sliders. Wrap each slider in plastic wrap, then place them in a freezer bag. This way, they stay fresh for up to three months. When you’re ready to eat, thaw them in the fridge overnight. Reheat in an oven at 350°F for about 10-15 minutes. This keeps them warm and tasty. Prepared sliders can be kept safely in the fridge for three days. If frozen, they last for about three months. Always check for any signs of spoilage before eating. Keep an eye on the smell and appearance. Enjoy the flavors of your cheeseburger game day sliders with confidence. If you want the full recipe, check it out! To keep your sliders juicy, start with good beef. Use ground beef with about 20% fat. This fat helps keep the meat moist. Add Worcestershire sauce to the beef mix. This sauce adds flavor and moisture. Don't overcook the patties; cook them just until they are done. Use a meat thermometer. Aim for an internal temp of 160°F. Let the patties rest for a few minutes after cooking. This helps keep the juices inside. Yes, you can make these sliders ahead of time. Prepare the patties and store them in the fridge. Keep them in an airtight container. You can also freeze them for later. When you're ready, just thaw and cook. If you want, you can toast the buns in advance too. Store them in a zip-top bag. On game day, assemble the sliders quickly. This saves time and lets you enjoy the fun. For game day, you want drinks that match the fun. Classic choices are soda, beer, or iced tea. You can also serve lemonade for a refreshing twist. If you want something unique, try a fruity mocktail. These drinks complement the flavors of the sliders well. They add a festive touch to your spread. Making cheeseburger game day sliders is simple and fun. Start with ground beef and seasonings to create flavorful patties. Cook them to perfection and add your favorite toppings. Don’t forget to toast the buns for extra crunch! With tips for storage and variations, you can adapt this recipe to fit your taste. Enjoy your sliders with friends and family on game day! This dish will surely be a crowd-pleaser. Happy cooking!

Cheeseburger Game Day Sliders Irresistible Flavor Treat

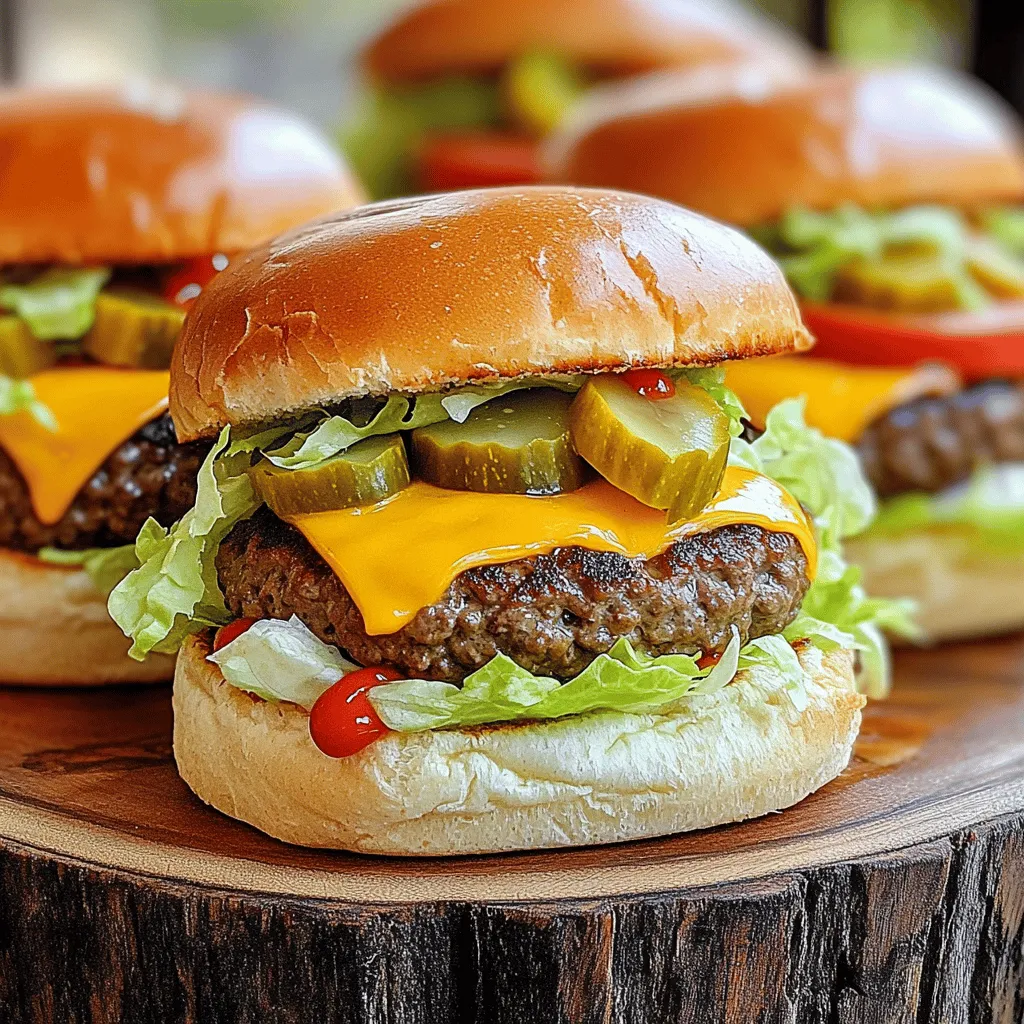
Get ready to impress your friends with my Cheeseburger Game Day Sliders! These mini delights pack big flavors that everyone

Here’s what you need for these ultimate chewy pumpkin cookies: - 1 cup canned pumpkin puree - 1 cup brown sugar, packed - 1/2 cup granulated sugar - 1/2 cup unsalted butter, softened - 1 large egg - 1 teaspoon vanilla extract - 2 cups all-purpose flour - 1 teaspoon baking soda - 1 teaspoon baking powder - 1 teaspoon pumpkin pie spice - 1/2 teaspoon salt - 1 cup chocolate chips (or your favorite mix-ins like nuts or dried cranberries) If you need substitutes for common allergies, here are some options: - Use coconut oil instead of butter for dairy-free cookies. - Replace the egg with a flaxseed meal for a vegan option. - Use gluten-free flour to make these cookies gluten-free. When choosing pumpkin, I recommend using quality canned pumpkin. Brands like Libby’s and Farmer’s Market are top choices for their rich flavor and smooth texture. For the sugars, try organic brown sugar for a deep flavor and regular granulated sugar for sweetness. Both work well in this recipe. Feel free to mix things up! You can add: - 1/2 cup chopped nuts like walnuts or pecans for a crunchy bite. - 1/2 cup dried fruits like cranberries or raisins for a sweet twist. - A sprinkle of chopped white chocolate for an extra layer of flavor. These add-ins can enhance the taste and make your cookies even more special. Explore different combinations based on your taste! For the full recipe, check out the Ultimate Chewy Pumpkin Cookies. Start by preheating your oven to 350°F (175°C). This step ensures even baking. Next, line two baking sheets with parchment paper. Parchment paper prevents sticking and makes cleanup easy. In a large bowl, cream together the softened butter, brown sugar, and granulated sugar. Mix until the blend is smooth and fluffy. This takes about 3 to 5 minutes. Next, add the canned pumpkin puree and egg. Also, stir in the vanilla extract. Blend everything until well combined. The mixture should be thick and creamy. In another bowl, whisk together the flour, baking soda, baking powder, pumpkin pie spice, and salt. Proper whisking helps mix the dry ingredients well. This step avoids clumps in your flour mixture. Make sure to break any lumps that may form. Using a cookie scoop or tablespoon, drop rounded balls of dough onto the prepared baking sheets. Space them about 2 inches apart to allow for spreading. Bake your cookies for 10 to 12 minutes. The edges should be lightly golden, but the centers should stay soft. This helps achieve that chewy texture. Let the cookies cool on the baking sheet for 5 minutes before moving them to a wire rack. For the full recipe, check the detailed instructions above. To make chewy pumpkin cookies, moisture is key. Pumpkin puree adds natural moisture, which keeps cookies soft. This high moisture also means you should watch your baking time. For chewier cookies, bake for 10 minutes instead of 12. Check them often. Look for edges that are golden but the centers should still look soft. Storing your cookies right helps keep them fresh. Place them in an airtight container at room temperature. This keeps them soft for up to a week. If you want to save dough for later, scoop it into balls. Then freeze them on a baking sheet. Once frozen, transfer them to a ziplock bag. They can last for up to three months. To make these cookies even tastier, try extra spices. A pinch of nutmeg or a dash of ginger works wonders. You can also add a splash of maple extract for a sweet twist. If you want to change up the chocolate chips, use white chocolate or butterscotch chips instead. Nuts or dried fruit can also add a fun crunch. {{image_2}} You can easily make these cookies gluten-free. Just swap out the all-purpose flour. Use a gluten-free flour blend instead. Look for one that has xanthan gum for the best texture. This will help keep your cookies chewy and tasty. To make these cookies vegan, replace the egg with ground flaxseed. Mix one tablespoon of ground flaxseed with three tablespoons of water. Let it sit for five minutes until it thickens. For the butter, use a plant-based alternative. This way, you won’t miss out on flavor or texture. Want to jazz up your cookies? Add a teaspoon of orange zest or lemon zest. This will give a fresh twist to the flavor. You can also mix in spices like cinnamon or nutmeg for a cozy touch. For seasonal variations, try adding cranberries or pecans. These will add crunch and a fun flavor. You can also use white chocolate chips for a sweeter option. The possibilities are endless, and every batch can be unique! For the full recipe, check the Ultimate Chewy Pumpkin Cookies section. To keep your chewy pumpkin cookies fresh, use an airtight container. This helps seal in moisture, keeping them soft and chewy. I recommend stacking the cookies in a single layer if possible. If you have many cookies, you can add parchment paper between layers. This will prevent them from sticking together. Store the container at room temperature, away from sunlight. You can freeze cookie dough to enjoy later. First, scoop the dough into balls and place them on a baking sheet. Freeze them for about an hour until firm. Then, transfer the balls to a freezer bag. Make sure to label the bag with the date. When you're ready to bake, there’s no need to thaw. Just add a couple of extra minutes to the baking time. For baked cookies, let them cool completely before freezing. Place them in an airtight container or freezer bag. They will stay good for up to three months. When you want to eat them, thaw the cookies in the fridge overnight. You can warm them in the oven for a few minutes to restore their chewy texture. These cookies last about a week at room temperature. You’ll know they’re still good if they remain soft and fragrant. If they start to harden or lose their smell, it’s time to toss them. Always check for any signs of mold or unusual smells. For the best taste, enjoy them within the first few days after baking. For the full recipe, check out the Ultimate Chewy Pumpkin Cookies. Yes, you can use fresh pumpkin. Fresh pumpkin has a different texture and flavor. It may be less sweet than canned pumpkin. This can change the taste of your cookies. To use fresh pumpkin, roast and puree it first. Make sure it is smooth and not too watery. Adjust the sugar in your recipe if needed. If you want to replace eggs, there are several good choices. Here are some options: - Mashed banana: Use 1/4 cup per egg. - Applesauce: Use 1/4 cup per egg. - Flaxseed meal: Mix 1 tablespoon with 2.5 tablespoons of water. Let it sit for 5 minutes. - Chia seeds: Use the same method as flaxseed meal. These options can help bind your cookies together without eggs. To check if your cookies are done, look for a few signs. The edges should be lightly golden. The centers should still look soft. You can also gently touch the top. If it springs back, they are likely done. Let them cool on the baking sheet for a few minutes. This helps them set up perfectly. This blog post covered the essential ingredients and steps for baking delicious cookies. We discussed ingredient measurements, allergen substitutions, and shared quality brand recommendations. I offered tips for mixing and baking and outlined methods for achieving the perfect chewy texture. Remember, your cookies can have endless variations. Consider gluten-free or vegan options, and explore seasonal flavors. With proper storage, you can enjoy your cookies longer. Happy baking, and may your cookie creations always turn out perfectly!

Chewy Pumpkin Cookies Simple and Irresistible Treat

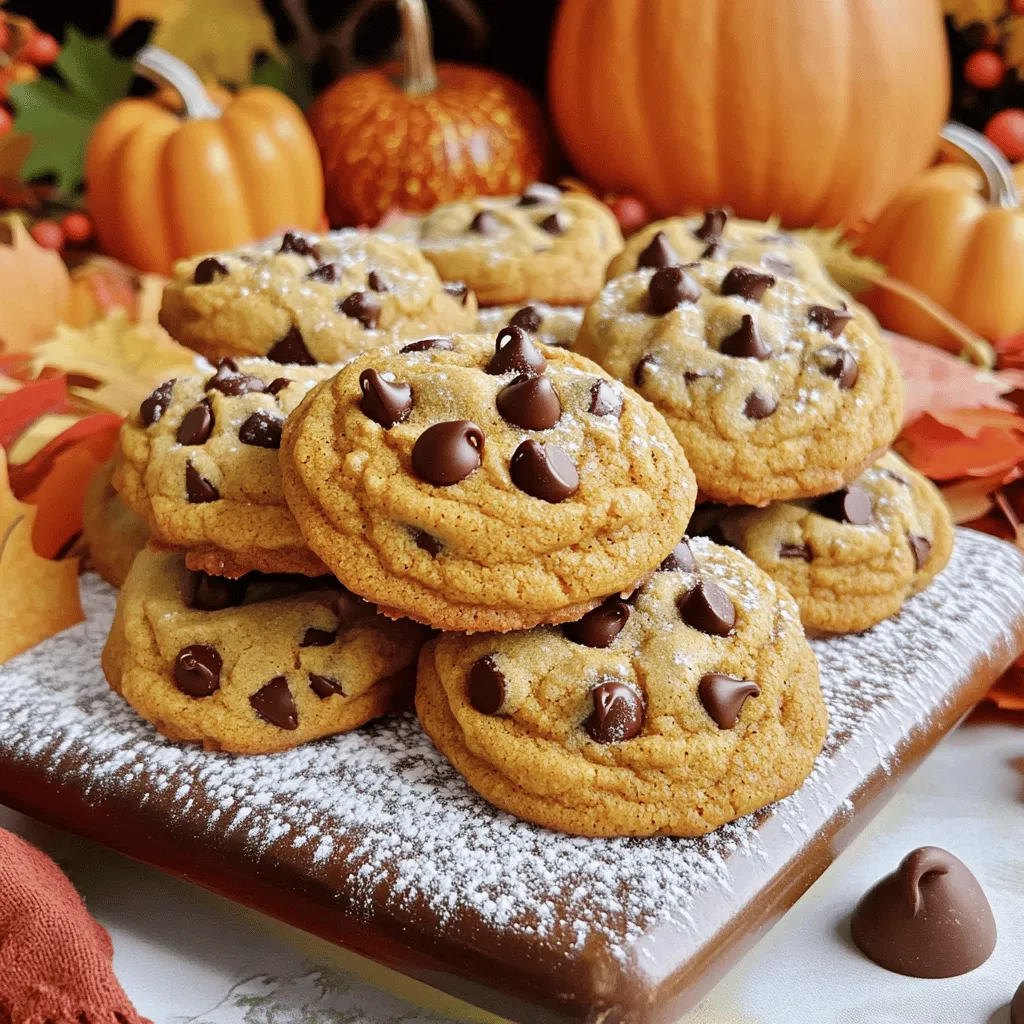
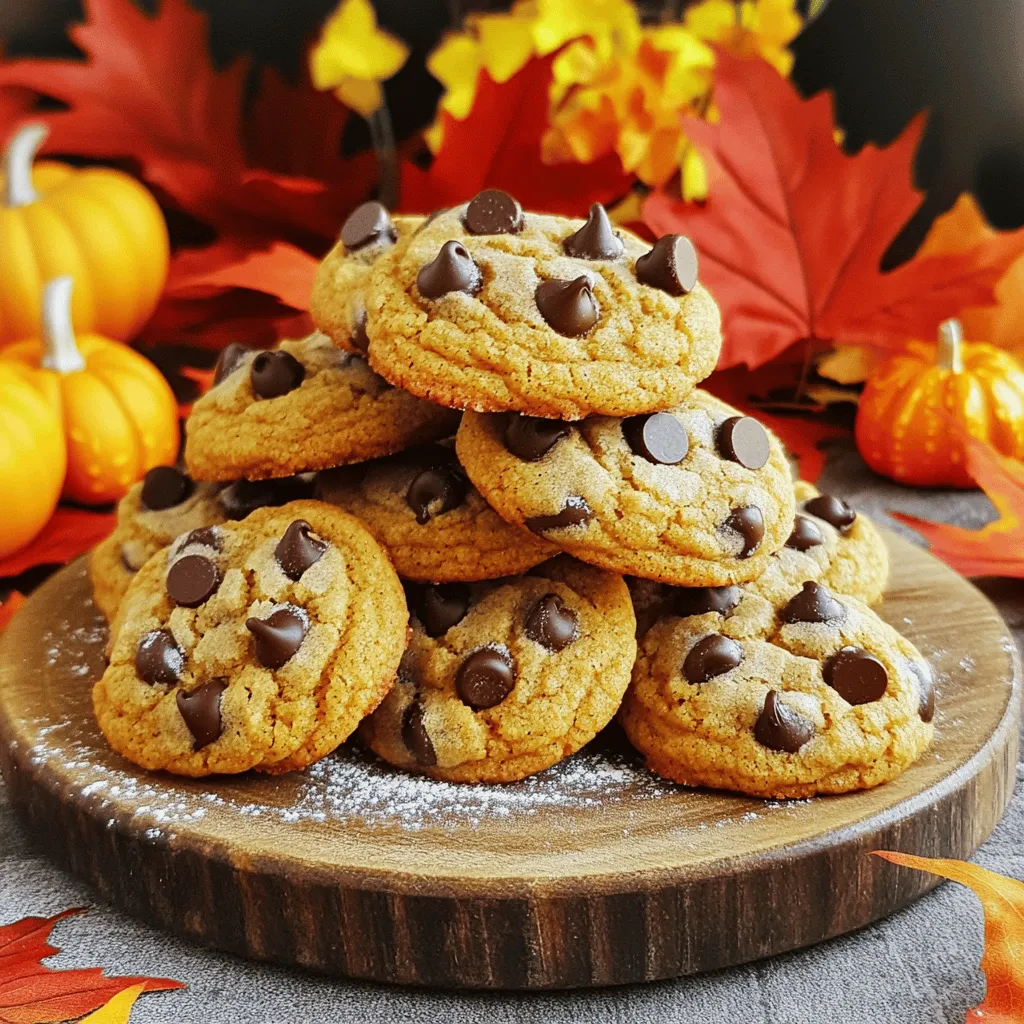
Craving a delicious fall treat? Look no further! My chewy pumpkin cookies are simple to make and completely irresistible. With

Older posts
Newer posts
← Previous Page1 … Page10 Page11 Page12 … Page80 Next →

dsad

© 2025 My Saved Recipe • Built with GeneratePress

Our Policies

  • Copyright Policy
  • Cookie Policy
  • GDPR Policy
  • Privacy Policy
  • Disclaimer
  • Terms Of Use

More Information

  • Home
  • About
  • Contact
  • Appetizers
  • Dessert
  • Dinner
  • Drinks
©2025, My Saved Recipe About Back To Top