Skip to content
DisclaimerTerms Of UseGDPR PolicyCookie Policy

My Saved Recipe

  • Home
  • Drinks
  • Appetizers
  • Dinner
  • Dessert
  • About
  • Contact
  • Privacy Policy
DisclaimerTerms Of UseGDPR PolicyCookie Policy

Savannah

- 1 cup all-purpose flour - 1 cup whole wheat flour - 1 teaspoon baking powder - 1 teaspoon baking soda - 1 teaspoon ground cinnamon - 1/2 teaspoon ground nutmeg - 1/2 teaspoon salt - 1 cup canned pumpkin puree - 3/4 cup granulated sugar - 1/2 cup brown sugar, packed - 1/2 cup vegetable oil - 2 large eggs - 1 teaspoon vanilla extract The main ingredients for these muffins bring a lot of flavor. I use both all-purpose and whole wheat flour. This mix gives the muffins a nice texture and added nutrients. Baking powder and baking soda help the muffins rise. Spices like cinnamon and nutmeg add warmth and depth. Pumpkin puree is key here. It gives moisture and a rich flavor. The sugars blend well. Granulated and brown sugar make the muffins sweet and delicious. Eggs and oil help bind everything together. - 1/2 cup rolled oats - 1/3 cup brown sugar, packed - 1/4 cup all-purpose flour - 1 teaspoon ground cinnamon - 1/4 cup cold butter, cut into small cubes The streusel topping is what makes these muffins special. I use rolled oats for a crunchy texture. Brown sugar adds sweetness and richness. All-purpose flour gives structure to the topping. Cinnamon in the streusel gives a warm flavor that pairs well with pumpkin. Cold butter is essential. It creates that crumbly texture we love. You can find the full recipe for these delightful muffins to enjoy this fall. Preheating the Oven Start by preheating your oven to 350°F (175°C). This step is key. A hot oven helps the muffins rise well and bake evenly. Lining the Muffin Tin Next, line your muffin tin with muffin liners. This makes for easy clean-up. It also helps the muffins come out perfectly shaped. Whisking Flours and Leaveners In a large bowl, whisk together the all-purpose flour, whole wheat flour, baking powder, and baking soda. Mixing these dry ingredients well is important. It helps the muffins rise and gives them a light texture. Adding Spices and Salt Now, add ground cinnamon, nutmeg, and salt to the flour mixture. These spices bring warmth and flavor to your muffins. Stir until everything is well combined, and set this bowl aside. Mixing Pumpkin, Sugars, and Eggs In another bowl, mix the canned pumpkin puree, granulated sugar, brown sugar, vegetable oil, eggs, and vanilla extract. Blend these ingredients well. This mixture will keep your muffins moist and sweet. Combining with Dry Ingredients Slowly add the dry ingredients to the wet mixture. Stir gently until just combined. Be careful not to overmix. This keeps your muffins fluffy and light. Mixing the Topping Ingredients In a small bowl, combine rolled oats, brown sugar, all-purpose flour, and ground cinnamon. This mix adds a crunchy topping to your muffins. Crumbling the Butter into Mixture Add cold butter cut into small cubes to the topping mixture. Use a fork or your fingers to mix it. You want the mixture to be crumbly. This topping will give your muffins a nice texture. Filling Muffin Liners Fill each muffin liner about two-thirds full with the pumpkin batter. This allows room for the muffins to rise. Baking Time and Temperature Bake in the preheated oven for 18-20 minutes. Check for doneness by inserting a toothpick into the center of a muffin. If it comes out clean, they are ready! Cooling Time in the Muffin Tin Allow the muffins to cool in the tin for 5 minutes. This step helps them set and makes them easier to remove. Transferring to Wire Rack Carefully transfer the muffins to a wire rack to cool completely. This keeps them from getting soggy. For the full recipe, check the details provided earlier. Enjoy the lovely aroma filling your kitchen! Avoiding Overmixing Mixing too much can make muffins tough. Stir the wet and dry ingredients just until you see no dry flour. Lumps are okay! This will keep your muffins light and fluffy. Checking for Doneness To know when your muffins are done, use a toothpick. Insert it into the center of a muffin. If it comes out clean, they're ready! If there’s batter on it, bake for a few more minutes. Adding Nuts or Chocolate Chips For a fun twist, add nuts or chocolate chips. Chopped walnuts or pecans give crunch. Chocolate chips add sweetness. Mix in about half a cup for a tasty surprise in each bite. Adjusting Spices for Personal Preference Feel free to change the spices to match your taste. Add more cinnamon for warmth or a pinch of ginger for spice. Tailoring these flavors makes the muffins truly yours. Serving Suggestions Serve these muffins warm. A pat of butter on top melts into the muffin, adding richness. You can also enjoy them with coffee or tea for a cozy treat. Dusting Options For an extra touch, sprinkle powdered sugar on top. This makes them look fancy and adds sweetness. You can also use a light dusting of cinnamon for a lovely finish. Check out the Full Recipe for more details on making these delightful muffins! {{image_2}} To make gluten-free muffins, swap regular flour for gluten-free flour. Good options include almond flour or coconut flour. You might need to adjust the baking time. Gluten-free muffins often need a bit longer, so check for doneness at 20 minutes. For vegan muffins, replace eggs with flaxseed meal mixed with water. Use unsweetened applesauce or silken tofu as alternatives. Swap out dairy milk for plant-based milk, like almond or oat milk. For sweeteners, you can use maple syrup or agave nectar instead of sugar. Adding cranberries or diced apples gives your muffins a fun twist. These fruits add moisture and a burst of flavor. You can also try different spices, like ginger or cloves, for a unique taste. These variations keep your muffins exciting and fresh for every fall gathering. For the full recipe, check out the detailed steps provided earlier. To keep your Pumpkin Streusel Muffins fresh, follow these tips. First, let the muffins cool completely. Warm muffins can create moisture, leading to sogginess. Store them in an airtight container at room temperature. This keeps them soft and tasty. If you want to stack the muffins, place parchment paper between layers. For storage containers, use either a plastic container or a resealable bag. Both options work well. Make sure they close tightly to keep air out. Want to save some muffins for later? Freezing them is easy. First, wrap each muffin tightly in plastic wrap. This step prevents freezer burn. Then, place the wrapped muffins in a zip-top freezer bag. Remove as much air as possible before sealing. When you're ready to enjoy, thaw the muffins at room temperature for a few hours. For a quicker option, you can use the microwave. Heat on low power for 15-20 seconds to warm them up. At room temperature, these muffins last about 3-4 days. Keep an eye out for signs of spoilage. If you see mold or the muffins smell off, it’s best to toss them. Enjoying them fresh is always the best way! To make your muffins moist, you can add applesauce or yogurt. These ingredients add moisture without changing the flavor much. Another tip is to adjust your baking time. If the muffins bake too long, they can dry out. Check them a few minutes early. A toothpick should come out clean but not dry. Yes, you can use butternut squash puree instead of pumpkin puree. Sweet potato puree is another good choice. If you want a lighter option, consider using unsweetened applesauce. Just keep in mind that each substitute may change the taste a bit. These muffins pair well with warm drinks like coffee or chai tea. You can also serve them with a side of cream cheese spread. For a cozy breakfast, enjoy them with scrambled eggs or a fruit salad. They are great for brunch too! Pumpkin streusel muffins can last up to 3 days at room temperature. Store them in an airtight container to keep them fresh. If you want to keep them longer, freeze them. They can last up to 3 months in the freezer. Just thaw them at room temperature when you're ready to enjoy! In this blog post, we covered how to make delicious pumpkin streusel muffins. We discussed the key ingredients, step-by-step instructions, and tips for perfect results. Variations like gluten-free and vegan options let everyone enjoy these treats. I shared storage info to keep your muffins fresh and answered common questions. Now, you have all the tools to bake tasty muffins. Enjoy experimenting and sharing these warm treats with others!

Pumpkin Streusel Muffins Irresistible Fall Treat

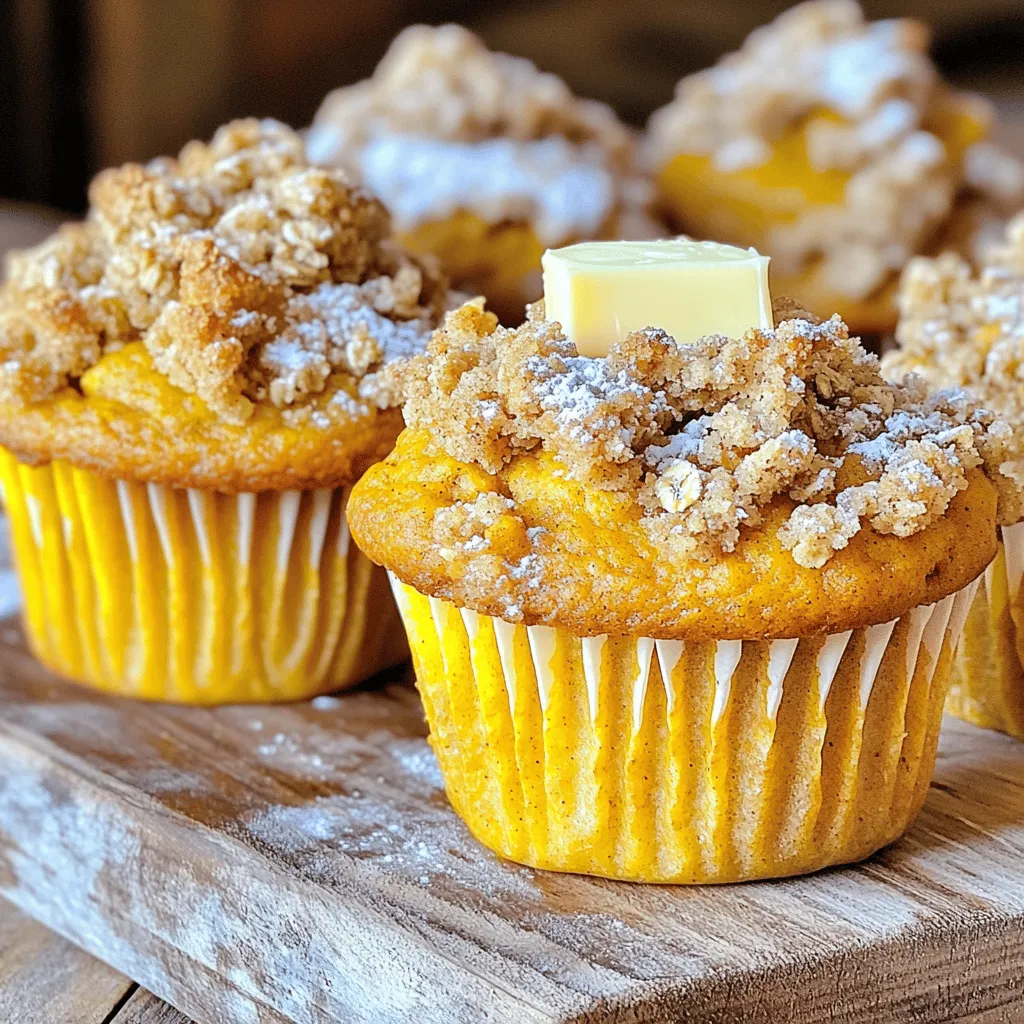
Fall is here, and what better way to celebrate than with warm Pumpkin Streusel Muffins? These muffins are soft, spiced,

To make your pumpkin cheesecake muffins, gather these simple items: - 1 cup all-purpose flour - 1 teaspoon baking powder - 1 teaspoon baking soda - 1/2 teaspoon salt - 1 teaspoon ground cinnamon - 1/2 teaspoon ground nutmeg - 1/2 teaspoon ground ginger - 1/2 cup granulated sugar - 1/2 cup brown sugar, packed - 1/2 cup vegetable oil - 2 large eggs - 1 cup canned pumpkin puree - 1 teaspoon vanilla extract For the creamy cheesecake filling, you will need: - 8 oz cream cheese, softened - 1/4 cup granulated sugar - 1 egg - 1 teaspoon vanilla extract You can add fun toppings to your muffins. Here are a few ideas: - Powdered sugar for dusting - Chopped nuts like walnuts or pecans - Chocolate chips for a sweet twist - A drizzle of caramel sauce These ingredients make the pumpkin cheesecake muffins a fun treat. The blend of spices brings warmth, while the cheesecake filling adds creaminess. Enjoy the process of baking and feel free to add your own twist! For the full recipe, check out the detailed steps to create these delightful muffins. To make the muffin batter, start by preheating your oven to 350°F (175°C). This ensures even baking. Next, grab a large bowl. In this bowl, sift together the dry ingredients: 1 cup of all-purpose flour, 1 teaspoon of baking powder, 1 teaspoon of baking soda, 1/2 teaspoon of salt, and spices like 1 teaspoon of ground cinnamon, 1/2 teaspoon of nutmeg, and 1/2 teaspoon of ginger. Set this bowl aside. Now, in another bowl, mix the wet ingredients. Combine 1/2 cup of granulated sugar, 1/2 cup of brown sugar, 1/2 cup of vegetable oil, 2 large eggs, 1 cup of canned pumpkin puree, and 1 teaspoon of vanilla extract. Whisk until smooth. Next, gently add the wet mixture to the dry ingredients. Stir just until combined. It’s okay if there are a few lumps. For the cheesecake filling, take a medium bowl and add 8 oz of softened cream cheese. Beat it with a mixer until creamy. Then, add 1/4 cup of granulated sugar, 1 egg, and 1 teaspoon of vanilla extract. Mix until smooth. This filling adds a rich layer to the muffins. Now, let’s fill the muffin tin. Line it with paper liners or grease it lightly. Spoon about 2 tablespoons of the pumpkin batter into each cup. Then, add 1 tablespoon of the cheesecake filling in the center. Top this with another 2 tablespoons of pumpkin batter to cover the filling. Bake your muffins in the preheated oven for 18-22 minutes. Check for doneness by inserting a toothpick into the muffins, avoiding the filling. It should come out clean. After baking, let the muffins cool in the pan for about 5 minutes. Then, transfer them to a wire rack to cool completely. For an extra touch, dust the cooled muffins with powdered sugar. Enjoy the delightful flavor of your Pumpkin Cheesecake Muffins! For more details, check the full recipe. One common mistake is overmixing the batter. This can make the muffins tough. Mix until the dry and wet ingredients just combine. Remember, lumps are okay! Another pitfall is not measuring ingredients correctly. Use measuring cups for flour and sugars. Too much flour will lead to dry muffins. Lastly, avoid skipping the cooling step. Letting them cool on a wire rack keeps them from getting soggy. To keep your muffins moist, use pumpkin puree. It adds moisture and flavor. Make sure to measure accurately. Also, don’t skip the oil; it adds richness. Using a mix of granulated and brown sugar helps too. Brown sugar adds moisture with its molasses content. Lastly, bake only until a toothpick comes out clean. Overbaking dries them out quickly. Spices make these muffins special. Use ground cinnamon, nutmeg, and ginger for warmth. You can also add a pinch of allspice for extra depth. For an aromatic twist, try adding a splash of maple extract. Vanilla extract enhances sweetness, so don't forget it! These small tweaks can elevate your muffins. For the Full Recipe, check the earlier section. {{image_2}} You can make gluten-free pumpkin cheesecake muffins easily. Just swap the all-purpose flour with a gluten-free blend. Many brands work well, but look for one that includes xanthan gum. This helps keep your muffins fluffy. Follow the same steps in the full recipe. Your muffins will be just as tasty! To create vegan pumpkin cheesecake muffins, replace eggs with flax eggs. Mix one tablespoon of ground flaxseed with three tablespoons of water. Let it sit for five minutes to thicken. For the cheesecake filling, use vegan cream cheese instead of regular cream cheese. You can also replace granulated sugar with coconut sugar for a healthier option. These muffins will still be rich and delicious! If you want to cut down on sugar, try using alternative sweeteners. Stevia or monk fruit sweetener can be good choices. Use them in the same amounts as granulated sugar. Keep in mind that these sweeteners can change the texture slightly. Make sure to test small batches first. You’ll enjoy a guilt-free treat! To keep your pumpkin cheesecake muffins fresh, store them in an airtight container. This helps lock in moisture and keep them soft. You can also place a slice of bread inside the container. The bread keeps the muffins moist. Store them at room temperature for up to three days. If you want to keep them longer, the fridge is a good option. Just remember to let them cool completely before storing. Freezing is a great way to save muffins for later. Wrap each muffin in plastic wrap tightly. Then, place them in a freezer-safe bag or container. They can stay fresh in the freezer for up to three months. When you're ready to enjoy, take a muffin out and let it thaw at room temperature. For a warm treat, pop it in the microwave for about 15-20 seconds. You can also reheat in the oven at 350°F (175°C) for about 10 minutes. Pumpkin cheesecake muffins can last a while if stored properly. At room temperature, they stay fresh for about 2-3 days. In the fridge, they can last up to a week. If frozen, they keep well for three months. However, for the best taste and texture, enjoy them within a month. For the full recipe, check the section above to make these delightful muffins! Yes, you can use fresh pumpkin. Start with a small pumpkin. Cut it in half and remove the seeds. Roast the halves cut side down in the oven until soft. Once cool, scoop out the flesh and mash it. Measure one cup for your muffins. Fresh pumpkin adds a lovely taste. These muffins stay fresh for about three days at room temperature. Keep them in an airtight container. If you want them to last longer, store them in the fridge for up to a week. Just warm them in the microwave before eating. If you need a cream cheese substitute, use Greek yogurt. It gives a similar tang and creaminess. You can also try mascarpone cheese for a rich flavor. If you prefer dairy-free, use a vegan cream cheese option. All of these choices work well in this recipe. Absolutely! You can add chopped nuts like walnuts or pecans for crunch. Chocolate chips also make a sweet addition. Just fold them into the batter before you fill the muffin cups. This adds fun flavors and textures to your muffins. To make them healthier, you can swap some all-purpose flour for whole wheat flour. You can also reduce the sugar by a little. Consider using applesauce to replace some oil. These changes keep the muffins tasty and nutritious. Yes, mini muffins are a great idea! Just adjust the baking time. Bake them for 12 to 15 minutes instead of the usual time. Keep an eye on them to avoid overbaking. They make perfect bite-sized treats for gatherings. For the complete recipe and details, check out the Full Recipe section above. It includes all the steps you need to create these delightful muffins. In this post, we explored how to make delicious pumpkin cheesecake muffins. We covered key ingredients, from spiced batter to creamy filling. You learned step-by-step instructions for mixing and baking. I shared tips to avoid common mistakes and ensure moist muffins. You can even try gluten-free or vegan versions. Finally, we discussed how to store these muffins for freshness. Enjoy baking and sharing these treats with others!

Pumpkin Cheesecake Muffins Delightful Flavor Treat

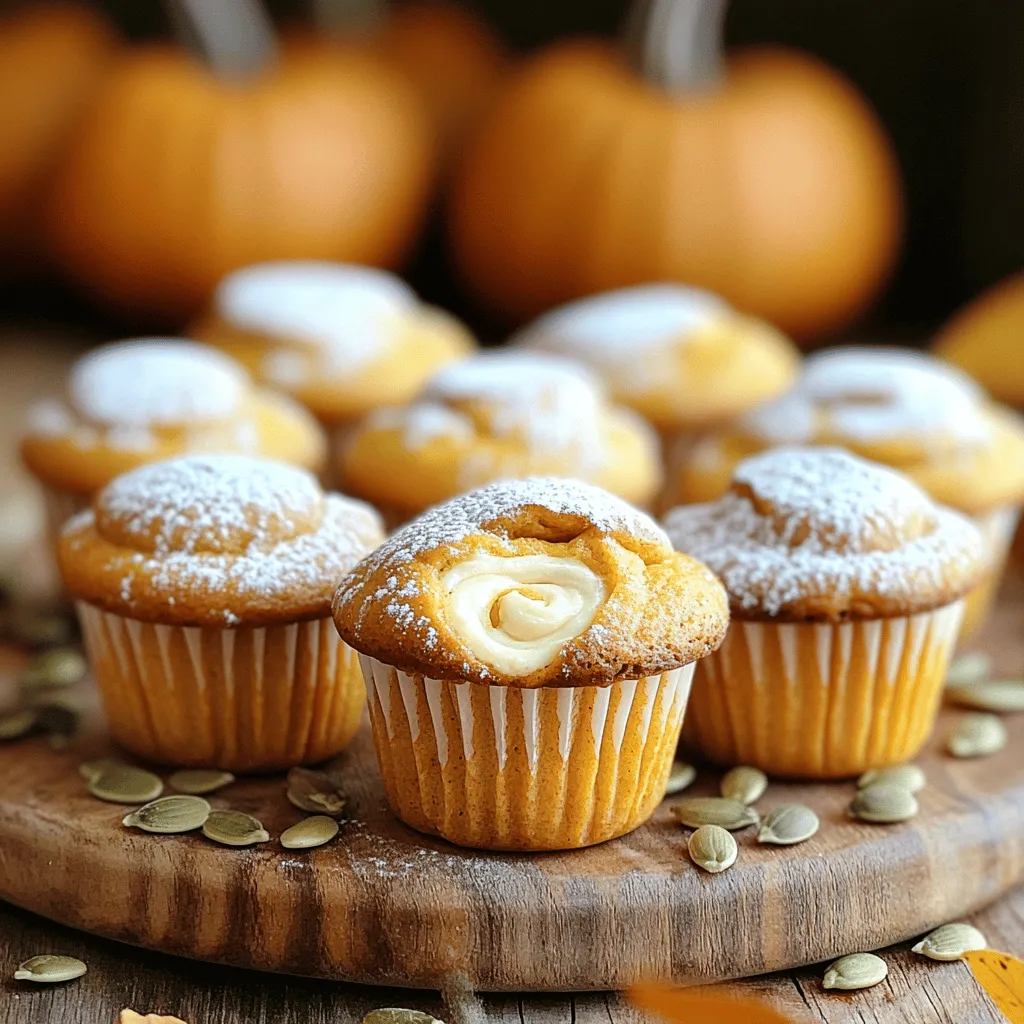
Craving a sweet treat that screams fall? You’re in for a treat with Pumpkin Cheesecake Muffins! These muffins blend rich

To make the best skinny pumpkin spice coffee creamer, you need a few key items. Here’s what you’ll need: - 1 cup unsweetened almond milk - 1/2 cup canned pumpkin puree - 1/4 cup pure maple syrup - 1 teaspoon vanilla extract - 1 teaspoon pumpkin pie spice - 1/4 teaspoon ground cinnamon - A pinch of salt These ingredients blend to create a creamy and flavorful treat. The almond milk keeps it light, while the pumpkin adds a cozy autumn vibe. You can tweak this recipe to match your tastes. Here are some optional ingredients to consider: - A splash of coffee extract for a stronger coffee flavor - A touch of nutmeg for extra warmth - Sweeteners like agave syrup or honey if you prefer - A bit of cocoa powder for a chocolate twist Feel free to mix and match. This way, you can enjoy a unique flavor each time. This creamer is not just tasty; it’s also a smart choice. Here’s a quick look at the nutrition per serving: - Calories: About 50 - Sugar: Roughly 8 grams - Fat: Less than 2 grams - Carbohydrates: Around 10 grams This information makes it easier to enjoy your coffee without guilt. You can savor the flavors and keep track of what you eat! Making skinny pumpkin spice coffee creamer is easy and fun. You only need a few simple steps. Start by gathering your ingredients. Then, heat them together to create a creamy delight. Follow the steps carefully for the best results. 1. In a medium saucepan, pour in 1 cup of unsweetened almond milk and 1/2 cup of canned pumpkin puree. 2. Turn the heat to medium. Whisk the mixture until it is smooth and well mixed. 3. Add 1/4 cup of pure maple syrup, 1 teaspoon of vanilla extract, and 1 teaspoon of pumpkin pie spice. 4. Sprinkle in 1/4 teaspoon of ground cinnamon and a pinch of salt. Keep whisking until all is warm, about 5 minutes. 5. Remove the saucepan from the heat. Let the mix cool slightly for a few minutes. 6. Use a fine mesh strainer to pour the creamer into a clean jar. This removes lumps and gives you a smooth texture. 7. Cool the creamer fully before sealing the jar. Store it in the fridge for up to 7 days. Shake well before each use. To get a silky smooth creamer, whisk well as you heat. This helps blend the pumpkin and milk. If you notice lumps, strain the mixture like I showed you. This will keep your creamer velvety. Also, be sure not to let it boil. Boiling can change the texture, making it grainy. Enjoy your creamy, pumpkin-spiced treat in your coffee! For the complete recipe, see the Full Recipe section. To make my skinny pumpkin spice coffee creamer shine, I focus on using fresh spices. Freshly ground cinnamon packs a rich aroma. You can also try adding a dash of nutmeg or ginger for depth. If you want a sweeter touch, use a little extra maple syrup. Just remember to keep it balanced. I love this creamer in my morning brew. Just add a few tablespoons to your coffee for a cozy feel. It also works well in lattes or even iced coffee. If you're feeling adventurous, drizzle some over whipped cream on top. This adds a fun twist to your favorite drinks. Homemade is always better than store-bought. Many store creamers contain hidden sugars and additives. With my recipe, you control the ingredients. You can even swap almond milk for oat milk for a creamier texture. This way, you enjoy a tasty drink that is also good for you. Check out the Full Recipe for more details on making this delicious creamer. {{image_2}} If you want a dairy-free creamer, almond milk is a great start. You can also use coconut milk for a richer taste. Oat milk works well too, giving a creamy texture. Each option brings its own flavor, so choose what you like best. For a sugar-free version, swap the maple syrup with a sugar-free sweetener. Stevia or erythritol can work well without adding calories. Just adjust the amount to taste, as these sweeteners can be much sweeter than regular sugar. You can play with flavors for different seasons. For Christmas, add a hint of peppermint extract. In summer, try mixing in some vanilla or even a splash of cold brew coffee. These small tweaks can keep your creamer exciting all year round. Feel free to check the Full Recipe to explore even more flavor options! To keep your skinny pumpkin spice coffee creamer fresh, use a clean jar. A glass jar works best. Make sure to let the creamer cool completely before sealing. This step helps to avoid extra moisture that can cause spoilage. Always shake well before pouring to mix up any settled ingredients. Homemade creamer lasts about 7 days in the fridge. Use it within this time for the best taste. If you notice any changes in smell or color, it’s best to toss it out. Before using, give it a good shake as flavors can separate. Enjoy it in your coffee, tea, or even with desserts! You can freeze your creamer for longer storage. Pour it into ice cube trays for easy use. Once frozen, transfer the cubes to a freezer bag. They can last up to 3 months. To use, simply thaw a few cubes in the fridge overnight. This way, you always have your favorite flavor ready! Check the [Full Recipe] for more details on making this delicious creamer. To make this creamer dairy-free, just use unsweetened almond milk as the base. Almond milk gives a creamy texture without dairy. You can also try coconut milk for a richer taste. Just follow the [Full Recipe] for the right mix of flavors. Yes, you can swap maple syrup for other sweeteners. You might try agave syrup or honey. If you want it sugar-free, use stevia or monk fruit. Keep in mind that each sweetener has a different taste. Adjust the amount to find your perfect sweetness. Homemade creamer lasts up to seven days in the fridge. Store it in a clean jar with a tight lid. Always shake well before using it, as ingredients may settle. If you see any changes in smell or texture, it’s best to toss it. Yes, this recipe is vegan-friendly! It uses almond milk and no animal products. The pumpkin puree and spices add a rich flavor without dairy. Enjoy this cozy treat knowing it fits into a vegan diet. This blog post covered how to make skinny pumpkin spice coffee creamer. We discussed the main and optional ingredients, along with their nutritional info. I also shared step-by-step instructions, tips for smooth texture, and ways to enhance flavor. You can customize your creamer with dairy-free and sugar-free options. Plus, I explained how to store it properly and answered common questions. Enjoy your coffee with this tasty and healthy creamer, and feel free to experiment with new flavors!

Skinny Pumpkin Spice Coffee Creamer Flavorful Delight

Are you ready to elevate your morning coffee? My Skinny Pumpkin Spice Coffee Creamer combines rich pumpkin flavor with just

To make these pumpkin spice cookie bites, you need a few simple ingredients. Each one adds to the flavor and texture of the cookies. Here’s what you will need: - 1 cup canned pumpkin puree - 1/2 cup brown sugar - 1/4 cup granulated sugar - 1/2 cup unsalted butter, softened - 1 large egg - 2 teaspoons vanilla extract - 2 cups all-purpose flour - 1 teaspoon baking soda - 1 teaspoon baking powder - 1 teaspoon pumpkin pie spice - 1/2 teaspoon salt - 1/2 cup chocolate chips (optional) - 1/4 cup chopped pecans (optional) Each ingredient serves a key role. The pumpkin puree keeps the cookies moist and adds a rich flavor. Brown and granulated sugars create a sweet balance. Butter gives the cookie bites a soft, melt-in-your-mouth feel. The egg binds everything together. The dry ingredients, like flour and baking soda, help the cookies rise and hold their shape. Pumpkin pie spice brings that classic fall flavor. If you want to add a twist, try the optional chocolate chips or pecans for a crunchy texture. For the full recipe and step-by-step instructions, check out the Full Recipe. This will guide you through the exciting process of baking these delightful treats! 1. Preheat your oven to 350°F (175°C). This step warms the oven for even baking. 2. Line a baking sheet with parchment paper. This will help prevent sticking. 3. In a large bowl, cream together the softened butter, brown sugar, and granulated sugar. Mix until it is light and fluffy. 4. Add the pumpkin puree, egg, and vanilla extract to the bowl. Stir until everything is well mixed. 5. In a separate bowl, whisk together the flour, baking soda, baking powder, pumpkin pie spice, and salt. This makes sure the dry ingredients are evenly mixed. 1. Gradually add the dry mix to the wet mix. Stir gently until just combined. Be careful not to overmix; this keeps your cookies soft. 2. If you want, fold in chocolate chips or chopped pecans now. This adds a nice crunch and flavor. 3. Using a tablespoon or cookie scoop, drop rounded balls of dough onto the baking sheet. Space them about 2 inches apart to allow for spreading. 4. Bake in the preheated oven for 10-12 minutes. The edges should be lightly golden. The centers may look soft but will firm up as they cool. 5. Once baked, remove the cookie bites from the oven. Let them cool on the sheet for about 5 minutes. Then, transfer them to a wire rack to cool completely. For a lovely touch, arrange the cookie bites on a rustic platter. Dust them with powdered sugar and serve alongside your favorite warm drink. Enjoy these treats with family and friends! For the full recipe, check out the details above. To make the best pumpkin spice cookie bites, focus on texture. Here are some key tips: - Use room temperature butter. This helps the sugar mix well. - Don’t overmix the dough. Mix until just combined. Overmixing makes cookies tough. - Chill the dough for 30 minutes. This helps the flavors meld and keeps cookies from spreading too much. Common mistakes to avoid include: - Using too much flour. Measure flour carefully or use a kitchen scale. - Skipping the baking powder. This gives the cookies their lift. - Ignoring oven temperature. Always preheat your oven for even baking. These cookie bites shine when paired with warm drinks. Try serving them with: - Hot apple cider. The spices match perfectly. - Coffee or tea. A cozy combo for chilly days. For a fun presentation, consider: - Arranging on a rustic platter. Dust with powdered sugar for a sweet touch. - Using decorative liners for individual cookie bites. This adds charm and makes them gift-ready! For the full recipe, check out the details above. Enjoy your baking! {{image_2}} You can change the flavor of pumpkin spice cookie bites easily. Adding spices can make a big difference. Try adding a pinch of nutmeg or allspice. These spices boost the warm taste. You can also use extracts like almond or maple. Just a few drops can change the flavor profile. You might want to switch up the mix-ins too. Instead of chocolate chips, try white chocolate or butterscotch chips. Both add a sweet twist. You can also use different nuts. Walnuts or hazelnuts can give a new crunch. These small changes can create a cookie that feels fresh and exciting. If you want a healthier version, you can substitute sugars. Instead of brown and granulated sugar, try coconut sugar or honey. These can add a unique flavor and are less processed. You can also reduce the amount of sugar by a bit. The cookies will still taste great. Using gluten-free flour is another option. You can replace all-purpose flour with a gluten-free blend. This makes the cookies safe for those with gluten issues. Just make sure to use a blend that works in cookies. This way, everyone can enjoy your tasty treats! After you bake your pumpkin spice cookie bites, let them cool completely. Once cool, store them in an airtight container. This keeps them fresh and moist. You can stack them in layers, but place parchment paper between layers to avoid sticking. When stored this way, these cookie bites last about one week. If you want them to stay fresh longer, you can freeze them. To freeze cookie bites, first let them cool down. Then, place them in a single layer on a baking sheet. Freeze them for about two hours. Once frozen, transfer the cookie bites to a freezer-safe bag or container. Remove as much air as possible to prevent freezer burn. You can store them in the freezer for up to three months. When you are ready to enjoy them, take out the desired amount. Let them thaw at room temperature for about an hour. For the best taste, you can warm them up in the oven for a few minutes. This brings back their soft and chewy texture. Enjoy your treats during those cozy fall days! How to make pumpkin spice cookie bites vegan? To make these cookie bites vegan, replace the egg with a flax egg. Mix 1 tablespoon of ground flaxseed with 2.5 tablespoons of water. Let it sit for about 5 minutes. Use vegan butter in place of the unsalted butter. You can also use maple syrup instead of brown sugar to add sweetness. Can these be made without pumpkin spice? Yes, you can make these cookie bites without pumpkin spice. If you want a different flavor, try using cinnamon or nutmeg instead. You can also add vanilla or almond extract for a unique twist. Just keep the other ingredients the same. Where can I buy pre-made pumpkin spice cookie bites? You can find pre-made pumpkin spice cookie bites at many grocery stores, especially during fall. Check the bakery section or the seasonal aisle. Some specialty stores and online retailers may also offer them. If you want a fresher option, try a local bakery. We covered how to make tasty pumpkin spice cookie bites from scratch. You learned about essential ingredients, step-by-step instructions, and extra tips. We discussed fun variations and how to store your treats for later. These bites are simple to customize and enjoy. Try them at your next family gathering or as a sweet snack. Remember, baking is fun, so explore new flavors and enjoy each step. Happy baking!

Pumpkin Spice Cookie Bites Irresistible Fall Treat

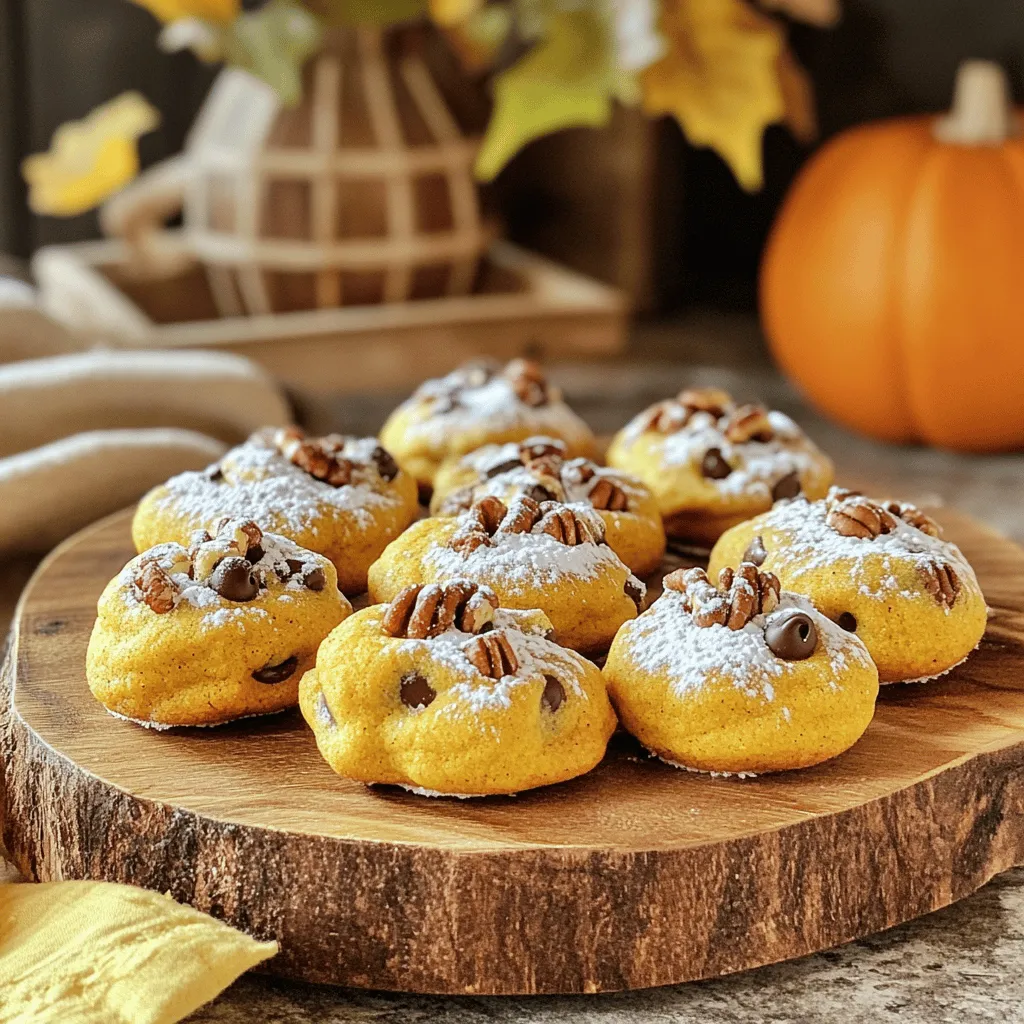
Are you ready to embrace the cozy flavors of fall? These Pumpkin Spice Cookie Bites are the perfect treat! They

To make Vegan Pumpkin Spice Cookies, gather these key ingredients: - 1 cup canned pumpkin puree - 1/2 cup coconut sugar - 1/3 cup maple syrup - 1/4 cup coconut oil, melted - 1 teaspoon vanilla extract - 1 1/2 cups whole wheat flour - 1 teaspoon baking soda - 1 teaspoon baking powder - 1 teaspoon pumpkin pie spice - 1/2 teaspoon cinnamon - 1/4 teaspoon nutmeg - 1/4 teaspoon salt - 1/2 cup vegan chocolate chips (optional) Using fresh pumpkin puree has some benefits. Fresh puree has a rich flavor and bright color. It also packs more nutrients than canned. Yet, canned pumpkin is easy and saves time. It offers a consistent texture and taste. If you want to substitute ingredients, here are some options: - Coconut sugar can be swapped for brown sugar. - Maple syrup works well with agave nectar. - Coconut oil can be replaced with vegetable oil or vegan butter. - Whole wheat flour can be substituted with all-purpose flour or gluten-free flour. Feel free to get creative with your ingredients. This flexibility will help you make these cookies your own. For the full recipe, check the section above. To make these vegan pumpkin spice cookies, start by mixing the wet ingredients. In a large bowl, combine: - 1 cup canned pumpkin puree - 1/2 cup coconut sugar - 1/3 cup maple syrup - 1/4 cup melted coconut oil - 1 teaspoon vanilla extract Stir this mixture well until it is smooth. Next, in another bowl, whisk together the dry ingredients. Combine: - 1 1/2 cups whole wheat flour - 1 teaspoon baking soda - 1 teaspoon baking powder - 1 teaspoon pumpkin pie spice - 1/2 teaspoon cinnamon - 1/4 teaspoon nutmeg - 1/4 teaspoon salt Once mixed, slowly add the dry ingredients to the wet mixture. Stir until just combined. You want the cookie dough to be thick but not dry. If it feels too sticky, add a bit more flour. Folding in chocolate chips is optional, but I highly recommend it for extra flavor. Add 1/2 cup vegan chocolate chips, if you like, and gently fold them into your dough. Preheat your oven to 350°F (175°C) before baking. Line a baking sheet with parchment paper to prevent sticking. Using a tablespoon, scoop out your cookie dough. Place the dough on the sheet, leaving space between each scoop. The cookies will spread while baking. Bake your cookies for 12-15 minutes or until the edges are lightly golden. To check if they are done, look for a firm edge and a soft center. Once baked, let the cookies cool on the baking sheet for about 5 minutes. This step helps them set. After that, transfer them to a wire rack to cool completely. This way, they will have the perfect texture! To bake the best vegan pumpkin spice cookies, avoid these common mistakes: - Overmixing the batter: This can lead to tough cookies. Mix until just combined. - Not measuring ingredients correctly: Use proper measuring cups to ensure accuracy. - Skipping the cooling time: Let the cookies cool on the sheet for five minutes. This helps them set. Here are some recommended tools for your baking: - Mixing bowls: Use large bowls for easy mixing. - Parchment paper: This prevents sticking and makes cleanup easy. - Cookie scoop: A scoop helps make uniform cookie shapes. Enhancing flavor is simple! Try these tips: - Use fresh spices: They add more flavor than old ones. - Add vanilla extract: It adds depth and richness to your cookies. - Experiment with extracts: Almond or maple extract can boost the flavor. Pair your cookies with these delicious treats: - Non-dairy milk: Almond or oat milk complements the cookies well. - Coffee or tea: A warm drink enhances the cozy fall vibe. - Dairy-free ice cream: Serve a scoop beside the cookies for a special dessert. For a lovely presentation: - Arrange cookies on a decorative plate: This makes them look inviting. - Sprinkle extra pumpkin pie spice on top: It adds a nice touch. - Serve with a side of fresh fruit: This adds color and freshness to your plate. Try these tips, and you'll have a delightful cookie experience! For the full recipe, check out the [Full Recipe]. {{image_2}} You can easily change the flavor of your vegan pumpkin spice cookies. Try different spices or extracts for a new twist. Instead of pumpkin pie spice, you can use ginger or allspice. This change will give your cookies a unique taste. You can also add a splash of almond or orange extract for a fresh flavor. Adding nuts or dried fruits can enhance your cookie dough. Walnuts or pecans add a nice crunch. Dried cranberries or raisins bring a sweet, chewy texture. Mix in 1/2 cup of your chosen nuts or fruits for extra flavor and fun. For gluten-free options, swap out whole wheat flour. Use almond flour or oat flour instead. These flours work well and keep the cookies soft. You can also try a gluten-free flour blend for an easy switch. If you want lower-sugar cookies, reduce the coconut sugar. Use just 1/4 cup instead of 1/2 cup. You can also add mashed bananas or applesauce for natural sweetness. This keeps your cookies tasty without adding too much sugar. To keep your vegan pumpkin spice cookies fresh, store them in an airtight container. This helps keep the moisture in and prevents them from getting stale. You can store them at room temperature for about a week. If you prefer, you can also refrigerate the cookies. This will extend their shelf life for up to two weeks. However, the texture may change slightly. If you want the best taste, I suggest room temperature storage. Freezing the cookies is a great way to enjoy them later. To freeze, first allow the cookies to cool completely. Then, place them in a single layer on a baking sheet. Freeze them for about an hour. After that, transfer the cookies to a freezer-safe bag or container. Make sure to remove excess air to prevent freezer burn. They can last for up to three months in the freezer. When you want to enjoy them again, thaw the cookies in the refrigerator overnight. This helps maintain their soft texture. You can also warm them in the oven for a few minutes before serving. This makes them taste freshly baked! Can I use a different sweetener? Yes, you can use other sweeteners. Agave nectar or brown sugar can work. Just keep the ratio the same. This will help your cookies stay sweet and chewy. How long will the cookies last? These cookies can last about a week. Store them in an airtight container at room temperature. You can also freeze them for longer storage. Can I make these cookies without pumpkin? Yes, you can! If you want to skip the pumpkin, try using mashed bananas or applesauce instead. This will change the flavor but still keep the cookies moist. What can replace coconut oil in the recipe? You can use vegetable oil, canola oil, or even vegan butter. Each option will give a slightly different taste but will still work well. Is there an alternative for maple syrup? Yes, you can use agave syrup or brown rice syrup. Both options have a similar sweetness and will help keep your cookies moist. In this blog post, we covered how to create delicious vegan pumpkin spice cookies. We discussed key ingredients, from fresh versus canned pumpkin puree to substitutes for common ingredients. The step-by-step instructions helped you mix, bake, and cool your cookies perfectly. Remember to avoid common mistakes and consider flavor variations. Finally, proper storage keeps your cookies fresh. With these tips, you can enjoy tasty treats that impress. Happy baking!

Vegan Pumpkin Spice Cookies Tasty Fall Delight

If you love fall flavors, you’ll adore these Vegan Pumpkin Spice Cookies! They are soft, spiced, and full of seasonal

- 1 lb ground beef - 1 tablespoon onion powder - 1 tablespoon garlic powder - Salt and pepper, to taste - 8 slider buns - 4 slices American cheese, halved - 1 cup shredded lettuce - 1 small onion, finely chopped - 8 dill pickle slices - ½ cup mayonnaise - 2 tablespoons ketchup - 2 tablespoons yellow mustard - 1 tablespoon sweet pickle relish To create these Copycat Big Mac Sliders, gather all your ingredients first. The ground beef serves as the base. I suggest using good quality beef for the best flavor. The onion and garlic powders add a savory kick. You can adjust the salt and pepper to your taste. Next, the toppings bring it all together. The American cheese melts perfectly on the warm patties. Shredded lettuce adds crunch, while chopped onions give a fresh bite. Don’t forget the dill pickles; they add that signature zing. Finally, let’s make the special sauce. This creamy mix of mayonnaise, ketchup, mustard, and relish is what gives these sliders their classic taste. It is easy to make and adds a burst of flavor to every bite. For the Full Recipe, check the details above and get ready to enjoy a homemade treat! First, preheat your oven to 350°F (175°C). Lightly grease a baking dish. In a mixing bowl, combine 1 lb ground beef, 1 tablespoon onion powder, 1 tablespoon garlic powder, and salt and pepper to taste. Mix everything well. Shape this mixture into small patties, about the size of your slider buns. Next, place the patties in the prepared baking dish. Bake them in the oven for about 15 to 20 minutes. You want them cooked through, and the juices should run clear. While the patties are baking, it’s time to make the special sauce. In a separate bowl, combine ½ cup mayonnaise, 2 tablespoons ketchup, 2 tablespoons yellow mustard, and 1 tablespoon sweet pickle relish. Mix until smooth. Once the patties are ready, layer them on the bottom half of the slider buns. Add half a slice of American cheese on each patty. Then, spread a generous amount of the special sauce over the cheese. Top with shredded lettuce, chopped onions, and a pickle slice. Now, place the top half of the buns on the sliders. For extra flavor, you can brush the tops with melted butter. Return the assembled sliders to the oven for about 5 minutes. This will warm the buns and slightly toast them. When done, cut them into individual sliders. You can find more details in the Full Recipe. To get the best flavor in your sliders, pay attention to your beef. Use 80/20 ground beef for the right fat balance. This mix gives juiciness and flavor. Season your beef well. Add about one tablespoon of onion powder and garlic powder each. Don’t forget to add salt and pepper to taste. When it comes to cheese, American cheese works best. It melts nicely and adds that creamy texture. For a twist, you can try cheddar or pepper jack for a kick. To keep your sliders juicy, do not overcook the patties. Bake them at 350°F for just 15-20 minutes. Check for clear juices to ensure they are done. Juicy patties are key to great sliders. The special sauce is also important for moisture. It combines mayonnaise, ketchup, mustard, and sweet pickle relish. This sauce adds creaminess and flavor. Make sure to add plenty of it to each slider for the best taste. For a great presentation, serve your sliders on a colorful platter. Add extra special sauce in a small bowl for dipping. This adds flair and lets everyone enjoy the sauce more. Pair your sliders with classic sides like fries or onion rings. A refreshing drink like lemonade or soda works well too. You can also add a side salad for a healthier touch. {{image_2}} If you want a lighter twist on my Copycat Big Mac Sliders, try these swaps: - Turkey or Plant-Based Patties: You can use turkey instead of beef. This makes the sliders leaner. Plant-based patties are a great choice too. They add flavor and fit various diets. - Whole Wheat or Gluten-Free Buns: Whole wheat buns are richer in fiber. They give you a healthier bite. If you need gluten-free options, many brands offer tasty gluten-free buns now. Adding new flavors can make these sliders even better: - Jalapeños for Spice: If you love heat, add sliced jalapeños. They bring a spicy kick that pairs well with the rich flavors. - Different Cheeses: While American cheese is classic, try other cheeses. Cheddar or pepper jack can add unique flavors and textures. Planning ahead makes cooking easier: - Preparing Sliders Ahead of Time: You can shape the patties and store them in the fridge. Make the special sauce too. This way, you save time when you’re ready to cook. - Freezing and Reheating Options: If you want to make them for later, freeze the cooked sliders. Wrap them tightly to keep them fresh. To reheat, bake them in the oven until warm. This keeps them tasty and prevents sogginess. For the full recipe, check out the Mini Mac Attack Sliders ! After making Copycat Big Mac Sliders, you may have leftovers. To store them, place the sliders in an airtight container. This keeps them fresh for later. If you separate the patties and toppings, they stay better. Wrap each slider in plastic wrap for extra protection. Avoid stacking them to stop squishing. You can freeze assembled sliders for a later meal. To do this, wrap each slider in plastic wrap and aluminum foil. This prevents freezer burn. Place them in a freezer bag for extra safety. When you want to eat them, thaw in the fridge overnight. To reheat, remove the foil and plastic. Place the sliders on a baking sheet. Bake in a preheated oven at 350°F (175°C) for about 10-15 minutes. This warms them nicely without drying them out. In the fridge, these sliders last for about 3-4 days. In the freezer, they can last up to 2-3 months. Always check for signs of spoilage before eating. If the sliders smell bad or look off, it’s best to toss them. Keeping an eye on storage helps you enjoy them at their best! Yes, you can! You can prepare the beef patties and the special sauce a day before. Just store them in the fridge. You can also assemble the sliders ahead of time. Place them in a baking dish and cover with foil. This keeps them fresh until you’re ready to bake. Try these tasty sides: - Crispy French fries - Sweet potato fries - Coleslaw - Onion rings - Potato salad For drinks, soda or iced tea pairs well. You can also serve milkshakes for a fun twist. To keep your buns from getting soggy, you can try these tips: - Toast the buns lightly before assembling. - Use a thicker layer of special sauce. - Avoid overloading your sliders with toppings. This way, your sliders will stay crispy and enjoyable. Absolutely! Here are some easy swaps: - Use ground turkey or a plant-based meat for a healthier option. - Try gluten-free slider buns if needed. - Swap American cheese for a dairy-free cheese. - Use Greek yogurt instead of mayonnaise for a lighter sauce. These changes keep the taste while meeting your needs. For the full recipe, check the link. You learned how to make delicious sliders with simple steps and tasty ingredients. The special sauce adds flavor and keeps them moist. You can also make healthier versions or get creative with toppings. Remember to store leftovers properly for fresh snacks later. These sliders are perfect for any gathering. Experiment with your favorites to make them your own! Enjoy your tasty creation!

Copycat Big Mac Sliders Tasty and Easy to Make

Craving the classic taste of a Big Mac but want to make it at home? You’re in luck! My Copycat

- 2 cups apple cider - 2 cups all-purpose flour - 1 cup granulated sugar - 1/2 cup brown sugar - 2 teaspoons baking powder - 1 teaspoon ground cinnamon - 1/2 teaspoon ground nutmeg - 1/2 teaspoon salt - 1/2 cup unsalted butter, melted - 2 large eggs - 1/2 cup whole milk - 1 cup vanilla ice cream - 1/4 cup granulated sugar for rolling - Extra ground cinnamon for rolling To make apple cider donut ice cream sandwiches, you need quality ingredients. Fresh apple cider gives the donuts a rich flavor. The flour, sugar, and spices create a perfect base. Baking powder helps the donuts rise and stay fluffy. - Baking sheet - Parchment paper - Mixing bowls You also need a few tools. A baking sheet helps with even cooking. Parchment paper makes cleanup easy and prevents sticking. Mixing bowls are key for combining your ingredients. Using the right ingredients and tools can make your apple cider donut ice cream sandwiches a hit. For the full recipe, check out the details in the previous section. Reducing the cider for maximum flavor Start by pouring 2 cups of apple cider into a small saucepan. Heat it over medium heat. Once it boils, turn the heat down and let it simmer. This process should take about 20 to 25 minutes. You want the cider to reduce to about 1 cup. This step brings out rich flavors. Cool down process Once the cider reduces, take it off the heat. Let it cool down for a few minutes. This will help it mix well with the other ingredients later. Combining dry ingredients In a large mixing bowl, whisk together the dry ingredients. You’ll need 2 cups of all-purpose flour, 1 cup of granulated sugar, 1/2 cup of brown sugar, 2 teaspoons of baking powder, 1 teaspoon of ground cinnamon, 1/2 teaspoon of ground nutmeg, and 1/2 teaspoon of salt. Make sure everything is mixed well. Mixing wet ingredients In another bowl, whisk together the wet ingredients. Combine 1/2 cup of melted unsalted butter, 2 large eggs, the reduced apple cider, and 1/2 cup of whole milk. Mix until you see no lumps. Pour this wet mixture into the dry ingredients. Stir until just combined. Shaping and spacing the dough Use a tablespoon or a cookie scoop to drop dough balls onto a lined baking sheet. Space them about 2 inches apart. Flatten each dough ball slightly to form a donut shape. This helps them cook evenly. Baking time and checking doneness Preheat your oven to 350°F (175°C). Bake the donuts for 10 to 12 minutes. They should be lightly golden around the edges. Press them gently; they should spring back when done. Let them cool for a few minutes on the baking sheet before moving them to a wire rack. Coating with cinnamon sugar While the donuts cool, mix 1/4 cup of granulated sugar with some extra ground cinnamon in a shallow dish. Once the donuts have cooled slightly, roll them in this mixture. Make sure they are fully coated for that sweet, spicy finish. Now, you can assemble your delightful apple cider donut ice cream sandwiches using the full recipe! To make the best apple cider donuts, avoid common mistakes. One mistake is overmixing the batter. This can lead to tough donuts. Mix just until you see no dry flour. This keeps them light and fluffy. Another tip is to ensure your dry and wet ingredients are at room temperature. Cold eggs or milk can mess with the dough. For fluffy donuts, make sure your baking powder is fresh. Old baking powder can cause dense donuts. Store it in a cool, dry place to keep it active. When it comes to scooping ice cream, use a warm scoop. This makes it easier to get nice, even scoops. Dip the scoop in hot water, then dry it before using. To form the perfect sandwich, place a scoop on the flat side of one donut. Press gently with another donut on top. This helps the ice cream stick without spilling out. Pair your sandwiches with warm apple cider or coffee. These drinks enhance the sweet and spicy flavors. For a fun presentation, stack the sandwiches on a plate. Dust some cinnamon sugar on top. You can also serve them with a drizzle of caramel sauce for extra flair. Enjoy! {{image_2}} You can have fun by changing the ice cream flavors in your sandwiches. Vanilla is great, but why not try caramel or maple? Each one brings a new taste to your treat. You can also add fruits like sliced apples or berries. They add a fresh crunch and balance the sweetness. Toppings like crushed nuts or sprinkles can give your sandwich extra fun and texture. Want to switch up the donuts? Try using pumpkin or sweet potato puree in the batter. This adds a lovely fall flavor and color. If you need gluten-free options, use almond flour instead of all-purpose flour. This keeps the donuts soft and tasty while making them safe for gluten-free diets. Each variation makes a unique twist on the classic apple cider donut ice cream sandwich. For the full recipe, check out the main article! To keep your apple cider donuts fresh, store them in an airtight container. This protects them from air and moisture, helping them stay soft. You can also wrap each donut in plastic wrap for extra safety. If you have leftover assembled sandwiches, wrap them well and place them in the freezer. This keeps the ice cream firm and the donuts intact. If stored properly, the donuts last about 3 days in the fridge. For the best taste, enjoy them fresh. In the freezer, they can last up to a month. When you’re ready to eat, thaw the sandwiches at room temperature for about 10 minutes. This warms the donuts and softens the ice cream. If you want a warm treat, heat the donuts in the microwave for 10-15 seconds before assembling. Enjoy the gooey goodness! Apple cider donut ice cream sandwiches are a fun twist on two favorite treats. You get warm, soft apple cider donuts filled with creamy vanilla ice cream. This dessert trend combines the fall taste of apple cider with the coolness of ice cream. Many people love them for their unique flavor and fun texture. You can enjoy them as a snack or dessert. They are perfect for parties or cozy nights at home. Yes, you can make these donuts ahead of time. Bake the donuts and let them cool completely. Store them in an airtight container. They stay fresh for about two days at room temperature. If you want to keep them longer, freeze the donuts. Place them in a freezer bag. They last for up to three months in the freezer. Just remember to thaw them before making your sandwiches. You can find pre-made apple cider donut ice cream sandwiches at several places. Look in local bakeries or artisanal ice cream shops. Some grocery stores may also carry them in the frozen dessert section. Brands like Talenti and Jeni's often have unique flavors. Check their websites or call ahead to see if they have them. You can customize your ice cream sandwiches in many fun ways. Try different ice cream flavors like caramel or pumpkin. Add mix-ins like chocolate chips or crushed nuts for extra crunch. You can also top your sandwiches with sprinkles or drizzle warm caramel sauce on top. Get creative and make them your own! In this post, we explored making delicious apple cider donut ice cream sandwiches. We covered key ingredients, proper equipment, and step-by-step instructions to create your treats. I shared tips to perfect your donuts and ideas for serving them. We also discussed variations and how to store leftovers for later enjoyment. Remember, the joy of baking comes from trying new flavors and techniques. Enjoy your tasty creations and impress your friends with these delightful desserts!

Apple Cider Donut Ice Cream Sandwiches Tasty Delight

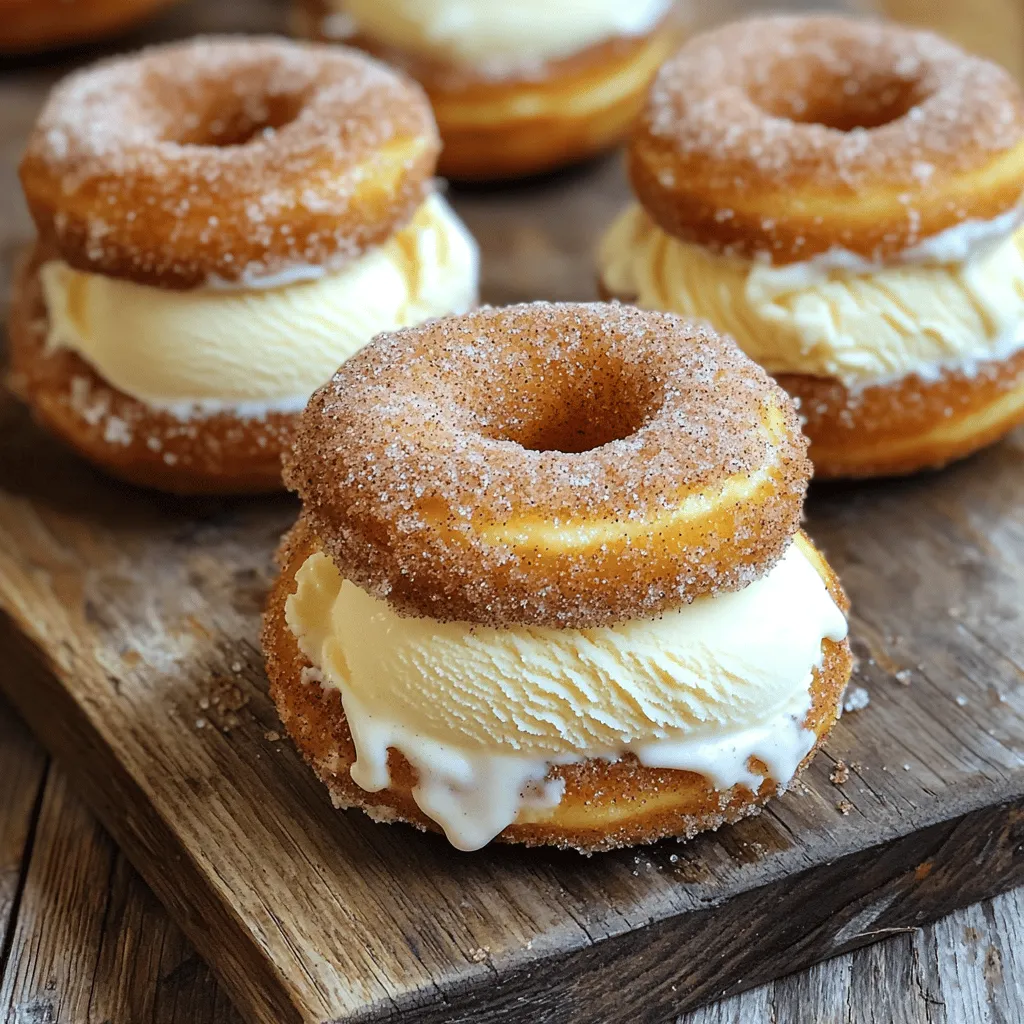
Get ready for a sweet treat that combines two favorites: donuts and ice cream! Apple Cider Donut Ice Cream Sandwiches

- 1 cup dill pickles, finely chopped - 1 cup ripe tomatoes, diced - ½ cup red onion, finely chopped - 1 jalapeño, seeds removed and minced - ¼ cup fresh cilantro, chopped - 2 tablespoons lime juice - 1 teaspoon garlic powder - 1 teaspoon ground cumin - Salt and pepper to taste - 1 cup cream cheese, softened - ½ cup sour cream To make a great Pickle de Gallo Pico Dip, you need fresh ingredients. I always choose ripe tomatoes for their juicy flavor. The dill pickles bring that perfect crunch. Red onion adds a mild bite, while jalapeño gives it a nice kick. Fresh cilantro brightens the taste. Lime juice balances the dip with a tangy touch. Garlic powder and ground cumin deepen the flavor. Cream cheese provides a rich and smooth base. Sour cream adds a creamy texture that makes every bite delightful. When you gather your items, make sure they are fresh. This makes a big difference in taste. For the best experience, use high-quality cream cheese. You can find the full recipe in the main article. Enjoy crafting this dip! - Step 1: Chopping and dicing Start by gathering all your fresh vegetables. Chop 1 cup of dill pickles into small pieces. Dice 1 cup of ripe tomatoes. Finely chop ½ cup of red onion. Remove seeds and mince 1 jalapeño. Finally, chop ¼ cup of fresh cilantro. - Step 2: Mixing ingredients in a bowl In a large mixing bowl, combine all the chopped vegetables. Stir gently to mix them well. This blend gives your dip a fresh taste. - Step 3: Creaming cheese mixture In another bowl, take 1 cup of softened cream cheese. Add ½ cup of sour cream. Use a fork or mixer to blend until it’s smooth and creamy. This base will make your dip rich. - Step 4: Incorporating spices and seasonings Add 2 tablespoons of lime juice, 1 teaspoon of garlic powder, and 1 teaspoon of ground cumin to the cream cheese mix. Season with salt and pepper. Stir everything well until it is fully combined. - Step 5: Merging both mixtures Gently fold the vegetable mix into the creamy base. Make sure everything is well mixed. This step is key for great flavor. - Step 6: Adjusting taste Taste the dip and adjust the seasoning. You might want more salt, pepper, or lime juice. Keep mixing until it’s just right. Now, your Pickle de Gallo Pico Dip is ready to enjoy! For the full recipe, check the ingredients list above. To get the best taste from your Pickle de Gallo Pico Dip, let it chill in the fridge for at least 30 minutes. This time allows the flavors to mix well. If you like it spicy, add more jalapeño. If you prefer less heat, use less jalapeño or leave it out. Serve the dip in a colorful bowl to catch the eye. You can use a bright ceramic bowl or a fun dish from your collection. Garnish it with fresh cilantro on top. This adds a nice green color and fresh flavor. Using fresh produce makes a big difference. Choose the ripest tomatoes and crisp dill pickles. Fresh herbs give your dip a bright taste. For the cream cheese, pick a well-known brand. A good cream cheese makes the dip creamy and rich. {{image_2}} You can make your Pickle de Gallo Pico Dip even better. Try adding avocado for creaminess. This gives the dip a rich texture. Just mash the avocado and mix it in. It blends well with the other flavors. You might also want to include different spices like smoked paprika. This spice adds a warm, smoky taste. Start with a small amount and taste as you go. You might discover a new favorite! If you want a lighter dip, substitute Greek yogurt for sour cream. Greek yogurt is tangy and creamy. It will keep the dip delicious while cutting calories. Another option is to use plant-based cream cheese. This is great for a vegan dip. It still gives that creamy feel without dairy. Look for a brand that you enjoy for the best flavor. Mix in different types of pickles for fun variations. Try sweet pickles for a hint of sweetness. Or use spicy pickles for an extra kick. Each type brings a new twist to your dip. Using heirloom tomatoes can change the flavor too. They are sweeter and have more color. This adds a beautiful look and taste to the dip. You’ll impress your friends with these unique flavors! For the complete recipe, check out the Full Recipe that includes all the steps to create this delightful dip. To keep your Pickle de Gallo Pico Dip fresh, store it in an airtight container. This method prevents air from spoiling the dip. I often use glass or BPA-free plastic containers. They seal well and help maintain the flavors. Before sealing, let the dip cool if it’s warm. This helps avoid condensation that can lead to sogginess. You can keep your Pickle de Gallo Pico Dip in the fridge for about three to five days. Always check for signs of spoilage before eating. If you see mold, a strange smell, or a change in color, it’s time to toss it out. It’s better to be safe than sorry! Yes, you can freeze Pickle de Gallo Pico Dip, but keep in mind that the texture may change. If you want to freeze it, use a freezer-safe container. Make sure to leave some room for expansion. When you’re ready to enjoy it, transfer it to the fridge to thaw overnight. Do not refreeze once it’s thawed. After thawing, give it a good stir before serving to reintroduce the flavors. You can enjoy Pickle de Gallo Pico Dip with many tasty options. Here are some great ideas: - Tortilla chips: Crunchy and salty, they pair perfectly with this dip. - Veggie sticks: Carrots, cucumbers, and bell peppers add a fresh crunch. - Crackers: Choose your favorite kind to dip and scoop. - Pita bread: Soft and chewy, it works well for scooping. - Toasted baguette slices: A little more fancy but oh so good! Feel free to mix and match these options for a fun snack board. Yes, you can prepare Pickle de Gallo Pico Dip in advance! Here are some tips to help: - Make it a day early: It will taste even better after the flavors blend. - Store it in an airtight container in the fridge. This keeps it fresh. - Stir it again before serving: This helps bring back the creamy texture. - Keep toppings separate: If you plan to add any toppings, do this just before serving. With these tips, you’ll have a ready-to-enjoy dip! Absolutely! You can easily make Pickle de Gallo Pico Dip vegan. Here are some simple swaps: - Cream cheese: Use plant-based cream cheese instead. - Sour cream: Choose a dairy-free sour cream option. - Adjust spices: Ensure your spices do not contain any animal products. These changes will keep the dip creamy and delicious! Pickle de Gallo Pico Dip is a fun and tasty treat. It combines fresh veggies, cream cheese, and spices for great flavor. Remember to chill for the best taste and adjust spices to fit your taste buds. You can make it unique with different ingredients like avocado or smoked paprika. Store leftovers in an airtight container, and keep an eye on freshness. This dip is easy to prepare and can be made ahead. Enjoy sharing it with friends at your next gathering!

Flavorful Pickle de Gallo Pico Dip Recipe to Enjoy

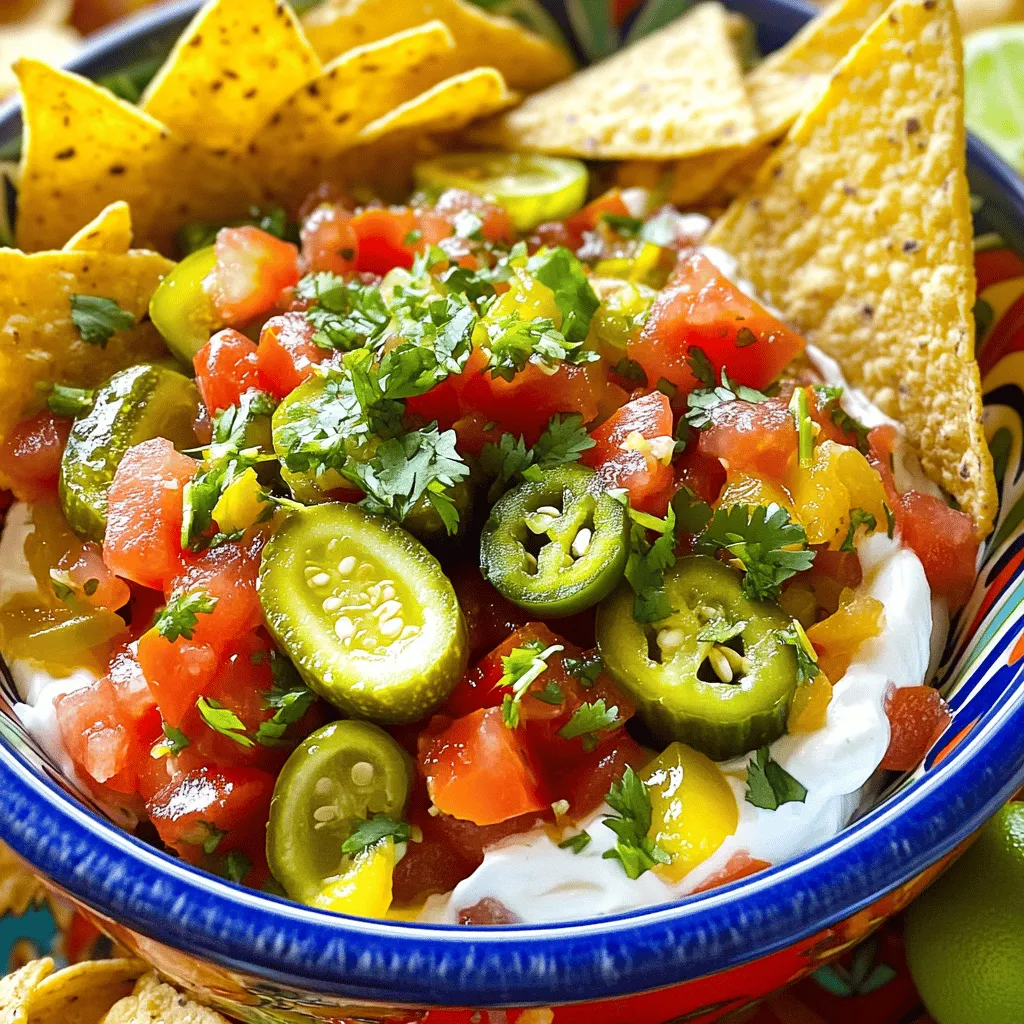
Are you ready to elevate your snack game? This Flavorful Pickle de Gallo Pico Dip is a perfect blend of

Here’s what you need to make Pumpkin Spice Cold Foam Floats: - 1 cup cold brewed coffee - 1/2 cup milk (or dairy alternative) - 2 tablespoons pumpkin puree - 1 tablespoon maple syrup (or to taste) - 1/2 teaspoon pumpkin pie spice (plus extra for garnish) - 1/4 teaspoon vanilla extract - Ice cubes - Whipped cream (optional, for topping) These ingredients are simple and easy to find. You can use any milk you like, including almond or oat milk. The pumpkin puree gives a rich flavor, while maple syrup adds sweetness. Pumpkin pie spice adds warmth and spice to the drink. Using cold brewed coffee makes this drink smooth and refreshing. You can brew it at home or buy it ready-made. The whipped cream on top is optional but adds a nice touch. This recipe is all about balance. You want the pumpkin flavor to shine through, but not overpower the coffee. Feel free to adjust the maple syrup if you like it sweeter. These ingredients come together to create a delicious fall treat. Check out the Full Recipe for all the steps to make this delightful drink! To start, brew your cold coffee a few hours ahead. Cold brew usually takes 12 to 24 hours to steep. If you want a quick fix, grab store-bought cold brew. Popular brands are Stumptown, Starbucks, and Dunkin'. Fill a tall glass halfway with ice cubes. Pour in that rich, cold coffee. Next, let’s make the pumpkin spice cold foam. You’ll need a whisk or a frother for this step. In a small bowl, mix together: - 1/2 cup milk (or dairy alternative) - 2 tablespoons pumpkin puree - 1 tablespoon maple syrup - 1/2 teaspoon pumpkin pie spice - 1/4 teaspoon vanilla extract Whisk until it’s well combined. For a frothier texture, use a frother or blender. The goal is to get a light, airy foam that sits nicely on top. Now for the fun part: creating the float. Slowly pour the pumpkin spice cold foam over the cold coffee. This creates a lovely layered effect. If it mixes, don't worry; it still tastes great. Use a spoon to help layer if needed. For a beautiful finish, top with whipped cream if you like. Sprinkle a pinch of pumpkin pie spice on top for a nice touch. Enjoy your Pumpkin Spice Cold Foam Float! For the full recipe, check out the complete guide! To boost your Pumpkin Spice Cold Foam Floats, try these swaps: - Use almond milk or oat milk for a nutty flavor. - Substitute honey for maple syrup if you prefer a floral note. To adjust sweetness, add more maple syrup. Test a little at a time. You can also lessen the syrup for a more balanced taste. You don’t need a machine to froth your cold foam. Try these simple methods: - Use a whisk to whip the mixture. It may take longer but works great. - A mason jar with a lid can also froth. Just shake it hard for a minute. To avoid separation, froth just before serving. Stir gently to mix before pouring it on coffee. Present your drink in tall, clear glasses to show off the layers. Here are some pairing ideas: - Enjoy with cinnamon sugar cookies for a sweet treat. - Pair with a slice of pumpkin bread for a cozy snack. {{image_2}} You can easily switch the milk in your Pumpkin Spice Cold Foam Floats. This change can make the drink dairy-free. Here are some great options: - Almond milk - Oat milk - Soy milk - Coconut milk I recommend using unsweetened almond milk for a light flavor. Oat milk gives a creamy texture that works well. If you want a tropical taste, try coconut milk. Want to mix things up? You can add fun flavors to your drink. Here are some ideas: - Drizzle chocolate syrup for a sweet twist. - Add caramel for a rich taste. - Mix in a touch of whipped cream for extra creaminess. For the holidays, try to add peppermint or gingerbread flavors. These can make your drink festive and fun! You can enjoy this drink hot, too. To make a warm version, simply brew hot coffee instead of cold. Here’s how to adjust the recipe: - Brew a strong cup of hot coffee. - Follow the same steps to make the foam. - Pour the hot coffee into a mug and top it with the foam. For winter, you can add cinnamon or nutmeg to bring warmth. This will make your drink cozy and inviting. For the full recipe, check out the recipe section above. You can save time by making cold brew coffee ahead. Brew it the night before. Store it in a sealed jar in the fridge. It will stay fresh for up to a week. For leftover cold foam, keep it in a sealed container. Refrigerate it for up to two days. Before using again, check that it still smells sweet and pumpkiny. If not, it is best to toss it out. Check the shelf life of your ingredients. Cold brew coffee can last about a week. Milk and dairy alternatives usually stay good for about a week too. Always look at the expiration date. Pumpkin puree can spoil if not stored right. If it’s opened, use it within a week. Signs of spoilage include a sour smell or discoloration. If you see either, throw it away. If you plan to serve cold foam later, store it properly. Keep it in the fridge in a tight container. This helps maintain its texture and flavor. Before serving, rewhip the foam to get it light and fluffy again. Just whisk it gently or use a frother. This gives your drink that fresh, airy touch. Enjoy your Pumpkin Spice Cold Foam Floats with confidence! To make this drink, follow these simple steps: 1. Prepare the Coffee: Brew your cold coffee a few hours ahead or use store-bought cold brew. Fill a tall glass halfway with ice cubes and pour in the cold coffee. 2. Make the Pumpkin Spice Cold Foam: In a small bowl, whisk together the milk, pumpkin puree, maple syrup, pumpkin pie spice, and vanilla extract. For a frothier mix, use a frother or blender to aerate it. 3. Create the Float: Slowly pour the pumpkin spice cold foam over the iced coffee. Use a spoon to help layer if needed. 4. Garnish: Add a dollop of whipped cream on top and sprinkle some pumpkin pie spice for extra flavor. 5. Serve: Insert a straw or enjoy with a spoon. Sip and enjoy your seasonal drink! If you don’t have pumpkin puree, try these alternatives: - Sweet Potato Puree: This gives a similar flavor and texture. - Butternut Squash Puree: It has a sweet taste and works well. - Applesauce: While not the same, it can add sweetness and moisture. These options keep your drink tasty and fun! Many coffee shops offer drinks similar to pumpkin spice cold foam floats. Here are some popular spots: - Starbucks: They often have seasonal pumpkin drinks. - Dunkin’ Donuts: Known for their pumpkin coffee options. - Local Coffee Shops: Check out neighborhood cafes that specialize in seasonal flavors. You can explore these places for your fall treat! This blog post detailed how to make a delicious Pumpkin Spice Cold Foam Float. We covered key ingredients, step-by-step instructions, and tips for perfecting your drink. You learned about flavor variations, perfect serving suggestions, and even storage tips. Overall, making this drink at home can be fun and rewarding. Try different flavors and enjoy your creation. With practice, you'll impress friends and family with your tasty skills.

Pumpkin Spice Cold Foam Floats Delightful and Easy Recipe

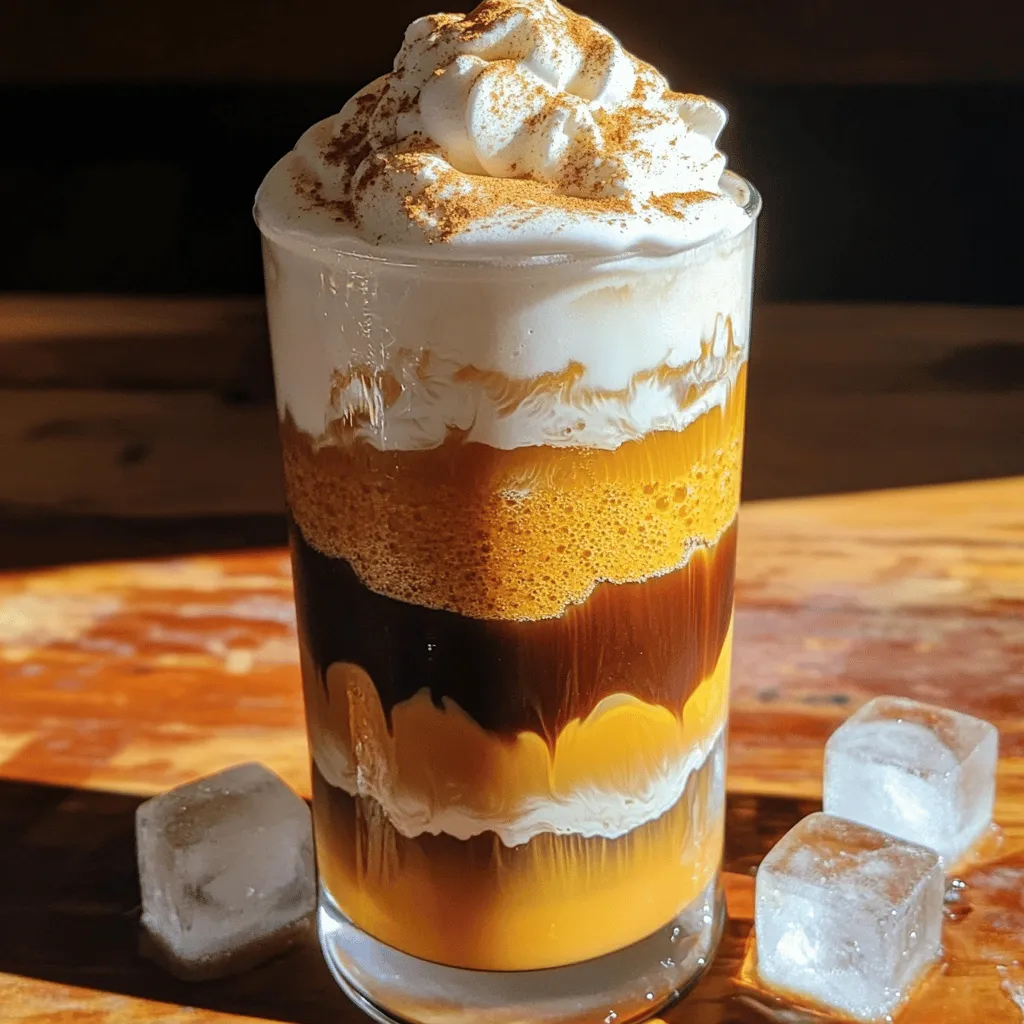
Looking for a fun fall treat that’s easy to make at home? Pumpkin Spice Cold Foam Floats are your answer!

When I create Cider Braised Short Rib Street Tacos, I gather a mix of tasty ingredients that work together. Each item adds flavor and depth to the dish. Here’s what you need: - 2 lbs beef short ribs - 2 cups apple cider - 1 large onion, chopped - 4 cloves garlic, minced - 2 teaspoons smoked paprika - 1 teaspoon ground cumin - 1 teaspoon chili powder - 2 tablespoons olive oil - Salt and pepper to taste - 12 small corn tortillas - Fresh cilantro, chopped (for garnish) - 1 cup diced apples (for topping) - 1/2 cup crumbled queso fresco (for topping) - Lime wedges (for serving) Each ingredient is key to making these tacos burst with flavor. The apple cider gives the short ribs a sweet and tangy kick. The spices create a warm, smoky taste that complements the beef. The fresh toppings add crunch and brightness, making every bite exciting. Make sure to use good-quality ingredients. Fresh herbs and ripe apples elevate your dish and make it truly special. For the full recipe, check out how to put these ingredients together for a delicious meal. - Prepare the short ribs: Start by seasoning the short ribs with salt and pepper. Heat olive oil in a large pot over medium-high heat. Add the short ribs, searing them on all sides for about 3 to 4 minutes. This step locks in flavor and gives a nice crust. Once browned, remove them from the pot. - Sauté aromatics: In the same pot, add chopped onion and minced garlic. Sauté them until the onion turns translucent, which takes about 5 minutes. This creates a base full of taste for your dish. - Add spices: Stir in smoked paprika, ground cumin, and chili powder. Cooking the spices for a minute brings out their full flavor. You want those spices to coat the onions and garlic well. - Deglaze with cider: Pour in the apple cider, scraping the bottom of the pot to release all the tasty brown bits. This step adds depth to your sauce. Bring the mixture to a gentle simmer. - Braise the short ribs: Return the short ribs to the pot, ensuring they are fully submerged in the cider mix. Cover the pot, reduce the heat to low, and let it braise for 2.5 to 3 hours. This slow cooking makes the meat tender and easy to pull apart. - Shred the meat: Once the short ribs are done, take them out of the pot. Let them cool slightly, then shred the meat using two forks. Discard any large pieces of fat to keep the tacos light. - Warm the tortillas: While the meat cools, warm corn tortillas in a dry skillet over medium heat. Heat them for about 30 seconds on each side. Warm tortillas make a big difference in taste and texture. - Assemble the tacos: On each warm tortilla, place a generous portion of shredded short rib. Top with diced apples, crumbled queso fresco, and chopped cilantro for a fresh touch. - Serve: Serve the tacos warm with lime wedges on the side. Squeeze lime over the filling for a bright flavor boost. Enjoy your Cider Braised Short Rib Street Tacos! For the complete cooking process, you can check the Full Recipe. How do I achieve the best sear on short ribs? To get a great sear, heat olive oil in a heavy pot. Make sure the oil is hot before adding the short ribs. Sear them for about 3-4 minutes on each side. This helps lock in flavors and gives a nice crust. Why is it important to let meat rest before shredding? Letting the meat rest is key. This allows the juices to settle. If you shred right away, the juices run out, making the meat dry. Rest for about 10 minutes after cooking, then shred with forks. What are the best toppings to enhance flavor? Top your tacos with diced apples for sweetness. Crumbled queso fresco adds creaminess and salt. Fresh cilantro brightens the dish and adds color. Squeeze lime juice on top for a zesty kick. What sides pair well with these tacos? Serve with a light salad for crunch. A side of Mexican street corn adds sweetness and spice. Chips with salsa are always a hit. These sides balance the rich flavors of the tacos. How do I store leftover tacos? Store leftover tacos in an airtight container in the fridge. Keep the meat separate from the tortillas to avoid sogginess. They stay fresh for about 3 days. What are the reheating instructions for optimal taste? To reheat, warm the meat in a pot over low heat. Heat tortillas in a skillet for a few seconds on each side. This keeps them soft and pliable. Enjoy your tacos just like fresh! For the full recipe, visit [Cider Braised Short Rib Street Tacos](#). {{image_2}} You can swap out the short ribs for other meats. Try pork shoulder or chicken thighs. Both options add their own twist to the dish. If you want to keep it plant-based, use jackfruit or mushrooms. They soak up flavor well and taste great. When it comes to tortillas, corn is the classic choice. But you can also use flour tortillas for a softer bite. Consider lettuce wraps for a low-carb option. They bring a fresh crunch to your tacos. Adding spices can really boost flavor. Try smoked chipotle for heat, or cinnamon for warmth. A pinch of cayenne can add a kick. Don't be afraid to experiment with what you have on hand. Toppings can change your taco game completely. Fresh avocado adds creaminess, while mango salsa gives sweetness. You can also try pickled onions for tang. Each topping adds its special flair. For gluten-free tacos, use corn tortillas. They are naturally gluten-free and perfect for all diets. Just check the label to be sure. If you want to keep it dairy-free, skip the queso fresco. Instead, use avocado or a dairy-free cheese. You can also top with fresh herbs for flavor. Both options keep your tacos tasty and satisfying. For the full recipe, check the detailed cooking process. It will guide you through each step to create these delicious tacos. How long do Cider Braised Short Rib Street Tacos last in the fridge? These tacos stay fresh for about 3 days in the fridge. Store them in an airtight container. Can I make the short ribs ahead of time? Yes, you can make the short ribs a day ahead. Just reheat gently before serving. What type of cider is best for cooking? I recommend using a dry apple cider. It adds great depth without being too sweet. Can I use a slow cooker for this recipe? Absolutely! A slow cooker works well. Cook on low for 6 to 8 hours for tender meat. What's the benefit of braising over other cooking methods? Braising locks in flavor and moisture. It makes tougher cuts tender and juicy, perfect for tacos. What are the best sides to pair with these tacos? You can serve these tacos with Mexican rice and black beans. A fresh salad also works well. How many tacos per person should I plan for? Plan for 2 to 3 tacos per person. It ensures everyone has enough to enjoy! Cider Braised Short Rib Street Tacos pack a big flavor punch. This dish combines tender beef short ribs with sweet apple cider. Ingredients: - 2 lbs beef short ribs - 2 cups apple cider - 1 large onion, chopped - 4 cloves garlic, minced - 2 teaspoons smoked paprika - 1 teaspoon ground cumin - 1 teaspoon chili powder - 2 tablespoons olive oil - Salt and pepper to taste - 12 small corn tortillas - Fresh cilantro, chopped (for garnish) - 1 cup diced apples (for topping) - 1/2 cup crumbled queso fresco (for topping) - Lime wedges (for serving) Cooking Process: 1. Start by seasoning the short ribs with salt and pepper. 2. Sear them in olive oil until brown. 3. Sauté onion and garlic in the same pot. 4. Stir in spices and apple cider to deglaze. 5. Add short ribs back and braise for 2.5 to 3 hours. 6. Shred the meat and warm the tortillas. 7. Assemble tacos with your favorite toppings. Prep Time: 15 minutes Total Time: 3 hours 15 minutes Servings: 12 tacos For a detailed cooking process and tips, check the Full Recipe. This blog post shared a tasty recipe for Cider Braised Short Rib Street Tacos. We covered ingredients, step-by-step cooking, tips, variations, and common questions. Enjoying these tacos will impress any guest. You can change ingredients for your taste or dietary needs. Store leftovers well and reheat for later. Cooking these tacos is fun and easy; they are worth the effort. Try making them today for a flavorful meal!

Cider Braised Short Rib Street Tacos Flavor Explosion

Are you ready for a flavor explosion? Cider Braised Short Rib Street Tacos bring together tender, juicy beef short ribs

Older posts
Newer posts
← Previous Page1 … Page11 Page12 Page13 … Page80 Next →

dsad

© 2025 My Saved Recipe • Built with GeneratePress

Our Policies

  • Copyright Policy
  • Cookie Policy
  • GDPR Policy
  • Privacy Policy
  • Disclaimer
  • Terms Of Use

More Information

  • Home
  • About
  • Contact
  • Appetizers
  • Dessert
  • Dinner
  • Drinks
©2025, My Saved Recipe About Back To Top