Skip to content
DisclaimerTerms Of UseGDPR PolicyCookie Policy

My Saved Recipe

  • Home
  • Drinks
  • Appetizers
  • Dinner
  • Dessert
  • About
  • Contact
  • Privacy Policy
DisclaimerTerms Of UseGDPR PolicyCookie Policy

Savannah

- 2 cups all-purpose flour - 3/4 cup granulated sugar - 1 tablespoon baking powder - 1/2 teaspoon salt - 2 large eggs - 1/2 cup whole milk To make the perfect cream soda donut holes, begin with essential ingredients. All-purpose flour forms the base. Granulated sugar adds sweetness. Baking powder helps them rise. A pinch of salt enhances flavor. You will need two large eggs for binding. Whole milk keeps the batter moist. - 1 cup cream soda - 1/2 cup unsalted butter, melted - 1 teaspoon vanilla extract - 1 cup powdered sugar (for coating) - Optional: Sprinkles for decoration Next, we add flavor enhancers. Cream soda gives a unique twist. Unsalted butter adds richness. Vanilla extract brings warmth. After baking, coat the donut holes in powdered sugar. You can add sprinkles if you like a pop of color. These ingredients combine to create a joyful treat. For the full recipe, follow the steps to bake your delicious cream soda donut holes! 1. Preheat the oven: Set your oven to 350°F (175°C). This ensures even baking. 2. Grease the muffin or donut hole pan: Use cooking spray or butter to coat the pan. This helps the donut holes pop out easily after baking. 1. Combine dry ingredients: In a large bowl, whisk together 2 cups of all-purpose flour, 3/4 cup of granulated sugar, 1 tablespoon of baking powder, and 1/2 teaspoon of salt. Make sure they blend well. 2. Mix wet ingredients until smooth: In another bowl, mix 2 large eggs, 1/2 cup of whole milk, 1 cup of cream soda, 1/2 cup of melted unsalted butter, and 1 teaspoon of vanilla extract. Stir until the mixture is smooth and creamy. 1. Fill the pan and bake: Pour the wet ingredients into the dry ingredients. Stir gently until just combined. Spoon the batter into the prepared pan, filling each cavity about 2/3 full. Bake for 12-15 minutes. When done, the tops should be golden brown. 2. Cooling and coating the donut holes: Let the donut holes cool in the pan for about 5 minutes. Then, transfer them to a wire rack. While they are warm, roll them in 1 cup of powdered sugar until fully coated. For fun, you can add sprinkles on top. Enjoy your Cream Soda Donut Holes! For the full recipe, refer to the recipe details above. To make the best cream soda donut holes, avoid over-mixing the batter. Over-mixing can lead to tough donut holes. Mix just until you see no dry flour. It’s okay if some lumps remain. This keeps your donut holes soft and light. Next, check for doneness with a toothpick. Insert the toothpick into the center of a donut hole. If it comes out clean, your donut holes are ready. If there is wet batter on the toothpick, bake them a few more minutes. These donut holes are best served warm. The warmth enhances their flavor and texture. You can also let them cool to room temperature if needed. Pair your donut holes with drinks like milk or coffee. They are also great with a glass of cream soda. This adds a fun twist to your dessert experience. If your donut holes turn out dense, try mixing less next time. Also, check your baking powder for freshness. Old baking powder may not rise well. To ensure even baking, fill each cavity in your pan with the same amount of batter. This helps them cook at the same rate and stay uniform. If some are larger, they may bake longer than others. For the full recipe, check the earlier section. Enjoy making these delightful treats! {{image_2}} You can switch up the soda flavor for fun. Try root beer or orange soda. Each brings a unique taste to the donut holes. Adding spices like cinnamon can also enhance the flavor. A teaspoon of cinnamon gives a warm touch. Nutmeg or ginger can add depth too. Experiment with what you like best! If you need gluten-free donut holes, use gluten-free flour blends. They work well in this recipe. For a vegan version, swap eggs with applesauce or flaxseed meal. Use non-dairy milk and vegan butter in place of dairy. These changes keep the taste great while fitting your diet. You can try different coatings beyond powdered sugar. Consider rolling in crushed nuts or coconut. For a twist, fill the donut holes with jam or cream. Chocolate ganache or whipped frosting can also work well. Get creative and make these treats truly yours! For the full recipe, check out the details above. To keep your cream soda donut holes fresh, store them at room temperature. Place them in an airtight container. This will help keep them soft and tasty. If you live in a hot area, refrigerate them to avoid spoilage. Just remember to let them come back to room temperature before serving. Freezing is a great way to save your donut holes. To freeze them, let the donut holes cool completely. Then, place them in a single layer on a baking sheet. Once they are frozen, transfer them to a freezer bag. This prevents them from sticking together. To reheat, simply pop them in the microwave for about 15-20 seconds. You can also warm them in the oven at 350°F (175°C) for about 5-7 minutes. At room temperature, cream soda donut holes last about 2-3 days. If stored in the fridge, they can last up to a week. Look for signs of spoilage, such as a dry texture or unusual smells. If they feel hard or look different, it’s best to toss them. Enjoy your sweet treats while they are fresh! You’ll find the full recipe for these delightful donut holes [here](link). To make cream soda donut holes from scratch, follow these steps: 1. Preheat the Oven: Set your oven to 350°F (175°C). 2. Grease the Pan: Use cooking spray on a mini muffin tin or donut hole pan. 3. Mix Dry Ingredients: In a bowl, whisk together the flour, sugar, baking powder, and salt. 4. Prepare Wet Ingredients: In another bowl, mix the eggs, milk, cream soda, melted butter, and vanilla until smooth. 5. Combine: Pour the wet mix into the dry mix. Stir gently, but don’t over-mix. 6. Fill the Pan: Spoon the batter into the prepared pan, filling each spot about two-thirds full. 7. Bake: Bake for 12-15 minutes until golden. A toothpick should come out clean. 8. Cool and Coat: Let them cool for five minutes. Roll the warm donut holes in powdered sugar. Add sprinkles if you like. This recipe makes about 24 donut holes. These bites are sweet, fluffy, and bursting with cream soda flavor. You can find cream soda donut holes at local bakeries or specialty shops. Some grocery stores may carry them in their bakery section. If you prefer online shopping, try platforms like Amazon or local delivery services. You can also check websites that specialize in gourmet treats. Yes, you can prepare these donut holes ahead of time. You can bake them a day before your event. Store them in an airtight container at room temperature. For longer storage, freeze them. To freeze, place them in a single layer on a baking sheet. Once frozen, transfer them to a zip-top bag. When ready to enjoy, thaw them at room temperature. You can reheat them in the oven for a few minutes to restore their warmth and texture. In this blog post, we covered how to make delicious cream soda donut holes. We discussed essential ingredients and key flavor enhancers that give them a unique taste. I shared step-by-step instructions, tips for perfect results, and variations for different diets and flavors. Remember, you can always store these treats for later or even freeze them. With these easy methods, you can enjoy baking fun treats. Don’t be afraid to get creative and try new variations. Your donut holes will delight friends and family!

Cream Soda Donut Holes Delightful Dessert Recipe

Are you ready to enjoy a fun twist on a classic treat? Cream Soda Donut Holes are sweet, fluffy, and

- 1 cup unsalted butter, softened - 3/4 cup brown sugar, packed - 1/4 cup granulated sugar - 2 teaspoons vanilla extract - 2 cups all-purpose flour - 1/2 teaspoon salt - 1 can (14 oz) sweetened condensed milk - 1 cup mini chocolate chips - 1/2 cup chopped nuts (optional) - 1 cup dark chocolate chips (for topping) When making cookie dough bars, start with the right ingredients. Each one plays a key role in taste and texture. The unsalted butter gives a rich base. Brown sugar adds a nice caramel flavor, while granulated sugar adds sweetness. The vanilla extract brings warmth to the overall mix. All-purpose flour makes the bars soft and chewy. Salt balances the sweetness and enhances flavors. Sweetened condensed milk adds creaminess and helps the bars hold together. Mini chocolate chips add bursts of chocolate in every bite. If you like, toss in chopped nuts for crunch. Finally, melting dark chocolate on top creates a perfect finish. - Vegan substitutes - Gluten-free flour options - Alternative sweeteners Feel free to customize your cookie dough bars! If you want a vegan version, swap out the butter for a plant-based option. Use flaxseed meal mixed with water instead of sweetened condensed milk. For gluten-free bars, you can try almond or coconut flour. If you want less sugar, use stevia or monk fruit as alternatives. Each choice allows you to create your own twist! For the full recipe, check out the Cookie Dough Bliss Bars . Enjoy the fun of baking! 1. Creaming the butter and sugars Start with a large bowl. Add 1 cup of softened butter, 3/4 cup of brown sugar, and 1/4 cup of granulated sugar. Mix them together until the mixture is light and fluffy. This step is key for a smooth texture. 2. Adding in the wet ingredients Next, stir in 2 teaspoons of vanilla extract. Make sure it blends well with the butter and sugar mix. This adds a lovely flavor to your bars. 3. Incorporating dry ingredients Gradually add 2 cups of all-purpose flour and 1/2 teaspoon of salt. Mix until just combined. Avoid overmixing; this keeps your bars soft and chewy. Then, slowly pour in 1 can of sweetened condensed milk. Mix until the dough is smooth and creamy. Finally, fold in 1 cup of mini chocolate chips and 1/2 cup of chopped nuts if you choose. 1. Preparing the baking dish Line a 9x9 inch baking dish with parchment paper. Leave some overhang on the sides. This makes it easy to lift out the bars later. 2. Pressing the dough Take the cookie dough mixture and press it evenly into the lined dish. Use a spatula to smooth out the top. Make sure it’s packed well for even baking. 3. Melting and layering the chocolate In a microwave-safe bowl, melt 1 cup of dark chocolate chips. Heat it in 30-second intervals, stirring in between. Once smooth, pour the melted chocolate over the pressed cookie dough. Spread it evenly with a spatula for a nice finish. 1. Refrigeration time Place the baking dish in the fridge for at least 2 hours. This helps the bars set and firm up nicely. 2. Cutting and displaying the bars Once the bars are firm, lift them out of the dish using the parchment paper. Cut them into squares. You can stack and display them on a pretty platter. If you want, dust with powdered sugar for an added touch. These cookie dough bars are a delightful treat that everyone will love. For the full recipe, refer back to the earlier section. To get the right texture in your cookie dough bars, you can aim for either chewy or crunchy. For chewy bars, cream the butter and sugars well. This adds air and creates a soft bite. Use all-purpose flour, which keeps it tender. For a crunchier bar, bake a little longer, and let it cool fully. You can also try baking them in a larger pan, which spreads the dough thinner. If you want a softer texture, try chilling the dough before pressing it into the pan. One common mistake is overmixing the dough. Mixing too much can make the bars tough. Mix just until you see no dry flour. Another issue is incorrect refrigeration time. If you don't chill them long enough, they won’t set properly. Always wait at least two hours. This helps the bars firm up nicely for cutting. When serving, stack the bars on a nice platter. This makes them look fancy and fun. You can dust them with powdered sugar for a sweet touch. If you want to add some flair, drizzle melted chocolate on top before serving. You can also add a scoop of ice cream on the side for a treat. These small changes can make your cookie dough bars even more special. {{image_2}} When it comes to cookie dough bars, you can get creative! Here are some fun variations to try. Vegan Cookie Dough Bars Make these bars vegan by swapping out some ingredients. Use vegan butter instead of regular butter. Replace sweetened condensed milk with coconut cream or a nut-based milk. You can also use flaxseed meal as an egg replacer. This keeps the bars just as tasty. Gluten-Free Cookie Dough Bars For gluten-free bars, use a gluten-free flour blend. Many blends work well, and you can find them easily at stores. Just make sure to check the labels to avoid any gluten traces. Your bars will still be delicious! Different kinds of chocolate Chocolate is key to these bars! You can switch from mini chocolate chips to white chocolate or milk chocolate. You can even mix flavors, like dark and milk chocolate. This adds a nice twist! Adding flavor extracts (like almond) You can also play with flavor extracts. Try adding almond or mint extract for a new taste. Just remember to start with a small amount, like half a teaspoon. You can always add more if you want a stronger flavor. Pairing with ice cream What goes great with cookie dough bars? Ice cream! Serve a bar with a scoop of your favorite flavor. This will make a yummy dessert. You can even drizzle chocolate sauce on top for extra sweetness. Making cookie dough bar sandwiches Try making cookie dough bar sandwiches! Take two bars and put a scoop of ice cream in the middle. Press them together gently. This fun treat is perfect for parties or a fun family night! These variations and serving ideas will keep your cookie dough bars exciting and delicious. Don't forget to check the Full Recipe for the base of these delightful treats! To keep your cookie dough bars fresh, you need proper refrigeration. Once you cut the bars, place them in an airtight container. This helps seal in moisture and flavor. If you don’t have one, use a plastic wrap. Wrap each bar separately for best results. If you want to save some for later, freezing is a great option. Cut the bars into squares and wrap them tightly in plastic wrap. Then, place them in a freezer-safe bag. Use a label to mark the date. To thaw, take them out and let them sit in the fridge overnight. You can also thaw at room temperature for a few hours. In the fridge, these cookie dough bars last about one week. Keep an eye out for signs of spoilage. If you see any mold or an off smell, it’s best to toss them. Enjoy your sweet treat fresh for the best taste! You can easily make cookie dough bars without eggs. Just skip the eggs and use sweetened condensed milk instead. This milk adds sweetness and moisture. You get a rich and creamy texture without any eggs. It's perfect for those who avoid eggs in their diet. Yes, you can use whole wheat flour. It adds a nutty flavor and more fiber. The bars might be a bit denser, but they will still taste great. Just make sure to adjust the moisture if needed, as whole wheat flour absorbs more liquid. Store leftover cookie dough bars in an airtight container. Place parchment paper between layers to prevent sticking. Keep them in the fridge for up to a week. For longer storage, freeze them. Wrap each bar in plastic wrap and then place them in a freezer bag. Yes, some brands offer ready-made cookie dough bars. Look for them in your local grocery store. Brands like Ben & Jerry's and Nestle often have delicious options. Check the frozen section for convenience. The nutritional facts can vary based on ingredients. On average, each cookie dough bar has about 150-200 calories. They contain around 8-10 grams of fat and 15-20 grams of sugar. For exact numbers, check the ingredient labels or use a nutrition calculator with the Full Recipe. In this blog post, we explored how to make delicious cookie dough bars. You learned about the key ingredients, step-by-step instructions, and helpful tips for great texture. We covered variations, including vegan and gluten-free options, along with storage advice. Now you can create these tasty treats and impress your family or friends. Don’t hesitate to experiment with flavors. Enjoy your baking adventure!

Cookie Dough Bars Delightful Recipe for a Sweet Treat

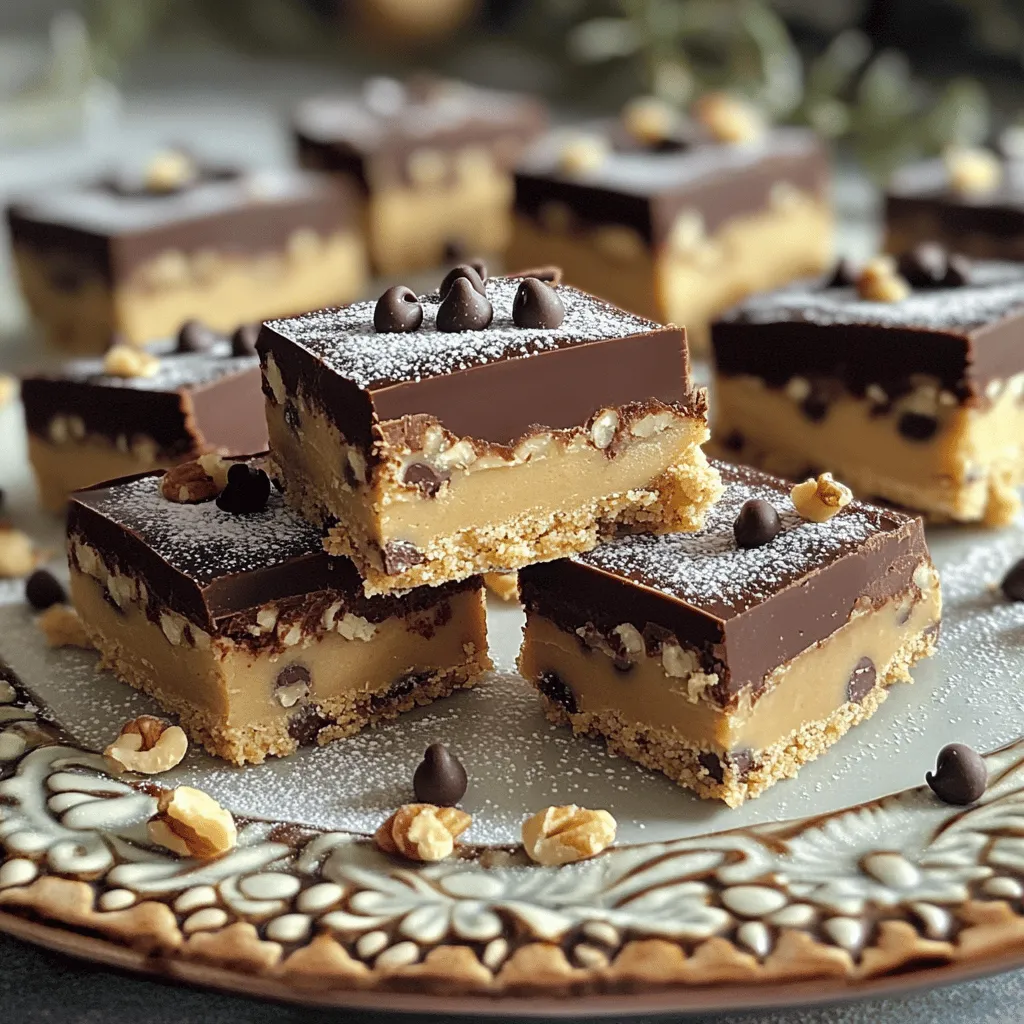
If you’ve ever craved the rich, sweet goodness of cookie dough, then you’re in for a treat! My recipe for

- 4 salmon fillets (6 oz each) - 1/4 cup red miso paste - 1/4 cup fresh cherries, pitted and pureed (or cherry preserves) - 2 tablespoons honey - 1 tablespoon soy sauce - 1 teaspoon sesame oil - 1 tablespoon fresh ginger, grated - 1 tablespoon green onions, finely chopped (for garnish) - Sesame seeds (for garnish) - Salt and pepper to taste - Lemon wedges (for serving) To create the best Miso Cherry Glazed Grilled Salmon, gather these fresh ingredients. The salmon fillets should be firm and bright. Red miso paste gives a deep flavor that pairs well with cherries. You can use fresh cherries or cherry preserves for a sweet touch. Honey adds sweetness, while soy sauce brings umami. Sesame oil gives a nutty taste, and ginger adds warmth. You can garnish with green onions and sesame seeds for a lovely finish. Lemon wedges add a bright touch when serving. This recipe is simple yet packed with flavor. For the full recipe, check out the detailed cooking instructions above. To make the miso cherry glaze, start with a medium bowl. Add the red miso paste, cherry puree or preserves, honey, soy sauce, sesame oil, and grated ginger. Whisk these ingredients together until they form a smooth mixture. Aim for a consistency that’s thick but pourable. If it seems too thick, add a teaspoon of water to loosen it up. This glaze brings a sweet and savory punch to the salmon. Next, take your salmon fillets and place them in a shallow dish. Season each fillet with salt and pepper. Pour most of the miso cherry glaze over the salmon. Make sure each piece is well-coated. Cover the dish and place it in the fridge. It’s best to marinate the salmon for at least 30 minutes. For even better flavor, try to let it sit for 1 to 2 hours. This step allows the flavors to soak into the fish. Now, it's time to grill! Preheat your grill to medium-high heat. If you use a grill pan, lightly oil it to prevent sticking. Once the grill is hot, take the salmon out of the marinade. Let the excess glaze drip off. Place the fillets on the grill skin-side down. Grill for about 5 to 6 minutes without moving them. Then, gently flip the salmon and grill for another 4 to 5 minutes. You know it’s done when the fish flakes easily with a fork. For a nice touch, brush some of the reserved glaze on top during the last minute of cooking. This method gives you juicy, flavorful salmon with a beautiful glaze. Enjoy the process and the delicious results! For full details, check out the Full Recipe. To grill salmon perfectly, keep the grill at medium-high heat. This heat cooks the fish evenly. I suggest aiming for around 375°F to 400°F. This range helps create a nice sear while keeping the inside moist. To avoid sticking, oil the grill grates. You can use a paper towel dipped in oil and rub it on the grates. If you’re using a grill pan, lightly oil it too. This simple step helps the salmon slide off easily. To boost flavor, think about adding citrus zest to the glaze. Lemon or lime zest can brighten the taste. You can also mix in a splash of rice vinegar for a tangy kick. If you want to customize the glaze, consider adding minced garlic for depth or even a pinch of chili flakes for heat. These add-ins can elevate the dish and make it unique. For an attractive plate, use a clean white dish to make the colors pop. Place the salmon in the center, and drizzle the reserved glaze over it. For garnishing, sprinkle finely chopped green onions and sesame seeds on top. This adds color and crunch. You can also serve lemon wedges on the side for a fresh touch. Remember, the visual appeal of the dish is just as important as the taste! {{image_2}} If you can't find red miso paste, try white miso. It has a milder taste but still offers umami flavor. For cherries, you can use frozen cherries or even apricot preserves for a sweet twist. If you follow a vegan diet, swap honey with maple syrup. This can give you a similar sweetness without the animal product. Grilling is fantastic, but not the only option. You can bake the salmon at 375°F for about 15-20 minutes. Just place the salmon on a lined baking sheet and brush it with the glaze. Broiling is another choice. It cooks faster, so watch it closely—around 7-10 minutes should do the trick. If you prefer pan-searing, heat some oil in a skillet and cook the salmon for about 5 minutes on each side. Adjust the glaze amount based on your cooking method. There are many ways to mix up the glaze. Try using peaches or mango for a fruity twist. You can also add spices like chili flakes for some heat. For a regional flair, incorporate miso with local fruits like persimmons or pomegranates. Each option adds a unique taste to your dish. For the full recipe, check out the complete guide! To keep your grilled salmon fresh, use airtight containers. Glass or plastic containers work well. Allow the salmon to cool before placing it in the container. Store it in the refrigerator for up to three days. If you want to keep it longer, freeze the salmon. In the freezer, it will last for about three months. Make sure to wrap it tightly in plastic wrap or foil before placing it in a freezer bag. When reheating grilled salmon, low and slow is the best way. Preheat your oven to 275°F (135°C). Place the salmon on a baking sheet and cover it with foil. Heat for about 15 minutes, or until warm. This keeps the salmon moist and tasty. You can also use a microwave, but be careful. Microwave it on a low setting for short bursts. This method may dry out the fish if you are not careful. Enjoy your flavorful salmon just like it was fresh from the grill! For the complete recipe, check the Full Recipe. To check if salmon is cooked, look for a few signs. The flesh should turn from a bright pink to a pale pink color. You can also use a fork to see if it flakes easily. This means it is done. Another way is to use a meat thermometer. Insert it into the thickest part of the salmon. The internal temperature should reach 145°F. If you prefer, you can also press the salmon gently with a spatula. If it feels firm and springs back, it is cooked just right. Yes, you can use frozen salmon for this recipe. Just remember to thaw it first. The best way to thaw salmon is in the fridge overnight. If you're in a hurry, you can place it in a sealed bag and submerge it in cold water for about an hour. Keep in mind that frozen salmon may have a slightly different texture. However, it can still taste amazing when grilled with the miso cherry glaze. To boost the miso flavor in your dish, try adding more miso paste to the glaze. Start with a small amount and taste as you go. This way, you can find the right balance. You can also add a splash of rice vinegar for some tang. It complements the sweetness of the cherries. Another great addition is a dash of chili paste for a spicy kick. To complement the cherry glaze, think about adding sesame seeds or crushed nuts. They add a nice crunch and flavor contrast. You can also serve the salmon with a side of steamed vegetables. This will round out the meal and enhance the overall taste. For the complete recipe, check the Full Recipe above. In this post, we explored the key ingredients and steps to make grilled salmon with a miso cherry glaze. You learned how to mix the glaze, marinate the salmon, and grill it to perfection. I shared tips for enhancing flavor, along with creative variations and storage advice. Remember to experiment with ingredients and cooking methods to find your favorite style. Enjoy making this dish and impressing your friends and family with your newfound skills! Grilled salmon will always be a tasty and healthy option for your meals.

Miso Cherry Glazed Grilled Salmon Flavorful Delight

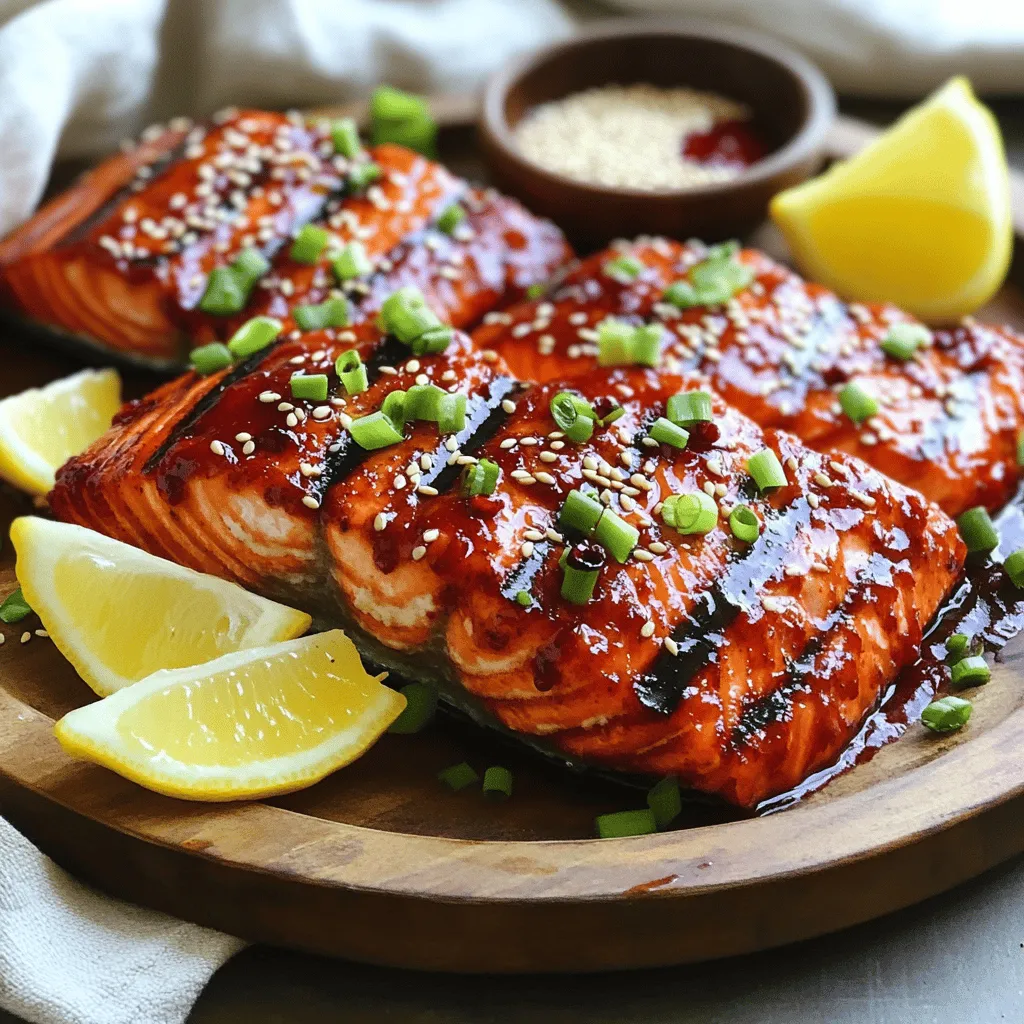
Craving a unique twist on grilled salmon? Look no further! My Miso Cherry Glazed Grilled Salmon combines savory miso with

To make Caprese stuffed peppers, gather these key ingredients: - 4 large bell peppers (any color) - 1 cup cherry tomatoes, halved - 1 cup fresh mozzarella balls (bocconcini), drained - 1/2 cup fresh basil, chopped - 2 tablespoons balsamic vinegar - 2 tablespoons olive oil - Salt and pepper to taste - 1/4 cup pine nuts, toasted (for added crunch) - Optional: 1 teaspoon dried oregano These ingredients work together to create a tasty and colorful dish. The bell peppers add sweetness, while the mozzarella gives creaminess. The tomatoes and basil bring freshness and brightness, making each bite delightful. Feel free to switch out some ingredients if you need to. Here are some options: - Use zucchini or eggplant instead of bell peppers for a different base. - Swap cherry tomatoes for regular tomatoes if that’s what you have. - Replace fresh mozzarella with shredded mozzarella or feta cheese for a twist. - If you don't have fresh basil, dried basil can work in a pinch. Just use less. These swaps can help you use what you have at home without losing much flavor. You will need a few tools to make this recipe easy: - Baking dish for the peppers - Mixing bowl for the filling - Sharp knife to cut the peppers - Spoon for stuffing the peppers - Aluminum foil to cover the dish while baking Having the right tools makes cooking smoother and more fun! If you want to see the full recipe, just check the Full Recipe section above. Start by preheating your oven to 375°F (190°C). This step is key for cooking the peppers evenly. While the oven warms up, grab your large bell peppers. Cut off the tops and remove the seeds and membranes. Make sure each pepper stands upright in a baking dish. This helps the filling stay inside while baking. In a large bowl, combine the halved cherry tomatoes and fresh mozzarella balls. Add the chopped basil, balsamic vinegar, and olive oil. Sprinkle in salt and pepper according to your taste. If you want more flavor, toss in some dried oregano. Mix everything well until it’s all combined. This filling brings the Caprese vibe to your dish. Now it’s time to stuff the peppers. Spoon the Caprese filling into each hollowed-out pepper. Fill them generously but avoid overstuffing. Cover the baking dish with aluminum foil. Place it in the preheated oven and bake for 25 minutes. After that, remove the foil and sprinkle the toasted pine nuts on top. Bake for an extra 10 minutes uncovered. The peppers should be tender, slightly charred, and the cheese melted. Enjoy your delicious Caprese stuffed peppers warm! For the full recipe, check the ingredients section. To make your Caprese stuffed peppers shine, focus on fresh ingredients. Use ripe cherry tomatoes for sweetness. Fresh mozzarella adds creaminess, while basil gives a nice herbal note. Drizzle with high-quality balsamic vinegar to enhance the flavors. If you want a savory kick, add a sprinkle of salt and pepper. This keeps the taste bright and balanced. You can also include dried oregano for extra depth. Mix everything well before stuffing the peppers to ensure even flavor in each bite. Garnishes enhance the look and taste of your dish. After baking, try adding a sprinkle of fresh basil on top. This adds color and a burst of flavor. A drizzle of balsamic glaze also works wonders. It gives a sweet touch and a glossy finish. For added crunch, top with extra pine nuts. These small touches make your meal feel gourmet and special. You can even place a small basil leaf on each pepper for a lovely presentation. Cooking times may vary based on your oven and pepper size. If your peppers are larger, you may need to bake them a bit longer. Check for tenderness by piercing them with a fork. If they’re still firm, add 5–10 more minutes. Always cover with foil for the first part of baking. This helps steam the peppers and keep them moist. When you uncover them, the tips will char nicely, giving a great texture and flavor contrast. Adjusting these times makes sure you get perfectly cooked peppers every time. {{image_2}} You can make Caprese stuffed peppers vegetarian by using fresh ingredients. Replace mozzarella with avocado or a nut-based cheese. This keeps the dish creamy and rich. For a vegan version, swap balsamic vinegar for a splash of lemon juice. This adds brightness and flavor without dairy. You can also add quinoa or lentils for more protein and texture. Caprese stuffed peppers are naturally gluten-free. Use fresh vegetables and cheeses to keep it safe for gluten-sensitive eaters. If you want more texture, consider using rice or quinoa as a filling. These options provide a hearty base that complements the peppers well. While fresh mozzarella is classic, feel free to experiment with other cheeses. Feta cheese adds a salty kick, while goat cheese gives a creamy touch. For a sharper flavor, try aged cheddar or gouda. If you want a dairy-free option, look for plant-based cheeses made from nuts or soy. Each cheese brings a unique taste that can change the dish completely. You can find the full recipe for Caprese stuffed peppers in other sections. To store leftovers, let the peppers cool to room temperature. Place them in an airtight container. You can keep them in the fridge for up to three days. Make sure to label your container with the date. This helps you track how long they have been stored. When it’s time to enjoy the peppers again, preheat your oven to 350°F (175°C). Place the stuffed peppers in a baking dish and cover with foil. Heat for about 15 minutes or until warm. If you want a crispy top, remove the foil for the last 5 minutes of heating. You can also microwave them, but the oven keeps the texture better. You can freeze Caprese stuffed peppers for longer storage. Wrap each pepper tightly in plastic wrap or foil. Place them in a freezer-safe bag or container. They can last up to three months in the freezer. When ready to eat, thaw them in the fridge overnight. Then reheat as mentioned above. Enjoy your easy, tasty meal anytime! You can find the full recipe above for more details. You can serve many tasty sides with Caprese stuffed peppers. A fresh green salad works well. You might try a simple arugula salad with lemon dressing. Garlic bread is another great choice for soaking up flavors. Roasted vegetables complement the dish nicely too. If you want something heartier, serve it with quinoa or rice. This adds a filling element to your meal. For a fun twist, pair it with pasta tossed in olive oil. Yes, you can prepare Caprese stuffed peppers ahead of time. Stuff the peppers and keep them covered in the fridge. This makes meal prep easy. You can prepare them up to a day in advance. When you’re ready to bake, just follow the cooking steps. This option saves time and makes dinner planning simple. If you choose to freeze, wrap them well, and bake from frozen when ready. To avoid crunchy peppers, cook them longer. Bake them for the recommended time, then check for doneness. If they need more time, keep them in the oven. Another tip is to blanch the peppers before stuffing. This means boiling them briefly, then cooling them fast. It softens the peppers and helps them cook evenly. Following these steps will give you perfectly tender stuffed peppers. In this blog post, we explored how to make Caprese Stuffed Peppers from start to finish. We covered the ingredients you need, tips for flavor, and smart storage options. You learned how to prep the peppers, make the filling, and bake them just right. Remember, you can mix things up with variations for diets or preferences. Now, it’s time to get cooking and enjoy these tasty peppers. Your kitchen is ready for a delicious meal that everyone will love!

Caprese Stuffed Peppers Flavorful and Easy Recipe

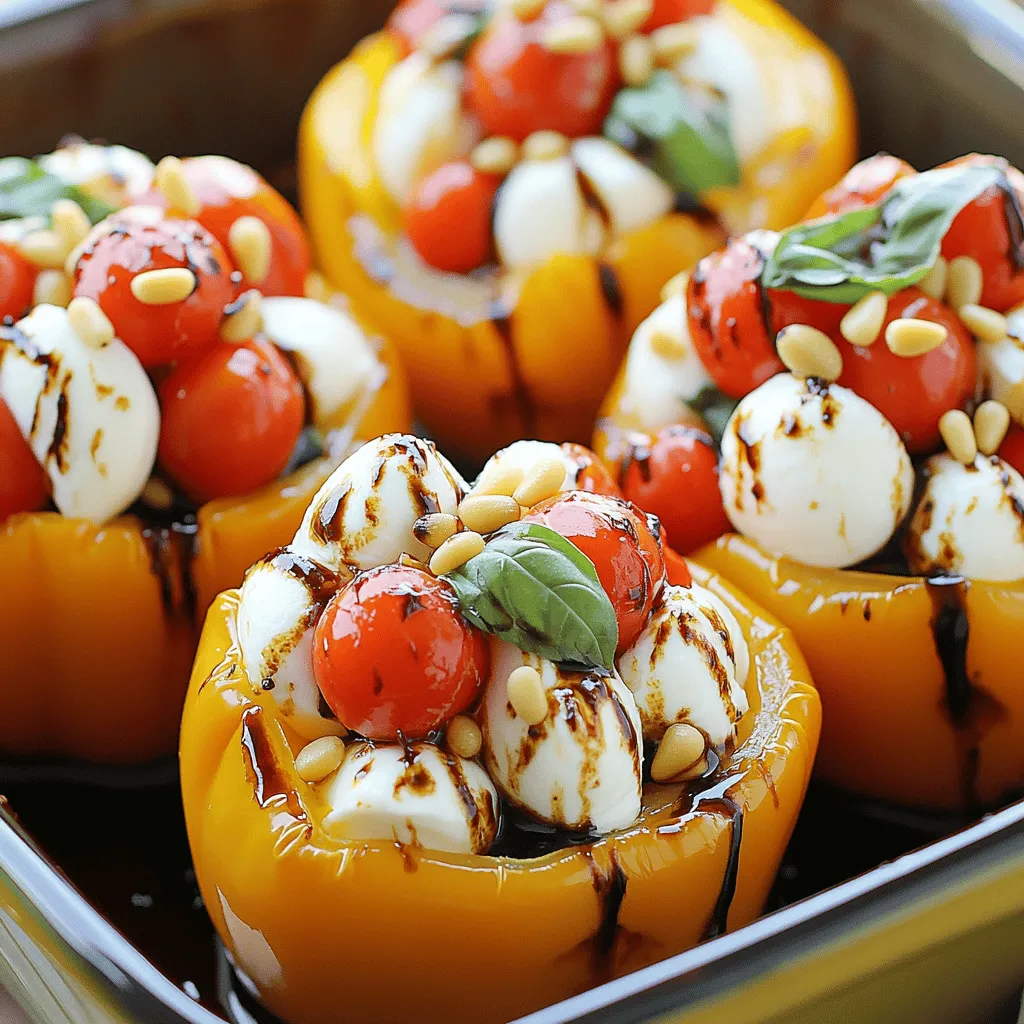
Looking for a fresh and easy dinner idea? Caprese stuffed peppers are the perfect choice! Bursting with classic Italian flavors,

- 1 cup pickled jalapeños, diced - 1 cup diced tomatoes - 1/2 cup red onion, finely chopped - 1/2 cup fresh cilantro, chopped - 1 avocado, diced - 1 tablespoon lime juice - Salt to taste - 8 tostada shells - 1 cup crumbled queso fresco (or your preferred cheese) - Sliced radishes for garnish Gather these fresh ingredients to make the best Pickle De Gallo Tostadas. Each ingredient plays a key role in creating a burst of flavor. The pickled jalapeños add heat, while the tomatoes bring sweetness. Red onion adds crunch, and cilantro brings a fresh taste. Use ripe avocados for creaminess and a squeeze of lime for a zesty kick. Don't forget the salt to enhance all the flavors. Choose your favorite cheese to sprinkle on top. Then, get some crispy tostada shells to hold everything together. These simple ingredients make a vibrant treat. You can find the full recipe in the earlier section of this article. Enjoy making these tasty tostadas! To start, gather your ingredients. In a medium bowl, combine: - 1 cup pickled jalapeños, diced - 1 cup diced tomatoes - 1/2 cup red onion, finely chopped - 1/2 cup fresh cilantro, chopped Next, drizzle in 1 tablespoon of lime juice. Add salt to taste. Gently toss everything together until well mixed. This mixture is fresh and bright. It brings a nice kick to your tostadas. Now, let's get those tostada shells ready. Preheat your oven to 350°F (175°C). Spread the tostada shells on a baking sheet. Bake them for 5 to 7 minutes. You want them to be crispy but not burnt. Keep an eye on them as they bake. Once the shells are crispy, take them out of the oven. Let them cool slightly. Then, it's time to build your tostadas. Top each shell with a generous spoonful of the pickle de gallo mixture. Next, add diced avocado on top for creaminess. Finally, sprinkle crumbled queso fresco over each tostada for a salty bite. For a nice touch, garnish with sliced radishes. These add color and crunch. Enjoy your fresh and flavorful Pickle De Gallo Tostadas! For the complete steps, check the Full Recipe. - Use fresh ingredients for the best flavor. Fresh tomatoes, cilantro, and jalapeños make a big difference. They add bright flavors and vibrant colors to your tostadas. - Adjust lime and salt for personal taste. Taste your pickle de gallo mix as you go. If you like it tangier, add more lime juice. If it needs salt, sprinkle a bit more until it tastes just right. - Baking vs. frying: which method to choose? Baking is healthier and easier. I like to bake my tostada shells at 350°F for 5-7 minutes. This gives them a nice crunch without the mess of frying. - How to store tostada shells before serving. Keep your tostada shells in an airtight container. This keeps them crisp until you are ready to serve. Avoid stacking them to prevent them from getting soft. {{image_2}} You can play with different types of peppers to change the heat level. Try serrano or habanero for a spicier kick. Each pepper brings its own flavor and heat, so have fun experimenting. You can also switch up the cheese. Crumbled feta or shredded cheddar can add a unique twist. Don’t be afraid to mix flavors! If you want a vegan option, you can skip the cheese or use a plant-based cheese. There are great vegan cheeses that melt well and taste good. For those needing gluten-free options, look for tostada shells made from corn. They are crunchy and perfect for this dish. These tostadas make great snacks or appetizers. You can serve them at parties or family gatherings. For a fun twist, pair them with dips like guacamole or salsas. They can add extra flavor and texture to your meal. Consider stacking some tostadas for a beautiful display on your table. Enjoy the fresh and vibrant flavors of your Pickle De Gallo Tostadas! Check the Full Recipe for more ideas. Store leftover pickle de gallo mixture in a sealed container. Keep it in the fridge. It will stay fresh for about 3 days. The flavors will blend together, which can make it even tastier. If you want to keep it longer, freeze it. Just remember to thaw it in the fridge before using. For tostada shells, store them in a cool, dry place. Use a zip-top bag or an airtight container. They can last for about 2 weeks. If you see any signs of moisture, toss them out. Moisture can make the shells soggy. To reheat tostadas, you want them to stay crispy. The best way is to use the oven. Preheat your oven to 350°F (175°C). Place the tostadas on a baking sheet. Heat them for about 5 minutes. This will help them regain their crunch. Avoid using the microwave, as it can make them soft and chewy. - Pickled jalapeños: Last for 1-2 months in the fridge. - Diced tomatoes: Keep for 3-5 days in the fridge. - Red onion: Can stay fresh for about 1-2 weeks. - Fresh cilantro: Lasts for up to 1 week. - Avocado: Best used within 1-2 days once cut. - Lime juice: Fresh juice lasts about 1 week; bottled juice can last longer. - Salt: Indefinite shelf life if kept dry. - Tostada shells: Can be stored for 2 weeks. - Queso fresco: Best used within 1 week once opened. - Sliced radishes: Keep for about 5 days in the fridge. Pickle de gallo is a fresh, zesty salsa made with pickled jalapeños, tomatoes, onions, and cilantro. You mix these ingredients together, adding lime juice and salt for flavor. This dish brings a nice crunch and bright taste to any meal. It is great on its own or as a topping for tostadas. Yes, you can prep some parts in advance. Make the pickle de gallo mixture a day before and store it in the fridge. Just keep the tostada shells separate until you are ready to serve. This way, they stay crispy. Assemble your tostadas just before eating for the best taste. You can top your tostadas with many things. Here are some great options: - Sliced avocado for creaminess - Crumbled queso fresco or your favorite cheese - Fresh cilantro for extra flavor - Sliced radishes for crunch - A drizzle of sour cream for tanginess - Chopped green onions for freshness Mix and match to find your favorite combinations! Pickle De Gallo Tostadas are easy and fun to make. We covered the ingredients and how to prepare them. You learned ways to make your tostadas extra crispy and how to store leftovers. Try different peppers or cheeses for unique flavors. Enjoy this tasty snack with friends or family! With these tips, you can create the perfect dish every time. Great food brings people together. Enjoy your cooking adventure!

Pickle De Gallo Tostadas Fresh and Flavorful Recipe

Are you ready for a burst of flavor? My Pickle De Gallo Tostadas combine zesty pickled jalapeños and fresh veggies

- 12 fresh cherries with stems - 50g pistachios, shelled and unsalted - 200g dark chocolate (70% cocoa) - 1 tablespoon coconut oil - Optional: 1 teaspoon vanilla extract - Sea salt, for sprinkling I love using fresh ingredients for this recipe. The cherries need their stems for a nice look. When you bite into them, the juicy fruit mixes with the rich chocolate. It’s a perfect match. Pistachios add a nice green color and a crunchy texture. You can find shelled and unsalted pistachios at most stores. They blend well with the sweet cherries. For the chocolate, I recommend dark chocolate with at least 70% cocoa. It has a rich taste that balances the sweetness of the cherries. The coconut oil makes the chocolate melt smooth and shiny. If you want extra flavor, add a teaspoon of vanilla extract. It makes a big difference! Lastly, a sprinkle of sea salt brings out all the flavors. It creates a nice contrast with the sweet chocolate and cherries. This recipe is simple but feels fancy. You can find the full recipe to dive deeper into the steps and tips. 1. Start by rinsing your cherries under cool water. Make sure to dry them well with a paper towel. This step is key. If they are wet, the chocolate won’t stick properly. 2. Next, melt the dark chocolate and coconut oil. Use a small saucepan over low heat. Stir continuously until the mixture is smooth. If you want, add a teaspoon of vanilla extract for added flavor. 1. While the chocolate melts, prepare your pistachio dust. Place shelled and unsalted pistachios into a food processor. Pulse them until they reach a fine crumb consistency. Be careful not to turn them into a paste. 2. Once the chocolate is melted, remove it from the heat. Dip each cherry into the warm chocolate. Make sure it is fully coated. Use a fork to lift it out and gently tap to remove extra chocolate. 1. Immediately after coating, sprinkle the melted chocolate cherries with pistachio dust and a pinch of sea salt. This adds a nice contrast to the sweetness. 2. Place the chocolate-coated cherries on a parchment-lined baking sheet. Repeat the process until all cherries are coated. 3. Finally, refrigerate the cherries for 30 minutes. This helps the chocolate set completely. For the complete recipe, check the [Full Recipe]. To get the best chocolate coating, start with dry cherries. Any moisture can ruin the chocolate. I always rinse my cherries and pat them completely dry. This step is key for a smooth finish. Next, use quality dark chocolate. I recommend chocolate with at least 70% cocoa. This chocolate has rich flavor and melts well. It ensures a delicious bite with every taste. For a stunning presentation, arrange the cherries on a nice serving platter. You can add a sprinkle of crushed pistachios for color and flair. A light dusting of sea salt makes them pop. It adds a savory touch. Pair these treats with drinks like red wine or champagne. The sweetness of the cherries and chocolate works well with these beverages. You can also serve them with herbal tea for a cozy afternoon treat. For more details, check out the Full Recipe. {{image_2}} You can change the flavor of your chocolate-covered cherries easily. Try using milk chocolate or white chocolate instead of dark chocolate. Milk chocolate will give a sweeter taste, while white chocolate adds a creamy touch. You can also spice things up! Adding a pinch of cinnamon gives warmth, while chili powder adds a fun kick. These small changes make a big difference. If you want to switch up the nuts, you can. Use almonds or walnuts instead of pistachios. Almonds will add a nice crunch and a slightly sweet flavor. Walnuts have a rich, earthy taste that works well with chocolate. Don’t be afraid to experiment with different nuts to find your favorite combination. Seasonal fruits can add exciting flavors to your chocolate-covered cherries. For example, in summer, try adding fresh strawberries or raspberries. In fall, consider apple slices or pear chunks. The fruit juices mix with the chocolate and create a fresh taste. This way, you can enjoy different flavors all year long. For a detailed guide on making these treats, check out the Full Recipe. To keep your chocolate-covered cherries fresh, store them in the fridge. Place them in an airtight container. This keeps moisture out and preserves the texture. If you can, separate layers with parchment paper. This stops them from sticking together. Make sure to eat them within a week. The chocolate may lose its shine over time but will still taste great. Keeping them cold helps the chocolate stay firm and delicious. You can freeze chocolate-covered cherries for longer storage. First, place them in a single layer on a baking sheet. Freeze them until solid. Then, transfer the frozen cherries to a freezer-safe bag. This way, they won’t clump together. When you want to enjoy them, simply take out the desired amount. Let them thaw in the fridge for a few hours. This helps maintain the texture and flavor. Avoid thawing them at room temperature, as it can make the chocolate too soft. Enjoy your treat! You can follow this easy method to make chocolate-covered cherries. First, rinse and dry 12 fresh cherries with stems. For the chocolate, melt 200g of dark chocolate (70% cocoa) with 1 tablespoon of coconut oil. Once smooth, dip each cherry into the warm chocolate. Tap off the extra and sprinkle with pistachio dust. Chill them for 30 minutes to set. For more details, check out the [Full Recipe]. Yes, you can! Dark chocolate gives a rich taste, but you can use milk chocolate or white chocolate too. Each type brings its own flavor. Milk chocolate adds sweetness, while white chocolate gives a creamy touch. You can even mix chocolates for a unique taste. Just remember to adjust the melting times, as different chocolates behave differently. Chocolate-covered cherries last about 5 days in the fridge. Store them in a sealed container. This will help keep them fresh. If you want to keep them longer, consider freezing them. Just remember to thaw them before serving. This way, you can enjoy your tasty treat even later! In this post, we covered how to make delicious chocolate-covered cherries. We explored fresh ingredients, step-by-step instructions, tips, and storage options. You can customize your treats with different chocolates and nuts for unique flavors. Remember, quality ingredients shine in this simple recipe. Enjoy experimenting with seasonal fruits or spices to make your cherries truly your own. These sweet bites will impress any guest and satisfy your cravings. Make sure to share your creations!

Chocolate Covered Cherries with Pistachio Dust Delight

Get ready to treat your taste buds with my “Chocolate Covered Cherries with Pistachio Dust Delight.” This sweet snack combines

- 2 cups ripe peaches, diced - 2 cups ripe plums, diced - ½ cup granulated sugar - ½ cup brown sugar, packed - 1 tablespoon lemon juice - ½ teaspoon vanilla extract - 1 teaspoon cornstarch - 1 ½ cups all-purpose flour - ½ cup rolled oats - ½ teaspoon baking powder - ½ teaspoon salt - ½ cup cold unsalted butter, cubed - 1 large egg I love using ripe peaches and plums for this recipe. They add a sweet and tangy flavor. The sugars balance the fruits' tartness, creating a delicious filling. A touch of lemon juice brightens the fruit and keeps it fresh. The vanilla extract enhances the overall flavor, making it even more inviting. For the crust and topping, all-purpose flour and rolled oats create a perfect crumbly texture. The baking powder helps the crust rise, while the salt enhances the flavors. Cold butter is key. It ensures the topping is light and flaky. Finally, one egg binds everything together, making the crust easy to work with. Gathering these ingredients is simple. You can find fresh peaches and plums at your local market. The other items are common pantry staples. Check the [Full Recipe] for clear measurements and steps. This will guide you to make the best Peach Plum Crumble Bars! - Preheat oven to 350°F (175°C). - Line an 8-inch square baking dish with parchment paper. First, set your oven to the right temperature. This step is key for even baking. Next, prepare your baking dish. The parchment paper helps the bars come out easily. - Toss diced peaches and plums with lemon juice and sugar. - Let the fruit mixture marinate. In a bowl, mix the diced peaches and plums. Add lemon juice and sugar to enhance the flavor. Toss gently so the fruit gets coated well. Now, let it sit for a bit. This will help the flavors come together. - Combine dry ingredients in a bowl. - Incorporate cold butter using a fork or pastry cutter. - Stir in the egg and divide the dough. In a large bowl, mix your dry ingredients: flour, oats, brown sugar, baking powder, and salt. Next, add cold butter and mix it. Use a fork or pastry cutter to break it into smaller pieces. The goal is a crumbly texture. Then, stir in the egg. This binds everything. Finally, split the dough in half. - Press dough into the baking dish base. - Spread marinated fruit on top. - Crumble remaining dough over fruit. Take one half of the dough and press it into the bottom of your dish. Make sure it covers the whole base. Now, spread the marinated fruit evenly over this layer. Crumble the rest of the dough on top of the fruit. This will create a nice topping. - Bake for 35-40 minutes until golden brown. - Cool bars in the dish before lifting out. Put the dish in the oven and bake. You’ll know it’s done when the top is golden brown and the fruit bubbles. Once baked, let it cool in the dish. This step helps the bars set up. After about 20 minutes, use the parchment paper to lift them out. Enjoy your Peach Plum Crumble Bars! How to select ripe peaches and plums When choosing peaches and plums, look for soft skin. The fruit should yield slightly to gentle pressure. A sweet aroma means they are ripe and full of flavor. Avoid any fruit with bruises or dark spots. Ideal mixing techniques for crumble texture To get that perfect crumble, mix the butter into the dry ingredients carefully. You want small, pea-sized pieces of butter. This helps create a flaky texture. Use a fork or pastry cutter for the best results. Do not overmix; you want a crumbly texture, not a dough. Presentation tips with powdered sugar and ice cream Serve your Peach Plum Crumble Bars on a nice plate. Dust them with powdered sugar for a sweet touch. Add a scoop of vanilla ice cream on the side. This makes the dish look fancy and taste even better. Pairing ideas with drinks or other desserts Pair these bars with a cup of tea or a glass of sparkling water. For a fun twist, enjoy them with a fruity cocktail. They also go well with other summer desserts, like berry sorbet. Overmixing the crumble topping Mixing too much can turn your topping into a dough. Stop as soon as you see the butter is mixed in. You want to see some small chunks for a nice texture. Not allowing bars to cool properly It is key to let the bars cool for at least 20 minutes. This helps them set and makes slicing easier. If you cut them too soon, they will fall apart. {{image_2}} You can easily adjust this recipe to fit your needs. If you want a gluten-free option, you can use almond flour instead of all-purpose flour. Almond flour gives a nice nutty flavor and works well in crumble bars. For a vegan version, replace the butter with coconut oil and the egg with a flax egg. A flax egg is made by mixing one tablespoon of flaxseed meal with three tablespoons of water. Let it sit for a few minutes to thicken. To make your crumble even tastier, think about adding spices. A pinch of cinnamon or nutmeg can really boost the flavor. These spices pair well with peaches and plums. You can also mix in some nuts or shredded coconut into the crumble topping. Chopped almonds or walnuts add a nice crunch and extra nutrition. Feel free to get creative with the fruit! You can swap out peaches and plums for other summer fruits like cherries or blueberries. Mixing different berries can create a colorful and flavorful treat. A mixed berry crumble bar will surprise your taste buds and is perfect for summer picnics. For the full recipe, check out the Peach Plum Crumble Bars section above. To keep your Peach Plum Crumble Bars fresh, store them in an airtight container. You can use glass or plastic containers for this. Make sure the bars are fully cooled before putting them inside. This helps prevent sogginess. You can place parchment paper between layers to avoid sticking. If you want to save some for later, freeze the baked bars. First, let them cool completely. Then, cut them into bars. Wrap each one in plastic wrap and place them in a freezer-safe bag. Make sure to remove as much air as possible. When you're ready to enjoy them, take them out and reheat them. To reheat, place the bars in the oven at 350°F (175°C) for about 10-15 minutes. This will keep the texture nice. At room temperature, these bars last about 3-4 days. If you store them in the fridge, they can stay fresh for up to a week. Watch out for signs that they have gone bad. If you see any mold or if they smell off, it’s best to throw them away. Trust your senses; they will guide you! Yes, you can make these bars ahead of time. Just bake the bars and let them cool completely. Then, store them in an airtight container. You can keep them at room temperature for up to three days. For longer storage, place them in the fridge for a week. If you want to freeze them, wrap each bar in plastic wrap, then put them in a freezer bag. They will last for up to three months. To reheat, place the bars in a warm oven for a few minutes. You can also enjoy them cold! Check the bars after 35 minutes. Look for a golden-brown topping. You should also see some bubbling fruit. Insert a toothpick into the crust. If it comes out clean, the bars are ready. If not, bake a few more minutes. The crust should feel firm but not hard. Trust your eyes and use these cues to ensure they are perfect! You can get creative with your toppings! Try adding chopped nuts, like almonds or pecans, for crunch. Shredded coconut adds a nice touch too. You can also sprinkle some cinnamon or nutmeg for warmth. For a sweeter flavor, mix in chocolate chips or dried fruit. Each topping brings a new twist to your bars. Experiment and find your favorite combination! This guide covered how to make delicious Peach Plum Crumble Bars step-by-step. We explored the key ingredients, baking methods, and tips for perfecting the recipe. You learned how to prepare the fruit and make the crumble dough. Also, we talked about storage and variations, so you can customize your bars. Now, you have the tools to create a tasty treat that suits your taste. Enjoy the process and share your results! Happy baking!

Peach Plum Crumble Bars Irresistible Sweet Treat

Are you ready for a dessert that combines the sweetness of peaches and plums? My Peach Plum Crumble Bars are

- 1 ripe avocado - 1 cup canned chickpeas, drained and rinsed - 2 tablespoons tahini - 2 tablespoons fresh dill, finely chopped - 2 tablespoons lemon juice - 2 cloves garlic, minced - 2 tablespoons olive oil - Salt and pepper to taste - 1 teaspoon ground cumin - Assorted crudités (carrot sticks, cucumber slices, bell pepper strips) - Pita bread, cut into triangles For the Avocado Dill Hummus Board, I start with simple yet fresh ingredients. The main star is the ripe avocado. It gives the hummus its creamy texture. The canned chickpeas add protein and bulk. Tahini brings a nutty flavor that pairs well with the other ingredients. Fresh dill adds a light, herbal touch that brightens up the dish. Lemon juice gives the hummus a zesty kick. The minced garlic adds depth and richness. If you want to enhance the flavor, you can add olive oil, salt, and pepper. Ground cumin gives a warm, earthy note. For serving, I love using assorted crudités. Carrot sticks, cucumber slices, and bell pepper strips add color and crunch. Pita bread cut into triangles is perfect for dipping. You can find the full recipe [here](#). First, gather your ingredients. You need one ripe avocado, one cup of drained chickpeas, and two tablespoons of tahini. Also, get two tablespoons of fresh lemon juice, two cloves of minced garlic, and two tablespoons of olive oil. Don't forget a teaspoon of ground cumin! Now, add all these ingredients to your food processor. Make sure everything goes in there: the avocado, chickpeas, tahini, lemon juice, garlic, olive oil, and cumin. Blend the mixture until it is smooth and creamy. You might need to scrape down the sides once or twice. This helps to mix everything well. Once it's smooth, add two tablespoons of finely chopped fresh dill. Season with salt and pepper to taste. Pulse the food processor a few times to mix the dill in. This gives the hummus a fresh and vibrant flavor. Now it's time to serve! Transfer your hummus to a nice serving bowl. Use the back of a spoon to create a small swirl on top. Drizzle a little olive oil over the hummus for a rich touch. If you like, garnish with whole dill sprigs for a pretty look. Finally, arrange assorted crudités and pita bread triangles around the bowl. This makes a colorful and tasty spread for everyone to enjoy! For the full recipe, check the details above. To get that creamy texture, start with ripe avocados. Make sure they are soft but not brown. Use a high-speed food processor. Blend the mix until it is very smooth. If it feels too thick, add a splash of water or olive oil. When blending, I recommend scraping the sides of the bowl. This helps mix in all the ingredients. Use a spatula to push down any bits stuck on the sides. Blend again until it’s fully combined and silky. Arranging the board is key for a lovely display. Start by placing the hummus in the center of a large board. Create a swirl on top with a spoon for a nice look. Next, arrange the crudités and pita triangles around the hummus. Use vibrant colors and different shapes. Carrot sticks, cucumber slices, and bell pepper strips add variety. This makes the board not only tasty but also eye-catching. For added flair, use small bowls for dips or olives. You can also sprinkle fresh dill over everything. This adds a pop of green and ties in with the hummus flavor. Use the full recipe to guide your steps for a stunning presentation. {{image_2}} You can make your avocado dill hummus unique by adding spices or herbs. Try smoked paprika for a smoky touch. A pinch of cayenne pepper adds heat. Fresh parsley or chives can also brighten the flavor. Incorporating roasted vegetables brings a new twist. Roasted red peppers add sweetness and depth. Caramelized onions contribute a rich, savory taste. Just blend them into the hummus for a creamy mix. This recipe is naturally vegan and gluten-free. You can enjoy it without worry if you follow these diets. If you need nut-free alternatives, tahini can be swapped for sunflower seed butter. This still gives you a creamy texture without nuts. You can find the full recipe in the earlier section. Enjoy experimenting with these variations! To keep your hummus fresh, store it in a sealed container. This helps prevent air from drying it out. Place a thin layer of olive oil on top before sealing. This method keeps the hummus creamy and delicious. You can refrigerate leftover hummus for up to five days. If you have more than you can eat, consider freezing it. Portion the hummus into small containers or ice cube trays. Once frozen, transfer the portions to a freezer bag. This lets you defrost only what you need later. Frozen hummus can last for up to three months. Store your crudités and pita bread separately. Vegetables like carrots and cucumbers stay fresh in a sealed bag with a damp paper towel. This keeps them crisp and ready to enjoy. Pita bread can dry out, so wrap it tightly in foil or plastic wrap. This helps maintain softness. When you are ready to serve again, check for freshness. If your veggies seem wilty, you can revive them in ice water for a few minutes. This quick soak can bring back some of their crunch. Always remember to enjoy your delicious Avocado Dill Hummus Board fresh for the best taste! For the full recipe, check out the Avocado Dill Hummus Board recipe. How long can I keep hummus in the fridge? You can keep hummus in the fridge for about four to five days. Store it in a sealed container to keep it fresh. If you see any signs of spoilage, it's best to toss it. Can I make this hummus in advance? Yes, you can make this hummus a day ahead. Just store it in the fridge. When you are ready to serve, give it a quick stir. You can also drizzle a bit of olive oil on top before serving for extra flavor. What goes well with avocado dill hummus? Avocado dill hummus pairs well with many things. I love serving it with fresh veggies like carrot sticks, cucumber slices, and bell pepper strips. Pita bread triangles are also a great choice. You can even add crackers or chips for a crunchy touch. How can I make a hummus board more filling? To make your hummus board more filling, add protein-rich items. Consider including hard-boiled eggs, grilled chicken, or chickpea salad. You can also add a variety of cheeses or nuts for extra texture and taste. Mix and match to create a vibrant and satisfying spread. For the complete recipe, check out the [Full Recipe]. This blog post covered how to create a delicious avocado dill hummus. We explored key ingredients like ripe avocado, chickpeas, and tahini. I shared step-by-step instructions for making the hummus smooth and creamy. Tips for presentation and variations added flavor and fun. Don't forget storage methods to keep it fresh longer. This recipe not only tastes great but can fit many diets. Try it for your next gathering!

Avocado Dill Hummus Board Fresh and Flavorful Delight

Looking for a fresh and tasty snack? Try my Avocado Dill Hummus Board! This vibrant dish is loaded with creamy

To make a tasty Blueberry Lemonade Float, you need fresh items. Gather these: - 1 cup fresh blueberries - 2 cups lemonade (homemade is best) - 1 cup vanilla ice cream - Zest of 1 lemon You can customize your float with fun extras. Here are some choices: - 1 tablespoon honey (for sweetness) - Fresh mint leaves (for garnish) Having the right tools makes cooking easier. Use these: - A small saucepan for the blueberry syrup - Serving glasses to show off the float - A spoon for mixing and serving - A zester for the lemon zest With these ingredients and tools, you're ready to create a refreshing Blueberry Lemonade Float. Check out the Full Recipe for more details and tips! To start, you need to make the blueberry syrup. Grab a small saucepan and place it on medium heat. Add 1 cup of fresh blueberries and 1 tablespoon of honey if you want it sweeter. Cook this mix for about 5 to 7 minutes. You will see the blueberries soften and release their juices. Stir gently as you go. Once it's done, remove it from heat and let it cool for a bit. This syrup will give your float a nice sweet burst. Now, it’s time to build your float! Take your serving glasses and divide the blueberry syrup evenly among them. Next, pour 2 cups of lemonade into each glass, filling them about three-quarters full. The lemonade should be light and tart for the best flavor. After that, add a generous scoop of vanilla ice cream on top of the lemonade in each glass. This scoop will float perfectly on the lemonade. For a stunning look, use clear glasses. You can see the pretty layers of blueberries, lemonade, and ice cream. To make it even prettier, add a lemon wheel on the rim of the glass. Finally, finish with fresh mint leaves and a sprinkle of lemon zest on top. This adds a nice touch and extra flavor. Serve right away with a straw or spoon. Enjoy your Blueberry Lemonade Float! For the complete method, check the Full Recipe. To make the best blueberry syrup, start with fresh blueberries. Cook them gently with honey in a small pot. Heat helps the berries burst and release their juices. Cook for about 5-7 minutes. Stir often to avoid burning. If you want a thicker syrup, cook it longer. Let it cool before using. This syrup adds great flavor to your float. Vanilla ice cream is classic, but you can try other flavors too. Lemon ice cream gives a bright taste. Blueberry ice cream keeps the theme going. Want something interesting? Think about using coconut or even mint chocolate chip. Each flavor adds a fun twist. Mix and match based on your mood or season. This drink works for many events. For a picnic, serve in mason jars. They are easy to carry. At a party, use clear glasses to show the layers. Add a lemon wheel on the rim for flair. For kids’ parties, use colorful straws. You can also make a large batch for family gatherings. Just keep the ice cream separate until serving. This way, everyone enjoys the float’s magic at its best. {{image_2}} You can make this float a bit more fun by adding alcohol. Use a light vodka or gin to keep the flavors bright. Mix one part of vodka with three parts of lemonade. Pour this mix over your blueberry syrup. Add the ice cream as usual. This twist turns your float into a refreshing summer cocktail. If you want a dairy-free version, switch the vanilla ice cream for coconut or almond milk ice cream. Both options give a nice creaminess without dairy. You can also use a dairy-free yogurt for a tangy twist. This keeps the float tasty while catering to those with dairy concerns. Feel free to change the blueberries to other fruits. Raspberries, strawberries, or blackberries work well. Each fruit brings a unique taste and color. For a tropical touch, try pineapple or mango. Just follow the same steps with your chosen fruit. This way, you can create a fun variety for any summer gathering. If you have extra blueberry syrup, store it in a clean jar. Make sure the jar is airtight. Keep it in the fridge for up to one week. This syrup is great on pancakes, waffles, or yogurt. You can also use it in other drinks. To keep ice cream fresh, store it in the back of the freezer. The back stays colder than the front. Keep the lid tightly closed to prevent ice crystals. Avoid leaving it out for too long at room temperature. Ice cream is best when it stays frozen until you serve it. To keep your float fresh, serve it right away. If you wait too long, the ice cream melts. This can make your lemonade watery. If you have leftovers, store the drink in the fridge without the ice cream. When you want to enjoy it again, add a scoop of ice cream. This keeps the float nice and tasty. For the full recipe, check the section above. Yes, you can use frozen blueberries. They work well in this recipe. Frozen blueberries may have a softer texture once cooked, but they still taste great. Just heat them as you would fresh ones. The syrup will still form nicely, giving your float a rich flavor. If you want to skip honey, try maple syrup or agave nectar. Both will add sweetness without changing the flavor too much. You can also use a sugar substitute if you prefer. Adjust the amount based on your taste. Making homemade lemonade is simple. Combine 1 cup of lemon juice, 1 cup of sugar, and 4 cups of water. Stir well until the sugar dissolves. Taste it to see if you need more sugar or lemon. You can add ice to chill it fast. Yes, this float is perfect for kids! It has a sweet taste and is fun to drink. The ice cream makes it a special treat. Just be sure to watch how much sugar you add. Kids will love the colorful layers and flavors. This blog post covers making a tasty Blueberry Lemonade Float. We talked about fresh ingredients, sweeteners, tools, and the steps for preparing the float. I shared tips for perfect syrup and fun serving ideas. You can also try different fruit or make it dairy-free. Keep this recipe on hand for hot days or special times. It's easy and fun to make. Enjoy this treat, and don't hesitate to play with flavors!

Blueberry Lemonade Float Refreshing Summer Drink

Looking for a fun and cool drink to beat the summer heat? You’ve come to the right place! The Blueberry

To make Grilled Watermelon Halloumi Skewers, you will need: - 1 medium watermelon, cut into 1-inch cubes - 8 ounces halloumi cheese, cut into 1-inch cubes - 1 tablespoon olive oil - 1 tablespoon balsamic glaze - Fresh mint leaves, for garnish - Salt and pepper to taste - Skewers (wooden or metal) You will need a few tools to help with this recipe: - Grill or grill pan - Knife and cutting board - Skewers (if wooden, soak them in water for 30 minutes) - Tongs for flipping skewers Feel free to get creative! Here are some fun ideas: - Add a sprinkle of chili flakes for heat. - Use lemon zest for a fresh, citrus kick. - Try adding cherry tomatoes for color and taste. - Swap in feta cheese for a different flavor profile. For the full recipe, check out the detailed steps further in the article. Enjoy your grilling! First, soak your skewers. If you use wooden skewers, soak them in water for at least 30 minutes. This step helps prevent burning on the grill. Next, cut your watermelon and halloumi cheese into 1-inch cubes. Make sure the pieces are even in size. This ensures they cook well and evenly. Now, it's time to assemble the skewers. Take a skewer and start threading the watermelon and halloumi. Alternate the pieces and leave a little space between them. This allows heat to reach each piece, enhancing the grill marks and flavors. Once you have your skewers ready, drizzle olive oil over them. Sprinkle salt and pepper to taste. This step adds flavor and helps the cheese get crispy on the grill. Now, preheat your grill to medium-high heat. If you prefer using a grill pan, heat it on your stovetop. When your grill is ready, place the skewers on it. Grill them for about 3-4 minutes on each side. You want the halloumi to turn golden and crispy. The watermelon should get nice grill marks and soften slightly. Make sure to keep an eye on them. Halloumi can cook fast, so you want to avoid burning. After grilling, carefully remove the skewers from the grill. Place them on a plate. Drizzle balsamic glaze over the skewers for a sweet finish. This adds a burst of flavor that pairs perfectly with the savory halloumi. Finally, garnish with fresh mint leaves. They add a lovely touch of color and flavor. Enjoy your grilled watermelon halloumi skewers! For the complete recipe, check out the Full Recipe section. Grilling watermelon and halloumi takes skill, but it's easy. Start with a clean grill. This helps prevent sticking. Preheat your grill to medium-high heat. This ensures a nice sear. Grill the skewers for 3-4 minutes on each side. Look for golden halloumi and nice grill marks on the watermelon. If you use a grill pan, heat it on medium too. Always keep an eye on your skewers. They can burn quickly if not watched. Good halloumi makes a big difference. Look for cheese that is firm and fresh. It should have a slight bounce when pressed. A good brand will melt just a bit, getting crispy on the outside. Avoid halloumi that seems too soft or too wet. This can lead to a messy grill. When in doubt, try a local cheese shop. They often have great options. You can add more flavor to your skewers. Try adding fresh herbs like basil or cilantro. These will brighten the dish. A sprinkle of chili flakes adds heat. If you want a sweet twist, drizzle honey on top after grilling. You can also use lime juice for a zesty kick. These small changes can make your skewers stand out. For the full recipe, check out the complete instructions above. {{image_2}} You can add colorful veggies to your skewers. Bell peppers, zucchini, and cherry tomatoes work well. They add extra flavor and nutrition. Just cut them into similar sizes for even cooking. Mix them with the watermelon and halloumi for a tasty twist. If you want to switch up the cheese, try feta or goat cheese. These cheeses have a strong flavor and pair well with sweet watermelon. You can also use a mild cheddar for a different taste. Just remember, each cheese will change the flavor profile. These skewers are naturally gluten-free, which is great! If you want to serve with a side, choose gluten-free bread or crackers. Always check labels to ensure your condiments are gluten-free, too. This keeps your meal safe and delicious for everyone. For the complete dish, check the Full Recipe. To keep your grilled watermelon halloumi skewers fresh, store them in an airtight container. Place a layer of parchment paper between the skewers to avoid sticking. Doing this helps maintain their shape and taste. If you have leftovers, they can last in the fridge for up to three days. When you want to enjoy your skewers again, reheating them is easy. Use a grill or a stovetop pan over medium heat. Cook for about 2-3 minutes, turning them once. This warms the skewers without losing flavor. You can also use a microwave for quick reheating, but they may lose some crispness. The grilled skewers are best eaten fresh. However, if you want to freeze them, wrap each skewer in plastic wrap. Then place them in a freezer-safe bag. They can last in the freezer for up to a month. When you’re ready to eat, thaw them in the fridge overnight before reheating. Yes, you can. Feta cheese works well for a different taste. You can also try goat cheese for a creamier texture. Each cheese brings its own flavor. Just remember that the grilling time may change. Check your cheese often to avoid burning. To avoid sticking, brush the grill grates with oil before cooking. You can also coat the cheese with a little olive oil. Soaking wooden skewers helps too. This will help keep everything moving smoothly on the grill. These skewers are great as a starter or side dish. You can serve them with fresh salad or pita bread. A yogurt dip adds a nice touch too. For a fun twist, pair them with a fruity salsa. This will bring out the flavors even more. Check out the Full Recipe for more ideas! This blog post covered how to create delicious grilled Halloumi skewers. We explored the key ingredients, essential equipment, and optional seasonings to enhance flavor. I shared step-by-step instructions and useful tips for perfect grilling techniques. You also learned about variations, including different cheeses and vegetables, and how to store leftovers properly. These skewers are both tasty and versatile. Now, it’s time to gather your ingredients and grill some amazing skewers. Enjoy your cooking journey!

Grilled Watermelon Halloumi Skewers Savory and Fresh

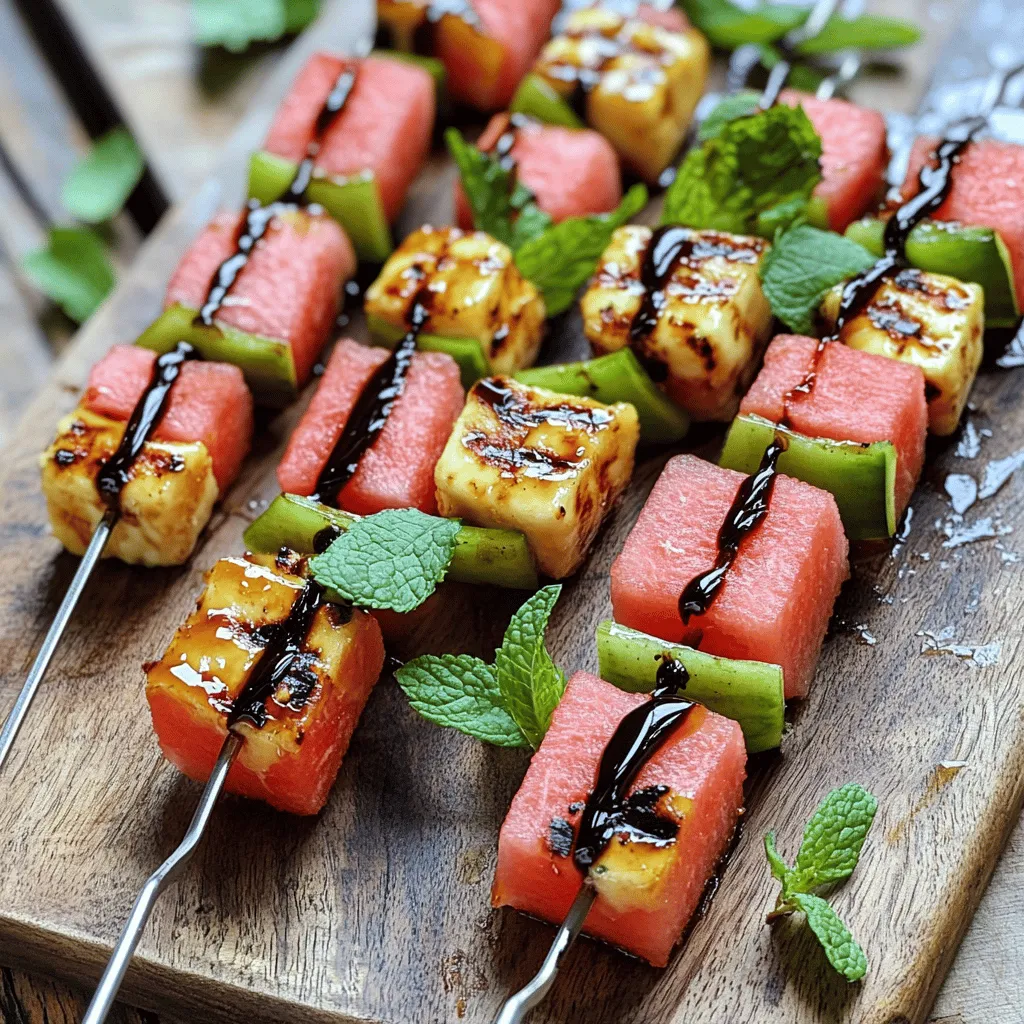
Get ready to spice up your summer with Grilled Watermelon Halloumi Skewers! This dish blends sweet watermelon and salty halloumi

Older posts
Newer posts
← Previous Page1 … Page14 Page15 Page16 … Page80 Next →

dsad

© 2025 My Saved Recipe • Built with GeneratePress

Our Policies

  • Copyright Policy
  • Cookie Policy
  • GDPR Policy
  • Privacy Policy
  • Disclaimer
  • Terms Of Use

More Information

  • Home
  • About
  • Contact
  • Appetizers
  • Dessert
  • Dinner
  • Drinks
©2025, My Saved Recipe About Back To Top