Skip to content
DisclaimerTerms Of UseGDPR PolicyCookie Policy

My Saved Recipe

  • Home
  • Drinks
  • Appetizers
  • Dinner
  • Dessert
  • About
  • Contact
  • Privacy Policy
DisclaimerTerms Of UseGDPR PolicyCookie Policy

Savannah

To make a tasty Peanut Crunch Salad, you'll need a variety of fresh and vibrant ingredients. Here’s a complete list: - 2 cups mixed greens (arugula, spinach, and romaine) - 1 cup red cabbage, thinly sliced - 1 cup carrots, shredded - 1/2 cup cucumber, julienned - 1/2 cup red bell pepper, sliced - 1/2 cup edamame, shelled - 1/4 cup fresh cilantro, chopped - 1/4 cup scallions, chopped - 1/2 cup roasted peanuts, roughly chopped - 3 tablespoons sesame oil - 2 tablespoons soy sauce - 1 tablespoon honey - 1 tablespoon lime juice - Salt and pepper to taste You can customize your salad with these add-ins: - Additional vegetables - Protein options (chicken, tofu) - Other nut varieties (cashews, almonds) Using these fresh ingredients gives the salad a great crunch and flavor. Fresh greens offer nutrients, while peanuts add protein and texture. Feel free to add your favorite veggies or proteins for a personal touch. You can find the full recipe to guide you through the steps to make this delicious dish. - First, take a large salad bowl. - Combine the mixed greens, red cabbage, shredded carrots, cucumber, red bell pepper, edamame, cilantro, and scallions. Ensure all the fresh ingredients mix well. - Next, grab a small mixing bowl. - Whisk together the sesame oil, soy sauce, honey, lime juice, salt, and pepper. This will create a tasty dressing. - Pour this dressing over the salad mixture. - Toss gently until every ingredient is coated. This step is key for flavor. - Just before serving, sprinkle the roasted peanuts on top. This adds a nice crunch. - For a beautiful presentation, use a large platter. Arrange the salad in a mound. Add a few whole peanuts on top for a striking look. - You can also add a lime wedge on the side for extra color and zest. - Enjoy this vibrant dish right away. The flavors are best when fresh. For the full recipe, check the section above. Choosing the right greens and vegetables is key to a great salad. I like to mix arugula, spinach, and romaine for a crunchy base. Each green adds its own taste and texture. Look for vibrant, crisp leaves when shopping. Avoid any greens that look wilted or brown. For veggies, fresh and colorful choices like red cabbage, carrots, and bell peppers make your salad pop. Washing and drying salad ingredients well keeps them fresh. Rinse greens and vegetables under cold water. Use a salad spinner to dry them quickly. If you don’t have one, pat them with a clean kitchen towel. This step prevents sogginess and helps the dressing stick better. Adding spices or herbs can boost your salad's taste. Fresh cilantro and scallions add a bright flavor. You can also try mint or basil for a unique twist. A pinch of chili flakes gives it a nice kick if you like some heat. Adjusting dressing ingredients for personal taste is easy. If you love sweetness, add more honey. If you prefer tanginess, increase lime juice. Experimenting with these ingredients allows you to create a dressing that suits your taste buds perfectly. You can even try different oils, like olive or avocado, to change the flavor. To get the full experience, check out the Full Recipe for Peanut Crunch Salad! {{image_2}} You can change the dressing to fit your taste. If you want to skip sesame oil, try olive oil or avocado oil. Both add a rich flavor. Instead of soy sauce, use tamari for a gluten-free option. You can also make a creamy dressing using Greek yogurt or tahini. These choices give the salad a unique twist. Do you need gluten-free options? Use gluten-free soy sauce or coconut aminos. Both are great for flavor without gluten. For a vegan version, swap honey with maple syrup. This keeps it sweet and plant-based. You can also add more veggies like bell peppers or snap peas. These changes keep the salad fresh and exciting. For the full recipe, check out the details above! To keep your Peanut Crunch Salad fresh, store it without the dressing. This helps prevent sogginess. Use an airtight container to seal in freshness. Place the salad in the fridge right away. It stays good for 2 to 3 days when stored this way. If you add dressing, the salad is best eaten the same day. Can you freeze Peanut Crunch Salad? I do not recommend freezing this salad. Freezing can change the texture of the greens and vegetables. If you want to freeze it, consider freezing the individual components. You can freeze shredded carrots, edamame, and chopped bell peppers separately. Just keep them in airtight bags. They store well for 2 to 3 months in the freezer. For best results, thaw them in the fridge before adding to your salad. How long does Peanut Crunch Salad last? Peanut Crunch Salad stays fresh in the fridge for about three days. Keep the dressing separate until serving. This helps keep the greens crisp and the salad tasty. Can I meal prep Peanut Crunch Salad? Yes, you can meal prep this salad! Make the salad base and store it in an airtight container. Add the peanuts and dressing just before eating. This makes it easy to enjoy a healthy meal all week. Is Peanut Crunch Salad gluten-free? Yes, Peanut Crunch Salad is gluten-free if you use gluten-free soy sauce. Check the label to make sure it meets your needs. Caloric value per serving Each serving of Peanut Crunch Salad has around 200 calories. This makes it a light yet filling option for lunch or dinner. Health benefits of ingredients used - Mixed greens: Packed with vitamins and minerals, they boost your immune system. - Red cabbage: Rich in antioxidants, it supports heart health. - Carrots: High in beta-carotene, good for your eyes. - Edamame: A great source of protein and fiber. - Peanuts: They provide healthy fats and keep you full longer. This salad is not only tasty but also good for your health. Enjoy the fresh flavors and benefits! You can find the Full Recipe for Peanut Crunch Salad above. Peanut Crunch Salad combines fresh greens, colorful veggies, and crunchy peanuts for a tasty meal. You can mix it up with different dressings and proteins. Use the tips for freshness and flavor to make it your own. Remember to store leftovers properly to keep them crisp. Whether you enjoy it right away or prep for later, this salad brings joy to any table. Enjoying a vibrant, healthy dish is easy and fun!

Peanut Crunch Salad Fresh and Flavorful Delight

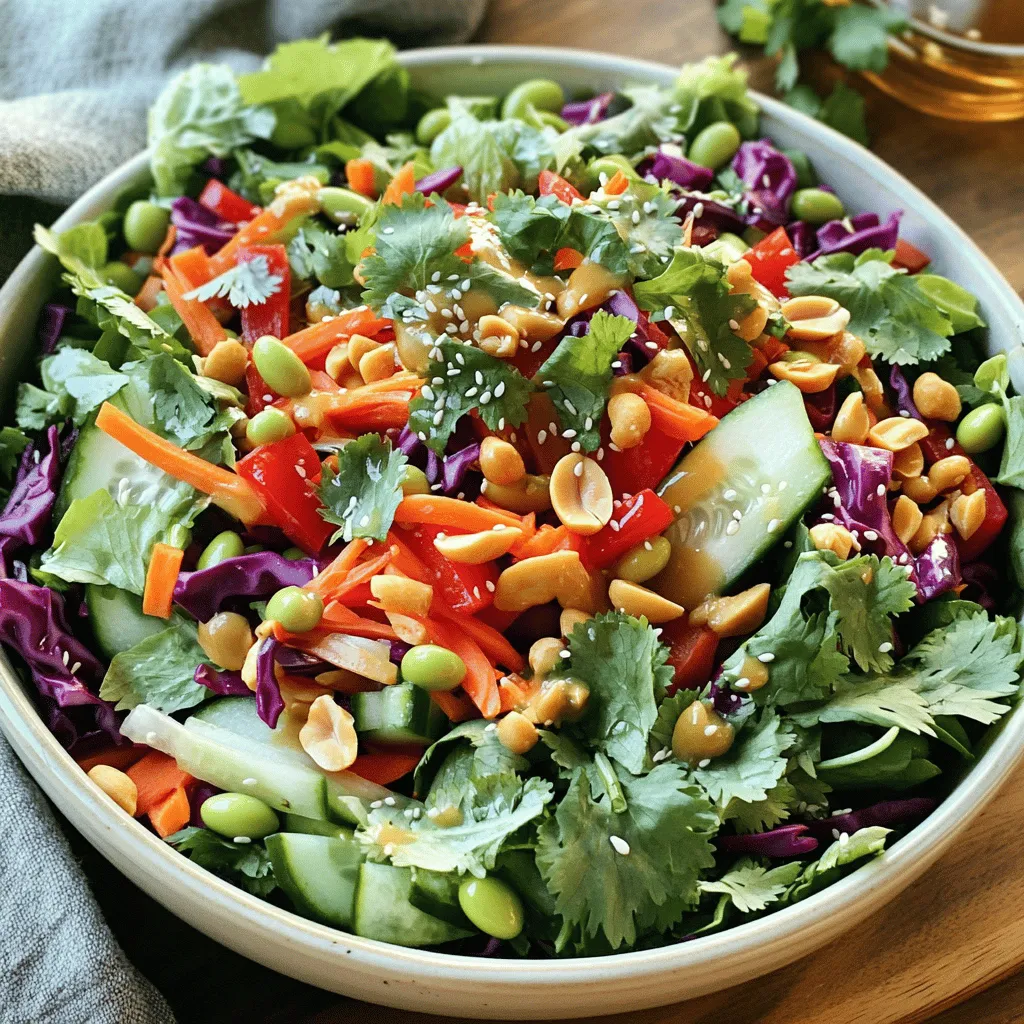
If you’re craving a fresh and tasty dish, try my Peanut Crunch Salad! This vibrant salad blends crunchy veggies with

- 8 oz elbow macaroni or fusilli pasta - 2 cups corn kernels (fresh, frozen, or canned) - ½ cup crumbled cotija cheese - 1 red bell pepper, diced - 1 jalapeño, seeded and minced - ¼ cup cilantro, chopped - 3 tablespoons mayonnaise - 2 tablespoons sour cream - 2 tablespoons lime juice - 1 teaspoon chili powder - Salt and pepper to taste When I make Mexican street corn pasta salad, I focus on fresh, vibrant flavors. This dish is great for gatherings or a cozy dinner. First, I select my main ingredients. The pasta is the base, and I often use elbow macaroni or fusilli. They hold the dressing well. Next, I add corn. Fresh corn is best, but frozen or canned works fine. For color and crunch, I include diced red bell pepper. It adds sweetness. I also like to use jalapeño for a little heat. If you prefer less spice, remove the seeds. Finally, I sprinkle in chopped cilantro for a fresh taste. The dressing is key. I mix mayonnaise and sour cream for creaminess. Lime juice brightens the flavors, while chili powder gives it that classic street corn taste. I season with salt and pepper, making it just right. For the full recipe, check out the detailed instructions. Enjoy creating this flavorful dish! To start, boil a large pot of salted water. Add 8 ounces of elbow macaroni or fusilli pasta. Cook it according to the package instructions until it’s al dente. This means it should be firm but not hard. Once done, drain the pasta in a colander. Rinse it under cold water. This helps stop the cooking process and keeps the pasta from getting mushy. Next, grab a large skillet. Over medium heat, add 2 cups of corn kernels. You can use fresh, frozen, or canned corn. Sauté the corn for about 5 to 7 minutes. You want it to get slightly charred. This will bring out its natural sweetness and add a nice flavor. Once cooked, set it aside to cool. In a large mixing bowl, combine the cooled pasta and sautéed corn. Add in the diced red bell pepper, minced jalapeño, finely chopped red onion, halved cherry tomatoes, and chopped cilantro. This mix of colors and textures makes the salad lively. Now, let’s make the dressing. In a small bowl, whisk together 3 tablespoons of mayonnaise, 2 tablespoons of sour cream, 2 tablespoons of lime juice, 1 teaspoon of chili powder, and a pinch of salt and pepper. Make sure it's well blended. Pour the dressing over the pasta and vegetable mix. Toss everything gently until well coated. You want every bite to burst with flavor. Finally, sprinkle ½ cup of crumbled cotija cheese over the top. Give it a light toss to mix it in. This cheese adds a creamy and salty kick to the salad. For the best flavor, cover the salad and chill it in the fridge for at least 30 minutes. This allows all the flavors to meld together beautifully. For more detailed steps, check out the Full Recipe. Using fresh ingredients is key for the best flavor. Fresh corn gives a sweet crunch. Look for corn on the cob in season. If fresh corn is not available, frozen corn works well too. Just be sure to sauté it to add a bit of char. Adjusting seasoning to taste is easy. Start with salt and pepper. After mixing, taste the salad. You might want more lime juice for zing. A bit more chili powder can add heat if you like it spicy. Serving your pasta salad in a large bowl makes it inviting. For a colorful touch, add extra diced red bell pepper on top. You can also sprinkle more cotija cheese for a creamy look. Garnish with chopped cilantro for a pop of color. Lime wedges on the side add brightness. This not only looks good but also gives a fresh twist when served. For a gluten-free option, swap the pasta for gluten-free pasta. There are great options available that taste just as good. To make the salad vegan, use plant-based mayo and sour cream. You can replace cotija cheese with vegan cheese or simply leave it out. The salad will still taste great! {{image_2}} You can change the cotija cheese if you want. Feta cheese works well too. If you seek a creamier texture, try goat cheese. For pasta, elbow macaroni is great, but fusilli adds a fun twist. You can also use whole wheat pasta for a healthier option. Feel free to mix in different veggies. Try adding diced cucumbers for some crunch. Chopped radishes can give a nice bite. You can even toss in some black beans for added protein and fiber. Each swap can change the salad’s flavor and texture. For a heartier dish, add proteins. Grilled chicken or shrimp are excellent choices. They pair well with the other flavors. You can also use cooked bacon for a smoky touch. This will make your salad more filling and satisfying. If you love heat, spice it up! Add extra chilies or a splash of hot sauce. You can use your favorite chili powder or even diced serrano peppers. This will elevate the flavor and give it a nice kick. Get creative by mixing in ideas from other cuisines. How about a Mediterranean twist? Add olives and artichokes for a unique taste. You can also mix Mexican street corn flavors with a classic pasta salad. Think about adding olives, mozzarella, and basil for a fun fusion. Combining flavors from different cultures can bring fresh excitement. The key is to balance the tastes. You want to keep that beloved street corn essence while exploring new flavors. To keep your Mexican street corn pasta salad fresh, store it in an airtight container. This helps prevent it from absorbing other flavors in your fridge. It stays fresh for about 3 to 5 days. After that, the taste and texture may change. Always check for any signs of spoilage before eating. You can freeze the pasta salad, but it's best to keep the dressing separate. To freeze, place the salad in a freezer-safe bag or container. Remove as much air as possible to avoid freezer burn. When you are ready to eat, let it thaw in the fridge overnight. Reheat gently on the stove, adding a bit of lime juice to revive the flavors. Before serving leftovers, give the salad a good stir. It may need some refreshing. Add a little more lime juice or salt to boost the taste. You can also toss in some fresh cilantro or extra cheese for a flavor kick. This way, you can enjoy each bite as if it was fresh! Mexican street corn, or elote, is a popular street food in Mexico. It features grilled corn on the cob, slathered with creamy sauce. You usually find it topped with cotija cheese, chili powder, and fresh lime juice. This dish bursts with flavors and textures that create a delightful experience. Yes, you can! Frozen corn is a great option. It is sweet and tender. Using frozen corn saves time and is easy to find. Just remember to thaw it first. Fresh corn has a bit more crunch and flavor, but frozen works well too. To spice up this salad, add more jalapeños. You can use diced fresh ones or pickled ones. Another option is to sprinkle in cayenne pepper or hot sauce. If you enjoy smoky flavors, try adding smoked paprika. Adjust to your heat preference for the best flavor. This salad pairs well with grilled meats. Try serving it alongside chicken, steak, or fish. It also complements barbecued dishes or tacos. For a lighter meal, serve it with a fresh green salad. The flavors blend well together in any meal setting. You can keep leftovers in the fridge for 3 to 5 days. Store them in an airtight container to maintain freshness. If the salad looks or smells off, it’s best to toss it. Always check for any changes before enjoying leftovers. This blog post covered a tasty Mexican Street Corn Pasta Salad. We explored key ingredients, like pasta, corn, and cotija cheese. I shared step-by-step instructions for making and storing the salad. You learned tips for flavor and presentation, along with variations for your tastes. Remember, using fresh ingredients enhances the flavor and joy of cooking. Enjoy experimenting and make this salad your own!

Mexican Street Corn Pasta Salad Flavorful and Fresh Dish

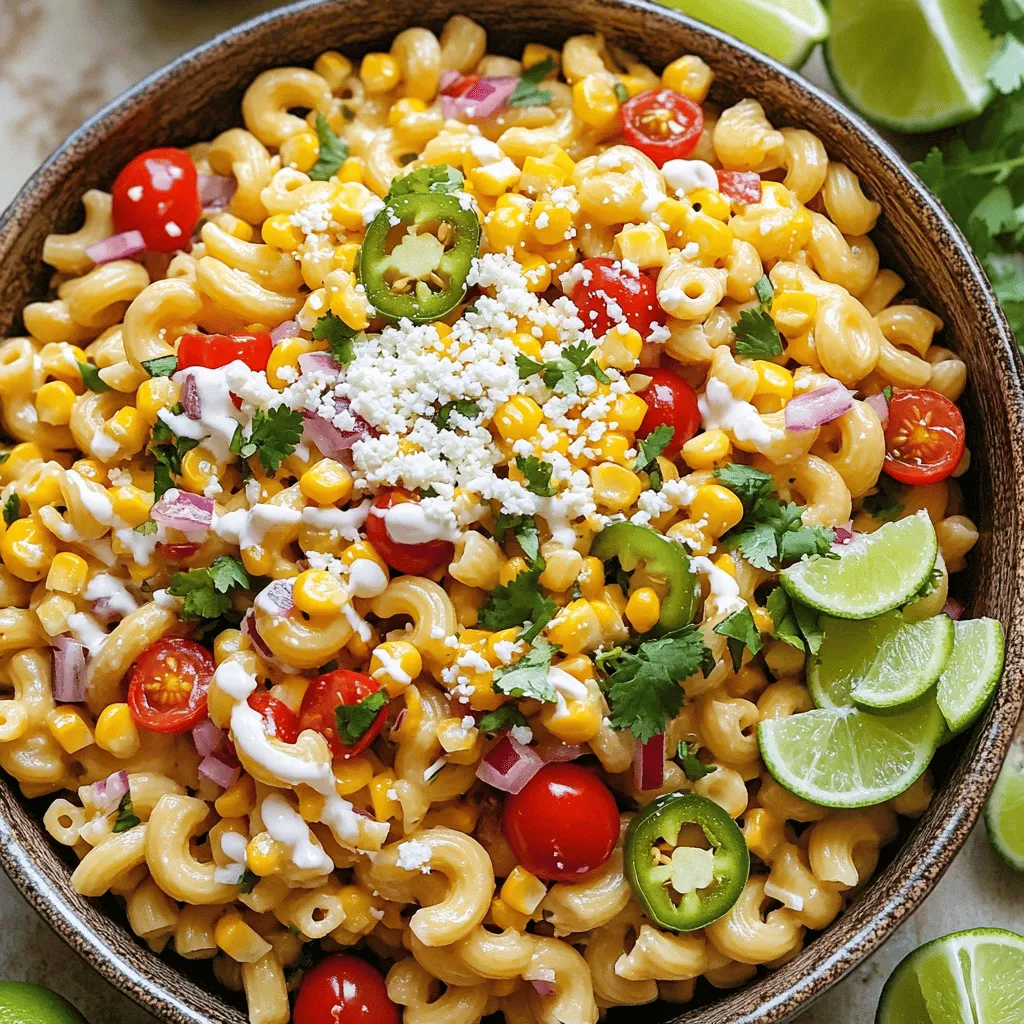
If you love vibrant flavors and fresh ingredients, this Mexican Street Corn Pasta Salad is for you! This dish brings

- 4 ripe peaches, pitted and chopped - 1 cup freshly squeezed lemon juice (about 4-5 lemons) - 1 cup granulated sugar (adjust to taste) - 4 cups water - 1/2 teaspoon pure vanilla extract (optional) - Fresh mint leaves for garnish - Lemon slices for garnish - Medium saucepan - Fine-mesh strainer or cheesecloth - Large pitcher To make my homemade peach lemonade, I start with fresh, ripe peaches. The sweetness from these fruits is key to a great drink. I also use fresh lemons for their bright, zesty flavor. Granulated sugar helps balance the tartness from the lemons. Adjusting the sugar gives you control over the sweetness. Next, I add water to help blend the flavors. A splash of pure vanilla extract adds a unique twist, but it's optional. For garnishing, I love using fresh mint leaves and lemon slices. They make the drink look beautiful and add extra flavor. For equipment, you need a medium saucepan to cook the peaches. A fine-mesh strainer or cheesecloth helps to separate the liquid from the solids. Finally, a large pitcher is perfect for mixing and serving the lemonade. You can find the full recipe for this refreshing peach lemonade to get started. First, take your ripe peaches and chop them into small pieces. In a medium saucepan, combine the chopped peaches, 1 cup of water, and sugar. Place the saucepan over medium heat. Stir occasionally and let it simmer for about 10 to 15 minutes. You want the peaches to soften and release their sweet juices. This step is key for a rich flavor. After cooking, remove the saucepan from the heat. Let the mixture cool for a few minutes. Once it's cool, strain it into a large pitcher using a fine-mesh strainer or cheesecloth. Press down on the solids to get every drop of liquid. Then, add the freshly squeezed lemon juice along with the remaining 3 cups of water. Stir everything well until it's fully mixed. Taste it and adjust the sweetness if needed. Now it's time to chill your peach lemonade. Place the pitcher in the refrigerator for about 1 hour. This lets the flavors blend perfectly. When you're ready to serve, fill glasses with ice cubes. Pour the chilled lemonade over the ice. For a nice touch, garnish each glass with fresh mint leaves and lemon slices. Enjoy your refreshing summer drink! How do I adjust sugar levels? Taste is key! Start with one cup of sugar. After mixing, taste and add more sugar if needed. Remember, you can always add more, but you cannot take it out. How do I balance tartness with lemon juice? For a nice balance, use one cup of freshly squeezed lemon juice. This amount adds a bright flavor. If it’s too tart, add a little more sugar. If it’s too sweet, add more lemon juice. What are the tips for selecting ripe peaches? Choose peaches that feel soft but not mushy. Look for a rich color and a sweet scent. This means they are ripe and ready to use. Why should I use freshly squeezed lemon juice versus store-bought? Fresh lemon juice tastes better! It has a bright flavor that store-bought juice lacks. The taste difference makes your peach lemonade stand out. What is the ideal glassware for serving? Use clear glasses to show off the pretty color of the peach lemonade. Tall glasses work well. They also hold more ice and lemonade, keeping your drink cold longer. What snacks or appetizers pair well with peach lemonade? Peach lemonade goes great with light snacks. Try serving it with cheese, crackers, or fresh fruit. It also complements spicy foods nicely, balancing the heat with its sweetness. For the full recipe, check out the detailed steps above! {{image_2}} You can make your peach lemonade even better by adding flavors. Infusing herbs like basil or rosemary gives it a fresh twist. Simply add a few leaves to the peach mixture while it cooks. The herbs will add a nice depth to the drink. Another fun idea is the Georgia peach twist. Just add extra peach slices to your lemonade. This not only boosts the peach flavor but also makes it look beautiful. The more peaches, the better! If you want a grown-up version, you can add alcohol. A splash of vodka or gin creates a refreshing cocktail. Just mix in about one to two ounces per glass when serving. A peach lemonade spritzer is another option. You can combine your lemonade with sparkling water. This adds fizz and makes it a fun drink for parties. The bubbles will keep everyone refreshed. You can also make healthier choices when making this drink. Use honey or agave syrup instead of sugar. These natural sweeteners give a nice taste without the extra calories. If you want a low-calorie version, simply reduce the sugar and use more lemon juice. This keeps the drink bright and tasty while cutting down on calories. You can still enjoy a delicious homemade peach lemonade without the guilt! For the full recipe, check out the Refreshing Peach Lemonade section. To keep your peach lemonade fresh, store it in a sealed pitcher. Place it in your fridge. This way, it stays cool and tasty. Homemade peach lemonade is best enjoyed within three to five days. After this time, it may lose its bright flavor. You can freeze peach lemonade into ice cubes. Pour the lemonade into an ice cube tray. Once frozen, pop the cubes out and store them in a zip-top bag. These cubes are great for adding to drinks later. When you want to use them, just take out what you need. Let them sit at room temperature for a few minutes to thaw. You can also blend them into slushies for a fun treat. If you have leftover peach lemonade, get creative. You can make popsicles by pouring it into molds and freezing. These are great for hot days. You can also use the leftover lemonade in cocktails or spritzers. Just mix it with some sparkling water or your favorite spirit for a refreshing drink. Enjoy experimenting with your peach lemonade leftovers! Yes, you can use frozen peaches! They save time and add a sweet flavor. However, using frozen peaches can change the texture. Fresh peaches give a better taste and texture. If you choose frozen, let them thaw first. Then, chop them into smaller pieces. This helps them mix better with the other ingredients. You can store homemade peach lemonade in the fridge for up to 5 days. Keep it in a sealed pitcher or bottle. This keeps it fresh and tasty. After a few days, the flavors might change. You can also freeze it for longer storage. Pour it into ice cube trays for easy use later. Just thaw it in the fridge or at room temperature when you want some. Yes, you can use less sugar! Try honey or agave syrup as substitutes. These sweeteners add a nice flavor. Just remember, using less sugar may change the taste. Start with half the amount and taste as you go. This way, you can find what works best for you. Enjoy your peach lemonade while keeping it healthy! You can make delicious peach lemonade easily. We covered fresh ingredients, like ripe peaches and lemons. I shared steps to cook, strain, and chill for the best taste. You can also adjust sweetness and add fun flavors. Finally, think about how to store leftovers or use them in new creations. Enjoy this drink on any sunny day. It’s refreshing and simple to share with friends and family. Embrace your creativity and make this recipe your own!

Homemade Peach Lemonade Refreshing Summer Drink

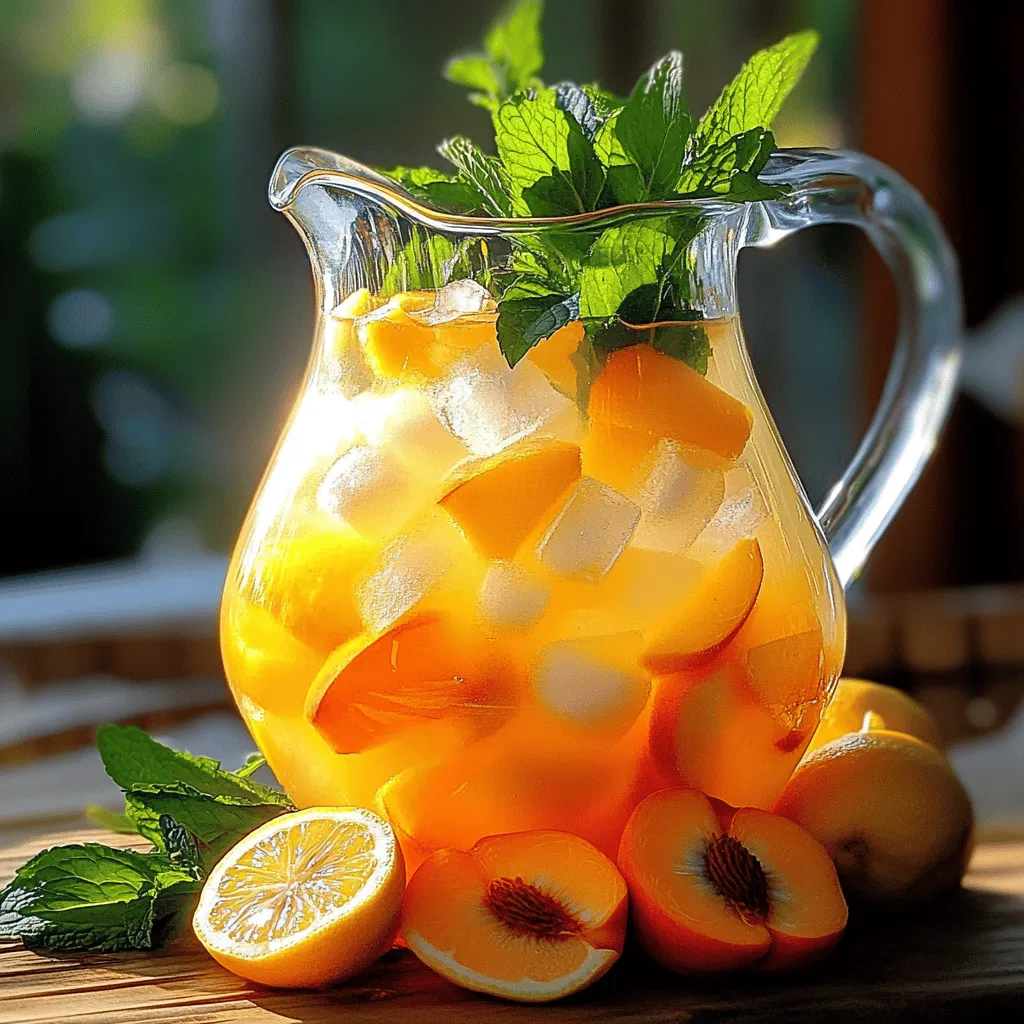
When summer hits, there’s nothing better than a refreshing drink. That’s where my Homemade Peach Lemonade comes in. Imagine ripe

To create a delicious Blueberry Cheesecake Fillo Galette, gather these key ingredients: - 8 sheets of fillo dough - 1 cup ricotta cheese - 1 cup cream cheese, softened - 1/2 cup powdered sugar - 1 teaspoon vanilla extract - 2 cups fresh blueberries - 1 tablespoon lemon juice - Zest of 1 lemon - 1 egg (for egg wash) - 2 tablespoons melted butter (for brushing) - Pinch of salt - Additional powdered sugar for dusting (optional) These ingredients come together to form a creamy filling and a crispy crust. The blueberries add a sweet and tangy flavor that brightens the dish. You can elevate your galette with various toppings: - Whipped cream for a light touch - A drizzle of honey for extra sweetness - Fresh mint leaves for color and taste - A sprinkle of cinnamon for warmth These options can enhance your dessert and provide a lovely presentation. If you have allergies or preferences, consider these substitutions: - Use dairy-free cream cheese for a vegan option. - Swap out ricotta for a nut-based cheese if you're vegan. - Replace blueberries with raspberries or strawberries if desired. These adjustments keep the recipe flexible while ensuring everyone can enjoy this delightful dessert. Check out the Full Recipe for more guidance on making this treat your own! First, let's get ready to make this tasty treat. Preheat your oven to 375°F (190°C). Line a baking sheet with parchment paper to prevent sticking. Next, take one sheet of fillo dough and lay it flat on your clean surface. Brush it lightly with melted butter. Repeat this process with the remaining sheets, stacking them on top of each other. Each layer gets its own brush of butter. This helps the dough become crispy and golden. Now, let's make the cheesecake filling. In a bowl, mix the ricotta cheese, cream cheese, powdered sugar, vanilla extract, lemon juice, lemon zest, and a pinch of salt. Use a mixer or whisk until everything is smooth and creamy. This step is key for a tasty filling. Now it’s time to put everything together. Place the stack of fillo layers in the center of your baking sheet. Leave a large border around the edges. Spoon the cheesecake mixture into the middle. Spread it out evenly. Be sure to leave space around the edges for folding. Next, gently fold the edges of the fillo dough over the filling. It should create a rustic, open shape. Don’t worry if it looks imperfect; that’s the charm of a galette! Pinch the folds to keep everything secure. For a golden finish, beat an egg in a small bowl and brush it over the edges of the fillo. This will give it a lovely shine. Finally, scatter the remaining fresh blueberries over the cheesecake mixture for a pop of color and flavor. Place your galette in the preheated oven. Bake it for 25 to 30 minutes. You want it to be golden brown and crispy. Keep an eye on it to avoid burning. Once done, take it out and let it cool for a few minutes. Before serving, you can dust it with extra powdered sugar for a sweet touch. Now, slice it into pieces and enjoy this delightful blueberry cheesecake fillo galette. It’s sure to impress your friends and family! To get great fillo dough, keep it cool. Fillo dries out fast. Always cover the sheets with a damp towel while you work. This keeps them soft and easy to handle. Use at least eight layers for a nice, crunchy crust. Brush each layer with melted butter. This adds flavor and helps them stick together. For a smooth cheesecake, mix your cheeses well. Use a hand mixer for the best results. Start with room temperature cream cheese. This helps it blend easily with ricotta. Add the powdered sugar slowly. This way, it mixes in smoothly. Don’t overmix once you add the blueberries. You want to keep their shape and texture. Serve your Blueberry Cheesecake Fillo Galette warm or at room temperature. A scoop of vanilla ice cream pairs well with it. You can also serve it with fresh whipped cream. For a twist, add a drizzle of lemon glaze. It brightens the flavors. If you like, sprinkle some extra powdered sugar on top for a sweet touch. Enjoy your galette with a cup of herbal tea or coffee for a delightful treat. For the complete process, check the Full Recipe. {{image_2}} You can swap blueberries for other fruits. Raspberries, strawberries, or peaches work well. When using different fruits, adjust the sugar. Some fruits are sweeter than others. This keeps the balance right in your galette. For a fun twist, mix fruits. This adds color and flavor. Want to add some flair? Try mixing in chocolate or spices. A touch of cinnamon gives warmth. You can also use lemon zest for brightness. If you love chocolate, add cocoa powder to the filling. This creates a rich, creamy mix. You can sprinkle chocolate chips on top too! If you're gluten-free, look for gluten-free fillo dough. Many brands offer this option now. For a vegan version, swap cream cheese with cashew cream. Blend soaked cashews, lemon juice, and a touch of maple syrup. This creates a creamy filling without dairy. You can use a plant-based egg wash or skip it for a crispier finish. For the full recipe, refer to the ingredients and steps outlined above. To keep your Blueberry Cheesecake Fillo Galette fresh, place leftovers in an airtight container. Store it in the fridge for up to three days. Make sure it cools down completely before sealing it. This helps keep the fillo dough crisp as long as possible. When you're ready to enjoy your galette again, preheat your oven to 350°F (175°C). Place the galette on a baking sheet and cover it loosely with foil. Heat for about 10-15 minutes. This will warm it up and help restore some crispness to the fillo dough. You can freeze the Blueberry Cheesecake Fillo Galette if you want to save it for later. Wrap it tightly in plastic wrap and then in aluminum foil. It can last up to two months in the freezer. When you want to eat it, thaw it in the fridge overnight. Then, reheat it in the oven as mentioned above. This way, you can enjoy this delightful treat anytime! Making a Blueberry Cheesecake Fillo Galette takes about 50 minutes. This time includes 20 minutes for prep and 30 minutes for baking. You will love how fast and easy this dessert comes together! Yes, you can make this dessert ahead of time. You can prepare the cheesecake filling and the fillo dough. Store each in the fridge for up to two days. When ready to serve, assemble and bake the galette. It stays fresh and tastes great! This galette pairs well with whipped cream or vanilla ice cream. You can also serve it with fresh berries or a drizzle of chocolate sauce. These toppings add flavor and make it look even more appealing. Enjoy every bite of this tasty treat! You’ve learned all about creating a delicious Blueberry Cheesecake Fillo Galette. We covered essential ingredients, from primary components to tasty toppings. You now know the steps to prepare, assemble, and bake your dessert perfectly. I shared tips for great texture and how to store leftovers. Remember, you can explore variations to fit your taste or dietary needs. This dessert is both rewarding and fun to make. So, grab your ingredients and enjoy the process. Happy baking!

Blueberry Cheesecake Fillo Galette Delightful Recipe

Looking for a dessert that wows and delights? Meet the Blueberry Cheesecake Fillo Galette! This easy recipe combines crispy fillo

To make tasty pineapple chicken kabobs, you need fresh and quality ingredients. Here’s what you will need: - 1 lb chicken breast, cut into 1-inch cubes - 1 fresh pineapple, peeled, cored, and cut into 1-inch chunks - 1 red bell pepper, cut into 1-inch pieces - 1 green bell pepper, cut into 1-inch pieces - 1 small red onion, cut into wedges - 3 tablespoons soy sauce - 2 tablespoons honey - 2 tablespoons olive oil - 2 cloves garlic, minced - 1 teaspoon grated fresh ginger - 1 teaspoon ground black pepper - Skewers (soaked in water if using wooden skewers) These ingredients work together to create a balance of sweet and savory flavors. The chicken absorbs the marinade well, while the fresh pineapple adds a nice tropical touch. You will need a few basic tools to prepare these kabobs: - A large bowl for marinating - A sharp knife for cutting - A cutting board - Skewers for grilling - A grill or grill pan for cooking - Tongs to flip the kabobs Having these tools ready makes the cooking process smooth and easy. If you want to boost the taste of your kabobs, consider adding these optional ingredients: - Fresh herbs like cilantro or parsley for garnish - Lime or lemon juice for a zesty kick - Chili flakes or hot sauce for some heat - Additional vegetables like zucchini or cherry tomatoes Using these extras can help you customize your kabobs to fit your taste. You can find the full recipe to see how to combine these flavors! Start by making the marinade. In a large bowl, mix together the soy sauce, honey, olive oil, minced garlic, grated ginger, and black pepper. This mix adds sweet and savory notes to the chicken. Toss the cubed chicken in the marinade until it is well coated. Cover the bowl with plastic wrap and refrigerate for at least 30 minutes. If you want more flavor, let it marinate for up to 2 hours. While the chicken marinates, prepare the veggies and pineapple. Cut the fresh pineapple into 1-inch chunks. Slice the red and green bell peppers and the red onion into 1-inch pieces as well. Keep the pieces similar in size for even cooking. Once everything is ready, it's time to assemble the kabobs. Preheat your grill to medium-high heat. Take the marinated chicken and thread it onto skewers, alternating with pineapple, red bell pepper, green bell pepper, and red onion. This not only looks good but also adds flavor. Place the skewers on the grill and cook for about 10 to 15 minutes. Turn them occasionally so they cook evenly. Cook until the chicken is no longer pink and has nice grill marks. Once cooked, let them rest for a few minutes before serving. For the full recipe, refer to the instructions provided above. Marinating chicken is key for great flavor. Start with a good marinade mix, like soy sauce, honey, and garlic. These ingredients work well together. Let the chicken soak for at least 30 minutes. For deeper taste, marinate it for up to 2 hours. Always cover the bowl or use a zip-top bag. This keeps the chicken juicy and full of flavor. Grilling kabobs can be easy, but some mistakes can happen. First, make sure your grill is hot before you start. This helps to sear the meat quickly. Do not overcrowd the skewers. Leave some space between the pieces. This ensures even cooking. Also, flip the kabobs often. This lets them cook evenly on all sides. Lastly, avoid pressing down on the kabobs. This can let the juices escape. When serving your kabobs, make them look nice. Use a large platter to show off the colors. Add extra pineapple and bell peppers for a splash of color. For sides, try coconut rice or a fresh green salad. Both pair well with the sweet and savory flavors. You can also add a dipping sauce, like sweet chili sauce, for an extra kick. {{image_2}} You can swap chicken for other meats. Try pork, beef, or shrimp. Each brings a unique taste. Pork has a sweet flavor that pairs well with pineapple. Beef adds a rich, hearty texture. Shrimp cooks fast and absorbs flavors well. You can use the same marinade for these proteins. Just adjust cooking time as needed. If you want a meatless option, use firm tofu. Cut the tofu into cubes like chicken. Marinate it just like the chicken. Add colorful veggies like zucchini, mushrooms, and cherry tomatoes. These will grill beautifully and taste great with the pineapple. Consider adding a sprinkle of sesame seeds for extra crunch. You can change up the marinade for new flavors. Try teriyaki sauce for a sweet and savory taste. For a spicy kick, add sriracha or chili paste. You can also use lemon juice for a zesty twist. Experiment with herbs like basil or cilantro to brighten the dish. Each change makes your kabobs unique and exciting. For the full recipe, check out the Tropical Pineapple Chicken Kabobs section! After enjoying your delicious pineapple chicken kabobs, you may have some left. To store them, let the kabobs cool to room temperature. Then, place them in an airtight container. You can store the kabobs in the fridge for up to three days. This way, you keep the flavors fresh and tasty. When you’re ready to eat your leftover kabobs, reheating is easy. Preheat your oven to 350°F (175°C). Place the kabobs on a baking sheet. Cover them with foil to keep them moist. Heat for about 10-15 minutes, or until hot. You can also reheat them on the grill for a few minutes. This adds a nice char and keeps the taste vibrant. If you want to save kabobs for later, freezing is a great option. First, let them cool completely. Then, wrap each kabob in plastic wrap. Place them in a freezer-safe bag or container. They can last up to three months in the freezer. When you’re ready to eat, thaw them in the fridge overnight. Reheat using the methods mentioned above for a quick meal. For more details, check out the Full Recipe. The best way to cut chicken for kabobs is to use boneless chicken breast. Cut the chicken into 1-inch cubes. This size cooks evenly and stays juicy. Make sure to cut against the grain for tender bites. If you cut with the grain, the meat can be tough. Remember to keep your knife sharp. A good knife helps you cut smoothly. Yes, you can use frozen chicken, but it's better to thaw it first. Frozen chicken needs more time to cook. This can lead to uneven cooking, which is not safe. Thaw chicken in the fridge overnight or use the microwave. Once thawed, cut it into 1-inch cubes, just like fresh chicken. This ensures your kabobs turn out juicy and delicious. To make your kabobs more flavorful, try marinating the chicken longer. A marinade adds depth and taste. I like to marinate for at least 30 minutes. You can also add spices like cumin or paprika to the marinade. Another tip is to use fresh herbs, like cilantro or basil. These add brightness and flavor. Don't forget to mix in some citrus juice for a zesty kick. For the full recipe, check the section above. You learned how to make tasty pineapple chicken kabobs. We covered key ingredients, tools, and optional items to boost flavor. The step-by-step guide helped with marinating, grilling, and serving your kabobs perfectly. Don't forget the tips to avoid common mistakes. You can try different proteins or even veggies for variety. Lastly, proper storage and reheating keep your kabobs delicious. Enjoy your cooking and share this recipe with others for fun meals!

Pineapple Chicken Kabobs Tasty and Easy Recipe

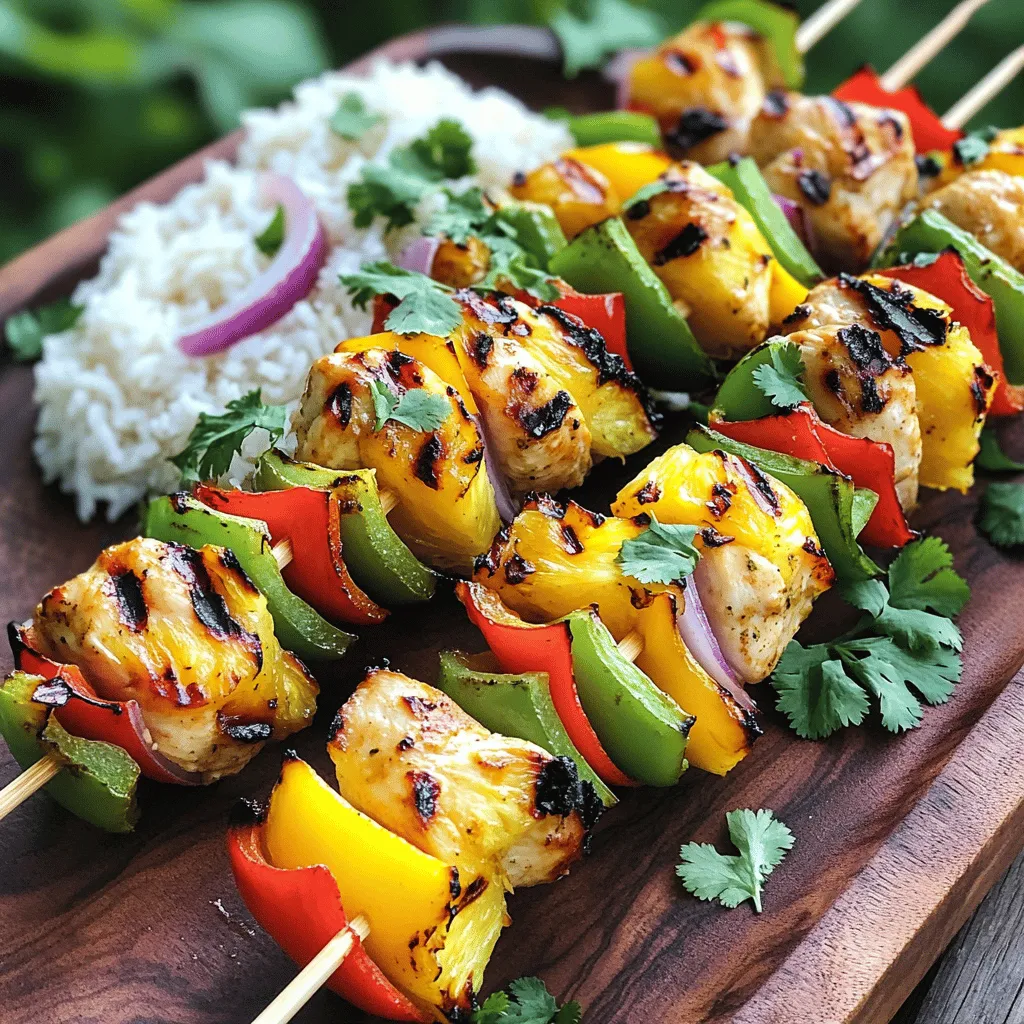
Are you ready to impress your friends and family with a fun, tasty dish? Pineapple Chicken Kabobs are super easy

- 3 medium cucumbers - 1 red bell pepper - 1 carrot - 2 green onions - Fresh cilantro leaves (optional) - 1 tablespoon sesame seeds - 1 tablespoon chili garlic sauce - 2 tablespoons soy sauce (or tamari) - 1 tablespoon rice vinegar - 1 teaspoon sugar - 1 teaspoon sesame oil - Salt to taste Using fresh cucumbers is key. They add crispness and flavor. Look for firm, bright ones. The best soy sauce enhances your dish. I prefer low-sodium soy sauce for balance. Tamari is a great gluten-free choice. It gives a similar taste. Always check the label for quality. This attention to detail makes your salad better. Start by preparing your veggies. For the cucumbers, thinly slice them into rounds. Use a sharp knife for even cuts. Next, take the red bell pepper and julienne it. This means cutting it into thin strips. Finally, grate the carrot using a box grater or a food processor. Place all these veggies into a large mixing bowl. Now, let's make the dressing. In a small bowl, combine the chili garlic sauce, soy sauce, rice vinegar, and sugar. Mix these ingredients well. It is important to whisk thoroughly. This helps blend the flavors for a tasty dressing. Pour the dressing over the vegetable mix in the large bowl. Toss everything together gently. This ensures the veggies get coated well with the dressing. Let the salad rest for about 10-15 minutes. This time lets the flavors meld together, and the cucumbers release some of their juices. To control the heat, you can add more chili garlic sauce. This will give your salad a nice kick. You can also try using fresh or dried chili peppers. If you want a different spice, consider adding sriracha or gochujang. Each option gives a unique flavor. To boost the taste, consider adding fresh herbs. Cilantro and mint pair well with the salad’s crunch. You can also add a pinch of ground ginger for warmth. Another option is to sprinkle in some crushed red pepper flakes for extra heat. These small tweaks can make a big difference. For serving, use colorful bowls or platters. Arrange the salad neatly for a stunning look. A sprinkle of sesame seeds adds charm. Finally, garnish with fresh cilantro leaves. This brightens the dish and adds a pop of color. Enjoy the vibrant sight before you dig in! {{image_2}} You can switch up the veggies in this salad. Try using radishes or cabbage for a new twist. Both add a nice crunch and flavor. If you need a gluten-free option, use tamari instead of soy sauce. Tamari has a similar taste and works great in this recipe. Want to make this salad more filling? You can add proteins like tofu or grilled chicken. They blend well with the fresh veggies. For extra crunch, toss in some nuts or seeds. Sesame seeds are a great choice, but you can also use chopped peanuts or sunflower seeds. Using seasonal veggies can make this salad even better. In the summer, add in fresh corn or zucchini. They bring a bright taste and a pop of color. This keeps the salad fresh and fun. Enjoy these variations to suit any occasion! Don’t forget to check the Full Recipe for all the details. To keep your Spicy Asian Cucumber Salad fresh, store it in the fridge right away. Use an airtight container to seal in flavors and moisture. This helps keep the salad crunchy and tasty. If you have a large batch, divide it into smaller portions. This way, you can grab just what you need. For the best taste, enjoy your salad within three days. After this, the cucumbers may get soggy. Look for signs that the salad has gone bad. If you see any discoloration or a bad smell, it’s time to toss it. Trust your nose and eyes to guide you. While you can freeze this salad, I don’t recommend it. Freezing changes the texture of cucumbers. They become mushy when thawed. If you must freeze, place it in a freezer-safe bag. Remove as much air as possible to avoid freezer burn. Remember, the fresh taste will not be the same after freezing. Yes, you can make this salad a few hours before serving. I recommend making it no more than 4 hours in advance. This way, the cucumbers stay crisp, and the flavors blend well. This salad pairs well with grilled chicken or fish. You can also serve it with rice or noodles. It adds a fresh crunch to any meal. Yes! You can prepare it for the week. Just store the salad in airtight containers. Keep the dressing separate until you’re ready to eat. This helps maintain the salad's crispness. To make it vegan, swap the regular soy sauce for tamari. You can also use maple syrup instead of sugar. These changes keep the salad tasty and plant-based. For the complete recipe, check out Fiery Crunchy Cucumber Salad 🥒. The Spicy Asian Cucumber Salad is fresh, flavorful, and easy to make. We covered key ingredients, preparation steps, and tips to enhance your dish. Remember to adjust the spice level to suit your taste. For a nutritious boost, consider adding proteins or seasonal veggies. Store leftovers properly to keep them fresh. This salad is great for meal prep and pairs well with many dishes. Enjoy creating this tasty dish that brightens any meal!

Spicy Asian Cucumber Salad Fresh and Flavorful Recipe

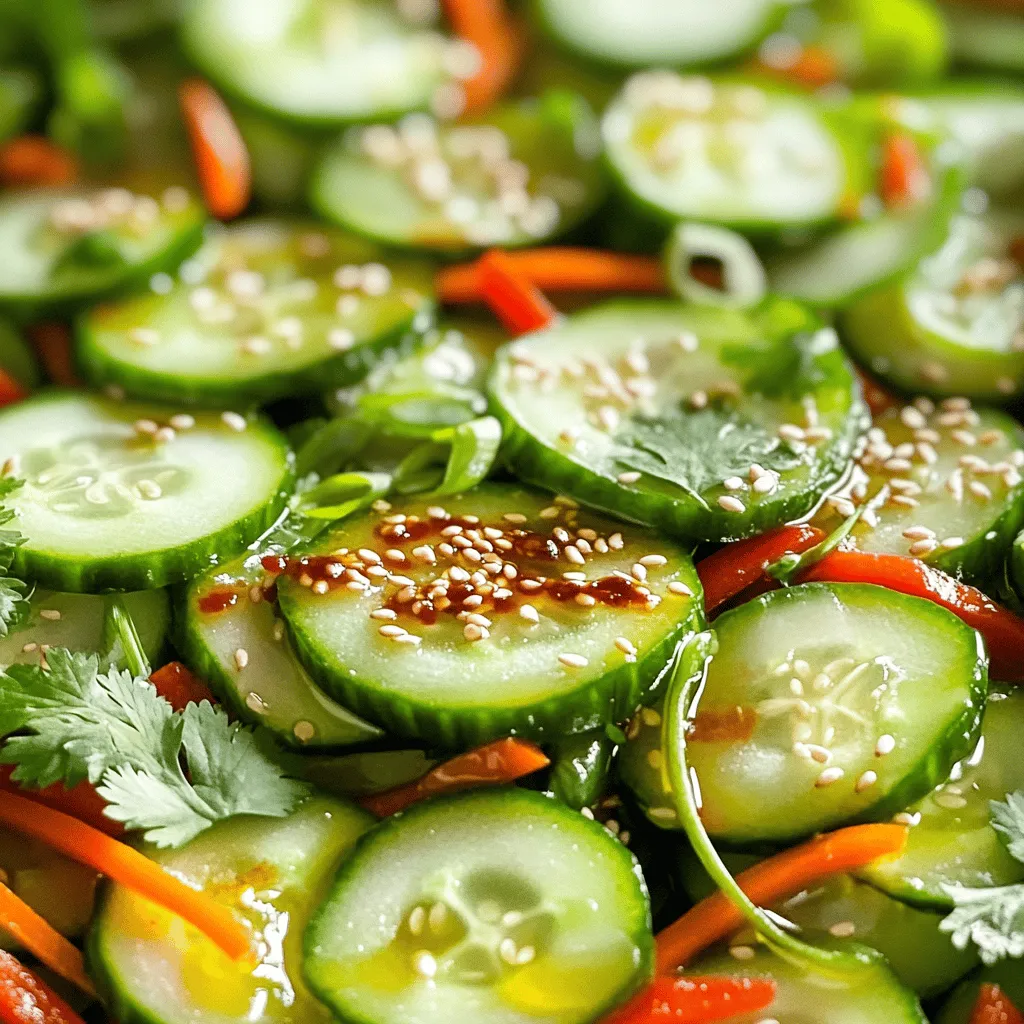
Get ready to spice up your meal with my delicious Spicy Asian Cucumber Salad! Crisp cucumbers mixed with vibrant veggies

- 1 lb large shrimp, peeled and deveined - 4 cloves garlic, minced - 1 cup heavy cream - 1 tablespoon olive oil - 2 tablespoons unsalted butter - 1 teaspoon paprika - 1 teaspoon Italian seasoning - Salt and pepper to taste - 1 cup spinach, chopped - 1/2 cup grated Parmesan cheese - Fresh parsley, chopped (for garnish) When measuring ingredients, use dry measuring cups for solids and liquid measuring cups for liquids. This ensures accuracy. Keep a set of measuring spoons handy for small amounts like spices. Using the right tools helps you get the best results in your cooking. You can swap heavy cream with half-and-half or coconut milk for a lighter option. If you want lower fat, use a non-dairy cream. For the shrimp, feel free to try scallops or chicken. If you don’t have fresh spinach, frozen spinach works too. Just make sure to thaw and drain it well. These substitutions keep your dish tasty and flexible. For the cheese, you can use Asiago or Gruyere for a different flavor twist. Check out the Full Recipe for more ideas! 1. First, grab a large skillet. Place it on the stove over medium heat. 2. Add 1 tablespoon of olive oil and 2 tablespoons of unsalted butter. Let them heat until melted. 3. Next, take 4 cloves of minced garlic. Add them to the hot oil and butter. 4. Cook the garlic for about 1 minute. You want it fragrant, not burnt. 1. Now, it’s time for the shrimp. Take 1 pound of large, peeled, and deveined shrimp. 2. Toss the shrimp into the skillet. Sprinkle in 1 teaspoon of paprika and 1 teaspoon of Italian seasoning. 3. Season with salt and pepper to taste. 4. Cook the shrimp for 2-3 minutes on each side. They should turn pink and opaque. 5. Once done, remove the shrimp from the skillet and set them aside. 1. In the same skillet, pour in 1 cup of heavy cream. Bring it to a gentle simmer. 2. Stir in the remaining butter until it melts. 3. Add 1 cup of chopped spinach to the cream. Let it wilt for 1-2 minutes. 4. Gradually mix in 1/2 cup of grated Parmesan cheese. Stir until the sauce is creamy and smooth. 1. Return the shrimp to the skillet. Gently toss them in the creamy sauce for about 2 minutes. 2. Adjust the seasoning if needed. 3. Finally, remove from heat. Garnish with freshly chopped parsley before serving. For a complete meal, serve your creamy garlic shrimp over rice or pasta. Enjoy! For the full recipe, refer to the instructions above. To avoid overcooking shrimp, pay attention to color and time. Cook them until they turn pink and opaque. This usually takes about 2 to 3 minutes on each side. If they curl tightly, you may have cooked them too long. When sautéing garlic, keep a close watch. Garlic burns quickly and turns bitter. Cook it for about one minute, just until fragrant. Use medium heat and stir often to ensure even cooking. This way, you’ll keep that sweet garlic flavor intact. For a creamy sauce, consistency is key. Start with heavy cream, as it gives a rich texture. Simmer it gently to avoid separation. Stir in your cheese gradually. This helps the cheese melt evenly, making the sauce smooth. Parmesan cheese works great in this dish. It adds a nice salty flavor. You can also try cream cheese or mascarpone for a different twist. Both options add creaminess and richness. Serve creamy garlic shrimp with rice or pasta for a hearty meal. Both options soak up the sauce well. Add a side of steamed vegetables for color and nutrition. Wine pairings can enhance the meal. A crisp white wine, like Sauvignon Blanc, complements the shrimp. For a bolder choice, try a light red like Pinot Noir. Both wines elevate the flavors and make the meal special. For the full recipe, check out the Garlic Lovers’ Creamy Shrimp Delight! {{image_2}} You can easily turn creamy garlic shrimp into a pasta dish. Start by cooking your favorite pasta, like fettuccine or linguine. Make sure to cook it al dente. The pasta will soak up the creamy sauce and add a nice texture. Once the pasta is ready, mix it with the creamy garlic shrimp right in the skillet. This method allows the noodles to absorb the sauce's rich flavor. For best results, add the pasta to the pan after making the sauce. Toss everything together gently. Adding veggies to your creamy garlic shrimp makes it colorful and nutritious. You can use seasonal vegetables like cherry tomatoes, bell peppers, or zucchini. These veggies add crunch and freshness. Chop them into small pieces and sauté them with the garlic before adding the shrimp. This way, they become tender and flavorful. Spinach is a great option too, as it wilts nicely in the sauce. If you love heat, you can spice up your creamy garlic shrimp. Add a pinch of red pepper flakes or sliced jalapeños. These ingredients will give a nice kick to the dish. While cooking the garlic, toss in the spice to let it bloom. This brings out the flavor and enhances the sauce. Adjust the amount based on your spice level preference. Enjoy your meal with a glass of chilled white wine to balance the heat. For the complete recipe, check out the Full Recipe. After enjoying creamy garlic shrimp, you may have some leftovers. To store them safely, place them in an airtight container. Glass or plastic containers work well. Make sure they cool down first before sealing. Store your shrimp in the fridge for up to three days. If you want to keep them longer, you can freeze them. Use freezer bags and remove as much air as possible. They can last up to three months in the freezer. When it’s time to enjoy your leftovers, reheating them properly is key. You want to keep your shrimp tender and tasty. The best method is to reheat them gently on the stove. Use a non-stick pan and set it to low heat. Add a splash of cream or broth to help keep them moist. Stir often, and heat them just until warm. Avoid high heat, as this can make the shrimp tough. If using a microwave, cover the dish and heat in short bursts. Aim for about 30 seconds at a time, stirring in between. Enjoy your delicious shrimp again! You can tell shrimp is cooked when it turns pink and opaque. It should curl into a "C" shape. If it curls into an "O," it may be overcooked. Cooking shrimp takes about 2-3 minutes on each side. Always keep an eye on them to avoid rubbery texture. Yes, you can use frozen shrimp. Just make sure to thaw them first. Place them in cold water for about 15-20 minutes. This helps them cook evenly. Frozen shrimp can save time and still taste great in this creamy garlic shrimp dish. Creamy garlic shrimp pairs well with many sides. Here are some ideas: - Rice: White, brown, or even jasmine rice. - Pasta: Fettuccine or linguine works best. - Bread: Crusty bread to soak up the sauce. - Salad: A fresh green salad for a light touch. If your sauce is too thin, there are simple ways to thicken it. You can: - Let it simmer longer to reduce the liquid. - Add a bit more cheese, like Parmesan. - Mix a teaspoon of cornstarch with water and stir it in. You can make this dish dairy-free. Use coconut cream or almond milk instead of heavy cream. For a low-fat option, try using low-fat milk or a dairy-free cream. Adjust seasoning to keep the flavor rich and satisfying. For the full recipe, check the details above. You can create a delicious creamy garlic shrimp dish using simple ingredients and steps. I covered the ingredients, preparation, cooking, and tips for best results. Remember to cook the shrimp just right to keep them tender. You can even make this recipe your own with variations and serving suggestions. Enjoy experimenting with flavors and enhancing the dish. Follow my steps, and you'll impress anyone who takes a bite. Keep these tips in mind for perfect results every time. Happy cooking!

Creamy Garlic Shrimp Rich and Flavorful Recipe

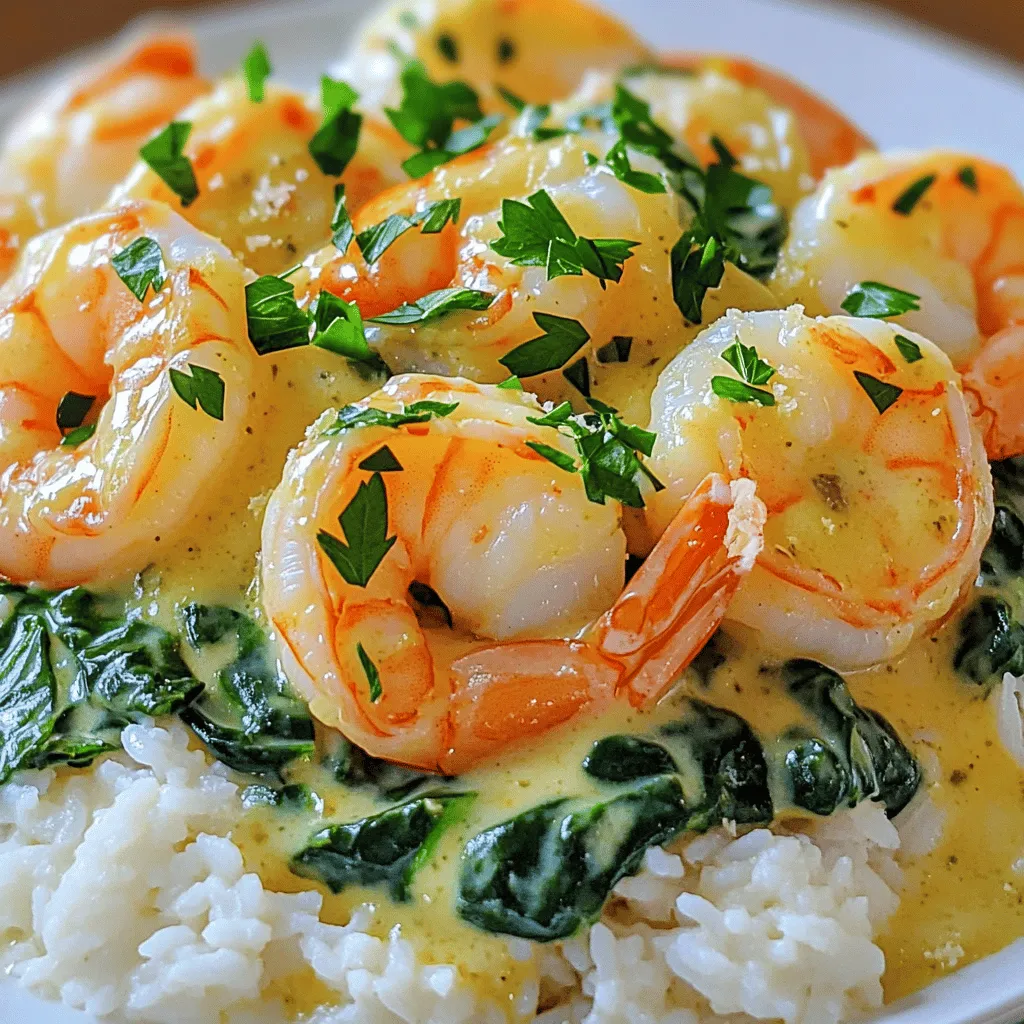
Looking for a quick and delicious meal? My Creamy Garlic Shrimp recipe packs rich flavor in every bite. With just

- 3 ripe peaches, sliced - 1 cup fresh mozzarella burrata - 2 cups fresh basil leaves - 2 tablespoons balsamic glaze - 1 tablespoon olive oil - Salt and pepper to taste - 1/4 cup toasted pine nuts To make the perfect Peach Caprese Salad with Burrata, you need fresh and high-quality ingredients. Let’s break down each one. Ripe Peaches: Choose peaches that feel slightly soft to the touch. They should smell sweet. This will give your salad a juicy and sweet flavor. Fresh Mozzarella Burrata: Burrata is creamier than regular mozzarella. It adds a rich texture to your dish. If you can’t find burrata, creamy buffalo mozzarella works well too. Fresh Basil Leaves: Fresh basil brings a bright taste. If you can't find fresh basil, you can use dried basil, but use less since it's stronger. Balsamic Glaze: The glaze adds sweetness and acidity. You can buy it or make your own by reducing balsamic vinegar until thick. Olive Oil: Use a good quality extra virgin olive oil. It enhances the flavors of the salad. Salt and Pepper: These simple seasonings bring out the natural flavors of the ingredients. Toasted Pine Nuts: Pine nuts add a nice crunch. You can substitute with walnuts or almonds if needed. - Alternatives for Burrata Cheese: If you can't find burrata, use creamy ricotta or a soft goat cheese for a different taste. - Choosing the Right Peaches: Look for peaches that are fragrant and slightly soft. Avoid hard or bruised ones. - Fresh vs. Dried Basil: Fresh basil is best, but if using dried, use about one-third the amount. Dried basil has a different flavor profile. For the full recipe and detailed steps, check the [Full Recipe]. First, wash your peaches well under cool water. This step is key for removing dirt. Next, cut each peach in half and remove the pit. Slice the peaches into wedges. Aim for thin, even slices for a nice look. Now, take a large serving plate. Arrange the peach slices in a circular pattern. Overlap them slightly for a pretty display. This makes your salad more inviting. Now it’s time to add the burrata. Tear the cheese into smaller pieces with your hands. Place these pieces among the peach slices. This adds creaminess and flavor. Next, scatter fresh basil leaves all around. The green basil adds a lovely color and smell. You want to create a vibrant look that draws people in. Drizzle balsamic glaze and olive oil over the salad. Use a spoon to spread it evenly across all the ingredients. This will enhance the taste and add a shiny finish. Finally, season your salad with salt and fresh cracked pepper. This will bring out all the flavors. For a crunchy finish, sprinkle toasted pine nuts over the top. These steps make this dish a true delight. For more details, check out the Full Recipe. How to select ripe peaches When I pick peaches, I look for ones that are soft and fragrant. A ripe peach should yield slightly when you press it gently. The color should be vibrant, with a golden hue. Avoid peaches with dark spots or wrinkled skin. This ensures your salad is juicy and sweet. Importance of using fresh ingredients Fresh ingredients make a big difference in taste. I always choose high-quality burrata and fresh basil. This salad shines when you use the best. Fresh flavors enhance every bite, making the dish more enjoyable. When you use fresh items, your meal feels alive and bright. Pairing wines with the salad For a refreshing drink, I recommend a chilled white wine. A Sauvignon Blanc pairs well with the sweetness of peaches. If you prefer red, a light Pinot Noir works nicely too. The right wine can elevate the salad experience. Accompaniments for a complete meal This salad goes well with grilled chicken or fish. A crusty baguette also makes a great side. These additions round out the meal and add heartiness. You can enjoy the salad as a light lunch or a stunning dinner starter. Plating suggestions for visual appeal When plating, I like to arrange peach slices in a circle. This creates a beautiful pattern. Place the burrata in the center for a focal point. Scatter basil leaves for a pop of green. A well-plated salad looks inviting and tastes better. Garnishing techniques Garnish with toasted pine nuts for crunch. A drizzle of balsamic glaze adds shine. Just a sprinkle of sea salt enhances the flavors. These small touches make the dish stand out. They also show your guests that you care about presentation. For the full recipe, check out the Peachy Burrata Bliss Salad. {{image_2}} You can switch up the cheese in this salad for a new twist. Goat cheese adds a tangy flavor. Feta cheese also works well if you want a salty kick. For those who love creaminess, try ricotta cheese. If you prefer a vegan option, use cashew cheese or coconut yogurt. Both give a creamy texture without dairy. Change the fruit based on the season. In summer, ripe peaches shine, but in fall, use pears. They offer a sweet taste that pairs well with burrata. For winter holidays, try pomegranate seeds for a festive look. They also add a tart taste that balances the salad. Adapt the recipe to match your special occasions and make it festive. Add spices or herbs to boost the flavor. A sprinkle of black pepper gives a nice kick. Fresh mint adds a cool touch, while chili flakes bring heat. You can also introduce toppings like prosciutto for a savory crunch. Try adding nuts or seeds for texture. Each enhancement makes the salad even more delicious. Check out the Full Recipe for more ideas! To keep your Peach Caprese Salad fresh, store leftovers in an airtight container. This helps prevent the salad from getting soggy. Place the salad in the fridge right away. You can keep it for 1 to 2 days. The peaches may lose some crunch but will still taste good. You might not think of reheating a salad, but if you enjoy it warm, do it gently. Heat it in a pan on low until just warm. Avoid microwaving, as it can make the burrata rubbery. Enjoy the salad warm or at room temperature for the best taste. I recommend serving your Peach Caprese Salad cold. The chilled peaches and creamy burrata work well together. If you prefer, let it sit at room temperature for about 15 minutes. This allows the flavors to bloom. Enjoy every bite of this refreshing dish! For the full recipe, check out the details above. You can prep the salad a few hours in advance. Store the peach slices in a bowl with lemon juice. This keeps them fresh and bright. You can also tear the burrata and wash the basil ahead. Just wait to assemble everything until you are ready to serve. This keeps the salad looking great and tasting fresh. Yes, you can make your own balsamic glaze! Combine balsamic vinegar and sugar in a pot. Heat it over medium heat. Stir until the sugar dissolves, then simmer. Cook until it thickens, about 10-15 minutes. Let it cool before drizzling it on your salad. You can also add a pinch of salt or herbs for a unique twist. To slice peaches, start by washing them well. Cut each peach in half and remove the pit. Slice each half into wedges. Aim for even slices, about 1/4 inch thick. This helps with even layering in your salad. You want them to be juicy but not too thick. Perfect slices make your salad look more appealing. In this post, we covered how to make a peach caprese salad with burrata. We looked at the key ingredients, including ripe peaches, fresh mozzarella, and basil. I shared tips on substitutes and best practices for selecting fresh ingredients. You learned how to prepare, assemble, and present the salad beautifully. Finally, we discussed variations, storage tips, and answered common questions. This easy salad not only tastes great but showcases summer’s best flavors. Enjoy it as a light meal or a starter at your next gathering.

Peach Caprese Salad with Burrata Fresh and Flavorful

Summer is here, and it’s the perfect time for a Peach Caprese Salad with Burrata! This fresh dish combines juicy

- 1 cup cooked jasmine rice - 1 lb boneless, skinless chicken thighs - 1 cup corn kernels (fresh or frozen) - 1 red bell pepper - 1 avocado - 1/2 cup crumbled cotija cheese - 2 tablespoons olive oil - 2 tablespoons lime juice - Spices: smoked paprika, chili powder, salt, and pepper The main ingredients in this dish are simple yet flavorful. You need one cup of cooked jasmine rice. This rice is fluffy and pairs well with spices. Next, grab one pound of boneless, skinless chicken thighs. They stay juicy and tender when cooked. You also need one cup of corn kernels, which can be fresh or frozen. This adds sweetness and crunch. For extra flavor, you’ll want a red bell pepper. Dice it up for a pop of color. You’ll also need an avocado for creaminess, and half a cup of cotija cheese. This cheese adds a nice salty bite. For the seasoning, use two tablespoons of olive oil to cook the chicken and veggies. Lime juice adds brightness; two tablespoons will do. Don’t forget your spices! Use smoked paprika and chili powder for depth. Salt and pepper will help bring all the flavors together. For the full recipe, check the details above. - Heat 2 tablespoons of olive oil in a skillet over medium heat. - Season 1 pound of diced chicken thighs with smoked paprika, chili powder, salt, and pepper. - Cook the chicken in the skillet for about 5 to 7 minutes. It should turn brown and cook through. Transfer it to a plate and set aside. - In the same skillet, add another tablespoon of olive oil. - Add 1 cup of corn kernels and 1 diced red bell pepper. - Cook these for about 5 minutes, stirring until they are charred and tender. - In a mixing bowl, combine 1 cup of cooked jasmine rice with the sautéed corn and bell pepper. - Add 2 tablespoons of lime juice and half of the chopped cilantro. Stir well to mix everything. - To assemble the bowls, divide the rice mixture into serving bowls. - Top each bowl with the cooked chicken, diced avocado, and 1/2 cup of crumbled cotija cheese. - Garnish with the remaining cilantro and an extra squeeze of lime if you like. For the full recipe, including ingredients and tips, check out the complete guide! How to achieve the best char on corn To get that perfect char on the corn, choose fresh corn if you can. If not, use frozen corn. Heat your skillet on medium-high heat. Add a little olive oil, then toss in the corn. Cook for about five minutes. Stir it only a few times. This allows for those nice, crispy char spots. Watch it closely so it doesn't burn. Timing for juiciness in chicken thigh cooking Chicken thighs stay juicy when cooked right. Start with a hot skillet and add the seasoned chicken. Cook for five to seven minutes. Check for a golden brown color. If you cut into it, the juices should run clear. This means your chicken is ready and juicy. Suggested spices for extra kick For a little extra kick, try adding cayenne pepper or garlic powder. These spices mix well with the smoked paprika and chili powder. Sprinkle them in when you season your chicken. This will give your dish a bold flavor that everyone will love. Alternative toppings to try Switch up your toppings for fun! Try using fresh jalapeños for heat or diced tomatoes for freshness. You could also add a dollop of sour cream or Greek yogurt. Each topping adds a new layer to the dish. Experiment to find your favorite combination! {{image_2}} You can switch out jasmine rice for brown rice or quinoa. Both options add more fiber. Brown rice gives a nutty flavor, while quinoa is light and fluffy. For cotija cheese, try feta or goat cheese. Both will still add creaminess to your dish. You can also skip cheese completely to make it dairy-free. In summer, add fresh vegetables like zucchini or cherry tomatoes. They boost flavor and color. You can even toss in some black beans for more protein. For winter, use roasted butternut squash or sweet potatoes. These veggies add warmth and sweetness. They make the bowl hearty and satisfying, perfect for cold days. To store leftovers properly, let your Street Corn Chicken Rice Bowl cool first. Place it in an airtight container. This keeps it fresh for up to three days. When you want to eat it again, simply reheat in the microwave. Use medium heat for about 2-3 minutes. Stir halfway through to ensure even warming. You can also reheat it on the stove. Add a splash of water to the pan. This helps keep the rice moist and tasty. If you want to freeze your bowl, separate the components. Freeze the chicken and corn mix in one bag. Freeze the rice in another. This way, they stay fresh longer. You can freeze them for up to three months. When you're ready to eat, take it out of the freezer. Thaw it in the fridge overnight. This helps maintain the best flavor and texture. Reheat as usual, and enjoy a quick meal! What is a Street Corn Chicken Rice Bowl? A Street Corn Chicken Rice Bowl is a tasty meal. It combines rice, chicken, corn, and fresh veggies. This dish gets its name from street corn, a popular Mexican snack. The flavors mix well, making it bright and fun. Can I make this dish in advance? Yes, you can make this dish ahead of time. Prepare the rice and chicken earlier in the day. Just store them in the fridge. When you are ready to eat, just heat them up. It’s a great meal for busy days. Is it suitable for meal prep? Absolutely! This dish is perfect for meal prep. You can pack it in containers for the week. Just keep the avocado separate until you eat it. This keeps everything fresh. Is it a healthy meal option? Yes, it is a healthy meal. The chicken provides protein, while the veggies add vitamins. The corn gives you fiber. Use whole ingredients for better nutrition. How can I make it more nutritious? To boost nutrition, add more veggies like spinach or zucchini. You can also use brown rice instead of jasmine. This extra fiber helps you feel full longer. What sides pair well with this dish? This dish goes well with a simple salad or black beans. You can also serve it with tortilla chips and salsa for crunch. These sides add flavor and variety. How to customize it for dietary needs? You can easily customize this meal. If you are vegan, use tofu instead of chicken. For gluten-free, ensure your rice is certified gluten-free. You can also swap ingredients based on what you like best. For the Full Recipe, check out the detailed instructions above. This post covered all you need to make a delicious Street Corn Chicken Rice Bowl. You learned about key ingredients, step-by-step cooking, and tips to improve your dish. Remember, you can swap ingredients for personal tastes, and meal prep is easy. Enjoy creating and sharing this flavorful bowl. Cooking should be fun, so experiment with new flavors. With these tips and ideas, you’ll impress everyone at the table. Happy cooking!

Street Corn Chicken Rice Bowl Flavorful Meal Idea

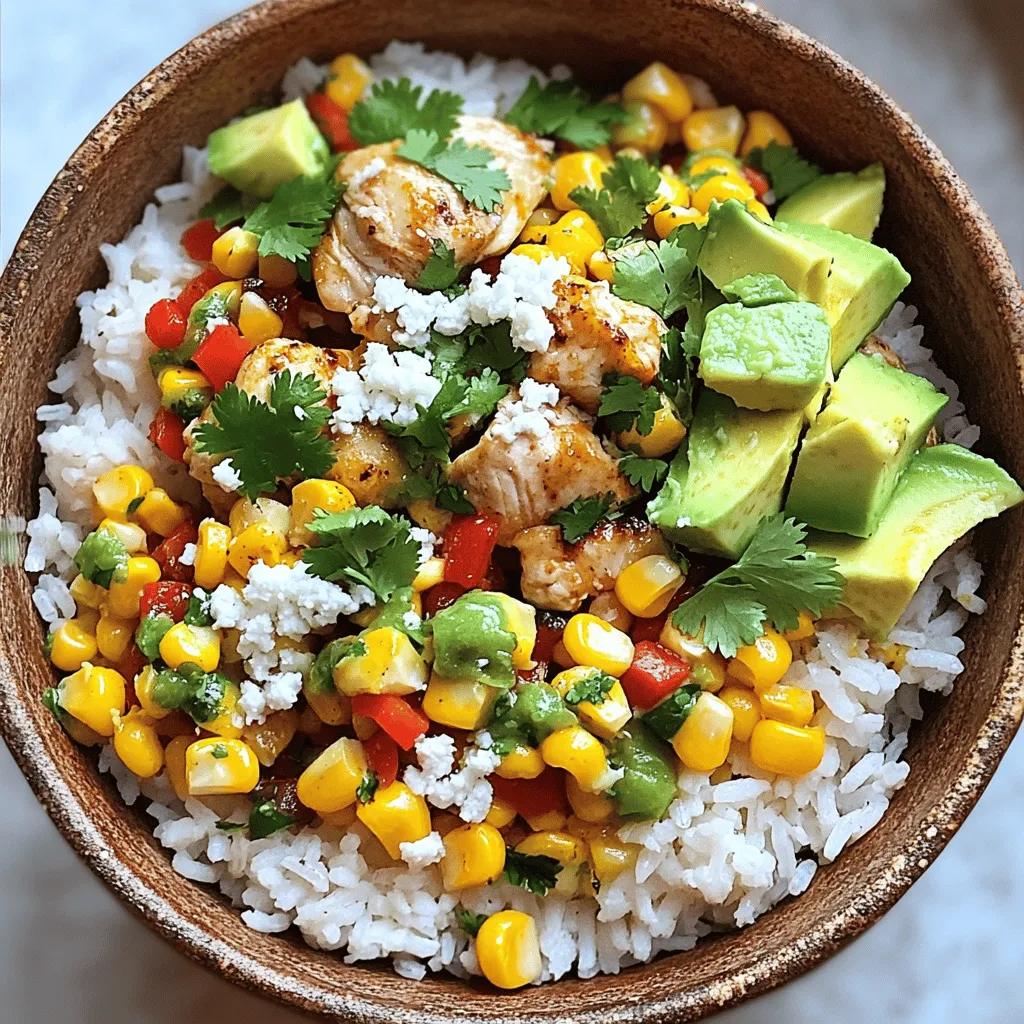
Are you craving a delicious and colorful meal? Look no further than the Street Corn Chicken Rice Bowl! Packed with

- 1 cup fresh pineapple, diced - 1 cup coconut water - Juice of 1 lime - 10 fresh mint leaves - 2 tablespoons agave syrup or honey - Sparkling water (to top off) - Ice cubes - Lime slices and mint sprigs for garnish The main ingredients for the Pineapple Coconut Mojito Mocktail are simple yet flavorful. Fresh pineapple gives the drink a sweet and tropical taste. Coconut water adds a lovely, light touch. Lime juice brings a zesty kick, while mint leaves add a refreshing aroma. You can sweeten it with agave syrup or honey, depending on your taste. - Flavored sparkling water - Alternative sweeteners (like stevia) - Additional fruits for garnish You can also customize your mocktail with optional ingredients. Flavored sparkling water can add a twist. If you prefer, try using stevia or another sweetener. You can also add other fruits for garnish, like berries or citrus slices, to make it more colorful. For the full recipe, check out the detailed instructions to create this refreshing drink. Enjoy your time in the kitchen! To start, gather your ingredients. You will need fresh pineapple, coconut water, lime juice, and agave syrup. 1. Blending Ingredients: In a blender, add 1 cup of diced pineapple, 1 cup of coconut water, the juice of 1 lime, and 2 tablespoons of agave syrup. Blend these until smooth. The mix should be creamy but not too thick. 2. Achieving Perfect Texture: If it’s too thick, add a splash of coconut water. This ensures it pours easily later on. Now, let’s bring in the mint. You want to release its fresh flavor. 1. Techniques for Muddling: Take 10 fresh mint leaves and place them in a pitcher. Use a muddler or the back of a spoon. Press gently, just enough to bruise the leaves without tearing them. 2. Importance of Mint Release: This step lets the mint oils escape. You want that bright minty aroma in your drink. Next, it’s time to mix everything together. 1. Mixing the Base with Mint: Pour the blended pineapple and coconut mix over the muddled mint in your pitcher. Stir well to combine all the flavors. 2. Pouring and Topping with Sparkling Water: Fill your glasses with ice cubes. Pour the mocktail mixture in until the glass is three-quarters full. Top off each glass with sparkling water. This adds a refreshing fizz. Stir gently. 3. Garnishing: Finish by adding a slice of lime and a sprig of mint to each glass. This recipe is a refreshing delight, perfect for any occasion. Enjoy your Pineapple Coconut Mojito Mocktail! For the full recipe, check the main section above. To make your Pineapple Coconut Mojito Mocktail shine, focus on the sweetness. You can adjust the sweetness by adding more or less agave syrup. Start with the 2 tablespoons, then taste. If it needs more, add a little more. You want the drink to be refreshing, not too sweet. Using fresh lime juice is key. Fresh juice gives a bright flavor. Bottled lime juice often lacks the same zing. Squeeze the lime right before you add it to your drink. This way, you get the best taste. For glassware, choose tall, clear glasses. These showcase the drink’s vibrant colors. You can also use mason jars for a fun look. The drink looks nice against the ice and garnishes. Garnish creatively! Add a slice of lime on the rim or drop it in the drink. Use a sprig of mint to add a pop of green. A colorful straw can also add a fun touch. You can prepare this mocktail in advance. Blend the pineapple and coconut mix and store it in the fridge. This keeps the flavors fresh. For best storage, keep the mint leaves separate until serving. Mint wilts quickly. Add it just before you pour the drink to keep it fresh. Enjoy your Pineapple Coconut Mojito Mocktail with ease, knowing you planned ahead! For the complete recipe, refer to [Full Recipe]. {{image_2}} You can easily change the flavor of your Pineapple Coconut Mojito Mocktail. Adding berries like strawberries or raspberries gives a fruity twist. Just blend them in with the pineapple. You can also use coconut cream. This gives a richer, creamier texture. It makes the drink feel more indulgent. Sweeteners can change the taste of your drink. If you want a different flavor, try maple syrup or agave. These options add unique notes. You can also use natural fruit juices as sweeteners. Fresh orange or mango juice can add a bright touch. Experiment with what you have on hand. Pair your mocktail with snacks or appetizers for a fun gathering. Chips and guacamole or fresh fruit platters work great. For a themed event, serve the drink in tropical glasses. Add fun straws or colorful cocktail umbrellas. These little touches make your drink stand out and delight your guests. Store leftover mocktails in a glass jar. Seal it tightly to keep it fresh. Place the jar in the fridge. This helps maintain the mocktail's flavor. Use the mocktail within two days for best taste. If you have extra ingredients, store them separately. This keeps everything fresh for longer. Fresh fruits, like pineapple, last about three to five days in the fridge. Mint leaves can stay fresh for about a week. To keep them fresh, store them in a damp paper towel in a bag. Coconut water lasts longer, about a week, if unopened. Once opened, use it within three days for quality. You can freeze the mocktail mixture, but it may change texture. Pour it into ice cube trays for easy use later. Once frozen, pop the cubes into a bag. This way, you can enjoy a quick refreshment anytime. For garnishes, freeze lime slices on a tray, then store them in a bag. This keeps your garnishes fresh for drinks later. A mocktail is a drink that looks like a cocktail but has no alcohol. It uses fresh fruits, herbs, and syrups to create fun flavors. Mocktails give you all the taste without the buzz. You can enjoy them at parties or any time you want a tasty drink. Yes, you can prepare the mocktail base ahead of time. Blend the pineapple, coconut water, lime juice, and sweetener. Store this mix in the fridge for up to two days. When you are ready, muddle the mint in your glasses, then pour the mocktail mix over ice. Top with sparkling water for fizz. For a vegan option, use agave syrup or maple syrup instead of honey. If you want a low-sugar mocktail, try using stevia or skip the sweetener altogether. Add more fresh fruit for natural sweetness. You can also switch to flavored sparkling water for extra taste without added sugar. This mocktail is packed with nutrients. Fresh pineapple is high in vitamin C, which boosts your immune system. Coconut water keeps you hydrated and has electrolytes. Mint aids digestion and gives a fresh taste. This drink is low in calories, making it a great choice for a healthy treat. This blog post covered how to make a refreshing mocktail. We started with key ingredients like fresh pineapple, coconut water, and mint. I shared step-by-step instructions for preparing the base and muddling mint. Tips on flavor enhancement and presentation help make it special. Variations allow you to customize for any taste. Storing information ensures your mocktail stays fresh. Crafting this drink can boost your creativity and impress guests. Enjoy experimenting with flavors and have fun mixing!

Pineapple Coconut Mojito Mocktail Refreshing Delight

Looking for a refreshing drink to enjoy without the buzz? The Pineapple Coconut Mojito Mocktail is your answer! This delightful

Older posts
Newer posts
← Previous Page1 … Page26 Page27 Page28 … Page82 Next →

dsad

© 2025 My Saved Recipe • Built with GeneratePress

Our Policies

  • Copyright Policy
  • Cookie Policy
  • GDPR Policy
  • Privacy Policy
  • Disclaimer
  • Terms Of Use

More Information

  • Home
  • About
  • Contact
  • Appetizers
  • Dessert
  • Dinner
  • Drinks
©2025, My Saved Recipe About Back To Top