Skip to content
DisclaimerTerms Of UseGDPR PolicyCookie Policy

My Saved Recipe

  • Home
  • Drinks
  • Appetizers
  • Dinner
  • Dessert
  • About
  • Contact
  • Privacy Policy
DisclaimerTerms Of UseGDPR PolicyCookie Policy

Savannah

To make Old Fashioned Peaches and Cream, you need fresh peaches. They should be ripe for the best flavor. Here’s what you’ll need: - 4 ripe peaches, halved and pitted - 1 tablespoon lemon juice Some simple items from your pantry will complete this dish. Make sure you have these on hand: - 2 tablespoons brown sugar - 1 teaspoon cinnamon - 1 cup heavy cream - 2 tablespoons powdered sugar - 1 teaspoon vanilla extract For a little extra flair, consider these garnishes: - Fresh mint leaves for garnish These add a nice touch and freshness to your dessert. You can find the Full Recipe for all the steps and details to make this dish shine! Start with ripe peaches. Look for peaches that are soft but not mushy. Cut each peach in half and remove the pit. This step is simple but very important for grilling. In a small bowl, mix two tablespoons of brown sugar, one teaspoon of cinnamon, and one tablespoon of lemon juice. This will be your peach glaze. Stir until the sugar dissolves. The glaze adds sweetness and a lovely flavor to the peaches. Preheat your grill or grill pan over medium heat. Brush the peach halves with the glaze. Make sure they are well-coated. Place the peaches cut-side down on the grill. Cook them for about four to five minutes. You want them caramelized with nice grill marks. While the peaches grill, prepare the whipped cream. In a medium bowl, add one cup of heavy cream, two tablespoons of powdered sugar, and one teaspoon of vanilla extract. Use an electric mixer or whisk to beat the cream. Stop when it forms soft peaks. Be careful not to overwhip, or it will turn to butter! Once the peaches are grilled, remove them and let them cool for a minute. In a bowl, place two peach halves. Spoon a generous amount of whipped cream over them. Drizzle any leftover glaze from the bowl on top if you wish. Finally, garnish with fresh mint leaves for a touch of color and flavor. Enjoy your delightful dessert! For the full recipe, check the details above. To make Old Fashioned Peaches and Cream shine, choose ripe peaches. Look for peaches that are firm but slightly soft when you press them. Their skin should have a warm hue, showing a bit of red or golden color. These signs mean they are sweet and juicy. Avoid peaches with green spots; they are not ripe yet. When you slice into a ripe peach, it should be fragrant and a bit juicy. These qualities make your dessert truly delightful. Whipping cream is easy, but you must pay attention. Start with cold heavy cream for the best results. Pour it into a clean bowl. Add powdered sugar and vanilla extract to enhance the flavor. Whip the cream until it forms soft peaks. Be careful not to overwhip; otherwise, it can turn into butter. Soft peaks mean the cream holds its shape but still looks smooth. This light and airy whipped cream will perfectly complement the rich peaches. When serving, make it look special. Place two grilled peach halves in a bowl. Spoon a generous amount of whipped cream over the peaches. Drizzle any leftover glaze on top for extra flavor. For a pop of color, add fresh mint leaves as a garnish. This dessert looks stunning and tastes even better. You can serve it warm or at room temperature. It’s perfect for summer gatherings or cozy family dinners. For the full recipe, check the earlier section. {{image_2}} If you want to change things up, try using other fruits. Grilled nectarines add a sweet twist. You can also use plums, which have a lovely tartness. Pineapple is another great choice. Grilled pineapple has a nice caramel flavor. You can even try apples for a crunchy bite. Each fruit brings its own charm to this dessert. For those who avoid dairy, there are simple swaps. Use coconut cream instead of heavy cream. It whips up nicely and has a great flavor. Almond milk or oat milk can replace regular whipped cream. Just make sure to choose a brand that whips well. This way, you still enjoy the creamy aspect of the dessert without the dairy. You can boost the flavor with a few easy additions. Try adding a splash of almond extract to the whipped cream. It adds a nice nutty taste. You can also mix in some orange zest for a fresh kick. If you want some warmth, add a pinch of nutmeg. Each of these additions creates a unique taste in your Old Fashioned Peaches and Cream. For more details on making this dish, check the Full Recipe. To store leftover Old Fashioned Peaches and Cream, first, let it cool. Place the peaches and cream in an airtight container. This keeps them fresh. Store in the fridge for up to three days. If you notice any liquid, drain it before storing. This helps keep the dessert from getting soggy. Reheating is simple. If you want warm peaches, place them in a microwave-safe dish. Heat them in short bursts of 15 seconds. Check after each burst. Be careful not to overheat, as they can become mushy. You can enjoy the whipped cream cold, so no need to heat that part. You can freeze peaches for later use. However, creamy toppings do not freeze well. To freeze, place the grilled peaches in a single layer on a baking sheet. Freeze them until solid, then transfer to a freezer bag. Use them within three months for the best taste. When you’re ready to use them, thaw in the fridge overnight. Old Fashioned Peaches and Cream is a simple dessert. It combines grilled peaches with sweet whipped cream. The peaches have a warm, caramelized flavor. The cream adds a rich, smooth touch. This dessert is fresh and perfect for summer. Yes, you can use canned peaches. However, fresh peaches taste best. If using canned, choose peaches in juice. Drain any syrup to avoid extra sweetness. You can grill them too, but they may not caramelize as well. You can prepare the peach glaze ahead of time. Just keep it in the fridge. You can whip the cream a few hours before serving. Store it in a covered bowl. Grill the peaches just before serving for the best taste. Old Fashioned Peaches and Cream pairs well with vanilla ice cream. You can also serve it with shortcake or pound cake. A sprinkle of nuts adds a nice crunch. For drinks, try sweet tea or a light white wine. In this blog post, I explored how to create a delicious Peaches and Cream dessert. We covered fresh ingredients, pantry staples, and optional garnishes to enhance your dish. I shared step-by-step instructions for preparing the peaches, making the glaze, grilling, and assembling it all. Tips on selecting the best peaches and serving suggestions were also included. Finally, I offered alternative fruits and storage tips for leftovers. Enjoy this simple yet delightful dessert with family or friends. It’s a treat you won’t want to miss!

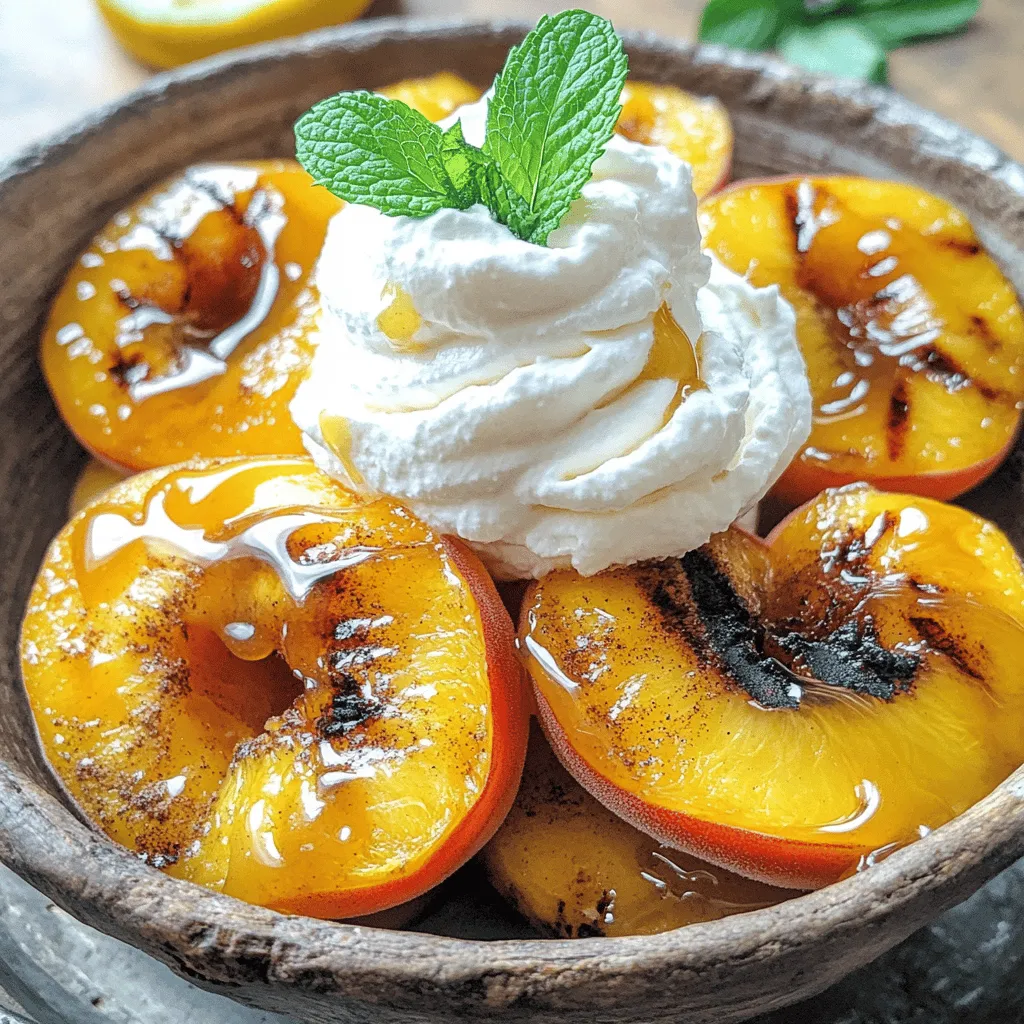
Old Fashioned Peaches and Cream Delightful Dessert

Craving a simple, sweet treat? Discover the joy of Old Fashioned Peaches and Cream! This classic dessert celebrates fresh peaches

To make a great Southern tomato pie, you need key ingredients. Here’s what you’ll need: - 1 pre-made pie crust - 4 large ripe tomatoes, sliced - 1 teaspoon salt - 1/2 teaspoon black pepper - 1 cup shredded sharp cheddar cheese - 1 cup mayonnaise - 1 tablespoon Dijon mustard - 3 green onions, chopped (including green tops) - 1/4 cup fresh basil, chopped - 1/2 teaspoon garlic powder - 1/4 teaspoon cayenne pepper (optional for a kick) These simple ingredients bring out the fresh taste of tomatoes. You can add some optional ingredients for more flavor. Try these: - Crumbled bacon for a smoky taste. - A sprinkle of paprika to enhance color. - Chopped bell peppers for a crunch. - Fresh herbs like thyme or oregano for depth. Feel free to mix and match based on your taste. Choosing the right tomatoes is key for your pie. Here are my tips: - Look for ripe tomatoes that feel firm but slightly soft. - Choose tomatoes that are bright and have a deep color. - Avoid tomatoes with bruises or blemishes. - Heirloom tomatoes add unique flavors and colors. The better the tomatoes, the tastier your pie will be. Check out the Full Recipe to get started! First, you need to prepare the tomatoes. Use four large, ripe tomatoes. Slice them evenly. Place the slices on a clean kitchen towel. Sprinkle one teaspoon of salt over them. Let them sit for 10 to 15 minutes. This draws out the extra moisture. After that, pat the slices dry with another towel. This step is key. It helps keep your pie from getting soggy. Now, grab your pre-made pie crust. Layer half of the tomato slices on the bottom. Next, add half of the chopped green onions. Then, sprinkle half of the chopped fresh basil on top. In a bowl, mix one cup of mayonnaise, one tablespoon of Dijon mustard, and half a teaspoon of garlic powder. If you like a little spice, add a dash of cayenne pepper. Spread half of this mixture over your layered ingredients. Finish this layer with half of the shredded cheddar cheese. Repeat these layers with the remaining ingredients. Preheat your oven to 375°F (190°C). Once layered, place the pie in the oven. Bake for 30 to 35 minutes. You want it bubbly and golden brown on top. When done, remove the pie from the oven. Let it cool for about 10 minutes before slicing. This will help the pie hold its shape. For the full recipe, feel free to check the detailed instructions provided earlier. Enjoy your delicious Southern Tomato Pie! To keep your crust crisp, start by salting your tomatoes. This draws out moisture. After 10-15 minutes, pat your tomatoes dry. This simple step makes a big difference. You can also blind bake your crust for a few minutes before adding the filling. This helps create a barrier that keeps the crust from getting soggy. For a rich flavor, I love using sharp cheddar cheese. It melts well and pairs nicely with tomatoes. You can also try mozzarella for a creamier texture. If you want a bit of tang, add some crumbled feta or goat cheese. Mixing different cheeses can add depth to your pie, making each bite exciting. Southern tomato pie is best served warm. I like to garnish it with fresh basil leaves for a pop of color. This dish pairs well with a light salad. A simple green salad with vinaigrette complements the pie's richness. For drinks, sweet tea or chilled white wine is a perfect match. Want to level up your meal? Serve it with crusty bread to soak up all those delicious flavors. For the full recipe, check out my detailed guide. {{image_2}} You can make Southern Tomato Pie vegetarian by adding more veggies. Try spinach, zucchini, or bell peppers. These add color and taste. You can also use different cheeses like mozzarella or feta. This gives the pie a new twist. If you need a gluten-free option, look for gluten-free pie crusts. Many brands offer tasty choices. You can also make your own crust using almond flour or rice flour. This keeps the pie light and crunchy without gluten. Want to boost the flavor? Add bacon or chicken. Cook the bacon until crispy and crumble it on top. For chicken, use cooked and shredded meat. Both options add heartiness. They make the pie more filling and satisfying. For the full recipe, check the earlier section. Enjoy making your Southern Tomato Pie! To keep your leftover Southern Tomato Pie fresh, wrap it tightly in plastic wrap. You can also place it in an airtight container. Store it in the fridge. It will stay good for about 3-4 days. Make sure to cool the pie to room temperature before you store it. This way, it won't trap steam and get soggy. When you are ready to enjoy your leftover pie, reheating it properly is key. Preheat your oven to 350°F (175°C). Place the pie on a baking sheet to catch any drips. Heat for about 15-20 minutes, or until it is warm throughout. This method keeps the crust crispy. You can also microwave individual slices for about 1-2 minutes, but the crust may not stay crisp. If you want to keep your Southern Tomato Pie for a longer time, freezing is a great option. Wrap the pie tightly in plastic wrap and then in aluminum foil. Label it with the date. You can freeze it for up to 3 months. To reheat, let it thaw in the fridge overnight. Then follow the reheating tips above for the best taste. Enjoy your delicious pie even later! If you want to skip mayonnaise, use Greek yogurt. It adds creaminess and tang. You can also try sour cream for a similar texture. Both options keep the pie rich and tasty. Yes, you can use canned tomatoes. Choose whole or diced tomatoes for best results. Drain them well to remove excess liquid. Fresh tomatoes give a brighter flavor, but canned works in a pinch. To spice up your Southern Tomato Pie, add cayenne pepper to the filling. You can also sprinkle crushed red pepper flakes on top. For more heat, mix in diced jalapeños with the tomatoes. Adjust the amount to your taste! For the full recipe, check the above sections. In this article, we explored how to make the perfect Southern Tomato Pie. We covered essential and optional ingredients, tips for choosing the best tomatoes, and provided step-by-step baking instructions. Plus, I shared tricks to avoid a soggy crust and some tasty variations to try. Southern Tomato Pie is simple, tasty, and fun to make. With these tips, you can impress anyone at your table. Now you're ready to bake your own delicious pie!

Southern Tomato Pie Flavorful and Easy to Make

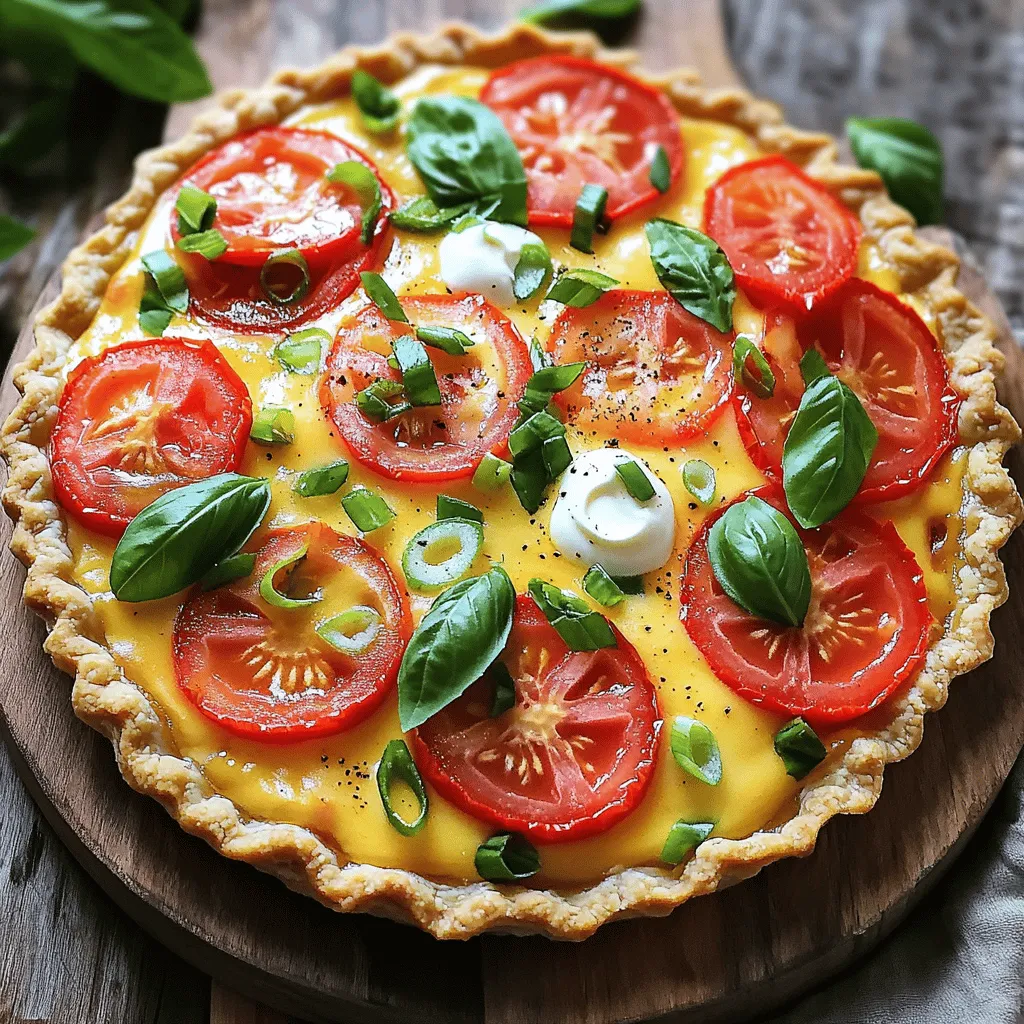
If you love tomatoes, you’ll adore Southern Tomato Pie! This dish is easy to make and full of flavor. You

To make quick refrigerator pickles, gather these simple ingredients: - 4 small cucumbers, thinly sliced - 1 cup white vinegar - 1 cup water - 1 tablespoon sugar - 1 tablespoon salt - 1 teaspoon black peppercorns - 1 teaspoon crushed red pepper flakes - 3 cloves garlic, peeled and smashed - 1 sprig fresh dill or 1 tablespoon dill seeds These ingredients come together to create a crunchy and zesty treat. You can swap some ingredients if needed. Here are a few ideas: - Use apple cider vinegar instead of white vinegar for a fruity twist. - For a sweeter pickle, try honey in place of sugar. - Sea salt can replace regular salt for a finer taste. - If you don’t have black peppercorns, use ground black pepper instead. - Fresh herbs, like cilantro or thyme, can add unique flavors instead of dill. These substitutions can give your pickles a fresh spin. Fresh ingredients make a big difference in your pickles. - Cucumbers: The crunchiness of fresh cucumbers adds a nice texture. - Herbs: Fresh dill gives a bright, herby flavor that dried dill can't match. - Garlic: Using fresh garlic provides a bold and aromatic taste. Using fresh ingredients ensures your pickles taste vibrant and delicious. If you use old or wilted items, your pickles can end up lacking flavor and crunch. Start with a clean jar. I use a quart-sized glass jar for my pickles. Wash it well with soap and hot water. Rinse it thoroughly. To make sure it is germ-free, you can sterilize it. Boil the jar in water for 10 minutes. Let it cool before using. This helps keep your pickles fresh longer. Next, grab your cucumbers. You need about four small ones. Wash them under cold water. Now, slice them thin. You can choose rounds or spears. Thin slices work best for a nice crunch. Place the sliced cucumbers directly into your clean jar. This way, they are ready for the brine. Now, let’s make the brine. In a medium pot, mix one cup of white vinegar and one cup of water. Add one tablespoon of sugar and one tablespoon of salt. Heat the pot on medium. Stir until the sugar and salt dissolve. This should take a few minutes. Once the brine is hot, add your spices. Toss in one teaspoon of black peppercorns, one teaspoon of crushed red pepper flakes, and three smashed garlic cloves. You can also add a sprig of fresh dill or one tablespoon of dill seeds for extra flavor. Stir it all together. Finally, pour the hot brine over the cucumbers in the jar. Make sure they are fully covered. Leave some space at the top of the jar. Let the jar cool to room temperature. After that, seal it and place it in the refrigerator. Wait at least four hours before tasting, but overnight is even better! For the full recipe, check out the Crisp & Zesty Quick Refrigerator Pickles 🥒 entry. Enjoy this crunchy and flavorful treat! To keep your pickles crunchy, start with fresh cucumbers. Choose small and firm ones. Thin slices work best for quick pickles. Avoid large cucumbers; they tend to be watery. You can also add a few grape leaves to your jar. These leaves help maintain crunchiness because they have tannins. Store your pickles in a clean, airtight glass jar. This keeps air out and helps flavors blend. Always keep the jar in the fridge. The cold temperature slows down spoilage. Try to consume the pickles within two weeks for the best taste. If you want more flavor, let them sit for a day or two before eating. You can eat your quick refrigerator pickles after just four hours. However, for the best flavor, wait overnight. The longer they sit, the more the flavors mix. You can enjoy them as a snack, on sandwiches, or alongside meals. The taste will get better each day, so don't rush it! Check out the Full Recipe for more details. {{image_2}} You can pickle many veggies besides cucumbers. Carrots, radishes, and green beans work great. Try cauliflower for a crunchy bite. Beets add a lovely color and sweetness. Pickling these veggies gives new flavors and textures. Slice them thin or cut them into sticks. The process is the same as making cucumber pickles. Spices and herbs change your pickles' taste. For a spicy kick, add more crushed red pepper flakes. You can try mustard seeds for a tangy twist. Coriander seeds bring a warm flavor. Fresh herbs like thyme or oregano can add freshness. Mix and match spices to create your perfect blend. Just remember to taste as you go! Pickles can be sweet or savory based on your choice of ingredients. To make sweet pickles, add more sugar. You might also add sliced onions or bell peppers for sweetness. For savory pickles, use more salt and garlic. You can even add a splash of soy sauce for an umami punch. Adjusting these ingredients helps you find the balance you love. Explore these variations to make your quick refrigerator pickles unique and delicious! Check out the Full Recipe for more ideas. To keep your quick refrigerator pickles fresh, store them in a clean glass jar. Ensure the jar has a tight lid. Place the pickles in the refrigerator right after you make them. This helps the flavors blend well. Always keep the pickles submerged in the brine. If needed, add more brine to cover them fully. Homemade quick refrigerator pickles last about two to four weeks. After that, the taste may change. You may notice they become softer. Always check for any signs of spoilage, such as off smells or mold. If they look or smell strange, throw them away. Freezing quick refrigerator pickles is not recommended. The texture changes after thawing. Instead, make smaller batches to enjoy fresh pickles. If you want to save them longer, consider canning them. For the full recipe, check the instructions provided earlier. This way, you can enjoy them all year round! Quick refrigerator pickles can last for about two weeks. After that, they may lose their crunch. Store them in the fridge, tightly sealed, to keep them fresh. Always check for any off smells or colors before eating. Yes, you can use different types of vinegar for quick refrigerator pickles. Apple cider vinegar adds a fruity taste. Rice vinegar offers a milder flavor. Each type changes the taste, so choose what you like best. Just remember to keep the same ratio of vinegar to water. Refrigerator pickles are great as a crunchy side dish. Serve them with sandwiches, burgers, or salads. You can also use them as a garnish for tacos or burgers. They add a zesty kick to any meal. Try them as a snack too! For the full recipe, check out the Crisp & Zesty Quick Refrigerator Pickles section. You now know how to make quick refrigerator pickles. We discussed key ingredients, easy steps, and helpful tips. You learned how to keep your pickles crunchy and flavorful. You can even try other veggies or spices for new tastes. Finally, remember to store them right for the best flavor. Happy pickling! Enjoy your tasty creations!

Quick Refrigerator Pickles Crunchy and Flavorful Treat

Are you ready to add a burst of flavor and crunch to your meals? Quick refrigerator pickles are the answer!

To make a great peach feta salad, gather these key ingredients: - 4 ripe peaches, sliced - 100g feta cheese, crumbled - 4 cups arugula (or mixed greens) - 1/4 cup walnuts, toasted and roughly chopped - 2 tablespoons olive oil - 1 tablespoon balsamic vinegar - 1 teaspoon honey - Salt and black pepper to taste These ingredients create a fresh and vibrant mix. The peaches add sweetness. The feta gives a creamy bite, while the walnuts add crunch. You can boost the taste with these optional ingredients: - Fresh mint leaves for garnish - A sprinkle of chili flakes for heat - Sliced red onion for a sharp note These extras can enhance the salad's flavor. Mint adds freshness, while onion can give a nice kick. Choosing the right peaches is key. Look for peaches that are: - Firm, but slightly soft to the touch - Fragrant, as this means they are ripe - Free from bruises or blemishes When selecting peaches, color matters too. A deep yellow or red hue often means great flavor. Fresh and ripe peaches will make your salad shine. If you want to make this salad, check out the Full Recipe for all the steps! First, wash the peaches under cool water. Dry them with a clean towel. Slice the peaches into thin wedges. Next, take the arugula or mixed greens. Rinse them to remove any dirt. Shake off the excess water and set them aside. Then, crumble the feta cheese into small pieces. In a large bowl, combine the sliced peaches and arugula. Gently mix them to avoid bruising the peaches. Next, add the crumbled feta cheese to the bowl. Sprinkle in the toasted walnuts for some crunch. Toss the mixture lightly to ensure everything is well distributed. In a small bowl, whisk together the olive oil, balsamic vinegar, and honey. Add a pinch of salt and black pepper to taste. Mix until the dressing is smooth and creamy. Drizzle this dressing over the salad mix. Toss gently, making sure to coat all the ingredients. The dressing should enhance the peach and feta flavors. This simple process makes a fresh and tasty Peach Feta Salad that is sure to impress. You can find the full recipe above to guide you through the steps. To make this salad shine, focus on fresh, ripe peaches. Choose peaches that feel slightly soft and smell sweet. The feta adds a salty kick, balancing the fruit's sweetness. For a touch of warmth, toast the walnuts before adding them. This step enhances their flavor and adds a nice crunch. Lastly, whisk the dressing well to blend the olive oil, balsamic vinegar, and honey. This will ensure every bite is tasty and well-seasoned. When serving your peach feta salad, presentation matters. Use a large platter to show off the colorful layers. Arrange the arugula first, then add the peaches and feta. Sprinkle the toasted walnuts on top for added texture. For extra flair, scatter fresh mint leaves around the salad. This not only looks good but also adds a fresh aroma. Serve it as a side dish at your next picnic or as a light lunch. To keep your salad fresh, store the dressing separately. This prevents the greens from wilting. If you have leftovers, it’s best to eat them within a day. Use a clean, airtight container for storage. For best flavor, wait to add the feta and walnuts until just before serving. This way, everything stays crisp and delicious. For more details, check out the Full Recipe to ensure you capture all the flavors perfectly. {{image_2}} You can change some ingredients in the Peach Feta Salad. For instance, if you want a creamier texture, try goat cheese instead of feta. If you like a crunch, swap walnuts with pecans or almonds. You can also use spinach instead of arugula for a milder taste. Don’t hesitate to experiment with different oils, like avocado oil, for a unique flavor. In summer, ripe peaches shine in this salad. In fall, try apples or pears for a crisp bite. During winter, pomegranates add a burst of color and flavor. In spring, strawberries can bring a sweet twist. Each season offers fresh choices to keep the salad exciting. To make this salad vegan, skip the feta and use avocado for creaminess. You can add chickpeas for protein. For a gluten-free option, ensure your walnuts and dressing are certified gluten-free. This salad can fit various diets while staying fresh and tasty. Enjoy the Peach Feta Bliss Salad with these changes! For the full recipe, check out the complete details above. To store leftovers of Peach Feta Salad, place any uneaten salad in a bowl. Cover it with plastic wrap or a lid to keep it fresh. You can store it in the fridge for up to two days. However, the salad tastes best when fresh. If you leave it too long, the arugula may wilt. Use airtight containers for the salad. Glass containers work well since they don’t stain or hold odors. If you use plastic, make sure it is BPA-free. Choose a container that fits the amount you have left. This helps keep the salad from getting crushed. This salad is best served cold, so reheating is not needed. If you prefer warm salad, you can warm up the feta cheese slightly. Just place it in a microwave for a few seconds. However, it’s important to avoid overheating, as this can change the taste and texture. Enjoy it fresh for the best experience! Yes, you can prepare this salad ahead. Just keep the dressing separate. Mix it right before serving. This keeps the greens fresh and crisp. You can use many fruits! Try nectarines, strawberries, or blueberries. Each adds a unique flavor. Feel free to mix and match for fun. To keep lettuce fresh, store it dry and in a cool place. Wrap it in a paper towel. Then, place it in a plastic bag. This helps reduce moisture and keeps it crisp. Yes, this salad is great for meal prep! Just store the ingredients separately. Combine them when ready to eat. This keeps everything fresh and tasty. You can find the Full Recipe for more details. In this blog post, we explored how to make a tasty Peach Feta Salad. We covered essential and optional ingredients, plus tips to pick the best peaches. You learned step-by-step instructions for preparing the salad and making the dressing. We shared tips for flavor and serving ideas. We also discussed how to store leftovers and answered common questions. Remember, you can customize this salad to fit your tastes and needs. Enjoy experimenting with your ingredients!

Peach Feta Salad Fresh and Flavorful Delight

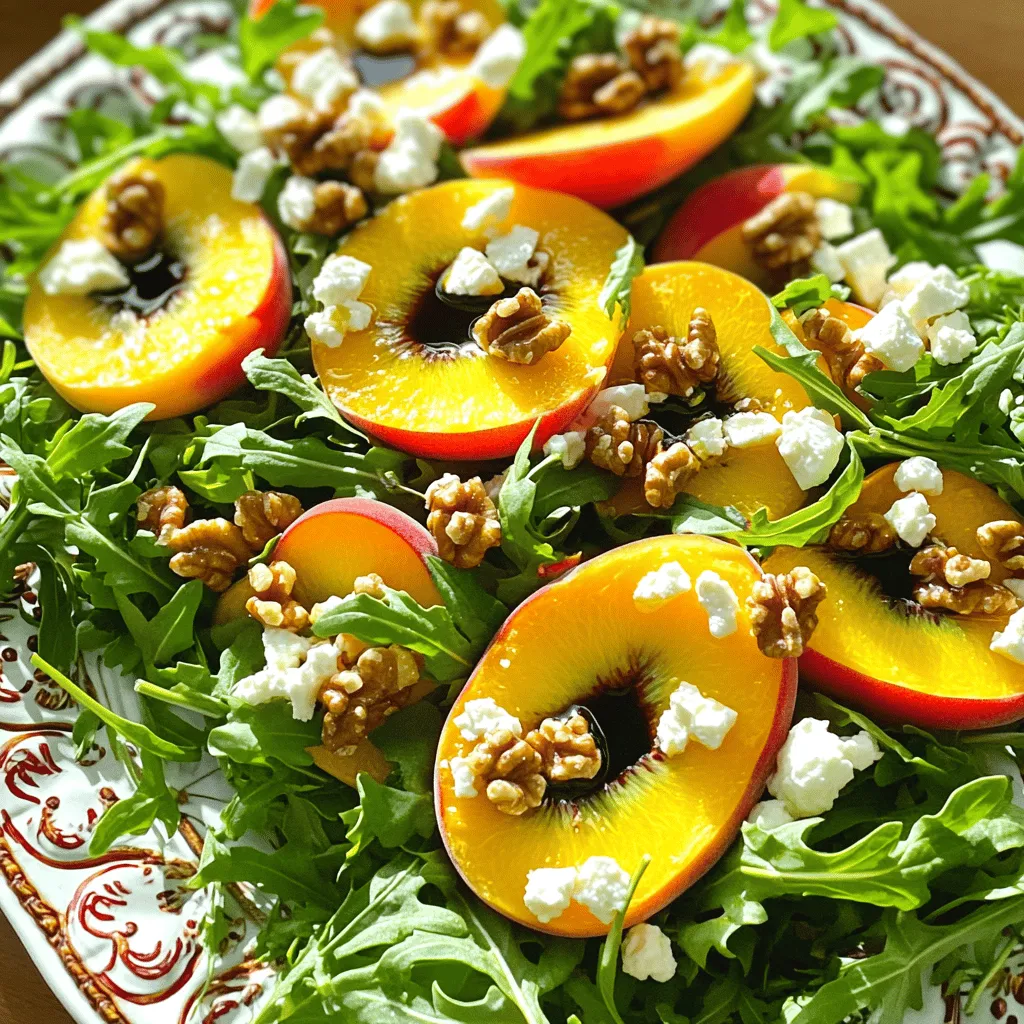
Looking for a fresh and tasty dish to impress your friends? Let me introduce you to my Peach Feta Salad!

To make these brownies, you need: - 1 large zucchini (about 1 cup, grated) - 3/4 cup almond flour - 1/4 cup cocoa powder - 1/2 teaspoon baking soda - 1/4 teaspoon salt These main ingredients create a rich base. The zucchini adds moisture without making it soggy. Almond flour gives a nutty flavor and a soft texture. Cocoa powder provides that deep chocolate taste we love. For sweetness and binding, gather: - 1/2 cup honey or maple syrup - 1/4 cup unsweetened applesauce - 2 large eggs - 1 teaspoon vanilla extract Honey or maple syrup adds natural sweetness. Unsweetened applesauce keeps the brownies moist and rich. The eggs bind everything together while adding fluffiness. Vanilla extract enhances all the flavors, making them pop. If you want to elevate your brownies, consider adding: - 1/2 cup dark chocolate chips (for added richness) Dark chocolate chips make these brownies extra special. They melt into the batter, creating pockets of gooey chocolate. You can skip them, but I highly recommend including them for that decadent touch. For the full recipe, check out the guidelines provided above. - Preheat your oven to 350°F (175°C). Line an 8x8 inch baking pan with parchment paper. - Grate one large zucchini until you have about one cup. Use a clean towel to squeeze out the extra moisture. Set this aside. - In a mixing bowl, combine 3/4 cup almond flour, 1/4 cup cocoa powder, 1/2 teaspoon baking soda, and 1/4 teaspoon salt. Whisk until they blend well. - In another bowl, beat 1/2 cup honey or maple syrup, 1/4 cup unsweetened applesauce, 2 large eggs, and 1 teaspoon vanilla extract until smooth. - Fold the grated zucchini into the wet mixture gently until fully mixed. - Gradually mix the dry ingredients into the wet mixture. Stir carefully until just combined; don't overmix. - Pour the batter into the prepared pan. Smooth it out evenly with a spatula. - Bake in the preheated oven for 25-30 minutes. Check if a toothpick inserted in the center comes out clean. For the full recipe, including presentation tips and serving suggestions, refer to the complete guide. To get the best texture, you must drain the zucchini well. Start by grating the zucchini. Then, take a clean kitchen towel and squeeze the grated zucchini. This removes excess water and helps keep your brownies rich and moist. Do not skip this step, as too much moisture can make your brownies soggy. Using unsweetened applesauce is another key tip. It adds moisture while keeping the sugar content low. Applesauce also helps bind the ingredients and enhances the brownie’s softness. This is a great way to cut calories without losing flavor. When baking, knowing how to check for doneness is crucial. I recommend using a toothpick. Insert it into the center of the brownies. If it comes out clean, they are done. If there is wet batter, give them a few more minutes. Avoid overbaking to keep your brownies soft and chewy. Set a timer for 25 minutes and check them. If you bake too long, the brownies will dry out. Remember, they continue to cook a bit after you remove them from the oven. Cutting and serving your brownies can be fun. Try cutting them into small squares or rectangles for easy sharing. You can also use a sharp knife to create clean edges. For extra flair, garnish the brownies. Dust them with cocoa powder or powdered sugar. You can also add fresh berries on the side for color. These small touches make your brownies look professional and appetizing. For the full recipe, check out the complete guide on making Healthy Zucchini Brownies. {{image_2}} You can easily substitute almond flour in this recipe. If you need a gluten-free option, try using coconut flour. Use only half the amount of coconut flour, as it absorbs more moisture. You can also use oat flour, which gives a nice texture. Just make sure it's certified gluten-free. These options still keep your brownies rich and moist. If you want to lower the calories, consider using Stevia or monk fruit. These sweeteners are much sweeter than sugar, so use less. For example, if you normally use half a cup of honey, start with just a couple of tablespoons of Stevia. This change keeps the brownies sweet while reducing calories. To make your brownies even tastier, add spices. Cinnamon or nutmeg can bring out great flavors. You could also mix in nuts like walnuts or pecans for crunch. Dried fruits, like raisins or cranberries, work well too. They add a chewy texture that makes each bite exciting. To keep your brownies fresh, always store them in an airtight container. This prevents air from drying them out. If you want to stack them, place parchment paper between layers. This helps avoid sticking. You can store them at room temperature for up to 3 days. For longer freshness, keep them in the fridge for up to a week. If you want to save some brownies for later, freezing is a great option. First, let the brownies cool completely. Then, cut them into squares. Wrap each piece tightly in plastic wrap. Place the wrapped brownies in a freezer-safe bag or container. This keeps them from getting freezer burn. You can freeze them for up to 3 months. When you want to eat one, take it out and leave it at room temperature for about 30 minutes. To reheat your brownies, use the oven for best results. Preheat your oven to 350°F (175°C). Place the brownies on a baking sheet and cover them with foil. Heat for about 10 minutes. This keeps them moist. If you’re in a hurry, you can use the microwave. Heat a brownie for about 15-20 seconds. Be careful not to overheat, or it will dry out. Enjoy your rich and moist zucchini brownies! Yes, you can make these zucchini brownies vegan. Replace the eggs with flax eggs. To make a flax egg, mix 1 tablespoon of ground flaxseed with 2.5 tablespoons of water. Let it sit for 5 minutes until it thickens. For sweeteners, you can use maple syrup or agave nectar instead of honey. Both options will work well in this recipe. Each brownie has about 120 calories. This number can change based on the sweetener used and whether you add chocolate chips. The main ingredients, like zucchini and almond flour, help keep the calories low while adding nutrients. If you don't have almond flour, you can use oat flour or whole wheat flour. Oat flour will keep the brownies moist. Whole wheat flour adds fiber but may change the texture slightly. You can also use a gluten-free all-purpose flour if you prefer. To check if the brownies are done, insert a toothpick into the center. If it comes out clean or with a few moist crumbs, they are ready. If the toothpick has wet batter on it, bake for a few more minutes. Keep an eye on them to avoid overbaking. These zucchini brownies offer a tasty way to enjoy a healthier treat. We covered the essential ingredients, step-by-step prep, and creative variations to try. Don't forget the tips for moisture balance and proper storage. Each tweak can make these brownies just right for you. Get creative with your flavors and enjoy them fresh or stored for later. With these straightforward steps, you can bake a delicious batch that everyone will love. Enjoy this sweet treat while staying healthy!

Healthy Zucchini Brownies Rich and Moist Delight

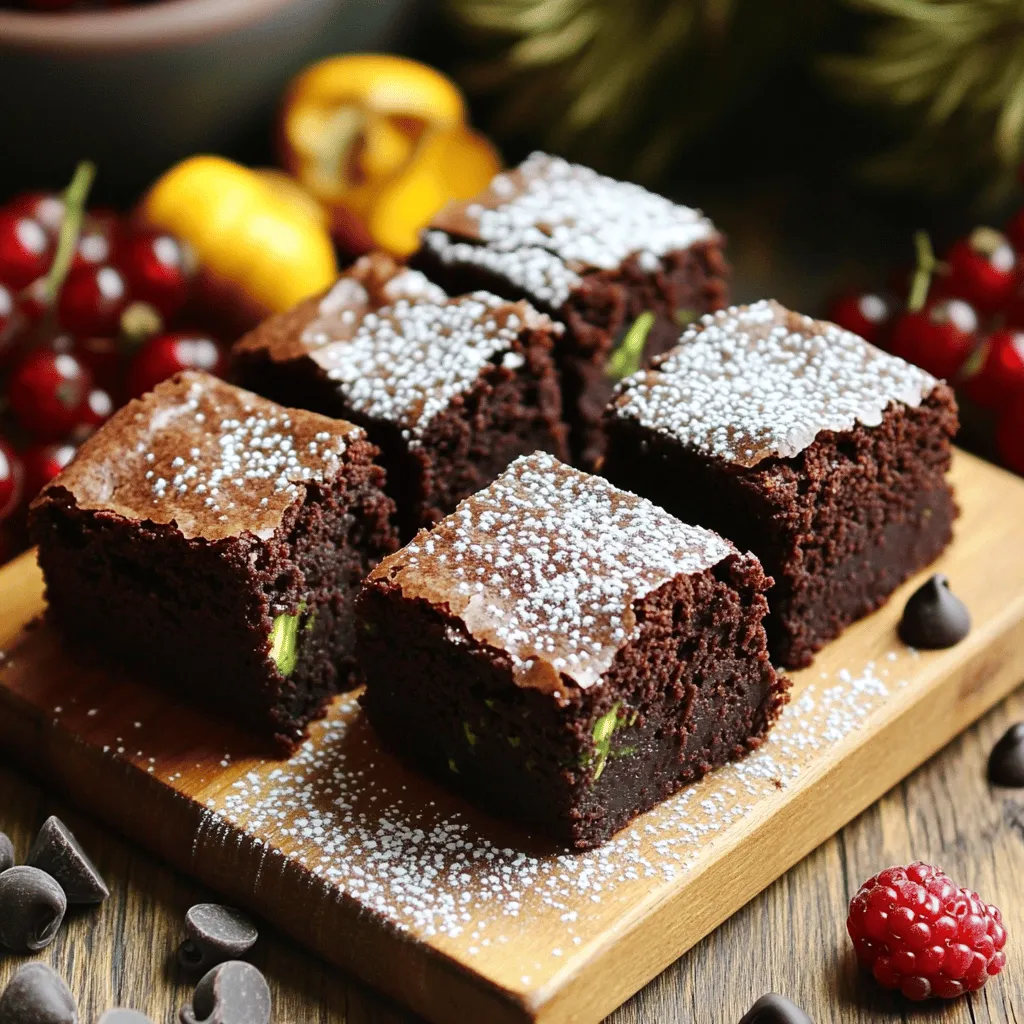
Are you ready to indulge in a sweet treat that’s both rich and healthy? My Healthy Zucchini Brownies are the

- 4 ripe peaches, diced - 1 cup strawberries, halved - 1 cup blueberries Using ripe fruits is key to flavor. Ripe peaches taste sweet and juicy. Strawberries should be bright red. Blueberries add a burst of freshness. When you choose ripe fruits, you enhance the salad's taste. - 8 oz cream cheese, softened - 1/2 cup Greek yogurt (vanilla flavored) - 1/4 cup powdered sugar - 1 teaspoon vanilla extract For the best cream cheese, look for full-fat options. They offer the richest flavor. Softened cream cheese blends easily and creates a smooth texture. Greek yogurt adds creaminess and a hint of tang. - 1 cup granola (for topping) - 1 teaspoon cinnamon - Fresh mint leaves (for garnish) Granola adds a crunchy texture. You can use flavored granola for extra taste. Cinnamon gives warmth and depth. Fresh mint leaves brighten the dish with color and flavor. Feel free to mix and match toppings for variety. For the full recipe, check out the detailed steps to make this delightful dish. First, you want to dice those peaches. Start by washing them well. Cut them in half and remove the pit. Then, slice each half into small pieces. Aim for about one-inch cubes. This keeps the peaches juicy and easy to eat. Next, take your strawberries. Rinse them under cool water. Remove the green tops and slice them in half. You can mix the peaches and strawberries in a large bowl. Use a gentle hand to avoid mashing the fruit. Now, let’s get to the cheesecake mixture. Take your softened cream cheese and put it in a bowl. Beat it with a hand mixer until it’s smooth. Add the Greek yogurt next. Mix this well until it’s creamy. This adds a nice tang and helps balance the sweetness. Then, sprinkle in the powdered sugar and pour in the vanilla. Mix until everything is smooth and blended. You’ve got your fruit and cheesecake mixture ready. Now, it’s time to combine them. Carefully fold the cheesecake mixture into the fruit bowl. Use a spatula and go slowly. You want to coat the fruit evenly with the creamy mixture. This way, every bite gets that great flavor. Chilling is key for this salad. Cover your bowl with plastic wrap. Pop it in the fridge for about 30 minutes. This time allows the flavors to mix and develop. When you take it out, you’ll notice how much better it tastes! When you’re ready to serve, think about how you want to present it. You can use individual bowls for a fun touch. Just spoon the salad into each bowl. If you prefer, a large serving dish works well too. Don’t forget to sprinkle granola on top before serving. This adds a nice crunch. Fresh mint leaves make a lovely garnish and add color. For the full recipe, refer to the section above. To make your Peach Cobbler Cheesecake Fruit Salad stand out, focus on flavor. Use ripe peaches, strawberries, and blueberries. Fresh fruit gives the best taste and texture. Overripe or under-ripe fruit can spoil your salad. Always taste your fruit before mixing. This ensures sweetness and ripeness. Adding a pinch of cinnamon boosts flavor. It adds warmth and pairs well with peach. Prep the fruit ahead of time. Dice peaches, halve strawberries, and wash blueberries. Place them in a bowl and cover with plastic wrap. This keeps them fresh until you are ready. You can also make the cheesecake mixture in advance. Store it in the fridge until you combine it with the fruit. This makes for a quick assembly when it's time to serve. One common mistake is mashing the fruit while mixing. Gently fold the fruit with the cheesecake mixture. This keeps the fruit intact and beautiful. Another mistake is not chilling the salad. Chilling helps the flavors blend. If your cheesecake mixture is lumpy, beat it longer. Smoothness is key to a great texture. For the best results, follow the steps in the Full Recipe. {{image_2}} You can change the fruit based on the season. In spring, use fresh strawberries and cherries. In summer, ripe peaches and blueberries shine. Fall brings delicious apples and pears. In winter, try citrus fruits like oranges and grapefruits. This keeps the Peach Cobbler Cheesecake Fruit Salad fun and fresh all year long. You can enjoy it with fruits in season for the best flavor. To make this salad gluten-free, use certified gluten-free granola. For a dairy-free version, swap cream cheese and yogurt with vegan options. Coconut cream works great too! You can also use natural sweeteners like honey or maple syrup. This way, you cater to different diets and keep everyone happy. Want to spice things up? Add a pinch of nutmeg or allspice to the cheesecake mix. A splash of almond or lemon extract can enhance the flavors too. For a zesty kick, squeeze in fresh lime juice. These small changes can take your salad to a whole new level. Enjoy experimenting with flavors to find your perfect blend! For the full recipe, check out the details to create this delightful treat. To keep your Peach Cobbler Cheesecake Fruit Salad fresh, place it in an airtight container. This helps prevent air from spoiling the flavors. If you have leftovers, make sure to cover them tightly. You want to keep the salad as tasty as possible for later. When stored in the fridge, this fruit salad stays good for up to three days. Always check for signs of spoilage. If you see any mold or if the salad smells off, it’s best to toss it. Fresh fruit can spoil quickly, so trust your senses! Can you freeze Peach Cobbler Cheesecake Fruit Salad? I do not recommend it. Freezing can change the texture of the fruit, making it mushy. If you still want to freeze it, remove the cheesecake mixture first. Freeze only the fruit and add the cheesecake mix when you're ready to eat. Make sure to place the fruit in a freezer-safe bag, removing as much air as possible. You can keep the Peach Cobbler Cheesecake Fruit Salad in the fridge for about three days. Make sure to store it in an airtight container. This helps keep it fresh and tasty. After three days, the fruit may start to lose texture and flavor. Yes, you can use frozen fruits, but fresh fruits give the best taste. Frozen fruits often lose some texture when thawed. If you choose frozen fruits, let them thaw and drain any extra juice. This helps avoid a watery salad. Fresh fruits provide a nice crunch and vibrant flavor. To make this recipe sugar-free, you can use sugar substitutes like stevia or monk fruit. These options can work well without changing the taste too much. Keep in mind that the sweetness level may vary, so adjust according to your preference. Yes, you can prepare the salad ahead of time. I recommend making it a few hours before serving. This allows the flavors to mix well. Just cover it tightly and store it in the fridge. If you want to add granola, wait until just before serving. This keeps it crunchy. For the complete instructions and details, refer to the Full Recipe. This blog post covered every key aspect of making Peach Cobbler Cheesecake Fruit Salad. We explored the best fruits, creamy base, and optional toppings. I shared step-by-step instructions for preparing ingredients and mixing them perfectly. Eating fresh fruit is delightful and healthy. With these tips, you can create a tasty dish. Remember to choose ripe fruits and chill for the best flavor. Now, enjoy your salad and impress your friends with this easy recipe!

Peach Cobbler Cheesecake Fruit Salad Delightful Treat

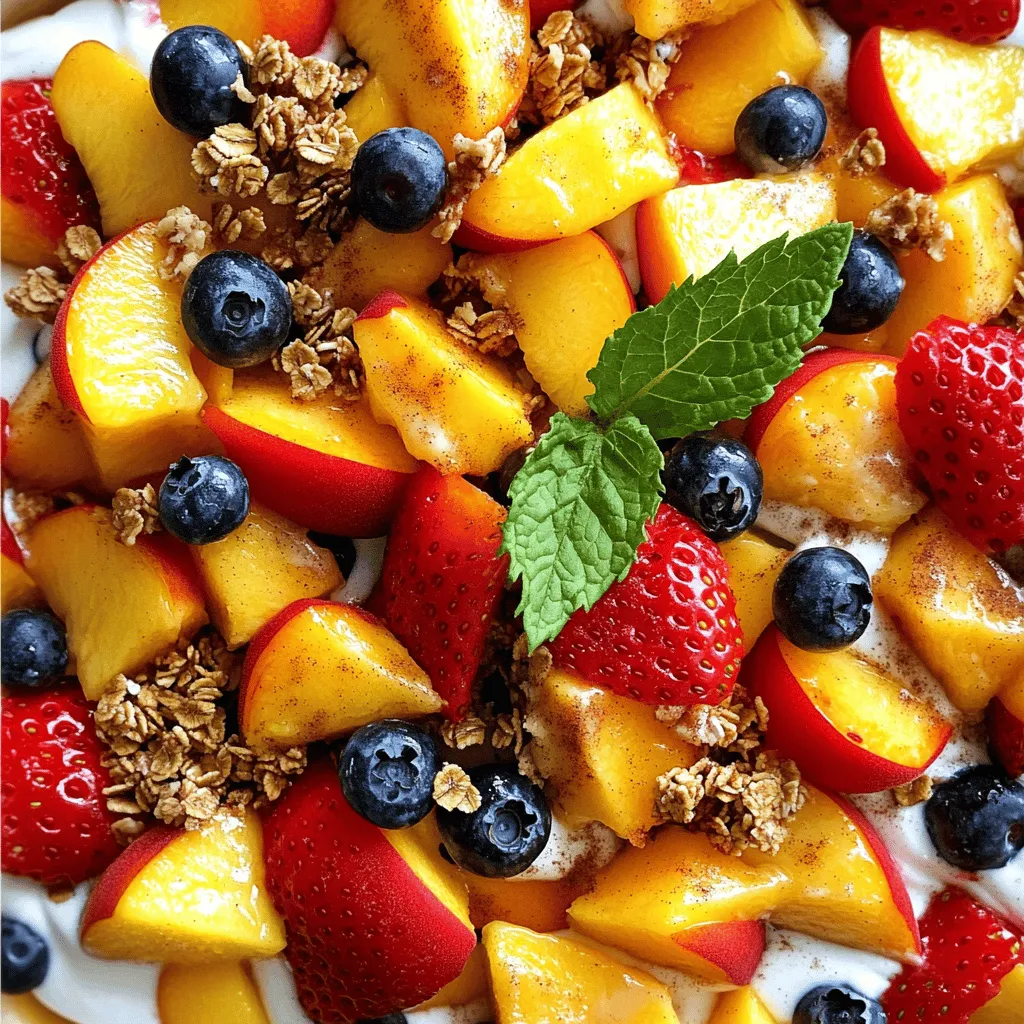
Are you ready for a sweet twist on dessert? My Peach Cobbler Cheesecake Fruit Salad is a delightful treat that

- Cucumbers: Choose firm, fresh cucumbers. They should be crisp and without soft spots. I like using pickling cucumbers for the best crunch. - Garlic: Use fresh garlic for a bold flavor. Smash the cloves to release more oils and flavor into the pickles. - Fresh vs. Dried Dill: Fresh dill gives a bright taste. Dried dill is fine too, but it has a milder flavor. I prefer fresh when I can find it! - Optional Spices and Seasonings: You can add red pepper flakes for heat. Other spices like mustard seeds or coriander seeds can add more depth. Getting the right balance of flavors is key. Here’s how to measure: - Cucumbers: Use about 4 medium cucumbers. This amount fits perfectly in one jar. - Garlic: Add 4 cloves. Adjust to taste if you love garlic. - Dill: For fresh dill, use 2 tablespoons; for dried, 1 tablespoon is enough. - Red Pepper Flakes: Add 1 teaspoon if you want a spicy kick. Skip it if you prefer mild pickles. If you miss an ingredient, here are some substitutes: - Cucumbers: Zucchini can work in a pinch but won’t have the same crunch. - Apple Cider Vinegar: You can use white vinegar or rice vinegar for a different taste. - Dill: Italian seasoning can add a unique flavor if you don’t have dill. For the full recipe, check out the complete guide on Garlic Dill Refrigerator Pickles! To make the brine, start with a large mixing bowl. Combine 2 cups of water, 1 cup of apple cider vinegar, 1 tablespoon of sea salt, and 1 tablespoon of sugar. Stir the mixture well until the salt and sugar dissolve completely. This brine adds a nice sweet and tangy flavor to the pickles. Next, take 4 medium cucumbers and slice them into spears or rounds. Place the cucumber slices into a clean, quart-sized jar. Make sure they fit snugly. Now, add 4 smashed garlic cloves and 2 tablespoons of chopped fresh dill, or 1 tablespoon if you prefer dried dill. If you like some heat, sprinkle in 1 teaspoon of red pepper flakes too. Pour the vinegar mixture over the cucumbers. Make sure the cucumbers are fully submerged. If they float, add more water to cover them completely. Seal the jar tightly with a lid. Give it a gentle shake to mix everything. Place your jar in the fridge. Let them sit for at least 24 hours before tasting. For the best flavor, wait 3-5 days. Enjoy these tasty Garlic Dill Refrigerator Pickles soon! You can find the full recipe [here](link)
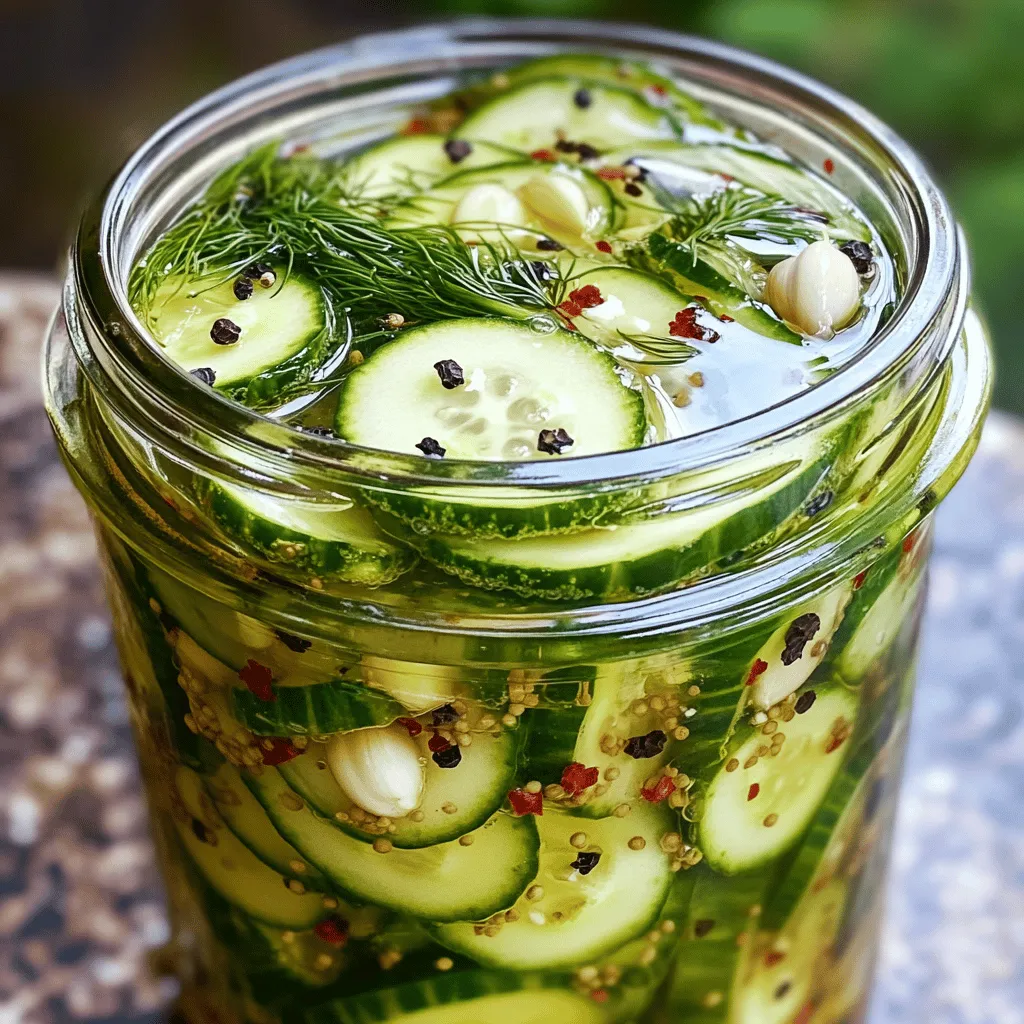
. To boost the taste of your garlic dill refrigerator pickles, try adding other spices. Some great options are mustard seeds, black peppercorns, or coriander seeds. These spices bring new layers of flavor. A pinch of sugar can also balance the heat from red pepper flakes. For the best flavor, let your pickles marinate for 3-5 days. This time allows the cucumbers to soak up all the tasty brine. If you’re in a rush, a minimum of 24 hours will still give you a nice crunch and flavor. One big mistake is skipping sterilization. Always use clean jars to avoid spoilage. Wash them in hot, soapy water, then rinse well. You can also run them through a dishwasher for extra safety. Another common error is not using enough brine. Ensure the cucumbers are fully submerged in the liquid. This step is key for even flavor and crunch. Garlic dill pickles are great on their own, but they can shine in many dishes. Serve them alongside sandwiches for a nice crunch. They also pair well with burgers or grilled meats. Get creative! Use your pickles in salads, or slice them up for a fresh topping on tacos. You can also chop them and mix them into potato or pasta salads for extra zing. Enjoy exploring these tasty options! {{image_2}} To make spicy garlic dill pickles, add more heat. Start by increasing the red pepper flakes. You can add up to 2 teaspoons for a real kick. If you like it hot, try adding sliced jalapeños or crushed chili peppers. These additions bring bold flavors to the mix. The heat pairs well with the crunchy cucumbers and garlic. If you want sweet dill pickles, adjust the sugar. Start with 2 tablespoons of sugar instead of 1. You can also add a small amount of honey for a natural sweetness. To enhance the flavor, consider adding a pinch of cinnamon or allspice. These spices give a warm touch that works well with the sweet notes. To create herb-infused pickles, explore various herbs and spices. Basil, thyme, or tarragon can add unique flavors. Add these herbs along with the dill in the jar. You might also try mustard seeds or black peppercorns for extra depth. Experimenting with different herbs lets you create your signature pickle. How long do pickles last in the fridge? Garlic dill refrigerator pickles can last for up to two months in the fridge. Store them in a sealed jar to keep them fresh. The flavor will improve over time, so feel free to let them sit for a week or more before enjoying. What to look for when checking for freshness? Check for any off smells, unusual colors, or mold on the surface. If the brine becomes cloudy, it may also indicate spoilage. Always trust your senses; if something seems off, it's best to toss the pickles. Can you reuse pickling brine? Yes, you can reuse the brine for another batch of pickles. However, it might lose some flavor and acidity after the first use. Make sure to check the brine for signs of spoilage before reusing it. For the best taste, consider adding fresh spices and herbs each time you use the brine. Garlic Dill Refrigerator Pickles need at least 24 hours to marinate. This time allows the flavors to blend. If you want a stronger taste, let them sit for 3 to 5 days. The longer they marinate, the better they taste. You can check them after the first day, but wait a few days for the full flavor. Yes, you can use many other vegetables for refrigerator pickles. Carrots, radishes, and green beans work well. Just cut them into sizes that fit in your jar. Some veggies may need a bit longer to pickle. Always remember to use the same brine for best results. Experimenting with different vegetables can lead to fun, new tastes. Refrigerator pickles are quick and easy to make. They do not require heat or long-term storage. Canned pickles are sealed in jars and processed for shelf life. This method uses heat to kill bacteria and create a vacuum seal. Both types taste great, but refrigerator pickles stay crispier due to their shorter cooking time. You now have everything you need to make Garlic Dill Refrigerator Pickles. We covered essential ingredients, step-by-step instructions, and helpful tips. You learned how to enhance flavors and avoid common mistakes. Explore variations for more unique tastes, like spicy or sweet options. Remember to store them correctly and check for freshness. Pickling is a fun way to enjoy healthy snacks. Enjoy your pickles and share them with friends!

Garlic Dill Refrigerator Pickles Easy Flavor Burst

Are you ready to elevate your snacking game? Garlic Dill Refrigerator Pickles are the answer! With a burst of flavor

To make delicious zucchini brownies, you'll need: - 1 cup grated zucchini (about 1 medium zucchini) - 1/2 cup coconut oil, melted (or unsalted butter) - 1 cup brown sugar (packed) - 1/2 cup granulated sugar - 2 large eggs - 1 teaspoon vanilla extract - 1 cup all-purpose flour - 1/2 cup unsweetened cocoa powder - 1/2 teaspoon baking soda - 1/4 teaspoon baking powder - 1/4 teaspoon salt These main ingredients create a rich, moist brownie. Grated zucchini adds moisture without changing the taste. It’s a sneaky way to add veggies to dessert! You can make your zucchini brownies even better with these optional add-ins: - 1/2 cup chocolate chips - 1/4 cup chopped walnuts Adding chocolate chips makes the brownies extra rich. Walnuts give a nice crunch. You can also top the brownies with powdered sugar or serve with ice cream for a treat. If you need alternatives, here are some good swaps: - Use applesauce instead of coconut oil for a lower-fat option. - Replace granulated sugar with a sugar substitute for less sweetness. - Gluten-free flour works well if you're avoiding gluten. These substitutions let you enjoy brownies while fitting your diet. The zucchini keeps the texture lovely, no matter the changes. If you want the full recipe, check it out [here](#). 1. Start by preheating your oven to 350°F (175°C). Grease an 8x8 inch baking pan. You can also line it with parchment paper. This helps with easy removal later. 2. In a large bowl, mix 1 cup of melted coconut oil and both sugars until they are smooth. You want a creamy texture. 3. Next, add 2 large eggs and 1 teaspoon of vanilla extract. Whisk these together until they blend well. 4. Now, take 1 cup of grated zucchini and fold it gently into your mixture. Make sure the zucchini spreads evenly throughout. 5. In another bowl, sift together 1 cup of all-purpose flour, 1/2 cup cocoa powder, 1/2 teaspoon baking soda, 1/4 teaspoon baking powder, and 1/4 teaspoon salt. 6. Gradually mix the dry ingredients into the wet ingredients. Stir until just combined to keep your brownies soft. 7. If you like, fold in 1/2 cup of chocolate chips and 1/4 cup of chopped walnuts for a tasty crunch. 8. Pour your brownie batter into the prepared pan. Smooth the top with a spatula so it cooks evenly. 9. Bake your brownies in the oven for 25-30 minutes. Check if they are done by inserting a toothpick. It should come out with a few moist crumbs. 10. Let the brownies cool in the pan for about 10 minutes. If you used parchment paper, lift them out carefully. 11. Transfer the brownies to a wire rack to cool completely. Once cool, cut them into squares. 12. For a special touch, serve the brownies on a nice plate. Dust the top with powdered sugar. Add fresh mint leaves for color. 13. Pair these brownies with a scoop of vanilla ice cream for a sweet treat. Enjoy your delicious zucchini brownies! For the full recipe, refer back to the ingredients and instructions. To make the best zucchini brownies, start by using fresh zucchini. Grate it finely. This helps it blend well into the batter. Squeeze out some moisture from the zucchini before adding it. This keeps the brownies from being too wet. Use a good quality cocoa powder for rich flavor. Mixing the wet and dry ingredients separately first makes a smooth batter. Don’t overmix; just stir until combined. This keeps your brownies tender. One common mistake is not measuring zucchini correctly. Too much zucchini can make the brownies soggy. Another mistake is baking at the wrong temperature. Always preheat your oven to 350°F (175°C) for even baking. Be careful not to open the oven door too soon. This can cause the brownies to sink in the middle. Lastly, don’t skip cooling time. Letting them cool helps set their texture. You can boost the flavor of your brownies with spices. A pinch of cinnamon adds warmth. For a kick, try a dash of cayenne pepper. Adding vanilla extract enhances sweetness without extra sugar. If you love nuts, sprinkle in some walnuts or pecans. They add crunch and flavor. Chocolate chips are also a great addition for extra richness. Try experimenting with different flavors to find your favorite mix. For the complete recipe, please refer to the Full Recipe section. {{image_2}} To make vegan zucchini brownies, swap the eggs with flax eggs. Mix 1 tablespoon of flaxseed meal with 2.5 tablespoons of water. Let it sit for 5 minutes to thicken. Use plant-based milk instead of regular milk. You can also replace coconut oil with a vegan butter. This keeps the brownies moist and rich. To make gluten-free brownies, use almond flour or gluten-free all-purpose flour. Both options work well. Check the flour package for a gluten-free label. You might need to adjust the liquid. Keep an eye on the batter's texture. It should still be thick but moist. For a healthier version, try reducing the sugar by half. You can also replace white sugar with maple syrup or honey. These options add flavor and a bit of moisture. Use applesauce instead of oil for a low-fat treat. This keeps the brownies soft and tender. Adding nuts or seeds can boost nutrition. They add a nice crunch and extra protein. For more details, you can refer to the Full Recipe. Store your zucchini brownies in an airtight container. This keeps them moist and fresh. Place a piece of parchment paper between layers to avoid sticking. Keep them at room temperature for up to three days. If you want them to last longer, refrigerate them. They can stay fresh in the fridge for up to a week. Freezing is a great way to save your brownies. First, let them cool completely. Then, cut them into squares. Wrap each square in plastic wrap. Place them in a freezer-safe bag or container. Label it with the date. You can freeze them for up to three months. To eat, just thaw them in the fridge overnight. To enjoy your brownies warm, reheat them in the oven. Preheat the oven to 350°F (175°C). Place the brownies on a baking sheet and cover with foil. Heat them for about 10 minutes. This warms them up without drying them out. You can also microwave a square for about 15-20 seconds. This makes them soft and gooey, just like fresh from the oven. Yes, you can use frozen zucchini. Thaw it and squeeze out extra water. This helps keep the brownies from getting too wet. Frozen zucchini works well since it still has good flavor. Check the brownies at 25 minutes. Insert a toothpick in the center. If it comes out with a few moist crumbs, they are done. If it has wet batter, bake a few more minutes. Remember, overbaking makes them dry. Zucchini adds moisture without many calories. It also packs fiber, vitamins, and minerals. This makes your brownies a bit healthier. Plus, you can sneak in vegetables without changing the taste much. Yes, you can use whole wheat flour or almond flour. These options add a different texture and flavor. Just keep in mind that this may change the taste slightly. Store them in an airtight container at room temperature. They stay fresh for about three days. For longer storage, place them in the fridge or freezer. Yes, you can. Use flax eggs or applesauce as a substitute. They help bind the ingredients together and keep the brownies moist. Absolutely! You can increase the cocoa powder or add more chocolate chips. This makes the brownies richer and more chocolatey. These brownies pair well with ice cream or whipped cream. You can also serve them with fresh fruit like strawberries or raspberries. This adds a nice contrast to the rich brownies. For the complete recipe, check out the Full Recipe section. In this post, we covered how to make delicious zucchini brownies. We explored key ingredients, baking steps, and tips for success. I shared variations like vegan and gluten-free options. Storing and reheating tips ensure your brownies stay fresh. Remember, using zucchini adds moisture and nutrition. Experiment with spices and toppings for more flavor. You now have all the tools to make perfect zucchini brownies. Enjoy the baking process and delight in the results!

Zucchini Brownies Simple and Delicious Recipe Guide

Are you ready to indulge in a sweet treat that’s packed with hidden veggies? My simple and delicious Zucchini Brownies

To make a tasty Quick Cucumber Gazpacho, you need fresh veggies. Here’s what to gather: - 2 large cucumbers, peeled and chopped - 1 green bell pepper, seeded and chopped - 1 ripe tomato, diced - 1 small red onion, finely chopped - 2 cloves garlic, minced - 2 cups vegetable broth - 2 tablespoons olive oil - 2 tablespoons apple cider vinegar - Salt and pepper to taste - Fresh basil leaves for garnish These ingredients work together to create a cool and refreshing dish, perfect for hot days. You can add some extra toppings to make your gazpacho shine. Here are some fun ideas: - A drizzle of olive oil - Croutons for crunch - A sprinkle of feta cheese - Chopped chives or green onions - Sliced radishes for a pop of color Feel free to mix and match these garnishes to make your dish special. Having the right tools makes cooking easier. For this recipe, you will need: - A sharp knife for chopping - A cutting board - A blender or food processor - Measuring cups and spoons - Serving bowls or glasses These tools will help you prepare the gazpacho quickly and efficiently. For the full recipe, check the section above. Start by washing the vegetables well. Use two large cucumbers. Peel and chop them into small pieces. Next, take one green bell pepper and remove its seeds. Chop it into small bits. Now, grab one ripe tomato and dice it. After that, take one small red onion and chop it finely. Finally, mince two cloves of garlic. These fresh veggies will bring bright flavors to your gazpacho. Grab a blender and add all your chopped vegetables. Pour in two cups of vegetable broth. Then, add two tablespoons of olive oil and two tablespoons of apple cider vinegar. Blend everything on high until the mixture is smooth and creamy. The colors will blend beautifully, creating a vibrant soup. If you want, you can blend it less for a chunkier texture. Taste your gazpacho and add salt and pepper to your liking. Once seasoned, cover your blender and chill the gazpacho in the fridge. Let it chill for at least 30 minutes. This helps the flavors mix well. When ready to serve, pour the gazpacho into bowls or glasses. Garnish with fresh basil leaves for a pop of color and flavor. Enjoy your refreshing cucumber gazpacho! You can find the Full Recipe for more details. To boost flavor, use ripe ingredients. Fresh cucumbers and tomatoes make a big difference. You can add a squeeze of lemon juice for zest. Consider mixing in a splash of hot sauce for a bit of heat. Fresh herbs, like dill or parsley, also enhance the taste. Try adding a pinch of smoked paprika for depth. Experiment with spices to find your favorite mix. Serve your gazpacho in bowls or glasses for a fun look. Pair it with crusty bread or crackers for a crunchy bite. You can also add croutons on top for texture. For a fancy touch, drizzle olive oil over the soup before serving. A sprinkle of feta cheese adds creaminess. Try serving it with a side of grilled shrimp for extra protein. Chilling is key to great gazpacho. Aim for at least 30 minutes in the fridge. This lets the flavors blend well. For quicker chilling, place the bowl in an ice bath. Make sure to cover the gazpacho to keep it fresh. If you’re in a hurry, you can chill it in the freezer for 10 minutes. Just don’t forget to stir it every few minutes! {{image_2}} To make a creamy avocado cucumber gazpacho, add one ripe avocado to the blender. The avocado brings a rich, smooth texture. It also adds healthy fats. Follow the full recipe as usual, blending all the ingredients together. This variation is perfect for a filling snack or a light meal. If you like heat, try spicy cucumber gazpacho. Add one or two diced jalapeños to the blender. Remove the seeds if you want less spice. Blend them in with the other ingredients. This variation heats up the classic gazpacho. Serve it chilled for a cool kick on a hot day. For a heartier soup, mix in extra veggies. Consider adding diced carrots, celery, or radishes. You can even throw in some corn for sweetness. Chop them small so they blend well. This gives more texture and flavor. You still follow the full recipe, but with these tasty additions. Enjoy a filling bowl of gazpacho that’s still refreshing! To store leftover gazpacho, first let it cool. Place it in an airtight container. I recommend using glass jars or plastic containers. Seal the container tightly to keep out air and moisture. This helps maintain freshness and flavor. Store it in the fridge. Enjoy it within three days for the best taste. You can freeze cucumber gazpacho for later use. Pour the chilled gazpacho into freezer-safe containers. Leave some space at the top, as liquids expand when frozen. Seal the containers tightly. Label them with the date. You can freeze it for up to three months. When ready to eat, thaw it in the fridge overnight. Blend it again to restore its smooth texture. For storing gazpacho, I suggest using glass or BPA-free plastic containers. Glass jars work well because they do not absorb odors. They are also easy to clean. Choose containers with tight-fitting lids to keep air out. This helps maintain the gazpacho's fresh flavor. If you want to freeze, use freezer-safe containers. I love serving cucumber gazpacho in chilled bowls or glasses. This makes it fun and fresh. You can also add some garnish for a nice touch. Fresh basil leaves work great as a topping. You can pair it with crusty bread or crunchy veggies. A drizzle of olive oil adds richness, too. Serve it cold for the best taste. It’s perfect on a hot day! Yes, you can make this recipe ahead of time. In fact, it tastes even better after chilling. I suggest making it a few hours or a day before serving. Just blend all the ingredients and chill in the fridge. This allows the flavors to mix well. When you’re ready to serve, just pour it into bowls and garnish. Easy and delicious! Absolutely! This gazpacho is vegan-friendly. It contains only vegetables, herbs, and broth. There are no animal products in the recipe. If you’re vegan, you can enjoy this dish worry-free. The fresh flavors make it a great choice for everyone. It’s a light and healthy option for any meal. Enjoy the freshness! Cucumber gazpacho is a quick, refreshing dish you can make with simple ingredients. We covered essential items, garnishes, and tools you need. You’ve learned step-by-step instructions for preparation and tips to enhance flavor. Variations add fun twists, and knowing how to store leftovers helps minimize waste. With this recipe, you can impress anyone seeking a tasty, cool treat. Enjoy experimenting with flavors and make this dish your own. Trust me, it’s worth it!

Quick Cucumber Gazpacho Fresh and Flavorful Recipe

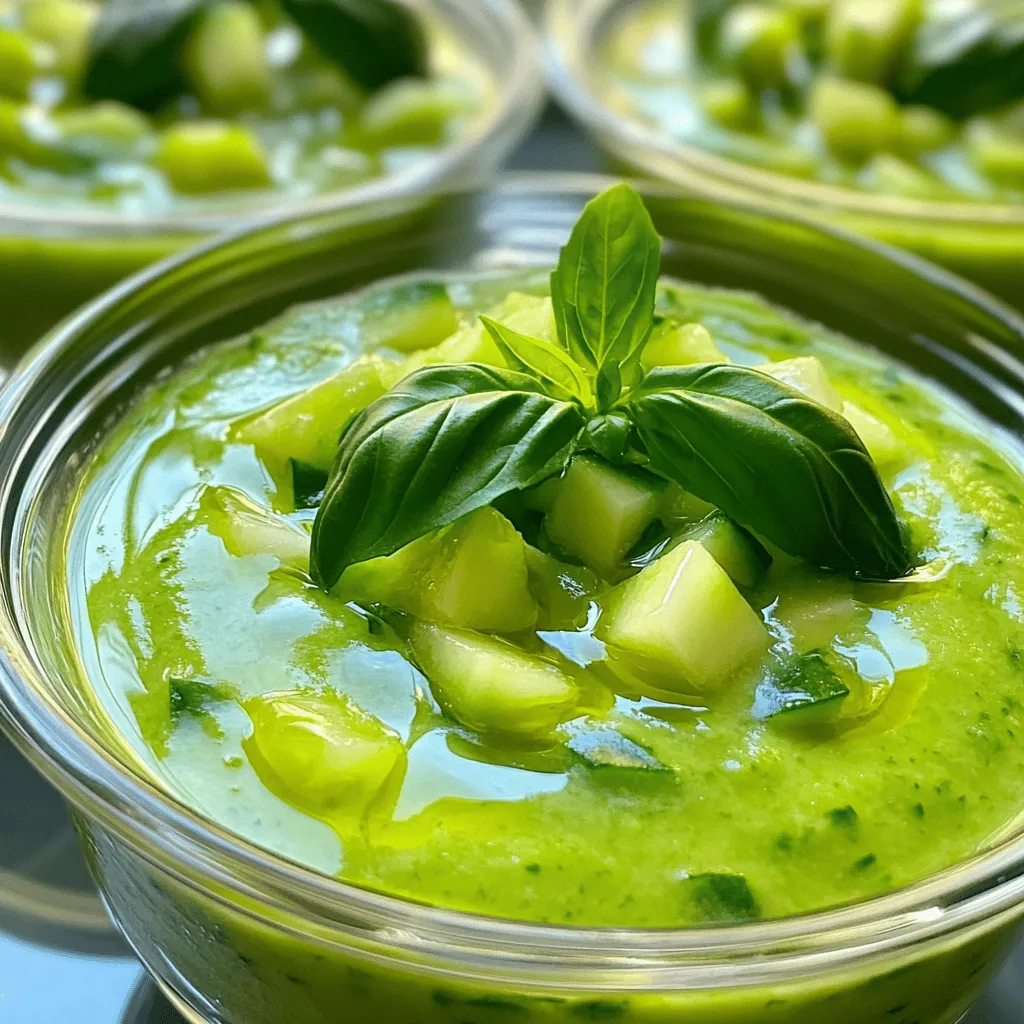
Looking for a refreshing dish that’s quick to make? You’ll love this Quick Cucumber Gazpacho! It’s light, tasty, and perfect

To make these brownies, you need simple, healthy items: - 1 cup black beans, rinsed and drained - 2 tablespoons cocoa powder - 3 tablespoons honey or maple syrup - 1 teaspoon vanilla extract - 1/4 teaspoon baking powder - Pinch of salt - 2 tablespoons unsweetened applesauce - 1/4 cup dark chocolate chips (optional for added richness) These main ingredients work together to create a rich, fudgy brownie. The black beans give moisture and protein. Cocoa powder adds the chocolate taste you crave. Honey or maple syrup sweetens the mix while keeping calories low. You can take your brownies to the next level with a few extras. Here are some ideas: - Chopped nuts for crunch - Dried fruits, like cherries or raisins, for sweetness - A sprinkle of sea salt on top for balance These options can change the flavor and texture. Nuts add healthy fats, while dried fruits bring natural sweetness. A touch of sea salt enhances the chocolate flavor. Each brownie is about 87 calories. Here’s a quick look at the nutrition: - Protein: 3g - Carbohydrates: 15g - Fat: 1g - Fiber: 3g - Sugar: 5g These brownies offer a sweet treat without the guilt. They are low in fat and high in fiber, making them a smart choice. Plus, you can enjoy them without breaking your diet. For the full recipe, check out the detailed instructions above. First, you will want to preheat your oven to 350°F (175°C). This step is key to getting the perfect bake. While the oven heats up, grab an 8x8 inch baking dish. You can lightly grease it or line it with parchment paper. This helps the brownies come out easily later. Next, take your food processor and add the main ingredients. Start with 1 cup of rinsed black beans. Then add 2 tablespoons of cocoa powder, 3 tablespoons of honey or maple syrup, and 1 teaspoon of vanilla extract. Toss in 1/4 teaspoon of baking powder and a pinch of salt too. Finally, add 2 tablespoons of unsweetened applesauce. Blend all these until you get a smooth mix. You can stir in 1/4 cup of dark chocolate chips if you want extra flavor. Now, pour your brownie batter into the prepared baking dish. Spread it evenly using a spatula. Place the dish in the oven and bake for 20 to 25 minutes. To check if they are done, insert a toothpick into the center. If it comes out clean, they are ready. After baking, take them out and let them cool in the pan for about 10 minutes. Then, cut them into squares. Enjoy your delicious healthy brownies! For the full recipe, check the earlier section. You can swap honey with other sweeteners. Try maple syrup or agave nectar. If you want a low-calorie option, use stevia or erythritol. Adjust the amount based on the sweetener you choose. Each sweetener has a different level of sweetness. Taste the batter before baking. This helps you get the right balance. To keep your brownies moist, do not overbake them. Check them at 20 minutes with a toothpick. If it comes out clean, they're done! If it comes out wet, bake for a few more minutes. The right amount of applesauce also helps. It keeps the brownies soft. If you find the mix too thick, add a splash of water or almond milk. If you are new to baking, follow the steps closely. Measure your ingredients carefully. Use a food processor for smooth mixing. Make sure your oven is preheated. This helps the brownies rise well. Don’t skip cooling them before cutting. This makes them easier to slice. For a fun twist, share with friends or family. They will love your healthy treat! For the full recipe, check the section above. {{image_2}} You can boost flavor and texture by adding nuts or dried fruits. Chopped walnuts or almonds add crunch. Dried cherries or cranberries offer a sweet twist. Mix in about 1/4 cup of your choice for a tasty treat. Nuts add healthy fats, while fruits add fiber. This makes your brownies even more satisfying. To make these brownies vegan, use maple syrup instead of honey. This simple swap keeps the taste great. For a gluten-free option, ensure your cocoa powder is gluten-free. You can also substitute black beans with chickpeas for a new flavor. These changes keep the brownies healthy and delicious for everyone. Try adding different flavors to your brownies for fun. A few drops of peppermint extract can give a minty kick. For coffee lovers, mix in espresso powder for a rich taste. If you love peanut butter, swirl in some before baking. Each of these options makes your brownies unique and exciting. With these variations, you can enjoy your healthy 87 calorie brownies in many ways. For the complete recipe, check out the Full Recipe. After you bake these brownies, let them cool completely. Place them in an airtight container. You can keep them at room temperature for three days. If you want them to last longer, put them in the fridge. They stay fresh for about a week in the fridge. Freezing is a great way to save leftovers. First, let the brownies cool fully. Then, cut them into squares. Wrap each square in plastic wrap. Place the wrapped brownies in a freezer bag. They can last up to three months in the freezer. Just remember to label the bag with the date. To enjoy your brownies warm, heat them in the microwave. Place a brownie on a microwave-safe plate. Heat for about 10-15 seconds. If you prefer the oven, preheat it to 350°F (175°C). Place the brownies on a baking sheet. Heat for about 5-10 minutes. This keeps them moist and tasty! Enjoy your delicious treat any time! You can find the Full Recipe to create these amazing brownies. These brownies are healthy because they use black beans instead of flour. Black beans add fiber and protein, which help keep you full. We also use less sugar, swapping in natural sweeteners like honey or maple syrup. This way, you enjoy a treat without too many calories. Each brownie has only 87 calories, making them a guilt-free choice. Yes, you can use other beans! White beans or kidney beans work well too. Each type gives a different taste but keeps the brownies moist. Just rinse and drain them like you do with black beans. You might notice a slight change in flavor, but they will still be delicious. To make these brownies sugar-free, use ripe bananas or unsweetened applesauce instead of sweeteners. You can also try stevia or monk fruit as sugar substitutes. Both add sweetness without calories. Ensure you still balance the flavors, so the brownies remain tasty and rich. Yes, there are alternatives to cocoa powder. You can use carob powder for a milder flavor. It has a different taste but works well in brownies. Another option is to use dark chocolate, melted and mixed into the batter. This adds richness and a deep chocolate flavor. These healthy 87-calorie brownies are easy to make and tasty. You learned about key ingredients, how to prepare them, and ways to tweak the recipe. I shared tips for texture and storage options. You can try different flavors, too. This recipe fits various diets, making it fun. Now, you have the tools to bake brownies that satisfy cravings without guilt. Enjoy your brownies and share them with friends!

Healthy 87 Calorie Brownies Simple and Delicious Recipe

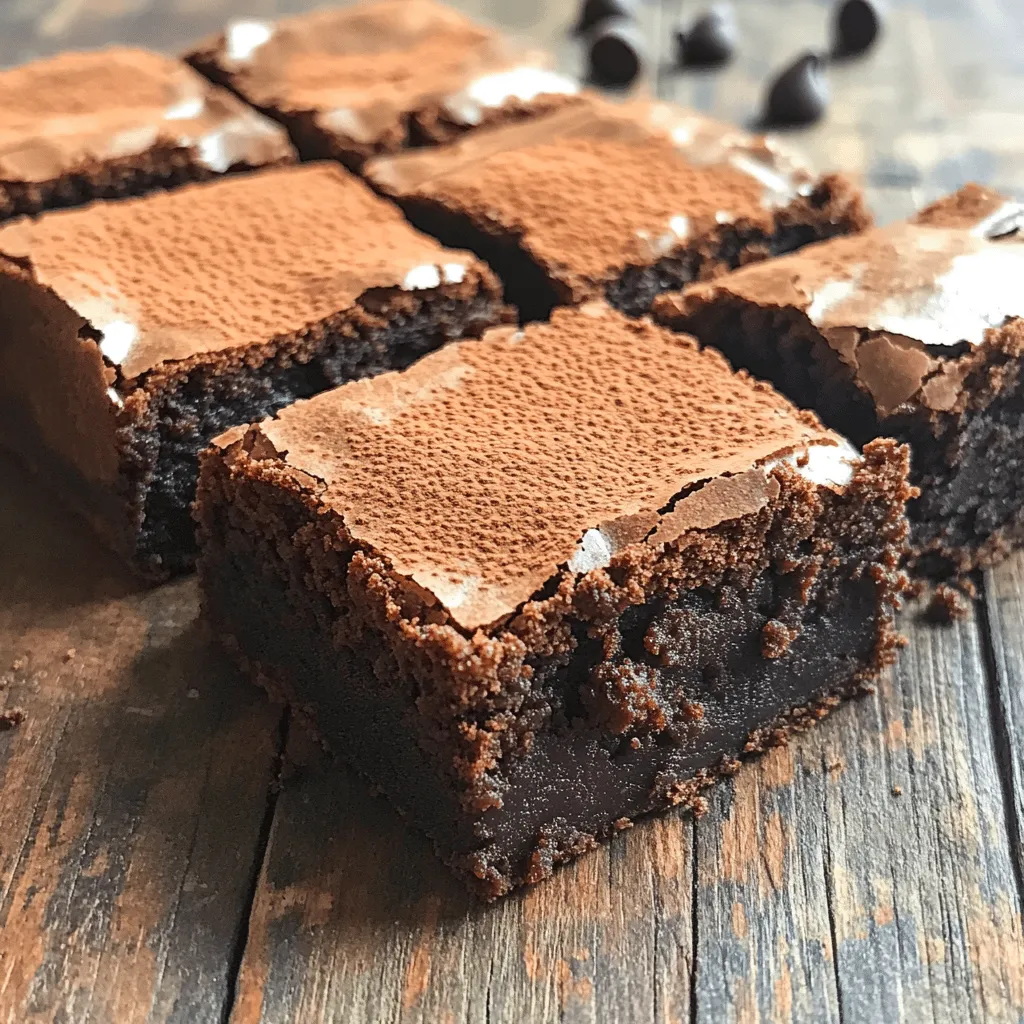
Craving chocolate without the guilt? You’re in luck! These Healthy 87 Calorie Brownies are not just simple to make, but

Older posts
Newer posts
← Previous Page1 … Page38 Page39 Page40 … Page84 Next →

dsad

© 2025 My Saved Recipe • Built with GeneratePress

Our Policies

  • Copyright Policy
  • Cookie Policy
  • GDPR Policy
  • Privacy Policy
  • Disclaimer
  • Terms Of Use

More Information

  • Home
  • About
  • Contact
  • Appetizers
  • Dessert
  • Dinner
  • Drinks
©2025, My Saved Recipe About Back To Top