Skip to content
DisclaimerTerms Of UseGDPR PolicyCookie Policy

My Saved Recipe

  • Home
  • Drinks
  • Appetizers
  • Dinner
  • Dessert
  • About
  • Contact
  • Privacy Policy
DisclaimerTerms Of UseGDPR PolicyCookie Policy

Savannah

To make garlic butter baked scallops, you need the following items: - 12 large sea scallops, cleaned - 4 tablespoons unsalted butter, melted - 4 cloves garlic, minced - 1 tablespoon fresh parsley, chopped - 1 tablespoon lemon juice - Zest of 1 lemon - 1/2 teaspoon red pepper flakes (optional) - Salt and black pepper to taste - Breadcrumbs for topping (optional) These ingredients create a rich and flavorful dish that tastes gourmet. When choosing scallops, freshness is key. Here’s how to select the best: - Look for scallops that are firm and slightly moist. - They should have a sweet, briny smell, not a fishy one. - If possible, buy scallops on the same day you plan to cook them. - Store scallops in the fridge and use them within a day or two. Keeping scallops fresh helps ensure the best taste and texture. You can customize your garlic butter baked scallops with these extras: - A dash of white wine for added depth. - Parmesan cheese for a rich, cheesy topping. - Fresh herbs like thyme or basil for extra flavor. - A squeeze of orange juice for a citrus twist. These optional ingredients can elevate your dish and suit your tastes. For the full recipe, check out the detailed cooking steps. First, preheat your oven to 375°F (190°C). This step warms up the oven for even cooking. Next, take your scallops and pat them dry with a paper towel. Removing moisture helps them sear nicely. Arrange the scallops in a single layer in a baking dish. Make sure they have space around them. This allows for even cooking and great flavor absorption. Now it’s time to make the garlic butter sauce. In a small bowl, combine 4 tablespoons of melted butter with 4 cloves of minced garlic. Add in 1 tablespoon of fresh chopped parsley and 1 tablespoon of lemon juice. For extra flavor, include the zest of one lemon. If you like a bit of heat, mix in 1/2 teaspoon of red pepper flakes. Season with a pinch of salt and black pepper. Stir everything together until it looks like a tasty sauce. With your scallops arranged and sauce ready, pour the garlic butter mixture over them. Ensure each scallop gets a nice coating. If you want a crunchy topping, sprinkle breadcrumbs on top. Place the baking dish in the preheated oven. Bake for 12 to 15 minutes. The scallops should turn opaque and tender. For a golden crust, switch to broil for the last 2 to 3 minutes. Keep an eye on them to avoid burning. Once done, let them cool slightly before serving. You can garnish with more parsley and lemon wedges for a bright touch. This step adds a nice presentation to your dish. For the full recipe, see above. When cooking scallops, I focus on a few key points. Always start with dry scallops. Wet scallops do not sear well. Pat them dry using a paper towel before cooking. This helps achieve a nice, golden crust. Cook them on high heat for a short time. This keeps them tender and flavorful. Choose scallops that are fresh and firm. Look for a sweet smell, not a fishy odor. Fresh scallops should have a glossy look. If you’re at a market, ask for "dry" scallops. These scallops are not treated with preservatives. They taste better and cook more evenly. To boost flavor, consider adding fresh herbs. Basil, thyme, or dill work well with scallops. A pinch of paprika or cayenne pepper can add a kick. You might like to use a splash of white wine for depth. Mix these in your garlic butter sauce for added taste. For the full recipe, check out the details above. {{image_2}} You can cook scallops in many ways. Grilling adds a smoky flavor. Just brush them with garlic butter and grill for about 2-3 minutes on each side. Sautéing is also easy. Heat some butter in a pan, add scallops, and cook for 2-4 minutes. Both methods keep the scallops tender and flavorful. You can change some ingredients to fit dietary needs. Use olive oil instead of butter for a dairy-free option. If you want less salt, try using low-sodium butter. You can swap out parsley for fresh basil or cilantro for a different taste. These swaps keep the dish tasty while meeting your needs. Garlic butter baked scallops pair well with many sides. Try serving them with a fresh salad or steamed veggies. A light pasta dish also complements the scallops nicely. For drinks, a crisp white wine enhances the flavors. You can check the Full Recipe for more ideas on how to enjoy this meal. After cooking, let the scallops cool down. Place them in an airtight container. This keeps them fresh. Store the container in the fridge. Use the leftovers within two days for best taste. If you want to keep them longer, consider freezing. To reheat, use the oven for the best results. Preheat your oven to 350°F (175°C). Place the scallops in a baking dish. Add a little butter or olive oil to keep them moist. Cover with foil to retain heat. Bake for about 10 minutes. Check to make sure they are warmed through. If you want to freeze scallops, do it right after cooking. Let them cool first. Then, wrap each scallop in plastic wrap. Place them in a freezer bag. Try to remove as much air as possible. This helps prevent freezer burn. Use frozen scallops within three months for the best flavor. Scallops are fully cooked when they turn opaque and firm. You can check by cutting one in half. If it looks white and not translucent, it’s ready. Cooking time is about 12-15 minutes at 375°F (190°C). If you want a nice crust, broil them for the last few minutes. This gives them a lovely golden top. Yes, you can use frozen scallops! Just be sure to thaw them first. Place them in the fridge overnight or run them under cold water. Pat them dry before cooking. This step helps the garlic butter stick better and keeps them from getting watery. Thawed scallops work very well in this dish. Garlic butter baked scallops pair well with many sides. I recommend serving them with a fresh green salad or roasted vegetables. You can also serve them over a bed of creamy risotto or pasta. A slice of crusty bread is great for dipping in the tasty garlic butter. For a refreshing touch, add a glass of white wine or lemon water. For the full recipe and more details, check the [Full Recipe]. In this article, we discussed how to make garlic butter baked scallops. We covered the main ingredients, giving tips for maximum freshness. I shared step-by-step baking instructions, along with best practices for cooking scallops. We explored variations, storage tips, and common questions. Remember, cooking scallops can be simple and tasty. Use fresh seafood and follow these tips. Enjoy your meal and impress your guests with this dish!

Garlic Butter Baked Scallops Easy Gourmet Delight

If you’re craving a dish that wows without the fuss, you’ve found it! Garlic Butter Baked Scallops are a simple

- 2 medium sweet potatoes, peeled and diced - 1 link of Andouille sausage, sliced - 1 red bell pepper, diced - 1 onion, chopped - 2 cloves garlic, minced - 1 teaspoon smoked paprika - 1/2 teaspoon cayenne pepper (adjust to taste) - 2 tablespoons olive oil - Salt and pepper to taste - Fresh parsley, chopped (for garnish) Sweet potatoes are the star here. They add a natural sweetness and a creamy texture. I love how they balance the spicy kick from Andouille sausage. This sausage brings a smoky flavor that really enhances the dish. Don’t forget the veggies! The red bell pepper and onion add color and crunch. Garlic boosts the taste with its strong aroma. The smoked paprika gives warmth, while cayenne adds heat. You can adjust the cayenne to fit your taste. Olive oil is key for cooking everything together. It helps the sweet potatoes get nice and tender. Season with salt and pepper to bring out all the flavors. Fresh parsley adds a pop of green and a fresh finish. This recipe is simple but packed with flavor. For the full experience, follow the full recipe. Enjoy every bite! Cooking the Sweet Potatoes Start by heating two tablespoons of olive oil in a large skillet over medium heat. Next, peel and dice two medium sweet potatoes. Once the oil is hot, add the sweet potatoes to the skillet. Sauté them for about ten minutes. Stir them often to keep them from sticking. They should become slightly tender but not fully cooked yet. Browning the Andouille Sausage After the sweet potatoes have cooked a bit, push them to one side of the skillet. Add one sliced link of Andouille sausage to the empty side. Cook the sausage for five to seven minutes. This browning adds flavor. Once done, mix the sausage with the sweet potatoes. Combining Ingredients and Cooking Together Now, chop one onion and one red bell pepper. Mince two cloves of garlic. Add these veggies to the skillet with the sweet potatoes and sausage. Sprinkle in one teaspoon of smoked paprika and half a teaspoon of cayenne pepper. Stir everything well to combine. Cook for another five to seven minutes until all the veggies are tender. Season with salt and pepper to taste. Remove from heat and let it sit for a minute. This allows the flavors to blend. For the full recipe, check out the details above. Ensuring Proper Cooking Times To get the best taste, cook each ingredient the right way. Sweet potatoes need around 10 minutes to soften. Andouille sausage needs about 5 to 7 minutes to brown nicely. Stir often to keep things even. Enhancing Flavors with Spices Spices make this dish shine. I love using smoked paprika for depth. A bit of cayenne pepper gives it a kick. Feel free to adjust spice levels to match your taste. Just remember, start small and add more if you want. Avoiding Common Mistakes One mistake is overcrowding the pan. If you add too many ingredients at once, they won’t cook well. Give everything room to breathe. Another tip is not to skip the garlic. It brings a rich flavor that ties everything together. For the full recipe, check out the Sweet Potato & Andouille Sausage Skillet. Enjoy making this meal! {{image_2}} You can switch Andouille sausage for other meats. Try chicken sausage for a lighter meal. Turkey sausage adds a nice flavor without too much fat. If you're vegetarian, use tempeh or tofu for protein. They soak up flavors well and keep the dish hearty. Feel free to mix in more veggies. Zucchini, corn, or spinach make great additions. For a crunch, add green beans or snap peas. These veggies add color and nutrients, making the dish even better. Just chop them small, so they cook evenly. You can control the heat in this dish. If you like it milder, cut down on cayenne pepper. For more heat, add chili flakes or a dash of hot sauce. You can also try different spices like cumin or coriander for a unique taste. Adjusting spices lets you make it your own. Try these variations to create your perfect Sweet Potatoes & Andouille Sausage meal. Check out the Full Recipe for more tips and ideas! After you enjoy your Sweet Potatoes & Andouille Sausage, store leftovers properly. Let the dish cool down first. Then, place it in an airtight container. It will stay fresh in the fridge for up to three days. Always keep it covered to prevent drying out. If you want to save it longer, freezing is a great option. Pack the cooled dish into a freezer-safe container. Make sure to leave some space at the top. This allows for expansion as it freezes. You can keep it frozen for up to three months. To reheat, you can use the microwave or stovetop. For the microwave, place a portion in a bowl and cover it. Heat in short bursts, stirring in between. For the stovetop, warm it in a skillet over low heat. Add a splash of water or broth to help it heat evenly. Always check that it’s hot throughout before serving. These steps will help you enjoy your meal again while keeping it tasty and safe! Can I use different types of potatoes? Yes, you can use other potatoes. Russets or Yukon Golds will work well. They will change the taste and texture. Sweet potatoes bring a natural sweetness that pairs well with Andouille sausage. What can I serve with Sweet Potatoes & Andouille Sausage? Pair this dish with a simple salad or some crusty bread. A fresh green salad adds a nice crunch. You can also serve it with rice or quinoa for extra fiber. How can I make this recipe healthier? To make it healthier, use turkey or chicken sausage. You can reduce the oil or use a cooking spray. Adding more veggies is another great way to boost nutrition. Try spinach, kale, or zucchini for added flavor and color. For the full recipe, check out the Sweet Potato & Andouille Sausage Skillet. This blog post covered how to make a tasty dish with sweet potatoes and andouille sausage. We explored the important ingredients, step-by-step cooking, and helpful tips. You also learned about variations you can try and how to store leftovers effectively. Cooking can be fun and rewarding. Don’t be afraid to experiment with flavors. Trust your taste buds and adjust as needed. Enjoy your meal, and share it with family and friends!

Sweet Potatoes & Andouille Sausage Flavorful Meal Guide

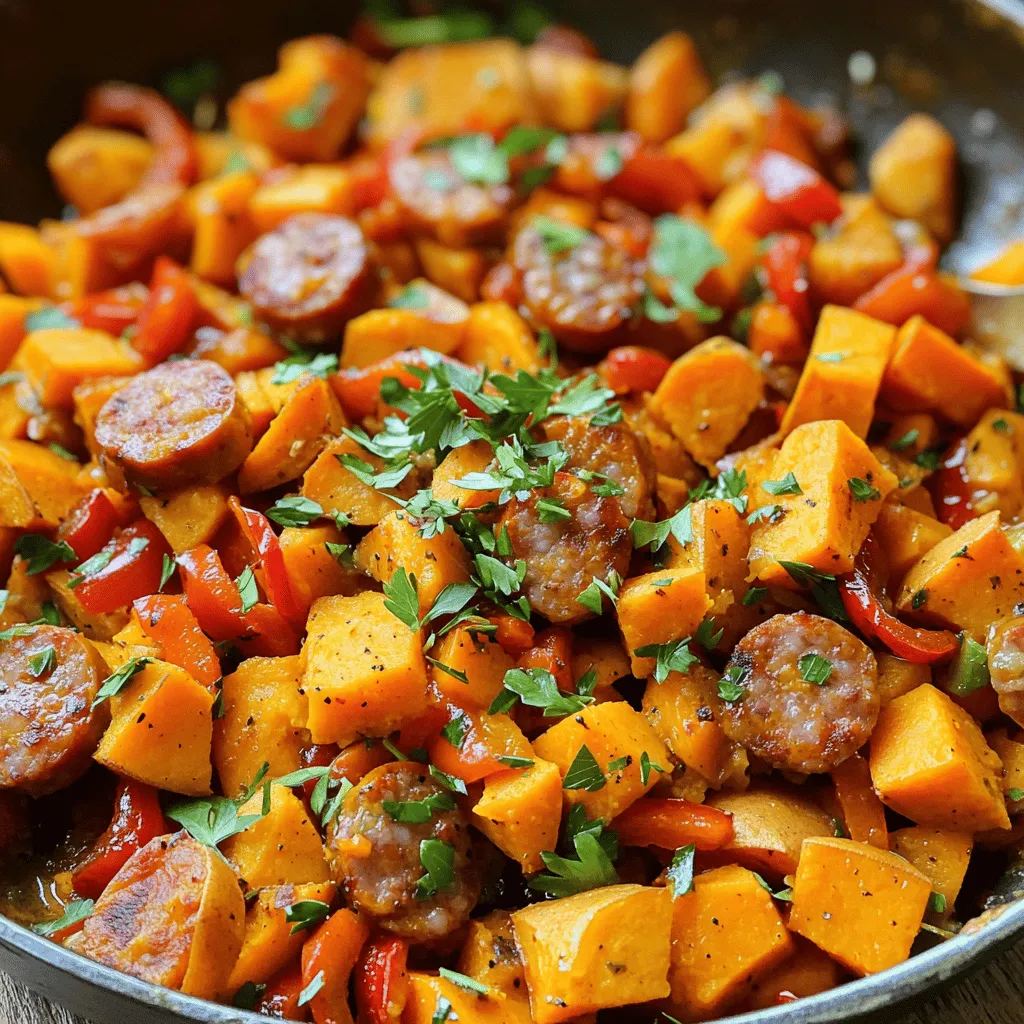
Get ready to savor a delicious meal! In this guide, I’ll show you how to make Sweet Potatoes and Andouille

- 2 rib eye steaks (about 1 inch thick) - 4 cloves garlic, minced - 2 tablespoons fresh rosemary, chopped - 2 tablespoons fresh thyme, chopped - 1 tablespoon olive oil - 1 teaspoon lemon zest - Salt and freshly ground black pepper to taste - 1 cup cherry tomatoes, halved - 1/4 cup balsamic vinegar - Fresh arugula, for serving To make the Tuscan Grilled Rib Eye Steak, you need fresh and quality ingredients. The rib eye steak is the star of the dish. It has rich marbling, which gives it great flavor. I prefer using steaks that are about one inch thick. This thickness helps to cook them evenly. You’ll want to use fresh herbs for the best taste. Garlic adds a strong, savory flavor. Rosemary and thyme give the steak a lovely aroma and depth. The olive oil helps to coat the steak and keep it moist while grilling. Adding lemon zest brightens the flavors and makes the dish pop. Don’t forget to season with salt and freshly ground black pepper. These enhance the natural taste of the steak. For accompaniments, the cherry tomatoes add sweetness and a juicy bite. Tossing them in balsamic vinegar gives them a tangy kick. Finally, fresh arugula serves as a great bed for the steak. It adds a peppery flavor that balances the dish. Follow the Full Recipe for a delightful cooking experience. Trust me, your taste buds will thank you! To start, you need to make a herb paste. Combine these ingredients in a small bowl: - 4 cloves garlic, minced - 2 tablespoons fresh rosemary, chopped - 2 tablespoons fresh thyme, chopped - 1 tablespoon olive oil - 1 teaspoon lemon zest - Salt and freshly ground black pepper to taste Mix them well until you get a fragrant paste. Next, rub this herb paste over both sides of your rib eye steaks. Let them sit for about 30 minutes. This step allows the flavors to soak in and makes the steak taste amazing. While your steaks marinate, preheat your grill to medium-high heat. This ensures a good sear on your meat. Once hot, place the marinated rib eye steaks on the grill. Grill them for about 4-5 minutes on one side for medium-rare. Then, flip the steaks and grill the other side for another 4-5 minutes. Adjust the time if you prefer a different doneness level. After grilling, remove the steaks from the heat. Let them rest for about 5 minutes. This step locks in the juices, making each bite tender. While the steaks rest, prepare your plate. Place a bed of fresh arugula on each serving plate. Slice the steaks against the grain and arrange the slices atop the arugula. Finally, top them with the balsamic-marinated cherry tomatoes for that extra burst of flavor. For the full recipe, check the link. To get those perfect grill marks, heat your grill well. A hot grill sears the meat and locks in juices. Place the rib eye steaks at a 45-degree angle on the grill. Leave them there for about two minutes. Then, rotate them to create a crosshatch pattern. Flip the steaks to the other side after four to five minutes. For doneness, a meat thermometer is your best friend. Insert it into the thickest part of the steak. Aim for 130°F for medium-rare and 145°F for medium. This ensures a juicy and tender steak every time. To elevate your steak's flavor, fresh herbs are key. Try adding sage or tarragon to your herb mix. These herbs add depth and fresh notes. You can also mix in a splash of red wine for an extra layer of taste. When marinating, time is essential. Use a sealable bag for even coating. Let the steaks sit in the marinade for at least 30 minutes. For a stronger flavor, marinate overnight. This way, the steak absorbs all those tasty herbs and spices. For the full recipe, check the details above. {{image_2}} You can switch up the protein in this recipe. Rib eye steak is rich and juicy, but other cuts work too. Try a flank or sirloin steak for a leaner option. They cook well and still taste great with the same herb marinade. If you're feeling adventurous, grill chicken or pork. Both meats soak up flavors nicely. Chicken breasts remain juicy when grilled, especially with the Tuscan herbs. Pork chops have a nice balance of fat and meat. They can be just as tasty. Herbs are key to making this dish shine. While rosemary and thyme are classic, other herbs can add a fun twist. Consider using sage or oregano for a different taste. Sage gives a warm, earthy flavor. Oregano adds a hint of brightness that works well with grilled meats. You can also play with citrus in the marinade. Lemon is great, but lime or orange can change the flavor profile. Lime adds a zesty kick, while orange offers sweetness. Both will brighten the dish and enhance the overall taste. For the complete cooking experience, follow the Full Recipe to guide you through each step. To keep your grilled rib eye steak fresh, allow it to cool first. Once cool, wrap the steak tightly in plastic wrap. This helps keep air out and moisture in. You can also place it in an airtight container. Glass containers work very well for this. Store the wrapped steak in the fridge. It will stay good for up to three days. If you have more time, consider freezing the steak. Wrap it well in foil or freezer bags. It can last up to three months in the freezer. When it's time to eat your leftover steak, reheating correctly is key. The best method is to use the oven. Preheat your oven to 250°F (120°C). Place the steak on a baking sheet and cover it with foil. This helps keep the moisture in. Heat it for about 20 minutes or until warm. You can also use a skillet. Heat it on low and add a little broth or water. Cover the skillet to keep the steam inside. This will help keep your steak juicy. Avoid using a microwave, as it can dry out your steak. The best cooking temperature for rib eye steak is 130°F to 135°F for medium-rare. You can use a meat thermometer to check the heat. Place it in the thickest part of the meat. This will help you avoid overcooking. For medium, aim for 140°F to 145°F. Adjust your grill time based on your desired doneness. Let the steak rest for about 5 minutes before cutting. This helps the juices to redistribute. If you cut too soon, the juices will run out. Resting ensures a juicy, flavorful bite. Cover the steak loosely with foil to keep it warm while resting. Using frozen steaks is not the best choice for this recipe. Thawing them first helps improve flavor and texture. If you must use frozen steak, defrost it in the fridge overnight. This keeps the meat safe and helps it cook evenly. Tuscan Grilled Rib Eye Steak pairs well with various sides. Here are some great options: - Garlic mashed potatoes - Grilled vegetables like zucchini and bell peppers - A fresh arugula salad with lemon vinaigrette - Crusty bread to soak up juices These sides balance the rich flavors of the steak and enhance your meal. For a full recipe, check the earlier section. In this post, we explored making a delicious Tuscan Grilled Rib Eye Steak. You learned about the ingredients to create tasty flavors, the step-by-step grilling process, and storage tips for leftovers. Remember, grilling is an art, and practice makes perfect. Enjoy experimenting with different herbs and proteins to find your favorite. This meal not only satisfies hunger but brings joy to gatherings. Now, grab your grill and get cooking!

Tuscan Grilled Rib Eye Steak Savory Delightful Meal

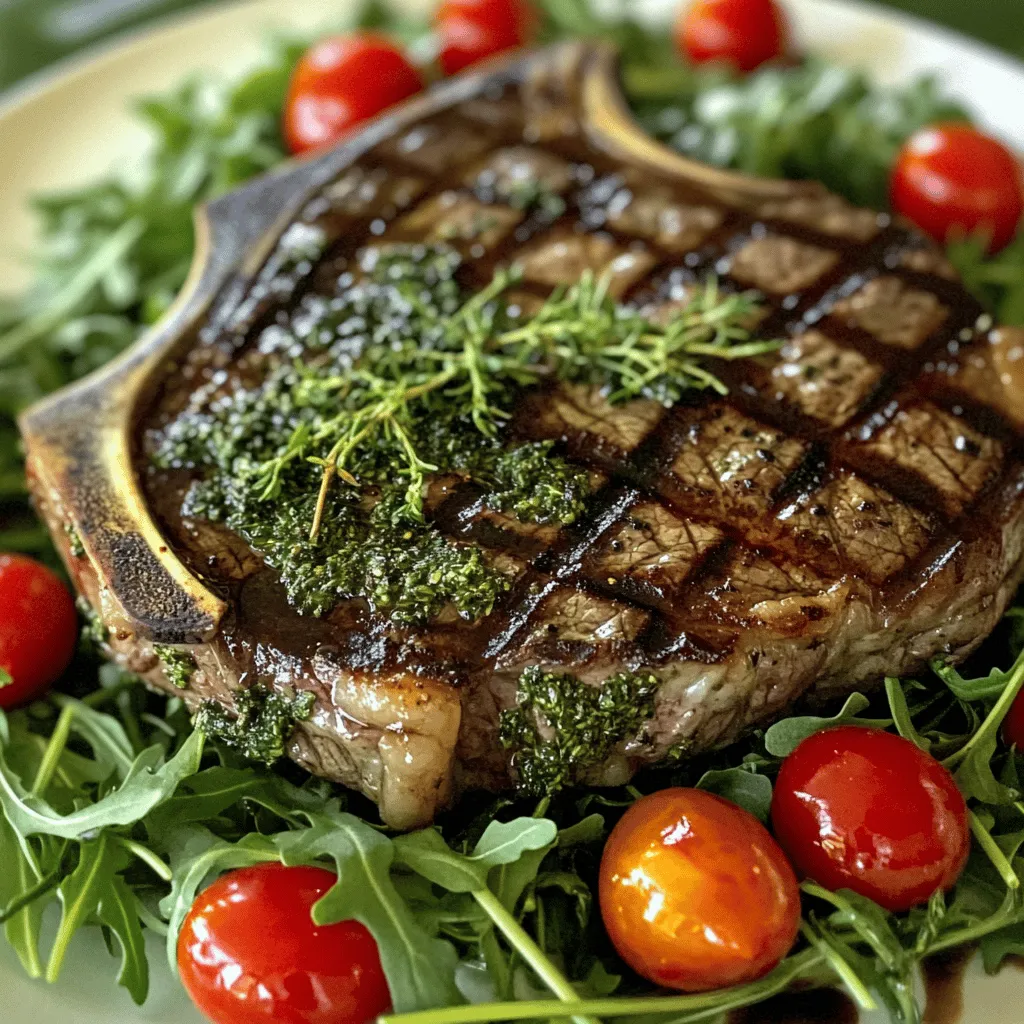
Are you ready to treat yourself to a Tuscan Grilled Rib Eye Steak? This flavorful dish combines juicy rib eye

- 1 cup pitted Medjool dates, chopped - 1/4 cup unsalted butter, softened - 3/4 cup brown sugar - 1 cup heavy cream Sticky toffee pudding shines with its key ingredients. The pitted Medjool dates add natural sweetness and a rich texture. Unsalted butter gives a creamy base, while brown sugar enhances the deep flavors. Heavy cream creates the sticky toffee sauce that makes this dessert truly special. - 1/2 cup chopped walnuts - 1 teaspoon vanilla extract Adding chopped walnuts brings a nice crunch and flavor contrast. A splash of vanilla extract enhances the overall taste. These options make your pudding even more delightful. - Vegan replacements: Use coconut oil instead of butter and almond milk for cream. - Gluten-free alternatives: Substitute all-purpose flour with a gluten-free blend. If you follow a vegan diet, swap in coconut oil and almond milk. For gluten-free needs, a good blend of gluten-free flour works well. These substitutes keep the dessert tasty while fitting your diet. 1. Prepping the oven and baking dish Start by preheating your oven to 350°F (175°C). This helps your pudding bake evenly. Grease an 8-inch square baking dish with butter. If you prefer, you can use individual ramekins. This way, everyone gets their own serving. 2. Soaking the dates In a bowl, chop the pitted Medjool dates. Add baking soda to the bowl. Pour in one cup of boiling water. Let the dates soak for about 10 minutes. This softens the dates, making them sweeter and easier to mix into the batter. 1. Creaming the butter and sugar In a big bowl, take 1/4 cup of softened unsalted butter. Add 3/4 cup of brown sugar. Use a mixer or a spoon to cream them together. Mix until the mixture is light and fluffy. This makes your pudding soft and rich. 2. Incorporating the dry ingredients Next, crack one large egg into the butter mixture. Add 1 teaspoon of vanilla extract. Mix well until everything is combined. Gradually add 1 cup of all-purpose flour, 1 teaspoon of baking powder, and 1/2 teaspoon of salt. Stir until just combined. Don’t overmix! Then, fold in the soaked dates and any chopped walnuts if you like. 1. Ingredients for the sauce You will need 1 cup of heavy cream and 1/2 cup of brown sugar. This sauce is what makes the pudding sticky and sweet. 2. Cooking the sauce to perfection In a saucepan, combine the heavy cream and brown sugar. Heat over medium heat. Stir until the sugar dissolves and the mixture starts to simmer. Let it cook for 2-3 more minutes. This will create a rich, smooth sauce that you can drizzle over the pudding. Now that you have all the steps, you are ready to bake your delicious sticky toffee pudding. Enjoy every bite of this warm dessert delight! For more details, check the Full Recipe. To make the best sticky toffee pudding, getting the baking time right is key. Bake it for 25 to 30 minutes at 350°F (175°C). Check for doneness by inserting a toothpick in the center. If it comes out clean, your pudding is ready. If it has batter stuck to it, give it a few more minutes. Presentation can elevate your pudding. Serve it warm in individual ramekins or slice it into squares. Drizzle warm sticky toffee sauce over the top. For a special touch, add a dollop of whipped cream or a scoop of vanilla ice cream. Fresh mint leaves can also make it look vibrant. Overmixing the batter can make your pudding tough. Mix just until combined. Also, don’t skimp on soaking the dates. They need at least 10 minutes in boiling water to soften fully. This step is crucial for the best flavor and texture in your pudding. {{image_2}} To make a vegan sticky toffee pudding, you need a few simple changes. Replace the egg with a flax egg. To make a flax egg, mix one tablespoon of ground flaxseed with three tablespoons of water. Let it sit for a few minutes to thicken. Use plant-based butter instead of regular butter. This keeps the texture smooth and rich. For texture and flavor, try using almond milk or coconut milk. These can add a nice creaminess to your pudding. You can also sweeten it with maple syrup for extra flavor. Gluten-free sticky toffee pudding is easy with the right flour. Use almond flour or gluten-free all-purpose flour. Both options work well and keep the pudding moist. Almond flour adds a nutty taste that pairs nicely with the dates. To ensure it does not affect the taste, mix the gluten-free flour with a bit of tapioca starch. This helps keep the pudding light and fluffy. You will still enjoy the same great flavor as the classic version. You can make your sticky toffee pudding even more exciting by adding fun flavors. Try adding a teaspoon of cinnamon or nutmeg for warmth. These spices can brighten the dish and make it unique. If you want a chocolate twist, fold in some chocolate chips. Dark chocolate works best, but you can use milk chocolate if you prefer. Adding fruits like chopped apples or pears can also give you a delightful surprise in each bite. To keep your sticky toffee pudding fresh, store it in the fridge. Use an airtight container to prevent it from drying out. If you want to save it longer, freeze it. Wrap it tightly in plastic wrap and then place it in a freezer bag. This method helps keep its taste and texture intact. To reheat, take it out of the fridge or freezer. If frozen, let it thaw in the fridge overnight. Then, warm it in the oven at 350°F (175°C) for about 10-15 minutes. For a quick option, microwave it for about 30 seconds or until heated through. Sticky toffee pudding lasts for about 3-4 days in the fridge. In the freezer, it can stay fresh for up to 3 months. Be sure to check for any signs of freezer burn or off smells before eating. Always trust your senses! If you plan a gathering, making sticky toffee pudding in advance is smart. You can bake it a day before and store it in the fridge. This way, you save time on the day of your event. For serving, cut it into portions before you store it. This makes it easy to grab and serve. Aim for 1-2 servings per person, depending on how sweet your guests like their dessert. Sticky toffee pudding is a rich dessert from England. It is made from moist sponge cake, dates, and a sweet toffee sauce. This treat dates back to the 20th century, with roots in the Lake District. Some say it was created by a hotel in the 1960s. Its warm, gooey texture makes it a favorite among many. Yes, you can make sticky toffee pudding in advance. I recommend baking it a day before serving. Let it cool completely and store it in the fridge. When ready to serve, gently reheat it in the oven. This keeps the cake moist and enhances the flavors. The toffee sauce can also be made ahead and warmed up later. You can find amazing sticky toffee pudding at many restaurants. In London, try The Ivy or Rules. If you prefer a homemade version, consider making it yourself using the [Full Recipe]. This recipe guides you through each step, ensuring a perfect dessert. Enjoy the satisfaction of creating this classic treat at home! Sticky toffee pudding is a delightful treat with rich flavors and a warm texture. I covered key ingredients, like Medjool dates and brown sugar, that make this dessert special. You can enhance it with optional items like walnuts or vanilla. I also shared tips for perfecting your pudding, avoiding common mistakes, and exploring variations for different diets. In the end, everyone can enjoy this dessert through simple swaps and thoughtful preparation. Whether you keep it classic or try something new, you now have all the tools to create your sticky toffee pudding masterpiece.

Sticky Toffee Pudding Decadent and Easy Dessert Delight

Sticky toffee pudding is the ultimate sweet treat that brings joy to any meal. It’s rich, moist, and incredibly simple

- 1.5 pounds baby potatoes, halved - 4 tablespoons unsalted butter - 4 cloves garlic, minced - 1 cup heavy cream - 1/2 cup grated Parmesan cheese Baby potatoes are small and tender. They cook fast and hold flavor well. I love using unsalted butter for a rich base. Garlic adds a strong, tasty punch. Heavy cream makes the sauce smooth and rich. Parmesan cheese brings a salty, nutty flavor that ties everything together. - Salt and pepper - 1 tablespoon fresh parsley, chopped - Optional: a pinch of red pepper flakes for heat Seasoning is key to a great dish. Salt and pepper enhance all the flavors. Fresh parsley adds a pop of color and freshness. If you like a bit of heat, add red pepper flakes. They give a little kick to the creamy garlic sauce. For the Full Recipe, check out the detailed steps to bring these ingredients together. First, you need to clean the baby potatoes. Rinse them well under cold water. Look for dirt and grime. After washing, cut each potato in half. This helps them cook faster and soak up the sauce. Next, put the halved potatoes in a large pot. Fill it with salted water and bring it to a boil. Let them boil for about 15 to 20 minutes. You want them to be fork-tender. To check, poke one with a fork. If it goes in easily, they are ready. Once done, drain the potatoes and set them aside. Now, let’s make the sauce. In a large skillet, melt the unsalted butter over medium heat. Once it melts, add the minced garlic. Sauté for about 1 to 2 minutes. You want the garlic to be fragrant but not brown. After that, lower the heat. Pour in the heavy cream slowly while stirring. This keeps the sauce smooth. Gradually add the grated Parmesan cheese. Stir until it melts completely. The sauce should be thick and creamy now. It’s time to bring everything together. Add the cooked potatoes to the skillet. Gently fold them into the creamy garlic sauce. Make sure each potato is well-coated. Now, add salt and pepper to taste. If you like a bit of heat, sprinkle in a pinch of red pepper flakes. Let the mixture heat on low for about 5 minutes. Stir occasionally to mix the flavors well. For those looking for the complete process, check out the Full Recipe. How to Avoid Burnt Garlic To keep garlic from burning, cook it on low heat. High heat makes garlic brown too fast. I suggest adding garlic after melting the butter. Stir it for just one to two minutes. You want it fragrant, not dark. If it burns, the sauce will taste bitter. Achieving the Right Creaminess The key to a creamy sauce is the heavy cream. Pour it in slowly and stir. Adding Parmesan cheese helps too. It melts and thickens the sauce. For extra creaminess, try adding a bit more cream. Just watch the heat to keep it smooth. Best Methods for Boiling Potatoes Start with cold water when boiling potatoes. This helps them cook evenly. Salt the water to enhance flavor. Boil the potatoes until fork-tender, about 15-20 minutes. Drain them well to avoid a watery sauce. Choosing the Right Potato Varieties Baby potatoes are perfect for this dish. They are creamy and tender. You can use red or yellow varieties. They hold their shape well and taste great with garlic sauce. Avoid starchy potatoes like russets; they can become too mushy. For the full recipe, check out the [Full Recipe]. {{image_2}} You can make creamy garlic sauce potatoes even better by adding fresh herbs. Thyme and rosemary add depth to the dish. Just chop a small amount and stir it into the sauce. You can also incorporate other vegetables. Try adding spinach or broccoli for color and nutrition. These veggies blend well with the creamy sauce and add a nice crunch. If you want to mix things up, consider using milk or sour cream. Milk creates a lighter sauce, while sour cream adds tang. Both options keep the dish creamy and rich. For those avoiding dairy, there are great dairy-free substitutes. Use almond milk or coconut cream for a creamy texture. These alternatives work well and keep the flavors intact. For the full recipe, check out the detailed instructions! To keep your creamy garlic sauce potatoes fresh, follow these tips: - Refrigeration Tips: Allow the potatoes to cool down. Place them in an airtight container. They can last about three to five days in the fridge. If you plan to eat them later, do not mix in the sauce. Store the sauce separately to keep flavors fresh. - Freezing Creamy Garlic Sauce Potatoes: You can freeze these potatoes, but the texture may change. Let them cool completely before freezing. Use a freezer-safe container or bag. They can last up to three months in the freezer. When ready to eat, thaw in the fridge overnight. For the best taste and texture when reheating, use these methods: - Best Methods to Reheat Without Drying Out: The oven or stovetop works best. If using the oven, preheat it to 350°F (175°C). Place the potatoes in a baking dish, cover with foil, and heat for about 15-20 minutes. Stir halfway through to keep them moist. If using the stovetop, place the potatoes in a skillet over low heat. Add a splash of cream or water to prevent drying. Stir gently until heated through. Enjoy your creamy garlic sauce potatoes just as they were made! Creamy garlic sauce potatoes can last about 3 to 5 days in the fridge. To store them, place the potatoes in an airtight container. This keeps them fresh and tasty. If you want to keep them longer, consider freezing them. However, the texture may change slightly after thawing. Yes, you can make creamy garlic sauce potatoes ahead of time. Prepare the dish as per the recipe and let it cool before storing it in the fridge. When ready to serve, reheat it gently on the stove. Add a splash of cream to keep it creamy and smooth. Creamy garlic sauce potatoes pair well with many dishes. Try serving them with grilled chicken, a fresh salad, or roasted vegetables. They also go well with steak or fish. For a complete meal, add a nice crusty bread to soak up the sauce. For the full recipe, check out the Creamy Garlic Sauce Potatoes section above. You will find all the ingredients and steps needed to create this delightful dish. This blog post covered a delicious recipe for creamy garlic sauce potatoes. We discussed key ingredients like baby potatoes, butter, and garlic, and how to make a rich sauce. I provided tips for cooking and storing these tasty potatoes. As you try this recipe, don't hesitate to customize it with your favorite herbs or veggies. Enjoy every creamy bite, and share it with friends for a delightful meal together!

Creamy Garlic Sauce Potatoes Easy and Flavorful Dish

Are you ready to take your potato game to the next level? My creamy garlic sauce potatoes are an easy

To make Oven Baked Crispy Garlic Shrimp, you'll need some key ingredients. Here’s what you need: - 1 pound large shrimp, peeled and deveined - 1 cup breadcrumbs (panko for extra crispiness) - 4 cloves garlic, minced - 1/4 cup grated Parmesan cheese - 2 tablespoons fresh parsley, finely chopped - 1 teaspoon paprika - 1/2 teaspoon salt - 1/4 teaspoon black pepper - 1/4 cup olive oil - Zest of 1 lemon These ingredients work together to give the shrimp a tasty, crunchy coating. The garlic and lemon zest add bright flavors that complement the shrimp. You can add extra flavor to your shrimp. Here are some great options: - A pinch of red pepper flakes for heat - A tablespoon of lemon juice for extra tang - A sprinkle of old bay seasoning for a coastal touch These additions can personalize the dish to suit your taste. Feel free to mix and match! If you have allergies or dietary needs, there are easy swaps. Here are a few: - Use gluten-free breadcrumbs if you need a gluten-free option. - Swap shrimp for chicken or tofu for different proteins. - Replace Parmesan cheese with nutritional yeast for a dairy-free option. Always check the labels to avoid allergens. These substitutions keep the dish delicious while catering to your needs. For the full recipe, you can refer to the earlier section. Start by gathering all your ingredients. This makes cooking smooth and fun. Preheat your oven to 400°F (200°C). Line a baking sheet with parchment paper. This step helps with easy cleanup. Make sure your shrimp are peeled and deveined. Rinse them under cool water and pat them dry with paper towels. The dryer the shrimp, the crispier they will be. In a large bowl, mix the breadcrumbs, minced garlic, Parmesan cheese, parsley, paprika, salt, and black pepper. Stir until everything is well combined. In another bowl, toss the shrimp with olive oil and lemon zest. This adds great flavor and helps the coating stick. Next, add the shrimp to the breadcrumb mix. Make sure each shrimp gets a good coat. Press the breadcrumbs onto the shrimp firmly to help them stay on during baking. Place the coated shrimp on the prepared baking sheet. Make sure they are in a single layer. This helps them bake evenly. Bake in the oven for 12-15 minutes. You will know they are done when the shrimp turn pink and the breadcrumbs look golden brown and crispy. Once baked, take them out and let them cool for a minute. Enjoy them hot for the best flavor! For the full recipe, check the details above. To make your shrimp extra crispy, use panko breadcrumbs. Panko has a light, airy texture that creates a great crunch. Be sure to coat the shrimp well with the breadcrumbs. Press them down to help them stick. Space the shrimp on the baking sheet. This allows hot air to circulate, which keeps them crispy. If you have leftovers, store them in an airtight container. This keeps them fresh for up to two days. Place a paper towel at the bottom of the container to absorb moisture. When you're ready to eat, you can reheat them in the oven for the best results. This will help keep the crispiness intact. One mistake is overcrowding the baking sheet. If the shrimp touch, they will steam instead of bake. Another error is not preheating the oven. Starting with a hot oven ensures the shrimp cook evenly and become crispy. Lastly, don’t skip the olive oil. It adds flavor and helps the breadcrumbs brown nicely. {{image_2}} You can change the taste of your crispy garlic shrimp by adding spices. Try cayenne pepper for heat. For a sweet touch, add a little brown sugar. You can also mix in some Italian herbs like oregano and basil. If you want a hint of zest, add lime juice or zest. Each spice brings a new flavor to your dish. This way, you can enjoy different meals from just one recipe. If you follow a low-carb diet, you can still enjoy this dish. Instead of breadcrumbs, use crushed pork rinds. They give you crunch without the carbs. You can also skip the Parmesan cheese or use a low-carb cheese. Serve the shrimp over zucchini noodles or cauliflower rice for a full meal. These swaps keep the dish tasty and fit your diet. To make this recipe gluten-free, use gluten-free breadcrumbs. Many brands offer good options on the market. You can also use almond flour as a replacement. It adds a nice texture and flavor. Always check the labels to avoid gluten in sauces or other added ingredients. This way, you can savor the dish without worry. For the full recipe, don’t forget to check the details above. Enjoy your cooking! To store your leftover Oven Baked Crispy Garlic Shrimp, let them cool down first. Place them in an airtight container. This helps keep them fresh. Store the container in the fridge for up to three days. Make sure to place a paper towel in the container. This absorbs any moisture and keeps the shrimp crispy. When you're ready to eat again, reheat the shrimp in the oven. Preheat your oven to 350°F (175°C). Spread the shrimp in a single layer on a baking sheet. Bake them for about 10 minutes. This method keeps them crispy. Avoid using the microwave as it makes them soggy. You can freeze Oven Baked Crispy Garlic Shrimp if you want to save some for later. Place the shrimp in a single layer on a baking sheet. Freeze them for about an hour until firm. Then, transfer the shrimp to a freezer bag. Squeeze out the air and seal it tightly. They can last up to three months in the freezer. When you're ready to cook, thaw them in the fridge overnight before reheating. This ensures they stay tasty. You can tell when shrimp are done by their color. They should turn pink and opaque. The shrimp will also curl into a "C" shape. If you see these signs, they are ready. The cooking time is usually 12 to 15 minutes. If you have doubts, use a meat thermometer. The shrimp should reach 120°F (49°C) for safety. Yes, you can use frozen shrimp! Just thaw them first. Place the shrimp in a bowl of cold water. Let them sit for about 15 minutes. After thawing, pat them dry with paper towels. This helps the coating stick better. Frozen shrimp work great for Oven Baked Crispy Garlic Shrimp. You can serve this dish with many sides. Here are some ideas: - Rice: White or brown rice works well. - Salad: A fresh green salad adds crunch. - Pasta: Tossed in olive oil or marinara sauce. - Bread: Garlic bread is a tasty option. - Veggies: Roasted or steamed veggies balance the meal. Making homemade breadcrumbs is easy! Here’s how: 1. Use bread: Start with stale bread or toast. 2. Cut: Tear the bread into small pieces. 3. Blend: Place the pieces in a food processor. 4. Pulse: Blend until they reach a fine texture. 5. Store: Use immediately or keep in a sealed bag. This simple method adds freshness to your dish. For extra flavor, you can season the breadcrumbs with herbs or spices. You can find the Full Recipe for Oven Baked Crispy Garlic Shrimp in other sections of this article. In this blog post, we explored the essential ingredients needed for oven baked crispy garlic shrimp, along with tips for flavor and substitutions. I provided clear step-by-step instructions for preparing, coating, and baking the shrimp. We discussed key tips for achieving perfect crispiness and shared some variations to make it your own. Remember, good cooking is about trying new things and enjoying the process. With the right approach, you can create a tasty dish that everyone will love. Happy cooking!

Oven Baked Crispy Garlic Shrimp Simple and Tasty Meal

Looking for a quick and tasty meal? Oven Baked Crispy Garlic Shrimp is your answer! This dish is simple to

For my slow cooker birria tacos, I need just a few key items. Here’s what you will gather: - 2 lbs beef chuck roast, cut into chunks - 4 dried guajillo chiles, stems and seeds removed - 2 dried ancho chiles, stems and seeds removed - 1 onion, quartered - 4 cloves garlic - 4 cups beef broth - Corn tortillas The beef chuck roast gives a rich flavor. The guajillo and ancho chiles add depth and spice. Now, let’s spice things up! These are the spices I use: - 2 teaspoons ground cumin - 1 teaspoon dried oregano - 1 teaspoon paprika - Salt and pepper, to taste These spices help create warmth and complexity in the dish. They balance the rich beef and chiles. To finish off the tacos, I suggest these fresh garnishes: - Fresh cilantro, chopped - Diced onion - Lime wedges, for serving The cilantro adds a burst of freshness. Diced onion offers crunch, and lime brings brightness. Together, they elevate the whole dish. Check out the Full Recipe for a delicious journey! Start by toasting the dried guajillo and ancho chiles. Use a dry skillet over medium heat. Toast them for about 2-3 minutes. Flip them often so they brown evenly. You want them fragrant but not burnt. Once they smell great, take them off the heat and let them cool. After cooling, put the chiles in a blender. Add the quartered onion, garlic, ground cumin, oregano, and paprika. Pour in one cup of beef broth. Blend until smooth. If the mix is too thick, add more broth a little at a time. You want a sauce-like consistency that is rich in flavor. Now, it’s time for the beef. Put the chunks of beef chuck roast in your slow cooker. Season them well with salt and pepper. Pour the blended sauce over the beef. Add the rest of the beef broth into the pot. Stir it gently to coat the beef with the sauce. After cooking for eight hours, check if the beef is ready. It should be tender and easy to shred. Take the beef out of the slow cooker. Use two forks to shred it into bite-sized pieces. Then, mix the shredded beef back into the sauce in the slow cooker. To make the tacos, warm the corn tortillas in a hot skillet. Just a few seconds on each side will do. Take a tortilla and spoon in some of the beef and sauce mixture. Top it with chopped cilantro and diced onion for extra flavor. Serve with lime wedges on the side to squeeze over the tacos. Enjoy the burst of flavors in every bite! For the complete recipe, check [Full Recipe]. To get real birria flavors, use dried chiles. Guajillo and ancho give deep taste. Toast them gently to bring out their oils. This step is key; it boosts flavor. Blend the chiles well with onion and garlic. This mix forms a rich sauce that coats the beef. Don't skip this part; it makes your tacos shine. Slow cooking is simple and rewarding. Use beef chuck roast for tender meat. Cut it into chunks for even cooking. Season the beef well with salt and pepper before adding sauce. Keep the slow cooker on low heat for eight hours. This slow process breaks down the meat, making it easy to shred. Stir the beef in the sauce before serving. This keeps every bite juicy and flavorful. Birria tacos shine with fresh toppings. I love cilantro and diced onion for crunch. A squeeze of lime adds brightness, too. You can serve these tacos with a side of rice or beans. They soak up the flavors well. Try pairing them with a cold drink, like agua fresca or beer. These sides balance the rich taste of the tacos. For more ideas, check the full recipe. {{image_2}} You can use many types of meat for birria. Beef is popular, but lamb or goat adds a nice twist. Each meat brings a unique flavor. For a richer taste, try short ribs or brisket. These cuts have more fat, making them juicy and tender. The cooking time may change, so keep an eye on it. If you want a plant-based option, you can use mushrooms. They have a great texture and absorb flavors well. Jackfruit is another awesome choice. It shreds easily and gives a meat-like quality. Use vegetable broth instead of beef broth for the sauce. Add spices and herbs to make it flavorful. Birria varies by region in Mexico. In Jalisco, they serve it with a broth for dipping. In Tijuana, they add cheese for a gooey, tasty bite. Each version shows local flavors and traditions. Try different toppings, like avocado or salsa verde, to mix it up. You can find many ways to enjoy birria tacos. Check out the Full Recipe for more ideas! After enjoying your birria tacos, you might have some left over. To store them, place the beef and sauce in an airtight container. Make sure to cool it first. You can keep it in the fridge for up to 4 days. For the tortillas, wrap them in foil or keep them separate in a bag. This helps keep them soft. When you’re ready to eat again, reheating is easy. You can use a microwave or a skillet. If using a microwave, place the beef in a bowl and cover it. Heat for 1-2 minutes or until hot. If using a skillet, place the beef in the pan and heat on medium until warmed through. For the tortillas, warm them in the skillet for a few seconds on each side. This keeps them nice and soft. If you want to save some for later, freezing is a great option. Let the beef and sauce cool completely, then place them in a freezer-safe container. It can last for up to 3 months in the freezer. When you're ready to eat, thaw it in the fridge overnight. Reheat it as mentioned above. You’ll have a delicious meal ready to enjoy again. Check the [Full Recipe] for all the details on making this tasty dish! Birria tacos are a tasty Mexican dish. They consist of soft corn tortillas filled with tender, spiced meat. The meat is usually beef, but you can also find it made with goat or lamb. The beef is cooked low and slow in a rich broth with dried chiles and spices. This gives it a deep, savory flavor. People often serve them with broth for dipping. Yes, you can use other cooking methods. If you don’t have a slow cooker, try a Dutch oven. Cook on low heat for about three hours. You can also use a pressure cooker. This will cut down the cooking time to about one hour. Both methods will still give you delicious flavors. I love serving birria tacos with a few sides. Here are some great options: - Mexican rice - Refried beans - Fresh salad - Pickled onions - Sliced avocado These sides add color and flavor to your meal. To make birria tacos milder, remove some chiles. You can use just one guajillo chile or skip the ancho chiles. If you like more heat, add a pinch of cayenne pepper or fresh jalapeños. Taste as you go to find the right balance. You can prepare most of the recipe ahead of time. Make the sauce and cook the meat a day before. Store them in the fridge overnight. When ready to serve, just warm them up and assemble the tacos. This saves time and makes your meal stress-free. For the full recipe, check out the earlier sections. Slow cooker birria tacos are a delicious treat. We covered the key ingredients, from chiles to spices. You now know how to prepare the meat and assemble tasty tacos. We also shared tips for authentic flavors and storage advice. Don’t forget to explore different meat options or even go vegan. These tacos are flexible! With the right steps, you can enjoy a fantastic meal. Dive in and try making them yourself. You won’t regret it!

Slow Cooker Birria Tacos Flavorful and Simple Recipe

If you crave rich, savory flavors in your meals, then Slow Cooker Birria Tacos are a must-try. This dish packs

- 1 cup granulated sugar - 1/2 cup unsalted butter, melted - 2 large eggs - 1 teaspoon vanilla extract - 1/3 cup unsweetened cocoa powder - 1/2 cup all-purpose flour - 1/4 teaspoon salt - 1/4 teaspoon baking powder - 16 oz cream cheese, softened - 1/2 cup granulated sugar - 2 large eggs - 1 teaspoon vanilla extract - 1/4 cup sour cream - 1/2 cup chocolate chips (optional) The brownie base gives this dessert a rich, fudgy flavor. I love how the layers blend together. The cheesecake layer is creamy and smooth. It adds a nice contrast to the brownie. Making sure your ingredients are fresh is key. Room temperature cream cheese mixes better. It helps create a smoother cheesecake. Use good quality chocolate chips for the best flavor. This recipe is great for sharing. You can impress your friends with this treat. For the full recipe, check out the link provided. Enjoy your baking! - Preheat your oven to 350°F (175°C). - Grease or line a 9-inch springform pan with parchment paper. This step helps your cake come out easily. - In a medium bowl, combine melted butter and sugar. Mix well until blended. - Incorporate eggs and vanilla, stirring until smooth. - In another bowl, mix dry ingredients: cocoa powder, flour, salt, and baking powder. - Gradually add the dry ingredients to the wet mixture. Stir until just combined. - Pour the brownie batter into the prepared springform pan. Spread it evenly across the bottom. - In a large bowl, beat cream cheese and sugar until smooth. This makes the cheesecake creamy. - Add eggs one at a time, mixing well after each addition. - Stir in vanilla and sour cream until fully combined. - If you like, fold in chocolate chips for extra flavor. - Pour the cheesecake mixture over the brownie layer in the pan. Spread the top smooth with a spatula. - Bake for 45-50 minutes. The center should be set with a slight jiggle. - Turn off the oven and crack the door. Let the cheesecake cool inside for 1 hour. This helps prevent cracks. - After cooling, refrigerate for at least 4 hours or overnight. - When ready, remove the sides of the springform pan carefully. - Slice the cheesecake with a hot, dry knife for clean edges. Enjoy your delicious brownie cheesecake delight! For the complete process and ingredient details, check the Full Recipe. To get a great brownie cheesecake, use room temperature ingredients. This helps them mix well. Cold ingredients can lead to lumps in the batter. Next, avoid overmixing. Mix just until you see no dry flour. Overmixing can make your cheesecake dense and tough. To keep your cheesecake smooth, cool it down slowly. After baking, turn off the oven and crack open the door. Let it sit for about an hour. This helps reduce sudden temperature changes that cause cracks. Also, bake at the right heat. Too hot can crack the top, while too cool may leave it undercooked. Make your dessert shine with simple garnishes. Drizzle warm chocolate sauce on top for a sweet touch. Use fresh berries, like strawberries or blueberries, for color and flavor. Place them on top right before serving. This adds freshness and makes it look beautiful. For more ideas, check out the Full Recipe for extra tips! {{image_2}} You can change the taste of your brownie cheesecake by adding different extracts. Almond extract gives a sweet, nutty taste. Mint extract adds a fresh, cool flavor. Each extract can transform the whole dessert. You can also try using different types of chocolate. Dark chocolate adds a rich, bold flavor, while white chocolate makes it sweet and creamy. Mixing these chocolates can create a unique taste that suits your palate. If you need a gluten-free option, use almond flour or gluten-free flour for the brownie base. This keeps it tasty while meeting dietary needs. For a vegan version, substitute eggs with flaxseed meal mixed with water. Swap cream cheese for a vegan cream cheese or blended silken tofu. This way, everyone can enjoy your delicious brownie cheesecake. You can create a beautiful marbled effect in your cheesecake by swirling in different flavors. Try adding peanut butter or fruit purees to the cheesecake layer before baking. This not only looks great but adds fun flavors too. You can also add nuts or fruit pieces to the batter. Chopped walnuts or pecans add crunch. Fresh raspberries or cherries can bring a burst of flavor. These simple add-ins make your dessert even more special. For the complete recipe, check out the Full Recipe section. To keep your brownie cheesecake fresh, store it in the fridge. Use an airtight container to avoid drying out. This will help keep the flavors rich and the texture smooth. I recommend wrapping the cheesecake with plastic wrap before placing it in a container. This extra layer prevents any odors from other foods in the fridge. You can freeze your brownie cheesecake for long-term storage. First, let it cool completely in the fridge. Next, wrap it tightly in plastic wrap. Then, place it in a freezer-safe container. This keeps it fresh and prevents freezer burn. When you are ready to serve, take it out of the freezer. Place it in the fridge to thaw overnight. This slow thawing keeps the texture creamy. If you need it faster, you can leave it at room temperature for about two hours. Just be careful not to let it sit out too long, as it can get too soft. Enjoy the deliciousness! Brownie cheesecake stays fresh for about 5 to 7 days in the fridge. To keep it tasty, store it in an airtight container. This helps prevent it from drying out or absorbing other fridge odors. If you want to make it last longer, you can freeze it. Yes, you can make brownie cheesecake ahead of time. It's perfect for meal prep! I recommend making it up to three days in advance. Just cool it completely before placing it in the fridge. This gives the flavors more time to develop, making it even more delicious! If you need a cream cheese substitute, try using Greek yogurt or a vegan cream cheese. Both options work well. Greek yogurt adds a tangy flavor, while vegan cream cheese is perfect for dairy-free diets. You can also use silken tofu for a lower-calorie option. This blog post walks you through making a delicious brownie cheesecake. We covered ingredients, step-by-step instructions, tips for texture, and variations. You learned how to store this treat for later enjoyment, plus how to answer common questions. By following these steps, you can create a dessert that will impress your friends and family. Enjoy making this tasty recipe and have fun experimenting with flavors!

Brownie Cheesecake Delight Easy and Tasty Treat

Chocolate lovers, get ready for a treat! Today, I’m sharing my easy and tasty Brownie Cheesecake recipe that combines rich,

Making Garlic Parmesan Cheeseburger Bombs is fun and easy. The ingredients are simple and flavorful. Here’s what you need: - 1 lb ground beef - 1 cup shredded cheddar cheese - 1/2 cup shredded mozzarella cheese - 2 cloves garlic, minced - 2 tablespoons grated Parmesan cheese - 1 teaspoon garlic powder - 1 tablespoon Worcestershire sauce - 1/2 teaspoon salt - 1/2 teaspoon black pepper - 1 package refrigerated biscuit dough (10 biscuits) - 1 tablespoon fresh parsley, chopped (for garnish) - 1 tablespoon olive oil (for brushing) Ground beef gives a juicy base. The cheddar and mozzarella add a creamy texture. Garlic brings a punch of flavor. Parmesan adds a nice salty finish. Biscuit dough wraps everything up perfectly. Each ingredient plays a key role in making these bombs a tasty treat. You can find the full recipe in the recipe section above. 1. Preheat the oven: Set your oven to 375°F (190°C). This step is key for even cooking. 2. Mix the beef: In a bowl, combine 1 lb of ground beef, 2 cloves of minced garlic, 1 tablespoon of Worcestershire sauce, 1 teaspoon of garlic powder, and 1/2 teaspoon each of salt and black pepper. Use your hands to mix well. This ensures every bite has flavor. 3. Shape the patties: Divide the beef mixture into 10 equal parts. Shape each part into a small patty. Center a cube of cheddar and a cube of mozzarella in each patty. Fold the edges over the cheese and roll into a ball. This keeps the cheese nice and melty inside. 1. Roll out the dough: Take the refrigerated biscuit dough and roll each piece flat on a floured surface. Aim for about 5 inches in diameter. This gives you enough dough to wrap the beef. 2. Place and seal: Put a beef ball in the center of each biscuit. Gather the edges of the dough around the beef and pinch to seal completely. Make sure there are no gaps to keep the filling inside. 1. Arrange on the baking sheet: Place the sealed burger bombs on a baking sheet lined with parchment paper. This helps prevent sticking and makes cleanup easier. 2. Brush and season: Lightly brush each bomb with 1 tablespoon of olive oil. Then, sprinkle grated Parmesan cheese on top. This adds a nice crust and a burst of flavor when baked. Now you’re ready to bake! Follow the Full Recipe for the perfect finishing touches. To keep the beef juicy, choose ground beef with a higher fat content. Aim for 80/20 beef for the best results. This fat helps the meat stay moist while cooking. When shaping the patties, avoid overworking the meat. Gentle handling keeps the texture tender. For sealing the biscuits, roll out the dough evenly. Place the beef ball in the center and gather the dough edges. Pinch them tightly to seal. If the dough tears, patch it with extra dough. This prevents leaks while baking. You can prep in advance to save time. Make the beef mixture and shape the patties a day ahead. Keep them in the fridge until you're ready to bake. This allows flavors to meld and saves you time on busy nights. Frozen ingredients can also help. Use frozen biscuit dough instead of fresh. This cuts down on prep time. Just remember to thaw the dough before you start. For added flavor, try mixing in some smoked paprika or onion powder. These spices can deepen the taste and give a smoky touch. You can also add chopped herbs like thyme or oregano for a fresh twist. If you want to switch up the cheese, consider pepper jack for a spicy kick. Feta adds a tangy flavor that pairs well with the beef. Mixing different cheeses can create unique flavors in each bite. You can find the full recipe to create these delicious Garlic Parmesan Cheeseburger Bombs. Enjoy experimenting with these tips for your next cooking adventure! {{image_2}} You can spice up your Garlic Parmesan Cheeseburger Bombs! Try adding jalapeños for a kick. Just chop them finely and mix them into your beef. This gives a nice heat that pairs well with the cheese. You can also swap cheeses for fun flavors. Instead of cheddar and mozzarella, use pepper jack or gouda. Each cheese brings its own taste. Experiment with different combinations to find your favorite! If you need gluten-free options, look for gluten-free biscuit dough. Many brands now offer this choice. It works just as well for making tasty bombs. For a vegetarian version, use plant-based ground beef. You can also replace the cheese with dairy-free alternatives. These swaps let everyone enjoy the dish! When serving these bombs, think about great sides. Crispy fries or a fresh salad make perfect partners. You can also serve them with coleslaw for a crunch. Dipping sauces enhance the fun. Try ketchup, ranch dressing, or a spicy aioli. Each dip adds a new layer of taste that everyone will love. For the full recipe, check the main article. To keep leftover bombs fresh, place them in an airtight container. Store them in the fridge for up to three days. When you're ready to enjoy them again, reheat the bombs in the oven. Set the oven to 350°F (175°C) and bake for about 10 minutes. This method keeps them crispy and warm. You can also use a microwave, but this may make the biscuit dough soft. If you want to save them for later, you can freeze the bombs. First, let them cool completely. Then, wrap each bomb in plastic wrap. Place the wrapped bombs in a freezer-safe bag or container. They can stay in the freezer for up to three months. When you're ready to eat, thaw them in the fridge overnight and reheat as mentioned before. How do I make these bombs ahead of time? You can prepare these cheeseburger bombs a day ahead. Just follow the recipe steps up to the baking part. After sealing the bombs, place them in the fridge. When you are ready to eat, take them out, brush with oil, and bake them directly. This keeps them fresh and tasty. Can I use ground turkey instead of beef? Yes, you can use ground turkey. It works well in this recipe. Ground turkey is leaner, so it may need a bit more seasoning. Adjust the salt and pepper to your taste. The cheese will still make them delicious! How do I know when they are fully cooked? These bombs cook well in about 15-18 minutes. Look for a golden brown color on the outside. If you have a meat thermometer, the inside should read 160°F (71°C) for ground beef. This ensures they are safe to eat. What can I substitute for Parmesan cheese? If you don’t have Parmesan, try Pecorino Romano or Grana Padano. Both have a nice salty flavor that works well. You can also use a blend of cheddar and mozzarella for a cheesy twist. Ideas for using the same ingredients in different ways You can use the same beef mixture to make sliders. Shape the beef into small patties and grill them. You can also make a pasta bake. Mix the beef with cooked pasta, cheese, and marinara sauce for a hearty meal. Similar easy recipes for busy nights For quick meals, try stuffed bell peppers. Fill them with the beef mixture, add rice, and bake. Another option is a taco night. Use the same beef and serve with tortillas, cheese, and toppings. These ideas keep dinner fun and simple! Now you know how to make delicious beef and cheese bombs. You learned about the key ingredients, steps to prepare, and tips to ensure the best taste. Remember, you can add your own twist with flavors and dietary changes. Store them well for later enjoyment, and don't hesitate to experiment with variations. Making these bombs is fun and easy, perfect for a meal or snack. Start cooking today, and enjoy a tasty treat with friends and family!

Garlic Parmesan Cheeseburger Bombs Flavorful Delight

Love burgers but want something fun? Try my Garlic Parmesan Cheeseburger Bombs! These tasty treats pack all the flavor of

To make your steak-stuffed French bread, gather these items: - 1 large French bread loaf - 1 pound flank steak, grilled and sliced - 1 cup sautéed bell peppers (red, green, and yellow) - 1 cup sautéed onions - 1 cup shredded mozzarella cheese - 1 tablespoon olive oil - 1 teaspoon garlic powder - ½ teaspoon smoked paprika - Salt and pepper to taste - Fresh parsley, chopped (for garnish) You can swap some ingredients without losing flavor. If you don’t have flank steak, use sirloin or ribeye. For a healthier option, try grilled chicken or turkey. Instead of mozzarella cheese, you can use provolone or cheddar. If you want a kick, add jalapeños. You can also use whole grain or sourdough bread instead of French bread for a different taste. Fresh ingredients make your dish shine. Choose a bread loaf that is crusty but soft inside. Look for flank steak that is bright red and well-marbled. Fresh bell peppers should feel firm and have shiny skin. When buying onions, select ones that are dry and heavy. Always check the expiration dates on cheese to ensure freshness. If you can, buy your parsley fresh from the store or a local market. First, gather your ingredients. You will need: - 1 large French bread loaf - 1 pound flank steak, grilled and sliced - 1 cup sautéed bell peppers (red, green, and yellow) - 1 cup sautéed onions - 1 cup shredded mozzarella cheese - 1 tablespoon olive oil - 1 teaspoon garlic powder - ½ teaspoon smoked paprika - Salt and pepper to taste - Fresh parsley, chopped (for garnish) Next, preheat your oven to 375°F (190°C). This step is key to getting the cheese nice and bubbly at the end. Slice the French bread in half lengthwise. Use your hands to hollow out some of the soft bread from the inside. You want to make a well for your tasty filling. Now, heat a skillet over medium heat. Drizzle in olive oil and add the sautéed onions and bell peppers. Sprinkle in garlic powder, smoked paprika, salt, and pepper. Cook this mix for about 5-7 minutes. You want the veggies to be tender and fragrant. In a large bowl, combine the sliced flank steak, sautéed vegetables, and half of the mozzarella cheese. Mix it all well. Once your filling is ready, spoon it evenly into the hollowed-out halves of the French bread. Don’t forget the cheese! Top each side with the rest of the mozzarella cheese, covering the filling generously. Place the filled bread halves on a baking sheet. Bake in the preheated oven for 15-20 minutes. You’ll know it’s done when the cheese is melted and bubbly. Once out of the oven, let it cool for a few minutes. This makes slicing easier. Cut the stuffed bread into sections. For a nice touch, garnish with fresh parsley. This adds color and a fresh flavor. You can serve this dish as a fun appetizer or a hearty main meal. Pair it with a simple salad or some crispy fries for a complete dinner. Enjoy your savory steak-stuffed French bread delight! To cook your steak right, I suggest grilling or pan-searing. Grilling gives a nice smoky flavor. It also adds those lovely grill marks. If you use a pan, heat it well before adding the steak. This helps get a good sear. Cook flank steak for about 4-5 minutes per side for a medium-rare finish. Always let the steak rest for five minutes before slicing. This helps keep it juicy. For great melted cheese, use fresh mozzarella. Shredded cheese melts better and spreads evenly. Top your steak-filled bread with cheese before baking. Bake it at 375°F for 15-20 minutes. Keep an eye on it. You want the cheese to be bubbly and golden. If cheese is not melting well, you can broil it for a minute at the end. Just watch it carefully to avoid burning. Add depth to your filling by using spices. Garlic powder and smoked paprika work well together. You can also add a dash of Worcestershire sauce for extra flavor. Fresh herbs like parsley brighten up the dish. Feel free to mix in other veggies like mushrooms or spinach. These can add color and nutrition. Taste your filling before you stuff the bread. Adjust the seasoning as needed for the best flavor. For the full recipe, check out the detailed guide above. {{image_2}} You can easily swap the steak for plant-based protein. Try using grilled portobello mushrooms, tempeh, or tofu. These options bring a robust flavor and texture. Sauté them with the same bell peppers and onions for a tasty mix. You can also add black beans or chickpeas for extra protein. While French bread is classic, many other bread types work great. Consider using ciabatta for a crispy crust and soft inside. You could also try focaccia for a herb-infused taste. If you like whole grain, choose whole wheat bread. Each option changes the dish while keeping it delicious. Feel free to get creative with your fillings. Add mushrooms, spinach, or jalapeños for a kick. You can also mix in some ranch dressing or barbecue sauce for extra flavor. Top with sliced tomatoes or fresh basil for a fresh touch. Cheese lovers can try different varieties, like cheddar or pepper jack, for a fun twist. After enjoying your steak-stuffed French bread, let it cool down. Wrap each piece in plastic wrap or foil. This keeps the bread fresh and moist. Store the wrapped bread in the fridge. It will last for about 3 days. Always check for any bad smell or mold before eating. To reheat, use an oven for the best results. Preheat your oven to 350°F (175°C). Unwrap the bread and place it on a baking sheet. Heat for about 10-15 minutes. This warms the filling and melts the cheese again. You can also use a microwave, but the bread may get soggy. If you choose this method, heat it for 1-2 minutes on medium power. You can freeze steak-stuffed French bread for up to 3 months. First, wrap each piece tightly in plastic wrap. Then place them in a freezer bag or container. When ready to eat, thaw overnight in the fridge. Reheat in the oven to enjoy a quick and tasty meal again. This makes meal prep easy and fun! Yes, you can prepare this dish ahead of time. Make the filling and store it in the fridge. You can also hollow out the bread. When you are ready to eat, just fill the bread and bake. This keeps the bread fresh and crunchy. Steak-Stuffed French Bread pairs well with many sides. Here are some great options: - A fresh green salad - Crispy French fries - Sweet potato wedges - Steamed vegetables - Garlic bread These sides add color and flavor to your meal. You can easily change the filling to suit your tastes. Here are some ideas: - Use chicken or turkey instead of steak. - Add mushrooms or spinach for extra veggies. - Change the cheese to cheddar or provolone. - Spice it up with jalapeños or hot sauce. Feel free to mix and match flavors to create your perfect dish! For the full recipe, check out the complete instructions above. This blog post covered ingredients, instructions, and tips for making steak-stuffed French bread. I shared ingredient lists, substitutes, and fresh ingredient tips. The step-by-step guide detailed cooking methods and serving ideas. We explored variations for vegetarians and different bread types. I also provided storage and reheating tips for leftovers. You can use this dish for fun meals or special gatherings. Enjoy experimenting and making the recipe your own!

Savory Steak-Stuffed French Bread Delight Recipe

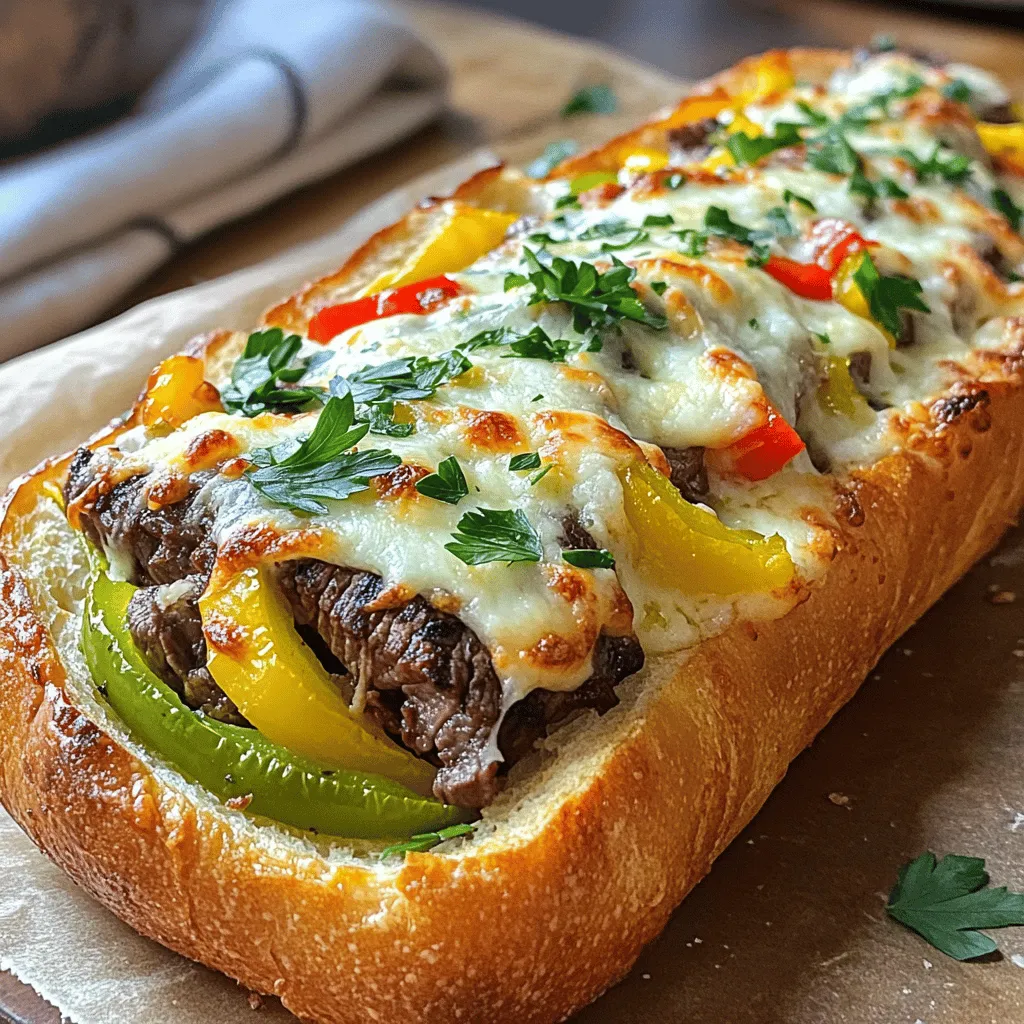
If you love steak and bread, you’re in for a treat. This Savory Steak-Stuffed French Bread Delight recipe will wow

Older posts
Newer posts
← Previous Page1 … Page49 Page50 Page51 … Page82 Next →

dsad

© 2025 My Saved Recipe • Built with GeneratePress

Our Policies

  • Copyright Policy
  • Cookie Policy
  • GDPR Policy
  • Privacy Policy
  • Disclaimer
  • Terms Of Use

More Information

  • Home
  • About
  • Contact
  • Appetizers
  • Dessert
  • Dinner
  • Drinks
©2025, My Saved Recipe About Back To Top