Skip to content
DisclaimerTerms Of UseGDPR PolicyCookie Policy

My Saved Recipe

  • Home
  • Drinks
  • Appetizers
  • Dinner
  • Dessert
  • About
  • Contact
  • Privacy Policy
DisclaimerTerms Of UseGDPR PolicyCookie Policy

Savannah

- 1 cup unsalted butter, softened - 3/4 cup brown sugar, packed - 2 cups semi-sweet chocolate chips These main ingredients create the base of your cookies. The butter adds richness and moisture. Brown sugar brings a warm, caramel flavor. Chocolate chips provide that classic sweet bite. - 1/2 cup chopped walnuts - 1/4 teaspoon instant coffee granules Adding walnuts gives a nice crunch. They also add healthy fats. Instant coffee enhances the chocolate flavor, making it deeper and richer. You can skip these if you prefer a simpler cookie. - Vegan alternatives: Use plant-based butter and flax eggs. - Gluten-free options: Swap all-purpose flour for a gluten-free blend. These options allow you to enjoy cookies no matter your diet. Make these switches without losing taste or texture. Enjoy experimenting with these fun changes! For the complete recipe, check out the Full Recipe. 1. First, preheat your oven to 350°F (175°C). This step warms the oven, helping cookies bake evenly. 2. Line your baking sheet with parchment paper. This keeps cookies from sticking and makes cleanup easy. 3. In a large bowl, cream together the softened butter, brown sugar, and granulated sugar. Mix until fluffy, around 2-3 minutes. This step adds air to the dough, giving you soft cookies. 1. Next, add the eggs one at a time. Mix well after each egg. This ensures even mixing. 2. Then, pour in the vanilla extract. It gives the cookies a nice flavor. 3. In a separate bowl, whisk together the flour, baking soda, salt, and instant coffee granules. The coffee enhances the chocolate flavor. 4. Gradually add this dry mixture to the wet ingredients. Stir just until combined. Avoid overmixing; this keeps cookies tender. 5. Finally, fold in the semi-sweet chocolate chips. If you like, add walnuts for a crunchy bite. 1. Use a cookie scoop or tablespoon to drop dough balls onto the prepared baking sheet. Leave about 2 inches between each ball. 2. Bake for 10-12 minutes. The edges should be golden brown, and the centers might look a bit soft. This is okay; they will firm up while cooling. 3. Let the cookies cool on the baking sheet for 5 minutes. Then transfer them to a wire rack to cool completely. This step helps keep the right texture. For a tasty treat, enjoy them warm with milk. Check out the Full Recipe for more tips! To make chewy cookies, use more brown sugar than white sugar. Brown sugar adds moisture. For crispy cookies, add more white sugar and bake longer. Ingredient temperature matters. Use room temperature butter and eggs. They blend better, giving your cookies a nice texture. Cold butter makes dough hard to mix. If your dough is dry or crumbly, add a bit of milk. Start with one tablespoon. Mix it in and check the texture again. You can also use melted butter for added moisture. Baking at high altitudes can be tricky. Reduce sugar by 1-2 tablespoons. Increase flour by 1-2 tablespoons. This helps cookies hold their shape. Serve cookies warm on a pretty plate. Add a glass of milk or coffee for a tasty treat. For a gourmet touch, sprinkle sea salt on top. To keep cookies fresh, store them in an airtight container. Room temperature works best. If you need to keep them longer, freeze them for up to three months. {{image_2}} For a fun twist, try double chocolate chip cookies. Just replace half the flour with cocoa powder. This change gives you deep, rich flavor. You can also add more chocolate chips. The result is a cookie that is super chocolatey and hard to resist. Another option is to use nut butters. Swap out some of the butter for creamy peanut or almond butter. This adds a nutty taste and makes the cookies soft and chewy. You can even mix two types of nut butter together for extra flavor. If you need gluten-free cookies, you can replace regular flour with a gluten-free blend. Look for a mix that works in baking. This will keep the cookies soft and tasty. Ensure the chocolate chips are also gluten-free. For those wanting a lower sugar option, use a sugar substitute. You can find many types in stores today. Some blends work well for baking and taste great too. Just be sure to check the package for the right measurements. Get creative with add-ins! Dried fruits like cranberries or cherries add a sweet chewiness. You can also mix in candies like M&Ms for a colorful touch. These add-ins make each bite exciting and unique. Spices can also enhance your cookies. Try adding a pinch of cinnamon or a touch of nutmeg. These spices bring warmth and depth to the flavor. You can even experiment with a dash of sea salt for a savory contrast. For the ultimate chocolate chip cookies, check out the Full Recipe! To keep your cookies fresh, use airtight containers. Glass jars work well, or you can use plastic containers with a tight seal. Store your cookies at room temperature for the best taste. If you live in a humid area, refrigeration can help. Just remember, cold cookies can lose some of their soft texture. You can freeze cookie dough for later use. To do this, scoop the dough into balls and place them on a baking sheet. Freeze them for about an hour until firm. Once frozen, transfer the balls to a freezer bag. When you're ready to bake, no need to thaw. Just bake them straight from the freezer. Add a couple of extra minutes to the baking time. Freshly baked cookies usually stay good for about one week at room temperature. If you store them in the fridge, they can last up to two weeks. Watch for signs of spoilage. If they become hard or develop an off smell, it's time to toss them. Enjoy your cookies while they are at their best! For the full recipe, check out Ultimate Chocolate Chip Cookies. To make your cookies softer, try these tips: - Use more brown sugar than white sugar. Brown sugar adds moisture. - Chill your dough for 30 minutes before baking. This helps keep them soft. - Don't overbake! Take them out when the edges are golden but centers look soft. - Add a bit of cornstarch to your flour. It helps create a softer texture. These small changes can make a big difference in texture. You’ll love the results! Yes, you can use different types of chocolate! Here are some ideas: - Dark chocolate chips add a rich flavor. They balance sweetness well. - Milk chocolate chips give a sweeter, creamier taste. - You can mix in white chocolate chips for a fun twist. - Try using chopped chocolate bars for a gourmet touch. Experimenting with different chocolates can lead to new favorites! If you need egg substitutes, here are a few options: - Use 1/4 cup applesauce for each egg. It adds moisture and sweetness. - Try 1/4 cup mashed banana. It works well in cookies. - Use flaxseed meal! Mix 1 tablespoon with 3 tablespoons water. Let it sit until it thickens. - Silken tofu is another great choice. Blend 1/4 cup until smooth for each egg. Each option changes the flavor and texture a bit, so choose based on your taste! This blog post outlines how to make delicious cookies from scratch. We discussed key ingredients like butter, sugar, and chocolate chips. I shared tips for perfect baking, common fixes, and fun variations. You can even explore storage methods to keep cookies fresh. Remember, baking is about finding what you love. Don't hesitate to experiment with flavors or substitutes. Enjoy your cookie journey and make it your own!

Ultimate Chocolate Chip Cookies Irresistible Recipe

Are you ready to bake the ultimate chocolate chip cookies? This recipe is a must-try for anyone who loves warm,

To make savory stuffed bell peppers, you need: - 4 large bell peppers (red, yellow, or green, tops cut off and seeds removed) - 1 cup cooked quinoa - 1 cup black beans, drained and rinsed - 1 cup corn (frozen or fresh) - 1 cup diced tomatoes (fresh or canned) - 1 small red onion, finely chopped - 2 cloves garlic, minced - 1 teaspoon ground cumin - 1 teaspoon smoked paprika - 1 teaspoon chili powder - 1 cup shredded cheese (cheddar or pepper jack) - Salt and pepper to taste - 2 tablespoons olive oil - Fresh cilantro or parsley for garnish You can change some ingredients if needed. Here are some ideas: - Instead of quinoa, use rice or couscous. - Use kidney beans or pinto beans instead of black beans. - Frozen corn works well, but you can also use peas. - If you don’t have fresh tomatoes, canned tomatoes are a great swap. - Any onion type works. Yellow or white onions are fine. - For cheese, try mozzarella or feta for a different taste. Each stuffed pepper is packed with nutrients. Here’s a quick look: - Calories: About 350 per pepper - Protein: Roughly 15 grams - Carbohydrates: Around 45 grams - Fiber: About 10 grams - Fat: Approximately 15 grams These peppers are not just tasty; they are also healthy. They offer protein, fiber, and vitamins. Enjoy a delicious meal without the guilt. For the full recipe, check out the steps to create these delightful stuffed bell peppers. First, gather your ingredients. You need bell peppers, quinoa, black beans, corn, diced tomatoes, red onion, garlic, spices, cheese, olive oil, and seasonings. Preheat your oven to 375°F (190°C). Next, cut the tops off the bell peppers and remove the seeds. Rinse the black beans and prepare your vegetables by chopping the onion and mincing the garlic. In a skillet, heat the olive oil over medium heat. Add the chopped onion and minced garlic. Sauté for about 3-4 minutes until the onion looks clear. In a large bowl, mix cooked quinoa, black beans, corn, diced tomatoes, and the onion-garlic mix. Add cumin, smoked paprika, chili powder, and half the cheese. Stir well and season with salt and pepper. Stuff each bell pepper with this tasty mixture. Pack it tightly to hold everything inside. Place the stuffed peppers upright in a baking dish. If they lean, trim the bottoms a bit. Cover your dish with foil and bake for 25 minutes. After that, take off the foil, add the rest of the cheese on top, and bake for another 10-15 minutes. The cheese should melt and the peppers should be soft. When done, take them out of the oven and let them cool. Garnish with cilantro or parsley. Enjoy this flavorful dish with family or friends! For the full recipe, check out the details above. To get the best peppers, choose ones that are firm and vibrant. Cut the tops off and remove the seeds. Next, cook them in boiling water for 3-5 minutes. This softens them and helps with even cooking. After boiling, put them in an ice bath to stop the cooking. This method keeps the peppers bright and fresh. Spice up your stuffed peppers with extra flavor. Add more spices like oregano or cilantro. You can also mix in some diced jalapeños for heat. If you want a savory kick, a splash of hot sauce works wonders. Don't forget to taste your filling before stuffing the peppers. Adjust salt and pepper as needed for the best taste. One common mistake is overcooking the peppers. This makes them mushy and unappealing. Also, don’t pack the filling too tightly. Leave some space for the filling to expand while cooking. Another mistake is skipping the cheese topping. It adds a delicious layer of flavor. Follow the Full Recipe to ensure you avoid these pitfalls. {{image_2}} You can customize your stuffed peppers with different fillings. For a meat option, use ground beef or turkey. Brown the meat in a skillet before mixing it with the other ingredients. For a vegetarian version, stick with quinoa, beans, and veggies. A vegan option can use plant-based proteins like lentils or tofu. Feel free to add spices and herbs to match your taste. Cheese adds creaminess and flavor. Cheddar is a classic choice that melts well. Pepper jack gives a spicy kick. You can also try mozzarella for a mild taste. For a dairy-free option, use vegan cheese made from nuts or soy. Just remember, the type of cheese can change the dish's texture and flavor. Seasonal ingredients can brighten your dish. In summer, add fresh basil, zucchini, or diced bell peppers to the filling. In fall, consider adding pumpkin or sweet potatoes to give a warm taste. You can also use seasonal herbs like sage or thyme. These changes can make your stuffed peppers unique and exciting! For the full recipe, check out the complete guide on making savory stuffed bell peppers. To store your savory stuffed bell peppers, let them cool first. Place them in an airtight container. Keep them in the fridge. They will stay fresh for about 3 to 5 days. If you want, you can also wrap them tightly in plastic wrap. This helps keep them moist. When you reheat your stuffed peppers, use the oven for the best results. Preheat your oven to 350°F (175°C). Place the peppers on a baking dish. Cover them with foil to keep them from drying out. Heat for about 20 minutes. You can also use the microwave. Just place one pepper on a plate and heat for 2 to 3 minutes. To freeze your stuffed bell peppers, let them cool completely. Wrap each pepper in plastic wrap. Then, place them in a freezer-safe bag. You can freeze them for up to 3 months. When you want to eat them, thaw them in the fridge overnight. Then, reheat them in the oven or microwave as mentioned above. Enjoy your meal anytime! For the full recipe, check the earlier section. To reheat stuffed peppers, place them in a baking dish. Preheat your oven to 350°F (175°C). Cover the dish with foil to keep the peppers moist. Bake for about 20 minutes. You can also use the microwave. Place the peppers on a microwave-safe plate. Heat them for about 2-3 minutes, checking for warmth. Both methods work well to keep flavors intact. Yes, you can make stuffed peppers ahead of time. Prepare the filling and stuff the peppers. Then, store them in the fridge for up to two days. You can also freeze them. Wrap each stuffed pepper tightly in plastic wrap. Place them in a freezer bag and freeze for up to three months. Just remember to thaw them in the fridge before baking. Savory stuffed bell peppers pair well with many sides. Here are some ideas: - A fresh green salad with lemon vinaigrette - Garlic bread for a crunchy texture - Rice or quinoa on the side for added carbs - Roasted vegetables for extra flavor - A dollop of sour cream for creaminess For the full recipe, visit the section above. You learned all about making stuffed peppers, from ingredients to cooking tips. You found ingredient swaps and nutritional info to customize your dish. Remember to follow the steps for perfect cooking and avoid common mistakes. Get creative with fillings and cheeses based on the season. Store leftovers properly to enjoy later. With the right approach, stuffed peppers can be a tasty and fun meal. Now it's time to cook and impress with your delicious creation.

Savory Stuffed Bell Peppers Flavorful and Easy Recipe

Craving a meal that’s both tasty and simple? Savory stuffed bell peppers are your answer! In this easy recipe, I’ll

To make a delicious Cinnamon Roll Swirl Coffee Cake, you will need: - 2 cups all-purpose flour - 1 cup granulated sugar - 1 tablespoon baking powder - 1/2 teaspoon salt - 1/2 cup unsalted butter, softened - 3/4 cup milk - 2 large eggs - 1 teaspoon vanilla extract - 1 tablespoon ground cinnamon - 1/2 cup brown sugar, packed - 1/2 cup chopped walnuts or pecans (optional) - 1/2 cup powdered sugar (for glaze) - 2 tablespoons milk (for glaze) You can adjust some ingredients if needed. For a lighter cake, use whole wheat flour. You can replace granulated sugar with coconut sugar for a less sweet taste. If you want to make it dairy-free, use almond milk and coconut oil instead of butter. Feel free to make this cake your own! You can add chocolate chips or dried fruit for extra flavor. If you want a nutty crunch, toss in some chopped walnuts or pecans. You can also sprinkle some extra cinnamon on top for a stronger taste. For the full recipe, check the instructions above. First, preheat your oven to 350°F (175°C). This ensures even baking. While the oven heats, take a 9-inch round or square baking pan. Grease it with butter or cooking spray. Then, dust it lightly with flour. This step helps the cake come out smoothly after baking. In a large mixing bowl, whisk together these dry ingredients: - 2 cups all-purpose flour - 1 cup granulated sugar - 1 tablespoon baking powder - 1/2 teaspoon salt Next, add wet ingredients: - 1/2 cup unsalted butter, softened - 3/4 cup milk - 2 large eggs - 1 teaspoon vanilla extract Use an electric mixer on medium speed. Mix until the batter looks smooth and creamy, about 2 minutes. It should feel fluffy and light. In a small bowl, mix these ingredients for the swirl: - 1 tablespoon ground cinnamon - 1/2 cup brown sugar, packed - 1/2 cup chopped walnuts or pecans (optional) Now, pour half of the batter into the prepared pan. Spread it evenly. Sprinkle half of the cinnamon mixture over this layer. Then, add the rest of the batter on top. Finish by adding the remaining cinnamon mixture. Use a fork or knife to swirl it gently into the batter. This creates a beautiful marbled effect. Now you are ready to bake! Follow the remaining steps in the Full Recipe for a delightful treat. To bake a great cinnamon roll swirl coffee cake, follow a few simple steps. Always preheat your oven to 350°F (175°C) before you start. This helps the cake rise evenly. Grease your baking pan well with butter or spray to avoid sticking. Use a toothpick to check if the cake is done. Insert it in the center; if it comes out clean, your cake is ready! Mix your batter just until smooth. Over-mixing can make your cake dense. If you want a fluffier cake, sift your flour before measuring. This adds air and keeps the cake light. If you want some crunch, consider adding nuts like walnuts or pecans. A good glaze can make your cake shine! For the glaze, whisk together powdered sugar and milk until smooth. The glaze should be thick enough to stay on the cake but not too runny. Drizzle it over the warm cake. This allows the glaze to soak into the cake a bit. Use a spoon or a small whisk for a nice drizzle effect. You can also add a pinch of cinnamon to the glaze for extra flavor. If you have leftovers, store them in an airtight container. This keeps the cake fresh for up to three days at room temperature. If you want to keep it longer, freeze slices in plastic wrap, then place them in a freezer bag. To reheat, simply microwave slices for about 20-30 seconds. Enjoy it warm for that fresh-baked taste! For the full recipe, be sure to check the detailed instructions. {{image_2}} You can make this cake a bit healthier with simple swaps. Use whole wheat flour instead of all-purpose flour. It adds fiber and nutrients. Swap out granulated sugar for coconut sugar. This change lowers the glycemic index. You can also use Greek yogurt in place of butter. It keeps the cake moist while cutting calories. You can play with flavors in this coffee cake. For a fall twist, add pumpkin puree to the batter. It gives moisture and a lovely taste. Try adding cocoa powder for a chocolate version. Mix in a little espresso powder for a coffee kick. You can also add spices like nutmeg or cardamom for extra warmth. To make this cake gluten-free, use a gluten-free flour blend. Look for one with xanthan gum for the best texture. You can also try almond flour or oat flour. Just be aware that the cake may need more liquid. Add an extra tablespoon of milk to keep it moist. These swaps make it friendly for those with gluten sensitivities. Remember to check the [Full Recipe](#) for the best results! Serve slices of the coffee cake on a pretty plate. Add a light dusting of powdered sugar on top. It looks nice and adds sweetness. You can place some chopped nuts beside the cake for crunch. If you want to impress your guests, use a colorful napkin under the plate. This gives a fun pop of color. This coffee cake pairs well with coffee or tea. A rich cup of coffee brings out the flavors of the cake. If you prefer tea, a warm chai or Earl Grey works great. For sides, consider fresh fruit like berries or slices of apple. These add freshness and balance the sweetness of the cake. This cake is perfect for brunches or special gatherings. It looks great on a buffet table. You can slice it ahead of time for easy serving. If you’re celebrating a birthday, add candles on top for a fun touch. For holidays, use festive plates and serve with hot cocoa. Everyone will love this warm treat! For the full recipe, check out the details above. To keep your coffee cake moist, use fresh ingredients. Always use softened butter and fresh eggs. Make sure not to overbake the cake. If you stick a toothpick in, it should come out clean but not dry. Adding a little extra milk in the batter helps too. You can cover the cake with plastic wrap after it cools. This traps moisture and keeps it soft. Yes, you can make this coffee cake in advance. Bake the cake and let it cool completely. Wrap it tightly in plastic wrap. Store it in the fridge for up to three days. You can also freeze it for longer storage. Just make sure to wrap it well. When ready to serve, thaw it overnight in the fridge. Warm it up a bit in the oven for the best taste. If you need an egg substitute, there are many options. You can use unsweetened applesauce. About 1/4 cup replaces one egg. Mashed bananas also work well. Use 1/4 cup for each egg. Another option is to use flaxseed meal. Mix 1 tablespoon of flaxseed meal with 2.5 tablespoons of water. Let it sit for a few minutes before adding it to the batter. These swaps keep the cake moist and tasty. This blog post covered key steps to make a great Cinnamon Roll Swirl Coffee Cake. We discussed the main ingredients, how to prepare and mix them, and added tips for baking. I shared fun variations and serving ideas to make each cake special. You can even adjust ingredients to fit your needs. Whether for brunch or special occasions, this cake is sure to please. Enjoy baking and sharing your creation!

Cinnamon Roll Swirl Coffee Cake Delightful and Easy

Get ready to awaken your taste buds with my Cinnamon Roll Swirl Coffee Cake! This delightful and easy recipe blends

Here are all the ingredients you need for a tasty Quick Italian Pasta Salad: - 8 oz rotini pasta - 1 cup cherry tomatoes, halved - 1 cucumber, diced - 1 bell pepper, diced - 1/2 red onion, finely chopped - 1 cup black olives, sliced - 1/2 cup feta cheese, crumbled - 1/4 cup fresh basil, chopped - 1/4 cup olive oil - 2 tablespoons red wine vinegar - 1 teaspoon dried oregano - Salt and pepper to taste Gather these items before you start. The rotini pasta gives a nice twist to the salad. The fresh veggies add crunch and color. Cherry tomatoes burst with flavor, and feta cheese brings a creamy touch. Fresh basil adds a lovely aroma and ties everything together. Make sure to use good quality olive oil for the best taste. You can find the Full Recipe for more details on how to prepare this delicious dish. To start, boil water in a large pot. Add salt to the water for flavor. Once the water is boiling, add 8 oz of rotini pasta. Cook it until it is al dente, which means it should be firm but not hard. This usually takes about 7-10 minutes. After cooking, drain the pasta in a colander. Rinse it under cold water to stop the cooking process. This makes the pasta nice and cool for the salad. Next, grab your fresh vegetables. You will need 1 cup of cherry tomatoes. Cut them in half. Then, take 1 cucumber and dice it into small pieces. Next, chop 1 bell pepper of any color into cubes. For added flavor, finely chop 1/2 red onion. Finally, slice 1 cup of black olives. And don’t forget to crumble 1/2 cup of feta cheese. All these ingredients will add great taste and texture to your salad. Now, let’s make the dressing. In a small bowl, whisk together 1/4 cup of olive oil, 2 tablespoons of red wine vinegar, and 1 teaspoon of dried oregano. Add salt and pepper to taste. Mix it well until it blends together nicely. In a large mixing bowl, combine the cooled rotini pasta with all the chopped vegetables and the crumbled feta cheese. Pour the dressing over the salad. Gently toss everything to coat all the ingredients evenly. This is where the magic happens! To finish, fold in 1/4 cup of fresh basil. This adds a fresh, aromatic touch. It’s best to let the salad sit for at least 15 minutes before serving. This allows all the flavors to mix well. Enjoy your Quick Italian Pasta Salad! For the complete recipe, check out the Full Recipe section. To boost the flavor of your Quick Italian Pasta Salad, you can add more herbs. Fresh herbs like parsley or oregano work well. They add a burst of freshness. You can also try dried herbs like thyme or marjoram. Each herb brings its own unique taste. Using high-quality olive oil is key too. A good olive oil elevates the salad's overall flavor. Look for extra-virgin olive oil. It has a rich taste that enhances your dish. The oil adds depth to the dressing and complements the vegetables. For the best flavor, let the salad sit for about 15 minutes before serving. This time helps the flavors meld together. You will notice a big difference in taste. When it comes to presentation, serve the salad in a large, colorful bowl. Garnish with extra basil leaves and a sprinkle of feta cheese. This makes the dish look vibrant and inviting. Your guests will love the visual appeal as much as the taste! {{image_2}} You can add protein to your pasta salad for extra taste and nutrition. Here are some great options: - Grilled Chicken: Slice it into strips and mix it in. - Shrimp: Cooked shrimp adds a nice seafood touch. - Chickpeas: These are great for a vegetarian option. They add fiber and protein. Adding protein makes the dish more filling and satisfying. Feel free to swap out ingredients based on what you have at home. Here are some ideas: - Cheeses: Try mozzarella or goat cheese instead of feta. Each brings a unique flavor. - Vegetables: You can use spinach, artichokes, or zucchini. These add color and crunch. Mixing in different ingredients keeps the salad fresh and exciting. The dressing can change the whole flavor of your pasta salad. Here are some alternatives to try: - Pesto: It gives a rich, herby taste. - Italian Dressing: This can add a zesty kick. - Lemon Vinaigrette: A bright option to lighten the dish. Experimenting with dressings can help you find your favorite flavor profile. Don't be afraid to get creative! For the full recipe, refer to the section above. To keep your Quick Italian Pasta Salad fresh, store it in an airtight container. This will help keep the flavors intact and prevent any odors from getting in. Place it in the fridge right after serving. If you have leftovers, try to eat them within a few days for the best taste. In the fridge, this pasta salad lasts about 3 to 5 days. After that, the vegetables may lose their crunch. Always check for any signs of spoilage before eating. If it smells off or looks strange, throw it away. Can you freeze this salad? Yes, but it requires some care. Freeze only the pasta and vegetables, not the dressing. Mix the dressing fresh when you’re ready to eat. To freeze, place the pasta and veggies in a freezer-safe bag. Squeeze out all the air before sealing. To use, thaw in the fridge overnight and mix with the fresh dressing. Quick Italian Pasta Salad will stay fresh for about 3 to 5 days in the fridge. Store it in an airtight container. The flavors will deepen as it sits, making it even tastier. Just check for any signs of spoilage before eating. Yes, you can make this salad a day in advance. This allows the flavors to blend well. Just keep it in the fridge. If making it early, add fresh herbs like basil right before serving. This keeps them bright and fresh. If you don’t have rotini pasta, you can use penne, fusilli, or bowtie pasta. These shapes hold the dressing well and mix nicely with the veggies. Just cook any alternative pasta according to its package instructions. To make this recipe gluten-free, use gluten-free pasta. There are many good options available now. Always check the label to ensure that it meets your dietary needs. The rest of the ingredients are naturally gluten-free, making it easy to adapt. This blog post shows how to make a tasty Quick Italian Pasta Salad. You learned about the key ingredients, easy steps, and handy tips. We've also discussed variations and storage tips to extend freshness. Whether you add protein or use different veggies, the salad stays delicious. Try making it ahead for parties or meal prep. This salad is fun, simple, and a great dish for any table. Enjoy your cooking and impress your friends with this easy meal!

Quick Italian Pasta Salad Flavorful and Easy Recipe

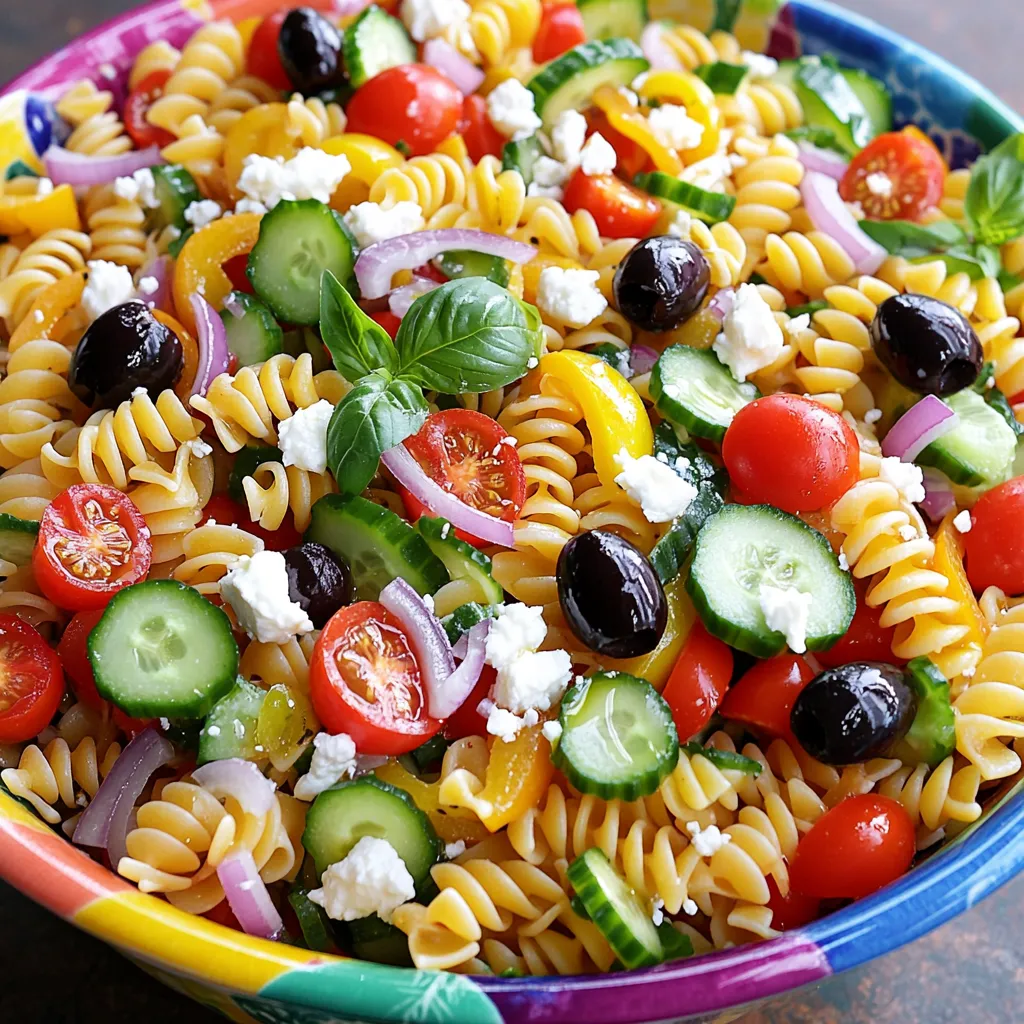
Are you craving a fresh and tasty dish that’s super easy to whip up? Look no further! My Quick Italian

To make a tasty Bananas Foster Crisp, you need simple and fresh ingredients. Here’s what you will need: - 4 ripe bananas, sliced - 1 cup rolled oats - 1/2 cup brown sugar - 1/2 cup all-purpose flour - 1/2 teaspoon ground cinnamon - 1/4 teaspoon nutmeg - 1/4 cup unsalted butter, melted - 1/4 cup chopped walnuts or pecans (optional) - 1 cup vanilla ice cream (for serving) - Fresh mint leaves for garnish (optional) Using ripe bananas is key. They should be soft and sweet for the best flavor. Rolled oats add a nice crunch to the dish. Brown sugar gives it a deep sweetness. The flour helps bind the topping. Ground cinnamon and nutmeg add warmth and spice. You can use unsalted butter to help the topping crisp up nicely. The optional nuts add texture and flavor. I love using walnuts, but pecans are great too. For serving, vanilla ice cream is a must. It melts into the warm crisp and makes it even more delicious. Fresh mint leaves can add a pop of color and a fresh taste. For the full recipe, you can check out the details to get started! 1. First, preheat your oven to 350°F (175°C). This step makes sure your dish bakes evenly. 2. Next, slice 4 ripe bananas and place them in a bowl. Add 1/4 cup of brown sugar. Toss gently to coat the bananas. Set this mixture aside. 1. In another bowl, combine 1 cup of rolled oats, 1/2 cup of all-purpose flour, and the rest of the brown sugar (1/4 cup). 2. Add 1/2 teaspoon of ground cinnamon and 1/4 teaspoon of nutmeg to the mix. 3. Pour in 1/4 cup of melted unsalted butter. If you like, add 1/4 cup of chopped walnuts or pecans. Mix until combined. 4. Grease a baking dish. Spread the banana mixture evenly in the dish. 5. Sprinkle the oat topping over the bananas. Make sure it covers the bananas completely. 1. Place the dish in the oven. Bake for 25-30 minutes. Watch for a golden brown topping and bubbly bananas. 2. Once done, take it out and let it cool for a few minutes. This makes it easier to serve. 3. Serve warm with a scoop of vanilla ice cream on top. You can add fresh mint leaves for a nice touch. Enjoy making this delightful dessert! For the complete recipe, check out the Full Recipe. Choosing the right bananas is key for great flavor. You want ripe bananas for this dish. Look for bananas with yellow skin and some brown spots. This shows they are sweet and soft. Avoid green bananas; they are not sweet enough for baking. To get the perfect crunch on your oat topping, use rolled oats. Mix them with flour, brown sugar, and melted butter. This combination gives a nice, crispy layer. You can add nuts for more texture. Walnuts or pecans work well. If you want a twist, try adding coconut flakes or seeds. Serve your Bananas Foster Crisp warm. A scoop of vanilla ice cream on top adds creaminess. You can also garnish with fresh mint leaves for color. For a fun twist, drizzle some caramel sauce over the top. Arrange it in a nice bowl to make it look special. For the full recipe, check out the detailed steps above! {{image_2}} To make Bananas Foster Crisp your own, try using different nuts or seeds. You can replace walnuts or pecans with almonds or sunflower seeds. Each will add a new crunch and flavor. If you're looking for healthier options, swap out the brown sugar. You could use coconut sugar or maple syrup. These swaps keep the dessert sweet while adding unique flavors. Want to amp up the taste? Add chocolate chips or dried fruits like raisins or cranberries to the oat topping. This twist adds richness and sweetness. You can also infuse spices for extra flavor. Try a hint of ginger or a dash of vanilla extract. Both will give your dish a warm and inviting aroma. For a gluten-free version, use almond flour or gluten-free oats instead of regular flour. This keeps the crunch and flavor intact. Ensure all your ingredients are certified gluten-free. This way, you can enjoy your dessert without worry. You won't lose any taste with these changes! To keep Bananas Foster Crisp fresh, place it in an airtight container. Store it in the fridge. This way, it stays safe and tasty. You can keep it for up to three days. After that, the texture may change, and the flavors fade. When you reheat, use the oven for the best results. Set the oven to 350°F (175°C). Put the crisp in a baking dish, cover it with foil, and heat for about 15 minutes. This keeps the topping crunchy and the bananas soft. You can freeze Bananas Foster Crisp, but it’s best to eat it fresh. If you freeze it, wrap it tightly and use it within a month. You can prepare Bananas Foster Crisp a day in advance. Store the layered dish in the fridge before baking. When you are ready, bake it as per the instructions. This helps save time when you want to serve it. For fresh taste, serve it warm with ice cream right after baking. Bananas Foster Crisp is a warm dessert made with bananas and a crunchy topping. It blends sweet, soft bananas with a crispy oat layer. This dish comes from New Orleans, where it gained fame. The classic Bananas Foster features flambéed bananas. In this twist, we bake ripe bananas with oats. The result is a cozy treat perfect for sharing. Yes, you can swap bananas for other fruits. Apples and peaches work well in this recipe. Berries like blueberries or strawberries add a fresh twist. Just make sure the fruit is ripe and sweet. This way, you keep the flavor bright and enjoyable for everyone. To make a vegan version, replace the butter with coconut oil or vegan butter. Use maple syrup instead of brown sugar for sweetness. You can also skip the ice cream or use a plant-based option. These swaps keep the dish tasty while meeting vegan needs. Enjoy every bite without missing out! In this post, we explored the delicious recipe for Bananas Foster Crisp. We covered ingredients, step-by-step instructions, and helpful tips. You learned how to choose ripe bananas and perfect the oat topping. We also shared variations and storage tips to enhance your experience. Bananas Foster Crisp is not only tasty but also versatile. You can adapt it to fit your needs. Enjoy every bite and make it your own!

Bananas Foster Crisp Flavorful and Easy Dessert Delight

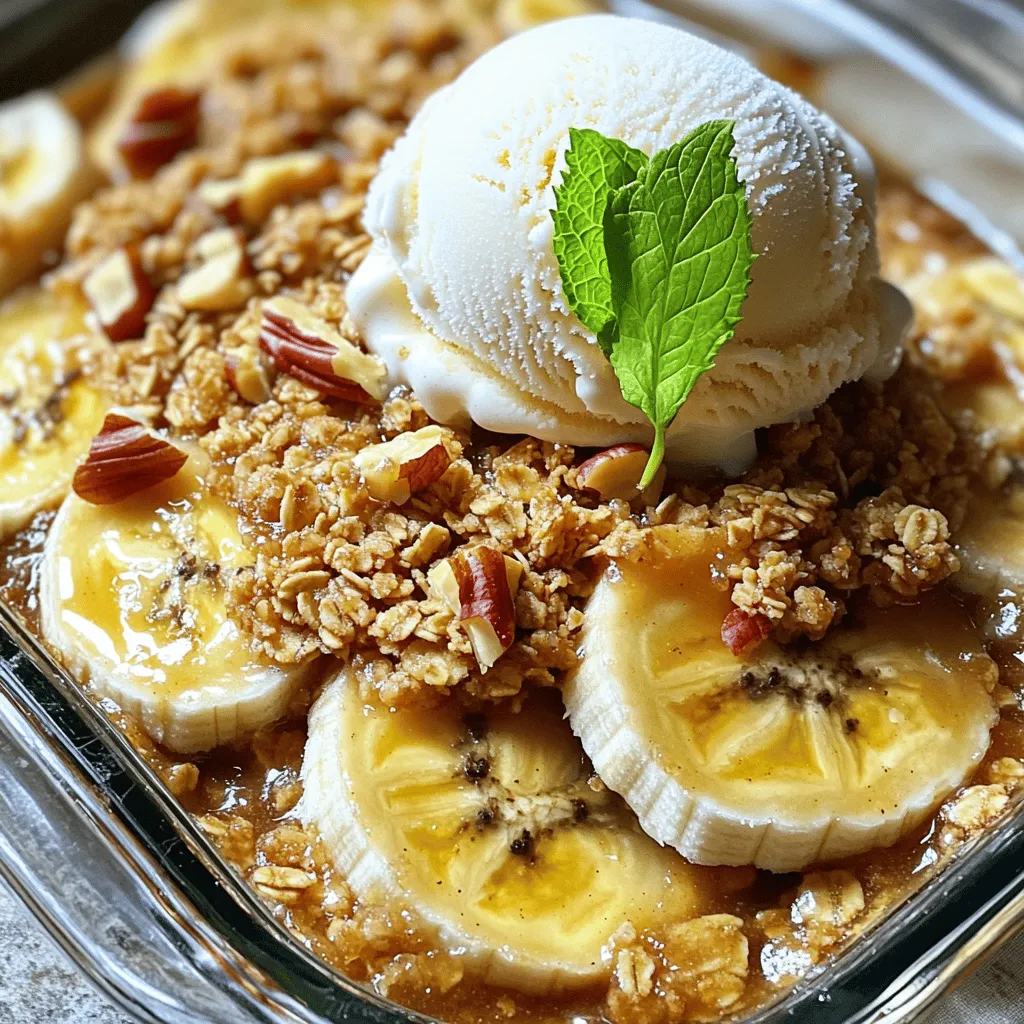
If you’re looking for a dessert that’s both delicious and easy to make, you’ve found it! Bananas Foster Crisp combines

- 2 ½ cups all-purpose flour - 1 cup warm milk (110°F) - 2 tablespoons sugar - 1 tablespoon instant yeast - 1 teaspoon salt - 2 tablespoons unsalted butter, melted - Cornmeal for dusting Best types of flour for English muffins For English muffins, all-purpose flour works great. It gives a nice balance of fluffiness and structure. You can also try bread flour for a chewier texture. Alternative milk options You can use dairy-free milk if you want. Almond milk or oat milk are good choices. Just make sure they are warm, like the recipe says. Conversions for different serving sizes If you want more muffins, double the ingredients. For fewer muffins, cut the amounts in half. Keep the ratios the same for best results. Gluten-free alternatives To make gluten-free muffins, use a gluten-free flour blend. Check that it has a binder like xanthan gum. This helps the muffins hold together while cooking. For the full recipe, refer to the sections above. Enjoy your baking! To start, you need to activate the instant yeast. Mix the warm milk, sugar, and yeast in a bowl. Let this sit for five minutes. You will see bubbles form on top. This shows the yeast is alive and ready to work. Next, mix the wet and dry ingredients. Add the melted butter and salt to the yeast mix. Gradually stir in the flour. Use a spoon or spatula to combine until a soft dough forms. Now, it’s time to knead the dough effectively. Place it on a floured surface. Use your hands to push and fold the dough. Knead for about five minutes. You want it to feel smooth and elastic. This step is key for fluffy muffins. After kneading, let the dough rise. Place it in a greased bowl. Cover it with a kitchen towel and set it in a warm spot. Let it rise for about one hour. It should double in size. This rise gives the muffins their light texture. For shaping, use a round cutter about three inches wide. Cut out circles from the dough. Place them on a baking sheet that has cornmeal dusted on it. This helps prevent sticking. Next, let the muffins rest for about thirty minutes. This gives them another chance to rise. To cook, preheat your griddle to medium heat. Cook each muffin for seven to eight minutes on each side. They should turn golden brown. Now you have fluffy, tasty English muffins ready to enjoy! Check the [Full Recipe] for more details. To make fluffy muffins, avoid common mistakes. One big mistake is using cold ingredients. Always use warm milk at 110°F. This helps the yeast work better. Another mistake is not kneading enough. Knead the dough for about 5 minutes until it's smooth. This builds gluten, which gives muffins their texture. The dough's temperature matters too. If it's too cold, the muffins won’t rise well. Keep the dough in a warm spot. Covering it with a towel helps keep it warm. You can add herbs or spices to your muffins for extra flavor. Try mixing in rosemary or garlic powder for a savory twist. For sweetness, consider adding cinnamon or nutmeg. Fillings also add fun flavors. You can stuff your muffins with fruits like blueberries or chocolate chips. For a savory option, try adding cheese or cooked bacon bits. When serving your muffins, think about toppings. Butter is a classic choice. You can also use jams or honey for a sweet touch. Pair your muffins with breakfast items like eggs or fruit. They also work great as snacks with coffee or tea. These tips will make your muffins shine! For more details, check the Full Recipe. {{image_2}} To make whole wheat English muffins, you need to switch the flour. Use 1 ½ cups of whole wheat flour and 1 cup of all-purpose flour. This mix gives a nice, hearty taste. Whole wheat flour absorbs more liquid, so add a bit more milk if the dough feels dry. When cooking, the time may change. Cook them for about 8-9 minutes on each side. Keep an eye on the muffins to prevent burning. The muffins should be golden brown and puffed up. You can add fun flavors to your muffins. Mix in fruits like blueberries or raisins. Nuts like walnuts or almonds also work well. Just add about ½ cup of your choice when mixing the dough. For a savory twist, try adding shredded cheese or fresh herbs. A tablespoon of dried oregano or thyme can add great flavor. Cheese like cheddar or feta can make the muffins even tastier. This way, you can enjoy muffins for breakfast or as a snack. If you want to make your muffins healthier, reduce the sugar. Use only 1 tablespoon of sugar or swap it for honey. You can also use natural sweeteners like maple syrup. They add sweetness without all the sugar. Using yogurt instead of butter can add moisture. Use 2 tablespoons of plain yogurt for a softer texture. It also gives a nice tang to the muffins. These changes keep your muffins fluffy while making them a bit healthier. For the Full Recipe, you can follow the steps above to create these tasty variations. To keep your English muffins fresh, store them in a zip-top bag. You can also use an airtight container. Place them at room temperature for up to three days. If you want longer storage, consider the freezer. To freeze the muffins, let them cool completely. Wrap each muffin in plastic wrap. Place the wrapped muffins in a freezer bag. They can stay frozen for up to three months. When you want to eat one, take it out and let it thaw at room temperature. For a warm muffin, you can also microwave it for about 20 seconds. Reheat your muffins for the best texture. You can use a toaster or oven. For the oven, set it to 350°F and heat for 5-10 minutes. This keeps the muffins from getting soggy. If you prefer the microwave, heat for 10-15 seconds. Enjoy them warm with butter or your favorite spread. Homemade English muffins stay fresh for about 3 to 5 days. Store them in an airtight bag or container at room temperature. If you want them to last longer, freeze them. They can stay good for up to three months in the freezer. Just remember to let them cool completely before you freeze them. Yes, you can use active dry yeast instead of instant yeast. Just remember, you need to activate it first. Mix the active dry yeast with warm milk and sugar. Let it sit for about 5 to 10 minutes until it bubbles. Then, you can follow the same steps as in the full recipe. If your muffins don’t rise, check a few things. First, make sure your yeast is fresh. Old yeast won’t work well. Second, check the dough temperature. If it’s too cold, it won’t rise. Give it a warm place to rise. Lastly, knead the dough enough. This helps develop gluten, which is key for rising. You can make English muffins without a griddle by using an oven. Preheat your oven to 350°F. Place the muffins on a baking sheet lined with parchment paper. Bake for about 20 minutes, flipping halfway through. This will give you a nice golden color and keep them fluffy inside. Making English muffins at home is tasty and fun. You need just a few simple ingredients and follow easy steps. From mixing dough to achieving that perfect rise, this guide has you covered. Remember to avoid common mistakes and try different flavors to enhance your muffins. Store them well for longer freshness and enjoy them anytime. With these tips, you can create delicious muffins that brighten your breakfast or snack time. Enjoy your baking journey and share the joy of homemade goodness!

Easy English Muffins Fluffy and Tasty Recipe Guide

Are you ready to create fluffy and tasty English muffins right at home? With just a few simple ingredients and

- 2 large potatoes, peeled and diced - 250g ground beef - 1 medium onion, finely chopped - 2 cloves garlic, minced - 1 tablespoon soy sauce - 1 tablespoon sweet soy sauce (kecap manis) - 1 teaspoon ginger paste - 1 teaspoon coriander powder - ½ teaspoon turmeric powder - Salt and pepper to taste - 1 cup breadcrumbs - 2 eggs, beaten - Cooking oil for frying To make easy Indonesian beef potato croquettes, you need fresh ingredients. Start with two large potatoes. Peel and dice them. Potatoes give the croquettes a creamy texture. Next, use 250 grams of ground beef. This adds a savory flavor. Chop one medium onion finely. Mince two cloves of garlic. These aromatics make your croquettes smell great. Then, gather your sauces. You will need one tablespoon of soy sauce and one tablespoon of sweet soy sauce. These will bring out the rich flavors. Spices are key too. You’ll need one teaspoon of ginger paste, one teaspoon of coriander powder, and half a teaspoon of turmeric powder. They give the croquettes a warm, spicy kick. Lastly, don’t forget salt and pepper to taste. You also need one cup of breadcrumbs to coat the croquettes, two beaten eggs for binding, and cooking oil for frying. For the full recipe, check the details above. This blend of ingredients will help you create delicious croquettes that everyone will love. First, you need to boil the potatoes. Place the diced potatoes in a pot with salted water. Bring the water to a boil and cook for about 15 minutes. The potatoes should feel soft when pierced with a fork. Drain the potatoes and mash them until smooth. Set the mashed potatoes aside to cool. This step is key to making your croquettes fluffy and light. Next, it’s time to cook the beef. Heat a skillet over medium heat and add a splash of oil. Sauté the chopped onion until it turns translucent. This usually takes about 3 minutes. Then, add the minced garlic and ginger paste to the skillet. Cook for another 2 minutes until they smell great. Now, add the ground beef and cook it until it is browned. This should take about 5 minutes. Stir in the soy sauce, sweet soy sauce, coriander powder, turmeric powder, salt, and pepper. Let this mixture cook for another 5 minutes to blend all the flavors. Once done, remove it from heat and let it cool slightly. When both the mashed potato and beef mixture are cool enough to handle, combine them in a large bowl. Mix well until everything is evenly combined. Now, shape the mixture into round or oval croquettes, about the size of a golf ball. Dip each croquette into the beaten eggs, coating it fully. Then, roll it in breadcrumbs until it is nicely covered. Heat oil in a deep skillet over medium-high heat. Fry the croquettes in small batches until they are golden brown and crispy. This takes about 3-4 minutes per side. After frying, use a slotted spoon to transfer them to a paper towel-lined plate to drain any excess oil. Enjoy your delicious croquettes! For the full recipe, check the details above. To create the best Indonesian beef potato croquettes, focus on texture and flavor. Start with starchy potatoes like Russets. They give a fluffy, creamy mix. Mash them well to avoid lumps. Always taste the beef mixture before forming croquettes. Adjust your seasoning with salt and pepper. A well-seasoned filling makes a big difference. Control the temperature when frying. Heat your oil to about 350°F (175°C). If it's too hot, the outside will burn before the inside cooks. Fry in small batches to keep the oil temperature steady. This ensures even cooking. If you prefer not to fry, try baking or air frying. Bake at 400°F (200°C) for about 25 minutes. In an air fryer, cook for 15 minutes, flipping halfway. Both methods result in a crispy exterior. Serve your croquettes hot for the best taste. Pair them with spicy sambal for a kick. Sweet chili sauce also works well for a milder option. Add a fresh salad or pickled veggies to balance the richness. These sides enhance the overall meal experience. Enjoy the blend of flavors and textures! {{image_2}} You can make a vegetarian version of these croquettes. Just swap the ground beef for vegetable protein. Textured vegetable protein (TVP) works well here. It absorbs flavors nicely. You can also use lentils or mushrooms for a hearty taste. Cook them the same way as the beef. This keeps the recipe fun and flexible. To boost the flavor, consider adding cheese or herbs. Cheese adds creaminess and richness. Try mozzarella or cheddar for a melty bite. Fresh herbs like cilantro or parsley add a fresh touch. Mix these into your beef or vegetable protein for extra taste. You can also add spices like chili powder for a kick. The coating is key to a crunchy croquette. Instead of regular breadcrumbs, you can use panko. Panko gives a lighter, airier crunch. You can also crush crackers for a unique texture. Both options will give your croquettes a delightful crunch. Experiment to find your favorite! For the full recipe, check out the complete guide. To keep your croquettes fresh, store them properly. First, let them cool completely. Place them in an airtight container. You can refrigerate them for up to three days. If you want to keep them longer, freeze the croquettes. Use a freezer-safe bag or container. They can last for up to three months in the freezer. Just make sure to label the bags with the date. Reheating croquettes can be tricky. You want them to be crispy, not soggy. The best way is to bake them. Preheat your oven to 375°F (190°C). Place the croquettes on a baking sheet. Bake for about 10-15 minutes until they are hot and crispy. You can also reheat them in a skillet. Heat a little oil over medium heat. Fry the croquettes for a few minutes on each side. This method gives them a nice crunch. Avoid using the microwave, as this can make them soft. For details on how to make these tasty treats, check out the Full Recipe. Cooked croquettes can last for about three to four days in the fridge. Make sure to store them in an airtight container. This keeps them fresh and tasty for you to enjoy later! Yes, you can prepare these croquettes in advance. You can shape them and place them in the fridge for a few hours. To store before frying, cover them with plastic wrap. This way, they stay moist and ready to fry when you are. These croquettes pair well with a variety of side dishes. You can serve them with a fresh salad or steamed veggies. For drinks, try iced tea or coconut water. They add a nice touch to your meal. For more details, check out the Full Recipe for serving ideas! This blog post covers how to make delicious Indonesian beef potato croquettes. We explored the key ingredients, from potatoes and ground beef to essential spices. I provided step-by-step instructions, tips for perfecting your croquettes, and variations to suit your taste. Remember, whether you follow the classic or a vegetarian version, these croquettes can impress anyone. Enjoy making them for yourself or sharing with friends. Cooking can be fun and rewarding, so get started today!

Easy Indonesian Beef Potato Croquettes Simple Recipe

Craving a tasty treat that’s easy to make? Try my Easy Indonesian Beef Potato Croquettes! This simple recipe combines savory

- 2 tablespoons vegetable oil - 1 red bell pepper, sliced - 1 yellow bell pepper, sliced - 1 cup broccoli florets - 1 cup snap peas - 1 carrot, julienned - 1 zucchini, sliced - 2 green onions, chopped - 2 cloves garlic, minced - 1 teaspoon ginger, grated - Salt and pepper to taste - 1/2 cup creamy peanut butter - 3 tablespoons soy sauce - 2 tablespoons honey or maple syrup - 1 tablespoon rice vinegar - 1 tablespoon sesame oil - 1/4 cup water (adjust for consistency) - Chili flakes to taste (optional) To make this dish shine, you need fresh vegetables. They add color and flavor. I love using bell peppers for sweetness and broccoli for crunch. Snap peas bring a nice snap, while zucchini adds a soft touch. Carrots add sweetness and color. Green onions give a fresh finish. The aromatics in this recipe are key. Garlic and ginger wake up the dish with their bold flavors. Adjust salt and pepper to your liking for extra taste. The peanut sauce is the star. Creamy peanut butter makes it rich. Soy sauce adds umami, while honey or maple syrup brings sweetness. Rice vinegar gives a tangy kick, and sesame oil adds depth. Water helps to thin it out. You can add chili flakes if you want some heat. For a detailed guide, check the Full Recipe. To start, let's make the peanut sauce. In a bowl, whisk together: - 1/2 cup creamy peanut butter - 3 tablespoons soy sauce - 2 tablespoons honey or maple syrup - 1 tablespoon rice vinegar - 1 tablespoon sesame oil - 1/4 cup water This will create a smooth and creamy sauce. If it feels thick, add more water to get the right consistency. You can also add chili flakes for a spicy kick if you want. Now, let's cook the vegetables. First, heat 2 tablespoons of vegetable oil in a large skillet or wok over medium-high heat. Next, add 2 cloves of minced garlic and 1 teaspoon of grated ginger. Sauté them for about 30 seconds until they smell great. Now it’s time to add the vegetables. Toss in the sliced red and yellow bell peppers, 1 cup of broccoli florets, 1 cup of snap peas, 1 julienned carrot, and 1 sliced zucchini. Stir-fry everything for 5 to 7 minutes. You want the veggies to be bright and tender-crisp. Add salt and pepper to taste. Once the veggies are cooked, remove the skillet from heat. Pour the peanut sauce over the stir-fried vegetables. Toss gently to coat all the veggies in that delicious sauce. For serving, transfer the stir-fry to a large platter or individual bowls. Garnish with chopped green onions. You can drizzle some extra peanut sauce on top for a nice finish. Adding crushed peanuts or lime wedges on the side also looks great! Feel free to explore the [Full Recipe] for more details and tips! - Optimal Stir-Frying Temperature: Heat your skillet or wok to medium-high heat. This helps cook the vegetables quickly. When the oil shimmers, it is ready. - Keeping Vegetables Crisp: Do not overcrowd the pan. Stir-fry in small batches. This ensures even cooking and keeps the veggies bright and crunchy. - Adding Spice with Chili Flakes: If you love heat, sprinkle chili flakes into the stir-fry. Start with a pinch and add more to suit your taste. - Using Fresh Herbs or Lime Juice: Fresh herbs like cilantro or basil brighten the dish. A splash of lime juice adds zing, making the flavors pop. - Pre-cutting Vegetables: Wash and cut your vegetables ahead of time. This saves you time and makes cooking easy and fun. - Storing Leftovers: Keep any leftovers in an airtight container in the fridge. They stay fresh for up to three days. Reheat in a pan to maintain texture. {{image_2}} You can boost your stir-fry with protein. Tofu or tempeh are great plant-based options. They soak up flavor well. Just cube them and add them to the skillet. Cook until golden brown for the best taste. If you prefer meat, chicken and shrimp are solid choices. Cut chicken into thin strips for quick cooking. Shrimp cooks fast, so add them last. They will turn pink and curl when done. For a vegetarian meal, stick to tofu or tempeh. If you want a vegan option, ensure your sauces are plant-based. Some soy sauces contain fish sauce. Always check the labels. You can swap honey for maple syrup for a vegan twist. This change keeps the sweet taste without using bee products. Adjust the sauces based on your dietary needs. Using seasonal veggies makes your stir-fry fresh and tasty. In spring, try adding asparagus or snap peas. Summer is perfect for zucchini and bell peppers. Fall vegetables like butternut squash add a sweet touch. Pair seasonal flavors like fresh basil in summer or nutty sage in fall. These flavors enhance your dish. You can also mix different colors for a beautiful plate. For the full recipe, check the section above. Refrigeration Guidance After enjoying your vegetable stir-fry with peanut sauce, let it cool. Place it in an airtight container. This keeps the flavors fresh. You can store it in the fridge for up to three days. Make sure you seal it well to avoid drying out. Freezing Stir-Fry If you want to save it for later, freezing works well too. Place the stir-fry in a freezer-safe bag. Remove as much air as possible before sealing. You can freeze it for up to three months. Just remember to label the bag with the date! Best Methods to Reheat When it’s time to eat again, reheat the stir-fry gently. Use a skillet over low heat. This helps keep the vegetables crisp. You can also use the microwave. Heat in short bursts, stirring in between. This ensures even heating. Maintaining Vegetable Texture To keep your veggies crunchy, don’t overheat them. Stir often and watch closely. If they look too soft, they may lose their fresh bite. A splash of water can help steam them back to life too. How long leftovers last in the fridge Your stir-fry can last up to three days in the fridge. Check for any signs of spoilage before eating. If it smells off or looks strange, toss it out. Signs of spoilage Signs of spoilage include a bad smell, slimy texture, or discoloration. If you see any of these, it’s best to discard the leftovers. Always trust your senses! To boost flavor, add fresh herbs like basil or cilantro. You can also use fresh lime juice for a zing. Try adding a splash of soy sauce or some chili flakes for heat. A sprinkle of sesame seeds adds crunch and flavor too. Absolutely! You can swap in your favorite veggies. Try adding mushrooms, bok choy, or asparagus. Use what is fresh and in season. This dish is flexible, so get creative with your choices! Yes, but make sure to use gluten-free soy sauce. Many brands offer this option. Check the labels to be sure. If you want a nut-free option, try sun butter instead of peanut butter. It takes about 10 minutes to prep and 10 minutes to cook. In just 20 minutes, you can have a tasty meal. This makes it perfect for busy weeknights. This stir-fry pairs well with rice or quinoa. You can also serve it with noodles for a heartier meal. Add some fresh fruit on the side for a colorful plate. Yes, you can prepare the peanut sauce ahead of time. Store it in the fridge in an airtight container. It stays good for about one week. Just give it a good stir before using it again. For the full recipe, check out the detailed instructions. This blog post covered a tasty vegetable stir-fry with a creamy peanut sauce. We explored fresh veggies, aromatics, and how to create a flavorful sauce. I shared tips for cooking and storing leftovers, plus ways to customize your dish. Remember, you can mix different proteins and seasonal veggies to keep things exciting. Enjoy your cooking journey and make this meal your own!

Vegetable Stir-Fry with Peanut Sauce Simple and Fresh

Are you ready to enjoy a quick, tasty meal? This Vegetable Stir-Fry with Peanut Sauce is just what you need.

- Tomatoes: Fresh tomatoes are the star of this soup. They bring vibrant flavor and natural sweetness. You can also use canned tomatoes if fresh ones aren’t available. - Basil: Fresh basil adds a fragrant touch. It brightens the soup and gives it a classic taste. Always chop it just before adding to keep its flavor strong. - Garlic and Onion: These two are essential. They build the soup's base flavor. Sautéing onion and garlic unlocks their sweetness, making the soup even more delicious. - Vegetable Broth: This adds depth to the soup. Choose low-sodium broth for better control over salt levels. It provides a great savory background. - Heavy Cream: This gives the soup its creamy texture. You can swap it for coconut cream for a dairy-free option. Both choices create a rich mouthfeel. - Olive Oil: Use extra virgin olive oil for the best flavor. It enhances the richness of the soup and helps sauté the onion and garlic. - Sugar for Taste: If your tomatoes are too acidic, a teaspoon of sugar can balance the flavors. It’s an easy fix to enhance the taste. - Salt and Pepper: These are key for seasoning. Adjust them to your liking after blending the soup. A pinch can elevate all the other flavors. For the complete recipe, check out [Full Recipe]. - Sautéing Onion and Garlic Start by heating two tablespoons of olive oil in a large pot over medium heat. Once hot, add one diced medium onion. Cook it until it becomes soft and clear, about five minutes. Next, stir in three minced garlic cloves. Cook for another minute until you smell that delicious aroma. - Adding Tomatoes and Broth Now it’s time for the star of the show. Add four cups of chopped fresh tomatoes or two cans of peeled whole tomatoes. If using canned tomatoes, crush them gently with a spoon. Pour in two cups of low-sodium vegetable broth. Bring this mixture to a simmer. Let it cook for about twenty minutes. This allows the flavors to mix and deepen. - Using an Immersion Blender After simmering, take the pot off the heat. Use an immersion blender to puree the soup until smooth. If you like a chunkier texture, blend just half of the soup. This gives you a nice mix of smooth and chunky bites. - Achieving Desired Texture Taste the soup as you blend. Adjust the texture to your liking. You want it creamy and rich, perfect for dipping or sipping. - Incorporating Cream and Basil Place the pot back on low heat. Stir in one cup of heavy cream or coconut cream for a dairy-free version. Add a quarter cup of fresh chopped basil. Let it warm through for about five minutes. The cream and basil make the soup even richer and fresher. - Seasoning the Soup to Taste Finally, taste the soup again. Add salt, pepper, and a teaspoon of sugar if needed. These small tweaks make a big difference in flavor. You want every bowl to be just right. Now you have a warm, creamy tomato basil soup ready to enjoy. For the full recipe, check the link. Using coconut cream makes this soup rich and tasty. It gives a slight sweetness and a smooth texture. Just swap it for heavy cream in the recipe. This choice is great for those who avoid dairy. When adding cream, heat it slowly. This helps prevent curdling. Pour it in after blending the soup. Stir gently until warm. This keeps the cream silky and delicious. To boost the soup's flavor, try adding spices. A pinch of red pepper flakes adds heat. A dash of smoked paprika gives it depth. These spices can transform your soup into something special. Fresh herbs make a big difference too. Besides basil, add a bit of parsley or oregano. These herbs brighten the soup and enhance its taste. Always chop them finely for the best results. Serve your creamy tomato basil soup with crusty bread. A grilled cheese sandwich pairs perfectly. The warm, gooey cheese complements the soup's richness. For garnishing, drizzle a little olive oil on top. It adds a nice shine and flavor. Fresh basil leaves also make a great garnish. They look pretty and taste fresh. For the full recipe, check out the complete instructions. Enjoy making this comforting dish! {{image_2}} For a vegetarian or vegan version of creamy tomato basil soup, start with dairy-free alternatives. Replace heavy cream with coconut cream or cashew cream. Both options add richness without dairy. You can also use almond milk for a lighter soup. Adding more vegetables can enhance the flavor and nutrition. Consider including carrots, bell peppers, or zucchini. These veggies blend well and add a pop of color. If you want a spicy tomato basil soup, add red pepper flakes or a dash of hot sauce. This extra kick can elevate the dish. You can also mix in smoked paprika for a smoky depth. Adding protein sources boosts the meal’s heartiness. Try mixing in cooked lentils, chickpeas, or diced tofu. These ingredients add texture and make the soup more filling. Incorporating seasonal ingredients can keep your soup fresh and exciting. In summer, use ripe heirloom tomatoes for a sweeter flavor. In winter, opt for roasted tomatoes for a deeper taste. Adjusting for fresh versus canned tomatoes is key. Fresh tomatoes offer brighter flavors, while canned tomatoes provide convenience and consistency. When using fresh tomatoes, let them simmer a bit longer to break down fully. These variations ensure your creamy tomato basil bliss remains delightful, no matter the season. For the full recipe, check out the section above. To store your creamy tomato basil soup, let it cool first. Pour the soup into an airtight container. This keeps out air and moisture. You can store it in the fridge for up to 4 days. Always check for signs of spoilage before eating. If it looks or smells off, toss it out. If you want to keep the soup longer, freezing is a great option. Use freezer-safe containers to prevent freezer burn. Leave space at the top for expansion. The soup can last in the freezer for about 3 months. When you're ready to eat, thaw it overnight in the fridge. Reheat it gently on the stove over low heat, stirring often to keep it smooth. You can be creative with leftover soup. Try using it as a pasta sauce. It also works well in a casserole. Pair it with grilled cheese for a comforting meal. You can also use it as a base for a tomato risotto. The options are endless! Yes, you can use canned tomatoes. Canned tomatoes are often picked at peak ripeness. This means they can be just as tasty as fresh ones. They save time and reduce prep work. When using canned tomatoes, choose whole or diced ones for the best results. To spice up your soup, add red pepper flakes or cayenne pepper. Start with a small amount, then taste. You can also add a dash of hot sauce while cooking. For extra flavor, sauté some chopped jalapeños with your onions. This will give your soup a nice kick! Grilled cheese is a classic choice. The gooey cheese complements the soup's creaminess. Crusty bread like a baguette or ciabatta is also great. It adds texture and is perfect for dipping. For a lighter option, try a fresh baguette with a dash of olive oil. For the full recipe, check out the Creamy Tomato Basil Bliss. In this post, we covered how to make a delicious tomato basil soup. We explored fresh ingredients, helpful pantry staples, and tasty optional add-ins. I shared step-by-step instructions to guide you through cooking, blending, and adjusting flavors. Plus, I offered tips for creaminess and serving ideas. Remember, you can mix in your favorite flavors or switch up ingredients. This soup is easy to make and enjoyable to share. Try it out, and make it your own!

Creamy Tomato Basil Soup Comforting and Easy Recipe

There’s nothing quite like a warm bowl of creamy tomato basil soup to lift your spirits. This easy recipe combines

To make a tasty chicken tikka masala, you'll need: - 1.5 lbs boneless, skinless chicken thighs, cut into bite-sized pieces - 1 cup plain yogurt - 2 tablespoons lemon juice - 2 tablespoons garam masala - 1 tablespoon ground cumin - 1 teaspoon turmeric - 1 teaspoon paprika - 1 teaspoon salt - 1/2 teaspoon black pepper - 2 tablespoons vegetable oil - 1 medium onion, finely chopped - 4 cloves garlic, minced - 1 tablespoon ginger, minced - 1 can (14 oz) crushed tomatoes - 1 cup coconut milk These ingredients work together to create rich, bold flavors in your dish. The chicken thighs stay juicy and tender. The yogurt helps to marinate and flavor the chicken. The spices create warmth and depth, while the coconut milk adds creaminess. For the best experience, consider adding: - Fresh cilantro for garnish - Suggested serving options: steamed rice or warm naan Fresh cilantro brightens the dish and adds a pop of color. Rice or naan acts as the perfect base to soak up the delicious sauce. Enjoy every bite with these tasty accompaniments! For the full recipe, check out the complete instructions above. - Ingredients for the marinade: - 1 cup plain yogurt - 2 tablespoons lemon juice - 2 tablespoons garam masala - 1 tablespoon ground cumin - 1 teaspoon turmeric - 1 teaspoon paprika - 1 teaspoon salt - 1/2 teaspoon black pepper Start by mixing the yogurt, lemon juice, and spices in a bowl. This mixture flavors the chicken and makes it tender. Add the chicken pieces, making sure they are well coated. Marinate for at least 30 minutes, or overnight for the best flavor. - Sautéing aromatics: Set the Instant Pot to 'Sauté' mode. Heat two tablespoons of vegetable oil. Add one finely chopped onion and cook for about five minutes. You want it to be soft and clear. Next, stir in four minced garlic cloves and one tablespoon of minced ginger. Cook for one more minute. This brings out great flavors. - Adding chicken and sauce ingredients: Stir in the marinated chicken and all the marinade. Cook for three to five minutes until the chicken turns white on the outside. Now, add one can of crushed tomatoes and one cup of coconut milk. Mix everything well so the flavors blend. - Pressure cooking details: Cancel 'Sauté' mode. Close the lid and set the Instant Pot to 'Pressure Cook' on high for ten minutes. Once it finishes, let the pressure drop naturally for five minutes. Then, switch to quick release to let out any extra pressure. - Adjusting consistency: Carefully open the lid and stir the chicken tikka masala. Taste it, and add salt if needed. If the sauce is too thick for your liking, add a little water or more coconut milk to thin it out. - Serving suggestions: Serve the chicken tikka masala hot. Garnish with fresh chopped cilantro. Pair it with steamed rice or warm naan for a complete meal. Enjoy this flavorful delight! To make tender chicken, marinating is key. The yogurt and lemon juice help break down the chicken's fibers. I suggest marinating for at least 30 minutes. For best results, try overnight in the fridge. This makes the chicken juicy and flavorful. When using the Instant Pot, ensure the chicken is in a single layer. This helps it cook evenly. Avoid overcrowding. Cook in batches if you need to. You can add more spices for extra flavor. Try adding cardamom, cinnamon, or chili powder. Each spice brings a unique taste. If you like it spicy, use fresh chilies. You can also adjust the heat by adding less chili powder or paprika. Taste as you go to find your perfect balance. For this recipe, use the 'Pressure Cook' setting on high. This cooks the chicken quickly and keeps it moist. After cooking, let the pressure release naturally for 5 minutes. This helps keep the chicken tender. Cleaning your Instant Pot is easy. Make sure to wash the inner pot with warm, soapy water. Check the seal and vent for any food debris. Proper care will help your Instant Pot last longer. {{image_2}} You can swap chicken for chickpeas or tofu. Chickpeas add protein and texture. Tofu soaks up flavors well. For the sauce, use coconut milk for creaminess. If you want a richer taste, try cashew cream instead. These swaps keep the dish tasty and filling. You can change the flavor by adding fruit like mango or peach. This gives a sweet twist to the dish. For heat variations, use different chili types. Jalapeños add warmth, while serranos pack more heat. Adjust spices to fit your taste buds. Serve your chicken tikka masala with grains like basmati rice or quinoa. Naan bread is great for scooping up sauce. You can also add a fresh salad or roasted vegetables. These sides balance the rich flavors of the dish. Explore your options for a complete meal. For the full recipe, check out the section above. Store any leftover chicken tikka masala in the fridge. Use an airtight container to keep it fresh. It will last for 3 to 4 days in the fridge. Make sure to let it cool before sealing the container. You can also separate the sauce from the chicken if you prefer. You can reheat your chicken tikka masala in the microwave or on the stovetop. For the microwave, place it in a bowl and cover it. Heat in short bursts, stirring in between to avoid hot spots. If you use the stovetop, heat it slowly in a pan over low heat. Add a splash of coconut milk to keep the sauce creamy. To freeze the chicken tikka masala, place it in a freezer-safe container. Leave some space at the top for expansion. It can stay frozen for up to 3 months. When ready to eat, thaw it in the fridge overnight. Reheat it on the stovetop, adding a bit of water or coconut milk to maintain the sauce’s smooth texture. Yes, you can use chicken breasts. However, thighs are juicier. Chicken breasts may dry out faster. Adjust cooking time to avoid overcooking. Thighs offer a richer taste. This adds depth to your chicken tikka masala. To reduce spice, use less garam masala. You can also skip the black pepper. Adding more yogurt or coconut milk cools the heat. A bit of sugar can balance flavors too. Taste your sauce as you go. This way, you find the right spice level for you. Yes, you can use a regular pot or slow cooker. For a pot, follow the same steps but cook longer. Simmer for about 30-40 minutes until chicken is tender. In a slow cooker, combine all ingredients and cook on low for 6-8 hours. Both methods yield great flavor, just take more time. You now have a complete guide to making Instant Pot Chicken Tikka Masala. We covered key ingredients like chicken thighs, spices, and aromatics. Step-by-step instructions took you from marinating to serving this dish. You learned tips for tender chicken and enhancing flavors. Variations allow you to customize this meal based on your taste. With proper storage and reheating tips, leftovers won’t go to waste. Enjoy your cooking adventure! Every bite will be worth it.

Instant Pot Chicken Tikka Masala Flavorful Delight

Are you ready to make a delicious Chicken Tikka Masala in your Instant Pot? This flavorful delight is simple to

Older posts
Newer posts
← Previous Page1 … Page52 Page53 Page54 … Page82 Next →

dsad

© 2025 My Saved Recipe • Built with GeneratePress

Our Policies

  • Copyright Policy
  • Cookie Policy
  • GDPR Policy
  • Privacy Policy
  • Disclaimer
  • Terms Of Use

More Information

  • Home
  • About
  • Contact
  • Appetizers
  • Dessert
  • Dinner
  • Drinks
©2025, My Saved Recipe About Back To Top