Skip to content
DisclaimerTerms Of UseGDPR PolicyCookie Policy

My Saved Recipe

  • Home
  • Drinks
  • Appetizers
  • Dinner
  • Dessert
  • About
  • Contact
  • Privacy Policy
DisclaimerTerms Of UseGDPR PolicyCookie Policy

Savannah

For my savory herb cornbread muffins, you will need: - 1 cup cornmeal - 1 cup all-purpose flour - 1 tablespoon baking powder - 1 teaspoon salt - 1 teaspoon sugar - ½ teaspoon black pepper - 1 teaspoon dried thyme - 1 teaspoon dried rosemary - 1 cup buttermilk (or milk with a squeeze of lemon juice) - 1 large egg - ¼ cup melted butter (or olive oil) - ½ cup shredded sharp cheddar cheese - ¼ cup chopped fresh chives (or green onions) You can easily tweak this recipe to fit your needs. Here are some options: - Gluten-Free Flour: Use a gluten-free blend for a gluten-free version. - Dairy-Free Buttermilk: Substitute with almond milk or oat milk mixed with vinegar. - Cheese Variations: Try feta or mozzarella for different flavors. To make these muffins, gather these tools: - Muffin tin - Mixing bowls - Whisk and spatula These ingredients and tools will help you create the perfect batch of savory herb cornbread muffins. For the full recipe, check the main guide above. First, you need to preheat your oven to 400°F (200°C). This step is key for even baking. While the oven heats up, prepare your muffin tin. You can line it with paper liners or grease it with cooking spray. Next, let’s mix the dry ingredients. In a large mixing bowl, combine: - 1 cup cornmeal - 1 cup all-purpose flour - 1 tablespoon baking powder - 1 teaspoon salt - 1 teaspoon sugar - ½ teaspoon black pepper - 1 teaspoon dried thyme - 1 teaspoon dried rosemary Whisk these dry ingredients together until they are well mixed. This helps ensure the muffins rise evenly. Now, let’s whisk together the wet ingredients. In a separate bowl, combine: - 1 cup buttermilk (or milk with a squeeze of lemon juice) - 1 large egg - ¼ cup melted butter (or olive oil) Whisk these until they are well combined. Pour the wet mixture into the bowl of dry ingredients. Be careful here! Use a spatula to fold the mixtures together gently. You want to combine them without overmixing. It's okay if some lumps remain. Next, gently fold in: - ½ cup shredded sharp cheddar cheese - ¼ cup chopped fresh chives (or green onions) Now, it’s time to bake! Divide the batter evenly among your muffin cups, filling each about 2/3 full. Place them in the preheated oven and bake for 15-20 minutes. To test if your muffins are done, insert a toothpick into the center of one muffin. If it comes out clean, the muffins are ready! Once baked, remove the muffins from the oven. Let them cool in the pan for 5 minutes. After that, transfer them to a wire rack to cool completely. Enjoy your Savory Herb Cornbread Muffins! For the full recipe, check the details above. To get the best muffins, avoid overmixing the batter. Mix just until you see no dry flour. Some lumps are fine. Overmixing can lead to tough muffins. To keep muffins moist, consider using buttermilk. It adds richness and flavor. You can also add melted butter or olive oil for extra moisture. You can enhance the flavor by adding more herbs. Try adding oregano, basil, or parsley. Fresh herbs can give a bright taste. For a little extra kick, add spices like cayenne pepper or smoked paprika. A pinch can elevate the flavor and make your muffins stand out. Serve your muffins warm right from the oven. Brush them with melted butter for a shiny look. For garnishing, sprinkle some fresh chives on top. This adds color and an extra burst of flavor. You can also serve them with a bowl of honey or jam on the side. Each of these tips will help you create Savory Herb Cornbread Muffins that are tasty and beautiful. For the complete recipe, check out the Full Recipe section. {{image_2}} For your savory herb cornbread muffins, you can mix up the cheese. Cheddar cheese gives a nice sharp taste. If you want more bold flavor, try blue cheese. It adds a creamy, tangy bite. For a Mediterranean twist, feta cheese works well. Feta adds a salty flavor and pairs nicely with herbs. You can even blend different cheeses for a unique taste. Herbs can change the flavor of your muffins. You can use fresh herbs instead of dried ones. Fresh chives, parsley, or basil brighten the dish. You can also customize herbs for holidays. For spring, try dill and parsley. In fall, use sage and thyme. This keeps the muffins exciting with each season. You can also change your muffins from savory to sweet. To make sweet muffins, add honey or maple syrup. Fruits like blueberries or peaches can bring sweetness. Nuts can add texture, too. Just think about what you like and mix it in. The basic recipe stays the same. You can switch flavors and enjoy a new treat. Check out the Full Recipe for more ideas! To keep your savory herb cornbread muffins fresh, store them in an airtight container. This helps retain moisture and flavor. Place a paper towel at the bottom of the container. It absorbs any excess moisture. You can also stack the muffins with parchment paper between them. This method prevents sticking. Store them at room temperature for up to three days. If you have more muffins, consider freezing them. If you want to save muffins for later, freezing is a great option. First, let them cool completely. Wrap each muffin in plastic wrap. Then, place them in a freezer-safe bag or container. Remove as much air as possible before sealing. This prevents freezer burn. You can freeze them for up to three months. When you want to enjoy a muffin, remove it from the freezer. Thaw it in the fridge overnight or at room temperature for a few hours. To reheat, place it in a microwave for about 15-30 seconds, or warm it in an oven at 350°F for about 10 minutes. Savory herb cornbread muffins stay fresh for a few days at room temperature. If stored properly, they can last up to three days. After that, they may start to lose flavor and texture. Signs of spoilage include a dry or hard texture, as well as an off smell. If you notice any mold, discard the muffins immediately. For the best taste, enjoy them fresh or freeze leftovers. Yes, you can use whole wheat flour. However, it will change the texture and flavor. Whole wheat flour makes the muffins denser and richer. If you want a lighter muffin, mix half whole wheat and half all-purpose flour. This mix keeps some lightness while adding health benefits. When using whole wheat, expect a nuttier taste that pairs well with the herbs. To help muffins rise, make sure your ingredients are at room temperature. Cold buttermilk or eggs can slow the rising process. Also, check that your baking powder is fresh. Old baking powder may not work well, and your muffins may not rise. Mix wet and dry ingredients quickly without overmixing. This keeps the batter light and airy. Absolutely! These muffins are great for meal prep. You can bake them ahead and store them in the fridge. They stay fresh for about a week. For quick reheats, wrap them in foil and heat in the oven. You can also freeze them for longer storage. Just thaw overnight in the fridge before reheating. Enjoy these muffins anytime with minimal effort. In this post, we explored how to make Savory Herb Cornbread Muffins. We covered the key ingredients, tools, and step-by-step instructions. You learned about tips for perfect texture and flavor options. I also shared how to store muffins and answered common questions. Now, you can bake delicious muffins at home! Customize them to your taste and enjoy the process. Happy baking!

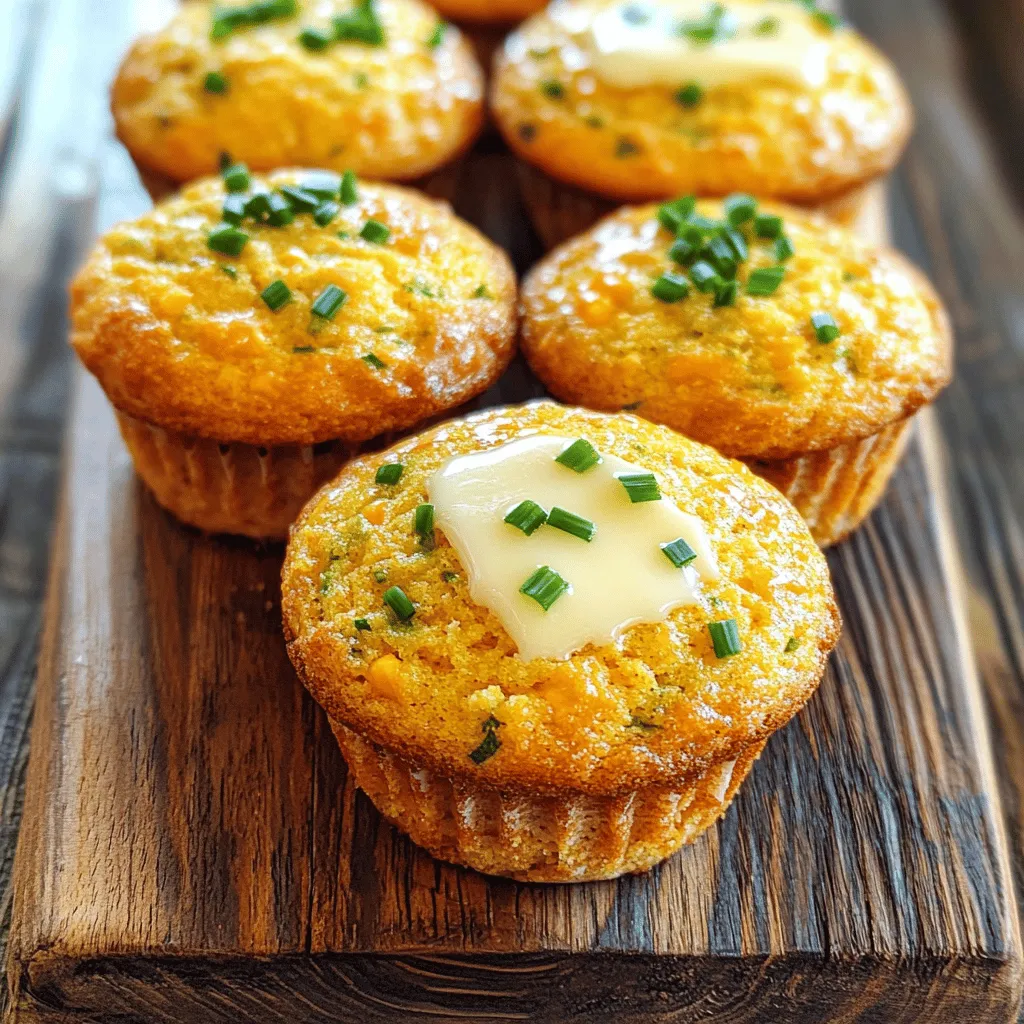
Savory Herb Cornbread Muffins Irresistible Recipe Guide

If you crave a warm, buttery bite of cornbread, then you’ll love my Savory Herb Cornbread Muffins! This simple recipe

For Mango Salsa Chicken, you need fresh and vibrant ingredients. Here’s what you'll need: - 4 boneless, skinless chicken breasts - 1 ripe mango, diced - 1/2 red onion, finely chopped - 1 red bell pepper, diced - 1 jalapeño, seeded and minced - 1/4 cup fresh cilantro, chopped - Juice of 2 limes - 1 tablespoon olive oil - Salt and pepper to taste - 1 teaspoon cumin - 1 avocado, sliced (optional, for serving) These ingredients work together to create a dish that is both tasty and refreshing. The chicken is juicy, while the mango salsa adds a sweet and spicy kick. I love how the lime juice brightens all the flavors, making every bite a delight. You can find the full recipe [here](#). When you gather these ingredients, you're on your way to a meal that's sure to impress. - Seasoning the Chicken Breasts Start by mixing salt, pepper, and cumin in a small bowl. This mix gives the chicken a nice flavor. Rub this seasoning evenly on both sides of the chicken breasts. This step helps bring out the chicken’s taste. - Preheating the Grill Preheat your grill or grill pan over medium-high heat. This heat level is perfect for cooking the chicken evenly. Once the grill is hot, brush it with olive oil to stop the chicken from sticking. - Combining Salsa Ingredients In a medium bowl, combine diced mango, chopped red onion, diced red bell pepper, minced jalapeño, and chopped cilantro. Each ingredient adds its own unique flavor. Mixing them creates a bright and fresh salsa. - Adding Lime Juice Squeeze the juice from two limes over the salsa mixture. This adds a nice zing and helps balance the sweetness of the mango. Stir gently to blend the flavors. Set the salsa aside and let it rest while you cook the chicken. - Grilling Times and Techniques Place the seasoned chicken breasts on the hot grill. Grill each side for about 6-7 minutes. This timing helps achieve a juicy interior while getting nice grill marks. - Checking Doneness Use a meat thermometer to check the chicken's internal temperature. It should reach 165°F (75°C). If you don’t have a thermometer, cut into a breast. The meat should be white and juices should run clear. Once cooked, let the chicken rest for a few minutes. Then, serve it with the mango salsa on top. This recipe makes a flavorful, fresh dish that is sure to impress. For the full recipe, check out the details above. Recommended Seasonings For mango salsa chicken, I love using simple and fresh flavors. You should season your chicken with: - Salt - Pepper - Cumin These spices give the chicken a warm, earthy taste. You can also try adding garlic powder or chili powder for more depth. Marinating Tips To really boost the flavor, marinate the chicken. Mix lime juice, olive oil, and seasonings in a bowl. Let the chicken sit in this mixture for at least 30 minutes. This step helps the chicken soak up all the tasty goodness. Grill Temperature Guidance Grill the chicken over medium-high heat. The grill should be around 375°F to 450°F for the best results. This temperature helps get those beautiful grill marks and a nice sear. Avoiding Sticking To prevent the chicken from sticking, brush your grill with olive oil. You can also oil the chicken lightly before placing it on the grill. Both steps help ensure easy flipping and clean removal. Pairing with Sides Serve your mango salsa chicken with fresh sides. I recommend: - Rice - Quinoa - Grilled veggies These sides balance the sweetness of the salsa and make your meal complete. Garnishing Ideas For a lovely presentation, add fresh cilantro on top. You can also include avocado slices for creaminess. This not only looks nice but adds even more flavor. Check out the Full Recipe for more tips! {{image_2}} You can easily swap chicken for other proteins. Tofu is a great choice for a plant-based meal. It soaks up the salsa flavors well. Cut the tofu into thick slices. Press it gently to remove extra moisture. Season it like chicken and grill until golden. Shrimp and fish also work nicely. For shrimp, peel and devein them first. Grill them quickly, just a few minutes per side. If using fish, choose a firm type like salmon or cod. Season and grill until it flakes easily with a fork. These options add new flavors and textures. Mango salsa is flexible. You can mix in different fruits for fun twists. Pineapple or peach add sweetness. If you like a tangy kick, try adding kiwi or pomegranate seeds. Adjust spice levels to suit your taste. Add more jalapeño for heat. If you want milder salsa, remove the seeds or use bell pepper instead. You can also mix in diced cucumber for crunch. Experiment until you find your favorite blend. If you don’t have a grill, you can bake or use a slow cooker. For baking, preheat the oven to 400°F (200°C). Place the seasoned chicken in a baking dish. Bake for 20-25 minutes, or until it reaches 165°F (75°C). Using a slow cooker is simple. Place the chicken in with the salsa. Cook on low for 4-6 hours. This method makes the chicken super tender. These methods keep the dish fresh and flavorful. For the full recipe, check the recipe section above. Refrigerator Guidelines After enjoying your Mango Salsa Chicken, store leftovers in an airtight container. This keeps the chicken juicy and the salsa fresh. The chicken can last up to four days in the fridge. Make sure it cools to room temperature before sealing. Freezing Capabilities You can freeze leftover chicken, but the salsa does not freeze well. Wrap the chicken tightly in plastic wrap and then in aluminum foil. It will stay good for up to three months in the freezer. When you're ready to eat, thaw it in the fridge overnight. Best Methods for Reheating To reheat chicken, use the oven or stovetop. Preheat your oven to 350°F (175°C). Place the chicken in a baking dish, cover it with foil, and heat for about 15-20 minutes. On the stovetop, heat a pan over low heat. Add a splash of water to keep it moist and cover it. Maintaining Flavor and Texture To keep the salsa fresh, do not reheat it. Instead, serve it cold on top of the chicken. Adding fresh lime juice can brighten the flavors after reheating. Enjoy your delicious Mango Salsa Chicken just like you made it! For the full recipe, check out the details above. Can I use frozen mango for the salsa? Yes, you can use frozen mango. Just thaw it first. Frozen mango works well if fresh mango is not available. It will still taste great in the salsa. How long does Mango Salsa Chicken last in the fridge? Mango Salsa Chicken lasts up to four days in the fridge. Make sure to store it in an airtight container. This keeps it fresh and safe to eat. Is this dish healthy? Yes, this dish is healthy. It includes lean chicken and fresh veggies. The mango adds vitamins and fiber. This meal is balanced and good for you. How many calories are in Mango Salsa Chicken? Mango Salsa Chicken has about 300 calories per serving. This depends on the size of the chicken breasts. The salsa adds very few extra calories. Gluten-free options This dish is naturally gluten-free. All the ingredients are gluten-free. You can enjoy it without worry if you have a gluten allergy. Dairy-free alternatives Mango Salsa Chicken is dairy-free. You do not need to change any ingredients. If you want creaminess, use avocado slices as a topping. This blog post covered a tasty mango salsa chicken recipe. We explored the best ingredients, step-by-step instructions, and helpful tips. You learned how to enhance flavor, perfect grill marks, and store leftovers. Plus, you found creative variations with different proteins and cooking methods. In my view, this dish is versatile and easy to make. It fits many diets, making it a great choice for everyone. Enjoy cooking and sharing this delightful meal!

Mango Salsa Chicken Flavorful and Fresh Grilled Dish

Are you looking for a fresh and vibrant meal that’s both easy and delicious? Mango Salsa Chicken is your answer!

- 1 cup unsalted butter, softened - 3/4 cup brown sugar, packed - 1/2 cup granulated sugar The main ingredients are key to a great cookie. The butter gives richness. Brown sugar adds moisture and a slight chew. Granulated sugar brings sweetness and helps with browning. - 2 large eggs - 2 teaspoons vanilla extract Eggs bind the dough and add fluffiness. Vanilla extract gives a warm, sweet flavor. Together, they enhance the overall taste of your skillet cookie. - 2 1/4 cups all-purpose flour - 1 teaspoon baking soda - 1/2 teaspoon salt - 1 1/2 cups chocolate chips - 1/2 cup chopped walnuts (optional) - Sea salt for sprinkling Flour forms the base of the cookie. Baking soda helps it rise, while salt balances the sweetness. Chocolate chips are the star, making each bite decadent. Walnuts add crunch if you choose to use them. A sprinkle of sea salt at the end boosts all the flavors and makes the cookie extra special. For the full recipe, check out the Chocolate Chip Cookie Skillet. First, you need to preheat your oven to 350°F (175°C). This ensures that your cookie cooks evenly. Next, grab a cast-iron skillet that is between 10 to 12 inches wide. Grease it with non-stick cooking spray or butter. This step helps to avoid sticking. In a large mixing bowl, cream together 1 cup of softened unsalted butter, 3/4 cup of packed brown sugar, and 1/2 cup of granulated sugar. Mix until it is smooth and creamy. Then, add 2 large eggs, one at a time. Make sure to mix well after each addition. Finally, stir in 2 teaspoons of vanilla extract for flavor. In a separate bowl, whisk together 2 1/4 cups of all-purpose flour, 1 teaspoon of baking soda, and 1/2 teaspoon of salt. This mix is your dry ingredients. Gradually add this to your wet mixture. Stir until just combined. Do not overmix, or your cookie may turn out tough. Now, fold in 1 1/2 cups of chocolate chips and, if you like, 1/2 cup of chopped walnuts. This adds a nice crunch. Transfer the dough into your prepared skillet and spread it out evenly. Bake in the preheated oven for 25 to 30 minutes. Look for golden edges and a slightly soft center. Once done, sprinkle a pinch of sea salt over the top while it is still warm. Enjoy your delicious Chocolate Chip Cookie Skillet! If you want the full recipe, just check it out. To get the best texture, avoid overmixing the dough. Mix just until you see no dry flour. If you mix too much, the cookies can turn out tough. Also, monitor the baking time closely. Every oven is different. Check the skillet cookie at 25 minutes. You want the edges to be golden brown and the center to stay soft. You can enhance the flavor by experimenting with different types of chocolate. Try dark, milk, or white chocolate chips for a unique taste. Each type gives a different vibe to your cookie. You can also add extracts like almond for a sweet twist. Just a little bit can make a big difference! For a special touch, serve your cookie warm with ice cream or whipped cream. The heat from the cookie melts the ice cream, creating a yummy combo. You can also drizzle chocolate sauce on top for added indulgence. It makes the dish even more tempting! For more details, check out the Full Recipe. {{image_2}} You can switch up flavors in your cookie skillet. Try using different nuts like pecans or macadamia nuts. These nuts add a nice crunch and unique taste. You can also mix in dried fruits such as cranberries or raisins. This adds sweetness and a chewy texture to your treat. If you need a gluten-free option, use almond or oat flour instead of regular flour. This keeps the cookie delicious while making it safe for those with gluten allergies. For a vegan version, substitute butter with coconut oil and eggs with flaxseed meal. This way, everyone can enjoy this tasty dessert. Serving ideas can make this dish stand out. You can top your cookie skillet with whipped cream or a scoop of gelato. This adds creaminess and enhances the rich chocolate flavor. For a lighter touch, pair your cookie with fresh fruits like berries or sliced bananas. These options balance the sweetness and make your dessert feel more refreshing. For the complete recipe, check the Full Recipe. To keep your Chocolate Chip Cookie Skillet fresh, store it in an airtight container. It will stay good at room temperature for up to 3 days. This way, you can enjoy a warm slice whenever you want! For longer storage, you can refrigerate the skillet cookie. It stays fresh for 5-7 days in the fridge. If you want to keep it even longer, freeze it for up to 3 months. When you're ready to eat it, simply reheat in the microwave or oven. This keeps the cookie warm and soft, just like when it was fresh out of the oven. Happy baking! It takes about 15 minutes to prep. The total time is 45 minutes. Yes, you can prepare the dough first. Just refrigerate it until ready to bake. You can use chocolate chunks, cocoa nibs, or butterscotch chips as good choices. Yes, you can use margarine. It may change the flavor and texture a bit. This blog post has covered how to make a delicious chocolate chip skillet cookie. We discussed the key ingredients, step-by-step instructions, helpful tips, and tasty variations. Remember, following these steps can help you achieve the perfect cookie. Enjoy serving it warm with ice cream or trying different flavors. Your cookie adventure starts now!

Chocolate Chip Cookie Skillet Easy and Delicious Treat

If you’re craving a warm, gooey dessert, look no further! This Chocolate Chip Cookie Skillet combines the best of a

For these tasty tacos, you need: - 1 lb large shrimp, peeled and deveined - 4 tablespoons unsalted butter - 4 cloves garlic, minced - 1 teaspoon paprika - 1 teaspoon cumin - 1 tablespoon lime juice - Salt and pepper to taste - 8 small corn or flour tortillas - 1 cup shredded cabbage - 1 avocado, sliced - Fresh cilantro, for garnish - Lime wedges, for serving These main ingredients blend well to create a rich flavor. The shrimp absorbs the savory garlic and butter, giving a lovely taste. You can change these tacos to fit your taste. Try adding: - Diced tomatoes - Sliced jalapeños - Sour cream or Greek yogurt - Shredded cheese - Hot sauce Feel free to mix and match these options. They can add a fun twist to your meal. These tacos are packed with good nutrients. Here’s a quick look: - Calories: 450 per serving - Protein: 30g - Carbohydrates: 40g - Fat: 20g This meal gives you a nice balance of protein and healthy fats. Enjoying these tacos means you get a delicious meal without sacrificing nutrition. For the full recipe, check out the details in the recipe section. First, gather your ingredients. You will need shrimp, butter, garlic, and spices. Start by melting the butter in a large skillet over medium heat. Next, add minced garlic to the skillet. Sauté it for about a minute until it smells great. Be careful not to burn the garlic. Then, stir in paprika, cumin, salt, and pepper. Mix them well. It's time to add the shrimp. Cook the shrimp for 2-3 minutes. They should turn pink and opaque. Finally, drizzle lime juice over the shrimp and stir again to mix the flavors. Now, let’s warm the tortillas. You can do this in a dry skillet or over a gas flame. Heat each tortilla for a few seconds on each side. They should be soft and easy to fold. This step adds warmth and flavor to your tacos. As you assemble the tacos, start with a handful of shredded cabbage on each tortilla. Next, add a generous portion of the garlic butter shrimp you just made. Top it off with slices of avocado and fresh cilantro. Serve with lime wedges on the side. The lime adds a nice zing. Enjoy your tasty Garlic Butter Shrimp Tacos! For the full recipe, check the link above. When choosing shrimp, look for large, fresh shrimp. They should smell like the sea, not fishy. If you see a gray color, skip those. Pink or slightly translucent is best. If buying frozen shrimp, check for ice crystals. They may indicate thawing and refreezing. Cook shrimp quickly over medium heat. They need just 2-3 minutes to turn pink and opaque. Avoid overcooking, as they can become tough. Stir occasionally for even cooking. Remove them from heat as soon as they are done. This simple method keeps them juicy. Seasoning adds depth to your shrimp. I use garlic, paprika, and cumin for a great taste. Fresh lime juice brightens the dish. Adjust salt and pepper to your liking. Don’t be afraid to experiment. You can add chili powder for heat or fresh herbs for freshness. These tips will elevate your Garlic Butter Shrimp Tacos. For the complete cooking process, check out the Full Recipe. {{image_2}} You can swap shrimp for other proteins. Chicken works well. Use grilled chicken or shredded rotisserie chicken. Fish is another tasty option. White fish like tilapia or cod will work great in tacos. For a fun twist, try using pork. Ground pork or pulled pork adds a nice flavor. If you like heat, add some spice to your shrimp. You can use red pepper flakes or fresh jalapeños. Mix them in with the garlic and butter. This will give your tacos a nice kick. You can also add hot sauce to the shrimp before serving. It’s a simple way to spice things up. Not a fan of meat? No problem! You can create tasty vegetarian tacos. Use grilled veggies like zucchini, bell peppers, or mushrooms. You can also try black beans or chickpeas for protein. Another great option is tofu. Marinate it in garlic butter for flavor. Each of these choices makes a filling and delicious taco. For the full recipe, check out the link and start cooking! After enjoying your tacos, you may have shrimp left. Store the shrimp in an airtight container. Keep it in the fridge. Use the leftovers within two days for the best taste. If you want to keep it longer, freeze the shrimp. Place it in a freezer-safe bag and remove air. You can store it in the freezer for up to three months. When you are ready to eat your leftover shrimp, it's easy to reheat. You can use a skillet over medium heat. Add a bit of butter to keep it moist. Heat the shrimp for about three to five minutes. Stir occasionally until it is warm. If you prefer, you can microwave it too. Use a microwave-safe dish and cover it. Heat for 30 seconds at a time until warm. For tortillas, keep them fresh by storing them in a sealed bag. A zip-top bag works well. You can also wrap them in foil. Store them in the fridge if you won’t use them soon. This helps keep them soft. If you have leftover tortillas after a few days, you can freeze them. Just separate them with parchment paper. Thaw them in the fridge overnight before use. Yes, you can use frozen shrimp. Just make sure to thaw them first. To do this, place them in cold water for about 15-20 minutes. Once thawed, pat them dry with a paper towel. This helps the shrimp sear nicely. Using frozen shrimp is convenient and saves time. Many toppings enhance these tacos. Here are some great choices: - Shredded cabbage adds crunch. - Sliced avocado gives creaminess. - Fresh cilantro adds a nice herbal note. - Diced tomatoes or salsa adds freshness. - A squeeze of lime brightens the flavors. Mix and match to find what you like best! To make these tacos healthier, consider these tips: - Use whole wheat tortillas instead of regular ones. - Add more veggies, like bell peppers or corn. - Reduce the butter to cut down on fat. - Swap avocado for a light drizzle of yogurt. These small changes can make a big difference. For the complete cooking guide, check out the Full Recipe for Garlic Butter Shrimp Tacos. You learned about the key ingredients and steps for making garlic butter shrimp tacos. We discussed tips for cooking shrimp and many ways to customize the recipe. You now know how to store leftovers and reheat them. These tacos are easy to prepare and full of flavor. Experiment with different proteins or spices to discover your perfect taco. Enjoy crafting delicious meals you can share with friends and family.

Garlic Butter Shrimp Tacos Flavorful and Easy Meal

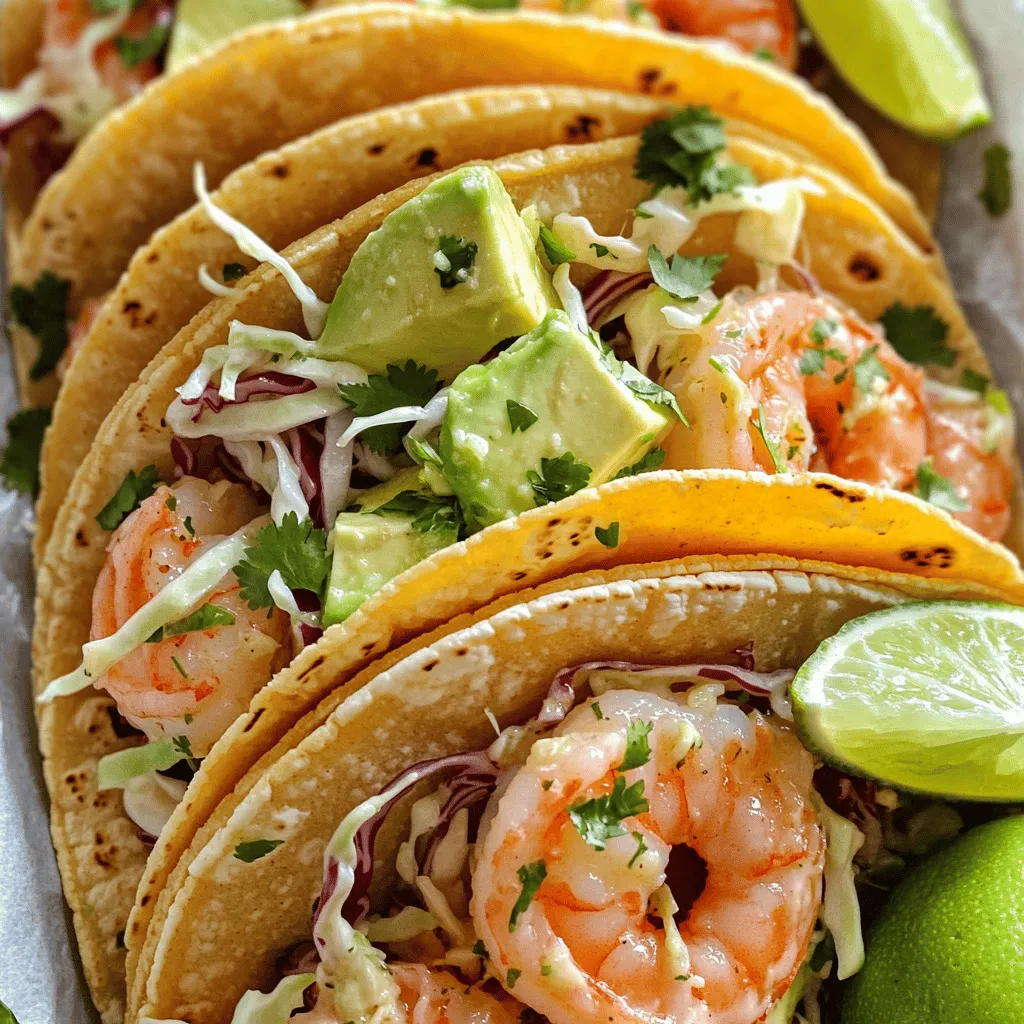
Looking for a tasty dish that’s quick and easy? Garlic Butter Shrimp Tacos might just be your new favorite meal!

To make Caprese Stuffed Avocados, you need: - 2 ripe avocados - 1 cup cherry tomatoes, halved - 1 cup fresh mozzarella balls, drained (bocconcini) - ¼ cup fresh basil leaves, chopped - 2 tablespoons balsamic glaze - 1 tablespoon olive oil - Salt and pepper to taste Choose ripe avocados that yield slightly to gentle pressure. This means they are soft, not mushy. Look for cherry tomatoes that are bright and firm. They should feel heavy for their size. When picking mozzarella balls, choose ones that are fresh and stored in water. Fresh basil should smell strong and have vibrant green leaves. Avoid any that are wilted or brown. Caprese Stuffed Avocados provide many health benefits. Avocados are rich in healthy fats, which are good for your heart. They also have fiber, which helps digestion. Cherry tomatoes are full of vitamins A and C, boosting your immune system. Mozzarella adds protein and calcium for strong bones. Basil is full of antioxidants, which can help reduce inflammation. Together, they create a tasty and healthy meal! To start, you need ripe avocados. Look for ones that yield slightly when pressed. Cut each avocado in half. Be careful when removing the pit. Use a spoon to scoop out a little flesh. This makes space for your filling. Set the avocado halves aside while you prepare the filling. In a medium bowl, take one cup of cherry tomatoes. Cut them in half for better mixing. Add one cup of fresh mozzarella balls. Make sure they are drained well. Then, chop ¼ cup of fresh basil leaves. Toss them all together in the bowl. Drizzle with one tablespoon of olive oil. Season with salt and pepper to taste. Mix gently until everything is well combined. Now it’s time to fill your avocados! Take the tomato and mozzarella mixture from the bowl. Spoon it into the hollowed-out avocado halves. Fill them generously, mounding the mixture on top. Drizzle balsamic glaze over the stuffed avocados for extra flavor. If you like, add some extra basil leaves on top for a nice touch. Your Caprese stuffed avocados are ready to serve! You can check out the Full Recipe for more details. To keep your avocados fresh, use lemon juice. Just squeeze some juice on the cut sides. This simple trick slows down browning. You can also cover the avocados tightly with plastic wrap. Air makes them brown faster, so wrap them well. For the best taste, use ripe avocados. They should feel soft but not mushy. Choose sweet cherry tomatoes for a burst of flavor. Fresh mozzarella adds creaminess, while basil gives a fresh touch. Mix these ingredients gently to keep the textures nice. Taste as you go. Adjust salt and pepper to make the flavors pop. Serve the stuffed avocados on a nice platter. Drizzle extra balsamic glaze around them for a fancy look. You can also add some crusty bread on the side. This makes it a full meal. For a fun twist, try different herbs like mint or cilantro. You can even sprinkle some crushed nuts for added crunch. These ideas make your dish eye-catching and delicious. Find the full recipe to create your own flavorful Caprese stuffed avocados! {{image_2}} If you want to skip cheese, try using avocado cream. Blend ripe avocado with lime juice and a touch of salt. You can also use cashew cheese. Soak raw cashews in water, blend until smooth, and season with garlic powder. These options give you a creamy texture without dairy. Get creative with your fillings! Instead of mozzarella, use feta or goat cheese for a tangy twist. You can also add cooked quinoa for more protein. If you like spice, try adding diced jalapeños or a sprinkle of red pepper flakes. Roasted red peppers or olives make great additions too. To make this dish vegan, just remove the cheese and use avocado cream or a vegan cheese alternative. This recipe is naturally gluten-free, so you don’t need to worry about substitutions here. Feel free to add more veggies like spinach or arugula for added nutrients. You can also serve it with gluten-free bread or crackers for a complete meal. For the full recipe, be sure to check out the Caprese Stuffed Avocados! To keep your Caprese stuffed avocados fresh, wrap them tightly in plastic wrap. Store them in the fridge. This helps slow down browning. It is best to eat them within one day for the best taste. If you have leftover filling, store it in an airtight container. For the best flavor, use fresh ingredients. Store avocados at room temperature until ripe. Once ripe, place them in the fridge. Keep cherry tomatoes in a cool, dark place, not in the fridge. Fresh mozzarella should stay in its brine until you need it. Use fresh basil right away for the best taste. You can eat Caprese stuffed avocados cold or at room temperature. If you want to heat them, be careful. Place them in the oven at a low temperature. Heat them for just a few minutes. This warms up the filling without cooking the avocado too much. Enjoy your meal fresh and flavorful! For the full recipe, check out the details above. Stuffed avocados last about one day in the fridge. After that, they start to brown. To keep them fresh, store them in an airtight container. You can add lemon juice on top before sealing. This helps slow down browning. You can prepare the filling ahead of time. Mix the tomatoes, mozzarella, and basil. However, it’s best to stuff the avocados just before serving. This keeps the avocado creamy and fresh. If you fill them early, they may brown and lose their taste. If you don’t have balsamic glaze, use balsamic vinegar. Just drizzle it over the stuffed avocados. You can also mix olive oil with a bit of honey for a sweet touch. This adds flavor without losing the dish's essence. For a tangy twist, try a lemon vinaigrette instead. Caprese Stuffed Avocados offer a simple, healthy dish that anyone can enjoy. We covered fresh ingredients, easy prep, and tasty assembly. You learned about keeping avocados fresh and flavorful, plus some fun variations. Always remember, you can adapt this recipe to fit any diet. With proper storage, your leftovers will still taste great. Enjoy making this dish several times, sharing it with friends or family. It’s easy and satisfying, perfect for any occasion.

Caprese Stuffed Avocados Fresh and Flavorful Meal

Get ready to elevate your meals with my Caprese Stuffed Avocados! This fresh and flavorful dish combines creamy avocados, mozzarella,

- 4 medium zucchinis, spiralized - 1 ripe avocado, pitted and peeled - 1 cup fresh basil leaves - 2 tablespoons lemon juice - 1/4 cup walnuts (or pine nuts) - 1 garlic clove, minced - 1/4 teaspoon red pepper flakes - 2 tablespoons olive oil - Salt and pepper to taste - Cherry tomatoes, halved - Fresh basil leaves for garnish When I prepare zucchini noodles with pesto, I start with fresh, vibrant ingredients. Zucchini makes a great base. It's low in carbs and full of water, keeping the dish light. I love to spiralize the zucchinis. It gives them a fun shape that looks great on the plate. The avocado adds a creamy texture and healthy fats. I always pick a ripe avocado for the best flavor. Fresh basil leaves are key for a bright taste. They add a lovely green color, too. For a nutty twist, I often use walnuts or pine nuts. They add crunch and depth. A little garlic brings warmth to the pesto. If you like some heat, red pepper flakes work well. I finish with olive oil for richness. I use salt and pepper to taste. Cherry tomatoes add freshness and color. I also add extra basil leaves on top for garnish. Each ingredient plays a role in creating a dish that is both flavorful and healthy. You can find the full recipe to guide you through the steps and ratios for perfecting this dish. 1. Spiralizing the zucchinis: Start by spiralizing the zucchinis. Use a spiralizer or a julienne peeler. This gives you long, noodle-like strands that look fun and appetizing. 2. Salting to draw out moisture: Place the spiralized noodles in a colander. Sprinkle a little salt over them. Let them sit for about 10 minutes. This step helps to draw out extra moisture. After that, pat them dry with a paper towel. This keeps your dish from getting soggy. 1. Blending ingredients in a food processor: In a food processor, combine the ripe avocado, fresh basil leaves, lemon juice, walnuts, and minced garlic. If you like a kick, add red pepper flakes too. Blend all the ingredients until smooth. 2. Adjusting consistency with water: If the pesto feels too thick, add a splash of water. This helps to achieve your desired consistency. Taste it and season with salt and pepper as needed. 1. Sautéing noodles for the right texture: Heat a large skillet over medium heat. Add the zucchini noodles and sauté them for about 2 to 3 minutes. You want them tender but still slightly crisp. 2. Combining noodles with pesto: Remove the skillet from heat. Pour the avocado pesto over the zucchini noodles. Toss gently to coat the noodles evenly with the pesto. Now, you can serve your flavorful zucchini noodles with pesto. You can garnish them with halved cherry tomatoes and fresh basil leaves. This adds a nice pop of color and flavor. For the complete recipe, check out the Full Recipe. To avoid soggy noodles, start by salting the zucchini. After spiralizing, place the noodles in a colander. Sprinkle them lightly with salt and let them sit for about 10 minutes. This draws out excess moisture. Afterward, pat them dry with a paper towel. This step keeps the noodles firm and tasty. For a great spiralizer, I recommend a handheld or countertop model. Some popular brands are Paderno and OXO. They are easy to use and make perfect noodles. Choose one that feels good in your hands. If you want to switch it up, try different nuts in your pesto. Instead of walnuts, use almonds or cashews. They both add a nice crunch. You can also skip the nuts for a nut-free option. For extra flavor, consider adding spinach or arugula to your pesto blend. They add a nice green color and boost nutrition. A little lemon zest also brightens the flavor. This dish pairs well with grilled chicken or shrimp. You can also serve it with crusty bread for a complete meal. For a vegetarian option, add chickpeas for protein. When plating, twist the zucchini noodles into a nest shape. This makes the dish look fancy. Top with halved cherry tomatoes and fresh basil for color. These small touches will impress your guests! {{image_2}} You can switch out the pesto for many other sauces. A creamy alfredo or marinara works great. You can also try a simple garlic and oil mix for a lighter taste. If you're looking for a vegan option for pesto, try blending cashews, spinach, and lemon juice. This gives a fresh twist and keeps it plant-based. Adding proteins can make this dish more filling. You can toss in cooked chicken or shrimp for a hearty meal. If you want a plant-based option, try adding tofu. Just cube the tofu and sauté it until golden. This will add texture and flavor to your zucchini noodles. Using seasonal veggies can elevate your dish. Bell peppers, cherry tomatoes, or spinach can all fit well. You can also use squash or carrots for added crunch. Adapting to seasonal flavors keeps your meal fresh and exciting. Enjoy the variety that each season brings to your plate! For the full recipe, check out Zesty Zucchini Noodles with Avocado Pesto. To keep your zucchini noodles with pesto fresh, store them in an airtight container. This method keeps out air and moisture. Place the noodles in the fridge right after serving. Use them within two days for the best taste. You can also layer the pesto on top to prevent browning. You can freeze pesto separately for longer storage. Pour it into an ice cube tray and freeze. Once solid, transfer the cubes to a freezer bag. For the zucchini noodles, it's best to freeze them uncooked. Lay the noodles flat in a freezer bag, remove air, and seal. They can last up to three months in the freezer. Reheat zucchini noodles gently to avoid mushiness. Use a skillet over low heat for best results. Heat for just a couple of minutes until warm. If they seem dry, add a splash of olive oil. This helps keep the texture nice. You can also briefly microwave them, but keep the time short. To spiralize zucchini, you need a spiralizer. It's simple to use. Just follow these tips: - Cut the ends off each zucchini. - Secure the zucchini in the spiralizer. - Twist to create noodles. - If you don’t have a spiralizer, you can use a julienne peeler. It works well too. Yes, you can prepare this dish ahead of time. Here are some tips: - Spiralize the zucchini and store it in the fridge for a day. - Make the pesto and keep it in an airtight container. - When ready to eat, sauté the noodles and mix in the pesto. Adjusting flavors is easy. If you make it ahead, taste the dish before serving. You may want to add a bit of lemon juice to brighten the flavors. Absolutely! This recipe is great for meal prep. To portion the dish: - Divide the zucchini noodles and pesto into meal containers. - Store them separately to keep the noodles crisp. - This way, you have meals ready for the week. For storage, keep it in the fridge for up to five days. Remember to check the freshness before eating. For more details, check the Full Recipe. This blog post shared a simple recipe for zucchini noodles with avocado pesto. We covered the ingredients, preparation steps, and helpful tips to get perfect results. You can even explore variations like adding proteins or changing sauces. Remember, storing leftovers well helps keep your dish fresh. Enjoy experimenting with this recipe for tasty, healthy meals. With practice, you'll master it quickly!

Zucchini Noodles with Pesto Flavorful and Healthy Dish

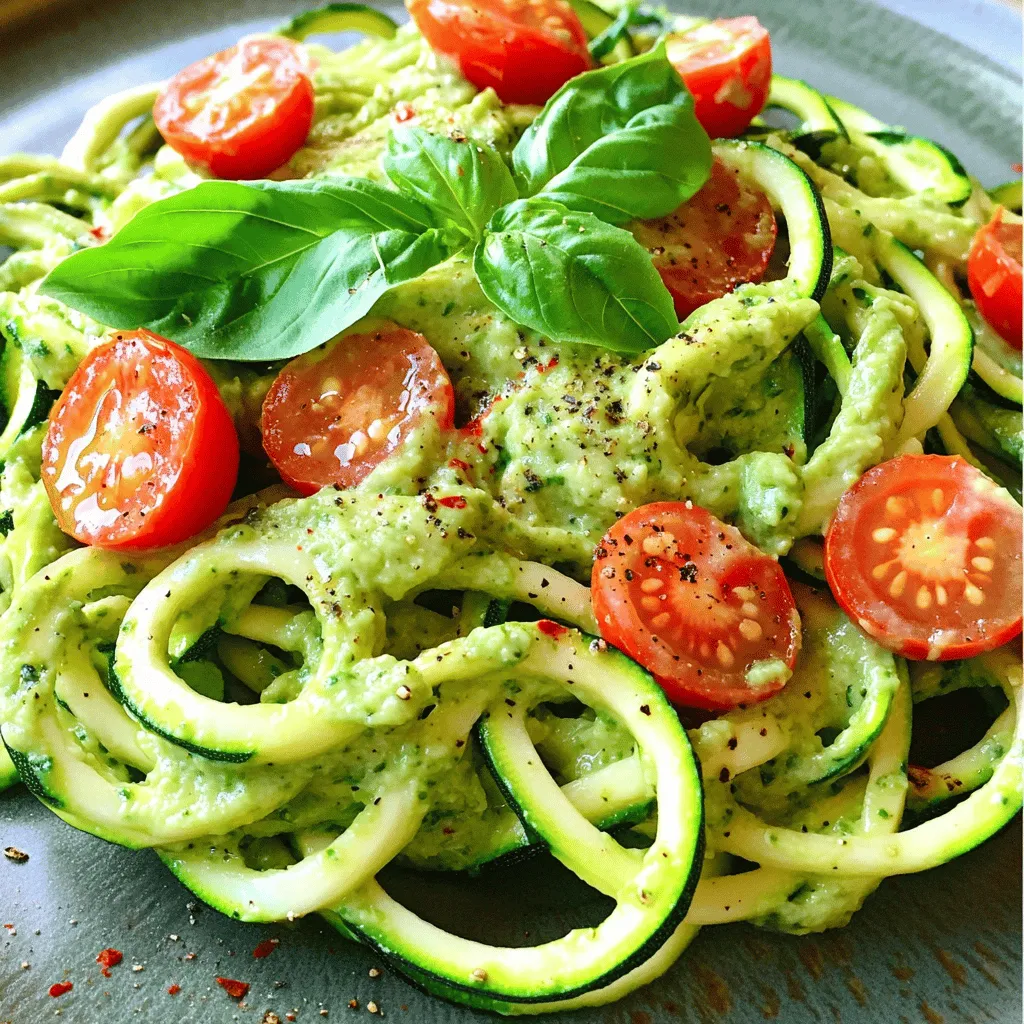
Looking for a fresh, vibrant dish that’s both healthy and easy to make? Zucchini noodles with pesto are your answer!

- Chicken Wings: 2 pounds of fresh or thawed chicken wings. - Baking Powder: 2 tablespoons for crispiness. - Salt: 1 teaspoon to enhance flavor. - Black Pepper: 1 teaspoon for a bit of spice. - Garlic Powder: 1 teaspoon for savory taste. - Onion Powder: 1 teaspoon for depth of flavor. - Smoked Paprika: 1 teaspoon for a smoky kick. - Cayenne Pepper: ½ teaspoon (or adjust for heat). - Olive Oil: 2 tablespoons to help spices stick. - Lime Juice: 1 tablespoon for a fresh zing. - Optional: Fresh herbs like parsley or cilantro for garnish. Getting the right mix of these ingredients is key. The baking powder helps achieve that golden and crispy skin. The spices add layers of flavor that make every bite delicious. If you want to change things up, fresh herbs can add a nice touch. You can find the [Full Recipe] to guide you through the steps. 1. Preheat your oven to 425°F (220°C). 2. Line a large baking sheet with aluminum foil. 3. Place a wire rack on top of the foil. This helps air flow for crispiness. 4. In a large bowl, mix the dry ingredients: - 2 tablespoons baking powder - 1 teaspoon salt - 1 teaspoon black pepper - 1 teaspoon garlic powder - 1 teaspoon onion powder - 1 teaspoon smoked paprika - ½ teaspoon cayenne pepper (adjust for heat preference) 5. Make sure to mix well so all spices blend evenly. 6. Pat the chicken wings dry with paper towels. This step is key for crispiness. 7. Add the wings to the bowl with the spice mix. 8. Drizzle 2 tablespoons of olive oil and 1 tablespoon of lime juice over the wings. 9. Toss the wings until every piece is coated in the spice blend. 1. Arrange the wings in a single layer on the wire rack. 2. Make sure the wings don't touch each other. This helps them cook evenly. 3. Bake in the preheated oven for 40-45 minutes. 4. Flip the wings halfway through cooking for even crispiness. 5. Once they turn golden brown and crispy, take them out of the oven. 6. Let the wings rest for a few minutes. This keeps them crispy. 7. Garnish with fresh herbs if you like. Serve hot with your favorite dip. For a full recipe, check the Crispy Baked Chicken Wings with Zesty Spice Blend. To get your wings super crispy, start by patting them dry. Use paper towels to soak up any moisture. If the wings are wet, they won’t crisp up well. This is a key step! Next, use baking powder wisely. It helps create that crunchy texture we all love. When mixed with the spices, it draws moisture out and makes the skin crisp. Just be sure to mix it evenly with your seasonings for the best result. For dipping sauces, try classic choices like ranch or blue cheese. You can also go for a spicy buffalo sauce if you like heat. These will enhance the flavor of your wings perfectly. Pair your wings with sides for a full meal. Celery sticks and carrot sticks are great for crunch. You can add a simple salad or fries for extra fun. This combo makes for a perfect game day feast or a cozy dinner at home. For the full recipe, check out the section above. {{image_2}} You can play with flavors to make your wings unique. For a sweet touch, try honey and soy sauce. Mix these in a bowl and toss your wings before baking. This adds a nice glaze. You can also use a dry spice rub. Combine different spices like cumin, turmeric, or lemon pepper for a zesty kick. After baking, toss your wings in sauce for more flavor. Classic choices include buffalo sauce, barbecue sauce, or teriyaki sauce. This adds moisture and a burst of taste. You can even mix sauces for a fun twist. Try a buffalo-barbecue blend for something special! Baking chicken wings gives a crispy texture while keeping them healthier. You can also fry or air fry them. Frying gives a crunchy texture but adds more fat. Air frying is a great middle ground. It cooks wings quickly and uses less oil. Adjust the cooking time, as air fryers often cook faster than ovens. If your oven runs hot or cold, check the temperature. Ovens can vary, so you might need to adjust by 5 to 10 degrees. Use an oven thermometer for the best results. This helps ensure your wings come out perfectly crispy every time. For the full recipe, check back to the cooking steps provided. To keep your leftover wings fresh, place them in an airtight container. This helps prevent sogginess. You can refrigerate them for up to three days. If you want to save them for longer, freezing is a great option. Place them in a freezer-safe bag. Remove as much air as possible. Frozen wings can last up to three months. To re-crisp your wings, use the oven. Preheat it to 400°F (200°C). Place the wings on a baking sheet. Bake for about 10-15 minutes. This will make them crispy again. You can also use a microwave, but it may change the texture. To keep some crispiness, place a paper towel on the plate. Heat them for short intervals, about 30 seconds at a time. Check them often, so they don't overcook. Wings can turn out soggy for several reasons. Here are some common mistakes to avoid: - Not drying the wings: Moisture prevents crispiness. Always pat the wings dry with paper towels. - Too much oil: Using too much oil can make wings greasy. Stick to the recipe for the right amount. - Overcrowding the pan: When wings touch, they steam instead of bake. Arrange them in a single layer. - Wrong baking temperature: Make sure your oven is set to 425°F (220°C). This high heat helps achieve that crispy skin. If you follow these tips, you’ll enjoy perfectly crispy wings every time! Yes, you can use frozen wings! Here’s how to prepare them: - Thawing: Always thaw wings in the fridge overnight. This keeps them safe and helps them cook evenly. - Cooking adjustments: If wings are still a bit frozen, add 5 to 10 extra minutes to the baking time. Just make sure they reach an internal temperature of 165°F (75°C). - Drying: After thawing, pat the wings dry. This step is still key for crispiness. So, feel free to grab those frozen wings and enjoy! A variety of sauces can enhance your baked wings. Here are some popular choices: - Buffalo Sauce: This classic adds a spicy kick. Mix hot sauce with melted butter for a simple recipe. - Ranch Dressing: Creamy and cool, ranch is a fan favorite. You can buy it or make your own using yogurt, herbs, and spices. - BBQ Sauce: Sweet and tangy, BBQ sauce is great for a different flavor. Try making a homemade version with ketchup, brown sugar, and vinegar. - Honey Mustard: This mix of sweet and tangy is easy to whip up. Just blend honey with mustard to taste. Explore these sauces to find your favorite pairing with crispy baked chicken wings! This blog post covered everything you need to make perfect baked chicken wings. We discussed the important ingredients and seasoning, simple steps to prepare and cook them, and helpful tips for achieving that perfect crunch. We also explored various flavor options, side dishes, and how to store leftovers properly. In the end, enjoying great wings is all about flavor and crispiness. With these guidelines, you can make delicious wings every time. Now, it's your turn to try them out!

Crispy Baked Chicken Wings Simple and Flavorful Recipe

Looking for the perfect wings that are crispy and packed with flavor? You’ve found the right recipe! With simple ingredients

For a delightful Peach Cobbler Dump Cake, gather these fresh ingredients: - 4 cups fresh peaches (or canned peaches, drained) - 1 cup granulated sugar - 1 teaspoon vanilla extract - 1 teaspoon cinnamon Fresh peaches bring a sweet and juicy flavor to this dish. If you choose canned peaches, make sure to drain them well. The sugar enhances the natural sweetness of the peaches. The vanilla extract adds a warm aroma, while the cinnamon gives it a cozy touch. Next, you will need these pantry staples: - 1 box yellow cake mix (about 15.25 oz) - 1 cup unsalted butter, melted - 1 cup chopped pecans or walnuts (optional) The yellow cake mix acts as the base for your cobbler, creating a soft and fluffy texture. Melting the butter helps it soak into the cake mix. Adding chopped nuts is optional, but they can bring a nice crunch. To serve your Peach Cobbler Dump Cake, try these options: - Vanilla ice cream or whipped cream for serving Serving this warm dessert with vanilla ice cream or whipped cream creates a perfect contrast. The creaminess complements the sweet peaches, making each bite a treat. For the full recipe, check out the detailed cooking steps! - Preheat oven to 350°F (175°C). - Grease a 9x13-inch baking dish with butter or non-stick spray. - In a large bowl, mix together 4 cups of sliced peaches, 1 cup of sugar, 1 teaspoon of vanilla, and 1 teaspoon of cinnamon. Make sure the peaches are well-coated. - Spread the peach mixture evenly in the bottom of the baking dish. - Sprinkle 1 box of yellow cake mix evenly over the peaches. - Drizzle 1 cup of melted butter evenly over the cake mix. It doesn’t need to cover fully. - If you like nuts, sprinkle 1 cup of chopped pecans or walnuts on top. - Bake for 45-50 minutes. The top should be golden brown and bubbly. Use a toothpick to check; it should come out clean. - Let it cool for a few minutes before serving. For the complete recipe, refer to the Full Recipe section. To achieve a golden brown crust, keep these tips in mind: - Bake the dump cake for the full time. Check it at 45 minutes, but don’t rush it. - Make sure the melted butter is evenly drizzled. This helps the top crisp. Using fresh peaches gives the best flavor and texture. Their juices blend well with the cake. If you use canned peaches, drain them well to avoid extra moisture. This keeps the cake from getting soggy. Adding spices can take your dump cake to the next level. Cinnamon adds warmth, while nutmeg gives a cozy touch. You can also try almond or vanilla extract for a richer flavor. Pair your peach cobbler dump cake with ice cream. Vanilla ice cream is classic. Chocolate ice cream adds a fun twist, while cinnamon ice cream enhances the spice notes. How you present your dump cake matters. Serve it warm, topped with a scoop of vanilla ice cream. A dollop of whipped cream also works great. Garnish with a slice of peach or a sprig of mint for a fresh look. For sides, consider serving it with a light salad. A refreshing green salad balances the sweetness of the cake. You can also serve it with a glass of sweet tea for a delightful treat. {{image_2}} You can switch out peaches for other fruits. Try cherries, blueberries, or apples. Each fruit adds a unique flavor. Seasonal fruits like strawberries or plums taste great too. This gives you a fresh twist each time. If you want a lower sugar dessert, use less sugar or a sugar substitute. Applesauce can replace some sugar too. For gluten-free options, look for a gluten-free cake mix. It still tastes great and works well in this recipe. For a fun twist, add chocolate or caramel sauce. Drizzle it over the top before baking. You could also layer the cake with whipped cream or pudding. This makes it a layered dessert, adding more flavor and fun! To keep your Peach Cobbler Dump Cake fresh, start by placing it in the refrigerator. Use an airtight container or cover it with plastic wrap. Make sure it cools completely first. This will prevent moisture build-up and keep it tasty. If you want to store it for later, freezing is a great option. Cut the cake into pieces and wrap each piece in plastic wrap. Then place them in a freezer-safe bag or container. This helps keep the flavor and texture intact. When it’s time to enjoy your leftovers, reheating is simple. The best method is to use the oven. Preheat your oven to 350°F (175°C). Place the cake in an oven-safe dish and cover it with foil. Heat it for about 15 to 20 minutes. This makes sure it warms evenly without drying out. You can also use the microwave for quick reheating. Heat a slice for about 30 seconds to 1 minute, checking to make sure it's warm but not too hot. In the refrigerator, your cake will stay good for about 3 to 4 days. If you freeze it, it can last for up to 3 months. Just remember to wrap it well to prevent freezer burn. When you’re ready to eat it, thaw it overnight in the fridge before reheating. For the best flavor and texture, try to eat it within these time frames. Enjoy every bite of your delightful dessert! Yes, you can use frozen peaches. Just thaw them first. Drain any excess water before mixing. This keeps your dump cake from becoming too watery. The flavor will still be great! Frozen peaches often work well, especially when fresh ones aren't in season. For a tasty twist, try these toppings: - Whipped cream for extra creaminess - Vanilla ice cream for a cold treat - Chopped nuts for crunch - Fresh mint leaves for a pop of color These toppings add flavor and make your dessert look fancy! You can prepare it one day ahead. Mix the peach filling and put it in the baking dish. Cover with plastic wrap and store in the fridge. Wait to add the cake mix and butter until you're ready to bake. This keeps everything fresh. Bake it just before serving for the best taste! This post covered how to make a delicious Peach Cobbler Dump Cake. We discussed fresh ingredients, pantry staples, and serving ideas. I shared step-by-step baking instructions and useful tips for perfect texture and flavor. You learned how to store and reheat your cake, plus variations and substitutions for customization. Try out these methods and enjoy sweet servings of joy. Bake, taste, and delight in this easy treat!

Peach Cobbler Dump Cake Delicious and Easy Dessert

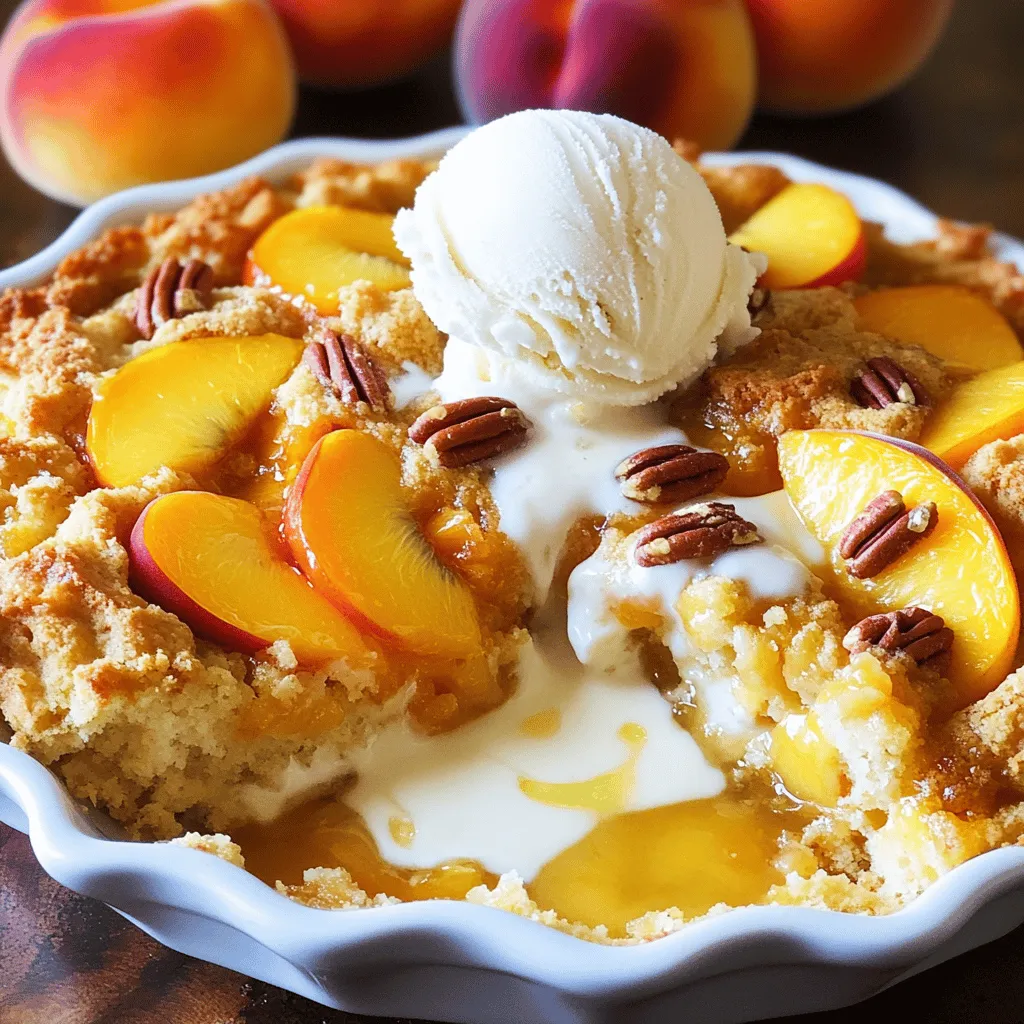
Are you ready to indulge in a warm, fruity treat that’s super easy to make? My Peach Cobbler Dump Cake

Here is what you need to make Vegan Quinoa Stuffed Peppers: - 4 large bell peppers (any color) - 1 cup quinoa, rinsed - 2 cups vegetable broth - 1 can (15 oz) black beans, rinsed and drained - 1 cup corn (fresh or frozen) - 1 medium red onion, diced - 2 cloves garlic, minced - 1 teaspoon cumin - 1 teaspoon smoked paprika - 1 teaspoon chili powder - Salt and pepper to taste - 1 cup diced tomatoes (fresh or canned) - 2 tablespoons fresh cilantro, chopped (for garnish) - Lime wedges (for serving) This list makes a colorful and tasty dish. Each ingredient adds flavor and nutrition. Quinoa serves as a great base, packing protein. Black beans add extra fiber and texture. The spices give a warm kick, while the bell peppers hold it all together. You can find the full recipe at the start of this article. Don't forget to gather everything before you start cooking! - Preheat the oven to 375°F (190°C). - Cut the tops off the bell peppers and remove the seeds and membranes. This makes room for the tasty filling. You can choose any color of bell pepper you like. They all add a nice touch. - Combine rinsed quinoa and vegetable broth in a saucepan. Rinsing helps remove any bitter taste. - Bring to a boil and then simmer until liquid is absorbed. This usually takes about 15 minutes. The quinoa should fluff up nicely when done. - Sauté red onion until translucent; add garlic. This step adds a lot of flavor. - Mix in the cooked quinoa, beans, corn, tomatoes, and spices. Stir well to combine everything. You’ll see how colorful and inviting this mixture looks. - Spoon the quinoa mixture into each pepper and pack gently. Make sure to fill them well. - Cover with foil and bake. This keeps the peppers moist while they cook. - Bake for 30 minutes, then uncover and bake for an additional 10-15 minutes. The peppers should be slightly soft and have a bit of char. This gives them a nice flavor. For the complete recipe, check the [Full Recipe]. This dish is not only easy to make but also full of nutrients and flavor. - Rinse quinoa to remove bitterness. This simple step enhances its flavor. - Use a mix of fresh and canned ingredients for the best taste. Fresh veggies add crunch, while canned beans save time. - Pair your stuffed peppers with creamy avocado or a crisp side salad. This balances the meal. - Drizzle with lime juice to add a zesty kick. It brightens the flavors and makes each bite pop. - Serve on a colorful plate to make your meal look vibrant. This adds to the dining experience. - Garnish with extra cilantro and lime wedges. This not only looks good but also gives a fresh aroma. For the complete recipe, check out the Full Recipe section. Enjoy your cooking! {{image_2}} You can boost the protein in your stuffed peppers. Try adding shredded tofu or tempeh for a hearty bite. They soak up the flavors well and add texture. You can also mix in more beans or lentils. This way, you enhance the protein and keep the dish filling. Feel free to swap out some veggies in your recipe. If you want a change, use zucchini, mushrooms, or spinach instead of corn. Each option brings its own taste. You can even replace bell peppers with zucchini boats or eggplant. These alternatives make the dish just as colorful and tasty. Want some heat? Add jalapeños to your filling for a spicy kick. Or, get creative with different spices like curry powder. This can give your dish a unique flavor profile. Don’t be afraid to experiment with seasonings. Adjusting spices can make a simple meal exciting and new. For the full recipe, check out the details above. Store leftovers in an airtight container in the fridge. They taste best when eaten within 3-4 days. This keeps them fresh and safe to enjoy later. You can freeze stuffed peppers individually or in batches. Wrap them well to prevent freezer burn. When you're ready to eat, thaw overnight in the fridge. This makes reheating easier and keeps the flavor. To reheat, the oven works best. Preheat it to 350°F (175°C) and bake until warm. This helps keep the peppers from getting soggy. You can also use the microwave for a quick option. Just remember, the texture may not be the same. For the full recipe, check the details above. Yes, you can prep these stuffed peppers in advance. Just store them in the fridge before baking. This makes meal prep easy and saves time on busy nights. If you want to switch things up, try using rice, couscous, or another grain. Each option gives a different taste and texture but still tastes great. You’ll know they are ready when the peppers are slightly softened and have a light char on them. This adds flavor and makes them extra tasty. Absolutely! Just make sure all your ingredients are certified gluten-free. This way, you can enjoy the dish without worry. Yes, these stuffed peppers are packed with nutrients. They offer protein, fiber, and vitamins, making them a healthy meal choice for everyone. For a complete meal, pair them with a quinoa salad, roasted vegetables, or a fresh green salad. These sides complement the stuffed peppers well and add even more flavor. You learned how to make tasty vegan quinoa stuffed peppers. The main steps include prepping, cooking, and baking the peppers. You can also customize them with different veggies or spices. Storing leftovers is easy, and you can enjoy them later. Remember, these peppers are not just healthy; they are fun to make. I hope you try this recipe and share it with friends!

Vegan Quinoa Stuffed Peppers Flavorful and Nutritious

Are you ready to dive into a deliciously healthy dish? Vegan Quinoa Stuffed Peppers are not just flavorful; they’re packed

- 1 large head of cauliflower, cut into bite-sized florets - 1 cup all-purpose flour (or gluten-free flour) - 1 teaspoon garlic powder - 1 teaspoon paprika - 1/2 teaspoon salt - 1/4 teaspoon black pepper - 1/2 cup water (adjust as needed for batter consistency) - 1/4 cup sriracha sauce (adjust for spice preference) - 2 tablespoons honey (or maple syrup for a vegan option) - 1 tablespoon soy sauce (or tamari for gluten-free) - 1 tablespoon sesame oil - 2 tablespoons chopped green onions (for garnish) - Sesame seeds (for garnish) Using fresh ingredients makes a big difference. For cauliflower, look for firm florets with no browning. This ensures a crisp bite. If you use gluten-free flour, check that it's a 1:1 substitute. Store your flour in a cool, dry place to keep it fresh. When it comes to sriracha, you can adjust the amount based on your spice level. Honey adds sweetness and helps balance the heat. If you're vegan, maple syrup works just as well. Always taste as you go to find your perfect mix. For the best texture, ensure your batter is smooth. It should coat your cauliflower but not be too thick. Enjoy experimenting with these ingredients, and don't forget to check the [Full Recipe] for all the details! 1. Preheating the oven and preparing the baking sheet Start by preheating your oven to 425°F (220°C). This high heat helps make the cauliflower crispy. Line a baking sheet with parchment paper. This will keep the bites from sticking and make cleanup easy. 2. Mixing dry ingredients and creating the batter In a large bowl, mix together the flour, garlic powder, paprika, salt, and black pepper. Make sure all the dry ingredients are well combined. Next, slowly add water to the dry mix. Stir until you have a smooth batter. It should be thick enough to coat the cauliflower but not too runny. 3. Coating the cauliflower florets Take each cauliflower floret and dip it into the batter. Let any extra batter drip off before placing it on the baking sheet. Arrange the florets in a single layer. This helps them cook evenly and get crispy. 1. Baking time and ideal texture Bake the cauliflower for 20-25 minutes. You want them to be golden brown and crispy. Keep an eye on them near the end to avoid overcooking. 2. Tips for achieving crispiness For extra crispiness, make sure the florets are not crowded on the baking sheet. If they are too close, they will steam instead of bake. You can also flip them halfway through baking for even crispiness. 1. Combining and heating the sriracha honey sauce While the cauliflower bakes, prepare the sauce. In a small saucepan, combine sriracha sauce, honey, soy sauce, and sesame oil. Heat it on low, stirring until everything is well mixed and warmed up. 2. Adjustments for spice level and sweetness You can change the spice level by adding more or less sriracha. If you like it sweeter, add a bit more honey. Taste the sauce as you go to find the perfect balance for you. For the complete recipe, check the [Full Recipe]. To get that perfect crispiness, set your oven to 425°F (220°C). This hot temperature helps the cauliflower become golden and crunchy. Make sure to line your baking sheet with parchment paper. It keeps the bites from sticking and helps achieve a nice, even browning. For even coating of the batter, let the excess batter drip off each floret. This way, you won’t have soggy spots. The batter should be thick enough to coat but not too thick. If it doesn't stick, add a little more flour to thicken it. Adjusting the water helps here too. These Sriracha honey cauliflower bites shine with simple dips. Try ranch, blue cheese, or even a yogurt sauce. They also pair well with a fresh salad or crunchy veggies. For a party, serve them on a platter with toothpicks. Guests love finger foods! You can also make mini sliders. Use soft rolls and add a few bites inside. This gives a fun twist and makes them easy to eat. Want to amp up the flavor? Add herbs like cilantro or parsley to the batter. They give a fresh taste that blends well with the sriracha. For garnishing, beyond green onions and sesame seeds, consider using crushed peanuts or cilantro. These add crunch and a burst of flavor. A drizzle of extra honey on top can bring out the sweet notes too. For the full recipe, check out the details linked above. {{image_2}} For a tasty vegan version, swap honey with maple syrup. This keeps the sweet touch. Use gluten-free flour if you need a gluten-free option. It works just as well in the batter. Make sure to check labels for hidden gluten in sauces. Want to mix it up? Try different sauces! Buffalo sauce adds heat, while barbecue sauce gives a sweet twist. You can also add veggies like broccoli or bell peppers for more crunch. For protein, toss in some chickpeas or tofu. They pair well with the sauce and add a nice bite. Planning a party? Double or triple the recipe to serve more guests. To scale the ingredients, just keep the same ratios. This way, you get the same great taste, even in bigger batches. You can also serve them as appetizers or a side dish. Whatever the occasion, these bites will shine. For the complete instructions, check the Full Recipe. To store your Sriracha honey cauliflower bites, let them cool fully. Place the bites in an airtight container. This way, they stay fresh in the fridge. They will last up to three days. If you want them crisp, avoid stacking them. The air needs to flow to keep them crunchy. You can freeze these bites for longer storage. Just place them in a single layer on a baking sheet. Freeze until firm, then transfer to a freezer-safe bag. They can stay frozen for up to three months. To reheat, bake them at 400°F (200°C) for about 10-15 minutes. This helps bring back their crispy texture. You can also use an air fryer for a quicker option. Enjoy these bites again without losing their yummy crunch. For the full recipe, check the main section of this article. To lower the spice, use less sriracha. Start with a tablespoon. You can also add more honey to balance the heat. For a kick, add more sriracha. If you want it hot, try a spicy chili sauce too. This gives you control over the spice level. Yes, you can! Broccoli works well. Brussels sprouts are tasty too. You can even use carrots or zucchini. Just make sure they are cut into similar sizes for even cooking. Each veggie will bring its own flavor. I love pairing these bites with a cool dip like ranch or yogurt. They go great with rice or a fresh salad. For drinks, try iced tea or a light beer. These choices balance the heat and make the meal fun. To find the complete instructions and details, check the [Full Recipe](#). You've learned how to make Sriracha Honey Cauliflower Bites, focusing on key ingredients and baking steps. We covered tips for crispiness, serving ideas, and variations to fit your needs. Remember, freshness matters for ingredients. Think about how you can adjust spice levels or use different veggies. Enjoy creating this dish for any occasion. It's a fun way to explore flavors and impress your friends. For full recipe details, check the link. Happy cooking!

Sriracha Honey Cauliflower Bites Crispy and Flavorful

Looking for a tasty snack that’s both crispy and flavorful? You’ll love these Sriracha Honey Cauliflower Bites! This recipe combines

Older posts
Newer posts
← Previous Page1 … Page56 Page57 Page58 … Page82 Next →

dsad

© 2025 My Saved Recipe • Built with GeneratePress

Our Policies

  • Copyright Policy
  • Cookie Policy
  • GDPR Policy
  • Privacy Policy
  • Disclaimer
  • Terms Of Use

More Information

  • Home
  • About
  • Contact
  • Appetizers
  • Dessert
  • Dinner
  • Drinks
©2025, My Saved Recipe About Back To Top