Skip to content
DisclaimerTerms Of UseGDPR PolicyCookie Policy

My Saved Recipe

  • Home
  • Drinks
  • Appetizers
  • Dinner
  • Dessert
  • About
  • Contact
  • Privacy Policy
DisclaimerTerms Of UseGDPR PolicyCookie Policy

Savannah

For easy pizza rolls, you need a few simple items. Gather these ingredients: - 1 package of refrigerated pizza dough - 1 cup shredded mozzarella cheese - ½ cup pepperoni slices, chopped - ½ cup bell peppers, diced (any color) - ½ cup marinara sauce (for dipping) - 1 teaspoon Italian seasoning - 1 tablespoon olive oil - 1 egg, beaten (for egg wash) - Flour for dusting Using the right tools makes cooking easier. Here are the tools you will need: - Rolling pin - Baking sheet - Parchment paper - Mixing bowl - Pastry brush - Knife or pizza cutter Choosing fresh ingredients improves taste. Here are some quick tips: - Pizza Dough: Look for dough with a clean label. Check the expiration date. - Cheese: Choose block mozzarella for the best flavor. Shred it yourself for freshness. - Pepperoni: Pick a brand with minimal fillers. Look for a nice red color. - Bell Peppers: Select firm peppers with shiny skin. Avoid any soft spots or wrinkles. - Marinara Sauce: Go for sauces with fewer additives. Taste a few for the best flavor. With these ingredients and tools, you'll make tasty pizza rolls in no time. For the full recipe, check out the details provided! First, get your oven ready. Set it to 400°F (200°C). This heat will make your pizza rolls crispy. While the oven heats, prepare your baking sheet. Line it with parchment paper. This way, your rolls won’t stick. Next, you will work with the pizza dough. Take your package of refrigerated dough. Open it and place it on a lightly floured surface. Roll it out until it is about ¼ inch thick. A rolling pin works best for this task. If you don’t have one, you can use a wine bottle! Once you have rolled out the dough, cut it into squares. Each square should be about 3x3 inches. You will need enough squares for all your filling. Now, let’s make the filling. In a bowl, mix together 1 cup of shredded mozzarella cheese, ½ cup of chopped pepperoni, ½ cup of diced bell peppers, and 1 teaspoon of Italian seasoning. Stir it well so all flavors blend together. Take a square of dough and place about one tablespoon of filling in the center. Make sure not to overfill it! Fold the corners of the dough over the filling. Pinch the edges tightly to seal the pocket. This helps keep the yummy filling inside. Arrange each filled pizza roll on your baking sheet. Leave some space between them. This helps them bake evenly. Before baking, brush the tops of the rolls with a beaten egg. This gives them a nice golden color when baked. Place the baking sheet in your preheated oven. Bake for 15 to 20 minutes. Keep an eye on them. They should turn golden brown and puff up nicely. Once done, take them out and let them cool for a few minutes. Serve warm with marinara sauce for dipping. Enjoy your tasty pizza rolls! For the full recipe, check the recipe section. To get that perfect golden brown finish, brush the tops of your pizza rolls with beaten egg. This egg wash helps create a nice, shiny crust. Make sure your oven is fully preheated to 400°F (200°C). Place the rolls on the center rack for even cooking. Keep an eye on them as they bake. The rolls should take about 15 to 20 minutes to reach that golden look. Avoid overcrowding your baking sheet. If the rolls are too close, they may steam instead of bake. This will make them soggy. Make sure to seal the edges well. If they open while baking, the filling will ooze out. Lastly, don't skip the Italian seasoning. It adds a lot of flavor to your rolls. If you're new to cooking, start with simple steps. Roll the dough thin, about a quarter-inch thick. Thin dough puffs up nicely and cooks evenly. Use a sharp knife to cut your squares. Uneven cuts can lead to uneven baking. If you’re unsure about how much filling to use, start with a tablespoon. Too much filling can make sealing hard. Enjoy the process and have fun in the kitchen! {{image_2}} You can change up the filling to match your taste. Some great options include: - Cooked sausage, crumbled - Sliced olives - Sautéed mushrooms - Spinach - Feta cheese Mix and match these ingredients to create your own unique flavor. Just remember to keep the balance of cheese and sauce. If you want a meat-free option, go for a veggie mix. You can try: - Spinach and ricotta - Roasted zucchini and bell peppers - Mushrooms and mozzarella For a vegan twist, skip the cheese. Use vegan cheese or tofu instead. You can also try a mix of herbs for added flavor. For those who like a kick, add some heat. Consider using: - Jalapeños - Hot sauce in the filling If you prefer sweet, try: - Nutella with banana slices - Cinnamon sugar with cream cheese These options let you explore new flavors. Don’t be afraid to experiment! Use the full recipe to inspire your creations. After you enjoy your pizza rolls, cool them down. Place them in an airtight container. This keeps them fresh. You can store them in the fridge for about three days. If you want to keep them longer, freeze them. To reheat pizza rolls, the oven works best. Preheat it to 350°F (175°C). Place the rolls on a baking sheet. Heat them for about 10-15 minutes until they are warm. You can also use a microwave. Heat them for about 30 seconds but they may get soggy. To freeze pizza rolls, first, let them cool completely. Lay them on a baking sheet in a single layer. Freeze them for about an hour. Once frozen, transfer them to a freezer bag. This way, you can enjoy a quick snack anytime! Yes, you can use homemade dough for Easy Pizza Rolls. Making your own dough adds a personal touch. It can taste fresher and more flavorful. Just ensure the dough is easy to roll out and not too sticky. You can follow a simple bread or pizza dough recipe. This way, you control the ingredients and flavors. You can store pizza rolls in the fridge for up to three days. Make sure they cool completely before placing them in an airtight container. This helps keep them fresh and tasty. If you want to enjoy them later, reheat them in an oven or air fryer. This method keeps them crispy. The best dipping sauce for pizza rolls is marinara sauce. It pairs well with the cheesy and savory flavors. You can also try ranch dressing for a creamy twist. If you like heat, a spicy marinara or hot sauce works great too. Feel free to experiment with different sauces to find your favorite! For a full recipe of Easy Pizza Rolls, check out the main article. In this article, I covered essential ingredients, tools, and tips for making pizza rolls. I shared step-by-step instructions for preparation, assembly, and baking. I also highlighted common mistakes and ways to ensure a perfect finish. Remember, experimenting with different fillings can make pizza rolls even more fun. Store any leftovers properly for quick snacks later. Enjoy your cooking and the tasty results!

Easy Pizza Rolls Quick and Flavorful Snack Recipe

Are you craving a snack that’s quick, easy, and packed with flavor? Look no further! In this post, I’ll share

For a tasty Turkey and Pepper Stir Fry, you will need the following: - 1 lb ground turkey - 1 red bell pepper, sliced - 1 green bell pepper, sliced - 1 yellow bell pepper, sliced - 1 small onion, thinly sliced - 2 cloves garlic, minced - 1 inch fresh ginger, grated - 3 tablespoons soy sauce - 1 tablespoon sesame oil - 1 tablespoon hoisin sauce - 1 tablespoon cornstarch - 2 tablespoons water - Salt and pepper to taste - Cooked rice or noodles, for serving - Sesame seeds and green onions for garnish These ingredients form the base for a quick and healthy meal. Each item plays a key role in creating layers of flavor. Ground turkey gives you a lean protein, while the bell peppers add crunch and sweetness. The onion, garlic, and ginger give depth and warmth. The sauces combine to create a rich, savory taste. You can serve this stir fry over rice or noodles. This dish is not only easy to make, but it is also full of fresh flavors. You can find the Full Recipe for step-by-step instructions to make this delicious meal! 1. Preheat the skillet: Start by heating your large skillet or wok over medium-high heat. Add 1 tablespoon of sesame oil. This oil gives the dish a nice flavor and helps cook the turkey and veggies well. 2. Prepare the turkey and vegetables: While the skillet heats, slice your bell peppers and onion. Mince the garlic and grate the ginger. You want everything ready to go since stir-frying cooks quickly. 3. Cooking process overview: First, sauté the aromatics like garlic and ginger. Then, brown the turkey. Finally, add the veggies and sauce for a tasty mix. 1. Sautéing vegetables: Once the skillet is hot, toss in the onion, garlic, and ginger. Sauté for about 2 minutes until they smell great. This step builds the base flavor for your stir fry. 2. Browning turkey: Next, add 1 pound of ground turkey. Use a spoon to break it apart. Cook it for 5 to 7 minutes until it turns brown and is fully cooked. This step keeps the turkey juicy and flavorful. 3. Combining sauce with ingredients: After the turkey is brown, add the sliced bell peppers. Sauté them for 3 to 4 minutes until they are tender but still crisp. In a small bowl, mix 3 tablespoons of soy sauce, 1 tablespoon of hoisin sauce, 1 tablespoon of cornstarch, and 2 tablespoons of water. Pour this sauce into the skillet. Stir well to coat everything. Cook for 2 to 3 more minutes until the sauce thickens a bit. You can serve this stir fry over cooked rice or noodles and add sesame seeds and green onions on top. This dish is colorful and full of flavor! For the full recipe, check the earlier section. To avoid dry turkey, cook it quickly. Use medium-high heat to keep it juicy. Break it apart in the pan. Stir it often for even cooking. For crisp vegetables, do not overcook them. Add bell peppers last. Cook them for just a few minutes. They should be bright and crunchy, not mushy. Pair your turkey and pepper stir fry with rice or noodles. They soak up the sauce well. Serve it over a bed of fluffy rice for a filling meal. For garnishes, sprinkle sesame seeds on top. Add some chopped green onions too. These add flavor and a nice look to your dish. For the complete dish, check the Full Recipe. Enjoy your cooking! {{image_2}} You can easily change this dish with different proteins. Instead of ground turkey, try chicken, beef, or tofu. Each option brings its unique taste and texture. Chicken is light, while beef adds depth. Tofu is a great choice for those wanting a plant-based meal. You can also swap out the bell peppers. Use broccoli or snow peas for a new twist. Broccoli adds crunch and color. Snow peas bring a sweet flavor that pairs well with the turkey. Feel free to mix and match your veggies based on what you have! To boost the flavor, add spices like red pepper flakes or a squeeze of lime juice. Red pepper flakes add heat, while lime juice brightens the dish. Both options make every bite exciting. Consider using alternative sauces too. Teriyaki sauce adds a sweet touch, while sweet chili sauce gives a nice balance of sweet and spicy. These changes can really elevate your stir fry. Don't hesitate to experiment and find your favorite flavors. To keep your Turkey and Pepper Stir Fry fresh, use airtight containers. Glass or BPA-free plastic works best. Store your leftovers in the refrigerator for up to three days. If you want to keep them longer, freeze them for up to three months. Make sure to label your containers with the date. This way, you know how long they've been stored. You can reheat your stir fry in two ways: in the microwave or on the stovetop. The microwave is quick and easy. Just put your dish in for about two minutes. Stir it halfway for even heating. For a better texture, use the stovetop. Heat a skillet over medium heat, add a splash of water, and stir the dish for about five minutes. This helps keep the vegetables crisp and tasty. Enjoy your meal again! Can I make this dish ahead of time? Yes, you can make this dish ahead of time. Just cook the stir fry and let it cool. Then, store it in an airtight container. You can keep it in the fridge for up to three days. Before serving, reheat it on the stove or in the microwave until hot. What can I serve with Turkey and Pepper Stir Fry? You can serve this stir fry with cooked rice or noodles. Both options soak up the sauce well and add texture. You can also add a side of steamed broccoli or a fresh salad for a complete meal. How do I adjust the spice level? To adjust the spice level, you can add red pepper flakes to the stir fry. Start with a small pinch and taste as you go. For a milder flavor, skip the flakes or use sweet bell peppers. What type of turkey is best for stir fry? Ground turkey works best for stir fry. It cooks quickly and absorbs flavors well. You can also use turkey breast, cut into thin strips, if you prefer a different texture. Can I use frozen vegetables? Yes, you can use frozen vegetables. They are a time-saver and can work well in stir fry. Just add them directly to the skillet. Cook them a little longer to ensure they heat through and become tender. This blog post covers how to create a tasty Turkey and Pepper Stir Fry. We explored the key ingredients, like ground turkey and colorful bell peppers. I provided step-by-step cooking instructions and essential tips for juicy turkey and crisp veggies. You learned about variations to personalize your dish and storage info for leftovers. In short, this meal is simple to make and fun to enjoy. Give it a try and savor the flavors!

Turkey and Pepper Stir Fry Quick and Easy Recipe

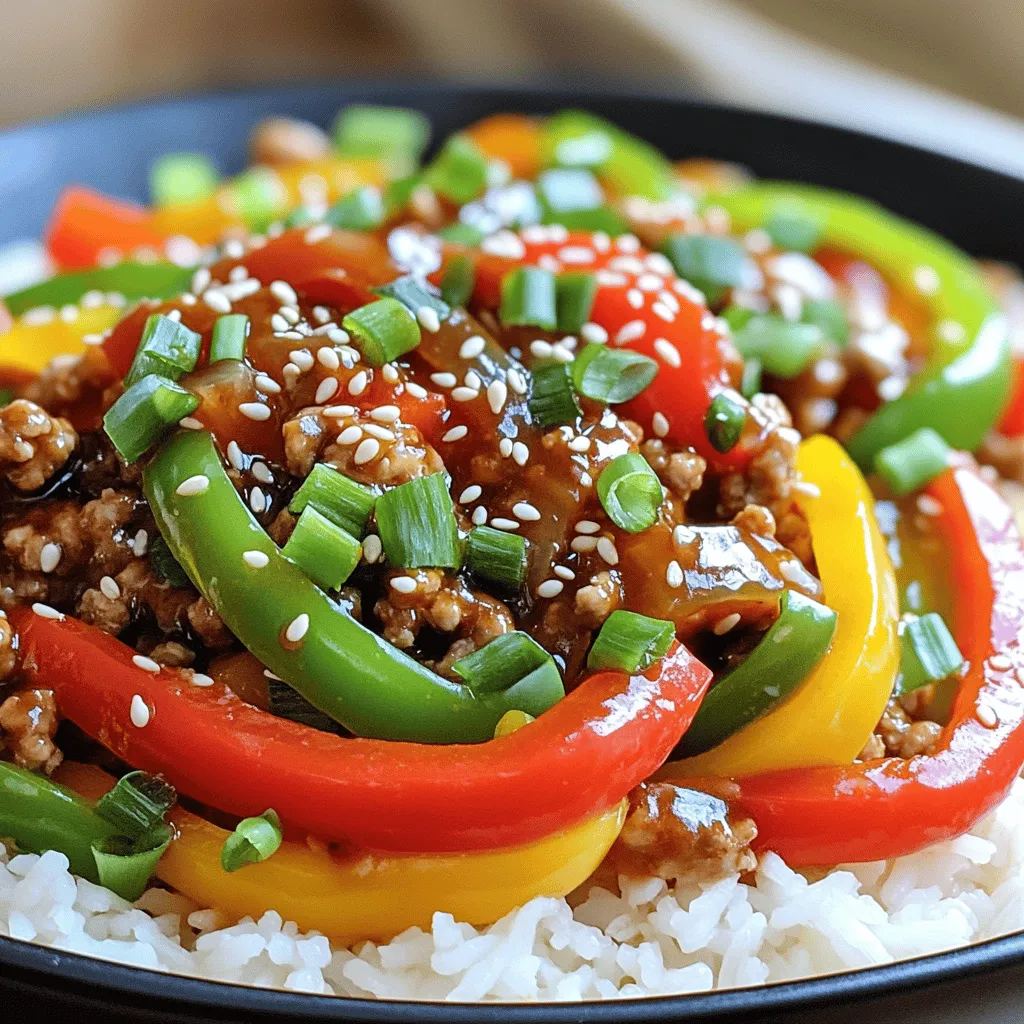
If you’re in need of a quick meal that’s packed with flavor, look no further! My Turkey and Pepper Stir

- 2 cups shredded cooked chicken - 1/2 cup chipotle ranch dressing - 1 cup black beans, drained and rinsed - 1 cup corn kernels (fresh, frozen, or canned) - 1 cup cooked rice (white or brown) - 1 cup shredded cheddar cheese - 1/2 cup diced tomatoes - 1/4 cup chopped fresh cilantro - 4 large flour tortillas - Salt and pepper to taste - Additional toppings (e.g., avocado, jalapeños) The main stars of your burrito are shredded chicken and chipotle ranch dressing. The chicken adds protein and flavor, while the dressing gives it a spicy kick. Together, they create a rich and tasty base. Next, we have the additional ingredients. Black beans provide fiber and texture. Corn kernels add sweetness and color. Rice helps to fill the burrito and makes it hearty. Shredded cheddar cheese brings creaminess, while diced tomatoes add freshness. Fresh cilantro offers a burst of herb flavor. Don't forget the seasoning! A pinch of salt and pepper can elevate your dish. You can also add other toppings like avocado for creaminess or jalapeños for heat. For the full recipe, check out the details above. This combination of ingredients will make your Chipotle Ranch Chicken Burrito a delicious and satisfying meal. 1. Combine chicken and dressing: In a large bowl, mix 2 cups of shredded cooked chicken with 1/2 cup of chipotle ranch dressing. Make sure the chicken gets coated well. 2. Add remaining ingredients: Next, add 1 cup of black beans, 1 cup of corn kernels, and 1 cup of cooked rice to the bowl. Now, toss in 1 cup of shredded cheddar cheese, 1/2 cup of diced tomatoes, and 1/4 cup of chopped cilantro. Season with salt and pepper to taste. Gently stir everything until combined. 1. Warming tortillas in the microwave: Take 4 large flour tortillas and warm them for about 15 seconds in the microwave. This makes them soft and easy to roll. 2. Skillet method: If you prefer, you can warm the tortillas in a skillet. Heat the skillet over medium heat. Place each tortilla in the skillet for about 20-30 seconds on each side until they are pliable. 1. Layering the filling: Lay a warm tortilla flat on a clean surface. Add a generous scoop of your chicken mixture in the center. 2. Folding techniques: Fold the sides of the tortilla inward. Then, roll from the bottom up. Tuck in the filling as you go to create a tight burrito. 3. Repeat this for all the tortillas and filling. If you want extra crispiness, heat a skillet over medium heat. Place the burritos seam side down and cook for 2-3 minutes on each side until golden and slightly crispy. I hope you enjoy making this Chipotle Ranch Chicken Burrito! For the complete recipe, check out the [Full Recipe]. - Drizzle extra chipotle ranch dressing on top for more flavor. - Garnish with fresh cilantro or lime slices for a pop of color. - For a crispy texture, grill the burritos. Cook each side for 2-3 minutes. - You can also bake burritos in the oven at 375°F for about 15 minutes. - Use pre-cooked chicken or store-bought chipotle ranch dressing to save time. - Make a big batch for meal prep. Store extras in the fridge for quick meals. This recipe is easy to follow and full of flavor. You can find the Full Recipe earlier in this article. {{image_2}} You can switch up the main protein in the burrito. Use turkey or beef instead of chicken. Both options add a different flavor. If you want a meatless meal, try tofu. Tofu absorbs flavors well. It will soak up the chipotle ranch dressing nicely. To make the dish more exciting, add spices to the mix. Cumin brings warmth, while paprika adds a sweet touch. You can also try other dressings. A spicy salsa or zesty ranch can change the taste. Experiment with what you like best. If you want to change how you serve this dish, consider burrito bowls. Layer the ingredients in a bowl instead of a wrap. This way, you can enjoy all the flavors without the tortilla. You can also make tacos using the same filling. Just use smaller tortillas for a fun twist. You can store your burritos in the fridge for up to three days. Make sure they cool down first. Place the burritos in an airtight container. This keeps them fresh and prevents them from drying out. For longer storage, you can freeze burritos. Wrap each burrito in plastic wrap. Then, place them in a freezer bag or container. They can last up to three months in the freezer. When you're ready to eat, let them thaw overnight in the fridge. Reheat them in the microwave for about 2-3 minutes. You can also warm them in the oven at 350°F for about 15-20 minutes. To keep your leftovers fresh, use airtight containers. This helps retain moisture and flavor. You can also use parchment paper to wrap each burrito before placing them in a container. This adds an extra layer of protection. If you want, you can separate the filling and tortillas. Store them separately for better freshness. A Chipotle Ranch Chicken Burrito is a tasty wrap filled with shredded chicken and chipotle ranch dressing. It also includes black beans, corn, rice, and cheese. The flavor is rich and smoky, with a hint of spice. This burrito is a crowd-pleaser and perfect for any meal. Yes! You can prepare the filling ahead of time. Store it in the fridge for up to three days. Just warm the filling and tortillas before serving. This saves time when you're ready to eat. To add heat, try these options: - Mix in diced jalapeños. - Use hot chipotle ranch dressing. - Sprinkle red pepper flakes into the filling. These additions will give your burrito a spicy kick. Many fast-casual spots offer burritos like this. Look for places that focus on Mexican or Tex-Mex food. You can often find similar options on their menu. Chain restaurants may also have their own take on this dish. Here are some great sides for your burritos: - Tortilla chips with salsa or guacamole. - A fresh salad with lime dressing. - Mexican rice or refried beans. These sides will enhance your meal and make it more filling. You can easily change your burrito filling. Here are some ideas: - Swap the chicken for turkey, beef, or tofu. - Add different veggies like bell peppers or onions. - Use brown rice or quinoa for a healthier twist. Feel free to get creative with your ingredients! You now know how to make a tasty Chipotle Ranch Chicken Burrito. Start with chicken and Chipotle ranch dressing, adding other ingredients for flavor. Warm your tortillas and layer your filling well. Remember, you can customize ingredients, try different cooking methods, and even prepare ahead of time. Whether you make burritos or bowls, the options are endless. Enjoy your delicious meal with friends or save some for later. Happy cooking!

Chipotle Ranch Chicken Burrito Easy and Flavorful Dish

Are you ready to enjoy a deliciously easy meal? The Chipotle Ranch Chicken Burrito combines juicy chicken with zesty chipotle

For a warm bowl of classic chicken noodle soup, gather these ingredients: - 1 tablespoon olive oil - 1 medium onion, diced - 2 carrots, sliced - 2 celery stalks, sliced - 3 cloves garlic, minced - 8 cups chicken broth - 2 cups cooked chicken, shredded - 1 teaspoon dried thyme - 1 bay leaf - Salt and pepper to taste - 2 cups egg noodles - 1 tablespoon fresh parsley, chopped (for garnish) When you select ingredients, look for fresh and vibrant produce. Here are some tips: - Onions: Choose firm onions with dry, papery skins. Avoid soft spots. - Carrots: Pick bright orange carrots. They should feel crisp and not bend. - Celery: Look for stalks that are firm and have a bright green color. - Garlic: Select heads that feel heavy and firm. Avoid sprouted garlic. - Chicken: Use fresh or high-quality cooked chicken for the best flavor. If you have specific dietary needs, you can make some easy swaps: - Chicken: Use tofu or chickpeas for a vegetarian option. - Noodles: Swap egg noodles for whole wheat or gluten-free noodles. - Broth: Use vegetable broth for a vegetarian soup. - Herbs: Fresh herbs can replace dried ones for a more vibrant taste. Feel free to explore these options to make this soup your own! Check out the Full Recipe for more details. 1. Start with a large pot. Heat the olive oil over medium heat. 2. Add the diced onion, sliced carrots, and sliced celery. Sauté them for about 5-7 minutes. The goal is to soften the veggies and make the onion clear. 3. Next, add the minced garlic. Cook for one more minute. You want that garlic smell to fill the kitchen. 4. Now, pour in the chicken broth. Bring the mix to a boil. 5. When it boils, add the shredded chicken, thyme, bay leaf, salt, and pepper. Turn the heat down to a simmer. Let it cook for about 15 minutes. 6. Stir in the egg noodles. Cook them for another 7-10 minutes. Check that the noodles are soft before serving. 7. Finally, remove the bay leaf. Taste the soup. Add more salt and pepper if you need it. 8. Serve the soup hot. Top it with fresh parsley for a nice touch. Imagine a large pot bubbling with bright veggies. You see the golden olive oil shimmer as it heats. The chopped onions turn clear, and the carrots and celery become tender. Garlic adds its strong scent, making you hungry. When you pour in the broth, the steam rises. You see the chicken and spices mix in, creating a warm blend. The noodles swirl around, soaking up the flavor. Finally, as you add the parsley, the soup looks just right. - Prep Time: 15 minutes - Cooking Time: 25 minutes - Total Time: 40 minutes This soup takes less than an hour from start to finish. It's quick, simple, and perfect for any day. For the full recipe, check the details above and get ready to enjoy a bowl of warmth! To make your chicken noodle soup truly shine, focus on fresh ingredients. Fresh herbs add a burst of flavor. I love using thyme and parsley. They bring warmth and brightness. Cook your veggies well at the start. Sauté them in olive oil until soft. This step builds a strong base for your soup. Adding a bay leaf is crucial. It infuses a subtle depth of flavor. Don’t forget to season as you go. Taste your broth and adjust salt and pepper. A little bit of acid, like lemon juice, can enhance the flavors too. Just a splash at the end brightens everything up. Cooking your noodles just right is key. I recommend adding them in the last 10 minutes of cooking. This keeps them from getting mushy. Use egg noodles for their nice texture. They soak up the broth well. Always check the package for cooking time. Taste them before draining to ensure they are al dente. If you plan to store leftovers, consider cooking the noodles separately. Mix them in when you serve. This keeps them from absorbing too much broth and getting soggy. One common mistake is adding too much salt early on. It’s easy to over-season before tasting. Always wait until the end to adjust salt and pepper. Another mistake is not cooking the vegetables enough. Under-cooked veggies can taste raw and harsh. Make sure to sauté them until tender. Also, don’t skip straining out the bay leaf before serving. It’s not meant to be eaten. Lastly, avoid boiling the soup too hard after adding the noodles. A gentle simmer is best for keeping everything tender. For the full recipe, check out the details above. {{image_2}} You can make chicken noodle soup healthier by swapping some ingredients. Use low-sodium chicken broth instead of regular broth. This helps cut back on salt. You can also add more veggies, like spinach or kale. They boost nutrition and add nice color. Using whole grain egg noodles is another great option. They are higher in fiber. You might also try using skinless chicken breast instead of dark meat. This reduces fat while keeping great flavor. Want to mix things up? Consider adding new ingredients. Sweet corn can add a nice pop of sweetness. You might also try adding peas for color and texture. For a zing, add a splash of lemon juice before serving. Fresh herbs like dill or basil can change the taste too. If you like spice, include some red pepper flakes or hot sauce. These small changes can create a whole new soup experience. You don’t have to stick to the stove. A Crockpot is perfect for making chicken noodle soup. Just add all your ingredients and let it cook on low for 6-8 hours. The flavors blend well over time. An Instant Pot is another great option. It cooks the soup quickly, in about 30 minutes. Just follow the same steps in the recipe. With these methods, you can enjoy a warm bowl of soup with less time and effort. Check out the Full Recipe for details on cooking methods. Storing leftover chicken noodle soup is easy. Use a clean, airtight container. Let the soup cool to room temperature first. This helps prevent moisture buildup. You can keep it in the fridge for up to three days. Make sure to label the container with the date. This way, you know when to eat it. If you want to save the soup for later, freezing is a great option. First, cool the soup completely. Then, pour it into freezer-safe bags or containers. Leave some space at the top for expansion. You can freeze it for up to three months. When you're ready to eat, just thaw it in the fridge overnight. Reheating chicken noodle soup should be simple. Pour the soup into a pot over medium heat. Stir it often to keep it from sticking. If it seems thick, add a little broth or water. You can also reheat individual servings in the microwave. Just cover the bowl to avoid spills. Heat in short intervals, stirring in between. Enjoy the warmth of your homemade soup, just like when you first made it! Yes, you can use rotisserie chicken. It saves time and adds flavor. Just shred the chicken and add it to the soup. This makes your meal even easier. Plus, it gives you a rich taste with less work. This soup lasts about 3 to 4 days in the fridge. Store it in an airtight container. If you want to keep it longer, consider freezing it. Just make sure to cool it first before freezing. Chicken noodle soup is warm and soothing. It can help when you're sick. The broth keeps you hydrated. Chicken provides protein, which helps your body heal. Vegetables add vitamins and minerals. Overall, it’s a great comfort food that nourishes you. For the full recipe, check out the section on ingredients and cooking steps. In this post, we explored making chicken noodle soup. We covered ingredient tips and how to ensure freshness. You now know substitutions for dietary needs. I provided easy steps for cooking and a visual guide. I shared tips to enhance flavor and avoid common mistakes. We also offered healthier variations and storage ideas. Enjoy your soup-making journey! Follow these tips, and you'll have a warm bowl of comfort.

Classic Chicken Noodle Soup Comforting and Simple Meal

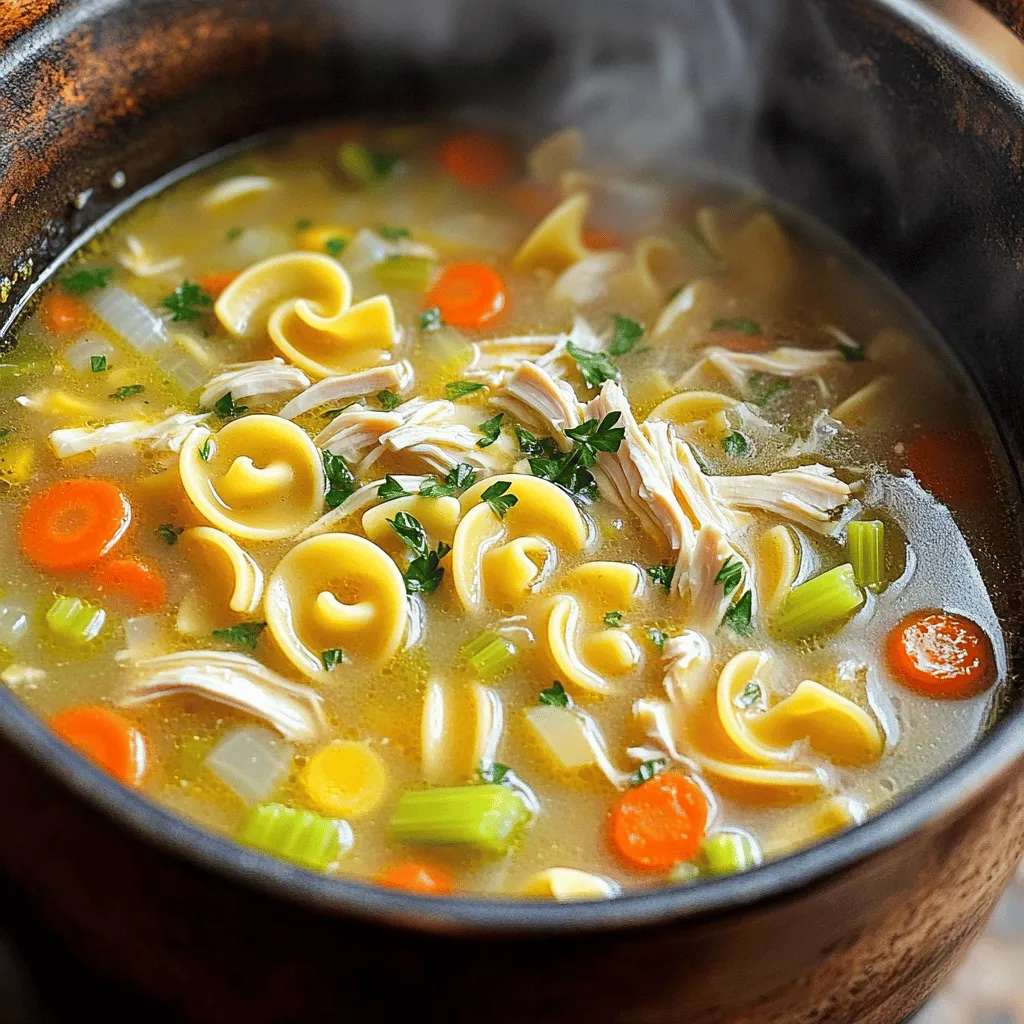
There’s nothing like a warm bowl of Classic Chicken Noodle Soup to lift your spirits. This comforting dish is not

For this Christmas salad, I use 4 cups of mixed greens. A blend of spinach, arugula, and romaine works best. This mix gives the salad a crunchy texture and a bit of peppery flavor. You can adjust the greens to fit your taste, but this mix is delightful. The fun part is adding colorful ingredients. Here’s what I choose: - 1 cup cherry tomatoes, halved - 1 cup cucumber, diced - 1/2 cup pomegranate seeds - 1/2 cup walnuts, toasted and roughly chopped - 1/4 cup feta cheese, crumbled - 1/4 cup red onion, thinly sliced These add-ins bring vibrant colors and flavors. The pomegranate seeds add a sweet burst, while the walnuts give a nice crunch. Feta cheese adds creaminess, and red onion gives a sharp taste. The dressing ties everything together. For the honey mustard dressing, you need: - 1/4 cup olive oil - 2 tablespoons apple cider vinegar - 2 tablespoons honey - 1 tablespoon Dijon mustard - Salt and pepper to taste This dressing is easy to make. The honey makes it sweet, while the mustard gives it a tangy kick. Mixing these ingredients creates a smooth and tasty dressing that coats the salad perfectly. You can find the full recipe linked within this section for more details. To start, gather your ingredients. You will need 4 cups of mixed greens, like spinach, arugula, and romaine. Next, take 1 cup of cherry tomatoes and cut them in half. Dice 1 cup of cucumber, too. Slice 1/4 cup of red onion thinly. In a large salad bowl, mix the greens, tomatoes, cucumber, and red onion. This base gives the salad a fresh, crunchy feel. The colors will brighten up your holiday table. Now, let’s make the honey mustard dressing. In a small bowl, whisk together 1/4 cup of olive oil, 2 tablespoons of apple cider vinegar, 2 tablespoons of honey, and 1 tablespoon of Dijon mustard. Add salt and pepper to taste. Whisk until all ingredients blend well. The dressing should be smooth and creamy. This adds a sweet and tangy flavor to your salad. Pour the honey mustard dressing over the salad base. Toss gently to coat everything evenly. This step is key to ensure every bite is delicious. Next, add 1/2 cup of pomegranate seeds and 1/2 cup of toasted walnuts. These add crunch and color. Sprinkle 1/4 cup of crumbled feta cheese on top for a creamy finish. Serve your Christmas salad right away or chill it for 30 minutes. This lets the flavors blend well. Enjoy your beautiful, festive dish! For the full recipe, check out the details above. To make your Christmas salad shine, use fresh ingredients. Fresh greens and ripe tomatoes give the best taste. Look for bright colors and firm textures. If you buy greens, check for wilting or browning. It’s best to use them within a few days. Store greens in the fridge in a sealed bag. This keeps them crisp. For the pomegranate seeds, choose ones that are plump. They add a juicy burst of flavor to your salad. Whisking the dressing well is key to a great salad. Start with a bowl for your dressing. Add olive oil, vinegar, honey, and mustard. Use a whisk or a fork to mix them together. Whisk until the dressing looks smooth and creamy. This helps to blend the flavors well. If you want a creamier dressing, you can add a bit of Greek yogurt. This adds a nice texture and taste. To wow your guests, focus on how you serve the salad. Use a large, colorful bowl to show off the bright greens and toppings. Arrange the salad layers nicely. Start with the greens, then add the veggies, and top with walnuts and feta. For a festive touch, sprinkle extra pomegranate seeds on top. This makes the salad look vibrant. You can also serve it in individual bowls for a more personal touch. Remember, a beautiful salad is just as important as a tasty one. For the full recipe, check out the Christmas Salad with Honey Mustard. {{image_2}} You can switch up the greens in the Christmas salad. Instead of mixed greens, try kale or baby spinach. These greens add a nice texture and flavor. If you want to go lighter, use shredded cabbage or iceberg lettuce. These alternatives can make your salad crunchy and fresh. Nuts and cheese can change the taste of your salad. Walnuts give a rich flavor, but pecans or almonds work well too. Toast the nuts for extra crunch and flavor. For cheese, feta is great, but goat cheese or blue cheese can add a unique twist. Try different combos to find your favorite mix. Fruits bring sweetness and color to your salad. Pomegranate seeds add a festive touch, but you can use cranberries or mandarin oranges for variety. Sliced apples or pears also work well. For seasonal flavors, add spices like cinnamon or nutmeg to the dressing. These small changes can make your Christmas salad even more delightful. For the full recipe, check out the complete details above. To store your Christmas salad leftovers, place them in an airtight container. Make sure to keep the salad dressing separate. This helps keep the greens crisp. You can refrigerate the container for up to three days. If you mix the salad with the dressing, it may get soggy. To keep your salad ingredients fresh, store them properly. Wrap mixed greens in a damp paper towel. Place them in a plastic bag or container. Keep cucumbers and cherry tomatoes in the fridge, but not in the crisper drawer. Pomegranate seeds and walnuts should stay in airtight containers to prevent them from losing taste. Most salad ingredients taste best when fresh. Mixed greens last about three days. Cherry tomatoes and cucumbers can last up to a week. Pomegranate seeds and walnuts can stay fresh for around two weeks. Feta cheese keeps well for about a week after opening. For the best taste, enjoy your Christmas salad soon after making it. Check out the Full Recipe for more tips on creating this delightful dish! Yes, you can make the honey mustard dressing ahead. Mix it and store it in the fridge. This saves time when you want to serve the salad. The flavors will blend and taste even better after a few hours. Just shake or whisk it again before you pour it on the salad. If you want a swap for feta cheese, try goat cheese or ricotta. Both add creaminess and flavor. You can also use a dairy-free option like a nut cheese. These choices keep the salad tasty and satisfying. Yes, this salad works well for meal prep! Store the salad and dressing separately. Keep the greens fresh by adding them just before serving. This way, they stay crisp and colorful. You can enjoy this salad throughout the week without losing flavor. Try the full recipe for great results! This blog post covered how to make a fresh salad with honey mustard dressing. We started with mixed greens and explored add-ins, toppings, and dressing components. You learned step-by-step instructions for salad prep, dressing mixing, and combining everything for serving. Tips included ways to keep ingredients fresh and stylish presentation ideas. In conclusion, enjoy experimenting with flavors and ingredients. Your creativity can make each salad unique. Remember, fresh ingredients make the best taste. Happy salad-making!

Christmas Salad with Honey Mustard Delightful Recipe

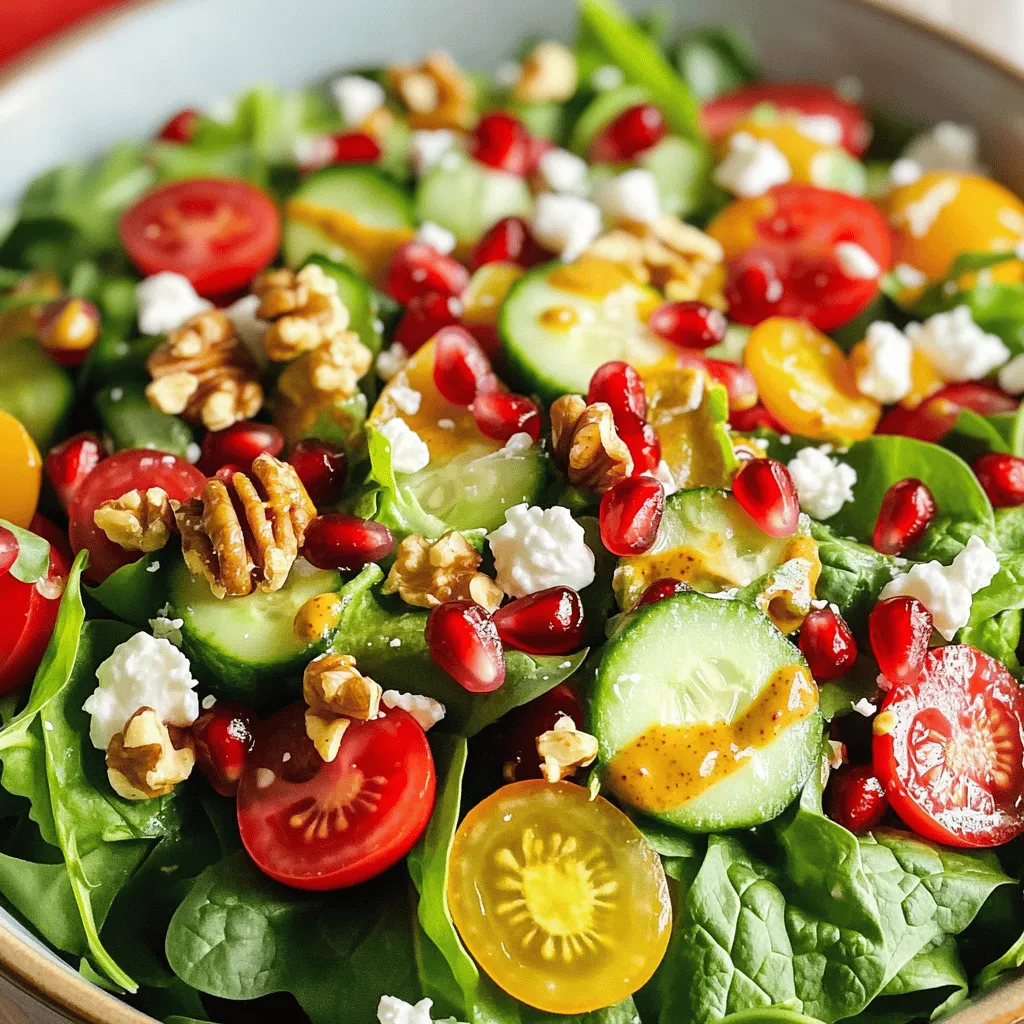
Looking to add a tasty twist to your holiday meals? This Christmas Salad with Honey Mustard is perfect! It combines

To make this Apple Cranberry Pecan Salad, you will need: - 2 medium-sized apples (Granny Smith or Honeycrisp), diced - 1 cup fresh cranberries (or dried if out of season) - 1/2 cup pecans, roughly chopped - 1/4 cup red onion, thinly sliced - 1/4 cup feta cheese, crumbled (optional for creaminess) - 2 cups fresh spinach or mixed greens - 3 tablespoons olive oil - 2 tablespoons apple cider vinegar - 1 tablespoon honey or maple syrup - Salt and pepper to taste You can add a few optional items to enhance your salad. Consider adding: - Sliced avocado for creaminess - Chopped celery for crunch - Dried figs for sweetness - A sprinkle of sunflower seeds for extra protein This salad packs a punch of nutrition. Here are some benefits of the main ingredients: - Apples provide fiber and vitamin C, supporting heart health. - Cranberries are rich in antioxidants, promoting good health. - Pecans add healthy fats and protein for energy. - Spinach is loaded with vitamins A and K, boosting immunity. - Olive oil offers healthy monounsaturated fats, good for your heart. - Honey or maple syrup adds natural sweetness with antioxidants. This combination makes the Apple Cranberry Pecan Salad not just tasty, but also a smart choice for your meals. For the full recipe, check out the section above. First, gather your fresh ingredients. Aim for two medium apples, like Granny Smith or Honeycrisp. Next, grab a cup of fresh cranberries, or dried ones if they’re out of season. You’ll also need half a cup of pecans, chopped roughly, and a quarter cup of red onion, sliced thin. If you want a creamy touch, add a quarter cup of crumbled feta cheese. Don’t forget two cups of fresh spinach or mixed greens. In a large mixing bowl, combine the diced apples, cranberries, chopped pecans, red onion, and feta cheese if you chose to use it. This mix brings together sweet, tart, and crunchy flavors, making it a delight! Now, let’s make the dressing. In a small bowl, whisk together three tablespoons of olive oil. Add two tablespoons of apple cider vinegar for a tangy kick. Then, mix in one tablespoon of honey or maple syrup for sweetness. Finally, sprinkle in salt and pepper to taste. Whisk until it’s smooth and well combined. This dressing will tie all the salad ingredients together. Drizzle the dressing over your apple and cranberry mixture. Gently toss the salad to coat all the ingredients. Be careful not to mash the apples or greens. After everything is mixed, add the fresh spinach or mixed greens. Toss lightly again to combine. This adds a lovely green color and extra nutrients. Taste your salad and adjust the seasoning if needed. If you want it sweeter, add more honey. If it needs more flavor, add a pinch of salt or pepper. Serve immediately for a fresh and crisp taste. You can also chill it for about 15 minutes to let the flavors meld. For a pretty presentation, serve in a large bowl and top with extra pecans and cranberries. Enjoy your Apple Cranberry Pecan Delight! When you choose apples, pick ones that feel firm and smell sweet. Granny Smith and Honeycrisp are great options. For cranberries, look for bright, shiny berries. They should be plump, not shriveled. If fresh cranberries are hard to find, dried cranberries work too. Select pecans that are crunchy and smell nutty. The red onion should be firm and have vibrant color. Fresh spinach or mixed greens should look crisp and green. This salad shines when served fresh. You can present it in a large bowl for sharing. For a festive touch, sprinkle extra pecans and whole cranberries on top. You might also add crumbled feta cheese for creaminess. Serve it as a side dish at dinner or as a light lunch. Pair it with grilled chicken or fish for a full meal. Avoid using overripe apples; they make the salad mushy. Don’t skip the dressing; it brings all the flavors together. When mixing, be gentle to keep the greens crisp. If you prepare the salad ahead of time, the greens can wilt. Always taste it before serving to adjust the seasoning. You want the right balance of sweet and tangy. For the full recipe, check out the Apple Cranberry Pecan Delight. {{image_2}} You can swap the apples for pears. Pears add a sweet touch to your salad. If you can’t find fresh cranberries, use dried ones. Dried cranberries work well and stay sweet. You can also replace pecans with walnuts or almonds. Both nuts give a nice crunch and flavor. In fall, add roasted butternut squash for warmth. It pairs nicely with apples and cranberries. In spring or summer, use juicy strawberries or peaches instead of apples. These fruits bring a fresh taste. Try adding herbs like mint or basil for a new twist. They add bright flavors and make the salad pop. This salad is easy to make vegan. Just leave out the feta cheese, or use a vegan cheese. You can also skip honey and use maple syrup for sweetness. For gluten-free options, this salad is already safe. Just check that your dressing ingredients are gluten-free. Enjoy this salad with any meal while keeping it healthy! You can find the full recipe for more details on how to make it. To keep your apple cranberry pecan salad fresh, place it in an airtight container. This helps prevent the greens from wilting. If you have dressing left, store it separately. This way, your salad stays crisp and tasty. You can store the salad in the fridge for up to three days. After that, the apples may brown, and the greens lose their crunch. Always check for freshness before eating leftovers. If the salad looks or smells off, it’s best to discard it. I do not recommend freezing this salad. Freezing affects the texture of the apples and greens. However, you can freeze the dressing. Just store it in a small container or jar. When you're ready to use it, thaw it in the fridge overnight. For the full recipe, check out the recipe section. This salad stays fresh for about three days in the fridge. The apples may brown, but they still taste great. Store it in an airtight container to keep it crisp. Yes, you can prep this salad ahead. Keep the dressing separate until you are ready to eat. Mix everything right before serving for the best taste and texture. This salad pairs well with grilled chicken or fish. It also goes great with a warm soup. For a full meal, serve it with whole-grain bread or a hearty grain dish. Check out the Full Recipe for more ideas! This blog post shared key ingredients for a tasty Apple Cranberry Pecan Salad. We covered the steps to prepare, mix, and serve it well. I discussed tips to pick fresh items, avoid common mistakes, and offered variations for different diets. Storing leftovers is simple, and I provided answers to common questions. Enjoy making this healthy salad often. It’s easy and fun to share with others. Dive into the flavors and get creative with your salad!

Apple Cranberry Pecan Salad Nutritious and Flavorful

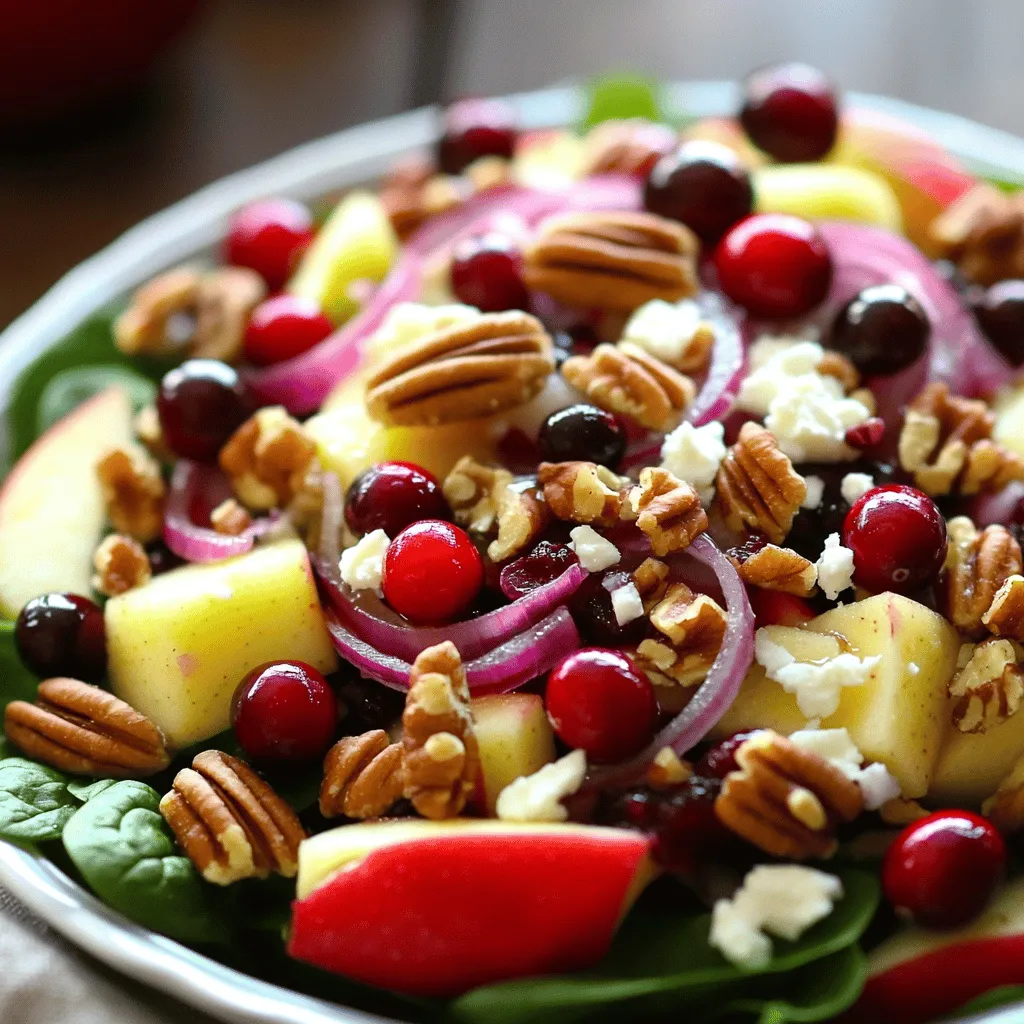
Are you ready to add a burst of flavor to your meals? My Apple Cranberry Pecan Salad is both nutritious

This Chicken Avocado Melt is a tasty dish that combines chicken and avocado. It’s easy to make and full of flavor. You can enjoy it for lunch or dinner. Let’s look at what you need to make this delicious meal. Here’s what you will need to make the Chicken Avocado Melt: - 2 boneless, skinless chicken breasts - 1 ripe avocado, peeled and mashed - 1 cup shredded mozzarella cheese - ½ cup cherry tomatoes, halved - ¼ cup red onion, finely chopped - 2 tablespoons olive oil - 1 tablespoon lime juice - Salt and pepper to taste - 4 slices of whole-grain bread - Fresh cilantro for garnish (optional) These ingredients come together to create a dish that is rich and satisfying. If you can’t find some of these ingredients, don’t worry! Here are some easy swaps: - Chicken Breasts: You can use grilled chicken thighs or rotisserie chicken. - Avocado: If you don’t have avocado, try hummus for a different taste. - Mozzarella Cheese: Cheddar or pepper jack cheese can add a fun twist. - Whole-Grain Bread: Use any bread you enjoy, like sourdough or rye. - Cilantro: Parsley or green onions can work well too. Feel free to get creative! Substitutions can help you make this recipe your own. To make your Chicken Avocado Melt, start by gathering your ingredients. You need: - 2 boneless, skinless chicken breasts - 1 ripe avocado, peeled and mashed - 1 cup shredded mozzarella cheese - ½ cup cherry tomatoes, halved - ¼ cup red onion, finely chopped - 2 tablespoons olive oil - 1 tablespoon lime juice - Salt and pepper to taste - 4 slices of whole-grain bread - Fresh cilantro for garnish (optional) First, preheat your oven to 375°F (190°C). Next, heat olive oil in a skillet over medium heat. Season the chicken breasts with salt and pepper. Cook the chicken for 6-7 minutes on each side. Make sure it's cooked through. After cooking, let the chicken rest for a few minutes. Then, slice it into thin strips. Now, it's time to mix up the avocado spread. In a bowl, combine the mashed avocado, lime juice, and chopped red onion. Add a pinch of salt and mix well. Take a baking sheet and lay out the slices of whole-grain bread. Spread a generous amount of the avocado mixture on each slice. Next, add slices of chicken on top. Follow this with halved cherry tomatoes. Finally, sprinkle shredded mozzarella cheese over everything. Place the baking sheet in the preheated oven. Bake for about 10-12 minutes. Look for the cheese to melt and bubble. Once done, remove from the oven and let it cool slightly. If you like, garnish with fresh cilantro. Your Chicken Avocado Melt is now ready to enjoy! Serve it warm on a plate. This dish pairs well with a fresh salad or crispy chips for crunch. You can also add a side of salsa for extra flavor. This meal is perfect for lunch, dinner, or a cozy snack. If you want to try this recipe, check the Full Recipe for all the details. To cook chicken well, start with fresh meat. I recommend using boneless, skinless chicken breasts. Season them simply with salt and pepper. Heat your skillet to medium. Add olive oil and wait until it shimmers. Cook each side for 6-7 minutes. The chicken should be golden brown and cooked through. Use a meat thermometer to check that it reaches 165°F (74°C). Let it rest for a few minutes before slicing. This helps keep it juicy. To create a great avocado mix, choose ripe avocados. They should be slightly soft when you press them. Peel and mash them in a bowl. Add lime juice right away to prevent browning. Stir in finely chopped red onion and a pinch of salt. Mix it until smooth but still chunky. This mix adds creaminess to your Chicken Avocado Melt. You can also add diced tomatoes for extra flavor. For a perfect cheese melt, use shredded mozzarella. It melts well and gives a nice stretch. Spread the cheese evenly over the chicken and avocado mix. Bake the Chicken Avocado Melt in a preheated oven at 375°F (190°C). Bake it for about 10-12 minutes. Keep an eye on it until the cheese is bubbly and golden. You can broil it for a minute at the end for a nice finish. Enjoy this tasty treat! You can find the Full Recipe above for all the details. {{image_2}} You can switch up the chicken for turkey or even ham. Both meats add a nice, savory twist. If you want something lighter, try using grilled shrimp. The seafood pairs well with avocado. For a touch of sweetness, add thin slices of pear or apple. These fruits bring a new flavor and texture. To make a vegetarian version, skip the chicken. Use grilled zucchini or eggplant instead. Both veggies have great texture and flavor when cooked. You can also try chickpeas; they add protein and a hearty bite. For cheese lovers, use a plant-based cheese to keep it vegan. For more flavor, try different herbs and spices. Garlic powder adds a warm kick, and smoked paprika gives a nice depth. You can also mix in fresh herbs like basil or cilantro. If you love heat, sprinkle red pepper flakes on top before baking. This adds a fun, spicy surprise to every bite. To keep your Chicken Avocado Melt fresh, store it in an airtight container. Let the dish cool before sealing. This helps maintain its taste. Place it in the fridge. It will stay good for up to three days. If you use a glass container, it’s even better. This keeps the food safe and tasty. When you're ready to enjoy leftovers, reheat it in the oven. Set the oven to 350°F (175°C). Place the melt on a baking sheet. Heat for about 10 minutes. This warms it evenly and keeps the cheese melty. You can also use a microwave. Heat on high for about 1-2 minutes. Just be careful not to overheat, or the bread will get soggy. If you want to save some for later, freezing works too. Wrap each melt in plastic wrap, then put it in a freezer bag. This keeps ice crystals away. You can freeze them for up to two months. When you’re ready to eat, thaw it in the fridge overnight. Then, reheat it as mentioned before. Enjoy your Chicken Avocado Melt even after weeks! The Chicken Avocado Melt will stay fresh for about three days. Store it in an airtight container in the fridge. The bread may get a bit soft, but the filling tastes great. Yes, you can prepare parts of this recipe ahead of time. Cook the chicken and make the avocado mixture a day before. Just assemble the melts when you are ready to bake. This way, you save time and still enjoy a fresh meal. You can pair the Chicken Avocado Melt with a side salad or some crispy veggies. Chips or sweet potato fries work well too. If you like, add some fresh fruit for a sweeter touch. For the full recipe, check out the Chicken Avocado Melt section above. This blog covers all you need for a tasty Chicken Avocado Melt. We explored key ingredients, listed necessary items, and suggested substitutes. I shared step-by-step cooking instructions and serving ideas. You learned best practices and cheese melting tips for success. We also discussed variations and smart storage methods to keep your meal fresh. Finally, I answered common questions to help you feel prepared. Enjoy making this dish, and let your creativity shine with each bite!

Savory Chicken Avocado Melt Easy Recipe to Enjoy

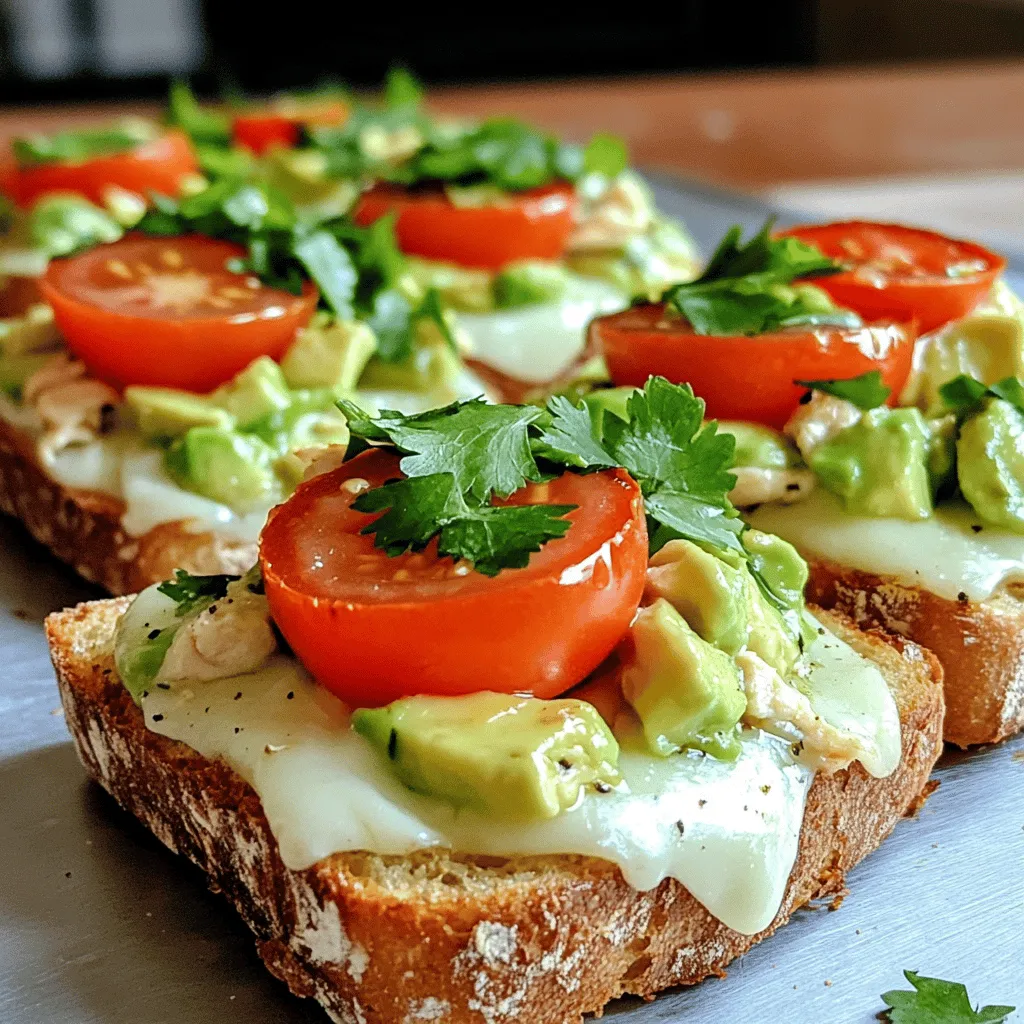
If you love tasty meals that are quick to make, you’re in the right place. This Chicken Avocado Melt recipe

- Boneless chicken thighs - Plain yogurt - Spices: garam masala, cumin, turmeric, chili powder - Fresh aromatics: onion, garlic, ginger - Heavy cream and diced tomatoes - Fresh cilantro - Additional cream for drizzling The main ingredients for quick homemade butter chicken bring flavor and warmth to your meal. Start with boneless chicken thighs. They are juicy and tender. I love using plain yogurt for marinating. It makes the chicken soft and adds a nice tang. Next, spices are key. I always use garam masala, cumin, turmeric, and chili powder. These spices give the dish its rich flavor. Fresh aromatics like onion, garlic, and ginger add depth. They make the dish smell amazing while cooking. Heavy cream and diced tomatoes create a creamy sauce. The cream balances the spices well. You can use canned diced tomatoes or fresh ones. Both work great in this dish. For optional garnishes, fresh cilantro adds a pop of color. It also gives a fresh taste. A drizzle of additional cream makes the dish look fancy. These simple touches elevate your butter chicken. This recipe is straightforward. You can find the full recipe for quick homemade butter chicken to guide you through every step. Enjoy making this delicious meal! To start, you need to create a tasty marinade for the chicken. In a bowl, combine: - 1 cup plain yogurt - 2 tablespoons lemon juice - 1 tablespoon garam masala - 2 teaspoons cumin powder - 1 teaspoon turmeric powder - 1 teaspoon chili powder Mix all the ingredients well. Then, add the chicken pieces and coat them evenly. Let the chicken marinate for at least 30 minutes. For even more flavor, you can marinate it overnight. Next, heat a large skillet over medium heat. Melt 2 tablespoons of butter in the skillet. Once the butter melts, add the marinated chicken. Discard any leftover marinade. Cook the chicken for about 8-10 minutes. You want it to be golden brown and cooked through. The chicken should no longer be pink in the center. After the chicken is done, it’s time to make the sauce. In the same skillet, add 2 more tablespoons of butter. Once melted, add the chopped onion. Sauté until the onion is golden brown, which takes about 5 minutes. Then, add 3 cloves of minced garlic and 1 tablespoon of minced ginger. Cook for another 1-2 minutes until you smell that great aroma. Now, add a can of diced tomatoes and let it cook on medium heat. You want the sauce to thicken a bit, which should take about 5-7 minutes. Finally, stir in 1 cup of heavy cream, and bring the sauce to a gentle simmer. Now, gently fold the cooked chicken back into the sauce. Let everything simmer together for about 5 more minutes. This step allows the flavors to blend nicely. Add salt to taste. If you want, you can serve it with fresh cilantro for a pop of color. For the full recipe, check out the details above. Enjoy your butter chicken! To make your butter chicken truly flavorful, marinate your chicken for at least 30 minutes. For the best taste, let it sit overnight. This will allow the spices to soak in well. Fresh spices are key. They give the dish an amazing aroma and depth of flavor. Always use whole spices when you can, and grind them just before use. Your taste buds will thank you! When cooking, set your heat to medium. This helps the chicken cook evenly without burning. If your pan gets too hot, the chicken can burn quickly. Stir often and keep an eye on it. If you notice it starting to brown too fast, lower the heat a bit. This way, you keep your chicken tender and juicy. For a perfect meal, serve your butter chicken with fluffy basmati rice or warm naan. These pair well and soak up the tasty sauce. When serving, use a wide, shallow bowl. Drizzle a bit of extra cream on top for a rich look. A sprinkle of fresh cilantro adds color and freshness to your dish. It makes everything pop! {{image_2}} You can easily make this dish vegetarian. Just swap out the chicken for paneer or tofu. Both options soak up all the rich flavors. Paneer adds a creamy texture, while tofu makes it lighter. Cut them into bite-sized pieces just like the chicken. Marinate them the same way to keep the taste strong. If you want a dairy-free version, use coconut milk instead of heavy cream. Coconut milk gives a nice, creamy feel without the dairy. It also adds a subtle sweetness that works well in the dish. Just replace the heavy cream with one cup of coconut milk. The taste stays rich and delicious. You can adjust the heat level to suit your taste. If you like it spicy, add more chili powder. For a milder dish, reduce the chili powder. You can also add some fresh green chilies for extra flavor. Taste the sauce as you go to get it just right. After enjoying your butter chicken, cool it down to room temperature. Store it in the fridge within two hours. Use an airtight container for best results. This keeps the flavors fresh and safe to eat. Your butter chicken will stay good for about 3 to 4 days in the refrigerator. If you want to keep it longer, you can freeze butter chicken. First, let it cool completely. Pour it into a freezer-safe container or a heavy-duty freezer bag. Make sure to remove as much air as possible. Label the container with the date. Your butter chicken can last up to three months in the freezer. When it's time to enjoy your frozen meal, take it out of the freezer. Thaw it in the fridge overnight for best results. If you're in a hurry, you can use the microwave to thaw it. Once thawed, reheat it on the stove. Stir occasionally to ensure even heating. You want it hot all the way through. Add a splash of cream if it looks too thick. Enjoy your meal! [Full Recipe] You can use coconut milk or cashew cream. Coconut milk adds a nice flavor and a creamy texture. It works well for a lighter dish. Cashew cream is rich and smooth. To make cashew cream, blend soaked cashews with water until smooth. Both options keep the dish creamy and delicious. Yes, you can use frozen chicken. Just make sure to thaw it first. Thawing helps cook the chicken evenly. You can place frozen chicken in the fridge overnight or run it under cold water until thawed. This way, the chicken absorbs the marinade better and cooks thoroughly. Homemade Butter Chicken lasts about 3 to 4 days in the fridge. Store it in an airtight container to keep it fresh. If you want to keep it longer, you can freeze it. Frozen Butter Chicken lasts up to 2 months. Just thaw in the fridge before reheating. Yes, you can make Butter Chicken ahead of time. Cook it fully, then let it cool. Store in the fridge for up to 3 days. You can also freeze it for later. To reheat, warm it on the stove over low heat. Stir often to avoid sticking. This makes weeknight meals super easy! For the full recipe, check the recipe section above. In this post, we explored making quick homemade butter chicken. We covered key ingredients, easy steps, and tips for great flavor. You can customize the dish to fit your needs, whether using chicken, paneer, or tofu. Proper storage and reheating ensure your buttery meal stays tasty. With the right spices and techniques, you’ll impress anyone at your table. Enjoy creating this comforting dish, and share it with friends and family!

Quick Homemade Butter Chicken Flavorful and Simple Meal

Are you craving a delicious home-cooked meal that’s quick and easy? Look no further! My Quick Homemade Butter Chicken is

To make the best white chicken chili, you need a few key ingredients. Here’s what you’ll need: - 2 tablespoons olive oil - 1 medium onion, chopped - 3 cloves garlic, minced - 2 medium jalapeños, deseeded and diced - 1 teaspoon ground cumin - 1 teaspoon dried oregano - 1/2 teaspoon coriander powder - 1/4 teaspoon cayenne pepper (adjust for spice preference) - 4 cups low-sodium chicken broth - 2 cans (15 oz each) white beans (like cannellini or great northern), drained and rinsed - 2 cups cooked chicken, shredded (rotisserie chicken works great) - 1 cup corn (fresh, frozen, or canned) - 1 cup cream cheese, softened - 1 cup shredded Monterey Jack cheese - Salt and pepper to taste - Fresh cilantro, chopped for garnish - Slices of lime for serving These ingredients create a warm and creamy blend. The chicken and beans add protein, while spices give it a nice kick. Feel free to add some optional ingredients to boost flavor: - Diced bell peppers for sweetness - Smoked paprika for a smoky touch - A splash of lime juice for brightness - Avocado slices for creaminess on top These additions can enhance your chili. Experiment with what you like best! You can switch some ingredients if you need to. Here are a few ideas: - Use turkey instead of chicken for a lighter dish. - Swap cream cheese for Greek yogurt for a healthier option. - If you want it spicy, add more jalapeños or a hotter pepper. These substitutions help you customize your chili to fit your taste or pantry. The Full Recipe provides a great base, but feel free to make it your own! 1. Start by heating 2 tablespoons of olive oil in a large pot over medium heat. 2. Add 1 chopped onion. Sauté it for about 5 minutes until it looks clear. 3. Next, stir in 3 minced garlic cloves and 2 diced jalapeños. Cook this mix for 2-3 minutes until it smells great. 4. Now, add 1 teaspoon of ground cumin, 1 teaspoon of dried oregano, 1/2 teaspoon of coriander powder, and 1/4 teaspoon of cayenne pepper. Stir well for about 1 minute to wake up those spices. 5. Pour in 4 cups of low-sodium chicken broth. Then add 2 cans of rinsed white beans. Let this mix come to a gentle simmer. 6. Toss in 2 cups of shredded chicken and 1 cup of corn. Let the chili simmer for 15-20 minutes. This helps all the flavors blend nicely. 7. Lower the heat, and add 1 cup of softened cream cheese. Stir until it melts and mixes well with the chili. 8. Gradually add 1 cup of shredded Monterey Jack cheese, stirring until it becomes creamy. 9. Finally, season with salt and pepper to taste. Adjust spices as needed. Serve hot, garnished with fresh cilantro and lime wedges. - Use Rotisserie Chicken: This can save you time on cooking and shredding chicken. - Pre-chop Veggies: Chop your onion and jalapeños ahead of time. Store them in the fridge for quick use. - Gather Ingredients: Before you start cooking, gather and measure your ingredients. This makes the process smoother. - Prep Time: 15 minutes - Cook Time: 25 minutes - Total Time: 40 minutes With these steps and tips, making the best white chicken chili is easy and fun. For the full recipe, check the earlier section. Enjoy your cooking! To make the best white chicken chili, focus on fresh ingredients. Use ripe jalapeños for a bright flavor. Sauté the onions until they are soft and sweet. Toasting the spices in the pot adds depth. Ensure the cream cheese melts well for creaminess. Simmer the chili gently to meld the flavors. Keep tasting and adjusting seasoning as you go. One common mistake is overcooking the chicken. If you use rotisserie chicken, add it later in the cooking process. Another mistake is not rinsing the white beans. Rinsing helps remove extra sodium and enhances taste. Also, don’t skip the lime juice! It brightens the chili and balances the richness. Lastly, be careful with the heat level; start with less cayenne. You can always add more if needed. Garnishes can elevate your chili. Fresh cilantro adds a pop of color and flavor. A squeeze of lime juice brightens every bite. You can also use sliced jalapeños for extra heat. Top with a sprinkle of shredded cheese for richness. Serve with tortilla chips for crunch. These simple touches make a big difference in taste and presentation. For the full recipe, check out the detailed instructions and enjoy every bite of this creamy delight! {{image_2}} You can easily change the heat level in your white chicken chili. Start with jalapeños. If you want it mild, remove the seeds and membranes. For more heat, leave some seeds in. You can also add cayenne pepper. Start with a small amount and taste as you go. For a milder version, skip the cayenne altogether. Remember, you can always add heat, but you can't take it away! You can make this chili meat-free and still delicious. Substitute the chicken with cooked quinoa or lentils. Use vegetable broth instead of chicken broth. Cream cheese can be replaced with cashew cream or coconut cream for a vegan option. You may also try adding more beans, like black beans or kidney beans, for extra protein. This keeps the chili hearty and satisfying. Get creative with your chili! You can add diced bell peppers for sweetness. Chopped spinach or kale adds color and nutrients. Want a smoky flavor? Try adding some smoked paprika or chipotle pepper. For a crunch, toss in some tortilla strips right before serving. You can even top it with fresh avocado slices for creaminess. Each add-in makes the dish unique! For the full recipe, check out the details above and enjoy your cooking adventure! To keep your white chicken chili fresh, use a clean container. Make sure it is airtight. Store it in the fridge for up to four days. Let it cool down before sealing. This helps preserve the taste and texture. When you're ready to eat, check for any signs of spoilage. If it smells off, toss it out. You can freeze white chicken chili for longer storage. Use freezer-safe containers or bags. Leave some space at the top, as the chili will expand. It can last up to three months in the freezer. To thaw, move it to the fridge overnight. You can also use the microwave on the defrost setting. When reheating, do it slowly on low heat. This keeps the flavor intact. Stir occasionally to ensure even heating. If the chili seems thick, add a splash of chicken broth. For microwave reheating, cover the bowl to keep moisture. Heat in short bursts, stirring in between. Enjoy your flavorful chili just like the first time! The total cooking time for the best white chicken chili is about 40 minutes. You will spend around 15 minutes prepping the ingredients. The actual cooking takes about 25 minutes. This time includes simmering the chili to blend all the flavors. Yes, you can make this chili ahead of time. In fact, it tastes even better the next day. Just store it in an airtight container in the fridge. You can enjoy it for up to three days. Reheat it on the stove over low heat, stirring often. To thicken white chicken chili, you have a few options. You can add more cream cheese or cheese. These ingredients help create a creamy texture. Another way is to mash some of the beans before adding them to the pot. This adds body to the chili without changing the flavor. You can also let it simmer longer to reduce the liquid. Each method will make your chili thicker and heartier. For the full recipe, check out the detailed list of ingredients and instructions. This blog post covered how to make the best white chicken chili. We discussed essential and optional ingredients and provided tips to perfect your dish. I shared step-by-step instructions for easy cooking. You learned how to avoid common mistakes and enhance flavors. We also explored variations for different diets. Finally, we talked about storage and reheating tips. Now, go ahead and create your own chili masterpiece. Enjoy this tasty dish with your friends and family!

The Best White Chicken Chili Flavorful and Easy Recipe

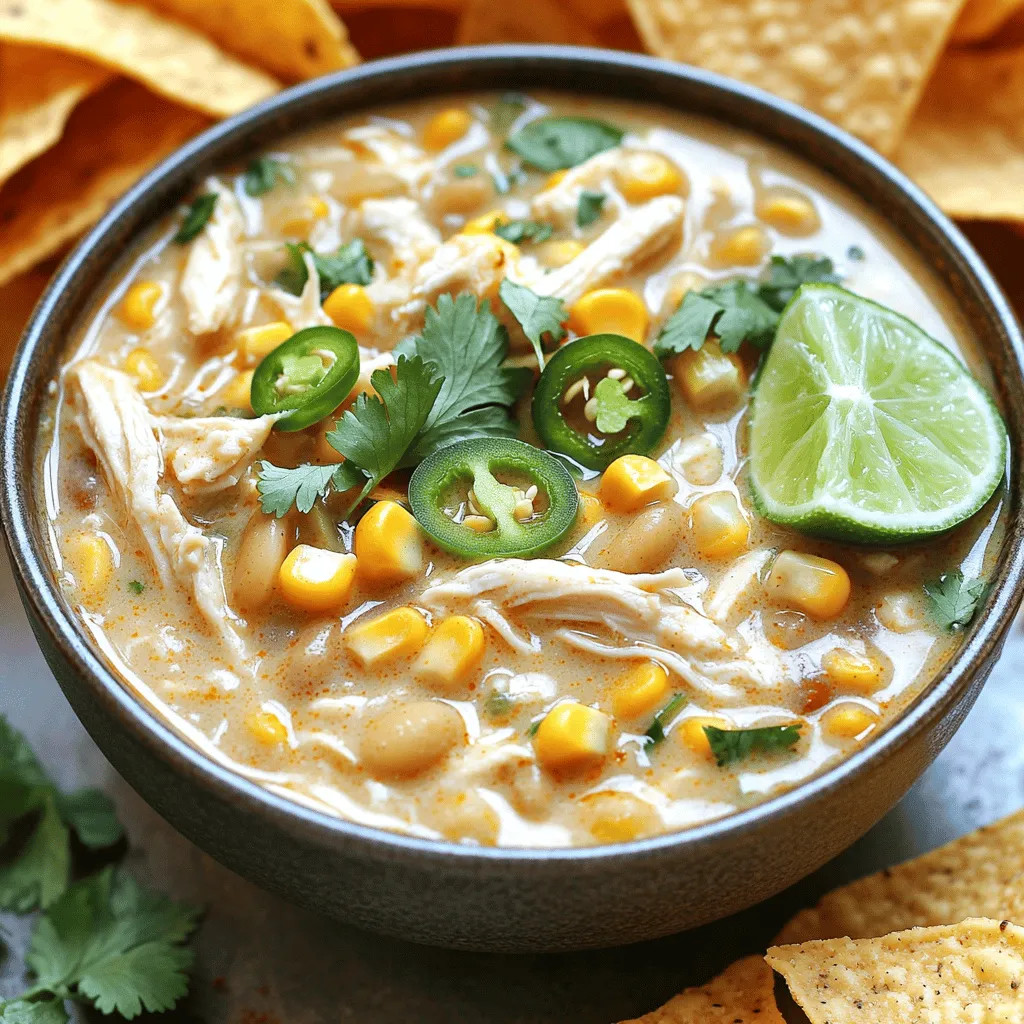
Are you ready to warm up your kitchen with the best white chicken chili? I’ve crafted a flavorful and easy

This dish shines with a few key ingredients. The sweet potatoes give a nice sweet base. The garlic adds that rich, bold flavor. Parmesan cheese brings a salty, nutty punch. Olive oil helps everything roast well and adds richness. When picking sweet potatoes, look for smooth skin. They should feel firm and heavy for their size. Avoid any with soft spots or bruises. The best sweet potatoes have a deep orange color. This means they are sweet and full of flavor. If you need a cheese swap, try Pecorino Romano. It has a similar taste but is a bit sharper. For garlic, garlic powder can work in a pinch. Use 1/8 teaspoon for each clove. Fresh garlic is best, but these swaps can still taste great! To start, gather all your ingredients. You need 4 medium sweet potatoes, olive oil, garlic, Parmesan cheese, dried oregano, smoked paprika, salt, and pepper. The first step is to preheat your oven to 425°F (220°C). Next, line a baking sheet with parchment paper. This helps with easy clean-up. Now, peel the sweet potatoes and cube them. Aim for uniform pieces so they cook evenly. In a large mixing bowl, add the cubed sweet potatoes and drizzle in 3 tablespoons of olive oil. Toss them well until they are fully coated in oil. This step is important for flavor and crispiness. Once the sweet potatoes are coated, add 4 minced garlic cloves, 1 cup of grated Parmesan cheese, 1 teaspoon of dried oregano, and 1 teaspoon of smoked paprika. Season with salt and pepper to your taste. Mix everything until the sweet potatoes are evenly covered. Spread the sweet potato mixture in a single layer on your lined baking sheet. Make sure the pieces are not crowded. This ensures they roast and not steam. Place the baking sheet in your preheated oven. Roast the sweet potatoes for 25-30 minutes. Halfway through the cooking time, flip the sweet potatoes. This helps them get crispy on all sides. For crispy sweet potatoes, don't skip the olive oil. It helps create that nice crunch. Use fresh garlic instead of garlic powder for a more robust flavor. Make sure you cut the sweet potatoes into similar-sized pieces. This helps them cook evenly. If you want extra crispiness, broil them for the last 2-3 minutes. Just watch them closely to avoid burning. Feel free to check out the Full Recipe for more details and serving suggestions! To make Parmesan garlic roasted sweet potatoes shine, add herbs and spices. Fresh herbs like rosemary or thyme work well. They add a nice touch. You can mix in red pepper flakes for heat. This gives a nice kick to the dish. Try using lemon zest for brightness. It will lift the flavors and make the dish pop! A few common mistakes can ruin your roasted sweet potatoes. First, don’t overcrowd the baking sheet. This can trap steam and make them soggy. Second, cut the sweet potatoes into even pieces. This ensures they cook at the same rate. Lastly, watch your roasting time closely. Overcooked sweet potatoes lose their taste and texture. You can easily turn this side dish into a full meal. Pair the sweet potatoes with grilled chicken or fish. They also go well with a fresh salad. For a vegetarian option, add black beans or chickpeas. This adds protein and fiber. Serve it all together for a colorful and satisfying plate. For the full recipe, check the details above! {{image_2}} You can switch up the cheese in these sweet potatoes. Try using cheddar for a sharp taste. Feta adds a salty kick and a crumbly texture. For a creamier option, go with goat cheese. Each cheese brings its own flavor, so feel free to mix and match. Want to spice it up? Add cayenne pepper for heat. If you like a smoky flavor, smoked salt can work wonders. You can also use fresh herbs like rosemary or thyme. Lemon zest adds brightness and pairs well with sweet potatoes. Experiment with spices to find your favorite mix. To make this dish vegan, swap the Parmesan for a dairy-free cheese. Nutritional yeast is a great option. It brings a cheesy flavor without dairy. You can also skip the cheese altogether and use extra garlic and spices for a tasty twist. This way, you keep the flavor while making it vegan-friendly. For the full recipe, check out the detailed instructions above. To store your Parmesan garlic roasted sweet potatoes, first let them cool. Place the cooled sweet potatoes in an airtight container. They will stay fresh for about three to four days in the fridge. Make sure to keep them away from moisture to avoid sogginess. When you're ready to enjoy leftovers, preheat your oven to 375°F (190°C). Spread the sweet potatoes on a baking sheet. Heat them for about 10 to 15 minutes, or until warm. This method keeps them crispy. You can also use a microwave, but they may lose some crunch. Heat in short bursts of 30 seconds, stirring in between. If you want to save sweet potatoes for later, freezing is a good option. First, let them cool completely. Spread them in a single layer on a baking sheet and freeze for about two hours. Once frozen, transfer them to a freezer-safe bag. They can last up to three months in the freezer. When ready to eat, thaw in the fridge overnight before reheating. For best results, reheat in the oven to retain their texture. For the complete recipe, refer back to the Full Recipe section. You can serve Parmesan garlic roasted sweet potatoes with many dishes. They pair well with grilled chicken, steak, or fish. Add a fresh salad to balance the meal. You can also enjoy them as a side with a hearty soup. Their savory flavor complements many foods, making them a great choice. Yes, you can make this recipe ahead of time. Cook the sweet potatoes and store them in the fridge. Just reheat them in the oven or microwave. This way, you can enjoy them without extra prep. For best taste, eat them within three days. Roasted sweet potatoes last about three to five days in the fridge. Store them in an airtight container for freshness. If you see any signs of spoilage, it's best to throw them out. You want to enjoy their delicious flavor without worry. For long-term storage, consider freezing them. This blog post covered everything about making Parmesan garlic roasted sweet potatoes. We discussed key ingredients, ideal preparation methods, and tips for perfect crispiness. You learned how to enhance flavors and avoid common mistakes. I shared different variations to fit your diet and detailed storage tips for leftovers. By following these steps, you can create a tasty side dish that impresses. Enjoy your cooking journey, and feel free to experiment with flavors!

Parmesan Garlic Roasted Sweet Potatoes Delightful Dish

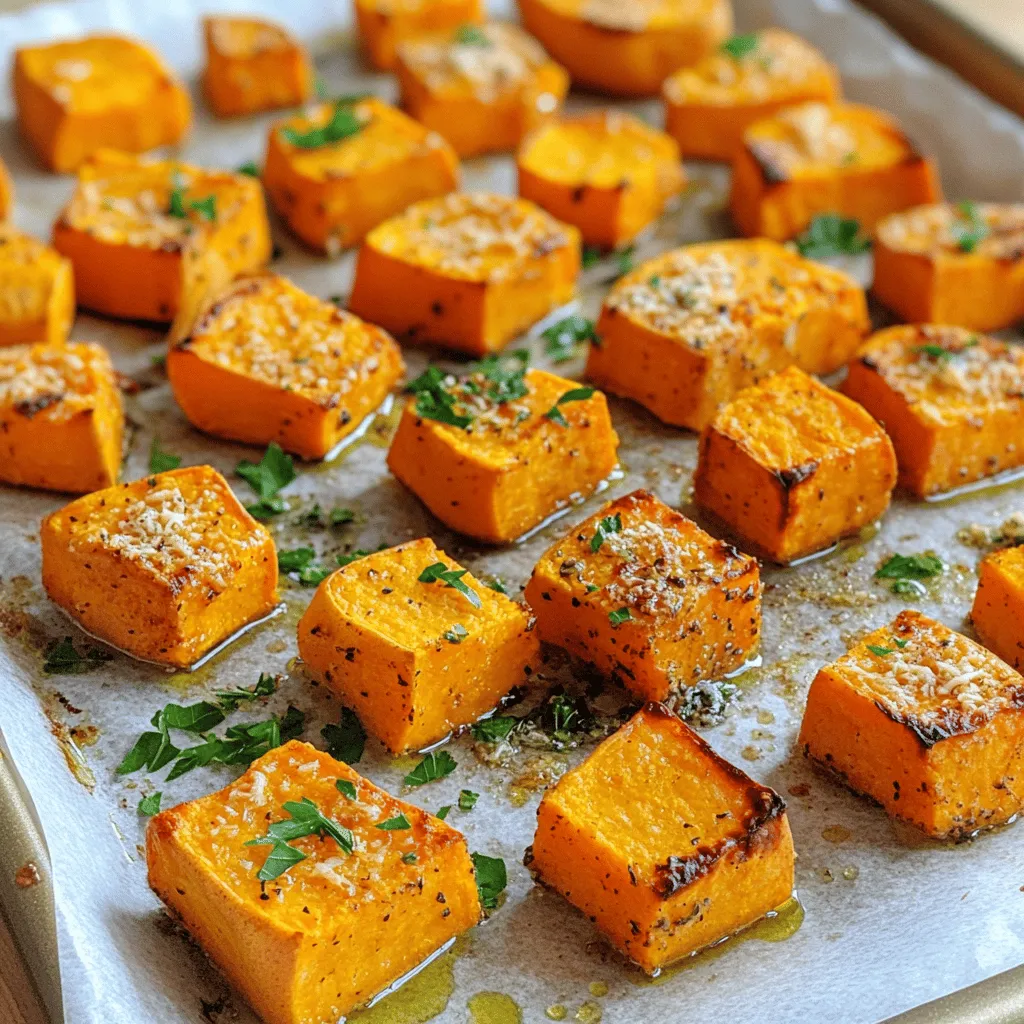
Are you ready to elevate your side dish game? Parmesan Garlic Roasted Sweet Potatoes are packed with flavor and texture,

Older posts
Newer posts
← Previous Page1 … Page5 Page6 Page7 … Page80 Next →

dsad

© 2025 My Saved Recipe • Built with GeneratePress

Our Policies

  • Copyright Policy
  • Cookie Policy
  • GDPR Policy
  • Privacy Policy
  • Disclaimer
  • Terms Of Use

More Information

  • Home
  • About
  • Contact
  • Appetizers
  • Dessert
  • Dinner
  • Drinks
©2025, My Saved Recipe About Back To Top