Skip to content
DisclaimerTerms Of UseGDPR PolicyCookie Policy

My Saved Recipe

  • Home
  • Drinks
  • Appetizers
  • Dinner
  • Dessert
  • About
  • Contact
  • Privacy Policy
DisclaimerTerms Of UseGDPR PolicyCookie Policy

Savannah

To make the perfect sweet cornbread, you need simple, fresh ingredients. Here’s what you’ll need: - 1 cup cornmeal - 1 cup all-purpose flour - 1/3 cup granulated sugar - 1 tablespoon baking powder - 1/2 teaspoon salt - 1 cup buttermilk - 2 large eggs - 1/4 cup unsalted butter, melted - 1/4 cup honey (plus extra for drizzling) - Optional: 1/2 cup corn kernels (fresh or frozen) These ingredients work together to create a warm and fluffy cornbread. The cornmeal gives it a nice texture, while the honey adds sweetness. You can even mix in corn kernels for extra flavor and crunch. When picking your ingredients, try to choose high-quality items. Fresh eggs and real buttermilk make a big difference in taste. Remember, the better your ingredients, the better your cornbread will be. For the full recipe, check out the instructions later on. - Preheating the oven Start by preheating your oven to 400°F (200°C). This step is key. A hot oven gives your cornbread a nice rise and a golden crust. - Mixing dry ingredients In a large bowl, mix together the cornmeal, flour, sugar, baking powder, and salt. Use a whisk to blend them well. This helps to ensure even flavor throughout. - Preparing wet ingredients In another bowl, whisk the buttermilk, eggs, melted butter, and honey. Make sure it’s smooth. The honey adds sweetness and moisture. - Combining the mixtures Pour the wet mix into the dry mix. Stir gently until just combined. Don’t overmix! A few lumps are fine. If you want, fold in corn kernels for extra texture. - Baking the cornbread Pour the batter into a greased 8-inch square baking dish. Bake it for about 20-25 minutes. The top should turn golden, and a toothpick should come out clean. - Cooling and drizzling Once baked, take it out of the oven. Let it cool for a few minutes. Drizzle with extra honey before cutting into squares. Enjoy this delightful treat warm! For the complete recipe, check out the Full Recipe. Ensuring the perfect texture To get a soft and fluffy cornbread, use fresh ingredients. Always measure your cornmeal and flour correctly. This ensures a nice rise. Also, try adding a bit of corn kernels. They add moisture and texture. Avoiding overmixing Mix just until the dry and wet ingredients come together. If you overmix, your cornbread can turn tough. A few lumps are okay! This keeps your cornbread light and airy. Checking doneness To see if your cornbread is done, use a toothpick. Stick it in the center. If it comes out clean, it's ready! The top should be golden brown. This gives the best look and taste. Serving warm with butter Always serve your cornbread warm. It tastes amazing with a pat of butter melting on top. This adds richness and flavor. Flavor enhancements with toppings You can drizzle extra honey over the top. It adds sweetness and a nice shine. Try topping with jam or fresh fruit, too. This brings a fun twist to each bite. Pairing ideas with meals Cornbread goes well with chili, soups, or stews. Its sweet flavor balances spicy dishes. You can also serve it with BBQ or grilled meats. Enjoy it alongside your favorite meals for a perfect match. {{image_2}} You can easily change the flavor of sweet cornbread. Here are some fun ideas: - Honey-infused sweet cornbread: Use more honey in the batter. This gives it a richer flavor. Drizzle extra honey on top for a sweet touch. - Maple syrup alternative: Swap honey for maple syrup. This adds a nice twist. The unique flavor pairs well with cornbread's sweetness. - Cheesy sweet cornbread with corn kernels: Add shredded cheese and corn kernels to the batter. The cheese adds a savory note that balances the sweetness. If you have special dietary needs, you can still enjoy sweet cornbread. Here are some options: - Gluten-free options: Use gluten-free flour instead of all-purpose flour. Make sure your cornmeal is also gluten-free. This way, everyone can enjoy the cornbread. - Vegan alternatives: Replace eggs with flaxseed meal and use plant-based milk. You can also use coconut oil instead of butter. This keeps the cornbread moist and tasty. Feel free to mix and match these ideas to find your perfect sweet cornbread! For the full recipe, check out the details above. To keep your sweet cornbread fresh, store it in an airtight container. You can also wrap it tightly in plastic wrap. This helps prevent it from drying out. Place the container in the fridge. It stays good for about 3 to 5 days. When you want to enjoy some cornbread again, reheating is easy. Preheat your oven to 350°F (175°C). Place the cornbread on a baking sheet. Heat it for about 10 minutes. You can also microwave it. Heat it for about 15-20 seconds for a quick treat. If you want to keep cornbread for longer, freezing works well. First, let the cornbread cool completely. Then, cut it into squares. Wrap each piece in plastic wrap. After that, place the wrapped pieces in a freezer-safe bag or container. This way, the cornbread stays fresh for up to 3 months. When you’re ready to eat it, you can thaw the cornbread. Take it out of the freezer and place it in the fridge overnight. If you’re in a hurry, you can microwave it. Heat it on low power for a quick thaw. Then, follow the reheating steps above for the perfect taste. For the full recipe, check out the Sweet Cornbread Delight. How to make cornbread moist? To make cornbread moist, add buttermilk and melted butter. These ingredients keep the bread soft. You can also mix in corn kernels for extra moisture. Can I add spices to my sweet cornbread? Yes, you can add spices! Cinnamon, nutmeg, or even chili powder can enhance the flavor. Start with a small amount to find your balance. What’s the difference between sweet and savory cornbread? Sweet cornbread contains sugar and often honey. Savory cornbread skips the sugar and may include cheese or herbs. The taste and texture vary greatly. How long can sweet cornbread be stored? Sweet cornbread lasts in the fridge for about four days. Make sure to cover it well to keep it fresh. What are the best substitutes for buttermilk? You can use regular milk mixed with vinegar or lemon juice. Alternatively, yogurt or sour cream works well too. Can I use different types of flour? Yes, you can use whole wheat flour or corn flour. Just remember that it may change the texture a bit. Can I bake cornbread in a cast iron skillet? Absolutely! A cast iron skillet gives a nice crust to the cornbread. Just make sure to preheat the skillet before adding the batter. How do I know when cornbread is done baking? Check for a golden top and insert a toothpick in the center. If it comes out clean, it’s ready. Enjoy your sweet cornbread delight with simple baking tips! For the full recipe, see above. This blog post shared easy steps to make delicious cornbread. You learned about the key ingredients, simple preparation, and useful tips for perfect texture. I provided flavor variations and storage advice. Remember to experiment with toppings and serve it warm for the best taste. Cornbread can be a versatile dish that adds joy to meals. Enjoy baking your cornbread, and don’t be afraid to make it your own! Simple adjustments can make all the difference. Happy cooking!

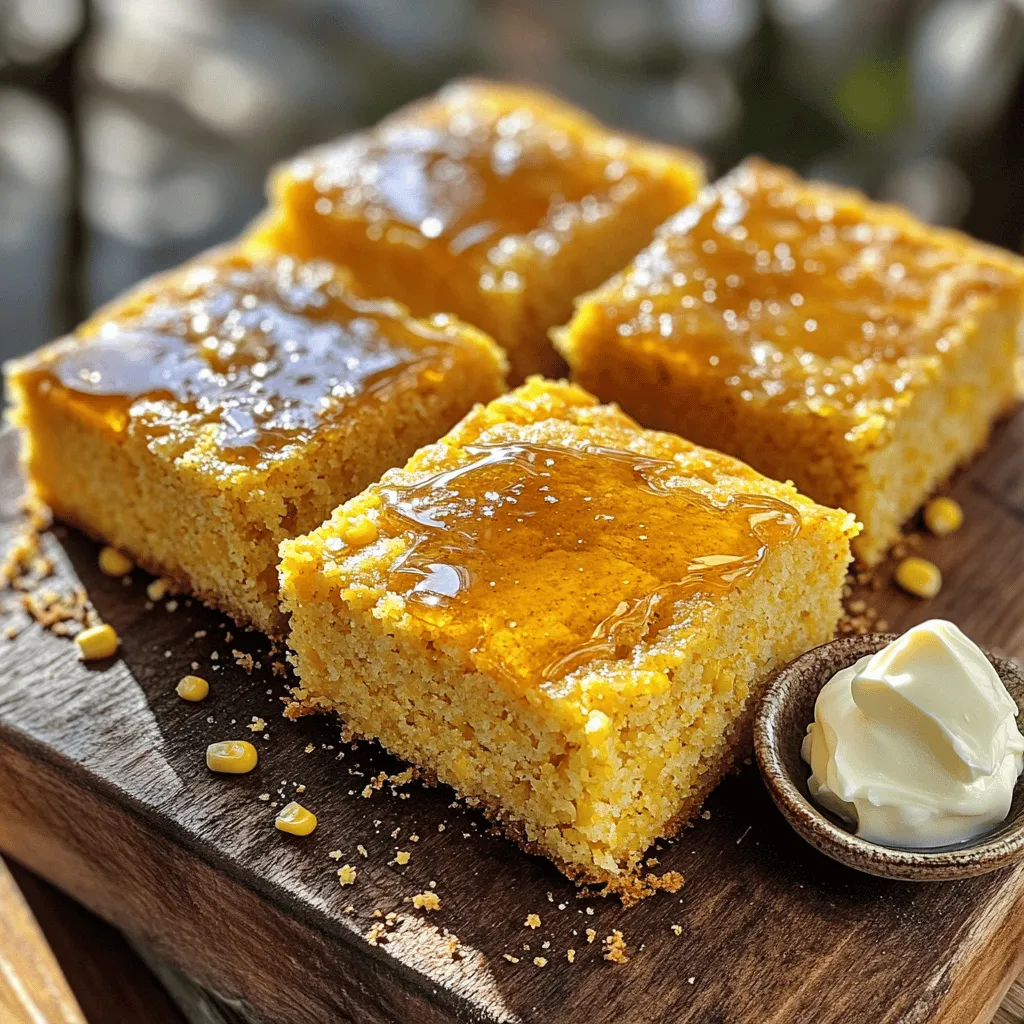
Sweet Cornbread Delight With Simple Baking Tips

Do you crave something warm, sweet, and oh-so-delicious? This Sweet Cornbread Delight is just what you need! With simple baking

- 2 cups all-purpose flour - 1/4 cup granulated sugar - 1 packet instant yeast - 1/2 teaspoon salt - 1/2 cup milk, warmed - 1/4 cup unsalted butter, melted - 1 large egg - 1 cup cream cheese, softened - 1/2 cup powdered sugar - 1 teaspoon vanilla extract - 1 1/2 cups fresh strawberries, diced - 1 egg wash (1 egg whisked with 1 tablespoon water) - Optional: Whipped cream for serving - Mixing bowls - Rolling pin - Baking dish - Whisk - Converting metric measurements: To convert cups to grams, know that 1 cup of flour is about 120 grams. Use a scale for accuracy. - Substitutions for key ingredients: You can replace all-purpose flour with a gluten-free blend. Yogurt can replace cream cheese for a lighter option. This list of ingredients is key to making the best Strawberry Cheesecake Sweet Rolls. Each item plays a part in creating that perfect blend of flavors. The fresh strawberries add a sweet and tangy taste. The cream cheese gives it a rich texture. Using the right tools helps too. A rolling pin makes it easier to spread dough. Mixing bowls help keep everything organized. These simple items are all you need to start. Feel free to explore the Full Recipe for detailed steps on how to use these ingredients. - Combine warm milk and yeast. In a bowl, mix warm milk, melted butter, and sugar. Sprinkle the yeast on top. Let it sit for about five minutes. It should become frothy. - Mix flour, salt, and wet ingredients. In a separate bowl, combine the flour and salt. Add the yeast mixture and egg. Stir until a dough forms. - Kneading the dough. On a floured surface, knead the dough for about five to seven minutes. Make it smooth and elastic. Place it in a greased bowl. Cover it with a towel and let it rise for about one hour. It should double in size. - Mixing cream cheese and sugar. In a bowl, beat the softened cream cheese and powdered sugar until smooth. Add in the vanilla extract for flavor. - Incorporating strawberries. Gently fold in the diced strawberries. Make sure they are evenly mixed in. Set the filling aside while the dough rises. - Rolling out the dough. After the dough rises, punch it down. Roll it out on a floured surface into a rectangle about 12 by 18 inches. - Spreading the filling. Spread the cheesecake filling evenly over the dough. Leave a small border around the edges. - Cutting and arranging rolls. Roll the dough tightly from one end. Cut the log into 12 equal pieces. Place them cut side up in a greased baking dish. - Baking time and tips. Preheat your oven to 350°F. Brush the tops with the egg wash. Bake for 25 to 30 minutes, until golden brown. Let them cool slightly before serving. For an extra sweet touch, drizzle with icing made from powdered sugar and milk. For the full recipe, refer to the recipe above. To get the best dough, start with warm milk. It wakes up the yeast. Use a kitchen scale for accurate flour measurements. Too much flour can make your rolls tough. Knead the dough until it feels smooth and elastic. If your dough is sticky, add a little flour, one tablespoon at a time. You want it soft, not wet. Flavored extracts can boost your rolls. Try almond or lemon for a twist. Always use fresh strawberries. They add sweetness and a burst of flavor. Frozen strawberries can be watery and change the texture. Fresh berries give the best results. Garnishing makes your rolls pop. Add fresh strawberries on top for color. A drizzle of icing adds sweetness and makes it look fancy. Serve with whipped cream for a treat. It makes every bite feel special. Arrange the rolls on a pretty plate. This makes them hard to resist. For a fun touch, add mint leaves for color and freshness. For the full recipe, check the main section. {{image_2}} You can get creative with your sweet rolls. Try adding chocolate chips for a rich twist. They melt into gooey pockets of goodness. Nut butter swirls can also make your rolls extra special. Just drizzle your favorite nut butter before rolling. This adds a nutty flavor that pairs well with strawberries. If you need gluten-free options, use a gluten-free flour blend. Make sure it has xanthan gum for the right texture. For a vegan twist, swap out the cream cheese. You can use a vegan cream cheese substitute or even a cashew cream. Both options keep your rolls creamy and delicious. You can change the fruit based on the season. In summer, add peaches or blueberries for a fresh taste. In winter, consider adding spices like cinnamon and nutmeg. This makes your rolls perfect for holiday gatherings. You could even try a pumpkin cheesecake filling for fall vibes. The options are endless! To keep your strawberry cheesecake sweet rolls fresh, place them in an airtight container. Store them in the fridge. They stay good for about 3 to 4 days. If you want them to last longer, freezing is a great option. You can freeze sweet rolls before or after baking. For rolled sweet rolls, wrap them well in plastic wrap. Place them in a freezer bag. This method keeps them fresh for up to 2 months. If you freeze baked rolls, let them cool completely first. Wrap them tightly and store them in a container. For thawing, leave them in the fridge overnight. To reheat, follow the reheating suggestions below. To avoid drying out your sweet rolls, use a microwave or oven. If using a microwave, cover the rolls with a damp paper towel. Heat them for about 20-30 seconds. For the oven, preheat it to 350°F (175°C). Place the rolls in a dish and cover with foil. Heat for about 10-15 minutes. This keeps them soft and tasty. Enjoy your delicious rolls warm! For the full recipe, check the earlier section. Yes, you can prepare the rolls ahead of time. You can make the dough and filling, then assemble the rolls. Cover them tightly and refrigerate. Bake them the next day. This saves you time and keeps them fresh. These sweet rolls last about 2 to 3 days at room temperature in an airtight container. If you want to keep them longer, store them in the fridge for up to a week. Just remember, they taste best fresh! Absolutely! You can use blueberries, raspberries, or peaches. Just make sure to chop the fruit into small pieces. Each fruit will give your rolls a different flavor, so feel free to experiment! If you don’t have instant yeast, you can use active dry yeast instead. Just remember to activate it first. Mix it with warm milk and sugar. Let it sit for about 5 to 10 minutes until it bubbles. Yes, you can make these rolls dairy-free. Use almond milk or oat milk instead of regular milk. For the cream cheese, try a plant-based cream cheese alternative. This way, everyone can enjoy these sweet rolls! Check the Full Recipe for more details. In this blog post, we explored how to make Strawberry Cheesecake Sweet Rolls from scratch. We covered the essential ingredients, kitchen tools, and clear steps to prepare the dough, filling, and bake the rolls. I shared tips for perfecting the dough, enhancing flavors, and presenting your rolls beautifully. Remember, you can customize them with different fillings and dietary options. Enjoy experimenting in the kitchen, as baking is all about creativity. Prepare these tasty rolls to delight any gathering or treat yourself!

Strawberry Cheesecake Sweet Rolls Delightful Treat

Are you ready to treat yourself to a delicious dessert? These Strawberry Cheesecake Sweet Rolls are a perfect blend of

- 1 pound beef stew meat, cubed - 1 pound lamb shoulder, cubed - 4 large carrots, chopped - 3 potatoes, diced - 2 onions, finely chopped - 4 cloves garlic, minced - 1 cup beef broth - 1 cup vegetable broth - 2 tablespoons olive oil - 2 teaspoons dried thyme - 2 teaspoons smoked paprika - Salt and pepper, to taste - Fresh parsley, chopped (for garnish) Dwarven Feast is all about hearty flavors. I love using beef and lamb for rich taste. The beef stew meat adds depth. Lamb shoulder brings a unique, tender bite. Together, they create a warm base for the stew. Next, we need vegetables to add sweetness and texture. Carrots are perfect for color and taste. Potatoes make the dish filling and creamy. Onions and garlic bring aromatic notes that elevate every bite. The broths keep everything moist and flavorful. Beef broth adds richness. Vegetable broth balances the flavors. Thyme and smoked paprika give earthy warmth. This mix truly captures the essence of comfort food. - 1 cup roasted chestnuts, chopped - Rustic bread for serving For a fun twist, I often add roasted chestnuts. They lend a nutty crunch that surprises the palate. Rustic bread is perfect for dipping. It soaks up the stew's rich broth. You won't want to miss this addition! Now, let’s dive into the full recipe. This Dwarven Feast is great for cozy gatherings. It brings everyone together around the table. 1. In a large pot, heat 2 tablespoons of olive oil over medium heat. 2. Add 2 finely chopped onions and 4 minced garlic cloves. Sauté them until they are soft and fragrant, about 4-5 minutes. 3. Next, add 1 pound of cubed beef stew meat and 1 pound of cubed lamb shoulder. Brown the meat on all sides for about 8-10 minutes. If your pot is small, do this in batches to avoid overcrowding. 1. Once the meat is browned, add 4 chopped carrots, 3 diced potatoes, and 1 cup of chopped roasted chestnuts to the pot. Stir everything together well. 2. Pour in 1 cup of beef broth and 1 cup of vegetable broth. Make sure the liquid covers the meat and veggies. 3. Sprinkle in 2 teaspoons of dried thyme, 2 teaspoons of smoked paprika, and salt and pepper to taste. Stir to coat all the ingredients with the spices. 1. Bring the mixture to a boil over high heat. Then, reduce the heat to low and cover the pot. 2. Let it simmer for 1.5 to 2 hours. This makes the meat tender and melds the flavors. 3. Stir the stew occasionally during cooking. If it gets too thick, add more broth or water as needed. 4. Taste the stew towards the end of cooking and adjust the seasoning with salt and pepper, if needed. Now your hearty Dwarven stew is ready to warm up any gathering. For the full recipe, check the provided details! To make the best Dwarven Feast hearty stew, start with the meat. When you brown the beef and lamb, use a hot pot. This helps to lock in their juices. Brown them in batches if your pot is small. Overcrowding cools the meat. Next, cooking time can change based on your equipment. If you use a slow cooker, you may need up to four hours on low heat. For a pressure cooker, it can take just 30 minutes. Always check the meat; it should be tender. Serve your Dwarven Feast in sturdy bowls for a rustic feel. Wooden platters also add charm. Pair it with crusty bread for dipping. This makes each bite special. For garnishing, sprinkle fresh parsley on top. This adds a bright color and fresh flavor. You can also place a few roasted chestnuts around the dish. They look great and add texture. To explore more ways to enjoy this dish, check the Full Recipe for tips on sides and variations! {{image_2}} You can easily switch the meats in this recipe. If you prefer chicken, use boneless thighs. They add nice flavor and tenderness. For pork, try shoulder or belly for rich taste. Both options work well. Just adjust the cooking time slightly. Chicken cooks faster, while pork needs a bit longer to become tender. You can make a hearty stew without meat. Start with a mix of root vegetables like carrots, potatoes, and parsnips. Add beans or lentils for protein and fiber. Use vegetable broth for depth of flavor. Toss in mushrooms for a meaty texture. This stew will still feel cozy and filling. Get creative with spices to give your stew a unique twist. Try adding cumin or coriander for warmth. A dash of chili powder can bring heat if you like spice. Fresh herbs like rosemary or sage add a fragrant touch. Experiment with different flavors to find your favorite combination. To keep your hearty stew fresh, let it cool first. Then, pour it into airtight containers. This helps keep the stew safe and tasty. Store it in the fridge. Your stew will stay good for about three to four days. If you want to keep it longer, freeze it. It can last for up to three months in the freezer. Just remember to label the containers with the date! When it's time to enjoy your leftovers, there are great ways to reheat them. The best method is on the stove. Pour the stew into a pot and heat it over medium heat. Stir often to heat evenly. If the stew seems too thick, add a splash of broth or water. You can also use a microwave if you're in a hurry. Place the stew in a microwave-safe bowl. Cover it with a lid or wrap to avoid splatters. Heat it in short bursts, stirring in between. This keeps the flavors intact. To refresh the dish, add a bit of fresh parsley or a squeeze of lemon juice. This gives the stew a nice lift. Enjoy your Dwarven Feast stew just like the first time! A Dwarven Feast is a grand meal often shared among family and friends. It celebrates community and togetherness. This feast has roots in fantasy literature, especially within tales of dwarves. These hearty gatherings often include rich, robust dishes. The focus is on comfort and flavor, using simple yet bold ingredients. This style of cooking reflects the dwarven culture, which values craftsmanship and tradition. Preparing the Dwarven Feast takes about 20 minutes. Cooking time is around 1.5 to 2 hours. So, the total time is about 2 hours and 20 minutes. Start by gathering your ingredients and prepping them. This includes chopping vegetables and cubing the meats. Cooking involves browning the meat first, then adding the veggies and broth. It’s a slow cook, which allows flavors to deepen. Yes, you can make the Dwarven Feast in advance. Prepare the stew a day before your gathering. Let it cool, then store in the fridge. This helps the flavors meld even more. When ready to serve, simply reheat it on the stove. Add a little water or broth if it thickens too much. This way, you enjoy stress-free cooking during your cozy gathering. This blog post shared all you need for a Dwarven Feast. We covered the key ingredients and cooking steps. You learned tips for perfecting the dish and how to store leftovers. We even explored fun variations for meat lovers and vegetarians. Plan to try this hearty meal soon. Enjoy the rich flavors and warmth it brings. You won't regret diving into this hearty feast!

Dwarven Feast Hearty Stew for Cozy Gatherings

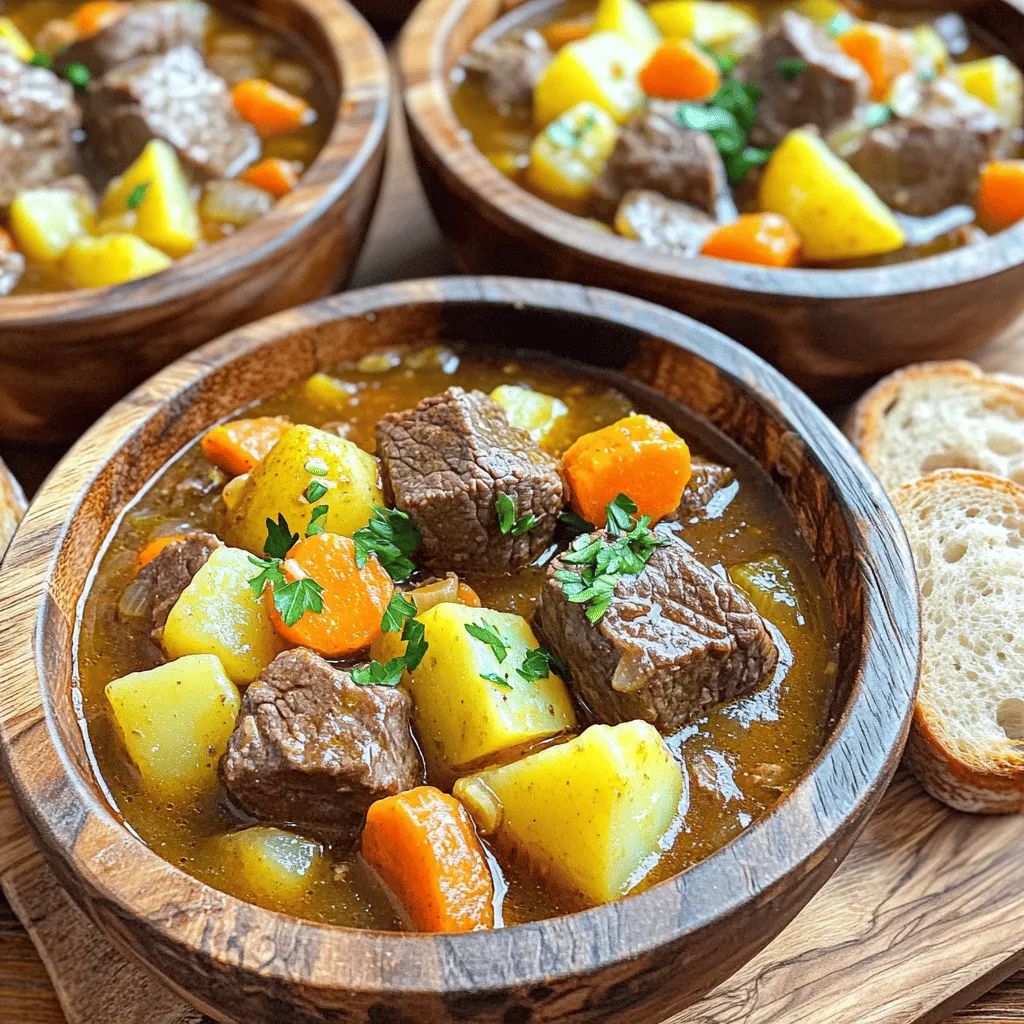
Gather around the hearth, my friends! Today, I’m taking you on a culinary journey to create a Dwarven Feast that

To make these delicious enchiladas, you need the following main ingredients: - 2 cups cooked chicken, shredded - 8 oz cream cheese, softened - 1 cup shredded cheddar cheese - 1 cup sour cream - 1 can (10 oz) enchilada sauce - 8 small flour tortillas - 1 teaspoon garlic powder - 1 teaspoon cumin - ½ teaspoon chili powder - Salt and pepper to taste These ingredients blend well to create a creamy and tasty filling. The cream cheese adds a great texture. The spices give the dish a nice kick that you will love. You can add some extra touches to your enchiladas with these garnishes: - Fresh cilantro, for garnish - Sliced jalapeños, if you like heat - Diced avocado, for creaminess - Sour cream, for extra richness For sides, consider serving these with: - Mexican rice - Refried beans - A simple green salad These sides and garnishes will make your meal even better. To prepare these enchiladas, you will find these tools helpful: - Mixing bowl, for combining ingredients - 9x13-inch baking dish, for baking - Spoon, for filling tortillas - Oven mitts, for safe handling Having the right tools makes cooking easier and more fun. Use these to create a perfect dish that everyone will enjoy. For the full recipe, check the earlier section. First, gather all the ingredients. You need cooked chicken, cream cheese, cheddar cheese, sour cream, enchilada sauce, tortillas, and spices. Start by shredding the chicken if you haven’t done so. Next, let the cream cheese soften at room temperature for easy mixing. This will help create a smooth and creamy filling. Now, it's time to fill the tortillas. In a bowl, mix the shredded chicken, cream cheese, half of the cheddar cheese, sour cream, garlic powder, cumin, chili powder, salt, and pepper. Stir until everything is well combined. Spread a little enchilada sauce on the bottom of a baking dish. Take a tortilla and scoop about ¼ cup of the chicken mix into the center. Roll it up tightly and place it seam-side down in the dish. Repeat this until all tortillas are filled. Once all the enchiladas are in the dish, pour the rest of the enchilada sauce over them. Make sure they are fully covered. Then, sprinkle the remaining cheddar cheese on top. Bake in a preheated oven at 350°F (175°C) for 25-30 minutes. Look for bubbly cheese and a golden top. After baking, let them cool for a few minutes. Garnish with fresh cilantro, and your creamy chicken enchiladas are ready to serve. For the full recipe, check the details above. To boost the creaminess of your enchiladas, use full-fat cream cheese. Mixing in some sour cream adds richness too. You can also blend in a bit of heavy cream for an even silkier texture. For a twist, try adding a little cream cheese to the enchilada sauce. It makes every bite heavenly. Baking your enchiladas at the right temperature is key. Preheat your oven to 350°F (175°C). This heat helps the cheese melt perfectly. Cover the baking dish with foil for the first 15 minutes. This keeps the enchiladas moist. Then, remove the foil to let the cheese get golden and bubbly. Lastly, let them rest for a few minutes after baking. This makes serving easier and helps the filling stay put. One mistake is overfilling the tortillas. Too much filling can cause them to break. Another mistake is not rolling them tightly. Loose enchiladas can open up during baking. Also, don’t skip the sauce on the bottom of the dish. It prevents sticking and adds flavor. Lastly, remember to let them cool a bit before cutting. This step helps keep the filling intact. For the full recipe, check out the complete guide on making these delicious enchiladas! {{image_2}} You can make these enchiladas vegetarian by swapping out the chicken. Use 2 cups of cooked vegetables instead. Great options include bell peppers, zucchini, and spinach. This veggie mix gives you color and flavor. Keep the cream cheese and spices the same for a creamy texture. You can still use the same enchilada sauce and tortillas. These enchiladas are just as tasty! If you like heat, add some spice! Mix 1-2 jalapeños into the chicken mix. You can also use spicy enchilada sauce. For extra kick, sprinkle some red pepper flakes on top. This will give your enchiladas a nice zing. You can also use pepper jack cheese instead of cheddar. This adds creaminess and a spicy kick. Flour tortillas are great, but you can try others too. Corn tortillas work well for a gluten-free option. They add a lovely, nutty flavor. You can also use whole wheat tortillas for a healthier choice. They have more fiber and nutrients. Just make sure to warm them up to prevent tearing. Enjoy exploring these variations! Don’t forget to check the full recipe for all the details. To store leftover enchiladas, let them cool first. Place them in an airtight container. Ensure they are covered tightly to keep them fresh. You can store them in the fridge for up to three days. This helps maintain their taste and texture. If you are unsure about how long they will last, mark the date on the container. If you want to freeze your enchiladas, make sure they are completely cool. Wrap each enchilada tightly in plastic wrap. Place them in a freezer-safe bag or container. You can freeze them for up to three months. Label the bag with the date. When you are ready to eat them, they will taste just as good. To reheat your enchiladas, you have a few options. The oven is great for even heating. Preheat your oven to 350°F (175°C). Place the enchiladas in a baking dish. Cover them with foil to keep them moist. Bake for about 20 minutes. You can also use a microwave for quick reheating. Place a few on a microwave-safe plate. Heat in 30-second intervals until warm. Just be careful not to overcook them. Enjoy your enchiladas just like fresh from the oven! Cream Cheese Chicken Enchiladas last about 3 to 4 days in the fridge. Make sure to store them in an airtight container. This keeps the flavors fresh and tasty. If you notice any odd smells or changes in color, it’s best to throw them out. Always trust your senses when it comes to food safety. Yes, you can make these enchiladas ahead of time. You can prepare them a day in advance, then cover and store them in the fridge. When you’re ready to bake, just pour the sauce and cheese on top. This saves time and is perfect for busy days. Just remember to adjust the baking time if they are cold from the fridge. You can serve many sides with Chicken Enchiladas. Here are some tasty options: - Spanish rice - Refried beans - Fresh guacamole - Pico de gallo - A simple green salad with lime dressing These sides add color and flavor to your meal. They also help balance the richness of the enchiladas. Enjoy your feast! For the complete recipe, check out the Full Recipe section. This article shows how to make easy cream cheese chicken enchiladas. We covered main ingredients, steps, and tips to make them great. You learned about variations and how to store leftovers. Remember, the right tools make cooking easier. Avoid common mistakes for tasty results. Try different styles and toppings to keep meals fun. Enjoy your cooking journey, and make these enchiladas your own! They are a tasty dish that can impress anyone. Happy cooking!

Easy Cream Cheese Chicken Enchiladas Tasty and Quick Recipe

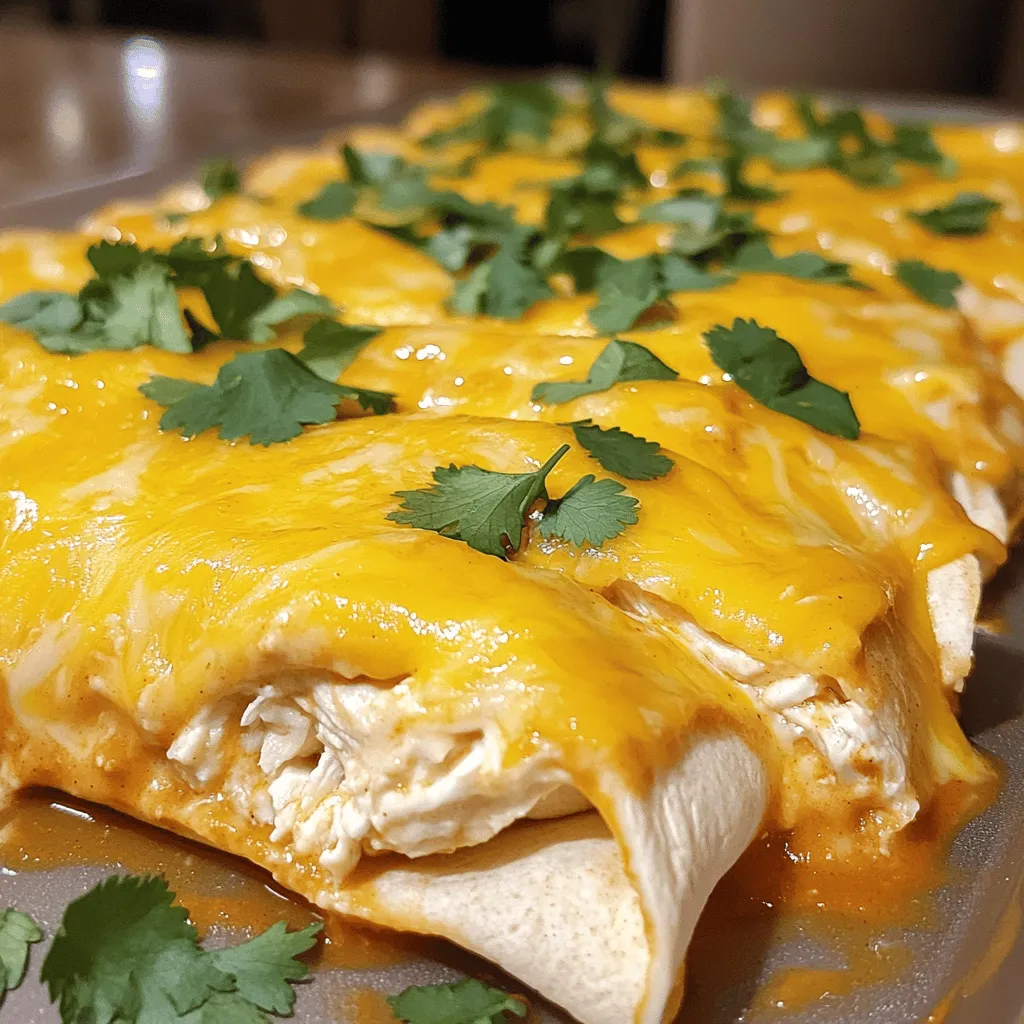
Looking for a tasty and simple dinner idea? These Easy Cream Cheese Chicken Enchiladas will hit the spot! With creamy

To make this rich and creamy dessert, gather these ingredients: - 2 ripe avocados, pitted and peeled - 1/2 cup unsweetened cocoa powder - 1/2 cup maple syrup (or agave syrup) - 1/4 cup almond milk (or any plant-based milk) - 1 teaspoon vanilla extract - Pinch of salt - 1/4 cup melted dark chocolate (dairy-free) - Fresh berries and mint leaves for garnish (optional) Each ingredient plays a key role in achieving the perfect texture and flavor. The avocados give creaminess, while cocoa powder gives that rich chocolate taste. When picking avocados, choose ripe ones that feel slightly soft when pressed. They should have smooth skin, free of dark spots. Quality cocoa powder truly elevates this pudding. Opt for unsweetened, high-quality cocoa for the best flavor. The maple syrup or agave syrup should be pure for a natural sweetness. If you can, use organic almond milk. It adds a nice touch to the pudding. You can easily swap some ingredients if needed. For example, if you don’t have maple syrup, agave syrup works great. You can also use any plant-based milk you prefer, like soy or oat milk. If you want a nut-free option, try coconut milk. For added flavor, you can use vanilla bean paste instead of extract. If you’re not a fan of dark chocolate, try using vegan chocolate chips. These simple swaps let you customize this vegan chocolate avocado pudding to your taste. For the full recipe, check out the detailed instructions. First, gather all your ingredients. You need ripe avocados, unsweetened cocoa powder, maple syrup, almond milk, vanilla extract, salt, and melted dark chocolate. Ripe avocados are key. They should be soft to the touch. This ensures a creamy pudding. Measure your ingredients carefully. This makes blending easier and faster. Now, it’s time to blend! Start by placing the avocados in your blender or food processor. Add in the cocoa powder, maple syrup, almond milk, vanilla extract, and a pinch of salt. Blend on high speed until the mixture is smooth and creamy. If your blender struggles, pause to scrape down the sides. This helps everything blend evenly. Once smooth, slowly pour in the melted dark chocolate. Blend again until it mixes well. Taste your pudding. If you want it sweeter, add a little more maple syrup. Blend for a few more seconds to combine. Transfer your luscious pudding into serving bowls. Cover them with plastic wrap or a lid. Place them in the fridge for at least 30 minutes. This chilling time helps the pudding thicken. When ready to serve, take them out. You can garnish with fresh berries or mint leaves for a pop of color. Enjoy your vegan chocolate avocado pudding! For the complete recipe, refer to the Full Recipe section above. To get a creamy and smooth pudding, start with ripe avocados. They should feel soft but not mushy. When you blend, use a high-speed blender or food processor. This helps break down the avocados well. If the mixture is too thick, add a little more almond milk. Blend again until it’s velvety. Taste is key! After blending, try a spoonful. If it needs more sweetness, add a bit more maple syrup. Blend again for a few seconds. Keep tasting until it feels just right. You can also swap maple syrup with agave syrup if you want a different flavor. Presentation makes dessert special. For this pudding, I love using fresh berries and mint leaves. They add color and freshness. You can also sprinkle some cocoa powder on top. Try adding a few dark chocolate shavings for extra flair. For the full recipe, visit [Full Recipe]. Enjoy making your vegan chocolate avocado pudding! {{image_2}} You can add fun flavors to your pudding. Try adding a shot of espresso for a rich coffee taste. You can also mix in spices like cinnamon or cayenne for a warm kick. A dash of sea salt can highlight the chocolate flavor nicely. Each tweak can make this dessert feel new and exciting. If you want to change the sweetener, maple syrup works great, but you can use agave syrup too. For a sugar-free option, try using stevia or monk fruit sweetener. When it comes to milk, almond milk is my go-to, but oat milk or coconut milk can be used instead. Each milk will change the taste a bit, so feel free to experiment! While serving in bowls is classic, you can get creative. Try using small cups or shot glasses for a fun twist. Layer the pudding in a parfait with granola or fruits. You can also pipe it into a pie crust for a unique dessert. The options are endless, and each presentation adds to the fun of enjoying this tasty treat. For the full recipe, check out [Full Recipe]. To keep your vegan chocolate avocado pudding fresh, store it in an airtight container. This helps prevent air from entering and keeps it creamy. Make sure to cover the surface with plastic wrap if you don't have a lid. This will stop the pudding from turning brown. You don’t need to reheat this pudding. It tastes best when chilled. If you want it warm, gently heat it in a saucepan over low heat. Stir it often to avoid cooking the pudding. This pudding lasts about 3 to 5 days in the fridge. If you want to store it longer, you can freeze it. Place it in a freezer-safe container. It will stay good for up to 3 months. When you want to eat it, thaw it overnight in the fridge. Stir well after thawing to regain the creamy texture. For the best results, enjoy it fresh. You can find the full recipe to make this delightful treat anytime. To make this pudding sugar-free, swap the maple syrup with a sugar-free sweetener. Options like stevia or erythritol work well. Start with a small amount and adjust to taste. Remember, the sweetness level may vary between sweeteners. Always blend until smooth to keep the creamy texture. Yes, you can make this pudding without a blender. Use a fork or potato masher to mash the ripe avocados until smooth. Then, mix in the cocoa powder, maple syrup, and almond milk. Stir well until everything is combined. It may take a bit longer, but it can still be delicious! You can use frozen avocados, but you must thaw them first. Place them in the fridge overnight or run them under warm water. Once thawed, drain any excess water. This will help keep the pudding smooth. Then, follow the recipe as usual for a tasty treat. For the complete recipe, check the Full Recipe section! This blog post covered how to make vegan chocolate avocado pudding. We explored the best ingredients, methods for prep, and blending tips. I shared ideas for flavor and sweetener swaps. I also included storage info and FAQs for common questions. With this pudding, you can enjoy a creamy and rich dessert without guilt. Remember, experimenting with spices or different milks can bring your creation to the next level. Enjoy your journey to making the perfect vegan treat!

Vegan Chocolate Avocado Pudding Indulgent Dessert

Craving a sweet treat that’s both rich and healthy? You’ll love this Vegan Chocolate Avocado Pudding! It’s creamy, delicious, and

To make Sweet Potato Black Bean Enchiladas, gather these simple ingredients: - 2 medium sweet potatoes, peeled and diced - 1 can (15 oz) black beans, rinsed and drained - 1 cup corn kernels (fresh or frozen) - 1 teaspoon cumin - 1 teaspoon chili powder - Salt and pepper, to taste - 2 cups enchilada sauce (store-bought or homemade) - 8 small corn tortillas - 1 cup shredded cheese (cheddar or Monterey Jack) - Fresh cilantro, for garnish - 1 avocado, sliced (for topping) These enchiladas are a tasty way to enjoy healthy ingredients. Each serving offers: - Calories: 350 - Protein: 14g - Carbohydrates: 54g - Dietary Fiber: 10g - Total Fat: 12g Sweet potatoes provide vitamins A and C while black beans add protein and fiber. This dish is filling and nutritious. You can adjust this recipe to fit various diets. Here are some options: - Vegan: Omit cheese or use a vegan cheese substitute. - Gluten-Free: Use gluten-free tortillas instead of corn tortillas. - Low-Carb: Substitute sweet potatoes with zucchini or cauliflower. These changes keep the dish flavorful while meeting different dietary needs. For the full recipe, check the earlier section. First, you need to preheat your oven to 375°F (190°C). This step is key for even cooking. Next, bring a large pot of salted water to a boil. Add the diced sweet potatoes and cook them for 10-12 minutes. You want them to be fork-tender. After that, drain and set them aside. In a large bowl, combine the sweet potatoes, rinsed black beans, corn, cumin, chili powder, salt, and pepper. Mix it well so all the flavors blend together. This filling will be the heart of your enchiladas. Now, warm the corn tortillas. Use a dry skillet over medium heat. Heat them for about 30 seconds on each side. This makes them soft and easy to work with. Grab a greased 9x13-inch baking dish. Pour about 1/2 cup of enchilada sauce on the bottom. Take one tortilla and fill it with about 1/3 cup of your sweet potato mixture. Sprinkle a little cheese on top, then roll it up tightly. Place it seam-side down in the dish. Repeat this for all tortillas. Pour the remaining enchilada sauce over the rolled enchiladas. Make sure they are covered well. Then, sprinkle the rest of the cheese on top. Cover the dish with foil and bake for 20 minutes. After that, remove the foil. Bake for another 10-15 minutes until the cheese is melted and bubbly. Take the dish out of the oven and let it cool for a few minutes. Before serving, garnish with fresh cilantro and sliced avocado. Enjoy your Sweet Potato Black Bean Enchiladas, bursting with flavor! For more detailed guidance, check the Full Recipe. To make the best enchiladas, use fresh tortillas. They should be soft and warm. Heat them in a skillet for a few seconds. This makes them easy to roll. Also, don’t overfill the tortillas. About 1/3 cup of filling works well. If you pack them too tight, they can break. When cooking sweet potatoes, cut them into even pieces. This helps them cook evenly. Boil them for 10-12 minutes until fork-tender. If you prefer, you can also roast them. Just toss them with a little oil, salt, and pepper. Roast at 400°F for about 25 minutes. This adds a nice caramelized flavor. For cheese, I love using cheddar or Monterey Jack. Both melt nicely and add great taste. Feel free to mix them for more flavor. As for sauces, you can use store-bought enchilada sauce or make your own. A homemade sauce gives a fresh taste and goes well with the sweet potatoes. For a twist, add some lime juice or cilantro to the sauce. You can find the Full Recipe for more detailed steps. {{image_2}} You can add ground turkey or chicken to your enchiladas. This step adds protein and richness. Start by cooking 1 pound of ground meat in a skillet until brown. Drain the fat and mix the meat with the sweet potato filling. This makes the dish hearty and satisfying. You can also season the meat with cumin and chili powder to match the filling's flavors. To make these enchiladas vegan, swap the cheese for a plant-based option. You can use cashew cheese or nutritional yeast for a cheesy flavor. Replace the regular tortillas with corn tortillas that are dairy-free. Ensure your enchilada sauce contains no animal products. This way, you keep the deliciousness without any animal ingredients. If you like heat, add jalapeños to the mix. Chop 1-2 fresh jalapeños and stir them into the sweet potato filling. You can also sprinkle some sliced jalapeños on top before baking. This adds a nice kick and makes the dish more exciting. Adjust the amount based on your spice preference. To keep your enchiladas fresh, let them cool completely. Place leftovers in an airtight container. They will stay good in the fridge for up to four days. If you want to enjoy them later, freezing is a great option. To reheat, take the enchiladas out of the fridge. Preheat your oven to 350°F (175°C). Cover the dish with foil to keep them moist. Heat for 20-25 minutes, or until warm. You can also use a microwave. Place them on a microwave-safe plate and heat in 30-second intervals until hot. To freeze, wrap each enchilada tightly in plastic wrap. Then place them in a freezer-safe bag. They can last for up to three months. When you're ready to eat, thaw them overnight in the fridge. Bake them at 350°F (175°C) until heated through. This way, you can enjoy sweet potato black bean enchiladas anytime! For the full recipe, check the earlier section. Yes, you can prepare these enchiladas ahead of time. Just assemble them and cover tightly. Store in the fridge for up to 24 hours. When ready to cook, just bake as directed. This makes meal prep easy and quick! If you want to swap black beans, use pinto beans or kidney beans. You can also try lentils for a different texture. Each option adds protein and flavor to your dish. To make enchilada sauce, blend together: - 1 can (15 oz) of tomato sauce - 2 tablespoons chili powder - 1 teaspoon cumin - 1 teaspoon garlic powder - Salt to taste. Heat it in a pot until warm, stirring often. This simple sauce gives your enchiladas a fresh taste! Enchiladas go well with many sides, like: - Mexican rice - Refried beans - A fresh salad - Guacamole. These sides add more color and flavor to your meal. To make the enchiladas gluten-free, use corn tortillas instead of flour tortillas. Make sure the enchilada sauce is gluten-free as well. This way, you can enjoy the dish without worry! For the full recipe, check out the [Full Recipe]. You learned about making tasty Sweet Potato Black Bean Enchiladas. We covered the key ingredients, steps, and tips for success. You can even make variations to suit your taste. Storage options help keep your leftovers fresh. I hope you feel ready to try this fun recipe. Enjoy your cooking and impress everyone with your delicious enchiladas!

Sweet Potato Black Bean Enchiladas Flavorful Feast

Looking for a warm and tasty meal? You’ll love these Sweet Potato Black Bean Enchiladas! They combine rich flavors, healthy

To make crispy air fryer chicken wings, you need: - 2 lbs chicken wings - 1 tablespoon baking powder - 1 teaspoon garlic powder - 1 teaspoon onion powder - 1 teaspoon smoked paprika - 1/2 teaspoon salt - 1/2 teaspoon black pepper - 2 tablespoons olive oil You can add some extra kick with: - 1/4 teaspoon cayenne pepper (for heat) - Fresh herbs like parsley or cilantro for garnish You will need the following tools: - Air fryer - Large mixing bowl - Paper towels - Tongs or a spatula Start with fresh chicken wings. You want to use about 2 lbs. Pat them dry with paper towels. This step is key! It helps the wings crisp up nicely. Make sure to get rid of all moisture. Dry wings lead to crispy skin. Set the wings aside while you mix the spices. Grab a large bowl for the spice blend. Combine the following: - 1 tablespoon baking powder - 1 teaspoon garlic powder - 1 teaspoon onion powder - 1 teaspoon smoked paprika - 1/2 teaspoon salt - 1/2 teaspoon black pepper - 1/4 teaspoon cayenne pepper (optional) Mix these spices well. The baking powder is important. It makes the wings extra crispy. Now, add the chicken wings to the bowl. Drizzle 2 tablespoons of olive oil over them. Toss everything together. Ensure each wing is coated with the spice mix. This will give your wings great flavor. Preheat your air fryer to 400°F (200°C) for about 5 minutes. This step helps the wings cook evenly. Place the seasoned wings in a single layer in the basket. Don’t crowd them; they need space to crisp up. Cook for 25-30 minutes. Flip the wings halfway through. For extra crispiness, raise the temperature to 420°F (215°C) for the last 5 minutes. Keep an eye on them to avoid burning. Once they are golden brown, remove them from the fryer. Let them rest for a few minutes. Garnish with fresh herbs like parsley or cilantro before serving. For the full list of steps, check the Full Recipe. To get the best crispiness, start by drying the wings. Use paper towels to remove moisture. This step is key. Next, use baking powder in your spice mix. It helps create a crunchy crust. Preheat your air fryer before cooking. Set it to 400°F (200°C). For even more crunch, raise the heat to 420°F (215°C) for the last few minutes. Just watch them closely to avoid burning. One big mistake is not drying the wings well enough. Moisture leads to sogginess. Another mistake is overcrowding the air fryer. Always cook in a single layer. This helps the hot air circulate evenly. Don’t skip flipping the wings halfway. This ensures both sides get crispy. Lastly, don’t forget to check the temperature. Cooking at too low a heat will leave you with chewy wings. Chicken wings pair well with many sides. Try serving them with fresh veggies, like carrots and celery. A creamy dip, such as ranch or blue cheese, adds flavor. You can also offer different sauces on the side. Hot sauce or BBQ sauce can enhance the taste. For a fun twist, serve with a side of fries or onion rings. Enjoy your crispy air fryer chicken wings with friends and family! For the full recipe, click here. {{image_2}} You can change the flavor of your crispy air fryer chicken wings with different marinades. Some great options include teriyaki, buffalo, or honey mustard. Each adds a unique taste. To make a marinade, mix your choice of sauce with olive oil, garlic, and herbs. Let the wings soak for at least 30 minutes. This way, they absorb all the great flavors. You can choose between bone-in and boneless wings. Bone-in wings have more flavor. They also stay juicier during cooking. Boneless wings are easy to eat and cook faster. The choice is yours! Just know that the cooking time may change slightly. Bone-in wings need a few extra minutes to cook. Sauces are a must when serving chicken wings. Classic choices include ranch, blue cheese, and barbecue. For a spicy kick, try sriracha or hot sauce. You can also mix sauces for fun flavor combos. Dip your crispy wings in the sauce or drizzle it over the top. This makes every bite even better! To keep your leftover chicken wings fresh, store them in an airtight container. Make sure to let them cool to room temperature first. Place a paper towel at the bottom of the container to absorb moisture. This helps keep the wings crispy. You can store them in the fridge for up to three days. When you reheat chicken wings, the goal is to keep them crispy. The best way to do this is in the air fryer. Set the air fryer to 350°F (175°C). Heat the wings for about 5 to 10 minutes. Keep an eye on them to avoid drying out. This method brings back their crunch and flavor. If you want to save wings for later, freezing is a great option. Place the cooled wings on a baking sheet in a single layer. Freeze them for about an hour until solid. Then, transfer them to a freezer-safe bag. Remove as much air as you can to prevent freezer burn. You can store them for up to three months. When you’re ready to eat, thaw them in the fridge overnight before reheating. For the full recipe, check out the Crispy Air Fryer Chicken Wings section. Yes, you can cook frozen chicken wings in the air fryer. Start by preheating your air fryer to 400°F (200°C). Place the frozen wings in the basket, leaving space between them. Cook for about 30-40 minutes. Flip them halfway through for even cooking. They will come out crispy and delicious. Just remember, they may take longer than fresh wings. To make your wings spicier, add more cayenne pepper to the spice mix. You can also include hot sauce in the marinade. Try mixing in chili powder or paprika for extra heat. Toss the cooked wings in your favorite hot sauce for a kick. Adjust the spice level to your taste for the perfect heat. Many sauces go well with air fryer chicken wings. Here are some popular choices: - Ranch dressing - Blue cheese dressing - Honey mustard - BBQ sauce - Buffalo sauce - Garlic aioli Feel free to try different flavors to find your favorite. You can even mix sauces for a unique taste. Enjoy your crispy air fryer chicken wings with these tasty dips! For the full recipe, check out the detailed cooking guide. This post covered how to make tasty chicken wings in the air fryer. We explored key ingredients, kitchen tools, and step-by-step instructions to get perfect wings. I shared tips to help you avoid mistakes and ensure crispiness. You can also try different flavors and sauces to mix things up. Enjoy your wings fresh, or store them for later. So go ahead and impress your friends with your cooking skills!

Crispy Air Fryer Chicken Wings Your Next Favorite Dish

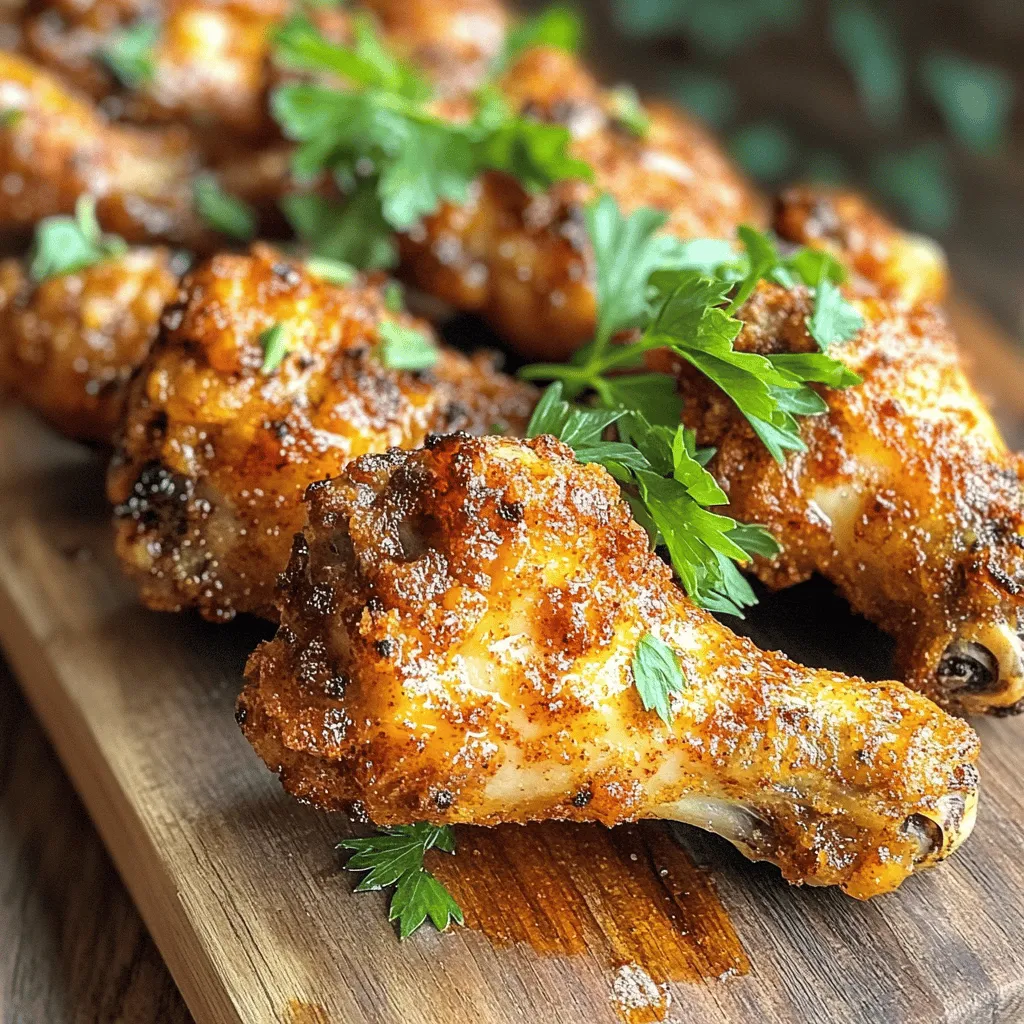
Looking for a dish that’s sure to impress? Crispy air fryer chicken wings could be your next favorite! In this

For a great Garlic Butter Shrimp Pasta, you'll need these main items: - 8 oz (225g) spaghetti or linguine - 1 lb (450g) shrimp, peeled and deveined - 4 tablespoons unsalted butter - 4 cloves garlic, minced - 1 teaspoon red pepper flakes, adjust to taste - 1 lemon, juice and zest - 1/2 cup cherry tomatoes, halved - 1/4 cup fresh parsley, chopped - Salt and pepper to taste These main ingredients bring together rich flavors. The shrimp adds protein, while garlic and butter create a tasty sauce. The lemon brightens the dish, and cherry tomatoes add sweetness. You can boost the taste of your dish with some optional ingredients. Consider adding: - Grated Parmesan cheese, for serving - A splash of white wine, for depth - Fresh basil, for a twist - Spinach or arugula, for greens These extras enhance the dish. Parmesan cheese gives creaminess, while white wine adds complexity. Fresh herbs like basil make it fresh and fragrant. Leafy greens add nutrients and balance. Pair your Garlic Butter Shrimp Pasta with these tasty sides: - A crisp green salad with vinaigrette - Garlic bread for dipping - Steamed vegetables like broccoli or asparagus These accompaniments round out the meal. A salad adds crunch, while garlic bread soaks up sauce. Steamed veggies bring more color and health. Check out the Full Recipe for all the details on making this delicious dish! Start by boiling a large pot of salted water. Add 8 oz of spaghetti or linguine. Cook according to the package instructions until the pasta is al dente. This usually takes about 8 to 10 minutes. Remember to reserve 1 cup of pasta water before draining. Set the pasta aside once done. In a large skillet, melt 2 tablespoons of butter over medium heat. Once it’s melted, add 4 cloves of minced garlic and 1 teaspoon of red pepper flakes. Sauté for about 1 minute. You want to smell that garlic! Now, raise the heat to medium-high. Add 1 pound of peeled and deveined shrimp to the skillet. Season with salt and pepper. Cook for about 2 to 3 minutes on each side. The shrimp should turn pink and opaque. Remove the shrimp from the skillet and set them aside. In the same skillet, add the remaining 2 tablespoons of butter. Toss in 1/2 cup of halved cherry tomatoes, 1 tablespoon of lemon juice, and the zest of 1 lemon. Sauté everything for about 3 to 4 minutes. The tomatoes should become soft and burst a bit. This adds great flavor! Return the cooked shrimp to the skillet. Now, add the drained pasta. Toss everything together. If it seems dry, add a bit of the reserved pasta water. Mix until the pasta is well-coated in the sauce. You’ll want a nice, creamy consistency. Remove the skillet from heat. Stir in 1/4 cup of chopped fresh parsley. Taste the dish and adjust the seasoning with more salt, pepper, or lemon juice if needed. Serve the pasta on plates. If you like, sprinkle some grated Parmesan cheese on top. Enjoy your Garlic Butter Shrimp Pasta! For the full recipe, check the full details above. To get the best shrimp, choose fresh or frozen shrimp. I prefer shrimp that are large and easy to cook. When cooking, do not overdo it. Cook shrimp for 2-3 minutes on each side. They should turn pink and opaque. If you see them curling, they are done. Overcooked shrimp become tough and rubbery. Seasoning is key for this dish. I use salt and pepper, but you can add more. For a spicy kick, increase the red pepper flakes. Lemon juice and zest brighten up the sauce. Taste as you go. If you like more lemon, add it! You can also sprinkle in fresh herbs like basil or thyme for extra flavor. Use a large skillet for cooking shrimp. A non-stick skillet works best. This helps prevent sticking and burning. A big pot is great for boiling pasta. Remember to keep a cup of pasta water. This water helps to create a creamy sauce later. Always have a spatula handy for stirring. For this dish, a serving bowl is nice for presentation. For the full recipe, check back to the start! {{image_2}} You can boost this dish's nutrition by adding vegetables. Spinach, broccoli, or bell peppers work well. Simply sauté them with the shrimp. Add the veggies right after the garlic. They will cook quickly and add both flavor and color. You can also toss in peas or zucchini for extra crunch. This not only makes the dish healthier but also more vibrant. While I love spaghetti or linguine, you can use other types of pasta. Penne, fettuccine, or even whole wheat pasta can be great choices. Each type brings a unique texture. Just remember to adjust cooking times based on the pasta you choose. You can even try gluten-free pasta for a different twist. It will taste great with the garlic butter sauce. Feel free to experiment with seasonings and sauces. Try adding fresh herbs like basil or thyme for depth. You can also swap out red pepper flakes for chili powder. For a creamier sauce, add a splash of heavy cream or cream cheese. Adding a bit of white wine while cooking can enhance the flavor too. It brings out the shrimp's natural sweetness. For the full recipe, check out the Garlic Butter Shrimp Pasta . To store your Garlic Butter Shrimp Pasta, let it cool first. Place it in an airtight container. This keeps the dish fresh. You can store it in the fridge for up to three days. If you want to keep it longer, freezing is a great option. When you're ready to eat, reheating is easy. You can use a microwave or a skillet. If using a microwave, place the pasta on a plate. Heat it on medium power for 1-2 minutes. Stir halfway to heat evenly. If using a skillet, add a splash of water or broth. Heat over medium until warm, about 5 minutes. This helps keep the pasta moist and tasty. Freezing is a smart choice for leftovers. To freeze, pack the cooled pasta in a freezer-safe container. It can last up to three months. When you’re ready to eat, thaw it in the fridge overnight. Reheat it as mentioned before. Remember, shrimp can lose some texture after freezing, but the flavor stays great. For the full recipe, check out the main article. The best shrimp for this recipe are medium to large ones. I prefer wild-caught shrimp for flavor. They hold up well during cooking and provide a nice bite. Look for shrimp labeled as "peeled and deveined" to save time. Fresh or frozen shrimp both work well. Just make sure to thaw frozen shrimp properly before cooking. Yes, you can use gluten-free pasta. There are many good options available, like brown rice or chickpea pasta. These options cook well and taste great with the garlic butter sauce. Just follow the cooking instructions on the package to get the best results. To spice up this dish, add more red pepper flakes to the garlic butter sauce. You can also stir in some diced jalapeños or a splash of hot sauce. Adjust the heat to fit your taste. Just remember, it’s easier to add heat than to take it away, so start small. Yes, you can prepare parts of this recipe ahead of time. Cook the pasta and shrimp in advance. Store each in separate containers in the fridge. When ready to eat, reheat them in a skillet with some extra butter and lemon juice. This keeps the dish fresh and tasty. Great side dishes include a simple green salad or garlic bread. You can also serve steamed vegetables like broccoli or asparagus. These sides add color and nutrients. They complement the pasta well and make your meal balanced and delicious. For the complete recipe, check out the [Full Recipe]. This blog taught you how to make delicious garlic butter shrimp pasta. You learned essential ingredients and how to cook each part step-by-step. Tips can help you get the right shrimp texture and add flavor. You also discovered tasty variations to enhance your dish. Finally, I covered storage and reheating methods. Enjoy your tasty pasta! Remember to try new things and make it your own. Happy cooking!

Garlic Butter Shrimp Pasta Flavorful and Easy Recipe

If you crave a tasty meal that’s quick to make, this Garlic Butter Shrimp Pasta recipe is for you. I’ll

For these muffins, I recommend using gluten-free all-purpose flour. This flour blend works well because it mimics the texture of regular flour. You can also try almond flour or oat flour for a different taste. Just remember, not all gluten-free flours are the same. Some may absorb more liquid than others. I often use coconut sugar in this recipe. It gives a lovely caramel flavor and is less processed. You can swap it for any granulated sweetener you like, such as cane sugar or brown sugar. Just keep in mind that different sweeteners may change the taste slightly. To boost flavor, I like adding lemon zest. It brightens the muffins and pairs perfectly with blueberries. You can also add chopped nuts like walnuts or pecans for crunch. A sprinkle of cinnamon or nutmeg can add warmth too. For a fun twist, try mixing in some dark chocolate chips. The Full Recipe provides all these details and more to help you create the perfect snack. Start by gathering all your ingredients. This keeps your space tidy and makes cooking smooth. You need gluten-free flour, baking powder, baking soda, salt, and coconut sugar. Have the eggs, almond milk, melted coconut oil, and vanilla extract ready. Don't forget the fresh blueberries and lemon zest. If you want, chop some nuts for extra crunch. Measure everything first for best results. In one bowl, mix the dry ingredients. Whisk the gluten-free flour, baking powder, baking soda, salt, and coconut sugar together. This gets rid of lumps and blends flavors. In another bowl, beat the eggs. Add almond milk, melted coconut oil, vanilla extract, and lemon zest. Stir until it looks smooth. Gradually pour the wet mix into the dry mix. Stir gently to combine. A few lumps are fine; don't overmix. Fill the muffin tin with the batter, about ¾ full for each cup. This helps them rise nicely. Bake at 350°F (175°C) for 18 to 20 minutes. Check with a toothpick; it should come out clean. Let the muffins cool in the tin for 5 minutes. Then, transfer them to a wire rack to cool completely. These steps help make your muffins fluffy and delicious. For the full recipe, check the section above. To make your muffins fluffy, use the right gluten-free flour. A good blend helps. Mix your dry and wet ingredients gently. Overmixing makes muffins dense. Adding the eggs one at a time helps too. Let the batter rest for a few minutes. This gives the flour time to absorb moisture. One big mistake is using expired baking powder or baking soda. Always check the dates. Don't skip the lemon zest; it brightens the flavor. If you use frozen blueberries, don’t thaw them first. This keeps the batter from turning blue. Lastly, don’t open the oven door too soon. It can cause your muffins to sink. After baking, let the muffins cool in the tin for five minutes. This helps them set. Move them to a wire rack to cool completely. Serve warm for the best taste. Try adding a sprinkle of powdered sugar on top. These muffins pair nicely with Greek yogurt or a cup of tea. For a fun twist, top them with chopped nuts or coconut flakes. Enjoy these muffins fresh from the oven or store them for later. For the full recipe, click here. {{image_2}} You can easily make these muffins vegan. Just replace the eggs with flax eggs. To make one flax egg, mix one tablespoon of ground flaxseed with three tablespoons of water. Let it sit for about five minutes until it thickens. Substitute your almond milk with any plant-based milk. This simple swap keeps your muffins moist and delicious. For a paleo twist, use almond flour instead of gluten-free flour. Almond flour gives a nutty flavor. You can also use honey or maple syrup as sweeteners. These options fit well in a paleo diet. Just remember to adjust the liquid in the recipe, as almond flour absorbs more moisture. Feel free to get creative with your muffins. Swap blueberries for other fruits like raspberries or chopped apples. You can also mix in nuts like pecans or walnuts for crunch. If you want to add extra flavor, try mixing in a teaspoon of cinnamon or nutmeg. Each change brings a new taste to this tasty treat. Enjoy experimenting with these variations! To keep your muffins fresh, store them in an airtight container. You can use a plastic or glass container. Place a paper towel at the bottom to absorb moisture. This helps keep the muffins soft. If you don't have a container, wrap them in plastic wrap. Store at room temperature for up to three days. For longer storage, refrigeration is an option, but it may dry them out. Freezing muffins is a great way to save them for later. First, let your muffins cool completely. Once cooled, wrap each muffin tightly in plastic wrap. This keeps air out and prevents freezer burn. Place the wrapped muffins in a freezer bag or a container. Label the bag with the date. You can freeze them for up to three months. When you want to eat one, just take it out and let it thaw at room temperature. To reheat your muffins, you have a few options. For a quick method, use the microwave. Place a muffin on a microwave-safe plate. Heat it for about 15-20 seconds. If you prefer a crispy texture, use the oven. Preheat it to 350°F (175°C). Place the muffins on a baking sheet and heat for about 5-7 minutes. This warms them up nicely while keeping the outside crisp. Enjoy your muffins warm for the best taste! Yes, you can make this recipe without eggs. Use a flaxseed meal or chia seed mix instead. To replace one egg, mix 1 tablespoon of flaxseed meal with 2.5 tablespoons of water. Let it sit for a few minutes until it gets thick. This mix works well as a binder in gluten-free recipes. The best gluten-free flour mix has a balance of textures. A mix of almond flour, coconut flour, and tapioca flour works great. You can also use a store-bought blend designed for baking. Just ensure it contains xanthan gum, which helps with texture and rise. To check if the muffins are done, insert a toothpick into the center. If it comes out clean or with a few crumbs, they are ready. If it has wet batter, bake for a few more minutes. Also, look for a golden-brown color on top. This means they are baked through. This blog post covered everything from ingredients to baking tips for delicious muffins. You learned about gluten-free flours, the right sweeteners, and flavor boosts. I shared step-by-step instructions to mix and bake perfect muffins. You also got great tips to avoid mistakes and make them fluffy. Lastly, I provided storage facts and answered common questions. Now, you can confidently bake your own tasty muffins. Enjoy trying different variations and impressing friends!

Gluten-Free Blueberry Muffins Simple and Tasty Snack

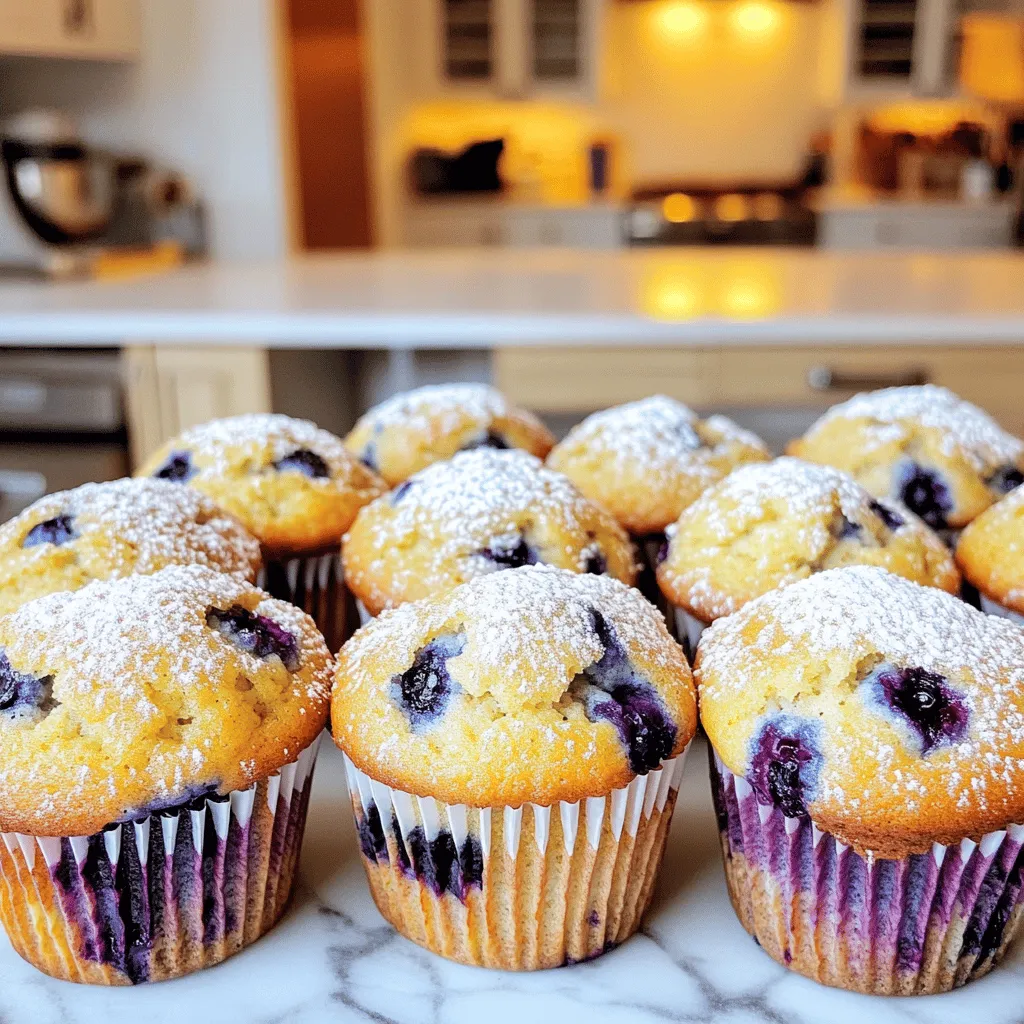
Are you craving a tasty snack that’s also gluten-free? These Gluten-Free Blueberry Muffins are simple to make and loaded with

Coconut Curry Lentil Soup is a warm and filling dish. It combines lentils, coconut milk, and spices. This recipe is simple and takes only 35 minutes to make. You will enjoy this rich and creamy soup. - 1 cup red lentils, rinsed - 1 can (14 oz) coconut milk - 4 cups vegetable broth - 1 onion, diced - 3 cloves garlic, minced - 1 tablespoon fresh ginger, grated - 2 tablespoons curry powder - 1 teaspoon turmeric powder - 1 teaspoon cumin - 1 tablespoon olive oil - 1 cup diced carrots - 1 cup spinach or kale, chopped - Salt and pepper to taste - Fresh cilantro for garnish - Juice of 1 lime Coconut Curry Lentil Soup is not only tasty but also healthy. Each serving is rich in protein and fiber. The lentils provide energy, while the coconut milk adds healthy fats. This soup is full of vitamins from the veggies too! You can find the Full Recipe above to start cooking today. First, gather your ingredients. You need red lentils, coconut milk, vegetable broth, onion, garlic, ginger, curry powder, turmeric, cumin, olive oil, diced carrots, spinach or kale, salt, pepper, cilantro, and lime. Rinse the lentils in cold water until the water runs clear. Dice the onion and garlic, and grate the ginger. This prep makes cooking easier. In a large pot, heat the olive oil over medium heat. Add the diced onion and sauté for about 5 minutes, until it turns soft and clear. Next, stir in the minced garlic and grated ginger. Cook for another 1-2 minutes until you smell the lovely aroma. Then, mix in the curry powder, turmeric, and cumin. Stir well for about a minute to bring out the spices' flavors. Now, pour in the vegetable broth and bring it to a boil. Once boiling, add the rinsed lentils and diced carrots. Reduce the heat to a simmer. Cover the pot and cook for 15-20 minutes until the lentils and carrots are tender. After that, stir in the coconut milk and chopped spinach or kale. Let it simmer again for another 5 minutes. This allows the greens to wilt and all the flavors to blend beautifully. Now, it's time to season your soup. Add salt and pepper to taste. Squeeze in the juice of one lime for a fresh twist. The lime juice brightens the soup and balances the rich coconut flavor. Serve the soup hot, garnished with fresh cilantro for that extra flavor pop. Enjoy this warm and comforting meal, perfect for any day! For the complete recipe, refer to the Full Recipe. To boost the flavor of your coconut curry lentil soup, consider adding a squeeze of lime juice right before serving. It brightens the dish and adds a fresh taste. You can also mix in some diced tomatoes for extra sweetness and acidity. Fresh herbs like cilantro or basil can elevate the soup's aroma and flavor. Don’t forget to taste as you go. Adjust salt and spices to suit your palate. Use a heavy pot to cook this soup. It helps heat evenly and prevents burning. Start with a good sauté of onions, garlic, and ginger. This step builds a flavor base. Toast the spices before adding liquids. This simple trick releases their oils and enhances their taste. If you want a creamier soup, blend a portion of it with an immersion blender. This adds a smooth texture without losing the hearty feel. Serving your soup in a vibrant bowl makes it pop. Add a drizzle of coconut milk on top for a beautiful finish. Sprinkle fresh cilantro for color and garnish. You can even top it with toasted coconut flakes for a fun crunch. Pair it with warm naan or rice for a complete meal. A wedge of lime on the side invites guests to add more zest. For the full recipe, refer to the earlier section. {{image_2}} Coconut curry lentil soup is already vegan and gluten-free. The base uses plant-based ingredients. You can enjoy this dish without worry. If you want to ensure it's gluten-free, check the broth label. Some store-bought broths may have gluten. You can easily swap ingredients in this soup. If you don't have red lentils, use green lentils. They will change the texture but still taste great. Want less coconut? Use almond milk or cashew milk. This will change the flavor, but it can be a fun twist. You can also add different veggies. Try sweet potatoes or bell peppers for more color and taste. Spices are key to flavor. If you like heat, add chili powder or cayenne pepper. For a smokier taste, try smoked paprika. Love fresh herbs? Use fresh basil or mint instead of cilantro. You can adjust spices to match your taste. Keep it fun and experiment with what you have! Explore the full recipe for more ideas on how to create your perfect coconut curry lentil soup. After making your coconut curry lentil soup, let it cool first. Once cool, pour it into an airtight container. Store it in the fridge for up to five days. This soup tastes even better the next day as the flavors meld together. Just remember to stir well before serving. You can freeze the soup for longer storage. Use freezer-safe containers or bags. Leave some space at the top, as liquids expand when frozen. The soup lasts for up to three months in the freezer. When you're ready to eat, let it thaw overnight in the fridge for best results. To reheat, you have a few options. You can use the microwave or the stovetop. If using a microwave, heat in short bursts and stir in between. On the stovetop, warm it over medium heat. Add a splash of vegetable broth if it seems too thick. Always taste and adjust the seasoning if needed. For more details, refer to the Full Recipe. Yes, you can use other lentils. Green or brown lentils work well. They have a firmer texture. They may take longer to cook than red ones. Adjust your cooking time as needed. Red lentils break down more, making the soup creamier. If you prefer a chunkier soup, go for green or brown. If you need a substitute, consider almond milk or cashew cream. These options add a nice flavor but keep the soup creamy. You can also use regular milk or heavy cream, but it will change the taste. For a lighter option, try vegetable broth with a splash of olive oil. To add heat, include diced jalapeños or serrano peppers. You can also add red pepper flakes. Start with a small amount and taste it as you go. If you want a deeper spice, try adding a pinch of cayenne pepper. Adjust to your own spice level for the best experience. For the full recipe, check out the complete list of ingredients and steps above. This post covered all you need to know about making a great soup. We explored ingredients, step-by-step instructions, and useful tips. You learned how to enhance flavors and present your dish beautifully. Variations allow for creativity, whether you choose a vegan twist or different spices. Lastly, we discussed storage methods to keep it fresh. Enjoy cooking and experimenting with your soup. The joy of a perfect recipe is just a spoon away.

Coconut Curry Lentil Soup Rich and Flavorful Meal

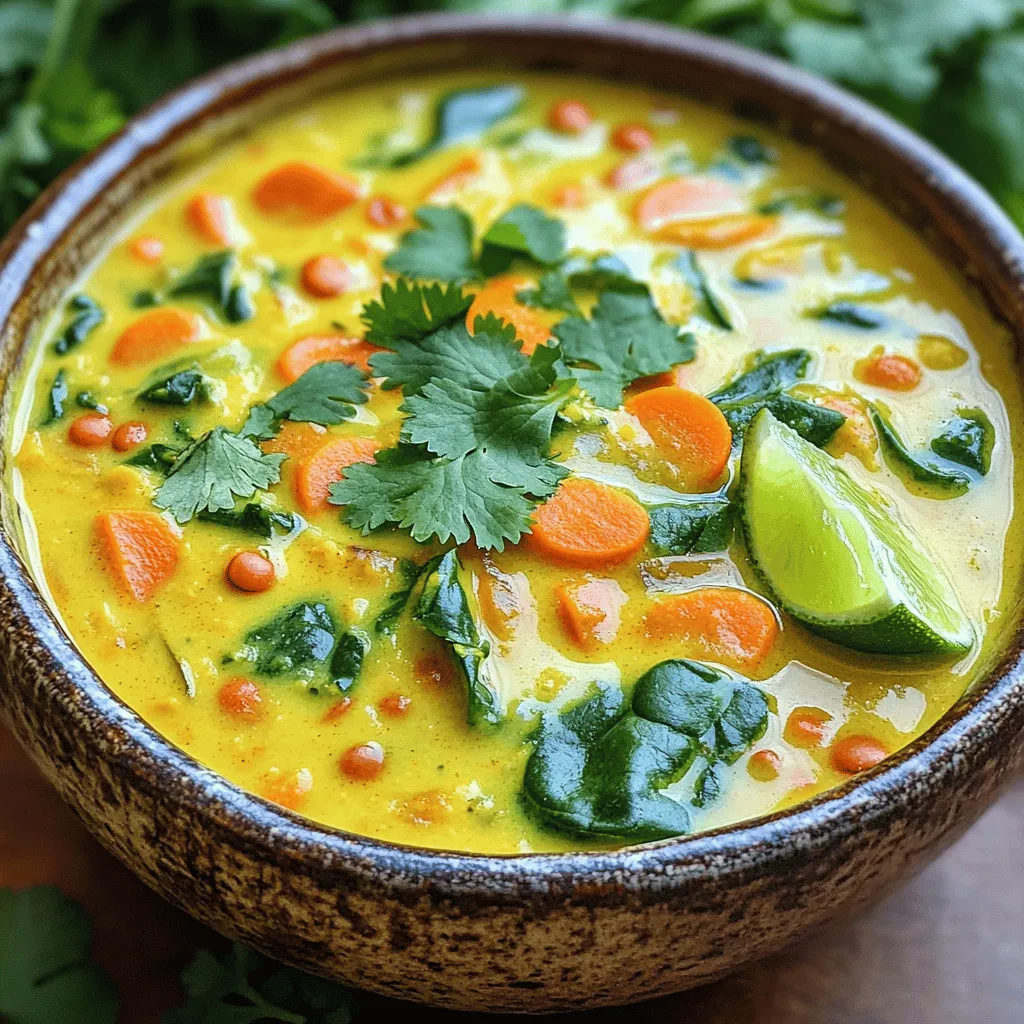
Are you ready to enjoy a warm bowl of Coconut Curry Lentil Soup? This rich and flavorful meal combines creamy

Older posts
Newer posts
← Previous Page1 … Page66 Page67 Page68 … Page82 Next →

dsad

© 2025 My Saved Recipe • Built with GeneratePress

Our Policies

  • Copyright Policy
  • Cookie Policy
  • GDPR Policy
  • Privacy Policy
  • Disclaimer
  • Terms Of Use

More Information

  • Home
  • About
  • Contact
  • Appetizers
  • Dessert
  • Dinner
  • Drinks
©2025, My Saved Recipe About Back To Top