Skip to content
DisclaimerTerms Of UseGDPR PolicyCookie Policy

My Saved Recipe

  • Home
  • Drinks
  • Appetizers
  • Dinner
  • Dessert
  • About
  • Contact
  • Privacy Policy
DisclaimerTerms Of UseGDPR PolicyCookie Policy

Savannah

To make the best white chicken chili, you need a few key ingredients. Here’s what you’ll need: - 2 tablespoons olive oil - 1 medium onion, chopped - 3 cloves garlic, minced - 2 medium jalapeños, deseeded and diced - 1 teaspoon ground cumin - 1 teaspoon dried oregano - 1/2 teaspoon coriander powder - 1/4 teaspoon cayenne pepper (adjust for spice preference) - 4 cups low-sodium chicken broth - 2 cans (15 oz each) white beans (like cannellini or great northern), drained and rinsed - 2 cups cooked chicken, shredded (rotisserie chicken works great) - 1 cup corn (fresh, frozen, or canned) - 1 cup cream cheese, softened - 1 cup shredded Monterey Jack cheese - Salt and pepper to taste - Fresh cilantro, chopped for garnish - Slices of lime for serving These ingredients create a warm and creamy blend. The chicken and beans add protein, while spices give it a nice kick. Feel free to add some optional ingredients to boost flavor: - Diced bell peppers for sweetness - Smoked paprika for a smoky touch - A splash of lime juice for brightness - Avocado slices for creaminess on top These additions can enhance your chili. Experiment with what you like best! You can switch some ingredients if you need to. Here are a few ideas: - Use turkey instead of chicken for a lighter dish. - Swap cream cheese for Greek yogurt for a healthier option. - If you want it spicy, add more jalapeños or a hotter pepper. These substitutions help you customize your chili to fit your taste or pantry. The Full Recipe provides a great base, but feel free to make it your own! 1. Start by heating 2 tablespoons of olive oil in a large pot over medium heat. 2. Add 1 chopped onion. Sauté it for about 5 minutes until it looks clear. 3. Next, stir in 3 minced garlic cloves and 2 diced jalapeños. Cook this mix for 2-3 minutes until it smells great. 4. Now, add 1 teaspoon of ground cumin, 1 teaspoon of dried oregano, 1/2 teaspoon of coriander powder, and 1/4 teaspoon of cayenne pepper. Stir well for about 1 minute to wake up those spices. 5. Pour in 4 cups of low-sodium chicken broth. Then add 2 cans of rinsed white beans. Let this mix come to a gentle simmer. 6. Toss in 2 cups of shredded chicken and 1 cup of corn. Let the chili simmer for 15-20 minutes. This helps all the flavors blend nicely. 7. Lower the heat, and add 1 cup of softened cream cheese. Stir until it melts and mixes well with the chili. 8. Gradually add 1 cup of shredded Monterey Jack cheese, stirring until it becomes creamy. 9. Finally, season with salt and pepper to taste. Adjust spices as needed. Serve hot, garnished with fresh cilantro and lime wedges. - Use Rotisserie Chicken: This can save you time on cooking and shredding chicken. - Pre-chop Veggies: Chop your onion and jalapeños ahead of time. Store them in the fridge for quick use. - Gather Ingredients: Before you start cooking, gather and measure your ingredients. This makes the process smoother. - Prep Time: 15 minutes - Cook Time: 25 minutes - Total Time: 40 minutes With these steps and tips, making the best white chicken chili is easy and fun. For the full recipe, check the earlier section. Enjoy your cooking! To make the best white chicken chili, focus on fresh ingredients. Use ripe jalapeños for a bright flavor. Sauté the onions until they are soft and sweet. Toasting the spices in the pot adds depth. Ensure the cream cheese melts well for creaminess. Simmer the chili gently to meld the flavors. Keep tasting and adjusting seasoning as you go. One common mistake is overcooking the chicken. If you use rotisserie chicken, add it later in the cooking process. Another mistake is not rinsing the white beans. Rinsing helps remove extra sodium and enhances taste. Also, don’t skip the lime juice! It brightens the chili and balances the richness. Lastly, be careful with the heat level; start with less cayenne. You can always add more if needed. Garnishes can elevate your chili. Fresh cilantro adds a pop of color and flavor. A squeeze of lime juice brightens every bite. You can also use sliced jalapeños for extra heat. Top with a sprinkle of shredded cheese for richness. Serve with tortilla chips for crunch. These simple touches make a big difference in taste and presentation. For the full recipe, check out the detailed instructions and enjoy every bite of this creamy delight! {{image_2}} You can easily change the heat level in your white chicken chili. Start with jalapeños. If you want it mild, remove the seeds and membranes. For more heat, leave some seeds in. You can also add cayenne pepper. Start with a small amount and taste as you go. For a milder version, skip the cayenne altogether. Remember, you can always add heat, but you can't take it away! You can make this chili meat-free and still delicious. Substitute the chicken with cooked quinoa or lentils. Use vegetable broth instead of chicken broth. Cream cheese can be replaced with cashew cream or coconut cream for a vegan option. You may also try adding more beans, like black beans or kidney beans, for extra protein. This keeps the chili hearty and satisfying. Get creative with your chili! You can add diced bell peppers for sweetness. Chopped spinach or kale adds color and nutrients. Want a smoky flavor? Try adding some smoked paprika or chipotle pepper. For a crunch, toss in some tortilla strips right before serving. You can even top it with fresh avocado slices for creaminess. Each add-in makes the dish unique! For the full recipe, check out the details above and enjoy your cooking adventure! To keep your white chicken chili fresh, use a clean container. Make sure it is airtight. Store it in the fridge for up to four days. Let it cool down before sealing. This helps preserve the taste and texture. When you're ready to eat, check for any signs of spoilage. If it smells off, toss it out. You can freeze white chicken chili for longer storage. Use freezer-safe containers or bags. Leave some space at the top, as the chili will expand. It can last up to three months in the freezer. To thaw, move it to the fridge overnight. You can also use the microwave on the defrost setting. When reheating, do it slowly on low heat. This keeps the flavor intact. Stir occasionally to ensure even heating. If the chili seems thick, add a splash of chicken broth. For microwave reheating, cover the bowl to keep moisture. Heat in short bursts, stirring in between. Enjoy your flavorful chili just like the first time! The total cooking time for the best white chicken chili is about 40 minutes. You will spend around 15 minutes prepping the ingredients. The actual cooking takes about 25 minutes. This time includes simmering the chili to blend all the flavors. Yes, you can make this chili ahead of time. In fact, it tastes even better the next day. Just store it in an airtight container in the fridge. You can enjoy it for up to three days. Reheat it on the stove over low heat, stirring often. To thicken white chicken chili, you have a few options. You can add more cream cheese or cheese. These ingredients help create a creamy texture. Another way is to mash some of the beans before adding them to the pot. This adds body to the chili without changing the flavor. You can also let it simmer longer to reduce the liquid. Each method will make your chili thicker and heartier. For the full recipe, check out the detailed list of ingredients and instructions. This blog post covered how to make the best white chicken chili. We discussed essential and optional ingredients and provided tips to perfect your dish. I shared step-by-step instructions for easy cooking. You learned how to avoid common mistakes and enhance flavors. We also explored variations for different diets. Finally, we talked about storage and reheating tips. Now, go ahead and create your own chili masterpiece. Enjoy this tasty dish with your friends and family!

The Best White Chicken Chili Flavorful and Easy Recipe

Are you ready to warm up your kitchen with the best white chicken chili? I’ve crafted a flavorful and easy

This dish shines with a few key ingredients. The sweet potatoes give a nice sweet base. The garlic adds that rich, bold flavor. Parmesan cheese brings a salty, nutty punch. Olive oil helps everything roast well and adds richness. When picking sweet potatoes, look for smooth skin. They should feel firm and heavy for their size. Avoid any with soft spots or bruises. The best sweet potatoes have a deep orange color. This means they are sweet and full of flavor. If you need a cheese swap, try Pecorino Romano. It has a similar taste but is a bit sharper. For garlic, garlic powder can work in a pinch. Use 1/8 teaspoon for each clove. Fresh garlic is best, but these swaps can still taste great! To start, gather all your ingredients. You need 4 medium sweet potatoes, olive oil, garlic, Parmesan cheese, dried oregano, smoked paprika, salt, and pepper. The first step is to preheat your oven to 425°F (220°C). Next, line a baking sheet with parchment paper. This helps with easy clean-up. Now, peel the sweet potatoes and cube them. Aim for uniform pieces so they cook evenly. In a large mixing bowl, add the cubed sweet potatoes and drizzle in 3 tablespoons of olive oil. Toss them well until they are fully coated in oil. This step is important for flavor and crispiness. Once the sweet potatoes are coated, add 4 minced garlic cloves, 1 cup of grated Parmesan cheese, 1 teaspoon of dried oregano, and 1 teaspoon of smoked paprika. Season with salt and pepper to your taste. Mix everything until the sweet potatoes are evenly covered. Spread the sweet potato mixture in a single layer on your lined baking sheet. Make sure the pieces are not crowded. This ensures they roast and not steam. Place the baking sheet in your preheated oven. Roast the sweet potatoes for 25-30 minutes. Halfway through the cooking time, flip the sweet potatoes. This helps them get crispy on all sides. For crispy sweet potatoes, don't skip the olive oil. It helps create that nice crunch. Use fresh garlic instead of garlic powder for a more robust flavor. Make sure you cut the sweet potatoes into similar-sized pieces. This helps them cook evenly. If you want extra crispiness, broil them for the last 2-3 minutes. Just watch them closely to avoid burning. Feel free to check out the Full Recipe for more details and serving suggestions! To make Parmesan garlic roasted sweet potatoes shine, add herbs and spices. Fresh herbs like rosemary or thyme work well. They add a nice touch. You can mix in red pepper flakes for heat. This gives a nice kick to the dish. Try using lemon zest for brightness. It will lift the flavors and make the dish pop! A few common mistakes can ruin your roasted sweet potatoes. First, don’t overcrowd the baking sheet. This can trap steam and make them soggy. Second, cut the sweet potatoes into even pieces. This ensures they cook at the same rate. Lastly, watch your roasting time closely. Overcooked sweet potatoes lose their taste and texture. You can easily turn this side dish into a full meal. Pair the sweet potatoes with grilled chicken or fish. They also go well with a fresh salad. For a vegetarian option, add black beans or chickpeas. This adds protein and fiber. Serve it all together for a colorful and satisfying plate. For the full recipe, check the details above! {{image_2}} You can switch up the cheese in these sweet potatoes. Try using cheddar for a sharp taste. Feta adds a salty kick and a crumbly texture. For a creamier option, go with goat cheese. Each cheese brings its own flavor, so feel free to mix and match. Want to spice it up? Add cayenne pepper for heat. If you like a smoky flavor, smoked salt can work wonders. You can also use fresh herbs like rosemary or thyme. Lemon zest adds brightness and pairs well with sweet potatoes. Experiment with spices to find your favorite mix. To make this dish vegan, swap the Parmesan for a dairy-free cheese. Nutritional yeast is a great option. It brings a cheesy flavor without dairy. You can also skip the cheese altogether and use extra garlic and spices for a tasty twist. This way, you keep the flavor while making it vegan-friendly. For the full recipe, check out the detailed instructions above. To store your Parmesan garlic roasted sweet potatoes, first let them cool. Place the cooled sweet potatoes in an airtight container. They will stay fresh for about three to four days in the fridge. Make sure to keep them away from moisture to avoid sogginess. When you're ready to enjoy leftovers, preheat your oven to 375°F (190°C). Spread the sweet potatoes on a baking sheet. Heat them for about 10 to 15 minutes, or until warm. This method keeps them crispy. You can also use a microwave, but they may lose some crunch. Heat in short bursts of 30 seconds, stirring in between. If you want to save sweet potatoes for later, freezing is a good option. First, let them cool completely. Spread them in a single layer on a baking sheet and freeze for about two hours. Once frozen, transfer them to a freezer-safe bag. They can last up to three months in the freezer. When ready to eat, thaw in the fridge overnight before reheating. For best results, reheat in the oven to retain their texture. For the complete recipe, refer back to the Full Recipe section. You can serve Parmesan garlic roasted sweet potatoes with many dishes. They pair well with grilled chicken, steak, or fish. Add a fresh salad to balance the meal. You can also enjoy them as a side with a hearty soup. Their savory flavor complements many foods, making them a great choice. Yes, you can make this recipe ahead of time. Cook the sweet potatoes and store them in the fridge. Just reheat them in the oven or microwave. This way, you can enjoy them without extra prep. For best taste, eat them within three days. Roasted sweet potatoes last about three to five days in the fridge. Store them in an airtight container for freshness. If you see any signs of spoilage, it's best to throw them out. You want to enjoy their delicious flavor without worry. For long-term storage, consider freezing them. This blog post covered everything about making Parmesan garlic roasted sweet potatoes. We discussed key ingredients, ideal preparation methods, and tips for perfect crispiness. You learned how to enhance flavors and avoid common mistakes. I shared different variations to fit your diet and detailed storage tips for leftovers. By following these steps, you can create a tasty side dish that impresses. Enjoy your cooking journey, and feel free to experiment with flavors!

Parmesan Garlic Roasted Sweet Potatoes Delightful Dish

Are you ready to elevate your side dish game? Parmesan Garlic Roasted Sweet Potatoes are packed with flavor and texture,

The main ingredients create a hearty base for the stuffing. Here’s what you need: - 1 loaf of rustic bread (about 1 pound), cubed - 1 cup celery, diced - 1 cup onion, finely chopped - 1 cup mushrooms, diced (optional) - 1/2 cup dried cranberries (optional for sweetness) Rustic bread gives the best texture. It absorbs flavors well and holds up during baking. Celery and onion add crunch and a sweet taste. If you like, you can include mushrooms for an earthy note. Dried cranberries add a hint of sweetness. Seasoning brings the dish to life. Use these ingredients for great flavor: - 1 tablespoon fresh sage, chopped (or 1 teaspoon dried sage) - 1 tablespoon fresh thyme, chopped (or 1 teaspoon dried thyme) - 1 tablespoon fresh parsley, chopped - 2 cups vegetable broth (or chicken broth) - 1 teaspoon poultry seasoning (optional) - 1/2 cup chopped nuts (optional for crunch) Fresh herbs add brightness. Sage, thyme, and parsley each bring unique tastes. The broth keeps the stuffing moist. You can add poultry seasoning for a deeper flavor. Nuts can give you a nice crunch. Extra ingredients boost the flavor even more. Here’s what I recommend: - 4 cloves garlic, minced - Salt and pepper to taste - 1/2 cup unsalted butter Garlic adds warmth and richness. You can adjust salt and pepper based on your taste. Butter is key for a rich and savory stuffing. It helps everything blend together beautifully. For the full recipe, check out the [Full Recipe]. 1. Preheat your oven to 350°F (175°C). This heat helps the stuffing cook evenly. 2. Spread the cubed bread on a baking sheet. Toast it in the oven for about 10-15 minutes. This step makes the bread dry and crunchy. It adds great texture to your stuffing. Remove the bread from the oven and set it aside. 1. In a large skillet, melt the butter over medium heat. This gives the stuffing a rich taste. 2. Add the diced celery, onion, and mushrooms if you choose to use them. Cook for about 5-7 minutes. The veggies should get soft and the onions clear. 3. Stir in the minced garlic. Cook for another minute. Garlic adds a nice punch of flavor. 1. In a large mixing bowl, combine the toasted bread cubes, sautéed veggies, and fresh herbs. Add salt, pepper, and optional poultry seasoning if you wish. 2. If you're using cranberries or nuts, mix them in now. These add extra flavor and crunch. 3. Gradually pour in the vegetable or chicken broth. Stir gently until the bread is moist but not soggy. Adjust seasoning as needed. 1. Transfer the stuffing mixture into a greased baking dish. Cover it with aluminum foil. 2. Bake for 30 minutes. This helps the flavors meld together. 3. Remove the foil and bake for an additional 10-15 minutes. You want the top to turn golden brown and crispy. For the full recipe, check the details above! To boost flavor, try using different herbs. Rosemary and oregano can add a nice twist. Adjusting your seasoning is key. Always taste your stuffing before you bake it. You may need more salt or herbs. This small step makes a big difference. The right amount of broth is crucial. Start with two cups, then add more if needed. The goal is moist bread, not soggy stuffing. To avoid a wet texture, add broth slowly. Stir gently and check the consistency. If it feels too wet, add more bread. Serve your stuffing in the baking dish for a cozy look. Garnish with fresh herbs or nuts on top for color. For a fun twist, stuff vegetables like bell peppers or squash. This makes a beautiful plate and adds flavor. You can also use small ramekins for individual servings. {{image_2}} You can easily make stuffing vegan. Start by using non-dairy butter and vegetable broth. This makes your dish plant-based. You can also add more vegetables. Consider carrots, bell peppers, or zucchini. These veggies add flavor and color, making your stuffing more appealing. If you want to add protein, sausage or bacon works great. Cook the sausage in the skillet first. Crumble it before adding it to the bread mixture. If using bacon, chop it up and cook until crispy. Then mix it in. When adding meat, adjust your cooking time. You may need a few extra minutes in the oven to ensure everything cooks well. To make gluten-free stuffing, use gluten-free bread. Many stores offer good options now. Just make sure to check the ingredients. You might need to adjust the cooking method slightly. Gluten-free bread can absorb broth differently. So, start with a little less broth. You can always add more if needed. This helps keep the stuffing from getting too soggy. To store leftover stuffing, place it in an airtight container. This helps keep it fresh. You can also cover it tightly with plastic wrap. It stays good in the fridge for about three to four days. When reheating, use an oven for the best results. Preheat it to 350°F (175°C). Spread the stuffing in a baking dish. Add a little broth to moisten it. Cover with foil to keep it from drying out. Heat for about 20 minutes. To freeze bread stuffing, let it cool completely first. Then, pack it in freezer bags or containers. Be sure to remove as much air as you can. This helps avoid freezer burn. Stuffing can last up to three months in the freezer. When you want to eat it, thaw the stuffing in the fridge overnight. After it's thawed, reheat it in the oven. You can add broth to keep it moist. In the fridge, bread stuffing lasts three to four days. In the freezer, it can last up to three months. Watch for signs of spoilage. If you see mold or feel it has an off smell, it's best to toss it. Always trust your senses when it comes to food safety. You can prepare stuffing a day in advance. First, make the stuffing as directed. Once it cools, cover it and store it in the fridge. On the day you plan to serve it, take it out and let it sit at room temperature for 30 minutes. Then, bake it as you normally would. This helps the flavors meld together nicely. I recommend using rustic bread for the best flavor and texture. Sourdough or French bread also works well. These types of bread hold up to moisture without turning mushy. Whole grain bread adds a nice touch too. The key is to avoid soft white bread, as it can get too soggy. Yes, you can use frozen vegetables. They save time and are often just as tasty. However, fresh vegetables have a better crunch and flavor. If using frozen, thaw and drain them first. This helps prevent excess water from making the stuffing soggy. Classic bread stuffing pairs well with many dishes. Try serving it with roasted turkey or chicken. It also complements gravy and cranberry sauce nicely. For a fun twist, serve it with roasted veggies. They add color and nutrients to your meal. If your stuffing is dry, add more broth. Pour it in slowly, mixing gently. You want the bread to be moist, not soggy. If it’s still too dry after baking, cover it with foil. This traps steam and helps it stay moist while cooking. This blog post shared the key ingredients, steps, and tips for making great stuffing. We explored how to mix bread, veggies, and herbs for flavor. I provided ideas for variations to suit different diets and how to store leftovers. In closing, you can create a delicious stuffing that fits your needs. Use these tips to impress at your next meal. Enjoy experimenting and make it your own!

Classic Bread Stuffing Flavorful and Simple Recipe

Are you ready to elevate your holiday dinner with a comforting dish? Classic bread stuffing combines simple ingredients to create

- 3 ripe bananas - 2 tablespoons coconut oil, melted - 2 tablespoons granulated sugar - 1 teaspoon ground cinnamon - A pinch of salt - Nutmeg for additional warmth - Vanilla extract for enhanced flavor - Air fryer - Sharp knife or mandoline - Mixing bowls I love using ripe bananas for this recipe. They are sweet and soft, which makes them perfect for chips. The coconut oil gives a nice flavor and helps the sugar stick. You can add nutmeg or vanilla if you want to mix things up. To make these snacks, you will need an air fryer. It cooks the banana chips quickly and makes them crispy. A sharp knife or mandoline helps you slice the bananas evenly. This way, they cook at the same time. You will also need mixing bowls to combine the ingredients well. Check out the Full Recipe for easy step-by-step instructions! - Peel and slice bananas thinly. - Use a mandoline for uniform thickness. First, grab three ripe bananas and peel them. I find that ripe bananas have the best sweetness and flavor. Next, slice the bananas into thin rounds, about 1/8 inch thick. A mandoline works great here. It gives you even slices, which cook better. If you don't have one, a sharp knife will do. Just try to keep the slices as uniform as possible. - Mix sugar, cinnamon, and salt in a bowl. - Coat banana slices with coconut oil. Now, let’s get the sweet mix ready. In a small bowl, combine two tablespoons of granulated sugar, one teaspoon of ground cinnamon, and a pinch of salt. This simple mix makes the banana chips taste amazing. In another bowl, add the banana slices and drizzle two tablespoons of melted coconut oil over them. Toss gently until the slices are well-coated. This step is key for flavor and crispiness. - Preheat air fryer to 350°F (175°C). - Arrange banana slices in the basket and air fry. Next, preheat your air fryer to 350°F (175°C). This usually takes about five minutes. After that, arrange the banana slices in a single layer in the air fryer basket. Make sure they do not overlap. This will help them cook evenly and get crispy. Air fry the slices for 10 to 12 minutes. Shake the basket halfway through to ensure even cooking. When they turn golden and crispy, they are done! Let them cool for a few minutes before enjoying. They will crisp up even more as they cool. To make your banana chips crispy, cut the banana slices uniformly. This means they will cook at the same rate. I suggest slicing them about 1/8 inch thick. If the slices are different sizes, some will burn while others stay soft. Also, avoid overcrowding the air fryer basket. Give each chip space to breathe. If they overlap, they won’t crisp up well. Get creative with flavors! You can try different spices like nutmeg or ginger for added warmth. Mix in nut butters before air frying for a tasty twist. Peanut or almond butter gives a nutty flavor that pairs well with bananas. This simple change can elevate your chips to a new level of yum. These crispy chips are perfect as a snack. You can also use them as a topping for yogurt. They add a delightful crunch and sweetness. For a special treat, pair them with dark chocolate. The rich chocolate balances the sweet banana flavor perfectly. Enjoy them however you like! {{image_2}} You can switch up the sweetener for your banana chips. If you want a different taste, try honey or maple syrup instead of granulated sugar. Both add a nice flavor without being too sweet. Coconut sugar is another great choice. It has a lower glycemic index and gives your chips a caramel-like taste. If you don’t have an air fryer, no worries! You can bake your banana chips in the oven. Preheat your oven to 350°F (175°C). Spread the banana slices on a baking sheet in a single layer. Bake for about 15-20 minutes, flipping them halfway. You can also pan-fry them for a crispy texture. Heat some coconut oil in a pan over medium heat. Fry the slices until they are golden brown, about 2-3 minutes on each side. Want to jazz up your banana chips? Try adding cocoa powder for a rich, chocolatey flavor. Just mix it in with your cinnamon-sugar blend. You can also mix in dried fruits like cranberries or raisins. This adds a chewy texture that contrasts nicely with the crunchy chips. For the full recipe, check out the details above. To keep your crispy banana chips fresh, store them in an airtight container. This step helps protect them from moisture. Place the container in a cool, dry place. Avoid areas with heat or humidity. These banana chips last up to one week when stored correctly. To maintain their crispness, make sure the container is sealed tightly. If you find them getting soft, try placing them back in the air fryer for a few minutes. This quick fix can help restore some crunch. Can slices be frozen for later use? Yes, you can freeze the banana chips. Lay them flat on a baking sheet until frozen solid. Then, transfer them to a freezer-safe bag. This method prevents them from sticking together. How to re-crisp frozen chips? To re-crisp, preheat the air fryer. Cook the frozen chips at 350°F (175°C) for about 5-7 minutes. Keep an eye on them to avoid burning. This way, you can enjoy tasty snacks anytime! You can use unripe bananas, but they will not be as sweet. Ripe bananas have more sugar, which helps the chips caramelize and get crispy. Unripe bananas may give a firmer texture and less flavor. For the best taste, choose bananas that are yellow with a few brown spots. Air fry the banana chips for about 10-12 minutes at 350°F (175°C). Check them halfway through and shake the basket. This helps them cook evenly. Watch closely towards the end, as they can burn quickly. Crispy banana chips are great on their own or paired with other snacks. Try them with yogurt or oatmeal for breakfast. You can also add them to salads for crunch. If you're feeling fancy, use them as a topping on desserts like ice cream or pancakes. Yes, if you want to make more banana chips, you can double the recipe. Just make sure to keep the banana slices in a single layer in the air fryer. Avoid overcrowding the basket. If your air fryer is small, you might need to cook in batches. Yes, this recipe is vegan-friendly! It uses bananas, coconut oil, sugar, and spices. All these ingredients are plant-based. Enjoy these snacks without any worries about animal products. You can feel good about your tasty treat! This blog post covers a simple recipe for crispy air fryer banana chips. You learned key ingredients, including ripe bananas and coconut oil, along with helpful equipment. I shared step-by-step instructions, tips for perfect texture, and variations for added flavor. These banana chips make a great snack or topping. Enjoy making this easy treat, and don’t hesitate to experiment with flavors. Healthy snacks can be fun and tasty!

Crispy Cinnamon Sugar Air Fryer Banana Chips Delight

Are you ready for a snack that’s both crunchy and sweet? I’m excited to share my Crispy Cinnamon Sugar Air

- 4 boneless, skinless chicken thighs - 1 cup long-grain rice - 2 cups chicken broth - 1 medium onion, diced - 1 red bell pepper, diced - 3 cloves garlic, minced - 1 teaspoon smoked paprika - 1 teaspoon dried thyme - ½ teaspoon cayenne pepper (adjust to taste) - 1 cup heavy cream - 2 tablespoons olive oil - Salt and pepper to taste - Chopped parsley for garnish - Large skillet - Measuring cups and spoons - Wooden spoon or spatula - Knife and cutting board Gather these ingredients before you start. Fresh, quality items make a big difference. I love using boneless, skinless chicken thighs for this dish. They stay juicy and tender. Long-grain rice works best because it cooks evenly. Onions and red bell peppers bring a nice crunch and sweetness. Garlic adds a bold flavor. The smoked paprika and thyme give warmth to the dish. You can adjust the cayenne pepper based on your taste. If you like heat, add more! Heavy cream makes everything rich and creamy. Olive oil is perfect for searing the chicken and sautéing the veggies. For tools, a large skillet is essential for cooking everything in one pot. Measuring cups and spoons help keep your portions just right. A wooden spoon or spatula will let you stir without scratching the skillet. A sharp knife and cutting board make chopping quick and easy. With these items ready, you can dive into making this comforting meal. Don't forget to check the Full Recipe for more details! - First, season the chicken thighs. Use salt, pepper, smoked paprika, and cayenne. This mix adds flavor and depth. - Next, heat olive oil in a large skillet over medium heat. Once it’s hot, sear the chicken. Cook until golden brown on both sides, about 5-6 minutes each. Remove the chicken and set it aside. - Now, add diced onion and bell pepper to the same skillet. Sauté them until they soften, which takes about 3-4 minutes. - Then, add minced garlic. This step is key since garlic brings a wonderful aroma and enhances the dish's flavor. - Stir in the long-grain rice. Toast it in the skillet for about a minute. This step adds a nutty flavor. - Next, pour in the chicken broth and add dried thyme. Stir well and bring it to a boil. - Once boiling, lower the heat and return the chicken thighs to the skillet. Cover and simmer for about 20 minutes. The rice should be tender and absorb most of the liquid. - After the rice cooks, gently fold in the heavy cream. This creates a rich and creamy texture that comforts the soul. - Let it simmer for another 5 minutes to warm through. Check the seasoning and adjust with salt and pepper if needed. - Lastly, garnish with chopped parsley before serving. This adds a nice touch and a splash of color. To get that nice golden crust on your chicken, use medium heat. This helps the chicken cook evenly without burning. Sear each side for about 5–6 minutes. Keep an eye on it, and don’t rush. A good sear makes a tasty meal. To keep your cream from curdling, add it at the end. Stir it in gently when the chicken and rice are fully cooked. You can use heavy cream or even half-and-half if you want a lighter touch. Both options work well. Pair your smothered chicken with a side salad. A fresh green salad with a light dressing works best. If you enjoy wine, a nice white wine is a great choice. Look for a Chardonnay or Sauvignon Blanc for a balanced meal. For the complete recipe, check out the Full Recipe. {{image_2}} You can switch chicken thighs for breasts in this recipe. Breasts are leaner and cook faster. If you want a vegetarian option, use firm tofu or tempeh. Both options soak up flavors well and keep the dish hearty. Adding spices can change the dish's taste. Try cayenne for heat or garlic powder for depth. You can also mix in fresh or frozen vegetables. Spinach adds color and nutrition, while mushrooms bring a nice umami flavor. If you prefer an oven-baked dish, preheat the oven to 375°F. After searing the chicken, mix everything in a baking dish and cover it with foil. Bake for 30-35 minutes until the rice is tender. For a slow cooker, place all ingredients inside and cook on low for 4-6 hours. This method gives a great depth of flavor with little effort. These variations allow you to customize your smothered chicken and rice skillet to fit your taste. For the full recipe, check the section above. To store your delicious Smothered Chicken and Rice Skillet, let it cool first. Place the dish in an airtight container. You can keep it in the fridge for up to three days. If you want to enjoy it later, freezing is a great option. To freeze the dish, first cool it completely. Then, transfer it to a freezer-safe container. Make sure to leave some space at the top, as the rice may expand. You can freeze it for up to three months. When you're ready to enjoy, move it to the fridge to thaw overnight. For reheating, the best method is using the stove. Place the skillet on low heat and stir occasionally. If the dish seems dry, add a splash of chicken broth or cream. This keeps the flavors bright and the texture creamy. You can also microwave it in a microwave-safe dish, but stir often to ensure even heating. Yes, you can use brown rice. Brown rice takes longer to cook. You will need to increase the cooking time by about 15 to 20 minutes. Use more chicken broth to ensure it cooks well. Yes, this recipe is great for meal prep! Store the dish in an airtight container. It lasts up to four days in the fridge. To reheat, use the microwave or a skillet. Add a splash of chicken broth to keep it moist. To make this dish gluten-free, use gluten-free chicken broth. Make sure your spices and seasonings are also gluten-free. You can use rice flour as a thickener, if needed. If your rice is not cooking right, check the liquid ratio. You may need more broth or water. Also, ensure your heat is low enough to simmer. If the rice is still hard, add a bit more liquid and continue cooking. This recipe offers a simple way to enjoy flavorful chicken and rice. You start by seasoning, searing, and cooking your ingredients to perfection. Remember, using fresh spices and cream makes a big difference. You can customize this dish with different proteins or spices to match your taste. Enjoy leftovers with proper storage for great meals later. With these easy steps, you’ll create a comforting dish everyone will love. Happy cooking!

Smothered Chicken and Rice Skillet Comforting Meal

Looking for a cozy meal that warms the heart? My Smothered Chicken and Rice Skillet combines juicy chicken thighs with

- 4 medium sweet potatoes, peeled and cubed - 1/2 cup brown sugar - 1/4 cup maple syrup Sweet potatoes are the star here. They bring a creamy texture and a sweet taste. Brown sugar adds a rich sweetness. Maple syrup gives a nice twist with its unique flavor. - 1/2 cup unsalted butter, melted - 1 teaspoon vanilla extract - 1/2 teaspoon ground cinnamon - 1/4 teaspoon nutmeg Unsalted butter makes the casserole rich and smooth. Vanilla extract enhances the sweet flavors. Cinnamon and nutmeg add warmth and depth to the dish. - 1/2 cup mini marshmallows - 1/2 cup chopped pecans Mini marshmallows bring a fun, sweet crunch. Chopped pecans add a nice nutty flavor and texture. You can mix and match these toppings to suit your taste. For the full recipe, visit the link provided. - Preheat the Oven and Prepare the Baking Dish Start by preheating your oven to 350°F (175°C). This step warms the oven for even cooking. Next, take a 9x13 inch baking dish and grease it with a little butter. This helps prevent sticking. - Boil and Mash the Sweet Potatoes Fill a large pot with water and bring it to a boil. Add 4 medium, peeled, and cubed sweet potatoes. Cook them for 15-20 minutes until they become tender. Once cooked, drain the water and let them cool slightly. Now, mash the sweet potatoes in a large bowl until smooth. This creates a creamy base for your casserole. - Mixing the Sweet Potato Mixture Add in 1/2 cup of brown sugar, 1/4 cup of maple syrup, and 1/2 cup of melted unsalted butter. Don’t forget to include 1 teaspoon of vanilla extract, 1/2 teaspoon of ground cinnamon, and 1/4 teaspoon of nutmeg. Stir everything together until well combined. This mix gives your casserole a sweet and rich flavor. - Spreading in the Baking Dish Pour the sweet potato mixture into your prepared baking dish. Use a spatula to spread it evenly across the bottom. If you like, sprinkle 1/2 cup of mini marshmallows and 1/2 cup of chopped pecans on top. This adds a nice crunch and sweetness to the dish. - Baking Time and Tips Place the baking dish in the preheated oven. Bake for 25-30 minutes to heat through and brown the marshmallows. Keep an eye on it to avoid burning. - Checking for Doneness You know it’s done when the marshmallows look golden brown. You can also insert a toothpick into the center. If it comes out clean, your casserole is ready to serve. For the full recipe, check out the detailed steps! Achieving the Right Texture To get a smooth and creamy texture, mash the sweet potatoes well. If you want some lumps, use a fork instead of a masher. This gives your casserole a rustic feel. Make sure not to overmix. Overmixing can make it gummy, which is not what we want. Best Practices for Boiling Sweet Potatoes Start by cutting the sweet potatoes into equal-sized cubes. This helps them cook evenly. Boil them in salted water for about 15-20 minutes. They should be tender but not mushy. Check doneness by piercing with a fork. Drain them well before mashing to avoid excess water. Flavor Enhancements with Different Spices You can add more warmth by using spices like ginger or cloves. A pinch of allspice also works well. Don’t be afraid to play with flavors. Each spice adds its own character to your casserole, making it unique. Using Different Sweeteners While brown sugar and maple syrup are great, try honey or agave syrup for a twist. These sweeteners add a different flavor profile. Adjust the amount based on your taste. You can use less sugar if you prefer a healthier option. Best Pairings for Your Sweet Potato Casserole This casserole pairs well with savory dishes like roasted turkey or ham. The sweetness balances the saltiness of meats. It also goes great with a fresh salad for a lighter meal. Presentation Tips for Serving Serve the casserole in the baking dish for a rustic look. For a fancy touch, transfer it to a beautiful serving bowl. Add a sprinkle of chopped pecans or marshmallows on top for color. This small detail makes a big impact when you serve it to guests. For more ideas, check the Full Recipe for variations and tips. {{image_2}} You can make this casserole healthier without losing taste. One great swap is using Greek yogurt instead of butter. Greek yogurt adds creaminess and protein. This change helps cut down on fat and calories. Another option is to reduce the sugar amounts. Instead of using a full half cup of brown sugar, try using a third cup. You can also mix in some unsweetened applesauce. This will keep your casserole sweet and moist. If you need gluten-free options, you are in luck! Sweet potatoes are naturally gluten-free. Just check the toppings you choose. Make sure the mini marshmallows and pecans are gluten-free. For vegan alternatives, you can use plant-based butter. Swap the Greek yogurt for a vegan yogurt. This way, you can enjoy the casserole without dairy. Adding fruits or nuts can take your casserole to the next level. You might try mixing in chopped apples or pears. Dried cranberries also work well. They add a nice tang and chewiness. For a southwestern twist, you can add spices like chili powder or cumin. This gives the casserole a whole new flavor profile. You will impress your family with this fun twist on a classic dish. For the full recipe, check out the Cozy Sweet Potato Delight above! Refrigeration Tips To store leftovers, let the casserole cool. Cover it with plastic wrap or foil. Place it in the fridge. It will stay fresh for up to five days. Freezing Instructions If you want to keep it longer, freeze the casserole. Use an airtight container or a freezer bag. It can last up to three months in the freezer. Thaw it in the fridge before reheating. Best Methods to Reheat The best way to reheat is in the oven. Preheat it to 350°F (175°C). Place the casserole in a baking dish. Heat it for about 20 minutes or until warm. You can also use the microwave for quick reheating. How to Maintain Texture To keep the texture, cover the dish with foil while reheating. This will help keep moisture in. If you want a crispy top, remove the foil for the last few minutes. How Long It Lasts in the Fridge In the fridge, your casserole lasts about five days. Make sure to check for signs of spoilage after that time. Signs of Spoilage Watch for changes in color or smell. If it looks or smells bad, toss it out. You should not eat spoiled food. This easy sweet potato casserole is a great dish to enjoy now and later. For the complete recipe, check out the Full Recipe. Can I make this casserole ahead of time? Yes, you can make this casserole a day early. Prepare it fully, cover, and refrigerate. When ready to bake, let it sit at room temperature for about 30 minutes. Then, bake as directed. This saves time on busy days! What can I substitute for butter? If you need a butter substitute, use coconut oil or vegan butter. Both options will add richness without changing the flavor too much. You can also try applesauce for a lighter option. How can I make it dairy-free? For a dairy-free version, use coconut milk instead of butter. It adds creaminess and a hint of flavor. Remember to use a dairy-free butter substitute for the same taste. What is the best type of sweet potato to use? I recommend using orange-fleshed sweet potatoes. They are sweet and creamy when cooked. Purple or white sweet potatoes work too, but they may alter the flavor. How to avoid mushy sweet potatoes? To avoid mushy sweet potatoes, do not overboil them. Simmer them until just tender, about 15 to 20 minutes. Drain them well and let them cool slightly before mashing. Can I use canned sweet potatoes instead of fresh? Yes, you can use canned sweet potatoes. Drain and rinse them well, then mash them. This saves time and is still very tasty. However, fresh sweet potatoes have a better texture and flavor. For the best experience, I suggest trying the fresh ones first. This blog post shared how to make an easy sweet potato casserole. We covered key ingredients like sweet potatoes, brown sugar, and maple syrup. The step-by-step guide walked you through preparation and baking. I provided tips for perfecting the texture and customizing flavors. You also learned about variations and storage tips. In summary, this dish is simple and tasty. You can make it your own. Enjoy sharing your sweet potato casserole with family and friends.

Easy Sweet Potato Casserole Simple and Tasty Recipe

Looking for a sweet, easy dish that steals the show? My Easy Sweet Potato Casserole is just what you need!

- 1 pound chicken breast, cubed - 1 cup gnocchi (store-bought or homemade) - 1 tablespoon olive oil The main ingredients for this dish are simple yet key. I love using fresh chicken breast for its mild flavor and tender texture. Gnocchi, a soft pasta made from potatoes, adds a nice touch. You can use store-bought gnocchi to save time or make your own for extra fun. Olive oil brings all the flavors together while cooking. - 4 cloves garlic, minced - 1 teaspoon Italian seasoning - Fresh basil leaves for garnish Garlic is a must-have for this recipe. It adds a lovely aroma and taste. Italian seasoning gives it an authentic flavor that makes you feel like you’re dining in Italy. Fresh basil leaves as a garnish not only look great but also add a fresh taste that brightens the dish. - 1 pint cherry tomatoes, halved - 1 cup fresh spinach - 1/2 cup grated Parmesan cheese For a tasty twist, you can add cherry tomatoes. They burst with flavor and add color. Fresh spinach is also a great choice for a pop of green and some extra nutrients. If you like cheese, sprinkle in some grated Parmesan for a rich, creamy finish. Try out these ingredients to create your Garlic Chicken Gnocchi Skillet. You can find the Full Recipe to guide you through each step. Enjoy your cooking adventure! - Seasoning the chicken Start by cubing the chicken breast. In a bowl, mix salt, pepper, and Italian seasoning. Coat the cubed chicken with the blend. This step adds flavor right from the start. - Sautéing the garlic Next, heat olive oil in a large skillet over medium heat. Once hot, add minced garlic. Sauté the garlic for about 30 seconds until it is fragrant. This will fill your kitchen with a wonderful aroma. - Cooking the chicken Now, add the seasoned chicken to the skillet. Cook it for about 5 to 7 minutes. Make sure the chicken is browned and fully cooked. Remove the chicken and set it aside for later. - Adding other ingredients to the skillet In the same skillet, toss in halved cherry tomatoes. Cook them for 3 to 4 minutes until they soften. Then, add fresh spinach and stir for about 2 minutes until it wilts. This step adds bright colors and fresh taste. - Adjusting seasoning Stir in gnocchi, chicken broth, and heavy cream. Bring the mixture to a simmer. Cook for 3 to 4 minutes until the gnocchi floats. Taste the dish and adjust the seasoning if needed. This step ensures every bite bursts with flavor. - Garnishing before serving Finally, add the cooked chicken back to the skillet along with grated Parmesan cheese. Mix until everything combines well and the cheese melts. Serve immediately and garnish with fresh basil leaves. The basil gives a nice touch to your dish. For the complete cooking steps and details, see the Full Recipe. To ensure your chicken is cooked properly, use a meat thermometer. The chicken should reach 165°F inside. Cook the chicken for about 5-7 minutes until it is golden brown. This step keeps it juicy and flavorful. Add the gnocchi when your sauce is bubbling. This timing gives the gnocchi a soft and chewy texture. They should float when done, which usually takes about 3-4 minutes. For sides, pair garlic chicken gnocchi with a crisp green salad. A simple side of steamed broccoli works well too. These sides balance the richness of the dish. For wine, choose a light white wine like Pinot Grigio. The bright notes will enhance the flavors of the garlic and chicken. You will need a large skillet for this recipe. A non-stick skillet works best to prevent sticking. Use a sturdy spatula to stir and serve the dish. A wooden spoon is a great option too, as it won’t scratch your skillet. For the full recipe, you can check the detailed instructions to ensure perfect results every time! {{image_2}} You can switch out chicken for turkey or tofu. Turkey gives a leaner option. Tofu is great for a plant-based meal. For cream and cheese, use coconut milk or almond milk. Nutritional yeast works well instead of Parmesan cheese if you want it dairy-free. Want more heat? Add red pepper flakes or a dash of cayenne. This will spice things up nicely. For fresh taste, try using thyme, rosemary, or dill. These herbs can brighten the dish and add depth. Use seasonal veggies to change the dish. In spring, add asparagus or peas. In fall, try butternut squash or kale. You can also adjust the recipe for holidays. For Thanksgiving, add cranberries for a sweet twist. During the summer, fresh zucchini or bell peppers can work wonders. These simple changes make your Garlic Chicken Gnocchi Skillet more exciting. Plus, it keeps the meal fresh and fun! For the full recipe, check the earlier sections of this article. To keep your garlic chicken gnocchi skillet fresh, place leftovers in an airtight container. This helps prevent moisture loss and keeps flavors intact. Make sure to cool the dish before sealing it. In the fridge, your leftovers will last about 3 to 4 days. When it's time to enjoy leftovers, reheating is key. Use a skillet over low heat to warm the dish. Stir often to blend the flavors back together. This method keeps the dish tasty. Avoid the microwave if you can, as it might overcook the gnocchi. Gnocchi can become tough when reheated too fast. Yes, you can freeze this dish! However, I suggest freezing it before adding the cream and cheese. This keeps the texture better. To freeze, let the dish cool, then transfer it to a freezer-safe container. When you’re ready to eat, thaw it overnight in the fridge. Heat in a skillet and add cream and cheese before serving. This ensures every bite stays creamy and delicious. For the full recipe, click here! Can I use frozen gnocchi? Yes, you can use frozen gnocchi. Just add them directly to the skillet. They will cook through as the dish simmers. This can save time and still give you a tasty meal. Is there a gluten-free version of this recipe? Absolutely! You can find gluten-free gnocchi at many stores. Just check the package for the right cooking time. You can also use zucchini noodles for a lighter option. Caloric breakdown per serving This dish has about 500 calories per serving. It includes protein from the chicken and carbs from the gnocchi. The heavy cream and cheese add richness, making it very satisfying. Information on allergens in the recipe This recipe contains common allergens. It has chicken, dairy (from cream and cheese), and gluten (if using regular gnocchi). Always check labels if you have allergies. Tips for quick prep To save time, chop the chicken and vegetables ahead. You can also measure your ingredients before starting. This way, everything is ready when you cook. Can this recipe be made ahead of time? Yes, you can prep this dish ahead. Cook the chicken and veggies, then store them in the fridge. When you're ready to eat, just add the gnocchi and cream to finish the dish. This blog post covered how to make a delicious skillet dish with chicken and gnocchi. We explored key ingredients, step-by-step instructions, and helpful tips. You now have ideas for variations, storage, and answers to common questions. Keep these details in mind as you cook. Enjoy the flavors and the process. Get creative with this recipe, and share it with friends and family! Cooking should be fun, and this dish makes that easy. Happy cooking!

Garlic Chicken Gnocchi Skillet Quick and Tasty Meal

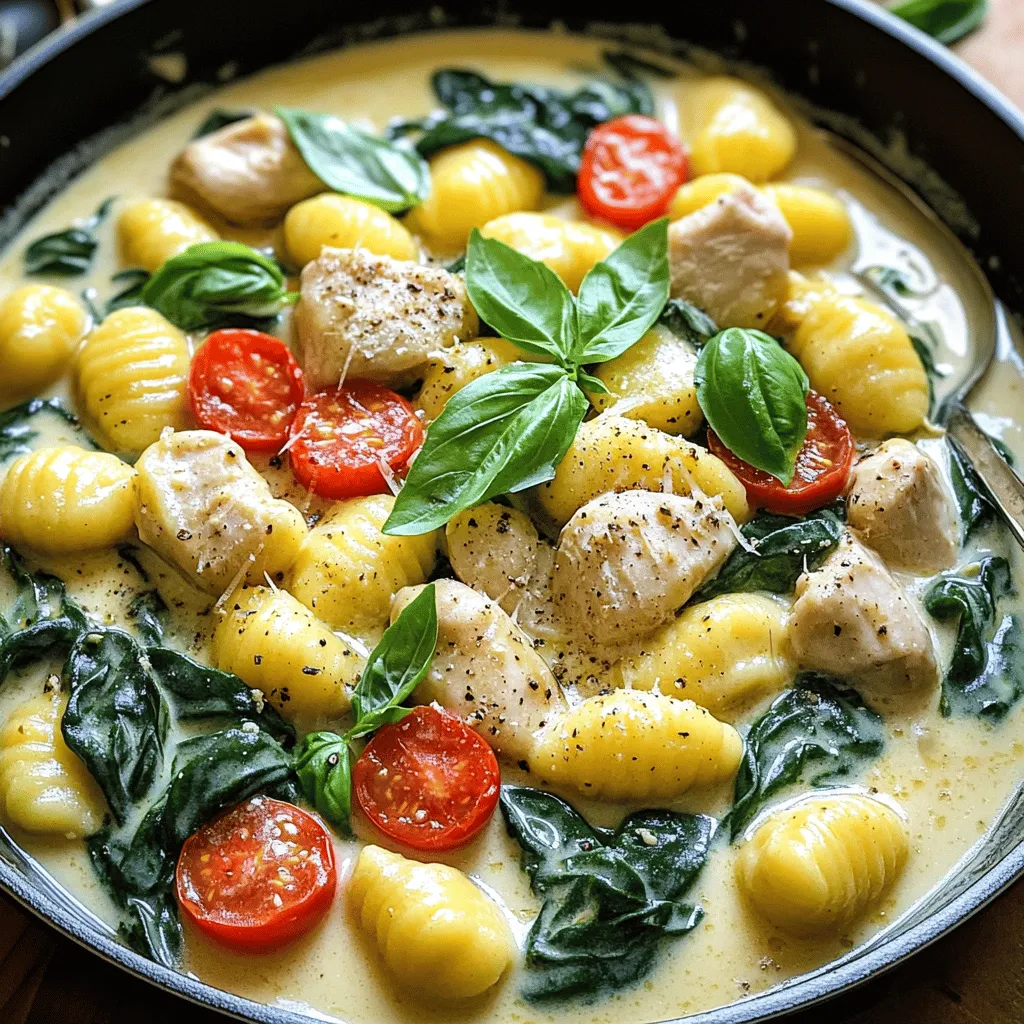
Looking for a quick and tasty meal? You’re in the right place! This Garlic Chicken Gnocchi Skillet packs flavor and

- 32 oz frozen tater tots - 1 lb ground beef (or plant-based alternative) - 1 medium onion, chopped - 2 cloves garlic, minced - 1 cup frozen mixed vegetables (peas, carrots, corn) - 1 can cream of mushroom soup - 1 cup sour cream - 1 cup shredded cheddar cheese - Spices (paprika, salt, pepper) When I make Tater Tot Casserole, I love to gather my ingredients first. The main ingredients are the stars of the show. The frozen tater tots give that crispy texture we all crave. For the protein, I often use ground beef, but a plant-based alternative works just as well. Next, I chop a medium onion and mince two cloves of garlic. These veggies really bring out the flavor. I also add a cup of frozen mixed vegetables like peas, carrots, and corn. They add color and nutrition to the dish. For the creamy base, I use a can of cream of mushroom soup and a cup of sour cream. This mix makes everything rich and smooth. A cup of shredded cheddar cheese tops it off, giving that melty goodness we all love. Finally, I sprinkle in some spices. Paprika adds a nice touch, while salt and pepper enhance all the flavors. This simple blend of ingredients makes Tater Tot Casserole a hit at any meal. For the full recipe, check out the details above. Enjoy! - Preheat the oven to 375°F (190°C). - In a large skillet, add 1 lb of ground beef. Cook until it is browned, about 5-7 minutes. Drain any fat. - Add 1 medium chopped onion and 2 cloves of minced garlic. Sauté until the onions turn clear, about 3-4 minutes. - Stir in 1 cup of frozen mixed vegetables. Cook for another 2 minutes. - In a separate bowl, mix 1 can of cream of mushroom soup, 1 cup of sour cream, and spices: 1 teaspoon of paprika, plus salt and pepper to taste. - Spread the beef and vegetable mix into a greased 9x13 inch baking dish. - Layer 32 oz of frozen tater tots on top of the beef. Arrange them in a single layer. - Sprinkle 1 cup of shredded cheddar cheese over the tater tots. - Bake in the preheated oven for 30-35 minutes. Look for a golden brown and crispy top. - Let the casserole sit for 5 minutes before serving. This helps it set. To get that great crisp on your tater tots, follow these tips: - Baking at the right temperature: Always preheat your oven to 375°F (190°C). This helps the tater tots cook evenly and get golden brown. - Using a single layer of tater tots: Spread your tater tots in one flat layer. This allows hot air to circulate around each tot, giving them that crunchy texture we all love. Want to boost the taste? Here are some simple ways: - Adding different spices: Try adding garlic powder, onion powder, or chili powder. These spices can give your dish more depth and warmth. - Incorporating fresh herbs: Fresh parsley, thyme, or chives can brighten up the flavors. Just sprinkle them on top before serving for a pop of color and taste. Pair your tater tot casserole with some great sides: - Recommended side dishes: A simple green salad or steamed veggies work well. They add freshness and balance the richness of the casserole. - Pairing with sauces or dips: Serve it with ranch dressing or hot sauce. This adds a fun twist and lets everyone customize their plate. These tips and tricks will help you create a tater tot casserole that is not only tasty but also a hit with the whole family. For the full recipe, check out Cheesy Tater Tot Delight. {{image_2}} You can make this dish meat-free. Use lentils or a good meat substitute. Lentils add protein and texture. They also soak up flavors well. Some great meat substitutes include tofu or tempeh. For veggies, think outside the box. You can add bell peppers, spinach, or mushrooms. These vegetables boost taste and nutrients. Just chop them up and stir them in with other ingredients. If you need a gluten-free version, swap the soup and tater tots. Use gluten-free soup brands available in stores. You can also find gluten-free tater tots made from sweet potatoes or cauliflower. Keep the flavor strong by using spices. Add herbs like thyme or oregano. These add depth without gluten. For a lighter dish, choose low-fat dairy. Swap sour cream for Greek yogurt. Use low-fat cheese instead of regular cheese. This keeps the creaminess without the extra calories. Be mindful of sodium too. Use low-sodium soup and limit added salt. This small change helps make your meal healthier. For the full recipe, check out Cheesy Tater Tot Delight. I always recommend storing leftovers in an airtight container. This keeps the casserole fresh. You can refrigerate it for up to three days. Just make sure it cools completely before sealing it. You can freeze the casserole both before and after baking. To freeze before baking, assemble the dish but don’t cook it. Wrap it tightly in plastic wrap and then in foil. It can last up to three months in the freezer. If you freeze it after baking, let it cool first. Then, wrap it well and freeze. For thawing, simply move it to the fridge overnight. Reheat it in the oven to keep it crispy. To reheat, the oven is best. Preheat it to 350°F (175°C). Place the casserole in a baking dish and cover it with foil. This helps retain moisture. Bake for about 20-25 minutes. To keep the top crispy, remove the foil for the last 5 minutes. Avoid using the microwave, as it may make the casserole soggy. Tater Tot Casserole is a fun, hearty dish that many families love. It combines tater tots, ground meat, and creamy soup. This dish likely started in the Midwest of the U.S. It became popular because it's easy to make and very tasty. You can use different meats, veggies, and cheeses. It’s a great way to use what you have at home. This dish is perfect for busy nights or when you want comfort food. Yes, you can prep Tater Tot Casserole in advance. Prepare the meat and veggie mixture a day before. Store it in the fridge until you are ready to bake. Just layer the tater tots and cheese on top right before baking. You can also freeze it unbaked. Just thaw it overnight in the fridge and bake as normal the next day. This makes dinner planning much easier! If you want to add some heat, try these options: - Mix in diced jalapeños or green chilies with the meat. - Use spicy sausage instead of ground beef. - Add cayenne pepper or hot sauce to the soup mixture. - Top with pepper jack cheese instead of cheddar. These changes will give your casserole a nice kick! To reheat your casserole, follow these steps for the best taste: - Preheat your oven to 350°F (175°C). - Place the casserole in a baking dish, cover with foil. - Heat for about 20-25 minutes, or until warmed through. - If you want a crispy top, remove the foil for the last 5-10 minutes. This method keeps the tater tots crunchy and the filling creamy. This blog post covered all the tasty details of making Tater Tot Casserole. I shared ingredient lists, step-by-step instructions, and helpful tips. You learned how to prep, bake, and store this dish. Plus, I explored variations for veggie lovers and those seeking healthier choices. As you try this recipe, remember it’s simple yet full of flavor. Enjoy your meal with family or friends. With each bite, you'll appreciate the blend of tater tots and savory goodness. Happy cooking!

Tater Tot Casserole Scrumptious Family Favorite Dish

Tater Tot Casserole is a dish that brings smiles to every dinner table. It’s easy, filling, and loved by kids

- 1 pound fresh green beans, trimmed and halved - 1 can (10.5 oz) cream of mushroom soup - 1 cup milk - 1 teaspoon garlic powder - 1 teaspoon onion powder - 1 cup crispy fried onions - 1/2 cup shredded cheddar cheese - Salt and pepper to taste - You can add herbs like thyme or rosemary. - Try gluten-free cream of mushroom soup. - Use almond milk or cashew cheese for vegan options. The green beans give this dish a nice crunch. The cream of mushroom soup adds rich flavor. Milk helps make it creamy. Garlic and onion powders enhance the taste. Crispy fried onions on top add a fun crunch. Cheese makes it extra yummy. Feel free to play with the ingredients. You can swap in your favorite herbs or spices. This lets you make the dish your own. - Preheat the oven to 350°F (175°C). - Blanch the green beans in salted water. To start, preheating the oven ensures the casserole cooks evenly. While the oven heats, fill a large pot with water and add a generous pinch of salt. Bring it to a boil. Once boiling, add one pound of fresh green beans, trimmed and halved. Blanch them for five minutes. This step brightens their color and keeps them crisp. After five minutes, drain the beans and set them aside. - Combine soup mixture ingredients in a bowl. - Mix blanched green beans with soup and cheeses. Next, grab a mixing bowl. In it, combine one can of cream of mushroom soup, one cup of milk, one teaspoon of garlic powder, one teaspoon of onion powder, and salt and pepper to taste. Whisk this mixture until it is smooth and creamy. In a large baking dish, add the blanched green beans. Pour the soup mixture over the beans. Then, stir in half a cup of shredded cheddar cheese and half a cup of crispy fried onions. Make sure all the green beans are coated evenly. - Add crispy fried onions and cheese on top. - Bake until golden brown and bubbly. Spread the mixture evenly in the baking dish. Top it with the remaining cheddar cheese and crispy fried onions. This layer adds crunch and flavor. Now, place the dish in your preheated oven and bake for 25 to 30 minutes. You want the casserole to be bubbly and golden brown on top. When it’s done, take it out and let it cool for a few minutes before serving. Enjoy your easy green bean casserole, a simple and comforting dish that everyone will love! For the full recipe, check the earlier section. To get the best texture, start with fresh green beans. Blanch them in boiling water for just five minutes. This step keeps them bright and crisp. If you prefer softer beans, cook them a bit longer. Every oven cooks differently. Check your casserole after 25 minutes. If it looks too soft, let it bake a little longer. Garnish your casserole with more than just parsley. Try crispy fried onions or even sliced almonds for crunch. You can also sprinkle fresh thyme or chives for color and flavor. Serve it straight from the baking dish for a homey feel. For special occasions, add a side salad for a nice touch. Use a 9x13-inch baking dish for best results. This size helps the casserole cook evenly. A glass dish works great, as it lets you see the bubbling goodness inside. For easier prep, use a large mixing bowl to mix your ingredients. A whisk makes blending the soup and milk smooth. {{image_2}} You can easily tweak the easy green bean casserole to match your taste. Adding bacon or sausage gives it a nice protein boost. The smoky flavor of bacon pairs well with green beans. Sausage adds a hearty touch that everyone loves. You can also mix in different vegetables. Mushrooms add a rich texture, while corn brings a sweet crunch. These additions make the dish more colorful and fun. If you follow a low-carb diet, you can still enjoy this dish. Simply swap out the cream of mushroom soup for a low-carb option. You can also use almond milk in place of regular milk. For those who are lactose intolerant, there are dairy-free cream soups available. You can try coconut milk for a rich, creamy texture. These versions keep the dish tasty while being diet-friendly. Time is precious, especially on busy days. Using frozen green beans helps cut down prep time. They are just as nutritious and save you from washing and cutting fresh beans. You can also choose ready-made soups. These soups can save time and make the prep faster. Just mix them with the beans and bake. With these shortcuts, you can have a delicious meal in no time! You can find the full recipe for a savory green bean delight in the previous section. To keep your easy green bean casserole fresh, store it in an airtight container. Place it in the fridge if you plan to eat it within a few days. The casserole stays good for about 3-4 days when refrigerated. For longer storage, consider freezing it. In the freezer, it can last up to 2-3 months. Be sure to label your container with the date so you know when to use it. When you're ready to enjoy the leftovers, you can reheat them in a few ways. The microwave is quick and easy. Just place a serving on a plate and heat for 1-2 minutes. If you prefer the oven, preheat it to 350°F (175°C). Place the casserole in a baking dish and cover it with foil to keep it moist. Bake for about 15-20 minutes until hot. To keep the texture nice, avoid overheating. You want to warm it, not cook it again. If the top gets too soft, you can remove the foil for the last few minutes. This will help it crisp up a bit. Enjoy your delicious, comforting dish! For the full recipe, visit the main article. How long does it take to bake an easy green bean casserole? It takes about 25 to 30 minutes to bake. You want it bubbly and golden brown. Can I make this casserole ahead of time? Yes, you can prepare it a day in advance. Just cover it and refrigerate. Bake it right before serving. What can I substitute for cream of mushroom soup? Try cream of chicken soup or a homemade béchamel sauce. Both work well and add great flavor. Can I use fresh green beans instead of canned? Absolutely! Fresh green beans add a nice crunch. Blanch them in boiling water for five minutes first. What are the best ways to enhance the flavor? Add a splash of soy sauce or Worcestershire sauce. Fresh herbs like thyme or rosemary also boost taste. How do I serve green bean casserole at a potluck? Serve it straight from the baking dish. This makes it easy for guests to help themselves. Can I double the recipe for a large gathering? Yes, just use a larger baking dish. Make sure to adjust baking time as needed for a bigger batch. This blog post covered how to make a delicious green bean casserole. We looked at key ingredients, preparation steps, and unique variations. You learned useful tips for perfecting your dish and storing leftovers. Creating this casserole is easy, and you can customize it to fit your needs. Enjoy the cooking process and share it with others. It’s a great dish for any meal or gathering. Happy cooking!

Easy Green Bean Casserole Simple and Comforting Dish

Are you ready for an easy and delicious green bean casserole that will impress everyone? This simple comfort dish uses

- 2 large cucumbers, thinly sliced - 1 cup plain Greek yogurt - 2 tablespoons fresh dill, chopped - 1 tablespoon lemon juice - 1 clove garlic, minced - 1 teaspoon honey (optional) - Salt and pepper to taste - Cherry tomatoes, halved (for garnish) - A sprinkle of sesame seeds (for garnish) When I make creamy cucumber salad, I love using fresh ingredients. The cucumbers are key. They should be crisp and cool. I often choose large ones for more crunch. The Greek yogurt gives the salad a rich taste. It also adds protein. Fresh dill brings a bright flavor that shines. Lemon juice adds zest. Garlic gives it a little kick. Honey is nice for a hint of sweetness, but it’s optional. I always keep salt and pepper on hand. They help balance the flavors. For garnishing, I use cherry tomatoes for color. They also add a sweet touch. A sprinkle of sesame seeds gives a nice crunch. Want to make it even better? Consider adding some optional ingredients. Feta cheese can bring a salty bite. Slices of red onion add a sharp taste. If you like creamy, diced avocado is perfect. You can find the full recipe in this article. Enjoy making this fresh and simple delight! Start with fresh cucumbers. Wash them well under cold water. Slice the cucumbers thinly. You can peel them if you wish. Next, take a colander and place the sliced cucumbers inside. Sprinkle a little salt over them. This step helps draw out excess moisture. Let them sit for about 10 minutes. After that time, rinse the cucumbers under cold water. Pat them dry with paper towels. This keeps the salad from becoming too watery. Now, let’s make the creamy dressing. In a mixing bowl, combine one cup of plain Greek yogurt. Add in two tablespoons of fresh dill, one tablespoon of lemon juice, and one clove of minced garlic. If you like a hint of sweetness, include one teaspoon of honey. Mix everything until it is smooth and well combined. Taste the dressing and adjust flavors with salt and pepper. Gently fold the cucumbers into the yogurt mixture. Make sure they are well coated. This is where the magic happens! After mixing, season with additional salt and pepper if needed. Chill the salad in the refrigerator for about 30 minutes. This helps the flavors blend nicely. When ready to serve, present the salad in a large bowl or individual servings. Garnish with halved cherry tomatoes and a sprinkle of sesame seeds. This adds a lovely touch to your creamy cucumber salad. For the complete process, refer to the Full Recipe. How can I make it vegan? You can swap Greek yogurt for a plant-based yogurt. Look for brands made from almond, coconut, or soy. This change makes the salad creamy and keeps the flavor. How can I adjust the creaminess? You may add more yogurt for a thicker texture. For a lighter version, use less yogurt. You can also mix in some water to thin it out if needed. How do I keep the cucumbers crisp? Start by salting the cucumbers. This step draws out moisture. Rinse them well before mixing. Chill the salad after mixing. This step helps keep the cucumbers firm. When should I add flavors for the best taste? Mix the salad about 30 minutes before serving. This time lets the flavors blend well. Letting it sit longer can make the cucumbers too soft. What sides pair well with this salad? Creamy cucumber salad goes great with grilled meats. It also complements sandwiches or wraps nicely. Try it with pita and hummus for a fresh meal. How can I plate it creatively? Serve the salad in a clear bowl to show the colors. Add a sprinkle of sesame seeds on top for crunch. You can use halved cherry tomatoes for a pop of color. {{image_2}} Cucumber salad can adapt to many styles. Here are some fun variations to try. Mediterranean style In this version, I add olives and feta cheese. You can also use olive oil and lemon juice. This twist gives a rich, tangy flavor that brightens the dish. Asian-inspired cucumber salad For an Asian take, mix soy sauce and rice vinegar. You can add sesame oil for depth. Toss in sliced radishes and scallions for a crunchy bite. This style is fresh and zesty. Sour cream vs. Greek yogurt I often use Greek yogurt for its creaminess and protein. However, sour cream can work too. It gives a tangy taste that many love. You can choose based on your preference. Using vinaigrette instead If you want a lighter option, try a vinaigrette. Whisk together vinegar, oil, and a bit of mustard. This dressing adds a sharp flavor that contrasts well with the cucumber. Summer herbs selection In summer, fresh herbs shine in salads. Try adding basil, mint, or cilantro. They give a burst of flavor and enhance the freshness of the dish. Incorporating seasonal vegetables Think about adding other vegetables. Bell peppers and radishes add color and crunch. You can make it more colorful and nutritious. Enjoy the variety with each season! For the full recipe, check out the details above. Store your creamy cucumber salad in an airtight container. This keeps it fresh and tasty. It stays good for about 3 to 4 days in the fridge. Always check for any signs of spoilage before serving. You should not freeze cucumber salad. Freezing can change its texture. If you really want to save it, try freezing just the dressing. For thawing, let it sit in the fridge overnight. Mix it well before using again. You can prepare this salad a day in advance. Just keep it in the fridge. To keep the flavors bright, wait to add salt until just before serving. This helps maintain the crunch of the cucumbers and the creaminess of the dressing. For the full recipe, check the earlier section. You can boost flavor by adding fresh herbs. Try mint or parsley for a twist. A splash of vinegar can also add zest. If you like a kick, add chili flakes. Experiment with extra seasonings like cumin or smoked paprika. Cucumbers are low in calories, which makes them great for snacks. They have a lot of water, helping to keep you hydrated. They also contain vitamins like K and C. Cucumbers have antioxidants that can help fight inflammation too. Yes, you can use any yogurt you prefer. If you want a creamier texture, try using regular yogurt. Non-dairy options like coconut yogurt can work too. Just remember that taste and texture may change a bit. You can prepare the salad a day in advance. Just remember to add the cucumbers right before serving. This keeps them crispy and fresh. If you mix everything early, the cucumbers may release water and become soggy. This recipe is excellent for meal prep. It stores well in the fridge for a few days. Just keep it in an airtight container. You can use it as a side dish or a light lunch throughout the week. For best results, add cucumbers fresh before eating. For the full recipe, see the earlier section. This blog post showed you how to make a creamy cucumber salad. We covered key ingredients, like cucumbers and Greek yogurt, and explored optional add-ins. I gave steps for mixing and serving, plus tips for perfecting flavor. You learned about variations, storage, and how to customize your dish. Incorporating fresh cucumbers into your diet brings health benefits. Try this recipe to enjoy a tasty and refreshing snack. Happy cooking!

Creamy Cucumber Salad Fresh and Simple Delight

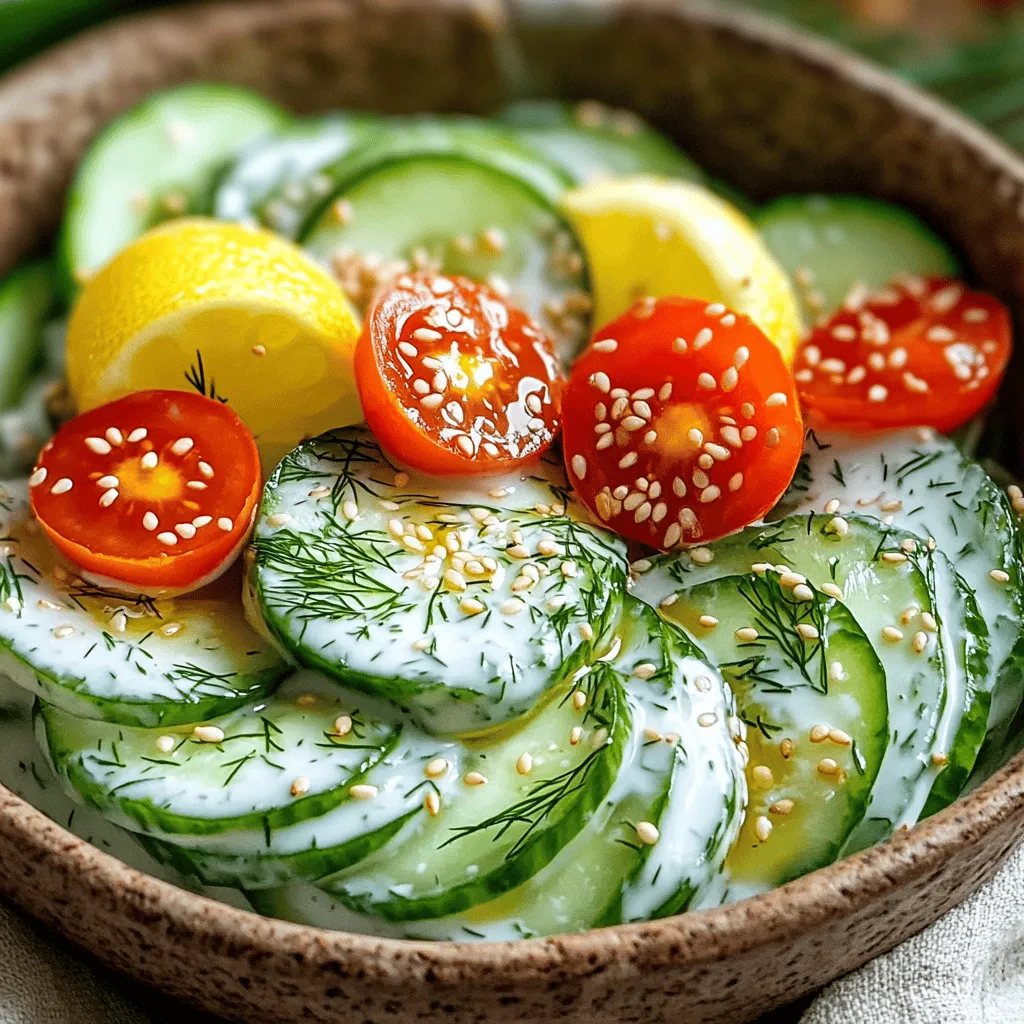
Looking for a refreshing dish that’s easy to make? Look no further! My Creamy Cucumber Salad is a delightful blend

Older posts
Newer posts
← Previous Page1 … Page6 Page7 Page8 … Page80 Next →

dsad

© 2025 My Saved Recipe • Built with GeneratePress

Our Policies

  • Copyright Policy
  • Cookie Policy
  • GDPR Policy
  • Privacy Policy
  • Disclaimer
  • Terms Of Use

More Information

  • Home
  • About
  • Contact
  • Appetizers
  • Dessert
  • Dinner
  • Drinks
©2025, My Saved Recipe About Back To Top