. To get the best roast, cut your cauliflower into even florets. This helps them cook at the same rate. Use a large baking sheet to spread out the florets. Crowding can lead to steaming instead of roasting. Make sure your oven is preheated to 425°F (220°C). This high heat makes the cauliflower crispy and golden. Stir the florets halfway through cooking for even browning. You can tweak the flavor to fit your taste. If you want more garlic, add a bit more minced garlic. For heat, try adding a pinch of red pepper flakes. You can also switch the smoked paprika for regular paprika if that's what you have. The salt and pepper can be adjusted too. Taste the mix before roasting to find your perfect balance. Serve this tasty dish with a squeeze of fresh lemon juice. The lemon adds a bright zing that contrasts well with the cheese. You can also pair it with grilled meats or fish for a lovely meal. Try adding it to salads for extra crunch or as a side to pasta dishes. For a fun twist, serve it on a taco with your favorite toppings. Check out the Full Recipe for more ideas on how to enjoy this dish! {{image_2}} If you want a vegan version, skip the cheese. You can use nutritional yeast instead. It adds a cheesy flavor without the dairy. Mix in 1/4 cup of nutritional yeast when you toss the cauliflower. This keeps it tasty and plant-based. You can try different cheeses for great flavor. Instead of Parmesan, use Pecorino Romano for a sharper taste. Or, go for a dairy-free cheese if you want to keep it vegan. Just remember to choose one that melts well. Want to mix it up? Add some other veggies like bell peppers or zucchini. They add color and flavor. You can also toss in some crushed red pepper flakes for heat. For a herb twist, sprinkle in thyme or rosemary before roasting. These additions keep your Garlic Parmesan Roasted Cauliflower exciting and fresh. Check out the Full Recipe for more ideas! After you enjoy your Garlic Parmesan Roasted Cauliflower, store leftovers in an airtight container. Keep it in the fridge for up to three days. This keeps the flavors fresh and the texture good. If you want to save it longer, consider freezing. To reheat, place the leftovers on a baking sheet. Bake at 350°F (175°C) for about 10-15 minutes. This method helps regain some crispness. You can also use a microwave, but it may make the cauliflower soft. For best results, use the oven. If you want to freeze Garlic Parmesan Roasted Cauliflower, let it cool first. Place it in a freezer-safe container or bag. It can last up to three months in the freezer. When you're ready to eat, thaw it in the fridge overnight. Then, reheat as mentioned before. Enjoy those tasty flavors later! Roasting cauliflower takes about 20 to 25 minutes. You want it tender and golden brown. Stir the florets halfway through to ensure they cook evenly. The time may vary slightly based on your oven and the size of the florets. Yes, you can prepare the cauliflower ahead of time. You can wash and cut the cauliflower a day before. Store it in the fridge in a sealed bag. Just add the olive oil and seasonings before roasting for the best flavor. Cauliflower is low in calories and packed with nutrients. It has vitamins C, K, and B6. It also contains fiber, which is good for digestion. Eating cauliflower may help reduce the risk of heart disease and improve overall health. You can use frozen cauliflower, but fresh gives the best texture. If using frozen, thaw it first and drain excess water. This helps the cauliflower roast well and not steam. Adjust roasting time as frozen cauliflower may need longer to cook through. For the full recipe, check out the complete instructions above. Garlic Parmesan Roasted Cauliflower is a tasty dish that’s easy to make. You learned about key ingredients and spices that add flavor. The step-by-step guide showed how to prepare, roast, and finish your cauliflower perfectly. Tips help you adjust flavors and serve it just right. Remember, you can make variations to suit your taste, whether using vegan cheese or extra spices. Storing leftovers is simple and reheating keeps the flavor strong. Now, enjoy this dish and impress your friends with your cooking skills!](https://mysavedrecipe.com/wp-content/uploads/2025/04/28f246aa-1154-419f-88fc-d3b482d748fd.webp)
Garlic Parmesan Roasted Cauliflower Tasty Side Dish
If you’re looking for a side dish that wows, Garlic Parmesan Roasted Cauliflower is it! This dish is packed with
If you’re looking for a side dish that wows, Garlic Parmesan Roasted Cauliflower is it! This dish is packed with
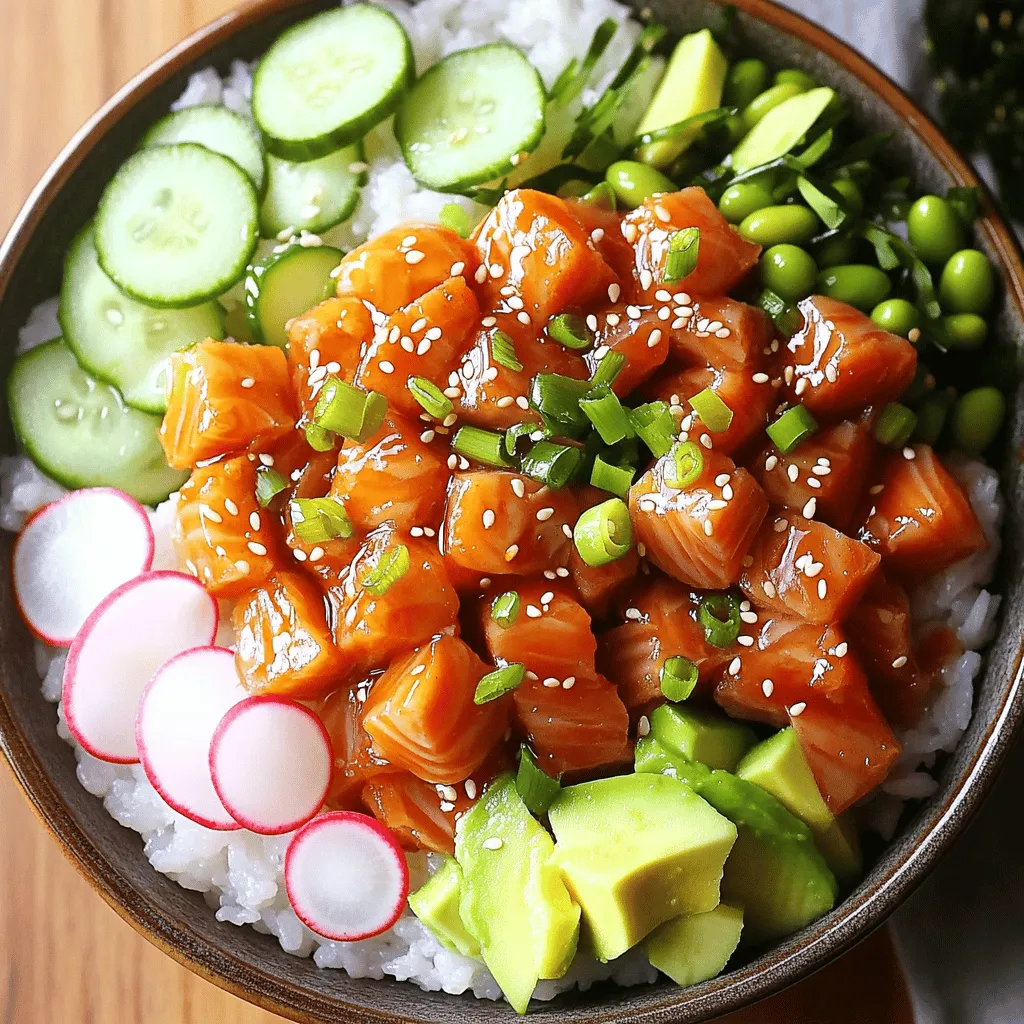
Want to impress your friends with a dish that’s fresh, flavorful, and super easy? Let’s dive into creating a Spicy
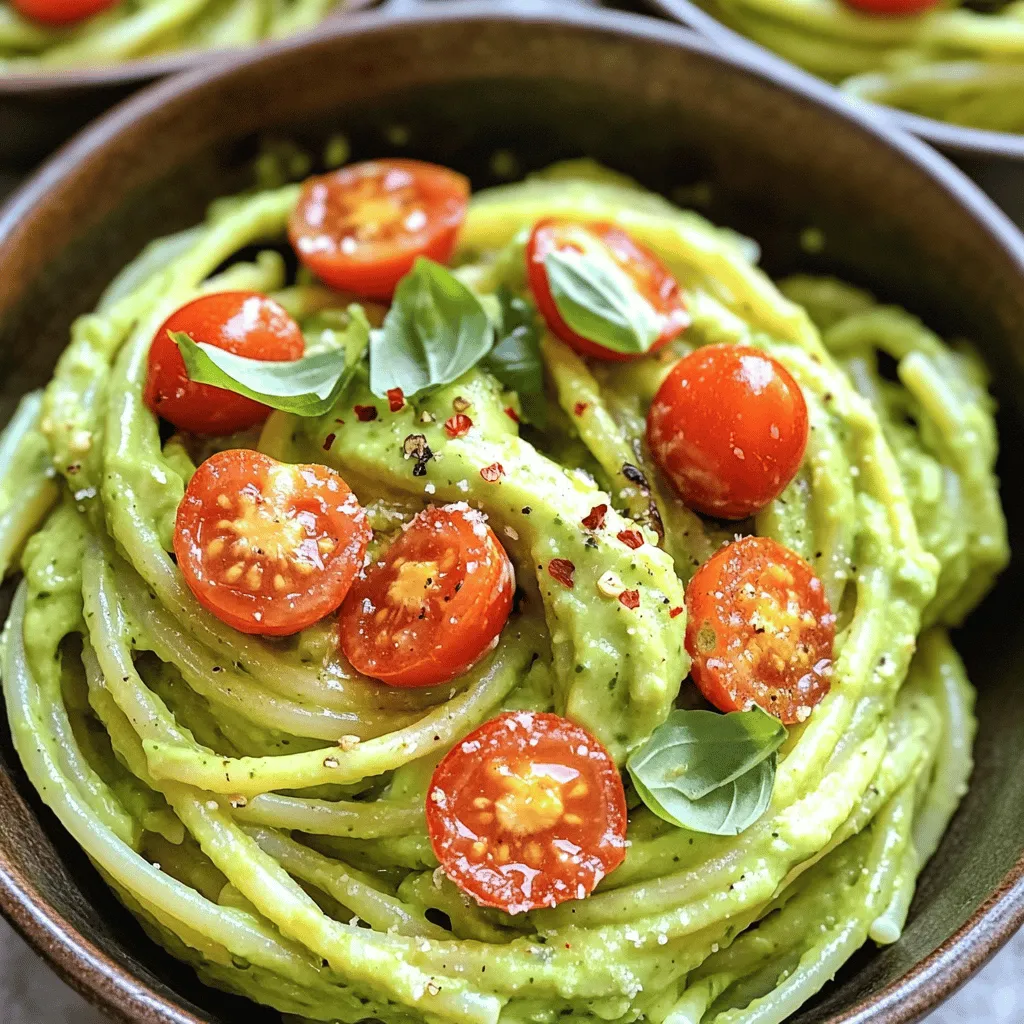
Are you ready to impress your taste buds with a creamy twist on pasta? This Creamy Avocado Pasta recipe brings
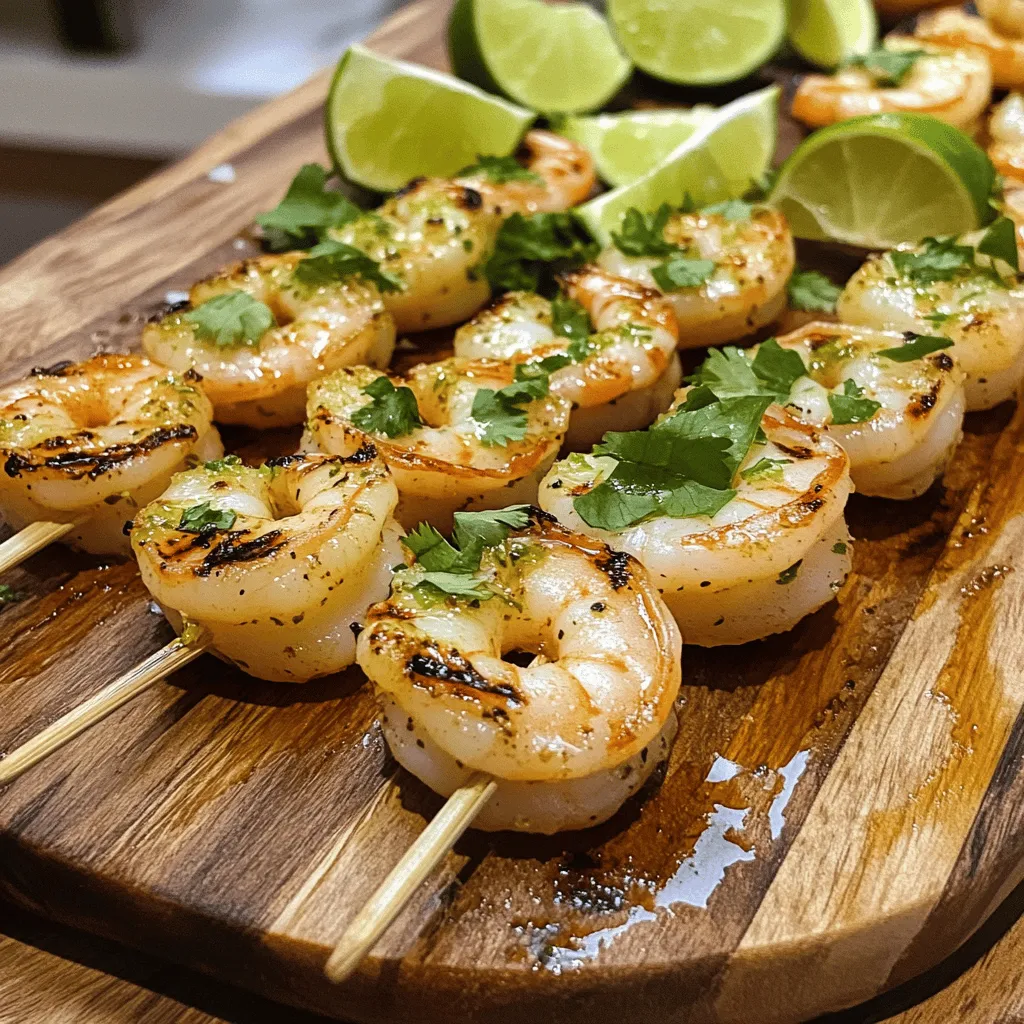
Get ready to fire up your grill with my Zesty Lime Grilled Shrimp recipe! This flavorful dish is packed with
![- 2 cups rolled oats - 1 cup pecans, chopped - 1/2 cup almond butter (or any nut butter) - 1/3 cup pure maple syrup - 1/4 cup honey (or agave syrup for a vegan option) - 1/2 teaspoon vanilla extract - 1/2 teaspoon cinnamon - 1/4 teaspoon salt - 1/2 cup dried cranberries or raisins (optional) - 1/4 cup mini dark chocolate chips (optional) The star of this recipe is the maple syrup. It gives the bars a sweet and rich flavor that pairs perfectly with the pecans. You can switch almond butter for another nut butter, depending on your taste. The oats offer a chewy texture, making every bite satisfying. When making these bars, consider adding dried fruit or chocolate chips for extra flavor. Dried cranberries add a tartness that balances the sweetness of the maple syrup. Mini dark chocolate chips bring a touch of indulgence that kids and adults love. Each bar has about 150 calories. They contain 4 grams of protein, 7 grams of fat, and 20 grams of carbohydrates. This makes them a great snack option for energy without a sugar crash. You can easily make these bars vegan by using agave syrup instead of honey. For a nut-free version, swap nut butter with sunflower seed butter. To keep them gluten-free, ensure your oats are certified gluten-free. This way, everyone can enjoy a delicious and healthy snack! - Preheat your oven to 350°F (175°C). - Line an 8x8 inch baking pan with parchment paper. - In a large bowl, mix 2 cups rolled oats and 1 cup chopped pecans. - Spread this mix on a baking sheet. - Toast the mixture in the oven for about 10 minutes. Stir halfway through. - In a saucepan over low heat, combine: - 1/2 cup almond butter - 1/3 cup pure maple syrup - 1/4 cup honey - 1/2 teaspoon vanilla extract - 1/2 teaspoon cinnamon - 1/4 teaspoon salt - Stir the mix for 3-5 minutes until smooth. - Remove the toasted oats and pecans from the oven and let cool slightly. - Pour the warm almond butter mix over the oat and pecan mix. - If desired, add 1/2 cup dried cranberries and 1/4 cup mini dark chocolate chips. - Use a spatula to stir everything until well coated. - Transfer the granola mix into the prepared baking pan. - Press the mixture firmly into the pan using a spatula or your hands. - Bake for 15-20 minutes until the edges start to brown. - Allow the bars to cool in the pan for about 10 minutes. - Lift them out using the parchment paper and let cool completely. - Once cool, cut into bars of your desired shape and size. For the complete recipe details, check the [Full Recipe]. To keep your granola bars fresh, store them in an airtight container. Place parchment paper between layers to avoid sticking. They stay good for about a week at room temperature. For longer storage, you can freeze them. Wrap each bar in plastic wrap and place them in a freezer bag. They will last for up to three months in the freezer. For a fun presentation, stack your granola bars on a wooden board. Add some extra pecans on top and drizzle with maple syrup. This gives a nice rustic look. You could also wrap each bar in parchment paper for easy snacks on the go. Pair these bars with yogurt or fresh fruit for a great breakfast or snack! A common mistake is not pressing the mixture firmly enough in the pan. This can lead to crumbly bars. Make sure to press it down well before baking. You can also customize your bars. Try adding different nuts, seeds, or dried fruits to match your taste. If you love chocolate, toss in some dark chocolate chips. This will add richness and flavor to your bars! For the full recipe, check the section above. {{image_2}} You can easily change the flavor of these bars. Adding different nuts or seeds makes a big difference. Try walnuts, almonds, or sunflower seeds. Each nut brings a unique taste and texture. You can also switch up the sweetener. Instead of maple syrup, use maple sugar or brown sugar for a new flavor. If you want to use a different nut butter, go ahead! Peanut butter works well and adds a nice taste. You can even try sunflower seed butter for a nut-free option. Changing sweeteners can also help. Use agave syrup instead of honey for a vegan choice. This keeps the bars tasty and suitable for everyone. You can make these bars fit many diets. For a gluten-free version, choose gluten-free oats. This keeps the bars safe for those with gluten issues. If you prefer a keto diet, swap the oats with crushed nuts or seeds. This adds healthy fats and keeps carbs low. For a high-protein option, add protein powder to the mix. This boosts the protein and helps you feel full longer. You can find many brands that sell maple pecan granola bars. Some popular options include Nature Valley, KIND, and Larabar. Each brand offers a unique flavor and texture. I recommend checking the ingredient list. Look for bars with whole ingredients and minimal added sugar. You can find these bars in grocery stores or online. Websites like Amazon and Thrive Market often have great selections. Making your own granola bars has benefits. You control the ingredients, so you can skip preservatives. You can also adjust flavors to your taste. However, making them takes time and effort. Store-bought bars are quick and easy, but they might cost more. Homemade bars are cheaper in the long run, especially with bulk ingredients. You can make a large batch to save money and have snacks ready. Here are some brands you might enjoy: - KIND: Known for its crunchy texture and clean ingredients. - Nature Valley: Offers a variety of flavors but often has added sugars. - RXBAR: Great for protein, but check for nut allergies. - Larabar: A simple ingredient list, perfect for a quick snack. These brands balance great taste and nutrition. When shopping, read the labels for the best choice. Homemade granola bars can last up to two weeks. Store them in an airtight container. Keep them in a cool, dry place. You can also freeze them for up to three months. Just wrap each bar tightly in plastic wrap or foil before freezing. Yes, you can make these bars nut-free. Use seeds like sunflower or pumpkin instead of nuts. You can also use seed butter, like sunflower seed butter, in place of almond butter. This gives the bars a similar texture and flavor. Yes, you can substitute maple syrup with honey or agave syrup. Honey will add a nice sweetness and stickiness. Agave syrup is a great vegan option. Keep in mind that different sweeteners can change the texture, so adjust accordingly. Granola bars can be healthy. They provide fiber from oats and nuts. They also contain healthy fats and protein. However, watch for added sugars and unhealthy fats in store-bought versions. Always read the labels to make smart choices. To make these granola bars vegan, use agave syrup instead of honey. Ensure your nut butter is vegan too. Many brands offer vegan options. You can also avoid adding chocolate chips if they contain dairy. This guide covered key ingredients and steps for making delicious granola bars. You learned about storage tips, serving ideas, and how to customize your recipe. Remember, you can easily swap ingredients to fit your needs, whether it’s vegan, nut-free, or gluten-free. Making your own granola bars can save money and meet your taste. Get creative with flavors, and enjoy your tasty, healthy snacks!](https://mysavedrecipe.com/wp-content/uploads/2025/04/2d1f59f7-78e6-44b5-bf2a-e71d97ea7330.webp)
Looking for a quick and healthy snack? You’ve come to the right place! In this post, I’ll show you how
![To make delicious egg muffins with veggies, you need the following: - 6 large eggs - 1 cup spinach, chopped - 1/2 cup bell peppers (red, yellow, or green), diced - 1/2 cup cherry tomatoes, halved - 1/4 cup red onion, finely chopped - 1/2 cup shredded cheese (cheddar or mozzarella) - 1/4 teaspoon garlic powder - 1/4 teaspoon black pepper - Salt to taste This mix gives a great flavor and texture. Each ingredient plays a role. The eggs bind everything together, while the veggies add color and nutrients. You can try adding these for extra flavor: - Fresh herbs like parsley or basil for garnish - Alternative cheeses such as feta or goat cheese These options let you customize your muffins. Each ingredient can make your meal unique and tasty. Don't be afraid to experiment! First, you need to preheat your oven to 375°F (190°C). This step helps the muffins cook evenly. While the oven heats, grease your muffin tin with a bit of oil or cooking spray. This keeps the muffins from sticking. A well-greased tin is key for easy removal. Next, grab a large mixing bowl. Crack the eggs into the bowl and whisk them well. You want them to be nice and fluffy. After that, add the chopped spinach, diced bell peppers, halved cherry tomatoes, and finely chopped red onion to the eggs. Stir everything together gently. Now, sprinkle in the shredded cheese, garlic powder, black pepper, and salt. Mix until all the ingredients combine nicely. Make sure the veggies and cheese are spread evenly throughout the egg mixture. Now it’s time to fill the muffin tin. Pour the egg and veggie mix into each cup, filling them about 3/4 full. This gives them room to rise. Once filled, place the muffin tin in the preheated oven. Bake for 18-20 minutes. The muffins are done when the eggs are set and the tops look lightly golden. After baking, remove the muffins from the oven and let them cool for a few minutes. Then, gently lift them from the tin. If you want, add some fresh herbs on top for a nice touch. Enjoy your veggie-packed egg muffins! For the full recipe, see the earlier section. To make your egg muffins perfect, start with the eggs. Whisk them well until they are frothy. This helps to add air, making the muffins light and fluffy. Use a fork or a whisk for best results. When you pour the mixture into the muffin tin, do not overfill. Fill each cup about three-quarters full. This allows space for the muffins to rise without spilling over. One common mistake is not greasing the tin properly. Use oil or cooking spray to coat the tin. This step prevents sticking and makes cleanup easier. Another mistake is undercooking or overcooking the muffins. Keep an eye on the bake time. Check them at 18 minutes. The muffins should be set and slightly golden on top. To boost flavor, add herbs and spices. Fresh parsley, basil, or oregano work well. You can use about a tablespoon of chopped herbs for a great taste. If you want to change the cheese, try feta or goat cheese. They add a nice tang and work well with veggies. These options can give your muffins a tasty twist. For the full recipe, visit the [Full Recipe] section. {{image_2}} You can mix up the vegetables in your egg muffins for fun flavors. Zucchini adds moisture and a mild taste. Mushrooms bring a nice umami flavor and a chewy texture. Broccoli adds a bit of crunch and a pop of green. The great thing about these muffins is you can use what you have. Seasonal vegetables are also a good choice. In the summer, use fresh corn or diced tomatoes. In fall, consider sweet potatoes or squash for added sweetness. This way, you can enjoy different tastes each season. Adding protein to your egg muffins makes them heartier. You can use bacon, ham, or sausage for a savory touch. Cook these proteins first to get the best flavor. Chop them into small pieces before adding them to the mixture. If you're looking for plant-based options, tofu works great too. Crumble firm tofu and mix it in. You can also use chickpeas or black beans for added protein. These options keep your muffins tasty and filling while catering to various diets. For the full recipe, check out the details in the earlier section. Refrigeration Tips After you bake the egg muffins, let them cool completely. Then, place them in an airtight container. Store them in the fridge for up to five days. Always check for any signs of spoilage before eating. Freezing Instructions For longer storage, freeze the muffins. Wrap each muffin tightly in plastic wrap. Place them in a freezer bag or container. They can last for about three months in the freezer. When ready to eat, just thaw them in the fridge overnight. Best Methods for Reheating You can reheat egg muffins in the microwave or oven. For the microwave, heat on medium power for about 30-60 seconds. In the oven, preheat to 350°F (175°C) and bake for around 10 minutes. Maintaining Texture and Flavor To keep the muffins moist, cover them with a damp paper towel when microwaving. This helps to prevent them from drying out. If using the oven, you can add a splash of water to the baking dish to create steam. This keeps them soft and tasty. Yes, you can make these muffins ahead of time. - Meal Prep Suggestions: Prepare a batch on the weekend. Store them in the fridge for easy breakfasts. Allow the muffins to cool before placing them in an airtight container. They stay fresh for about five days. You can also freeze them for longer storage. Just reheat in the microwave or oven when ready to eat. You can easily modify the recipe to fit many dietary needs. - Gluten-Free and Dairy-Free Options: For gluten-free muffins, use gluten-free flour. Most veggies are safe for gluten-free diets. For a dairy-free option, skip the cheese or use a dairy-free cheese substitute. You can also add nutritional yeast for a cheesy flavor without dairy. These egg muffins last about five days in the fridge. - Storage Duration and Safety Tips: Store them in a sealed container to keep them fresh. If you notice any changes in smell or texture, it’s best to toss them. Always check before eating. In this blog post, I shared how to make tasty egg muffins. We covered the key ingredients, like eggs and fresh veggies, and added options for flavor, like herbs and alternative cheeses. I detailed step-by-step instructions, from preparing your oven to mixing and baking. Plus, I offered tips to ensure perfect muffins and variations to suit your taste. Remember, these muffins are easy to store and reheat. You can adapt them for any diet too. Enjoy your egg muffins and get creative with the flavors!](https://mysavedrecipe.com/wp-content/uploads/2025/04/1d4a3e34-6d6e-4af4-82c1-787e144f4de7.webp)
Are you looking for a quick, healthy breakfast? Look no further! My Egg Muffins with Veggies are easy to make
![- 1 cup long-grain rice (white or brown) - 2 cups vegetable broth or water - Zest of 1 lime - 2 tablespoons fresh lime juice - 1/4 cup fresh cilantro, finely chopped - 1 tablespoon olive oil - 1 small clove garlic, minced - 1/2 teaspoon salt - 1/4 teaspoon black pepper - Optional: lime wedges and extra cilantro for garnish Lime cilantro rice is fresh and full of flavor. You need just a few items to make it shine. The main star is rice. You can use either white or brown rice based on your taste. The broth or water helps to cook the rice and gives it more flavor. Lime zest and juice bring a bright taste that wakes up the dish. Fresh cilantro adds a wonderful herb note. Together, they create a symphony of flavors in every bite. For the additional ingredients, olive oil adds richness. Garlic gives a hint of warmth. Salt and pepper round out the taste, making each bite better. If you want to add a special touch, use lime wedges and extra cilantro for garnish. They make the dish look pretty and add more zest! For the full recipe, check out the detailed steps. - Rinse the rice under cold water. This step removes extra starch. A fine mesh sieve works best. - Toast the garlic in olive oil. Heat the oil in a medium saucepan. Add minced garlic and sauté for about one minute. Watch it closely; you don’t want it to burn. - Add rice and broth to the saucepan. Stir the rinsed rice into the pan. - Bring to a boil, then reduce heat. After boiling, lower the heat to let it simmer. Cover the pan tightly. - Allow rice to steam. Let it sit covered for five minutes after cooking. This helps the rice become fluffy. - Fluff and mix in lime juice, zest, and cilantro. Use a fork to fluff the rice gently. Stir in the lime juice, zest, and chopped cilantro. This adds bright flavors to the rice. For the full recipe, check out the earlier section. - Rinsing the rice helps remove excess starch. This keeps your rice fluffy and light. - Adjust the heat as you cook. Start high to boil, then lower it to simmer. - Use homemade broth for a richer taste. This adds depth to the simple rice. - Experiment with seasonings. Try adding cumin or chili powder for a twist. - Add lime juice and zest after cooking. This keeps the flavors fresh and bright. - Garnish effectively with lime wedges and more cilantro. This adds color and appeal. For a full recipe, check out the [Full Recipe]. {{image_2}} You can choose different types of rice for this dish. Brown rice is a healthy choice. It has more fiber and a nutty taste. White rice cooks faster and has a softer texture. Both options work well. You can also try quinoa or cauliflower rice. Quinoa adds protein and a unique texture. Cauliflower rice is low in carbs and very light. Both add a fun twist to this recipe. Want to spice things up? Add diced jalapeños for heat. They give a nice kick and flavor. If you prefer milder flavors, try adding fresh parsley or green onions. These herbs add freshness and color to your rice. This rice pairs well with many proteins. Serve it with grilled chicken, shrimp, or fish. It also goes great with black beans or lentils for a veggie option. You can use Lime Cilantro Rice as a base for burrito bowls too. Top it with your favorite ingredients like salsa, avocado, or cheese. The options are endless! To store leftover rice, wait for it to cool. Place it in a container. Use an airtight container to keep it fresh. This helps avoid any bad smells or tastes. Leftover rice can last about 3 to 5 days in the fridge. When you want to reheat, keep the rice moist. Add a splash of water before heating. This helps the rice stay fluffy and soft. You can use the microwave or stovetop. If using the microwave, heat in short bursts. Stir in between to heat evenly. On the stovetop, add water to a pan on low heat. Stir until warmed through. To freeze lime cilantro rice, let it cool first. Then, place it in a freezer-safe bag. Remove as much air as possible before sealing. This helps prevent freezer burn. The rice can stay good for up to 2 months. When ready to use, thaw the rice in the fridge overnight. Reheat in the microwave or stovetop as mentioned earlier. Just add a little water to keep it moist. Enjoy your zesty lime cilantro rice anytime! Cooked Lime Cilantro Rice lasts about 4 to 5 days in the fridge. Store it in an airtight container to keep it fresh. I suggest letting it cool down before you put it in the fridge. This helps avoid extra moisture build-up, which can make the rice soggy. Yes, you can make Lime Cilantro Rice ahead of time. It’s great for meal prep or events. Just cook the rice and let it cool. Then, store it in the fridge until you're ready to serve. When you’re ready, simply reheat it on the stove or in the microwave. Add a little lime juice to freshen up the flavor. If you don't like cilantro, you can try parsley or chives. Both add a nice green flavor without the strong taste of cilantro. You can also use mint for a fresher twist. Just chop them finely and mix them in like you would with cilantro. Lime Cilantro Rice is not spicy at all. It has a bright, zesty flavor from lime. If you want to add some heat, you can mix in chopped jalapeños or red pepper flakes. Start with a little and taste as you go. Adjust it to your liking. This blog post covered a simple way to make Lime Cilantro Rice. We explored the main ingredients, like rice, lime, and cilantro. You learned step-by-step instructions to prepare and cook the rice perfectly. I also shared tips to enhance flavor and ways to vary the dish. Remember to store any leftovers correctly for great reheating. Lime Cilantro Rice is a tasty, fresh side that pairs well with many meals. Enjoy your cooking and experimenting with flavors to make it your own!](https://mysavedrecipe.com/wp-content/uploads/2025/04/0e918937-c68b-4897-9318-e171559d46c0.webp)
Looking for a fresh and flavorful side dish? Lime Cilantro Rice is your answer! This bright, zesty dish pairs perfectly
. First, preheat your oven to 400°F (200°C). This step is key for crispy chickpeas. While your oven heats, line a baking sheet with parchment paper. This helps with easy cleanup and keeps the chickpeas from sticking. Next, prepare the chickpeas. Drain and rinse them well. This removes excess sodium and makes them healthier. In a mixing bowl, toss the chickpeas with olive oil, smoked paprika, garlic powder, ground cumin, salt, and pepper. Make sure each chickpea gets coated evenly with the seasonings. Now it’s time to roast your chickpeas. Spread them in a single layer on the baking sheet. This allows hot air to circulate and gives them a nice crunch. Roast them for 25 to 30 minutes. Stir them halfway through to ensure even cooking. The chickpeas should turn golden brown and crispy. For optimal crispiness, make sure the chickpeas are dry before adding oil. Also, do not overcrowd the baking sheet. This helps them roast instead of steam. While the chickpeas roast, prepare the salad. In a large salad bowl, combine mixed greens, halved cherry tomatoes, diced cucumber, and sliced red onion. This mix adds freshness and color. Next, prepare the tahini dressing. In a small bowl, whisk together tahini, lemon juice, and water. This creates a creamy dressing. Adjust the water amount for your preferred thickness. Once the chickpeas are done, let them cool slightly. Then, add them to the salad bowl. Drizzle the tahini dressing over everything and toss gently to combine. If you like, sprinkle crumbled feta cheese on top. Finally, garnish with chopped fresh parsley before serving. For the full recipe, check out the details above. Enjoy your crispy chickpea salad! To get crispy chickpeas, use the right amount of oil. Too much oil makes them soggy. Just one tablespoon is enough to coat them well. The oil helps the seasonings stick and crisps them up in the oven. Next, pay attention to the roasting temperature and time. Preheat your oven to 400°F (200°C). Roast the chickpeas for 25 to 30 minutes. Stir them halfway to ensure even cooking. You want them golden brown and crunchy, not burnt. The order of ingredients matters for the best flavor. Start with your mixed greens. Add cucumbers and cherry tomatoes next. Top with red onion for a sweet crunch. Finally, toss in the crispy chickpeas. This way, the warm chickpeas mix well with the cold veggies. To prevent soggy greens, add the dressing just before serving. This keeps the greens crisp. You can set aside some chickpeas to sprinkle on top for extra crunch. For a great meal, pair this salad with grilled chicken or a warm pita. These sides complement the salad’s flavors nicely. When presenting the dish, use a large bowl to show off the colors. You can also serve it on individual plates. Garnish with fresh parsley for a pop of green. For an extra touch, sprinkle some feta cheese on top for creaminess. For the full recipe and more details, check out the Full Recipe. {{image_2}} You can change the dressing to suit your taste. Try balsamic vinaigrette for a tangy kick. A yogurt dressing adds creaminess and zest. You can mix things up with a spicy sriracha sauce for heat. Feel free to swap ingredients too. Instead of tahini, use almond butter for a nutty flavor. You can even add honey or maple syrup to sweeten your dressing. Want to boost your protein? Add grilled chicken or tofu to the salad. Both options give it a hearty touch. You can also try black beans or lentils if you want a different legume. They add flavor and nutrition, too. Using seasonal veggies makes your salad fresh and exciting. In spring, add peas or asparagus. In summer, use bell peppers or zucchini. In fall, try roasted butternut squash or apples. In winter, incorporate hearty greens like collards or Swiss chard. Adjust your salad for the time of year to keep it interesting and tasty. For the full recipe and tips, check out the detailed guide above. To keep your crispy chickpea salad fresh, use an airtight container. Glass containers work best. Make sure to cool your salad to room temperature before storing. This helps prevent sogginess. Layer your salad with chickpeas on top. This keeps the greens crisp. Store in the fridge for up to three days. Chickpeas can be reheated in an oven or on the stove. If using the oven, preheat it to 350°F (175°C). Spread the chickpeas on a baking sheet and warm for about 10 minutes. On the stove, heat them in a skillet over medium heat. Add a splash of olive oil to keep them crispy. To keep the salad fresh, do not reheat the greens. It’s best to serve the salad cold or at room temperature. Yes, you can freeze chickpeas. After roasting, let them cool completely. Then, place them in a freezer bag. Remove all air before sealing. They can last up to three months in the freezer. When you're ready to eat, thaw them overnight in the fridge. For quick meals, add the frozen chickpeas directly to soups or stews. This way, you have quick, healthy meals ready. Crispy chickpeas can last up to five days when stored properly. To keep them fresh, place them in an airtight container. Store them at room temperature, away from humidity. If they lose some crunch, you can re-roast them briefly to revive their crispiness. Yes, you can prepare this salad ahead of time! I recommend storing the salad and the crispy chickpeas separately. This way, the greens stay fresh, and the chickpeas remain crunchy. You can mix them just before serving. The tahini dressing can also be made ahead and stored in the fridge for up to three days. If you don’t have tahini, you can use almond butter or sunflower seed butter. These alternatives give a nice flavor. Greek yogurt is another option for a creamy dressing. Just mix it with lemon juice and water to reach your desired consistency. Feel free to get creative with what you have on hand! This blog provided a clear guide to making a tasty chickpea salad. You learned about the key ingredients, step-by-step cooking instructions, and expert tips. The recipe is flexible, letting you swap ingredients and try new flavors. For best results, focus on crisping up the chickpeas and layering your salad well. This dish is not just healthy; it's fun and easy to prepare. Enjoy it fresh or store for later. Experiment with variations to keep meals exciting!](https://mysavedrecipe.com/wp-content/uploads/2025/04/b5373eaf-2db1-4197-9154-50b74cd44625.webp)
Are you ready to spice up your mealtime? This Crispy Chickpea Salad is both flavorful and nutritious, making it the
![For sweet and spicy meatball subs, you will need: - 1 lb ground beef (or turkey) - 1/2 cup breadcrumbs - 1/4 cup grated Parmesan cheese - 1 large egg - 2 cloves garlic, minced - 1 teaspoon onion powder - 1 teaspoon smoked paprika - 1 teaspoon salt - 1/2 teaspoon black pepper - 1/4 cup fresh parsley, chopped - 1 cup sweet chili sauce - 1/4 cup sriracha sauce (adjust to taste) - 4 sub rolls - 1 cup shredded mozzarella cheese - Fresh basil leaves for garnish These ingredients create a rich flavor that makes every bite memorable. You can customize your meatballs. Consider adding: - 1/4 cup finely chopped onion - 1/2 teaspoon crushed red pepper flakes - 1 tablespoon Worcestershire sauce These add-ins can enhance the flavor. Experiment to find what you like best. The right toppings can elevate your subs. Try these: - Extra shredded mozzarella cheese - Sliced jalapeños for heat - Sliced avocado for creaminess - Pickled onions for a tangy crunch These toppings add texture and flavor to your dish. For the full recipe, check the steps to create these tasty meatball subs. First, preheat your oven to 400°F (200°C). This helps the meatballs cook evenly. In a large bowl, mix these ingredients: - 1 lb ground beef (or turkey) - 1/2 cup breadcrumbs - 1/4 cup grated Parmesan cheese - 1 large egg - 2 cloves garlic, minced - 1 teaspoon onion powder - 1 teaspoon smoked paprika - 1 teaspoon salt - 1/2 teaspoon black pepper - 1/4 cup fresh parsley, chopped Stir until everything blends together well. Now, shape the mixture into small meatballs, about 1 inch wide. Place them on a baking sheet lined with parchment paper. Bake the meatballs for 20-25 minutes. They should be brown and cooked through. While the meatballs bake, grab a small saucepan. Combine 1 cup of sweet chili sauce and 1/4 cup of sriracha sauce over medium heat. Mix until it warms up and blends nicely. When the meatballs are ready, take them out of the oven. Transfer them into the saucepan and gently toss them in the sweet and spicy sauce. Next, cut the sub rolls in half lengthwise, but don’t cut all the way through. Place the rolls on a baking sheet. Fill each roll with a good amount of the glazed meatballs. Top them with shredded mozzarella cheese. Put the loaded subs back in the oven for 5-7 minutes. Wait until the cheese melts and bubbles. Once done, take them out and garnish with fresh basil leaves. Enjoy your delicious Sweet and Spicy Meatball Subs! For the complete recipe, check out the [Full Recipe]. To make great meatballs, use fresh ingredients. Fresh parsley adds a bright taste. Mix the ground beef well with the egg, breadcrumbs, and spices. You want a smooth mixture. Form the meatballs into the same size. This helps them cook evenly. Bake them until they are nicely browned. A good tip is to use a meat thermometer. Aim for 160°F (71°C) for ground beef. Serve your meatball subs hot and fresh. Place the meatballs in the sub rolls right after baking. Top them with melted mozzarella cheese for a rich flavor. You can add fresh basil leaves for a nice touch. For extra heat, drizzle more sriracha on top. Pair your subs with a side of chips or a salad. This makes for a fun meal. You could also serve them on a platter for a party. One common mistake is overmixing the meatball mixture. This can lead to tough meatballs. Another mistake is undercooking them. Always check the temperature to ensure they are safe to eat. Avoid using stale breadcrumbs; they can make the meatballs dry. Lastly, don’t skimp on the sauce. The sweet and spicy mix really makes the dish shine. For the full recipe, refer to the Sweet and Spicy Meatball Subs above. {{image_2}} You can change up the meat in these subs. Ground beef is classic, but turkey works too. It gives a lighter taste. You can also use ground chicken for a different flavor. For a richer taste, try pork. Each meat brings its own spin to the dish. Switching sauces can make a big difference. If you want less heat, use barbecue sauce instead of sriracha. For a different sweet flavor, try honey garlic sauce. You can even mix in teriyaki sauce for an Asian twist. Each swap can change the whole vibe of the meal. For a meat-free option, use plant-based meat. There are many brands that mimic ground beef well. For a vegan sub, mix lentils with breadcrumbs. You can also mash chickpeas and add spices for great flavor. Use vegan cheese or skip it for a lighter bite. These swaps keep the subs tasty and fun. You can find the full recipe [here](#). To store leftover meatball subs, let them cool first. Place them in an airtight container. You can keep them in the fridge for up to three days. If you want to keep them longer, freezing is a better option. When you are ready to eat, take the subs out of the fridge. Preheat your oven to 350°F (175°C). Wrap each sub in foil to keep them moist. Heat them for about 15 minutes. If frozen, let them thaw in the fridge overnight before reheating. To freeze meatball subs, do not add the cheese yet. Once they cool, wrap each sub tightly in plastic wrap. Place the wrapped subs in a freezer bag. They can stay in the freezer for up to two months. When you're ready to enjoy, just follow the reheating instructions. For the best flavor, use the full recipe to make delicious meatball subs! Meatball subs started in the U.S., mainly in Italian-American communities. Italian immigrants brought their meatball recipes. They served meatballs in bread, creating a new dish. Over time, these subs gained popularity across the country. Now, they are a favorite at many diners and homes. Yes, you can prepare meatballs ahead of time. Making them a day before saves time on busy days. Just mix the ingredients and form the meatballs. Store them in the fridge. You can also freeze them for up to three months. When ready to cook, thaw them in the fridge overnight. Then, bake and enjoy! If you need a substitute for breadcrumbs, try crushed crackers or oats. Both options work well in meatballs. You can also use ground nuts for a gluten-free choice. Just adjust the amount to keep the meatball texture right. Each substitute adds a unique flavor to your meatballs. To adjust spice levels, change the amount of sriracha in your sauce. For milder subs, use less sriracha. You can also add sweet chili sauce for a hint of heat without overwhelming flavors. For spicier meatballs, mix in some red pepper flakes or jalapeños. Taste as you go to find the perfect balance! This blog post covered how to make tasty meatball subs. I shared key ingredients, step-by-step instructions, and useful tips for perfecting your dish. You learned about variations, storage, and even answered common questions. Now, you can create your own meatball sub masterpiece. Enjoy crafting your meal and impressing friends and family with your skills!](https://mysavedrecipe.com/wp-content/uploads/2025/04/43bfee7f-a6a6-46e3-88a1-d4ac2c477741.webp)
Looking for a comfort food delight? Sweet and Spicy Meatball Subs are the answer! In this post, I’ll show you
. {{image_2}} You can change the taste of lemon herb grilled chicken easily. Try using lime or orange juice instead of lemon juice. Each citrus brings a new twist. Lime adds a sharp zest, while orange gives a sweet touch. You can also add spices to your marinade. Paprika gives a smoky flavor, while cumin adds warmth. These spices change the dish, making it your own. If you don’t have a grill, you can bake the chicken. Just preheat your oven to 400°F (200°C). Place the marinated chicken in a baking dish. Bake for about 25-30 minutes. This method keeps the chicken juicy and tender. Another fun way to cook is to make lemon herb chicken skewers. Cut the chicken into cubes and thread them onto skewers. Grill or bake them until cooked. This method is great for parties or picnics. You can use lemon herb flavors with tofu too. Marinate firm tofu in the same mix. Grill or bake it until golden. This is a tasty option for vegetarians. Lemon herb flavors also work well with fish. Try grilling salmon or tilapia. The fish absorbs the flavors and turns out delicious. Just adjust the cooking time, as fish cooks faster than chicken. For the full recipe, check out the details above. Enjoy experimenting with these variations! To keep your lemon herb grilled chicken fresh, store it properly. First, let the chicken cool to room temperature. Avoid leaving it out for more than two hours. Place the chicken in airtight containers. You can also use resealable plastic bags. Make sure to remove as much air as possible. For freezing, wrap each piece in plastic wrap, then foil. This helps prevent freezer burn. When reheating, it’s best to use the oven or a skillet. Preheat the oven to 350°F (175°C). Place the chicken on a baking sheet. Cover it with foil to keep it moist. Heat for about 15-20 minutes. If using a skillet, add a splash of water or broth. Cover it and heat on low until warm. This method keeps the chicken juicy and tasty. Lemon herb grilled chicken lasts in the fridge for about 3-4 days. Make sure it is in a sealed container. In the freezer, it can last 2-6 months. For best flavor, eat it within 2 months. Always check for any signs of spoilage before eating. To marinate chicken well, start with a good mix of oil, acid, and herbs. I suggest using olive oil and lemon juice. The oil keeps the chicken juicy, while the acid helps tenderize it. Make sure to coat the chicken fully. Place it in a sealed bag or dish. This allows the flavors to soak in. For best results, marinate for at least 30 minutes to two hours. Overnight is even better! Grilling chicken takes about 12 to 15 minutes. Start by grilling for 6 to 7 minutes on one side. Then flip and grill for another 6 to 7 minutes. Always check the internal temperature. It should reach 165°F (75°C) for safe eating. This time gives the chicken a nice char and keeps it juicy. Yes, you can use dried herbs instead of fresh. Dried herbs have a stronger flavor. Use about one-third of the amount called for fresh herbs. For example, if the recipe calls for 2 teaspoons of fresh rosemary, use about 2/3 teaspoon of dried. However, fresh herbs add a bright taste and aroma that dried can't match. Lemon herb grilled chicken pairs great with many sides. Here are a few ideas: - Grilled vegetables like zucchini or bell peppers - A light salad with mixed greens and lemon vinaigrette - Quinoa or rice pilaf for a filling side - Garlic bread for a crunchy touch These sides complement the chicken's zesty flavors well. Enjoy your meal! For the full recipe, check the earlier section. This blog post covered how to make delicious lemon herb grilled chicken. You learned about the key ingredients, step-by-step instructions, and helpful tips. I shared variations and storage tips to keep your meals fresh. Grilling chicken does not have to be hard. With a few simple steps and some tasty herbs, you can create a meal that impresses everyone. Enjoy cooking and feel free to try your own twist on the flavors!](https://mysavedrecipe.com/wp-content/uploads/2025/04/357e2a24-e806-4f69-9a9e-b850acb3f340.webp)
Ready to spice up your dinner routine? This Lemon Herb Grilled Chicken recipe is simple and bursting with flavor! With
