Skip to content
DisclaimerTerms Of UseGDPR PolicyCookie Policy

My Saved Recipe

  • Home
  • Drinks
  • Appetizers
  • Dinner
  • Dessert
  • About
  • Contact
  • Privacy Policy
DisclaimerTerms Of UseGDPR PolicyCookie Policy

Savannah

To make peppermint chocolate chip cookies, you need these simple ingredients: - 1 cup unsalted butter, softened - 3/4 cup brown sugar - 3/4 cup granulated sugar - 1 large egg - 1 teaspoon vanilla extract - 1 teaspoon peppermint extract - 2 1/4 cups all-purpose flour - 1 teaspoon baking soda - 1/2 teaspoon salt - 1 cup chocolate chips (semi-sweet or dark) - 1/2 cup crushed peppermint candies or candy canes When I bake these cookies, I love how the flavors blend together. The butter gives a rich taste, while brown sugar adds a hint of caramel. The peppermint extract brings that refreshing zing, perfect for the holiday season. Using both chocolate chips and crushed peppermint creates a great mix of sweet and minty flavors. The semi-sweet or dark chocolate pairs well with the candy, making each bite a delight. If you want to try another twist, you can swap the chocolate chips for white chocolate. This makes a lovely contrast with the peppermint. For the full recipe, check out the complete instructions to create these festive treats! - Preheat the oven to 350°F (175°C). - Prepare your baking sheet with parchment paper. - In a large bowl, cream together butter, brown sugar, and granulated sugar. - Beat in the egg, vanilla extract, and peppermint extract until mixed well. - In another bowl, whisk flour, baking soda, and salt. - Gradually add the dry mix to the wet mix, stirring until combined. - Fold in chocolate chips and crushed peppermint candies with a spatula. - Drop tablespoon-sized portions of dough on the baking sheet, leaving space. - Bake for 10-12 minutes. Watch for edges turning golden. - Cool on the baking sheet for 5 minutes. - Transfer cookies to a wire rack to cool completely. For the full details, check out the Full Recipe. Baking cookies can be fun and rewarding. Here are some tips to make your peppermint chocolate chip cookies perfect. - Recommended temperature for creaming ingredients: Start with softened butter. This helps mix the butter and sugars easily. I find a room temperature around 65°F works well. Cream for about three minutes to get it fluffy. - Importance of not overmixing the dough: Once you add the flour, mix just until combined. Overmixing can make the cookies tough. You want them soft and chewy, not hard and dry. - Adding sea salt to enhance flavors: A little sea salt brings out the sweetness. Just a pinch on top before baking makes a big difference. - Using different types of chocolate chips: You can mix semi-sweet and dark chocolate chips for fun flavors. White chocolate also pairs well with peppermint. - Creative ways to arrange cookies for serving: Place cookies on a festive platter. Try stacking them or arranging them in a circle. Add some crushed peppermint candies on top for a pop of color. - Pairing ideas with beverages for a festive touch: Serve your cookies with a glass of cold milk or a warm cup of hot chocolate. This makes for a cozy treat, perfect for the holidays. Try these tips while making your peppermint chocolate chip cookies from the Full Recipe, and see how delicious they become! {{image_2}} If you want to make gluten-free peppermint chocolate chip cookies, use gluten-free flour. Some great substitutes include almond flour or coconut flour. You can also use a gluten-free all-purpose blend. Just make sure it has xanthan gum for the right texture. This way, everyone can enjoy these festive treats! To create a vegan version, swap the egg for a flax egg. Mix one tablespoon of ground flaxseed with three tablespoons of water. Let it sit until it thickens. Use coconut oil instead of butter for a dairy-free option. You can also use dairy-free chocolate chips. These swaps keep the cookies tasty and suitable for all diets! Feel free to get creative with flavors! Instead of peppermint extract, try using almond or orange extract. You can even add spices like cinnamon or nutmeg for a warm twist. These small changes can make your cookies unique and fun. Explore different extracts and spices to find your favorite combination. To keep your cookies fresh at room temperature, follow these steps: - Use an airtight container. This helps lock in moisture. - Layer with parchment paper. Place sheets between cookies to avoid sticking. - Store in a cool, dry place. Avoid damp areas that can cause mold. These cookies stay fresh for about five days when stored correctly. If you want to save some cookies for later, freezing is a great option. Here’s how: - Cool cookies completely. This prevents ice crystals from forming. - Wrap each cookie in plastic wrap. Ensure they are tightly sealed. - Place in a freezer-safe bag. Label the bag with the date. You can freeze these cookies for up to three months. Just thaw before enjoying! To keep your cookies soft and avoid staleness, try these tips: - Add a slice of bread to the container. The bread helps maintain moisture. - Avoid mixing different cookies together. Different types can affect texture and flavor. - Store in a single layer if possible. This helps to keep them from getting squished. These simple steps will keep your peppermint chocolate chip cookies delightful and ready to enjoy! To keep your cookies soft, do not overbake them. Bake until the edges turn golden but the centers remain soft. Once you take them out, let them cool on the baking sheet. This helps them finish cooking and stay chewy. Yes, you can use chocolate chunks. They add a nice texture and a rich chocolate flavor. Just chop them into small pieces and mix them into the dough. If you don’t have crushed peppermint candies, try using mini chocolate chips or even toffee bits. For a minty kick, you can use mint extract in place of the candies. These cookies can last about a week at room temperature in an airtight container. For longer storage, consider freezing them. Absolutely! You can swap peppermint extract for almond or vanilla extract. This will change the cookie’s flavor but still keep it delicious. Experiment with your favorite flavors! For the full recipe, check out the earlier section. These cookies blend sweet chocolate and mint for a festive treat. You learned key ingredients and step-by-step instructions to bake them perfectly. Remember to avoid overmixing and keep an eye on baking time for the best results. With storage tips, you can enjoy these cookies longer. Feel free to mix things up with flavors or dietary needs, too. Happy baking!

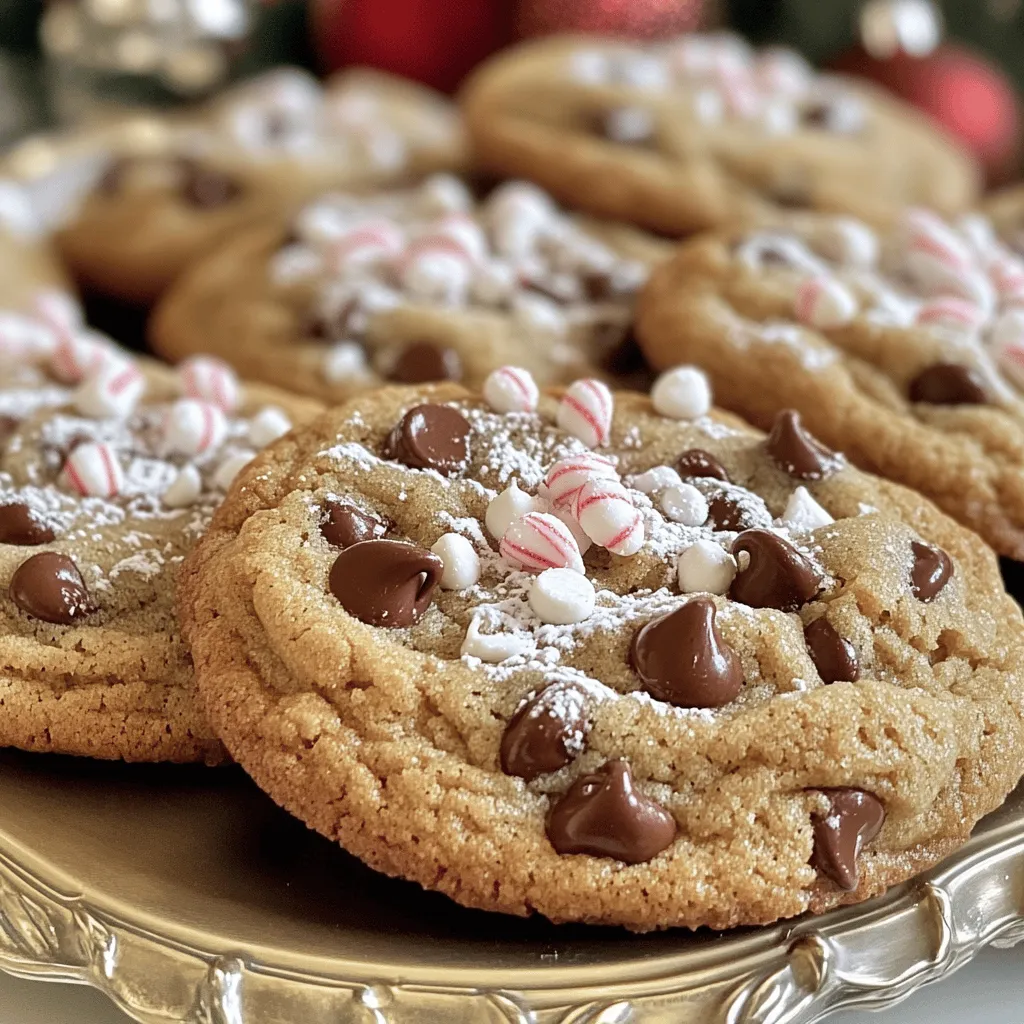
Peppermint Chocolate Chip Cookies Festive and Delightful

Get ready to celebrate the season with my Peppermint Chocolate Chip Cookies! These festive treats combine the rich taste of

To make the best chocolate thumbprint cookies, gather these key ingredients: - 1 cup all-purpose flour - 1/3 cup unsweetened cocoa powder - 1/2 teaspoon baking powder - 1/4 teaspoon salt - 1/2 cup unsalted butter, softened - 1/2 cup granulated sugar - 1/4 cup brown sugar, packed - 1 teaspoon vanilla extract - 1 large egg yolk - 1/2 cup chocolate chips (dark or milk) - 1/4 cup assorted jam or fruit preserves (raspberry, apricot, or strawberry) These ingredients create a rich, chocolatey base with a sweet filling. The jam adds a burst of flavor, making these cookies irresistible. If you need to swap some ingredients, here are some great options: - You can replace all-purpose flour with gluten-free flour for a gluten-free version. - Use carob powder instead of cocoa powder for a different flavor. - If you prefer, coconut oil can replace unsalted butter. - Maple syrup can work instead of granulated sugar for a natural sweetener. These substitutions keep the spirit of the cookies while catering to dietary needs. To make these cookies, you will need: - Mixing bowls (medium and large) - A whisk for dry ingredients - A hand mixer or stand mixer for creaming - Baking sheet - Parchment paper for easy cleanup - A wire rack for cooling - Measuring cups and spoons Having these tools ready will make your baking experience smooth and fun. For the full recipe, check out the instructions above. To start, gather your ingredients. You need flour, cocoa powder, baking powder, salt, butter, granulated sugar, brown sugar, vanilla extract, and an egg yolk. Make sure everything is at room temperature. This helps the butter mix well. In a medium bowl, whisk the flour, cocoa powder, baking powder, and salt together. Set this aside. Next, in a large bowl, cream the softened butter with the sugars until light and fluffy. This step is key for a tender cookie. Then, add the vanilla and egg yolk. Mix until smooth. Now it’s time to form the cookies. Take tablespoons of dough and roll them into balls. Place them on a baking sheet lined with parchment paper, spacing them about two inches apart. Press your thumb gently into the center of each ball to create an indentation. This is where the jam will go! Fill each indentation with about half a teaspoon of jam. Be careful not to overfill. Bake in a preheated oven at 350°F for 10 to 12 minutes. The edges should set, but the center may look soft. They will firm up as they cool. While the cookies bake, melt the chocolate chips. You can use a double boiler or the microwave. Stir until the chocolate is smooth. After the cookies cool completely on a wire rack, drizzle the melted chocolate over the jam-filled center. This adds a lovely touch and extra flavor. You can also dust the cookies with powdered sugar for a nicer look. For the full recipe, check back to ensure you didn’t miss any steps! To get the best texture, make sure your butter is soft but not melted. This helps create a light and airy dough. Mix the butter and sugars until they are fluffy. This step is key. Use a hand mixer or stand mixer for best results. When adding the dry ingredients, mix just until combined. Overmixing makes cookies tough. You want a thick dough that holds its shape but isn't dry. One common mistake is overfilling the thumbprint with jam. You only need about 1/2 teaspoon per cookie. Too much jam will spill out during baking. Another mistake is not spacing the cookies enough. Keep them about 2 inches apart. This allows them to spread and bake evenly. Also, avoid opening the oven door too early. This can cause your cookies to sink. To store your cookies, let them cool completely first. Place them in an airtight container at room temperature. They will stay fresh for about a week. For longer storage, you can freeze them. Place the cooled cookies in a single layer on a baking sheet. Freeze until solid, then transfer them to a freezer bag. They can last up to three months. When ready to eat, thaw at room temperature. Want to enjoy them warm? Just pop them in the oven for a few minutes! {{image_2}} You can change the filling of your thumbprint cookies to fit your taste. Instead of jam, try using your favorite chocolate ganache or nut butter. A rich hazelnut spread brings a creamy twist. For a fruity touch, use lemon curd or mango puree. Each filling adds a unique flavor and makes the cookies special. For the chocolate lovers, consider different types of chocolate. Dark chocolate chips offer a deep, rich taste. Milk chocolate chips give a sweeter, creamier flavor. White chocolate can add a fun, sweet touch, especially with fruity fillings. You can also melt chocolate bars for a thicker drizzle. Each choice gives a different experience! You can easily change the texture of your cookies. For a chewier cookie, add an extra egg yolk. To make them crunchier, add chopped nuts or oats to the dough. You can also mix in spices like cinnamon or espresso powder for added depth. Experimenting with flavors keeps the cookies fresh and exciting. Check out the Full Recipe for more ideas! To keep your cookies fresh, store them in an airtight container. This will stop them from drying out. Place parchment paper between layers to avoid sticking. Keep them at room temperature for up to a week. If you want to keep them longer, follow the freezing instructions below. For the best taste and texture, avoid exposing your cookies to air. Store them in a cool, dry place. You can also add a slice of bread in the container. This slice will help keep the cookies soft. Change the bread slice every few days to maintain freshness. Freezing cookies is a great way to save them for later. First, let the cookies cool completely. Then, place them on a baking sheet in a single layer. Freeze them for about an hour to firm them up. After they are frozen, transfer them to a freezer-safe bag or container. Label the bag with the date. You can freeze them for up to three months. When you want to enjoy them, thaw the cookies at room temperature. For a warm treat, pop them in the oven for a few minutes. This will bring back their soft, delicious texture. You can find the full recipe for these tasty treats above. To make chocolate thumbprint cookies vegan, swap the butter for a vegan butter or coconut oil. Use a flax egg instead of the egg yolk. To make a flax egg, mix one tablespoon of ground flaxseed with three tablespoons of water. Let this mix sit for five minutes until it thickens. Also, choose dairy-free chocolate chips for the filling. With these small changes, you can enjoy a tasty vegan treat that tastes just as good! Yes! You can use different types of chocolate in these cookies. Dark chocolate chips give a rich taste. Milk chocolate chips add sweetness. You could also try white chocolate for a unique twist. Each type changes the flavor and look of the cookies. Feel free to mix and match for your favorite combination! If your dough is sticky, add a little more flour. Start with one tablespoon at a time. Mix it in until the dough is easier to handle. You can also chill the dough in the fridge for 15-30 minutes. This makes it firmer and easier to shape. Don't worry; your cookies will still turn out delicious! For the full recipe, follow the steps closely and enjoy your baking! You learned the key ingredients and tools for chocolate thumbprint cookies. I shared step-by-step instructions for making them from scratch. Tips helped you avoid common mistakes and achieve the best texture. You also discovered fun variations to make your cookies unique. Finally, I covered storage techniques to keep them fresh. Enjoy baking and sharing these delightful treats! Your cookie skills will impress everyone.

Chocolate Thumbprint Cookies Irresistible Treat Recipe

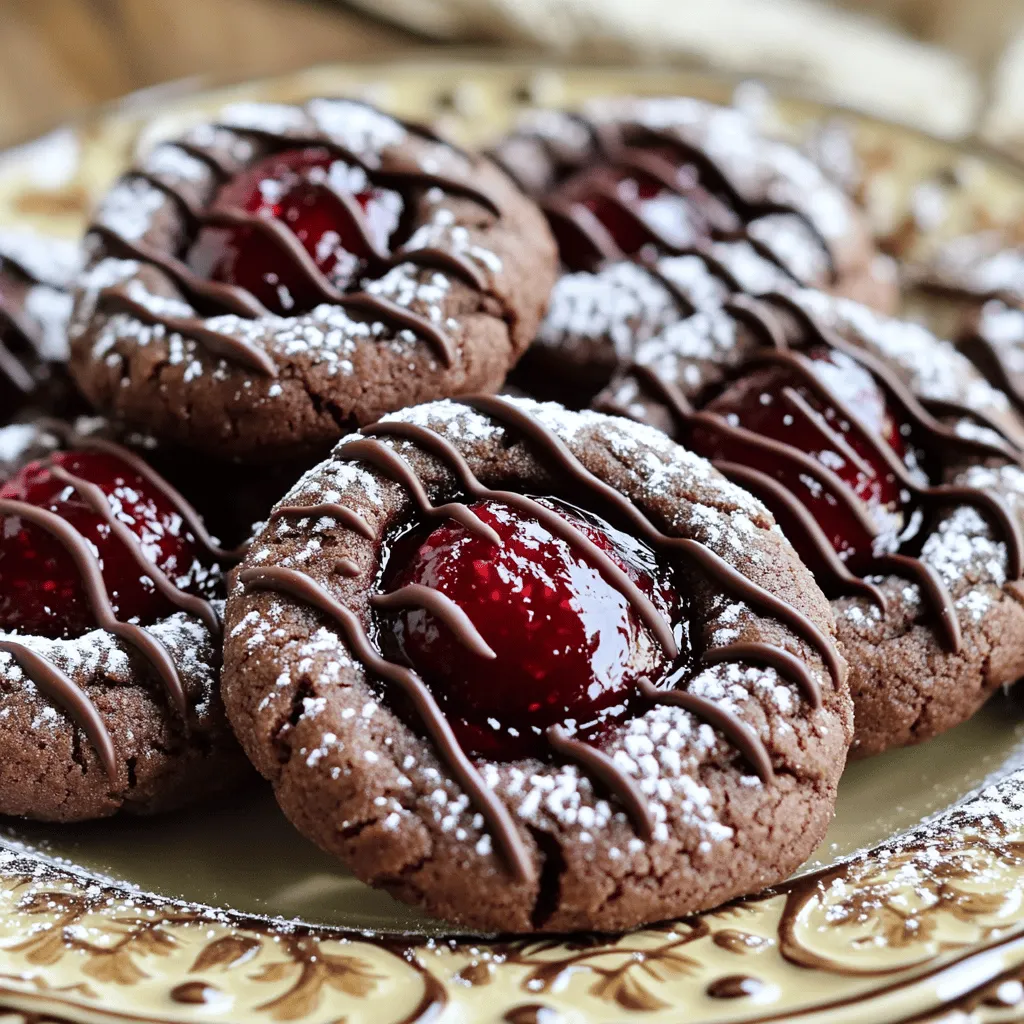
If you’re craving a sweet treat, you’ll love chocolate thumbprint cookies! These soft, chewy cookies are easy to make and

To make these tasty grilled cheese roll ups, you need just a few simple items: - 4 slices of bread (white or whole grain) - 4 slices of cheese (cheddar, mozzarella, or your choice) - 2 tablespoons butter, softened - 1 teaspoon garlic powder - 1 teaspoon dried Italian herbs (oregano, basil) You can get creative with your roll ups. Here are some fun ideas: - Add cooked bacon or ham for extra flavor. - Try different spices like paprika or chili flakes. - Use pesto or hummus for a unique twist. The cheese you pick makes a big difference. Here are my top choices: - Cheddar: sharp and melty, perfect for classic flavor. - Mozzarella: creamy and stretchy, great for kids. - Gruyère: nutty and rich, adds a gourmet touch. For the full recipe, refer to the section above. Enjoy your cooking! First, take your bread and trim off the crusts. This makes it easier to roll. Next, use a rolling pin to flatten each slice of bread. Aim for a thin, even layer. This helps the bread roll up tightly around the cheese. Now, place one slice of cheese at the end of each flattened bread slice. Roll it up carefully, making sure the cheese stays inside. In a small bowl, mix the softened butter with garlic powder and dried Italian herbs. This simple mix adds a tasty kick to your roll-ups. Stir well until everything is combined. You want a smooth blend that coats the bread nicely. Preheat your skillet over medium heat. Once it’s hot, place the roll-ups seam side down in the skillet. Cook them until they turn golden brown, about 2-3 minutes per side. Be sure to rotate them often. This ensures all sides get crispy and delicious. When done, take them out and let them cool. Cut into bite-sized pieces and enjoy! For an extra treat, serve with warm tomato soup for dipping. Check the Full Recipe for more details. To get that perfect golden crust, use medium heat. This allows the bread to toast slowly. If your heat is too high, the outside burns while the inside stays cold. Make sure to coat the roll-ups evenly with the garlic herb butter. This adds flavor and helps with browning. Flip the rolls gently using a spatula to get every side crispy. One common mistake is not rolling the bread tightly. If the rolls are loose, the cheese may leak out while cooking. Another mistake is skipping the crust removal. Crusts can make rolling hard and tough. Lastly, don’t rush the grilling. Let each side cook properly before flipping. This ensures a great texture. Grilled cheese roll-ups pair well with many sides. A classic choice is warm tomato soup. It adds comfort and flavor to each bite. You can also try ranch dressing or marinara sauce. These dips bring extra taste and fun. For a fresh touch, serve with a side salad or crunchy veggie sticks. {{image_2}} You can change up the cheese in your roll-ups. Try adding meats like ham or turkey. You can also use veggies like spinach and peppers. For a sweet twist, consider spreading Nutella or jam inside. These options keep your snack fun and fresh. To make your roll-ups healthier, use whole-grain bread instead of white. You can also swap regular butter for avocado or olive oil. Try low-fat cheese or even a dairy-free option. Adding fresh herbs can boost flavor without extra calories. These swaps can help you enjoy a tasty snack while focusing on health. Grilled cheese roll-ups fit any occasion. Serve them at parties with fun dips. At a picnic, pack them with fruit and drinks. For kids’ lunches, cut them into small pieces for easy eating. On a cozy night, enjoy them with soup while watching a movie. The options are endless, making these roll-ups a great snack choice. To store leftover roll-ups, let them cool first. Place them in an airtight container. You can keep them in the fridge for up to three days. Make sure to separate layers with parchment paper. This prevents them from sticking together. When reheating, use a skillet for the best results. Heat on medium-low to keep them crispy. Cook each side for about two minutes. You can also use an oven. Preheat it to 350°F (175°C) and bake for about 10 minutes. This method warms them well without making them soggy. You can freeze grilled cheese roll-ups for later use. Wrap each roll in plastic wrap. Then place them in a freezer bag. They will stay fresh for up to three months. To eat, thaw in the fridge overnight. Then, reheat in a skillet or oven for a tasty snack. Yes, you can use gluten-free bread. Gluten-free bread works well in this recipe. Just choose your favorite brand. Keep in mind that the texture may differ. Some gluten-free breads may be denser or softer. You can add many herbs to enhance the flavor. Try thyme, parsley, or rosemary. These herbs add freshness and aroma. You can mix and match to suit your taste. Experiment with different combinations for a unique twist. To make a vegan version, swap regular cheese for plant-based cheese. Use vegan butter instead of regular butter. You can also add sliced tomatoes or spinach for extra flavor. This way, you keep it delicious and dairy-free. The best temperature for grilling is medium heat. This allows the bread to toast without burning. If the heat is too high, the outside will brown too fast. Keep an eye on the roll-ups. Flip them when golden brown for the best results. For the Full Recipe, check the earlier sections. Enjoy your grilled cheese roll-ups! You learned the best ingredients, techniques, and tips for making grilled cheese roll-ups. I covered easy ways to customize these treats with different cheeses and flavors. You also discovered how to avoid mistakes for a perfect golden crust and what to pair with your meal. Don’t forget to store leftovers smartly and reheat them properly. Enjoy your cooking journey and impress your friends with delicious roll-ups!

Grilled Cheese Roll Ups Delightful Snack Idea

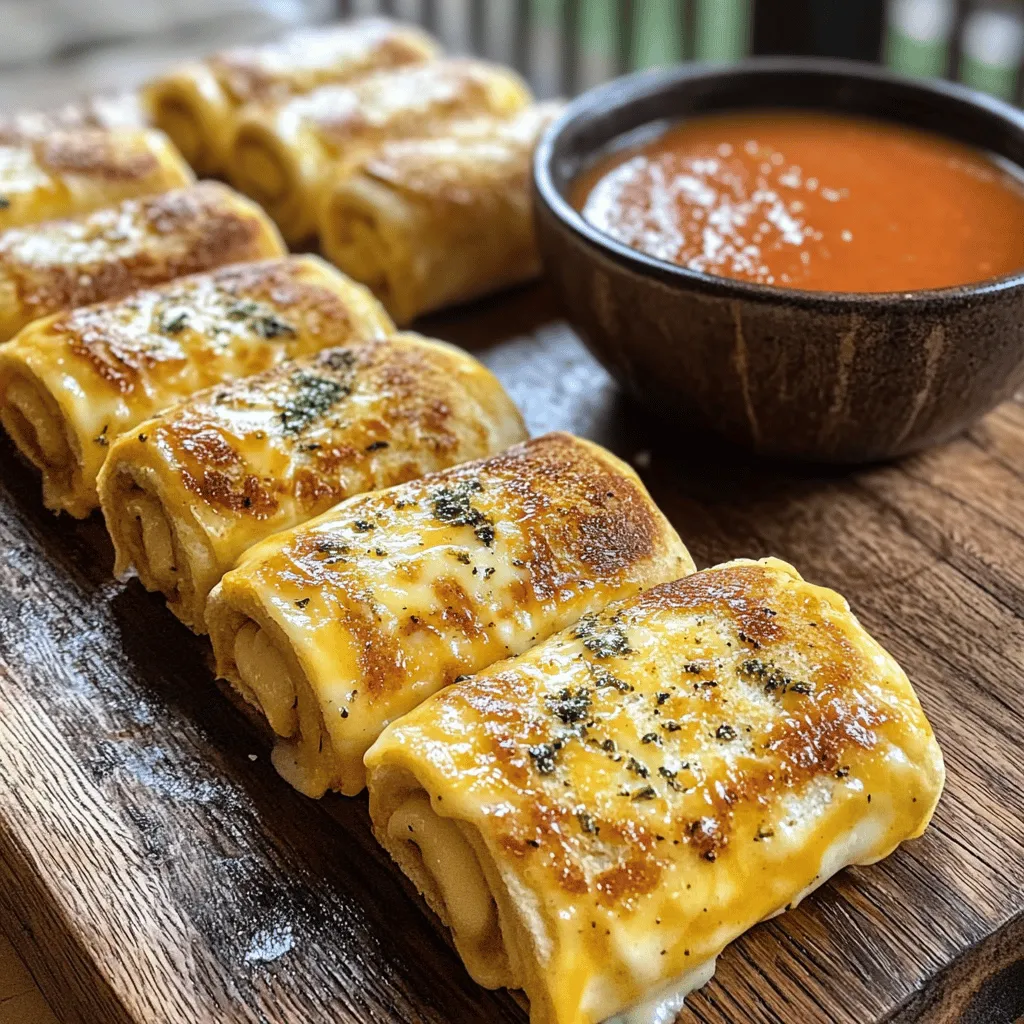
Looking for a fun twist on a classic snack? Grilled Cheese Roll Ups are here to delight you! These cheesy,

- 2 large cucumbers, sliced into thin rounds - 2 cups cherry tomatoes, halved - 8 oz fresh mozzarella balls, halved or quartered - 1/4 cup fresh basil leaves, torn - 2 tablespoons balsamic glaze - 2 tablespoons extra virgin olive oil - Salt and freshly cracked black pepper to taste What can I use instead of fresh mozzarella? You can swap fresh mozzarella for goat cheese or feta. They add a tangy flavor. What other dressings can I use? Feel free to use a lemon vinaigrette or a creamy ranch. Both can change the taste. Are there low sodium options for seasoning? Yes! Use herbs like oregano or thyme instead of salt. They add great flavor without sodium. To start, slice your cucumbers into thin, round discs. Use a sharp knife for clean cuts. Place the slices in a large bowl. Next, take your cherry tomatoes and cut them in half. Add these vibrant pieces to the bowl with the cucumbers. Now, we need to add the mozzarella. If you have mozzarella balls, cut them in half or quarters. When adding them to the bowl, be gentle. You don’t want to squish them. They should keep their nice shape. Next, grab fresh basil leaves and tear them into small pieces. Sprinkle these over your salad mix. The aroma of basil is fresh and uplifting. Now, for the dressing, drizzle balsamic glaze and olive oil over the salad. This adds rich flavor. Season the salad with salt and freshly cracked black pepper. Adjust the seasoning to your liking. Finally, gently toss everything together. We want to coat all the ingredients, but be careful not to break the mozzarella. Letting the salad rest is important. Aim for about 10 minutes. This allows the flavors to blend nicely. The salt and dressing will enhance each taste. For the best flavor melding, serve the salad soon after mixing. If you let it sit too long, the cucumbers may lose their crunch. Enjoy your fresh and vibrant dish! - Choosing the freshest ingredients Fresh ingredients make a big difference. Look for bright, firm cucumbers and ripe cherry tomatoes. The mozzarella should feel soft and moist. Fresh basil should be vibrant green and fragrant. This ensures your salad tastes great. - Slicing techniques for presentation Slice cucumbers into thin rounds for a nice look. Uniform slices create a pleasing pattern. Halve the cherry tomatoes for easy eating. Keep mozzarella pieces similar in size to the tomatoes. This makes your dish more appealing. - Balancing flavors effectively The key to a great salad is balance. Use enough salt to bring out flavors. The balsamic glaze adds sweetness and acidity. Olive oil gives richness. Taste as you mix to ensure you love the flavor. - Ideal pairings for the salad This salad pairs well with grilled chicken or fish. It's a refreshing side for a summer barbecue. Serve it with crusty bread to soak up the juices. You can also enjoy it as a light lunch. - Creative serving ideas for gatherings For parties, serve in small cups for easy grabbing. Layer the salad in a clear dish for a colorful display. Add some toasted pine nuts on top for a crunchy twist. You can also make mini skewers with the salad ingredients for fun finger food. {{image_2}} You can easily change the flavor by adding new ingredients. Avocados add creaminess and healthy fats. Simply slice ripe avocados and fold them into your salad. Greens like arugula or spinach can add a nice crunch, too. Experimenting with different cheese types can also create new tastes. Try feta or goat cheese instead of mozzarella. Both add a tangy kick that makes the salad special. You can also use vegan cheese if you prefer. Homemade dressings can mix things up. Try mixing olive oil with lemon juice or apple cider vinegar. A dash of honey or Dijon mustard can add a sweet or spicy note. Unique flavors can enhance your salad. Consider adding pesto or a yogurt-based dressing. These options provide a fresh twist that pairs well with cucumbers and tomatoes. For the best taste, always use fresh herbs in your dressings. For the full recipe, check out the details above and start creating your own version! To keep your Easy Cucumber Caprese Salad fresh, store it in the fridge right away. Use an airtight container for best results. This prevents air from drying out the salad. If you have extra dressing, store it separately. This keeps the cucumbers crunchy and the flavors bright. The salad lasts about 2 to 3 days in the fridge. To maintain the best taste, eat it within this time. After a day, check the texture. The cucumbers may start to release water. If they do, gently drain the excess liquid. This helps keep the salad fresh and enjoyable. To make this salad, follow these simple steps: 1. Slice the cucumbers into thin rounds and put them in a bowl. 2. Add the halved cherry tomatoes and mozzarella balls to the cucumbers. 3. Gently fold in the torn basil leaves, being careful not to break the mozzarella. 4. Drizzle the balsamic glaze and olive oil over the mixture. 5. Season with salt and freshly cracked black pepper to taste. 6. Toss everything gently until well combined. 7. Let the salad rest for about 10 minutes to blend the flavors. This quick process takes just 20 minutes. For the full recipe, refer to the details above. Yes, you can prepare the salad ahead of time. It tastes best when fresh, but you can make it a few hours early. Store it in the fridge and cover it tightly. If you make it too early, the cucumbers may become soggy. I recommend serving it within 2 to 4 hours after making it for the best taste and texture. This salad is packed with health benefits: - Cucumbers: They are low in calories and high in water. This helps keep you hydrated. - Tomatoes: They are rich in vitamins C and K, and they contain antioxidants. - Mozzarella: This cheese offers protein and calcium, which are great for bones. - Basil: It has anti-inflammatory properties and adds flavor without calories. - Olive oil: This healthy fat is good for heart health. Altogether, this salad is a light and nutritious choice for any meal or snack. This blog post covers how to make an Easy Cucumber Caprese Salad. You learned about the key ingredients and how to prep them. I shared tips for picking the best produce and enhancing flavors. You also discovered fun variations and storage methods. Incorporating diverse ingredients keeps it fresh. Try different dressings and add-ons to suit your taste. Enjoy your salad journey and create a dish that's vibrant and healthy!

Easy Cucumber Caprese Salad Fresh and Vibrant Dish

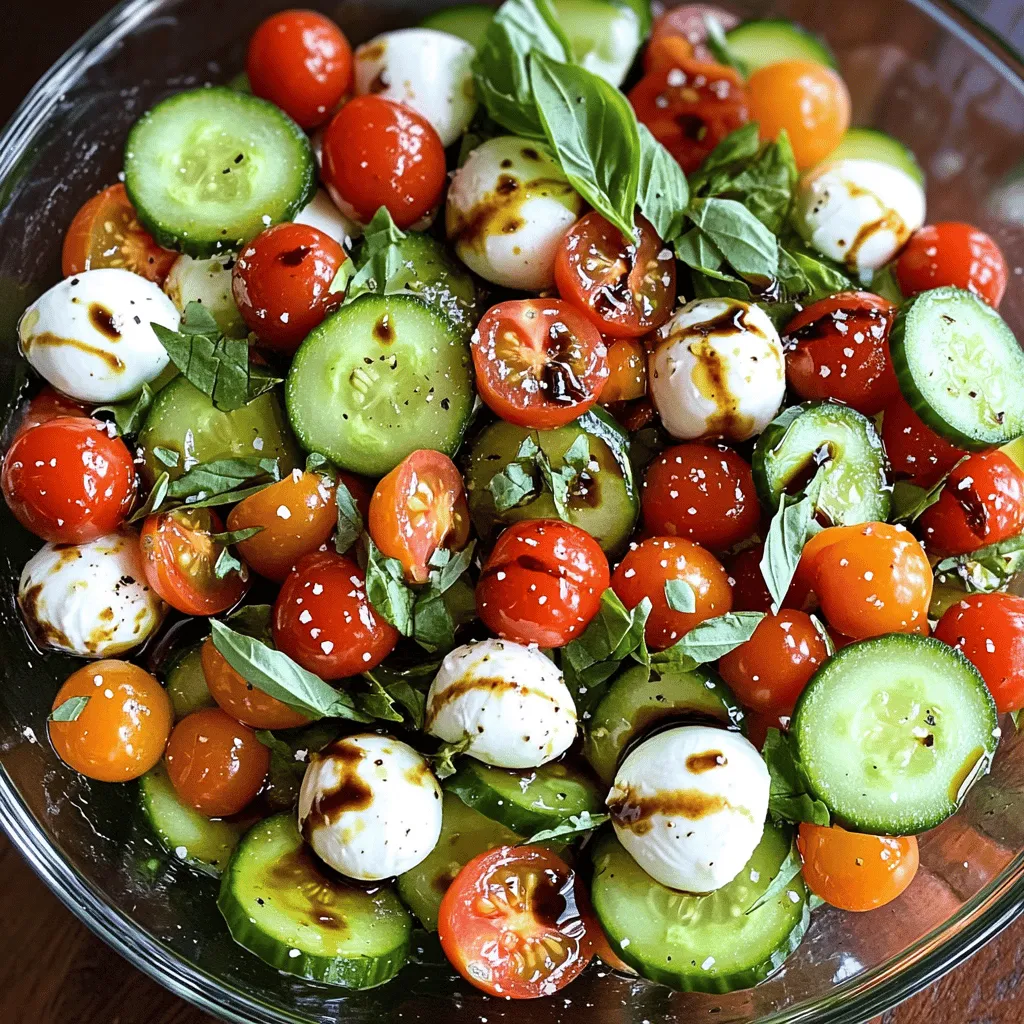
Looking for a fresh and easy dish that brightens up any meal? Try my Easy Cucumber Caprese Salad! Packed with

To make this dish, you'll need these simple ingredients: - 4 boneless, skinless chicken thighs - 1 cup baby carrots - 1 bell pepper (any color), sliced - 1 cup broccoli florets - 1/2 cup soy sauce (low-sodium) - 1/4 cup honey - 4 cloves garlic, minced - 1 tablespoon fresh ginger, grated - 1 teaspoon sesame oil - 1 teaspoon cornstarch (optional for thickening) - 2 tablespoons water (if using cornstarch) - Salt and pepper to taste - Sesame seeds and sliced green onions for garnish You can easily swap ingredients based on what you have. For the chicken, use chicken breast instead of thighs. If you want to skip soy sauce, try coconut aminos for a tasty twist. Any vegetables can work here. Snap peas or zucchini can replace broccoli and carrots. Choose your favorite! For a vegan option, replace chicken with firm tofu. This dish is not just tasty; it’s also healthy! Each serving is about: - Calories: 350 - Protein: 25g - Carbohydrates: 32g - Fat: 12g - Fiber: 4g This balanced meal provides protein, veggies, and a touch of sweetness. Enjoy it guilt-free knowing it fuels your body! For the full recipe, check the earlier section. To start, gather your ingredients. You need chicken thighs, veggies, and sauce items. First, place the chicken thighs at the bottom of the slow cooker. This helps keep them moist. Next, in a medium bowl, whisk together the soy sauce, honey, minced garlic, grated ginger, and sesame oil. Mix until the ingredients blend well. Pour this honey garlic sauce over the chicken. Make sure each piece is coated. Then, add the baby carrots, bell pepper slices, and broccoli florets. Toss the veggies gently to mix with the sauce. Cover the slow cooker with its lid. Cook the mixture on low for 6 to 7 hours. If you're short on time, you can cook it on high for 3 to 4 hours. Check the chicken at the end of cooking. It should be tender and cooked through. If you want a thicker sauce, mix cornstarch with water in a small bowl. Stir this into the slow cooker during the last 30 minutes. This will help thicken your sauce nicely. To check if the chicken is done, use a meat thermometer. The chicken should reach 165°F. If you don't have a thermometer, you can cut a piece open. The meat should be white, not pink. If you prefer, shred the chicken in the slow cooker. It makes it easy to serve. Taste the dish and add salt and pepper if needed. Enjoy your meal with fluffy rice or quinoa, garnished with sesame seeds and green onions for a beautiful finish. For the full recipe, click here. When using a slow cooker, keep a few things in mind. First, cut your veggies into even pieces. This helps them cook at the same rate. Place harder veggies like carrots at the bottom. They take longer to cook. Always avoid opening the lid while cooking. Each time you lift it, heat escapes, which can affect cooking time. Aim for low heat for longer cooking. This makes the flavors richer and the meat more tender. You can easily make this dish even better. Try adding a splash of rice vinegar for extra tang. A sprinkle of red pepper flakes will add heat. You can also toss in some sliced mushrooms or snap peas for more texture. Fresh herbs like cilantro or basil can brighten the dish. For a sweeter taste, mix in a bit of pineapple. It pairs well with the honey and garlic. If your chicken is dry, it may have cooked too long. Always check the time and temperature. For a watery sauce, you can thicken it with cornstarch mixed with water. Stir this in during the last 30 minutes. If your dish lacks flavor, taste it before serving. You can add a pinch of salt or a dash of soy sauce to boost the taste. Remember, balance is key! For full details on the recipe, check out the Full Recipe. {{image_2}} You can easily switch up the protein in this dish. Try beef or tofu for variety. For beef, choose tender cuts like sirloin or flank steak. Cut them into bite-sized pieces before cooking. Tofu is a great choice for a meatless meal. Use firm tofu and press it to remove extra water. This helps it absorb the sauce better during cooking. Feel free to use any veggies you have on hand. In spring, add asparagus or snap peas. Summer is perfect for zucchini or corn. In fall, consider using sweet potatoes or butternut squash. Winter calls for hearty veggies like carrots or Brussels sprouts. Always cut your veggies into similar sizes to ensure even cooking. If you want to change the flavor, use different sauces. Try teriyaki sauce for a sweet twist. BBQ sauce adds a smoky flavor. For a spicy kick, use sriracha or chili garlic sauce. You can also mix in fresh herbs like basil or cilantro for an extra layer of taste. Each of these options can bring a new life to your slow cooker honey garlic chicken and veggies. For the full recipe, check out the details above. After enjoying your Slow Cooker Honey Garlic Chicken and Veggies, you may have some leftovers. To store them, let the dish cool down first. Place the chicken and veggies in an airtight container. This helps keep them fresh. You can store them in the fridge for up to 4 days. Label the container with the date to keep track of freshness. When you're ready to enjoy your leftovers, reheating is easy. You can use a microwave or stovetop. If using a microwave, place a portion in a bowl. Cover it with a microwave-safe lid or wrap. Heat for 1 to 2 minutes, stirring halfway through. If you prefer the stovetop, heat on low in a pan. Stir often until it’s warmed through. Make sure it reaches a safe temperature of 165°F. If you want to save leftovers for later, freezing is a great option. First, cool the dish completely. Then, portion it into freezer-safe bags or containers. Remove as much air as possible to prevent freezer burn. Label each bag or container with the date and contents. You can freeze the chicken and veggies for up to 3 months. To use later, thaw them overnight in the fridge before reheating. For more details, check the Full Recipe. Yes, you can. You can use an instant pot or a regular pot on the stove. If using an instant pot, cook on high pressure for about 10 minutes. For a pot on the stove, simmer over low heat for about 30-40 minutes. Be sure to keep an eye on the chicken to avoid overcooking. The key is to let the chicken soak in the honey garlic sauce. This gives it that sweet and savory flavor. To make more servings, simply double or triple the ingredients. Use a larger slow cooker to fit the extra food. You can keep the cooking time the same, but check for doneness. If you're cooking a lot, you may need a bit more time. Always ensure the chicken reaches an internal temperature of 165°F. This keeps your meal safe and tasty. This dish goes well with many sides. Here are a few great options: - Steamed rice - Quinoa - Mashed potatoes - Garlic bread - Stir-fried greens - Asian-style noodles Each side adds a nice touch and balances the meal. The honey garlic chicken shines with these pairings! For the full recipe, check the earlier sections. Slow Cooker Honey Garlic Chicken and Veggies is simple and tasty. You learned about ingredients, cooking steps, and how to store leftovers. I shared tips for best results and many ways to switch up the dish. You can use different proteins and vegetables, making it perfect for any meal. Remember, cooking can be fun and easy. Enjoy trying new flavors and finding what you love most. This recipe is perfect for busy days. Happy cooking!

Slow Cooker Honey Garlic Chicken and Veggies Delight

Are you ready to enjoy a meal that’s both easy to make and bursting with flavor? In this blog post,

- 8 ounces elbow macaroni - 2 tablespoons unsalted butter - 2 tablespoons all-purpose flour - 2 cups whole milk - 1 cup shredded sharp cheddar cheese - 1 cup shredded Gruyère cheese - 1/2 cup grated Parmesan cheese - 2 tablespoons truffle oil (or to taste) - Salt and pepper to taste - 1/2 cup panko breadcrumbs - 2 tablespoons chopped fresh parsley (for garnish) For this baked mac and cheese, I use simple, quality ingredients. First, I choose elbow macaroni. It holds the cheese sauce well. The butter and flour create a smooth base for my cheese sauce. Whole milk makes it rich and creamy. I love using a mix of cheeses. Sharp cheddar adds sharp flavor. Gruyère gives a nutty taste. Parmesan adds depth and saltiness. Truffle oil brings a unique touch that elevates the dish. I season with salt and pepper to balance the flavors. For the topping, I sprinkle panko breadcrumbs mixed with Parmesan. This gives a crunchy texture. Fresh parsley adds a pop of color and freshness. You can find the full recipe for this creamy delight above. - Preheat the oven to 350°F (175°C). - In a large pot, bring salted water to a boil. Add 8 ounces of elbow macaroni and cook for 6-8 minutes until al dente. Drain and set aside. - In the same pot, melt 2 tablespoons of unsalted butter over medium heat. - Add 2 tablespoons of all-purpose flour and whisk continuously for 1-2 minutes to form a roux. - Gradually whisk in 2 cups of whole milk until smooth. Cook while stirring until the mixture thickens, about 5-7 minutes. - Lower the heat and mix in 1 cup of shredded sharp cheddar cheese, 1 cup of shredded Gruyère cheese, and 1/2 cup of grated Parmesan cheese until fully melted and creamy. - Stir in 2 tablespoons of truffle oil, then season with salt and pepper to taste. - Add the cooked macaroni to the cheese sauce and stir until the pasta is well coated. - Pour the macaroni and cheese into a greased 9x13 inch baking dish. - In a small bowl, combine 1/2 cup of panko breadcrumbs with the remaining Parmesan cheese. Sprinkle this mixture evenly over the macaroni and cheese. - Bake in the preheated oven for 25-30 minutes, or until the top is golden brown and crispy. For the complete recipe, check out the Full Recipe section. To get that creamy texture, I recommend using whole milk. Whole milk adds richness. A mix of cheeses also helps. Sharp cheddar brings flavor, while Gruyère adds smoothness. Always remember to not overcook the pasta before baking. Cook it just until al dente. This keeps it from getting mushy in the oven. For a crunchy topping, I suggest using panko breadcrumbs. Panko gives a light, crispy finish that regular breadcrumbs can’t match. To take it up a notch, broil briefly after baking. This will add extra crispiness to the top. Just watch it closely to avoid burning. Baked mac and cheese pairs well with a side salad or garlic bread. A fresh side balances the richness of the dish. You can also offer fun toppings like crispy bacon or fresh herbs. This adds flavor and makes your meal feel special. For a complete meal, serve it with a simple green salad. Don't forget to try the [Full Recipe] for detailed steps and proportions! {{image_2}} You can mix up your cheese choices. Try adding mozzarella for creaminess. Fontina also melts well and adds a nice flavor. You can even use flavored cheeses like smoked cheddar or pepper jack. These choices boost the taste and make your dish unique. Adding cooked vegetables can enhance your baked mac and cheese. Spinach and broccoli work great. They add color and nutrients. You can also mix in proteins like cooked chicken or crispy bacon. This makes your meal heartier and keeps everyone happy. If you need gluten-free options, use gluten-free pasta. Many great brands offer tasty choices. For a vegan version, swap regular cheese for vegan substitutes. There are many types available now, so you can still enjoy creamy comfort food. Check out the Full Recipe to see how to create this creamy delight! After enjoying your baked mac and cheese, let it cool completely before refrigerating. This step helps keep it fresh and safe. Once cooled, transfer it to an airtight container. This keeps the flavors in and prevents any fridge smells from getting in. You can freeze baked mac and cheese for later. If you freeze it before baking, cover it well with foil. If you freeze it after baking, let it cool fully first. To reheat, thaw it overnight in the fridge. Then, bake it in the oven at 350°F (175°C) until hot. This way, you keep that creamy texture we all love. In the fridge, baked mac and cheese lasts about 3 to 5 days. For the best taste, enjoy it within this time. When reheating, make sure it’s heated all the way through. This keeps it safe and tasty. Store it properly, and you can enjoy delicious leftovers for days! Yes, you can prepare baked mac and cheese ahead of time. This dish is great for meal prep! Start by cooking the pasta and making the cheese sauce. After mixing them, pour everything into a baking dish. Cover it tightly with foil and place it in the fridge. You can keep it there for up to two days. When you're ready to bake, simply remove the foil and bake it straight from the fridge. This saves time and effort when you want to enjoy creamy comfort food. Adding spice is easy! You can mix in diced jalapeños or red pepper flakes. For a smoky flavor, try adding some smoked paprika. Another great option is to use pepper jack cheese instead of regular cheese. This will give your dish a nice kick. Adjust the spice level to your taste, and enjoy the heat! To reheat baked mac and cheese, use the oven for best results. Preheat your oven to 350°F (175°C). Place the mac and cheese in an oven-safe dish. Add a splash of milk to keep it creamy. Cover the dish with foil to prevent it from drying out. Heat for about 20 minutes or until warm throughout. If you want it crispy again, remove the foil for the last few minutes. Enjoy your creamy delight from the fridge! This post covered the key ingredients and steps for baked mac and cheese. You learned how to create a creamy sauce, combine flavors, and bake to perfection. Remember to try different cheeses or add fun mix-ins to make it your own. Also, proper storage and reheating keep it tasting fresh. Enjoy crafting this comfort food and impress your friends and family with each bite. Happy cooking!

Baked Mac and Cheese Creamy Comfort Food Delight

Who doesn’t love a warm, cheesy bowl of baked mac and cheese? This creamy comfort food is a classic favorite.

- 2 cups cooked chicken, shredded - 1 can (15 oz) white beans, drained and rinsed - 1 can (4 oz) diced green chilies - 1 medium onion, chopped The main ingredients form the heart of the dish. The cooked chicken adds protein and flavor. White beans give it a creamy texture. Diced green chilies add a mild kick. Chopped onion offers a sweet base flavor. - 2 cloves garlic, minced - 1 cup corn (fresh, frozen, or canned) - 4 cups chicken broth - 1 cup heavy cream or coconut cream The additional ingredients enhance the chili. Garlic brings a strong aroma and taste. Corn adds sweetness and crunch. Chicken broth makes the chili rich and savory. Heavy cream or coconut cream adds creaminess and depth. - 1 teaspoon ground cumin - 1 teaspoon dried oregano - 1 teaspoon paprika - ½ teaspoon chili powder - Fresh cilantro, chopped - Lime wedges Seasoning and garnish elevate the dish. Ground cumin gives a warm, earthy flavor. Dried oregano adds herbal notes. Paprika brings color and mild heat. Chili powder adds a touch of spice. Fresh cilantro brightens the bowl, while lime wedges add a zesty kick. For the full experience, check the Full Recipe. - Sauté onion in olive oil until translucent. - Add garlic and cook until fragrant. Start by heating a splash of olive oil in a large pot over medium heat. Add the chopped onion and cook for about five minutes. You want the onion to turn soft and clear. This is the base of your flavor. Next, stir in the minced garlic. Cook it for about a minute. This will really bring out a nice smell. - Stir in chicken, beans, chilies, corn, and spices. - Pour in chicken broth and bring to simmer. Now it's time to add the fun stuff! Stir in the shredded chicken, drained white beans, diced green chilies, and corn. Don't forget the spices: cumin, oregano, paprika, and chili powder. Mix it all well so each bite is full of flavor. Pour in four cups of chicken broth. This gives your chili a nice, hearty base. Bring this mixture to a simmer. Let it cook for about 15 to 20 minutes. This allows all the flavors to blend together beautifully. - Stir in cream and season to taste. - Serve hot with garnishes. Once your chili has simmered, it’s time to finish it off. Lower the heat and stir in the heavy cream or coconut cream. This adds a rich, creamy texture to your dish. Season it with salt and pepper to taste. Give it another five minutes to heat through. Now, serve your chili hot. Top it with fresh chopped cilantro and lime wedges for a bright touch. Enjoy your flavor-packed comfort bowl! For the full recipe, check out the complete instructions. If you're looking for a dairy-free option for cream, try using coconut cream. It adds a nice richness without dairy. For beans, you can swap white beans for black beans or pinto beans. Each option offers a unique taste and texture that enhances the dish. To shred chicken, use two forks. Simply pull the chicken apart until it's in fine pieces. This method is quick and easy. For a creamy texture, add the cream at the end of cooking. Stir it in gently to keep the chili smooth and rich. To adjust spice levels, add more chili powder for heat or use less for a milder flavor. You can also include fresh jalapeños if you want a kick. For an extra layer of taste, try adding fresh herbs like cilantro or a squeeze of lime juice. These additions brighten the chili and make it even more enjoyable. {{image_2}} You can enjoy White Chicken Chili even if you have special diets. For a gluten-free version, ensure all your ingredients are gluten-free. Most canned beans and spices are safe. Just check the labels for any hidden gluten. If you prefer a vegan or vegetarian option, swap the chicken for chickpeas or tofu. Use vegetable broth instead of chicken broth. Replace cream with coconut cream for a rich texture. This makes it creamy and tasty without any animal products. To add a Southwest twist, include jalapeños or chipotle peppers. This gives your chili a nice kick. You can adjust the heat by adding more or fewer peppers. For a creamy version, try different bases like cream cheese or sour cream. These can make your chili even richer and more indulgent. You can mix and match these ideas to create your perfect bowl. Pairing side dishes with your chili can enhance the meal. Cornbread is a classic choice and goes well with the flavors. You can also serve it with tortilla chips for crunch. For fun serving ideas, try placing the chili in tortillas. This makes for a great hand-held meal. You can even serve it in bowls with toppings like cheese, cilantro, or avocado. Each option adds a unique touch to your chili experience. For the full recipe, check out the details above! To store your white chicken chili in the fridge, let it cool first. Use an airtight container. This keeps it fresh and tasty for later. Your chili will stay good for about three to four days. If you want to freeze it, pour the chili into freezer bags or containers. Leave some space at the top for expansion. It freezes well for up to three months. When it's time to enjoy your chili again, reheating is key. The best method is to use the stove. Pour your chili into a pot and heat it over low to medium heat. Stir often to avoid sticking. If you used heavy cream, it may separate when reheated. To prevent this, add a splash of broth or water while you heat it. This keeps the texture creamy and smooth. In the fridge, your chili lasts about three to four days. After that, it may spoil. Look for signs of spoilage like strange smells or mold. If the chili looks or smells off, it’s best to toss it. For longer storage, freezing is your best bet. Enjoy your creamy white chicken chili knowing it's safe and delicious! Is White Chicken Chili spicy? White Chicken Chili has a mild heat. The diced green chilies add some spice, but it stays friendly for all. If you like more heat, add jalapeños or extra chili powder. Adjust the spice to fit your taste. Can I make this recipe in a slow cooker? Yes! You can easily make this in a slow cooker. Just add all the ingredients except the cream. Cook on low for 6-8 hours. Stir in the cream at the end, and let it warm through. What beans work best for White Chicken Chili? I recommend using white beans like cannellini or navy beans. They add a creamy texture and flavor. You can also use great northern beans for a similar effect. Can I use rotisserie chicken? Absolutely! Rotisserie chicken is a great time saver. Just shred the meat and add it to your chili. It will still taste delicious and save you prep time. How to make it more or less creamy? To make your chili creamier, add more heavy cream or coconut cream during cooking. If you want it less creamy, reduce the cream or use less. You can also mash some beans into the mix for a thicker texture. Recommendations for additional toppings? Top your chili with fresh cilantro, diced avocado, or crumbled tortilla chips. A squeeze of lime adds a nice zing. You can also sprinkle cheese on top or add sour cream for extra richness. Check out the Full Recipe for more ideas! This blog post shared how to make a tasty White Chicken Chili. We covered the main and additional ingredients, from chicken to seasonings. I provided clear steps for preparation, cooking techniques, and storage tips. You can easily customize your dish with fun variations and ingredient swaps. Cooking should be fun, and this chili recipe offers great ways to enjoy meals with friends and family. Embrace your creativity and make it your own!

White Chicken Chili Flavor-Packed Comfort Bowl

Are you ready for a cozy, flavor-packed dish that warms your soul? White Chicken Chili is just what you need.

- 2 ¾ cups all-purpose flour - ½ teaspoon baking powder - ¼ teaspoon salt - 1 cup unsalted butter, softened - 1 cup granulated sugar - 1 large egg - 1 teaspoon vanilla extract - 1 cup crushed hard candy (various colors) - Colored sugar (for decoration, optional) To make easy stained glass cookies, start with simple ingredients. Each one plays a key role in the taste and look of the cookies. The all-purpose flour gives the cookies structure. Baking powder helps them rise, while salt enhances flavor. Butter adds richness, and sugar sweetens the dough. You need a large egg for binding. Vanilla extract brings a warm flavor that everyone loves. The crushed hard candy is the star for the stained glass effect. It melts to create that beautiful look. You can add colored sugar for extra sparkle if you like. You can find these ingredients in most local stores. Make sure to get the hard candy in different colors for a fun presentation. Using high-quality ingredients helps to create the best cookies. For the full recipe, check the [Full Recipe]. 1. Start by whisking together the dry ingredients. In a medium bowl, mix 2 ¾ cups all-purpose flour, ½ teaspoon baking powder, and ¼ teaspoon salt. This mix gives your cookies structure. 2. Next, cream the butter and sugar. In a large bowl, beat 1 cup of softened unsalted butter and 1 cup of granulated sugar. Use an electric mixer for about 2-3 minutes until it becomes light and fluffy. 3. Now, combine the wet and dry ingredients. Add 1 large egg and 1 teaspoon of vanilla extract to the butter mix. Mix until everything blends well. Gradually add the flour mixture, mixing until just combined. The dough may feel crumbly, and that's okay! 1. Chill the dough to make it easier to work with. Divide the dough into two parts and shape each into a disc. Wrap them in plastic wrap and refrigerate for at least 1 hour. This step helps the flavors develop. 2. Roll and cut out cookie shapes. Preheat your oven to 350°F (175°C) and line a baking sheet with parchment paper. On a floured surface, roll out one disc to about ¼-inch thickness. Use cookie cutters to cut out shapes. Make sure to press a small cutter in the center to create an opening for the stained glass effect. 3. Fill the cut-outs with crushed candy. Remove the center cut-out and fill it with 1 cup of crushed hard candy. Repeat this for all cookies. 1. Set the oven temperature. Make sure your oven is preheated to 350°F (175°C) before baking. 2. Bake the cookies. Place the cookies in the oven and bake for 8-10 minutes. Look for lightly golden edges and melted candy in the centers. 3. Cool the cookies after baking. Once out of the oven, let the cookies cool on the baking sheet for a few minutes. Then, transfer them to a wire rack to cool completely. This step keeps them from getting soggy. Enjoy making these colorful treats! You can find the full recipe [here]. To make stained glass cookies shine, choose the right hard candies. I like using clear candies like Jolly Ranchers or Life Savers. They melt beautifully and give a bright color. Avoid candies with too much color or flour coating. These can create a cloudy look. When filling the cut-outs, crush the candies into small pieces. This helps them melt evenly. Use a rolling pin or a heavy jar to crush them. Fill the center cut-out carefully, but don’t overfill. Leave a little space for the candy to expand. To keep your cookies soft, avoid overworking the dough. Mix just until the ingredients combine. If the dough feels crumbly, that’s okay! It will come together when you chill it. For a soft cookie center, keep an eye on baking time. Bake until the edges turn light golden, about 8-10 minutes. The center may look soft, but it will firm up as the cookies cool. Using colored sugar can add fun to your cookies. Sprinkle it on while they’re warm for a sparkly look. Choose colors that match your theme or occasion for added flair. To present your cookies as gifts, arrange them on a nice plate. You might wrap them in clear bags and tie with colorful ribbons. This not only looks great but also keeps them fresh! For the full recipe, check the link above. {{image_2}} You can change the flavor of your stained glass cookies easily. Adding extracts really makes a difference. Try using almond or lemon extract. Just one teaspoon will add great taste. You can also mix in spices like cinnamon or nutmeg. A dash of these spices will give your cookies a warm, cozy feel. While crushed hard candy shines in these cookies, you can use other fillings too. Chocolate chips add a rich twist. Mini marshmallows can bring a fun, chewy texture. You can even try different types of candies. Think about gummy bears or sour candies. Each one will give a unique look and taste. Cookie shapes can set the mood for any occasion. For holidays, use seasonal shapes like stars or hearts. For birthdays, try making custom cookie shapes like balloons or gifts. You can use any cookie cutter that fits your theme. The right shape can make your cookies even more special. For the full recipe, check out the [Full Recipe]. To keep your stained glass cookies fresh, use an airtight container. This will help keep moisture out and flavors in. Layer the cookies with parchment paper to avoid sticking. Store them at room temperature away from direct sunlight. This will help maintain their texture and color. You can freeze stained glass cookies for later. First, let them cool completely. Then, wrap each cookie in plastic wrap. Place the wrapped cookies in a freezer-safe bag. Squeeze out as much air as you can before sealing. To thaw, take the cookies out and let them sit at room temperature for about 30 minutes. This way, they will taste fresh and yummy. These cookies stay fresh for about one week at room temperature. After that, they may start to lose their charm. Watch for signs like a stale smell or a hard texture. If they feel soft or chewy, they are still good. Use your senses to decide if they are tasty or not. You can use margarine or coconut oil as a butter substitute in stained glass cookies. Both options will change the flavor slightly. Margarine gives a similar taste to butter. Coconut oil adds a hint of coconut flavor, which can be nice. If you use coconut oil, make sure it’s solid when you mix it. This helps your cookies hold their shape. Yes, you can prepare stained glass cookies ahead of time. Make the dough and chill it in the fridge for up to three days. When you’re ready, roll it out and cut your shapes. You can also bake the cookies and store them in an airtight container. They stay fresh for about a week. For longer storage, freeze the baked cookies. Just make sure to wrap them well to keep them from getting dry. For stained glass cookies, clear or light-colored hard candies work best. Brands like Jolly Rancher, Life Savers, and Werther's Originals are great choices. Their bright colors melt nicely and look beautiful. Crush the candies into small pieces. This helps them fill the center cut-outs well. Avoid using chocolate candies, as they do not melt clear. In this post, we explored how to make stained glass cookies. We discussed the ingredients needed, step-by-step instructions, and tips for great results. I shared variations to keep things fun and storage tips to keep cookies fresh. Remember, creativity makes cooking enjoyable. Don’t hesitate to try new flavors or shapes. You can create unique gifts for friends and family. Happy baking! Enjoy your delicious cookies!

Easy Stained Glass Cookies Simple and Fun Recipe

Get ready to create some beautiful treats with my Easy Stained Glass Cookies! This simple recipe is perfect for kids

For these tasty grilled ranch garlic parmesan chicken skewers, you need: - 1.5 lbs boneless, skinless chicken breasts, cut into 1-inch cubes - 1/2 cup ranch dressing - 1 tablespoon garlic powder - 1/2 cup grated Parmesan cheese - 1 teaspoon black pepper - 1 teaspoon paprika - 1 tablespoon olive oil - 2 tablespoons fresh parsley, chopped (for garnish) - Skewers (wooden or metal) The key to these skewers is fresh chicken. I like boneless and skinless chicken breasts. They cook evenly and stay juicy. Ranch dressing gives a great flavor. It also helps the spices stick. Next, we need garlic powder. It adds a rich taste without overpowering the dish. I also use black pepper and paprika. These spices give a nice kick and color to the chicken. Finally, grated Parmesan cheese brings a creamy, salty touch. It's the finishing touch that makes these skewers special. Don't forget fresh parsley for garnish. It adds color and freshness. These ingredients work together to create a delightful dish. Each bite is full of flavor and satisfaction. Enjoy the process of making these skewers! First, gather your ingredients. You need ranch dressing, garlic powder, black pepper, and paprika. In a large bowl, mix these with olive oil. Stir until everything blends well. Then, add the cubed chicken. Make sure each piece is coated. This step helps the chicken soak up all the flavors. Cover the bowl with plastic wrap. Place it in the fridge for at least 30 minutes. If you have time, marinate for up to 2 hours. The longer it sits, the more taste it gains. If you use wooden skewers, soak them in water for 30 minutes. This prevents burning on the grill. If you use metal skewers, you can skip this step. Once the chicken is ready, it's time to assemble. Take the soaked skewers and thread the marinated chicken cubes onto them. Leave a little space between each piece. This helps them cook evenly. Now, preheat your grill to medium-high heat, around 400°F. Place the skewers on the grill. Cook for about 12-15 minutes. Turn them occasionally for even cooking. The chicken should reach an internal temperature of 165°F. When they are almost done, sprinkle grated Parmesan cheese on top. This step adds a rich, cheesy flavor. After grilling, remove the skewers and let them rest for a couple of minutes. Garnish with fresh parsley before serving. Enjoy! For the full recipe, check the Full Recipe section. Marinating the chicken is key to flavor. Start by mixing ranch dressing, garlic powder, black pepper, paprika, and olive oil. You want a nice blend. Make sure every chicken piece gets covered. Marinate for at least 30 minutes. If you let it sit longer, up to 2 hours, the taste gets even better. Keep it in the fridge for safety. To get those perfect grill marks, preheat your grill to medium-high heat. Aim for about 400°F or 200°C. Place the skewers on the grill, but don’t move them right away. Let them sit for about 4-5 minutes. This helps form those beautiful grill marks. After that, flip them to the other side for even cooking. Cook the skewers for about 12-15 minutes in total. Turn them occasionally to ensure even cooking. You want the chicken to reach an internal temperature of 165°F or 74°C. Use a meat thermometer for accuracy. In the last 2 minutes, sprinkle on the Parmesan cheese. This gives a nice finish to your skewers. For the full recipe, check the section above. {{image_2}} You can swap chicken for other proteins. Shrimp works well and cooks fast. Beef chunks also add rich flavor. Try using firm tofu for a plant-based twist. Just marinate it like chicken for the best taste. For a vegan or vegetarian option, use hearty vegetables. Bell peppers, zucchini, and mushrooms are great choices. You can also use tempeh or seitan. Marinate these like the chicken to keep the flavors strong. Want to kick up the flavor? Add spices like cayenne pepper for heat. A dash of lemon juice brightens the dish. Fresh herbs like thyme or rosemary can add depth. You can mix in different dressings too, like blue cheese or Caesar. These changes can make the skewers even more exciting. For the full recipe, check the section above. You can store leftover skewers easily. First, let them cool down. Place them in a shallow dish. Cover the dish with plastic wrap or use an airtight container. They can stay fresh in the fridge for up to 3 days. If you want to keep them longer, freezing is a good option. To reheat your skewers, use an oven for the best results. Preheat your oven to 350°F (175°C). Place the skewers on a baking sheet. Heat them for about 10-15 minutes. You can also use a microwave. Heat them for 1-2 minutes, but the oven gives better flavor. If you want to freeze the skewers, wrap them tightly in plastic wrap. Then, place them in a freezer bag. They can last up to 3 months in the freezer. When you're ready to eat them, thaw them in the fridge overnight. Then, reheat them using your preferred method. Enjoy those tasty flavors again! Check out the Full Recipe for more delicious tips. You should marinate the chicken for at least 30 minutes. This lets the flavors soak in. If you can, marinate for up to 2 hours for even more taste. The longer time makes the chicken juicier and more flavorful. These skewers pair well with many sides. Here are some tasty options: - Fresh green salad - Grilled vegetables - Rice or quinoa - Garlic bread - Creamy coleslaw These sides will add color and flavor to your meal. They make a great balance with the rich taste of the skewers. Yes, you can make these skewers in the oven. Preheat your oven to 400°F (200°C). Place the skewers on a baking sheet and cook for about 15-20 minutes. Turn them halfway through to get an even cook. You want the chicken to reach 165°F (74°C) for safety. The oven method gives you a nice option if grilling isn’t possible. In this blog post, we explored how to make delicious Grilled Ranch Garlic Parmesan Chicken Skewers. We covered essential ingredients like chicken and ranch dressing. I shared step-by-step instructions, including marinating and grilling tips. We also discussed variations for different diets and how to store leftovers. With the right ingredients and techniques, you can create a tasty meal. Don’t hesitate to experiment with flavors and share your results. Happy grilling!

Grilled Ranch Garlic Parmesan Chicken Skewers Delight

If you crave a tasty, easy meal, you’re in the right place! Grilled Ranch Garlic Parmesan Chicken Skewers are a

- Baguette - Butter - Garlic - Mozzarella cheese - Parmesan cheese - Parsley - Garlic powder - Red pepper flakes - Salt To get the best taste, use the right amounts. For this recipe, you need: - 1 large baguette - 1/2 cup unsalted butter - 4 minced garlic cloves - 1 cup shredded mozzarella - 1/2 cup grated Parmesan - 1 tablespoon chopped fresh parsley - 1 teaspoon garlic powder - 1/2 teaspoon crushed red pepper flakes (if you like spice) - Salt to taste I suggest using high-quality butter, like Kerrygold. For cheese, fresh mozzarella makes a big difference in flavor. You can switch up the cheese! Use cheddar for a sharp bite or gouda for a smoky flavor. Fresh herbs add great taste, but dried herbs can work too. Use fresh parsley for bright flavor, or try dried oregano for a different twist. 1. Preheat your oven to 375°F (190°C). This step is key for a nice bake. 2. Gather your ingredients. You need a large baguette, butter, garlic, and cheeses. 3. In a bowl, mix softened butter, minced garlic, garlic powder, and salt. 4. Stir until everything blends well. This mixture will be rich and tasty. 5. Add chopped parsley and half of the mozzarella cheese. Mix again until even. 1. Take your baguette and slice it in half lengthwise. 2. Spread the garlic butter on the cut sides. Be sure to cover every inch. 3. Layer the remaining mozzarella cheese on top of the butter. 4. Add grated Parmesan cheese to both halves. This will add flavor. 5. If you like spice, sprinkle crushed red pepper flakes on top. 1. Place the baguette halves on a baking sheet lined with parchment paper. 2. Bake in the oven for 15-20 minutes. Look for a golden brown color. 3. The cheese should be bubbly and melted. This shows it is ready. 4. Once done, let it cool for a few minutes. 5. Slice it into pieces for easy serving. 6. Serve warm on a board. Add chopped parsley and marinara sauce for dipping. 7. Enjoy your cheesy garlic bliss! For the full recipe, see the details above. To make cheesy garlic bread shine, start with good butter. I suggest using unsalted butter. It allows you to control the saltiness. The type of cheese matters too. I love a blend of mozzarella and Parmesan. Mozzarella gives that stretch, while Parmesan adds a sharp flavor. Mixing both creates a great taste. You want a crispy crust, right? Bake the bread at a high temperature. This helps create that crunch. To avoid sogginess, don't skimp on the butter. Spread it evenly but not too thick. Also, make sure to bake it until golden. This will keep the bread light and airy. Cheesy garlic bread is best served fresh and warm. Try serving it as a side with pasta or salad. It also makes a great snack for game day. Pair it with marinara sauce for dipping. This adds a nice touch and makes it even more fun to eat. {{image_2}} You can make cheesy garlic bread even more exciting with different flavors. For a sweet twist, try a mix of honey and chili flakes. This blend gives you a sweet and spicy kick. You can also add sun-dried tomatoes or olives. These ingredients add a rich depth to your bread. They make each bite burst with flavor. If you need a gluten-free option, use gluten-free bread. It works just as well and tastes great. For those looking for a vegan choice, try using vegan cheese. Brands like Daiya or Violife melt nicely. They keep the cheesy goodness without dairy. Cheesy garlic bread is perfect as a snack or appetizer. Slice it into small pieces for easy sharing. You can also turn it into a sandwich. Just add your favorite fillings, like roasted veggies or meats. This way, you create a hearty meal that pleases everyone. For the full recipe, check out the Cheesy Garlic Bliss Bread section. To keep your cheesy garlic bread fresh, wrap it tightly in plastic wrap or foil. This helps prevent it from drying out. You can also place it in an airtight container. If you want to save it for longer, freeze it. Cut it into slices first for easy grabbing later. To reheat, preheat your oven to 350°F (175°C). Place the bread on a baking sheet. Cover it loosely with foil to keep the cheese from burning. Bake for about 10 minutes until warm. You can also reheat in a toaster oven for a quick fix. In the fridge, your cheesy garlic bread lasts about 3 to 4 days. If you freeze it, it can stay good for up to 3 months. Look for signs of spoilage like mold or an off smell. If you see either, it’s best to toss it out. Leftover garlic bread can shine in many dishes. You can slice it up and use it for a tasty garlic bread pizza. Just add sauce and toppings, then bake until the cheese melts. For breakfast, make a savory garlic bread sandwich. Add eggs and cheese for a filling meal. You can also turn it into croutons. Cut it into cubes, toast them, and sprinkle on salads or soups for added crunch. How to make garlic bread extra cheesy? To make your garlic bread extra cheesy, use a mix of cheeses. Combine mozzarella and Parmesan for a rich flavor. You can also add cheddar or gouda for a twist. The more cheese, the better! Spread a thick layer over the bread for maximum gooeyness. Can I use fresh garlic instead of minced? Yes, you can use fresh garlic! Just crush or finely chop it. Fresh garlic gives a strong flavor. Adjust the amount to your taste. If you prefer a milder taste, use less fresh garlic than minced. What oven temperature is best for baking garlic bread? Set your oven to 375°F (190°C). This temperature helps the bread get golden and the cheese to melt. Keep an eye on it, as ovens can vary. Bake until the cheese is bubbly and the bread is crisp. Should I cover the bread while baking? No, do not cover the bread while baking. Leaving it uncovered helps the cheese brown and the crust stay crispy. This way, you get that perfect texture. What goes well with cheesy garlic bread? Cheesy garlic bread pairs well with pasta, soups, or salads. It also makes a great snack on its own! Try it with marinara sauce for dipping, or serve it alongside your favorite Italian dish. Can cheesy garlic bread be made ahead of time? Yes, you can prepare cheesy garlic bread ahead of time. Assemble it and store it in the fridge. When ready to eat, just bake it! This makes it easy for parties or weeknight dinners. For the Full Recipe, check out the details above. Cheesy garlic bread is simple and fun to make, with many ways to enjoy it. Use quality ingredients for the best taste, and don’t be afraid to experiment with flavors. Remember to store any leftovers properly, so they stay fresh. Whether you savor it as a snack or pair it with meals, this dish shines. Dive into the world of cheesy garlic bread, and delight in its endless possibilities!

Cheesy Garlic Bread Irresistible and Simple Delight

If you’re craving a warm, cheesy treat, look no further! My Cheesy Garlic Bread recipe is not just easy to

Older posts
Newer posts
← Previous Page1 … Page7 Page8 Page9 … Page80 Next →

dsad

© 2025 My Saved Recipe • Built with GeneratePress

Our Policies

  • Copyright Policy
  • Cookie Policy
  • GDPR Policy
  • Privacy Policy
  • Disclaimer
  • Terms Of Use

More Information

  • Home
  • About
  • Contact
  • Appetizers
  • Dessert
  • Dinner
  • Drinks
©2025, My Saved Recipe About Back To Top