Skip to content
DisclaimerTerms Of UseGDPR PolicyCookie Policy

My Saved Recipe

  • Home
  • Drinks
  • Appetizers
  • Dinner
  • Dessert
  • About
  • Contact
  • Privacy Policy
DisclaimerTerms Of UseGDPR PolicyCookie Policy

Savannah

- 2 cups cooked rice (white or brown) - 1 lb (450g) chicken breast, diced - 1 cup broccoli florets - 1 red bell pepper, sliced - 1 carrot, julienned - 2 green onions, chopped - 1 tablespoon vegetable oil - Salt and pepper to taste - 1/4 cup mayonnaise - 2 tablespoons sweet chili sauce - 1 tablespoon sriracha sauce - 1 teaspoon garlic powder - 1 teaspoon lime juice When I make my Bang Bang Chicken Bowl, I keep it simple. I use fresh ingredients for the best taste. Cooked rice, chicken, and colorful veggies form the base of this dish. The chicken brings protein and heartiness. I prefer chicken breast because it cooks quickly and stays tender. The broccoli and red bell pepper add a nice crunch and bright color. Carrots bring a sweet note, while green onions add freshness. For the Bang Bang sauce, I mix mayonnaise with sweet chili and sriracha. This creates a creamy and spicy flavor. Garlic powder boosts the savory taste, and lime juice adds a tangy kick. This recipe is perfect for busy days. You can prep the ingredients ahead of time and cook them quickly. For the full recipe, check out the details above. Start by making the Bang Bang sauce. In a bowl, mix together these ingredients: - 1/4 cup mayonnaise - 2 tablespoons sweet chili sauce - 1 tablespoon sriracha sauce - 1 teaspoon garlic powder - 1 teaspoon lime juice Stir until smooth. This sauce adds a creamy, spicy kick to your bowl. Next, heat 1 tablespoon of vegetable oil in a large skillet. Season 1 pound of diced chicken breast with salt and pepper. Add the chicken to the skillet once the oil is hot. Cook it for about 6-8 minutes. You want it to be golden brown and fully cooked. Stir it occasionally for even cooking. Now, it's time to add some color and crunch. Toss in 1 cup of broccoli florets, 1 sliced red bell pepper, and 1 julienned carrot. Stir-fry these veggies with the chicken for about 4-5 minutes. The vegetables should be tender-crisp and bright. Once they are cooked, drizzle half of the Bang Bang sauce over the mixture. Toss everything to coat evenly. For the main event, grab 2 cups of cooked rice. Divide it into bowls. Top each bowl with the chicken and vegetable mix. This makes a hearty base for your meal. Finally, make your dish pop with flavor. Drizzle the remaining Bang Bang sauce over the top of each bowl. Sprinkle chopped green onions on each bowl for a fresh finish. Enjoy your colorful and tasty Bang Bang Chicken Bowl! Ensure you cook the chicken until it is golden brown. This gives the best texture. Use a medium-high heat in your skillet. This helps the chicken cook evenly. Make sure to stir it often, so it doesn’t stick. You want it juicy but not raw inside. A meat thermometer can help here. You can change the heat of the Bang Bang sauce. If you like it spicy, add more sriracha. If you prefer mild, use less. Taste the sauce as you mix it. This way, you can adjust it to your liking. The sweet chili sauce adds a nice balance to the heat. Serve your Bang Bang Chicken Bowl in colorful bowls. This makes the dish look fun and fresh. Add lime wedges on the side for a zesty kick. You can also sprinkle sesame seeds on top. They add crunch and a nice flavor. For more freshness, use extra green onions on the top. {{image_2}} You can easily swap the chicken in this dish. Shrimp, tofu, or beef work great too. Shrimp adds a nice sweetness. Tofu gives a soft texture and absorbs flavors well. Beef can add a hearty taste. Just adjust cooking time based on what protein you choose. You can mix up the veggies for more variety. Instead of broccoli and red bell pepper, try bell peppers, snap peas, or zucchini. Bell peppers bring a sweet crunch. Snap peas add a fresh snap. Zucchini is mild and cooks quickly. This keeps your meal colorful and fun. If you need a gluten-free meal, it’s simple to adjust. Use gluten-free soy sauce in the Bang Bang sauce. This keeps the flavor strong without gluten. It’s a great way to enjoy the dish without worry. Just make sure to check all labels to ensure they're gluten-free. Store leftovers in an airtight container in the refrigerator for up to 3 days. This keeps your Bang Bang Chicken Bowl fresh and tasty. When you're ready to eat, just take it out and enjoy. For longer storage, freeze the assembled bowl without the sauce. It can be kept for up to 3 months. This is a great option if you want to prep meals in advance. Just remember to remove the sauce before freezing. Reheat in a skillet or microwave until heated through. If you want to boost the flavor, add fresh sauce when you reheat. This makes the dish just as good as when you first made it. Yes, you can make it vegetarian. Simply replace the chicken with tofu or tempeh. Both options work well. Adjust the sauce if you like. Tofu absorbs flavors nicely, while tempeh adds a chewy texture. This makes the dish just as tasty. The spice level is flexible. You can change the heat by adjusting the sriracha amount in the sauce. If you want it spicier, add more sriracha. For less heat, use less. This way, you can cater to your taste. You can pair it with a side salad, spring rolls, or dumplings. These sides balance the meal and add variety. They also enhance the dining experience, making it more enjoyable. This recipe yields about 4 servings. This makes it great for family dinners or meal prep. You can easily double the recipe for more servings if needed. Try the full recipe for a delicious meal! This blog post taught you to make a tasty Bang Bang Chicken Bowl. We covered the main ingredients, sauce, cooking steps, and ways to customize your meal. You can use different proteins and veggies to suit your taste. Remember to store any leftovers properly to enjoy later. This bowl is not just easy to prepare but also fun to share. Try it out and enjoy each flavorful bite!

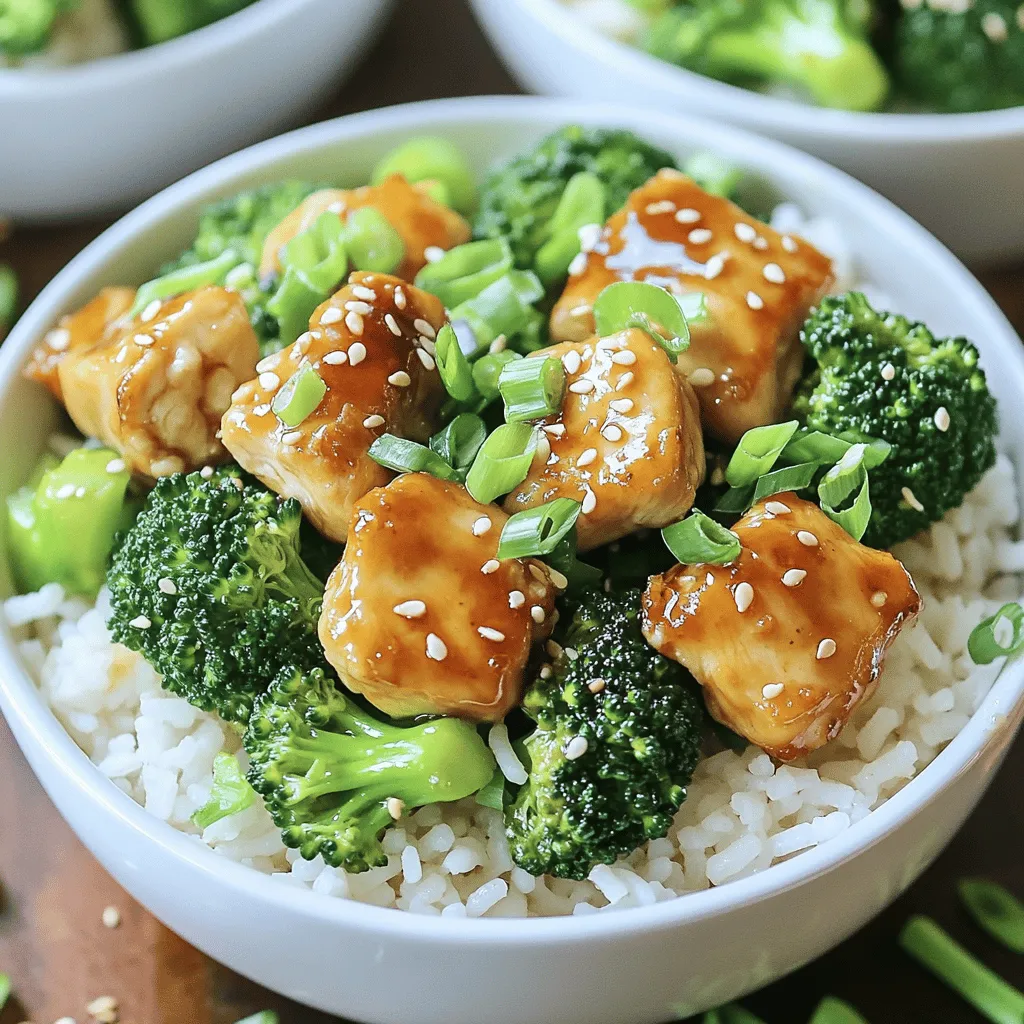
Bang Bang Chicken Bowl Flavorful and Easy Recipe

Craving a quick, flavorful meal? The Bang Bang Chicken Bowl is here to save your weeknights! This easy recipe combines

- 2 cups cooked chicken breast, diced - 1 can (15 oz) chickpeas, rinsed and drained - 1/2 cup Greek yogurt - 1/4 cup Dijon mustard - 1 tablespoon honey - 1 cup cherry tomatoes, halved - 1/2 cup cucumber, diced - 1/4 cup red onion, finely chopped - 1/4 cup fresh parsley, chopped - Salt and pepper to taste Gathering the right ingredients is key to a great chicken salad. Start with the cooked chicken breast. You can use leftovers or cook fresh chicken. Diced pieces work best. Next, grab a can of chickpeas. Rinse them well to remove any canning liquid. Greek yogurt acts as a creamy base. It adds protein and tang. Dijon mustard gives a nice kick. Honey sweetens the mix without being overpowering. You will need cherry tomatoes for freshness. Halving them allows their juices to mix in. The cucumber adds crunch. Dicing it keeps the texture light. Red onion brings a punch of flavor. Use it finely chopped to avoid too much bite. For color and freshness, grab some parsley. It brightens up the dish. Finally, don't forget salt and pepper. They enhance all the flavors in this salad. This mix of ingredients makes a high protein chicken salad that is simple and tasty. For full details on preparing the dish, refer to the Full Recipe. - Combining chicken and chickpeas Start by taking a large mixing bowl. Add 2 cups of diced cooked chicken breast to the bowl. Then, add one can of rinsed and drained chickpeas. This mix gives you a great base packed with protein. - Making the yogurt dressing In a smaller bowl, mix together 1/2 cup of Greek yogurt, 1/4 cup of Dijon mustard, and 1 tablespoon of honey. Use a whisk to blend these until smooth. This dressing adds creaminess and flavor to the salad. - Mixing the salad ingredients Pour the yogurt dressing over the chicken and chickpeas. Stir gently to coat everything well. Next, add 1 cup of halved cherry tomatoes, 1/2 cup of diced cucumber, 1/4 cup of finely chopped red onion, and 1/4 cup of chopped fresh parsley. Fold these in carefully to keep the salad looking nice. - Seasoning the salad Sprinkle salt and pepper to taste. This step enhances the flavors and makes the salad truly delicious. Don't be shy; seasoning is key! - Refrigeration for flavor enhancement Cover the bowl with plastic wrap or a lid. Place it in the fridge for at least 30 minutes. This cooling time allows all the flavors to meld together, making each bite better. Enjoy this high protein chicken salad as a simple, tasty meal. For the complete recipe, check out the Full Recipe section! Keeping chicken moist To keep your chicken juicy, cook it properly. Bake or grill the chicken until it reaches 165°F. Let it rest before you cut it. This helps the juices stay inside. You can also marinate the chicken in yogurt for added flavor and moisture. Ensuring balanced flavors Balance is key. Use a mix of flavors and textures. The tangy yogurt and mustard pair well with the sweetness of honey. Add salt and pepper to taste. Fresh herbs, like parsley, add a nice touch. Taste your salad as you mix. Adjust the seasonings as needed. Storing leftovers properly If you have leftovers, store them in an airtight container. Keep it in the fridge for up to three days. This salad tastes even better the next day as flavors blend. Just remember to give it a good stir before serving again. Garnishing options Garnish your chicken salad with extra parsley for color. You can also add sliced olives or diced avocado for richness. A sprinkle of paprika on top gives a nice visual touch. Accompaniments for a complete meal Serve your salad with whole-grain pita or on a bed of greens. Pair it with a side of fruit for a fresh twist. You can also enjoy it with whole-grain crackers for crunch. Explore different combinations to find what you love! For the full recipe, refer to the detailed steps above. {{image_2}} This chicken salad is high in protein. Each serving has about 30 grams of protein. Protein helps build muscle and keeps you full longer. The main ingredients, chicken and chickpeas, are great sources. - Cooked chicken breast: A lean meat packed with protein. - Chickpeas: They add fiber and protein. They also help with digestion. Using Greek yogurt in this salad has great benefits. Greek yogurt is lower in fat than sour cream. It adds creaminess without many calories. Plus, it has probiotics that help your gut. Chickpeas are not just tasty; they are also nutrient-rich. They contain vitamins and minerals like iron and magnesium. These nutrients support your overall health and energy levels. This salad has about 300 calories per serving. It is light yet filling. The macronutrient breakdown is as follows: - Protein: 30 grams - Carbohydrates: 35 grams - Fats: 7 grams These numbers can vary based on the specific ingredients you use. If you want to cut calories, go easy on the dressing. However, the balance of protein, carbs, and fats keeps it satisfying. For the full recipe, check out the details provided earlier. You might want to switch out the chicken in your salad. You can use turkey, tuna, or even shrimp. Each option keeps the protein high and adds a unique taste. If you're looking for vegetarian choices, try using cooked lentils or tempeh. Both options add protein and make the salad filling. You can also mix in beans, like black beans or kidney beans, for a hearty touch. To make your salad even more exciting, consider adding fresh herbs and spices. Chopped basil or dill can brighten up the dish. A pinch of cumin or paprika adds a warm, earthy flavor. If you want to change the dressing, try a lemon vinaigrette or a creamy avocado dressing. These dressings bring a new twist and keep the salad fresh. Experiment with different combinations to find what you love best. For the full recipe, check out the Protein-Packed Chicken Salad section above. Can I make this salad ahead of time? Yes, you can make this salad ahead of time. It tastes even better after chilling. Just mix the salad and store it in the fridge. How long will the salad last in the fridge? This salad will last about 3 to 4 days in the fridge. Always cover it well to keep it fresh. What can I serve with high protein chicken salad? You can serve this salad with whole-grain pita, crackers, or on a bed of greens. It pairs well with fruit or a light soup too. Is this recipe suitable for meal prep? Yes, this recipe is great for meal prep. You can portion it into containers for easy lunches all week. How to adjust the recipe for more servings? To adjust the recipe for more servings, simply double or triple the ingredients. Keep the same ratios for best results. Can I use canned chicken for this recipe? Yes, you can use canned chicken if you need a quick option. Just drain it well and break it up before mixing it in. This blog post covered a tasty chicken salad you can make easily. We talked about key ingredients, step-by-step instructions, and helpful tips for a great outcome. I shared the health benefits and variations to keep things exciting. My final thought is to try this recipe and customize it to your taste. Enjoy a fresh meal that is healthy and satisfying!

High Protein Chicken Salad Simple and Tasty Meal

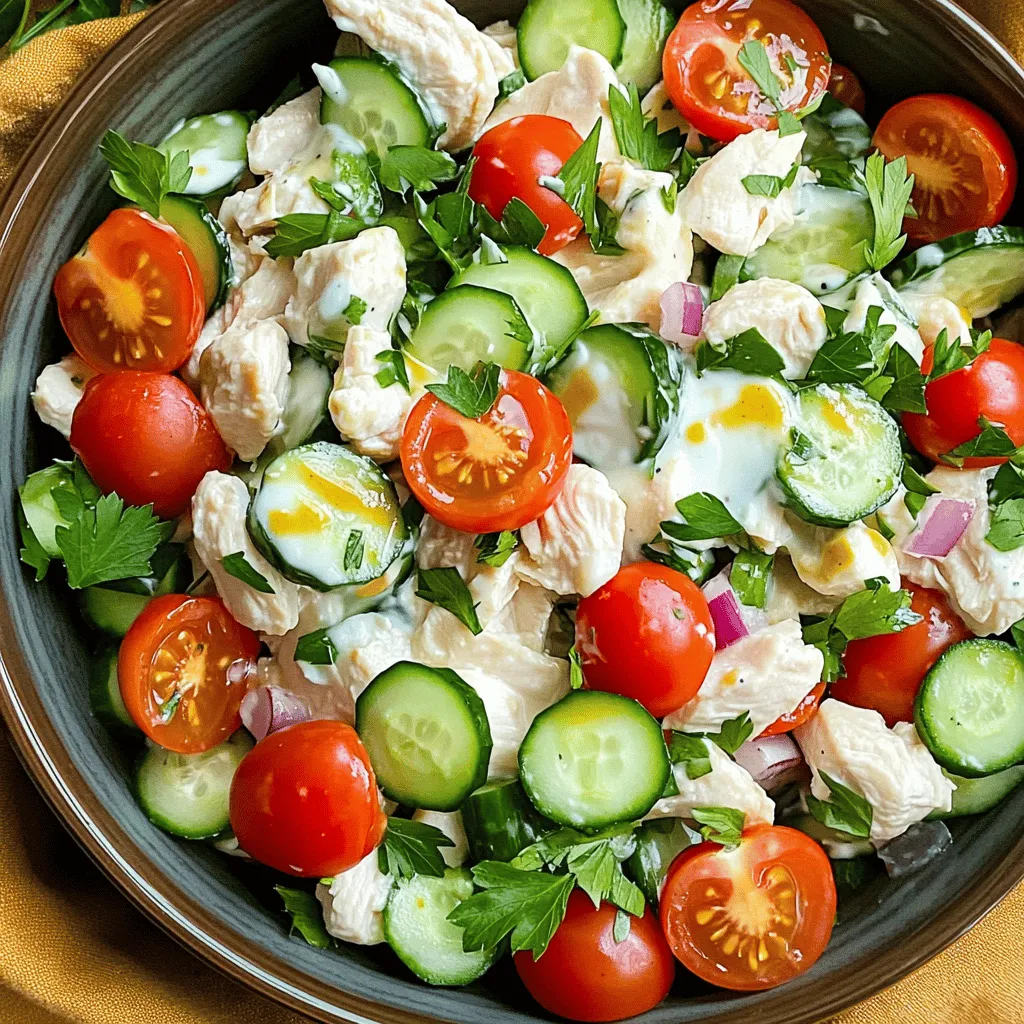
Looking for a quick yet nutritious meal? My High Protein Chicken Salad is just the fix! Packed with lean chicken,

The key to a great Mexican chopped salad is fresh ingredients. Here’s what you need: - 1 cup cherry tomatoes, halved - 1 cup cucumber, diced - 1 cup bell peppers (red, yellow, green), diced - 1 cup corn kernels (fresh or canned) - 1 can (15 oz) black beans, drained and rinsed - 1 avocado, diced - 1/4 cup red onion, finely chopped - 1/4 cup cilantro, chopped - Juice of 2 limes - 3 tablespoons olive oil - 1 teaspoon cumin - Salt and pepper to taste - Optional: 1 jalapeño, deseeded and minced (for added heat) This salad serves 4-6 people. It looks great in a colorful bowl. You can garnish it with extra cilantro or lime wedges for a splash of color. Using fresh produce makes the salad vibrant and tasty. Whenever possible, use organic ingredients. This salad is healthy and refreshing. You can find the full recipe above. Start by gathering your ingredients. In a large bowl, combine the following: - 1 cup cherry tomatoes, halved - 1 cup cucumber, diced - 1 cup bell peppers (red, yellow, green), diced - 1 cup corn kernels (fresh or canned) - 1 can (15 oz) black beans, drained and rinsed - 1 avocado, diced - 1/4 cup red onion, finely chopped - 1/4 cup cilantro, chopped - Optional: 1 jalapeño, deseeded and minced Mix these ingredients gently. You want them to blend but not mash. Each bite should have a bit of everything. In a separate bowl, whisk together: - Juice of 2 limes - 3 tablespoons olive oil - 1 teaspoon cumin - Salt and pepper to taste Whisk until it’s smooth. This dressing adds a bright flavor to your salad. Pour the dressing over the salad ingredients. Gently mix everything until it is coated well. Then, fold in the chopped cilantro. Let the salad sit for about 10 minutes. This allows the flavors to meld together. The wait makes a big difference in taste. For the full recipe, check out the details provided above. Enjoy your fresh and vibrant Mexican chopped salad! You can swap ingredients to fit your taste. Try grape tomatoes if you can’t find cherry tomatoes. For a crunchier texture, use radishes instead of cucumbers. Black beans can be replaced with pinto beans or chickpeas. If you want a creamier salad, add diced mango or pineapple. For dressings, a zesty cilantro lime dressing pairs well. A creamy avocado dressing is also a great choice. Prep your ingredients a day in advance. Chop the veggies and store them in separate containers. Keep them fresh in the fridge. For the best taste, add the dressing right before serving. This keeps the salad crisp. Letting the salad sit for about ten minutes before serving helps the flavors blend well. Use spices to enhance your salad. A pinch of chili powder gives it a nice kick. You can add smoked paprika for a smoky flavor. If you like it spicy, include more jalapeño or a dash of hot sauce. To make it milder, skip the jalapeño and reduce the spices. Taste as you go and adjust to your liking. {{image_2}} You can boost your Mexican chopped salad with protein. Adding grilled chicken makes it heartier. Shrimp works well, too. For a vegetarian option, try adding tofu. Just cube it and toss it in. For a vegan-friendly salad, skip the chicken and shrimp. Instead, focus on beans, quinoa, or lentils for protein. Using seasonal ingredients keeps your salad fresh and exciting. Swap out bell peppers for ripe tomatoes in summer. In fall, add roasted butternut squash for a sweet touch. You can also include seasonal fruits. Diced mango adds a tropical flavor. Strawberries bring a sweet contrast to the savory beans. Dressings can change the whole vibe of your salad. For a creamy option, use Greek yogurt mixed with lime juice. A vinaigrette made with olive oil and lime juice is light and fresh. I love a taco seasoning dressing. Just mix taco seasoning with olive oil and lime juice. It adds a fun twist to this classic dish. Don't forget to check the Full Recipe for more ideas! To keep your Mexican Chopped Salad fresh, refrigerate it right after serving. Use an airtight container to keep it crisp. This salad lasts about 3 days in the fridge. However, the avocado may brown. To slow this, squeeze lime juice on the avocado before storing. You can freeze some parts of the salad, but not everything. The veggies lose their crunch when frozen. I suggest freezing only the beans and corn. Eat the fresh ingredients, like tomatoes and avocado. They taste best fresh! When you're ready, thaw the beans and corn in the fridge overnight before use. Mexican Chopped Salad is a colorful dish filled with fresh ingredients. It often includes cherry tomatoes, cucumber, bell peppers, corn, black beans, avocado, red onion, and cilantro. This salad bursts with flavor and is easy to make. You can enjoy it as a side or a main dish. The lime juice and olive oil dressing adds a zesty touch. To make a healthier dressing, consider using yogurt instead of oil. You can also replace oil with more lime juice or vinegar. Another option is to blend avocado into your dressing for a creamy texture without extra fat. Use fresh herbs like cilantro or parsley for added flavor without calories. Yes, you can use canned beans for convenience. Canned beans save time, and they are already cooked. Just rinse them well to reduce sodium content. They also add a nice texture and flavor to the salad. Black beans are a great choice for this dish. Yes, Mexican Chopped Salad is gluten-free. All the main ingredients, like vegetables and beans, are naturally gluten-free. Just ensure that any dressings or additional toppings are also gluten-free. This makes it a safe choice for those with gluten sensitivities. To prepare this salad in advance, chop the veggies and store them in an airtight container. Keep the dressing separate until you are ready to serve. This prevents the salad from getting soggy. Add the dressing just before serving to keep it fresh and crunchy. For the best taste, enjoy it within a day or two of making it. This blog post covered how to make a vibrant Mexican Chopped Salad. We discussed fresh ingredients, bright dressings, and serving ideas to elevate your meal. Remember, you can customize it easily with different proteins or seasonal produce. Making it ahead keeps it fresh for later. Explore these variations to fit your taste. With these tips, you can create a delicious and healthy dish every time. Enjoy your salad journey!

Mexican Chopped Salad Simple and Fresh Recipe

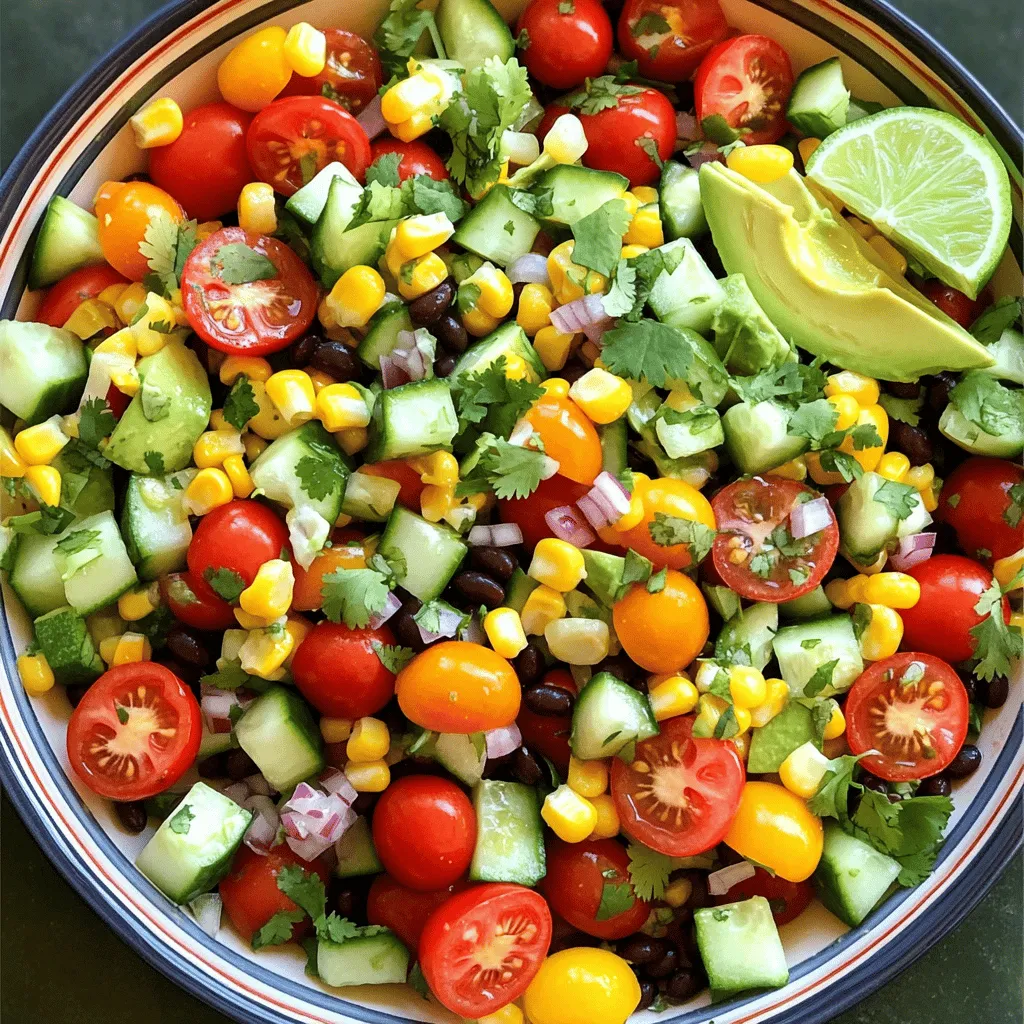
Looking for a fresh and simple dish that bursts with flavor? This Mexican Chopped Salad is your answer. Packed with

- Pre-made tart shell (9-inch) - Ripe white peaches - Mascarpone cheese - Heavy cream - Powdered sugar - Vanilla extract - Lemon zest - Fresh mint leaves for garnish - Optional: Honey For this delightful White Peach Mascarpone Tart, you need simple yet fresh ingredients. The pre-made tart shell saves time and lets you focus on flavors. Ripe white peaches add sweetness and a lovely aroma. Mascarpone cheese makes the filling rich and creamy. Heavy cream helps it become light and fluffy. Using powdered sugar gives the filling a sweet touch. Vanilla extract enhances the taste, while lemon zest adds brightness. Fresh mint leaves not only look great but also bring a cool flavor. If you want extra sweetness, honey is a great option. Gather these ingredients, and you will be ready to create a stunning dessert. For the complete directions, check the Full Recipe. To start, gather your ingredients. First, combine the mascarpone cheese and heavy cream in a medium bowl. Then, add the powdered sugar, vanilla extract, and lemon zest. Mix these together using a hand mixer or whisk. Beat the mixture until it becomes light and fluffy, about 2-3 minutes. This fluffy filling is what makes the tart so delicious. Next, carefully pour the mascarpone filling into the pre-made tart shell. Spread it evenly, making sure every corner is filled. Now, take your ripe white peaches and slice them thinly. Arrange the peach slices on top of the mascarpone layer. Overlap them slightly for a nice look. If you want a touch of sweetness, drizzle a bit of honey over the peaches. Now, it’s time to chill the tart. Place it in the refrigerator for at least 1 hour. This helps all the flavors blend well. When ready to serve, garnish the tart with fresh mint leaves. They add a pop of color and flavor. For the full recipe, check out the link. Enjoy your beautiful tart! - Beating mascarpone for optimal fluffiness: To get the best texture, beat mascarpone with heavy cream. Use a hand mixer for about 2-3 minutes. This makes the filling light and airy. - Choosing the best white peaches: Pick ripe white peaches that are soft but not mushy. Look for a sweet scent. The best peaches add flavor and color to your tart. - Tips for a smooth filling: Ensure all ingredients are at room temperature. This helps them mix well. Sift the powdered sugar to avoid lumps. A smooth filling looks great and tastes better. - Using powdered sugar for dusting: Just before serving, dust the tart with powdered sugar. This adds a sweet touch and makes the tart look fancy. - Arranging peaches artfully: Place the peach slices in a pattern. Overlap them slightly for a beautiful design. This makes your tart more inviting. - Slicing and serving tips: Use a sharp knife to cut the tart into wedges. Serve each piece with extra peach slices on the side. This adds freshness and color to your plate. For the full recipe, check out the White Peach Mascarpone Tart . {{image_2}} You can switch up the flavor of your tart by using different fruits. Try ripe strawberries or juicy blueberries. They add a nice color and taste. You can also mix fruits. A peach and raspberry combo makes a great choice. Adding spices can make your tart even more special. A dash of cinnamon or nutmeg gives warmth. You might like a hint of fresh basil or mint for a herbal twist. Just a little can make a big impact. If you want a vegan version, swap the mascarpone cheese for tofu. Blend silken tofu with a bit of lemon juice and maple syrup. It’s creamy and delicious! Use coconut cream for the heavy cream. It adds a nice flavor too. For those who need gluten-free options, look for a gluten-free tart shell. Many stores sell them now. You can also make your own with almond flour or oats. It’s easy and tastes great! Check out the Full Recipe for more ideas on how to make this tart your own! To keep your White Peach Mascarpone Tart fresh, store it in the fridge. Place it in an airtight container. This helps prevent moisture loss and keeps the tart from absorbing other smells. If you use a pie dish, cover it tightly with plastic wrap. This works well too! If you want to freeze the tart, slice it first. Wrap each slice in plastic wrap. Place the slices in a freezer-safe bag to avoid freezer burn. When you’re ready to enjoy it, remove a slice and let it thaw in the fridge overnight. This keeps the flavors intact and the texture nice. Always serve it chilled for the best taste! How long can the tart be stored in the fridge? You can keep the tart in the fridge for up to three days. Make sure to cover it well. This keeps the tart fresh and tasty. After a few days, the peaches might get soft. Can I use other types of cheese instead of mascarpone? Yes, you can use cream cheese or ricotta. These cheeses will change the flavor a bit. Cream cheese is tangy, while ricotta is light and fluffy. Both are great choices if you want to mix it up! What’s the best way to cut the tart? Use a sharp knife for clean slices. Dip the knife in hot water, then dry it before cutting. This will help with cutting through the peaches and cream. Cut slowly and gently to keep the layers intact. For the full recipe and more tips, check out the [Full Recipe]. This blog post covered a delicious peach tart made with simple ingredients. You learned how to create a fluffy mascarpone filling, arrange peaches beautifully, and chill your tart. I shared tips to elevate your presentation and variations for different diets. For a sweet treat, this tart is easy and fun to make. Enjoy it fresh or store it for later. With this guide, you're all set to impress anyone with this tasty dessert!

Delicious White Peach Mascarpone Tart Easy to Make

If you’re searching for a bright and delicious dessert, this White Peach Mascarpone Tart is your answer! It’s creamy, fruity,

To make Chicken and Broccoli Rice Bowls, you need fresh and simple ingredients. Each ingredient brings flavor and nutrition to the dish. You can find these at your local grocery store. Here are the ingredients you will need: - 2 cups cooked jasmine rice - 1 pound boneless, skinless chicken breasts, cut into bite-sized pieces - 2 cups broccoli florets - 3 tablespoons soy sauce - 2 tablespoons sesame oil - 1 tablespoon honey - 2 cloves garlic, minced - 1 inch ginger, grated - 1 tablespoon rice vinegar - Salt and pepper to taste - 2 green onions, chopped (for garnish) - Sesame seeds (for garnish) - Chicken: A great source of lean protein. It helps build muscles and keeps you full. - Broccoli: Packed with vitamins C and K. It boosts your immune system and supports bone health. - Jasmine Rice: A tasty carbohydrate that gives you energy. It also has a nice aroma. - Soy Sauce: Adds flavor and umami. It contains antioxidants that may benefit your health. - Honey: A natural sweetener that can help soothe your throat and improve digestion. - Garlic and Ginger: Both have anti-inflammatory properties and add a delightful taste. These ingredients work together to create a meal that is tasty and nutritious. You can enjoy a healthy dish that doesn’t take long to make. For the complete cooking steps, check out the Full Recipe. First, gather a large mixing bowl. Add soy sauce, sesame oil, and honey. Then, mix in minced garlic and grated ginger. Pour in rice vinegar for some zing. Add the chicken pieces and stir well to coat. Let it marinate for at least 15 minutes. This step adds flavor and makes the chicken juicy. Next, heat a large skillet over medium-high heat. Add the marinated chicken to the hot skillet. Keep the leftover marinade; you’ll use it later. Cook the chicken for about 6-8 minutes. Stir occasionally until the chicken turns golden brown and is cooked through. Once done, remove the chicken from the skillet and set it aside. In the same skillet, it’s time to cook the broccoli. Add the broccoli florets along with a splash of water. Cover the skillet to steam the broccoli. Let it cook for about 3-4 minutes. You want it tender but still crisp. Remove the lid and pour in the reserved marinade. Cook for another 2-3 minutes to let the sauce thicken. Now, return the cooked chicken to the skillet. Mix it with the broccoli and sauce until everything is hot and well coated. Season with salt and pepper to taste. To serve, layer cooked jasmine rice in bowls. Top it with the chicken and broccoli mixture. Finally, garnish with chopped green onions and sesame seeds for a great finish. Enjoy your tasty meal! For the full recipe, check the original source. To save time, prep your ingredients ahead of time. You can chop the chicken and broccoli the night before. Marinate the chicken early. This adds flavor and cuts down on cooking time. Use pre-cooked rice or microwaveable rice for quick meals. These options help you make Chicken and Broccoli Rice Bowls fast. Using a skillet is great for cooking chicken and broccoli. The high heat gives the chicken a nice sear. It helps the broccoli stay crisp. You can also use a steamer for the broccoli. This keeps its bright color and nutrients. Stir-frying the chicken with the broccoli is another quick method. It mixes flavors well and cooks everything evenly. To cook rice perfectly, rinse it first. This removes excess starch. Use the right water ratio; for jasmine rice, 1 cup rice to 1.5 cups water works well. Bring it to a boil, then cover and simmer on low heat. Let it sit for a few minutes after cooking. Fluff it with a fork before serving. This makes your rice light and fluffy, perfect for your Chicken and Broccoli Rice Bowls. For the full recipe, check out the complete guide. {{image_2}} You can easily swap jasmine rice for healthier options. Quinoa provides more protein and fiber. Cauliflower rice is a great low-carb choice. Brown rice adds more nutrients and a nutty flavor. Each option works well with chicken and broccoli. To spice things up, try adding crushed red pepper for heat. A splash of lime juice can brighten flavors. You might enjoy adding a dash of curry powder for warmth. Mix in some fresh herbs, like cilantro or basil, to give your dish a fresh twist. If you want to switch proteins, tofu works great for a vegetarian option. Shrimp adds a fun seafood flair. You can also use beef or pork for a heartier meal. Each protein brings its unique taste to the bowl, making it exciting every time you cook. For the full recipe, make sure to check the details mentioned above! To keep your Chicken and Broccoli Rice Bowls fresh, store them in airtight containers. Make sure each bowl has all the components: rice, chicken, and broccoli. Let the dish cool down before sealing the container. Properly stored, your leftovers can last for about three days in the fridge. When you’re ready to enjoy your leftovers, reheat them gently. You can use the microwave or a skillet. If using a microwave, cover the bowl with a damp paper towel. Heat in short bursts, stirring in between, until warm. For a skillet, add a splash of water and cover to steam the dish. This keeps the rice moist and prevents it from drying out. Freezing is a great option if you want to save some meals for later. Use freezer-safe containers to avoid freezer burn. You can freeze the chicken and broccoli mixture separately from the rice if you prefer. When ready to eat, thaw the bowls in the fridge overnight. Reheat them in the microwave or skillet, just as you would with leftovers. Enjoy your tasty meals anytime! Yes, you can use frozen broccoli. Frozen broccoli works well in this dish. It saves time and gives you more convenience. Just add it directly to the skillet. You may need to cook it a bit longer since it's frozen. Watch for the broccoli to be tender, but not mushy. To make this dish vegetarian, replace chicken with tofu or chickpeas. Tofu absorbs flavors well and adds protein. Chickpeas also offer great texture and nutrition. Use the same marinade to flavor your protein choice. The rest of the recipe stays the same, keeping it tasty and filling. You can serve several things with these bowls. A side of spring rolls adds crunch. A simple salad can add freshness. You might also enjoy some pickled vegetables for a tangy touch. These sides can complement the main dish well. You can find the full recipe for Chicken and Broccoli Rice Bowls in the article. It details all the steps and ingredients you need. This makes it easy to follow, even for new cooks. In this blog post, we explored how to make delicious Chicken and Broccoli Rice Bowls. We covered essential ingredients, step-by-step cooking methods, and helpful tips to make it easier. We also looked at tasty variations and how to store leftovers correctly. Remember, cooking can be fun and rewarding. Using fresh ingredients and trying new flavors will make you a better cook. Enjoy your meals and share this great recipe with others!

Chicken and Broccoli Rice Bowls Tasty and Easy Meal

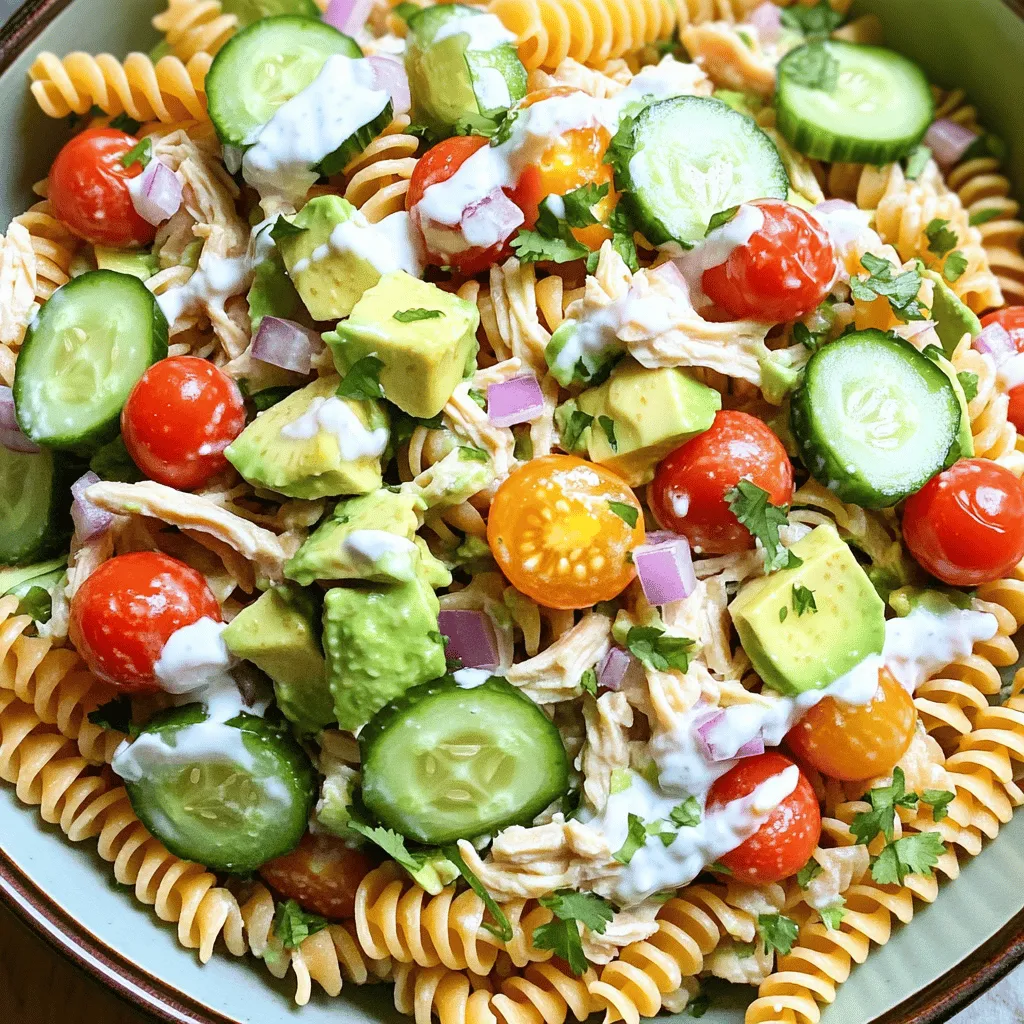
Looking for a quick, tasty meal that doesn’t skimp on nutrition? You’ve come to the right place! My Chicken and

- 2 cups whole wheat pasta (fusilli or rotini) - 1 cup cooked chicken breast, shredded - 1 ripe avocado, diced - 1 cup cherry tomatoes, halved - 1/2 cucumber, diced - 1/4 red onion, finely chopped - 1/4 cup Greek yogurt - 2 tablespoons lime juice - 1 tablespoon olive oil - 1 teaspoon garlic powder - Salt and pepper to taste - Fresh cilantro or parsley for garnish This salad packs a punch of health. Whole wheat pasta offers fiber for digestion. Chicken is a great source of lean protein, helping build and repair muscles. Avocado provides healthy fats that support heart health. Cherry tomatoes bring antioxidants that fight cell damage. Cucumber adds hydration and crunch. Greek yogurt boosts protein and probiotics, aiding gut health. Lime juice gives a fresh flavor and vitamin C. This mix makes a balanced meal! If you need to make swaps, it's easy! Use gluten-free pasta if you avoid gluten. For a plant-based option, replace chicken with chickpeas or tofu. Swap Greek yogurt with a dairy-free yogurt for a vegan choice. You can use lemon juice instead of lime if you prefer that flavor. Don't hesitate to play with the veggies too; bell peppers or spinach work well! Enjoy your cooking adventure with these fun swaps. First, you need to cook the whole wheat pasta. Use fusilli or rotini for best results. Bring a large pot of water to a boil. Add a pinch of salt to the water. Cook the pasta according to the package directions until it is al dente. This usually takes about 8 to 10 minutes. Once cooked, drain the pasta. Rinse it under cold water to stop the cooking process. This also helps cool the pasta down. Now, let’s prepare the salad. In a large mixing bowl, combine the shredded chicken, diced avocado, halved cherry tomatoes, diced cucumber, and chopped red onion. Make sure to mix these ingredients well. You want every bite to have a little bit of everything. This mix adds color and flavor. Remember, the avocado is soft, so handle it gently to keep it intact. Next, let’s make the dressing. In a small bowl, whisk together the Greek yogurt, lime juice, olive oil, garlic powder, salt, and pepper. Mix until it is smooth and creamy. This dressing adds a nice zing to the salad. Pour the dressing over the chicken mixture. Toss everything gently until all the ingredients are well coated. Finally, add the cooled pasta to the salad. Toss again to combine. Chill the salad in the refrigerator for about 30 minutes. This helps the flavors blend well. When you’re ready to serve, garnish with fresh cilantro or parsley. For the full recipe, check out the section above. To make your salad great, focus on the texture. Use whole wheat pasta. It adds a nice chew. Cook the pasta until it's al dente. This means it’s firm, not mushy. Rinse the pasta in cold water to stop cooking. This keeps the pasta from getting sticky. When you mix in the avocado, be gentle. You want it to stay chunky. Add more flavor with fresh herbs. You can use cilantro or parsley for a fresh taste. Lime juice brightens everything up. You can also add a pinch of chili flakes for heat. If you love garlic, use fresh minced garlic instead of garlic powder. This adds a punch. Taste your salad before serving. Adjust salt and pepper to make it perfect. You can make this salad ahead of time. Prepare the pasta and veggies a day before. Keep the dressing separate until serving. This helps the salad stay fresh. The flavors mix well if you let it sit for 30 minutes. Just remember to store it in the fridge. This keeps the ingredients crisp and tasty. For the full process, check out the Full Recipe. {{image_2}} You can swap out chicken for other proteins. Try grilled shrimp for a seafood twist. You might also use diced turkey or even canned tuna. For a vegetarian option, use chickpeas or black beans. Each protein adds its own flavor and texture. Feel free to get creative with your veggies. Bell peppers add crunch and color. Spinach or kale brings in a healthy boost. You can also use broccoli florets or snap peas for added fun. Mixing in different veggies will keep your salad fresh and exciting. The dressing can change with your mood or taste. Instead of Greek yogurt, try a tahini or avocado dressing for creaminess. A vinegar-based dressing with balsamic or apple cider vinegar gives a tangy twist. Add herbs like dill or basil for extra flavor. Each dressing option can transform the salad into something new. For the full recipe, check out Healthy Chicken Pasta Salad with Avocado. To keep your Healthy Chicken Pasta Salad with Avocado fresh, store it in an airtight container. Make sure to cool the salad before you seal it. This helps prevent condensation, which can lead to sogginess. If you have any leftover dressing, store it separately to keep the salad crisp. Use glass or BPA-free plastic containers for storage. Glass containers work well because they do not stain or hold odors. Choose containers that are the right size for your leftovers. This helps minimize air exposure, keeping your salad tasty. Your salad will last in the fridge for about 3 days. After that, it may lose its flavor and texture. Avoid freezing this salad, especially with the avocado. Freezing can change the avocado’s texture, making it mushy. If you want to enjoy this salad later, consider storing the ingredients separately. This way, you can combine them fresh when you're ready to eat. Yes, you can use regular pasta. Whole wheat pasta adds more fiber. It also gives a nutty taste. Regular pasta works just as well for this salad. You may want to cook it slightly less for a firmer bite. You can add many healthy options. Consider bell peppers, spinach, or olives. Chickpeas are a great protein boost. You can also toss in some grated carrots for extra crunch. Nuts like almonds or walnuts can add a nice texture. To stop the avocado from browning, use lime juice. The acid in lime slows down browning. You can also keep the pit in the bowl. Cover the salad tightly with plastic wrap if you store it. Yes, this recipe is very kid-friendly. Kids often love pasta and chicken. The creamy avocado and yogurt dressing add a fun taste. You can adjust the spices to suit their palates. Serve it in colorful bowls for extra fun. Absolutely! Swap the chicken for chickpeas or tofu. Use a plant-based yogurt instead of Greek yogurt. This way, you keep the creaminess while making it vegan. Add some nuts for protein to balance the salad. Check the Full Recipe for more tips. This blog post covered the key ingredients, their nutritional benefits, and dietary substitutions. I shared step-by-step instructions for cooking pasta, making the salad, and creating dressing. Tips for texture, flavors, and advance prep can elevate your dish. We explored variations with proteins, veggies, and dressings. Finally, I provided storage info, including leftovers and shelf life. In summary, this salad is easy, nutritious, and versatile. It’s a dish you can enjoy on any occasion.

Healthy Chicken Pasta Salad with Avocado Delight

Looking for a fresh, tasty meal that’s healthy and easy to make? You’ve come to the right place! My Healthy

- Fresh lychee - Fresh mint leaves - Rose syrup - Lime juice - Sugar - Sparkling water - Ice cubes - Garnishes In this Lychee Rose Mojito, each ingredient brings something special. Fresh lychee adds a sweet, floral taste. You can find these in stores or markets, often in cans or jars if fresh ones are hard to get. Fresh mint leaves provide a cooling touch that brightens the drink. Rose syrup gives a lovely aroma and a hint of sweetness. Lime juice adds a zesty kick that balances the flavors. - Alternatives for fresh lychee: If you cannot find fresh lychee, canned lychee works well. Just drain and rinse them before use. You may also try fresh peaches or pears for a different twist. - Different types of mint to use: Spearmint is the classic choice, but you can use peppermint for a stronger mint flavor. If you want something unique, try chocolate mint for a fun taste. - Substitutes for rose syrup: If you cannot find rose syrup, you can use simple syrup with a few drops of rose water. Honey or agave syrup can add a sweet touch, too. For the full recipe, make sure to check the instructions above. Enjoy crafting this delightful summer drink! Muddling the Ingredients To start, take a sturdy glass or cocktail shaker. Add one cup of fresh lychee, peeled and pitted. Next, toss in half a cup of fresh mint leaves and one tablespoon of sugar. Use a muddler to press down gently on the lychee and mint. This releases their flavors and juices. You want a nice, well-combined mix, but don’t mash it into a pulp. Mixing and Serving After muddling, add two tablespoons of rose syrup and two tablespoons of freshly squeezed lime juice. Muddle the mixture gently again. This helps the mint aroma to pop. Now, fill a glass with ice cubes. Pour the lychee mixture over the ice. Then, top it off with sparkling water. Stir gently to mix everything well. Adjusting Sweetness Now it’s time to taste your drink. If you find it not sweet enough, add more sugar or lime juice. Just stir it in until you reach your preferred flavor. Ideal tools for muddling A good muddler can make a big difference. Look for one that is sturdy and fits well in your hand. You can also use a wooden spoon if you don’t have a muddler. It works just fine! Avoiding over-muddling Be careful not to over-muddle your ingredients. If you press too hard, you can break the mint leaves too much. This can make your drink taste bitter. Keep it light and gentle for the best flavors. For a complete guide on making this delightful drink, check the Full Recipe. Garnishing your Lychee Rose Mojito adds fun and flair. While mint and lychee are classic choices, think outside the box. Here are some creative ideas: - Use lemon or lime slices. They add color and a zesty kick. - Try edible flowers like pansies or nasturtiums. These look pretty and are safe to eat. - Add thin cucumber ribbons for a fresh look. This gives a crisp taste too. - Incorporate a sprig of rosemary for a unique twist. Its scent blends well with rose. These garnishes not only make your drink look beautiful but also enhance the flavor experience. To elevate your Lychee Rose Mojito, consider these flavor-enhancing techniques: - Adding extra herbs can boost the taste. Try basil or thyme for a new depth. - For a spice kick, add a pinch of ginger or cayenne. This adds warmth and excitement. - Customize sweetness by adjusting the sugar. Taste as you go to find your perfect level. - You can also swap the rose syrup for lavender syrup. This gives a floral twist that’s delightful. Experimenting with these techniques allows you to create a drink that suits your taste perfectly. For the complete recipe, check out the Full Recipe section. {{image_2}} For a fun twist, try a tropical lychee mojito. Replace mint with basil for a fruity kick. Use coconut water instead of sparkling water. This gives a smooth, creamy texture. You can taste the island vibes in every sip. Another option is the spicy lychee mojito with jalapeño. Add a few slices of fresh jalapeño when muddling. This adds heat and balance to the sweetness of lychee. The spicy and sweet combo will surprise your taste buds! In winter, make a winter-inspired lychee mojito. Use warm spices like cinnamon or nutmeg. Add a splash of apple cider for a cozy feel. This mix will warm you up during the cold months. For summer, add fruity twists to your mojito. Use fresh berries like strawberries or raspberries. Muddle them with the lychee for a burst of color and taste. You can even mix in some peach or watermelon for a refreshing touch. Explore these variations to keep your lychee rose mojito exciting all year. Check out the Full Recipe for more ideas! To keep fresh lychee tasty, store them in the fridge. Place them in a paper bag. This helps them stay fresh up to a week. Do not wash them until you are ready to eat. Washing can cause them to spoil faster. For mint leaves, place them in a glass of water. Cover the leaves with a plastic bag. This keeps them fresh for a few days. Make sure to change the water every day. If you want them to last longer, wrap them in a damp paper towel and store in the fridge. You can make the lychee and mint mixture in advance. Just muddle the fresh lychee with mint and sugar. Store this mixture in a sealed container in the fridge. It stays fresh for about two days. This way, you can whip up a drink in no time! For the final drink, it’s best to serve it right after mixing. If you have leftovers, store them in the fridge. However, the sparkling water may lose its fizz. To keep it bubbly, do not mix in the sparkling water until you are ready to serve. Enjoy your refreshing drink whenever you want! For the full recipe, check the details above. A Lychee Rose Mojito is a fresh cocktail that blends sweet and floral flavors. It uses lychee, a tropical fruit with a juicy and fragrant taste. The drink also includes mint, which adds a cool touch, and rose syrup for a sweet, floral note. Lime juice brings a zesty kick while sparkling water adds a light fizz, making this drink refreshing and fun. Yes, you can easily turn the Lychee Rose Mojito into a mocktail. Just skip the alcohol and use more sparkling water or soda. You can also add extra lychee juice for sweetness. This way, everyone can enjoy a delicious drink, even those who prefer not to have alcohol. To make a Lychee Rose Mojito for a crowd, simply multiply the ingredients by the number of servings you need. For example, if you want to serve four, use two cups of lychee, one cup of mint, and so on. Mix all the ingredients in a large pitcher. Just remember to keep the sparkling water separate until you are ready to serve. Many trendy bars and eateries serve unique cocktails like the Lychee Rose Mojito. Look for places that focus on craft cocktails or international drinks. Some Asian fusion restaurants may also have this refreshing drink on their menu. Always ask your server for their recommendations! This blog post explores the delightful Lychee Rose Mojito, highlighting key ingredients and preparation steps. We discussed ingredient substitutions, tips for muddling, and creative garnishes to enhance your drink. I shared recipes for exciting variations, from tropical twists to winter flavors. Finally, I covered storage and prep tips to make your mojito plans easier. Enjoy making your own Lychee Rose Mojito. It’s a fun drink to share with friends!

Lychee Rose Mojito Refreshing Summer Cocktail Delight

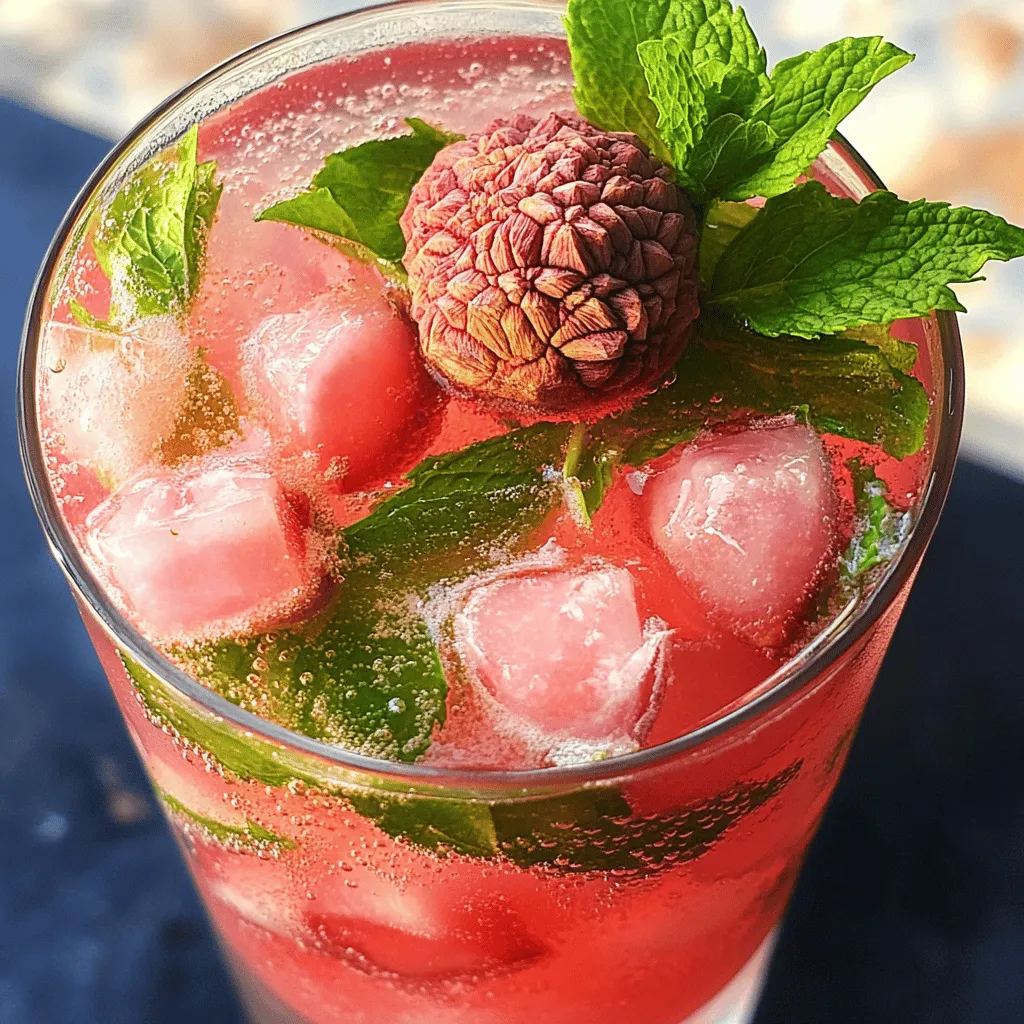
If you’re seeking a drink that captures the essence of summer, look no further! The Lychee Rose Mojito is a

- 1 pound beef sirloin, thinly sliced - 2 tablespoons fish sauce - 1 tablespoon lime juice - 1 tablespoon palm sugar (or brown sugar) - 1 clove garlic, minced - 1 teaspoon chili flakes (adjust to taste) - 2 cups mixed salad greens (arugula, spinach, and lettuce) - 1 cucumber, thinly sliced - 1 red bell pepper, thinly sliced - 1 carrot, julienned - 1/4 cup fresh cilantro, chopped - 1/4 cup fresh mint leaves, chopped - 1 tablespoon roasted peanuts, crushed (for garnish) To make the Thai Beef Salad, gather these fresh ingredients. Each one plays a key role in the dish's vibrant flavor. The beef sirloin gives the salad a hearty base. Fish sauce adds depth, while lime juice brightens every bite. Palm sugar balances the salty and sour notes. Garlic and chili flakes bring warmth and aroma. The mixed greens create a crunchy backdrop. The cucumber and bell pepper add refreshing crispness. Carrots provide a sweet crunch. Fresh herbs like cilantro and mint elevate the dish with their unique tastes. Finally, crushed peanuts give a satisfying crunch. This mix of ingredients results in a colorful and tasty meal. You can find the full recipe to create this delightful dish. Enjoy the bold flavors and fresh ingredients in your Thai Beef Salad! Start by whisking together these ingredients in a bowl: - 2 tablespoons fish sauce - 1 tablespoon lime juice - 1 tablespoon palm sugar (or brown sugar) - 1 clove garlic, minced - 1 teaspoon chili flakes (adjust to taste) This mixture is your marinade. It adds a lot of flavor to the beef. Next, place the thinly sliced beef in the bowl. Make sure each piece gets coated well. Let the beef sit in the marinade for at least 15 minutes. If you have time, one hour in the fridge gives better taste. While the beef marinates, get your salad ready. In a large bowl, combine these fresh ingredients: - 2 cups mixed salad greens (arugula, spinach, and lettuce) - 1 cucumber, thinly sliced - 1 red bell pepper, thinly sliced - 1 carrot, julienned Toss the greens and veggies gently. Set the bowl aside so the flavors can blend. Now, it's time to cook the beef. Heat a grill pan or skillet over medium-high heat. Take the marinated beef out and discard the leftover marinade. Grill or sauté the beef slices for about 2-3 minutes on each side. You want them cooked but still juicy. Once done, remove the beef from the heat. Let it rest for a minute. Then, slice the beef into thin strips. Add these strips to your salad bowl along with fresh cilantro and mint. Toss everything together gently. Serve immediately. If you want, top with crushed roasted peanuts for a nice crunch. For the full recipe, refer to the above instructions. Enjoy! To make your Thai Beef Salad shine, start with the marinade. Adjust the level of chili flakes for spice. If you love heat, add more flakes. For a milder taste, use less. Letting the beef marinate longer brings out great flavors. I recommend 15 minutes at room temperature or up to an hour in the fridge. This helps the beef soak up the flavors. When cooking the beef, use high heat. This gives it a nice sear and keeps it juicy. A cast iron skillet works well for even cooking. It holds heat well, so your beef cooks perfectly. Don’t overcrowd the pan; cook the beef in batches if needed. This step is key to achieving that perfect texture. Serve your Thai Beef Salad with jasmine rice or rice noodles for a satisfying meal. These sides complement the fresh flavors of the salad. For added taste, offer toppings like sliced avocado. It adds creaminess to the crunchy salad. You can also sprinkle crushed peanuts on top for extra crunch. Enjoy the burst of flavors in every bite! For the full recipe, check the main section. {{image_2}} You can easily change the main protein in this dish. Swap beef for grilled chicken or tofu for a tasty vegetarian option. This keeps the dish light and fresh. If you want a zesty boost, add lime zest to your marinade. This small change can brighten the whole dish. For a different twist, consider adding sesame oil or soy sauce to the dressing. Both options bring a nutty flavor that pairs well with the other ingredients. You can also try using fresh herbs like basil instead of cilantro or mint. This adds a unique touch that makes the salad your own. Using seasonal vegetables can make your salad even fresher. Think about adding crisp radishes or colorful cherry tomatoes. They not only taste great but also add visual appeal. For a sweet note, toss in seasonal fruits like mango. The sweetness from the fruit balances the lime and fish sauce perfectly. For the complete recipe, check out the [Full Recipe]. Store any leftovers in an airtight container. This keeps them fresh and tasty. For the best taste, eat them within 2 days. This way, you enjoy the full flavor of your Thai Beef Salad. If you want to save some for later, freeze the beef separately from the salad. This helps keep the salad fresh. When you're ready to eat, thaw the beef in the refrigerator. This slow method keeps the taste and texture just right. To reheat the beef, use a skillet or microwave. This warms it up nicely without drying it out. Do not reheat the salad greens. They lose their crunch and freshness if heated. Enjoy your meal at its best! For the complete recipe, check out [Full Recipe]. Thai Beef Salad is a fresh, vibrant dish from Thailand. This dish features tender beef, crisp veggies, and a zesty dressing. The flavors blend sweet, sour, salty, and spicy notes. Traditionally, it's enjoyed as a light meal or appetizer. Its origins stem from Thai street food, where balance in flavors is key. To add heat, you can increase the chili flakes in the marinade. Start with a teaspoon and add more if you like. Fresh Thai bird's eye chilies can also spice things up. Slice them thinly and mix them into the salad. Yes, you can prep elements in advance. Marinate the beef a few hours before cooking for better flavor. Chop the veggies and store them in the fridge to keep them fresh. Mix everything together just before serving for the best taste. This salad pairs well with jasmine rice or rice noodles. You can also serve it alongside spring rolls or satay skewers. These options complement the salad's flavors and make a complete meal. You can swap the beef for grilled chicken or tofu for a vegetarian dish. Add fruits like mango for sweetness or use lime zest for extra flavor. Play with herbs too; basil or cilantro can give it a unique twist. This salad is packed with nutrients. Beef adds protein and iron, while veggies provide vitamins and fiber. The dressing offers healthy fats from fish sauce and fresh herbs. Overall, it's a balanced dish that is both tasty and good for you. Enjoy this dish with the full recipe for a delightful experience! In this post, we covered how to make Thai Beef Salad. You learned about the key ingredients, marinating tips, and cooking steps. Remember, feel free to adjust spice levels and swap ingredients to suit your taste. Keep your leftovers fresh by storing them properly. Whether you're serving it with rice or adding seasonal fruits, this salad is versatile. Enjoy making it your own and impressing friends and family with bold flavors.

Thai Beef Salad Flavorful and Fresh Delight

If you crave something fresh and tasty, Thai Beef Salad is the perfect dish. With tender beef, vibrant veggies, and

- Mixed Baby Greens: Use 4 cups of mixed baby greens, like arugula, spinach, and watercress. These greens offer a fresh base for the salad. They add texture and flavor, making each bite exciting. - Fresh Strawberries: Select 1 cup of fresh strawberries. Look for ripe, juicy berries. Hull and slice them before adding. The sweetness of strawberries pairs perfectly with the saltiness of prosciutto. - Burrata Cheese: Choose 1 ball of burrata cheese. This cheese should feel soft and creamy. Cut it into large pieces to showcase its rich inside. Handle it gently to keep its beautiful shape. - Prosciutto: Use 6 slices of high-quality prosciutto. Look for thinly sliced meat with a nice marbling. Tear it into bite-sized pieces for easy eating. The savory flavor complements the salad well. - Roasted Pistachios: Prepare 1/4 cup of roasted pistachios, roughly chopped. These nuts add a nice crunch. You can substitute them with almonds or walnuts if you prefer. - Dressing Ingredients: Use 2 tablespoons of balsamic glaze and 2 tablespoons of extra virgin olive oil. These dressings enhance the salad's flavor. Add salt and freshly cracked black pepper to taste for extra seasoning. For the full recipe, check out the details above. 1. In a large mixing bowl, take the mixed baby greens and sliced strawberries. Gently toss them together until they blend well. This step ensures every bite has a mix of flavors. 2. Next, drizzle the extra virgin olive oil over the salad mixture. Add some salt and freshly cracked black pepper. Toss lightly again to coat everything evenly. This adds a nice flavor boost. 3. For presentation, grab a large serving platter or individual plates. Artfully arrange the salad mixture on the platter. Create a little nest in the center for the burrata pieces. 4. Now, scatter the torn prosciutto pieces on top of the salad. This adds a savory touch that pairs perfectly with the sweetness of the strawberries. 5. Place the burrata pieces on the salad. Make sure they stand out, as they are the stars of the dish. 6. Drizzle balsamic glaze over the entire salad. This will add sweetness and depth, making every bite more delightful. 7. Finish off by sprinkling the roasted pistachios on top. They give a nice crunch. Add fresh basil leaves to garnish, giving the salad a vibrant look. - Serve the salad immediately to keep the greens fresh. The bright colors and flavors are best enjoyed right away. - You can plate the salad in elegant dishes for a special touch. Consider adding a drizzle of extra balsamic glaze around the platter. This enhances the visual appeal. - This salad works great as a light lunch or appetizer. You can pair it with crusty bread or a light white wine for a complete meal. For a detailed view of this recipe, check out the Full Recipe. To keep your greens fresh, wash them in cold water. Dry them well using a salad spinner or clean kitchen towel. Store them in a container with a paper towel inside to absorb moisture. This helps them stay crisp longer. For strawberries, it’s best to keep them in the fridge. Don't wash them until you're ready to eat. Store them in a breathable container, like a berry basket. This allows air to circulate and keeps them fresh. Burrata cheese needs careful handling. Keep it in its liquid until you are ready to use it. Store it in the fridge and consume it within a few days for the best taste and texture. To give your salad a gourmet look, use a large, shallow bowl. Arrange the greens and strawberries in a colorful pattern. Place burrata pieces in the center for a stunning focal point. You can impress guests by serving the salad on individual plates. Drizzle extra balsamic glaze around the plate for a fancy touch. Scatter the pistachios on top for added flair and crunch. Fresh basil leaves add a pop of color, making your dish even more appealing. {{image_2}} You can change the burrata cheese if you want. Try using fresh mozzarella or goat cheese. These swap outs still give you a creamy feel. They also add a nice twist to the flavor. When it comes to greens, you have options. Instead of mixed baby greens, use kale or romaine. Both add crunch and taste. You can even mix them for a more interesting salad. Spinach also works and is mild in flavor. Want to add some extra fruit? Peaches or figs work great. They add sweetness and a juicy bite. You can slice them thin and toss them in. If you want to switch up the dressing, try honey mustard or lemon vinaigrette. These dressings give a different flavor profile. They can brighten the dish without overpowering it. For more ideas, check out the Full Recipe. It offers tips and tricks to make this salad your own! To keep your Prosciutto Strawberry Burrata Salad fresh, store it properly. I recommend using an airtight container. This helps keep the flavors vibrant. Try to eat it within two days for the best taste. Store the salad without the dressing. Dressings can make greens soggy. If you have extra strawberries or burrata, keep them in separate containers. This way, they stay fresh longer. If your greens start to wilt, don't worry. You can refresh them! Rinse the greens gently in cold water. Pat them dry with a towel. This will help them regain some crunch. You can also reuse the salad components in other dishes. Toss leftover greens into a wrap or sandwich. Use the burrata as a topping for pasta or pizza. It’s all about being creative with your leftovers! To make a vegetarian version, simply leave out the prosciutto. You can replace it with a flavorful option like roasted chickpeas or marinated artichokes. Both add texture and taste. You can use the same ingredients and follow the recipe steps. This way, you keep the salad fresh and vibrant. Yes, you can prepare parts of the salad in advance. Wash and dry the greens, and store them in a sealed container. Slice the strawberries and keep them in the fridge. However, wait to add the burrata and prosciutto until serving. This keeps the salad fresh and tasty. Burrata cheese offers several health benefits. It is rich in calcium, which helps your bones. It also has protein, which is good for muscle growth. Moreover, burrata contains healthy fats, which can support heart health. Enjoy it in moderation for a tasty treat! For the full recipe, check out the detailed instructions above. This blog post covered how to make a delicious Prosciutto Strawberry Burrata Salad. You learned the best ingredients to use, their preparation, and tips for storage. I shared serving suggestions and variations to keep things fresh. Remember, using quality ingredients makes a big difference. Try different fruits or greens to find your perfect mix. Enjoy your salad and impress your guests with these easy steps.

Prosciutto Strawberry Burrata Salad Fresh Delight

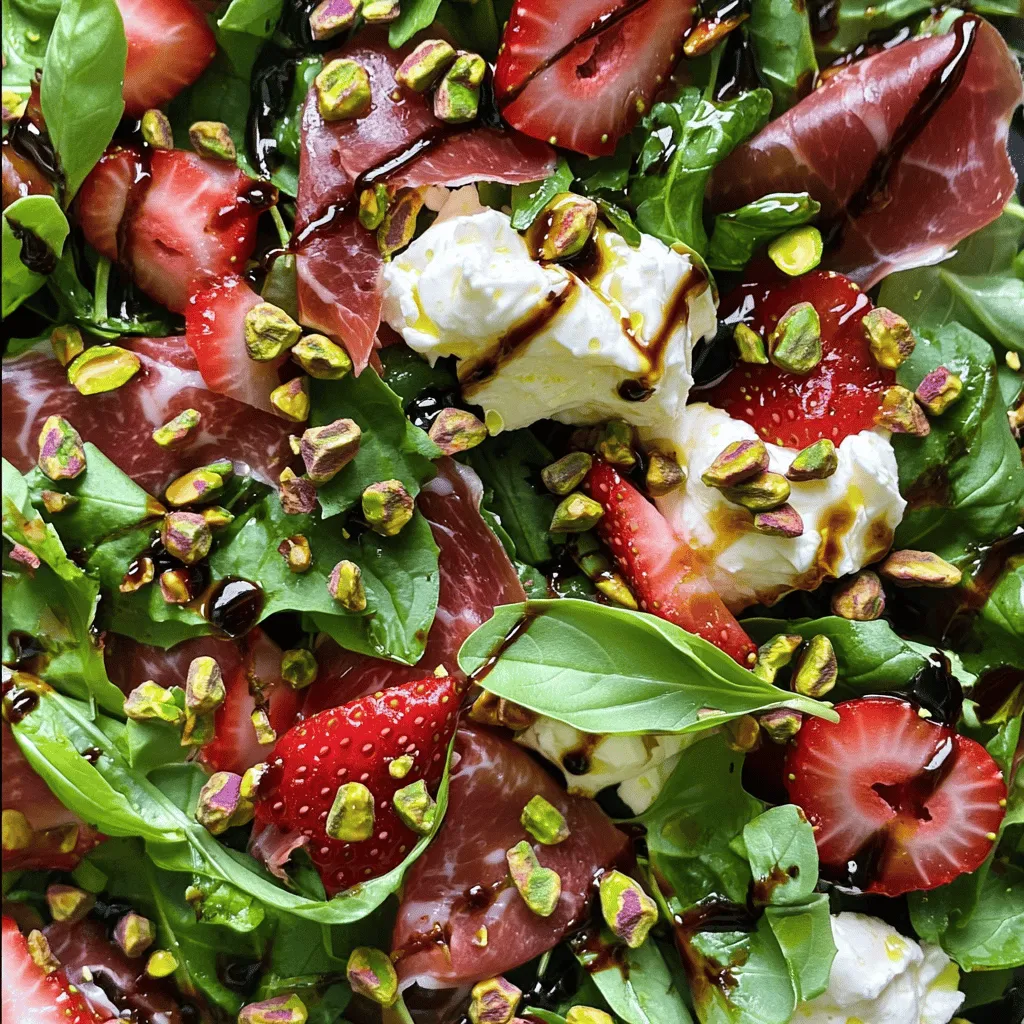
Are you ready to create a dish that dazzles the taste buds? My Prosciutto Strawberry Burrata Salad is a fresh

- 1 cup graham cracker crumbs - 1/4 cup unsalted butter, melted - 2 cups cream cheese, softened - 1/2 cup granulated sugar - 1/2 cup sour cream - 1 teaspoon vanilla extract - Zest of 1 lemon - 2 tablespoons lemon juice - 2 large eggs - 1 cup fresh blueberries The main ingredients create a rich and creamy base. The graham cracker crumbs form a buttery crust. Cream cheese gives the cheesecake its smooth texture. Granulated sugar adds sweetness, while sour cream contributes tang. Fresh lemon zest and juice bring a bright flavor. - 2 tablespoons blueberry jam - Fresh mint leaves For toppings, blueberry jam adds a fruity finish. Fresh mint leaves bring color and freshness. These toppings make the cheesecakes pop with flavor and look great. - Muffin tin - Mixing bowls - Electric mixer You will need a muffin tin to hold the mini cheesecakes. Mixing bowls help you combine the ingredients well. An electric mixer ensures a smooth batter without lumps. Having the right tools makes baking easier and more fun. For the full recipe, check out the detailed steps to create these delightful treats. 1. Preheat your oven to 325°F (160°C). This helps the cheesecakes bake evenly. 2. Line a muffin tin with paper liners. This makes it easy to remove the cheesecakes later. 3. In a medium bowl, mix 1 cup of graham cracker crumbs with 1/4 cup of melted unsalted butter. Stir until combined. 4. Press about a tablespoon of the crumb mixture into each muffin liner. Use the back of a spoon to pack it down firmly. 1. In a large mixing bowl, beat 2 cups of softened cream cheese until smooth using an electric mixer. 2. Add 1/2 cup of granulated sugar, 1/2 cup of sour cream, 1 teaspoon of vanilla extract, the zest of 1 lemon, and 2 tablespoons of lemon juice to the cream cheese. Mix until smooth. 3. Add 2 large eggs, one at a time. Mix on low speed until just combined. Do not overmix. 4. Gently fold in 1 cup of fresh blueberries into the cheesecake batter. Be careful to keep the blueberries intact for a lovely burst of flavor. 1. Evenly distribute the cheesecake batter over the prepared crusts in the muffin tin. Fill each liner about 3/4 full. 2. Bake in the preheated oven for 20-25 minutes. The centers should be set but still slightly jiggly. 3. Remove from the oven and let them cool at room temperature for about 10 minutes. 4. Refrigerate for at least 2 hours to set completely. For the complete recipe, check out the [Full Recipe](#). - Overmixing batter: This can make the texture tough. Mix just until smooth. - Not cooling properly: Let the cheesecakes cool before chilling. This helps set their shape. - Use room temperature ingredients: Cold cream cheese will not mix well. It needs to be soft. - Avoid overbaking: Bake until the centers are slightly jiggly. They will firm up as they cool. - Best served chilled: Chilling enhances the flavors and makes them refreshing. - Pair with homemade whipped cream: A dollop of whipped cream adds richness and a nice touch. Enjoy these tips to make the best mini lemon blueberry cheesecakes. Check out the Full Recipe for more details! {{image_2}} You can easily switch things up with your mini lemon blueberry cheesecakes. Instead of blueberries, try using raspberries or strawberries. These fruits add a nice twist to your dessert. You can also add chocolate chips or nuts. Dark chocolate adds richness, while nuts give a lovely crunch. Just fold them into the batter gently. If you need a gluten-free option, use gluten-free graham cracker crumbs. These work just like regular crumbs for the crust. For a dairy-free twist, substitute cream cheese with a dairy-free cream cheese. You can also use cashew cream for a smooth texture. These choices keep the flavor tasty for everyone. If you’re hosting a larger gathering, you can double the recipe. This will give you about 24 mini cheesecakes. To make one full cheesecake, use a 9-inch springform pan. Simply pour the batter into the pan after mixing. Bake it for 45-55 minutes instead of 20-25 minutes. This will create a lovely, creamy cheesecake that everyone will love. For more details, check the Full Recipe. To keep your mini lemon blueberry cheesecakes fresh, refrigerate them right away. Place them in an airtight container. This keeps moisture in and prevents them from drying out. They stay fresh for about 3 to 4 days. If you want to enjoy them longer, use plastic wrap before sealing. This adds an extra layer of protection. You can freeze mini cheesecakes for later enjoyment. First, let them cool completely. Then, wrap each cheesecake tightly in plastic wrap. After that, put them in a freezer-safe bag or container. This prevents freezer burn. They can last up to 2 months in the freezer. When you're ready to eat them, take them out and thaw in the fridge overnight. This keeps their texture smooth and creamy. Mini cheesecakes are best eaten within a week. After that, they may still be safe but lose quality. Look for changes in texture or smell to tell if they've gone bad. If they become watery or smell sour, it’s time to toss them. Enjoy these treats while they’re at their best! You can tell mini cheesecakes are done by looking for visual cues. The edges should be set, while the center may jiggle slightly. A toothpick test works well too; insert it into the center. If it comes out clean or with a few moist crumbs, they are ready. Keep an eye on the baking time. They usually bake for 20-25 minutes at 325°F (160°C). Yes, you can make the cheesecake batter in advance. Store it in the fridge for up to 24 hours. Just keep it in a sealed container. When you're ready to bake, give it a quick stir. This helps to mix any ingredients that may have settled. It's a great way to save time on busy days. If you need a substitute for sour cream, there are several options. Greek yogurt works well and gives a similar tang. You could also use cream cheese thinned with a bit of milk. Another option is buttermilk, which adds moisture and flavor. Choose what fits your taste or what you have on hand. This blog post shared how to make tasty mini cheesecakes. You learned about key ingredients, like graham cracker crumbs and cream cheese, and how fresh blueberries add flavor. I provided step-by-step instructions for perfecting your cheesecakes and offered tips to avoid common mistakes. Whether you're making variations for special diets or just for fun, you'll impress your friends. Remember to store them well for freshness. Enjoy your baking adventure and savor every bite of your delicious creation!

Mini Lemon Blueberry Cheesecakes Irresistible Treat

If you’re craving a sweet, zesty treat, you’re in the right place! Mini lemon blueberry cheesecakes are a perfect blend

Older posts
Newer posts
← Previous Page1 … Page9 Page10 Page11 … Page69 Next →

dsad

© 2025 My Saved Recipe • Built with GeneratePress

Our Policies

  • Copyright Policy
  • Cookie Policy
  • GDPR Policy
  • Privacy Policy
  • Disclaimer
  • Terms Of Use

More Information

  • Home
  • About
  • Contact
  • Appetizers
  • Dessert
  • Dinner
  • Drinks
©2025, My Saved Recipe About Back To Top