Skip to content
DisclaimerTerms Of UseGDPR PolicyCookie Policy

My Saved Recipe

  • Home
  • Drinks
  • Appetizers
  • Dinner
  • Dessert
  • About
  • Contact
  • Privacy Policy
DisclaimerTerms Of UseGDPR PolicyCookie Policy

Savannah

- 2 medium cucumbers, diced - 3 ripe tomatoes, diced - 1 small red onion, thinly sliced - 1 bell pepper (any color), diced - 1/4 cup fresh parsley, chopped - 2 tablespoons lemon juice - 1 tablespoon olive oil - 1 teaspoon honey (optional) - Salt and pepper to taste When you make this salad, the freshness of the ingredients really shines. The cucumbers give a nice crunch, while the tomatoes add sweetness and juiciness. The red onion offers a sharp flavor that balances well. Adding bell pepper gives it an extra layer of taste and color. The parsley adds a herbal note that brightens the dish. The dressing is simple yet zesty, made with lemon juice and olive oil, and honey is optional for a hint of sweetness. Don’t forget to season with salt and pepper to enhance all the flavors. - Avocado slices - Feta cheese crumbles - Olive slices Feel free to customize your salad! Adding avocado makes it creamy and rich. Feta cheese adds a salty kick, while olives bring a briny taste. Each add-in will give your salad a unique twist! - Calories per serving: 120 - Carbohydrates: 12g - Protein: 3g - Fats: 7g This salad is low in calories and packed with nutrients. It offers a good balance of carbs and healthy fats. Perfect as a light lunch or a side dish! You can find the full recipe [here](#). First, take a large mixing bowl. Combine the diced cucumbers, tomatoes, sliced red onion, and diced bell pepper in the bowl. This mix gives a great crunch and color. Next, add fresh parsley to the bowl. It adds a nice touch of green and fresh flavor to your salad. In a small bowl, whisk together the lemon juice, olive oil, and optional honey. This dressing will brighten up your salad. Make sure it is well combined, so every bite is tasty. Now, pour the dressing over the salad mixture. Gently toss everything together. You want to coat all the veggies without mashing them. Season with salt and pepper to taste. Toss again to spread the seasoning evenly. Let the salad sit for about 10 minutes. This allows the flavors to blend nicely. For the full recipe, check out the complete instructions. To make the best Easy Cucumber Tomato Onion Salad, start with fresh produce. - Tomatoes: Look for tomatoes that are firm but slightly soft. They should have a bright color and a sweet scent. - Cucumbers: Choose cucumbers that are dark green and firm. Avoid ones with wrinkles or soft spots. - Fresh Herbs: Use fresh parsley or any herb you love. Fresh herbs add bright flavors and color. Enhancing the flavor of your salad is simple and fun. - Spices and Herbs: You can add dill or basil for a twist. These herbs pair well with the salad's fresh taste. - Dressing Consistency: If your dressing is too thick, add a bit of water or extra lemon juice. This will help it coat the salad better. Serving your salad can make a big difference in enjoyment. - Temperature: This salad is best served chilled or at room temperature. It keeps the flavors fresh and vibrant. - Pairing Options: Serve it alongside grilled chicken or fish for a complete meal. It also works well with sandwiches or wraps. For more ideas, check out the Full Recipe. {{image_2}} You can easily change this salad to suit your taste. For a Mediterranean twist, add olives and feta cheese. This combination brings saltiness and creaminess. You can also try a Southwest flair. Adding black beans and corn will give it a hearty feel. Both options will make your salad exciting. Using seasonal veggies makes this dish even better. In summer, add zucchini or bell peppers for extra crunch. In winter, use diced celery or radish for a refreshing bite. Think about your meal setting too. For summer BBQs, serve it cold. In winter, you can enjoy it at room temperature. The dressing can change the entire salad. Try a vinegar-based dressing for a tangy kick. Balsamic or red wine vinegar works well. If you prefer something creamy, use a yogurt-based dressing. This will add a rich flavor while keeping it light. For the full recipe, check out the detailed instructions above. To keep your cucumber tomato onion salad fresh, store it in the fridge. Use an airtight container to prevent air from spoiling it. Glass or plastic containers work well. Avoid using metal containers, as they can react with the salad's ingredients. This salad stays fresh for about 2 to 3 days in the fridge. To prevent sogginess, keep the dressing separate until you're ready to eat. Add the dressing just before serving for the best taste and texture. You should not freeze this salad. The cucumbers and tomatoes lose their crispness when frozen. If you want to save it, consider freezing the dressing separately. When ready to use, thaw it in the fridge and mix it fresh with the salad ingredients. This will help maintain the salad's taste and texture. Yes, you can prep this salad ahead of time. To keep it fresh, store the ingredients separately. Cut the cucumbers, tomatoes, and bell pepper, but don’t mix them yet. Keep the dressing in a small jar. This way, you avoid soggy veggies. When ready to eat, combine everything and add the dressing. If you want a different sweetener, try maple syrup or agave nectar. Both add a nice touch. Maple syrup has a rich flavor, while agave is milder. You can also use stevia for a low-calorie option. Adjust the amount to taste, as some sweeteners are stronger than honey. To make this salad vegan, simply omit the honey. You can replace it with a touch of maple syrup or leave it out entirely. The salad will still taste great. All other ingredients are naturally vegan-friendly, so you're good to go! This salad pairs well with grilled chicken or fish. You could also serve it with pita bread and hummus for a light meal. For a heartier option, try it alongside quinoa or brown rice. The fresh flavors complement many main dishes. Yes, this salad is gluten-free! All the ingredients are safe for those avoiding gluten. You can enjoy it without worry. Just make sure any dressings or add-ins are also gluten-free. This salad is simple and packed with fresh flavors. We covered key ingredients, easy steps, and clever tips. You can personalize it with add-ins for different styles. Remember to use fresh produce for the best taste. Store leftovers properly to enjoy later. In the end, this salad fits any meal and is a healthy choice. Make it your own, and enjoy every bite!

Easy Cucumber Tomato Onion Salad Fresh and Zesty Dish

Looking for a simple and refreshing dish? This Easy Cucumber Tomato Onion Salad is your answer! Bursting with fresh flavors,

- 3 ripe mangoes, peeled and diced - 1 cup heavy cream - 1 cup coconut milk - 3/4 cup sweetened condensed milk - 1 tablespoon lime juice - 1 teaspoon vanilla extract - Pinch of salt Choosing the right mango is key. Look for mangoes that are ripe. They should feel slightly soft when you gently squeeze them. A ripe mango has a sweet scent near the stem. You want to avoid mangoes with dark spots or wrinkles. Fresh mangoes will give your ice cream the best flavor. - How to choose ripe mangoes: Check for softness and smell. - Signs of freshness: Look for bright color and no blemishes. If you don’t have heavy cream, don’t worry! You can use whole milk or a blend of milk and butter. For a dairy-free option, swap heavy cream with coconut cream. Almond milk is also a good choice. Just keep in mind that these changes may alter the texture a bit. - Substitutes for heavy cream: Use whole milk or milk with butter. - Dairy-free options: Coconut cream or almond milk work well. - Blending the mixture To start, take your blender. Add the diced mangoes, heavy cream, coconut milk, sweetened condensed milk, lime juice, vanilla extract, and a pinch of salt. Blend it all together until the mix is smooth and creamy. You want it to be rich and vibrant. - Adjusting sweetness Now, taste your mix. If you want it sweeter, add more condensed milk or some sugar. Just blend again to mix it in. It’s all about your taste. Make it perfect for you! - Using an ice cream maker Next, pour the mango mix into your ice cream maker. Follow the maker's instructions for churning. This usually takes about 20 to 25 minutes. You want it to reach a soft-serve texture. - Tips for achieving the right texture Keep an eye on it! If it seems too soft, let it churn a bit longer. If it looks great, stop the machine. The right texture makes the ice cream dreamy! - Storing in an airtight container After churning, transfer the ice cream to an airtight container. This helps keep it fresh and prevents ice crystals from forming. - Time to firm up Now, freeze it for at least 4 hours. This step is key to making it firm and scoopable. Once it’s ready, it’s time to enjoy your delicious treat! To make creamy mango ice cream, fat content is key. Use heavy cream and coconut milk for richness. These fats help create a smooth texture. Churning is also important. If you churn too slowly, your ice cream may be icy. Aim for a consistent churn for about 20-25 minutes. This ensures it becomes fluffy and light. Serving mango ice cream can be fun! Try it in bowls, cones, or even as a cake layer. You can also make mango sundaes. Top them with diced mango or toasted coconut. Adding a drizzle of lime juice enhances the flavor. Fresh mint leaves also add a bright touch. If your ice cream is too hard, let it sit out for a few minutes before scooping. This softens it and makes serving easier. If you notice a grainy texture, this may mean it didn’t churn enough. Next time, churn a bit longer. This helps to break down ice crystals for a smoother finish. For the full recipe, check the earlier sections. {{image_2}} You can add fun twists to your creamy mango ice cream. Try mixing in some coconut or lime zest. This will boost the tropical vibe. For a unique treat, create a mango swirl by blending mango with raspberry or passion fruit. This adds color and a new taste! You can make a dairy-free version using coconut milk. Replace heavy cream with more coconut milk. This keeps it rich and creamy. You can also use alternative sweeteners like agave or maple syrup. This makes it sweet without using refined sugar. Get creative by adding fruits or nuts. Chopped strawberries, blueberries, or walnuts work well. You can also swirl in some chocolate or caramel sauce. This adds extra flavor and makes your ice cream even more special. To keep your creamy mango ice cream fresh, follow these simple tips. First, use an airtight container. This helps prevent ice crystals from forming. Place a piece of wax paper on top before sealing. This adds an extra layer of protection. Store the container in the coldest part of your freezer. Your ice cream will stay fresh for about two weeks. You can repurpose old ice cream containers for storage. Rinse them well before using. They are great for storing leftovers or snacks. Make sure to label the containers. Write the date and contents on the lid. This helps you find what you need quickly. To tell if your ice cream is still good, check for ice crystals on the surface. If you see a lot, it may taste icy. Smell it to ensure there are no off odors. If it smells strange, it’s best to throw it away. To prevent freezer burn, always keep it tightly sealed and stored properly. You can make creamy mango ice cream without an ice cream maker. Use a simple method: blend all your ingredients. Pour the mixture into a shallow pan. Place it in the freezer. Stir it every 30 minutes for about 2-3 hours. This helps break up ice crystals. When it gets thick and creamy, it’s ready to enjoy! Yes, frozen mangoes work well in this recipe. They are often picked at peak ripeness. However, they can have a different texture. Fresh mangoes tend to be creamier. If you choose frozen, let them thaw a bit before blending. This will help achieve a smooth consistency. You can lower the calories in creamy mango ice cream. Use light coconut milk instead of heavy cream. Swap sweetened condensed milk for a sugar substitute or honey. You can also reduce the amount of sweetener. This keeps the flavor while cutting calories. Many brands offer creamy mango ice cream. You can find it at grocery stores or specialty shops. Look for brands like Häagen-Dazs or Ben & Jerry's. Local ice cream shops often make their own, too. Check their flavors for a fresh option! Homemade ice cream takes about 4-6 hours to freeze fully. For the best texture, freeze it for at least 4 hours. This allows it to become firm but still creamy. If you want to scoop it easily, let it sit out for a few minutes first. You learned how to make creamy mango ice cream using simple steps and fresh ingredients. Choosing ripe mangoes enhances flavor, while alternatives keep it fun and flexible. Tips on texture, storage, and serving make it easy to enjoy. I encourage you to try different variations for a unique twist. Homemade ice cream is not just a treat; it's a way to impress friends and family. Celebrate your success in the kitchen as you savor each delicious scoop.

Creamy Mango Ice Cream Delightful and Easy Recipe

Craving a refreshing treat that bursts with flavor? You’re in for a delicious surprise! In this article, I’ll share my

- 1 pound ground beef (or ground turkey) - 1/2 cup panko breadcrumbs - 1/4 cup green onions, finely chopped - 2 cloves garlic, minced - 1 tablespoon ginger, grated - 1/4 cup soy sauce - 1 tablespoon sesame oil - 1 tablespoon brown sugar - 1 large egg, beaten - Salt and pepper to taste - 1/2 cup mayonnaise - 1 tablespoon sriracha (adjust for spice) - 1 teaspoon lime juice - 1 teaspoon sesame seeds (for garnish) - Additional green onions When making Korean BBQ meatballs, choosing the right ingredients is key. I like to use fresh green onions and garlic for flavor. The ground beef or turkey gives a nice texture. Panko breadcrumbs keep the meatballs light and fluffy. You can adjust the spice in the spicy mayo by adding more sriracha. This recipe is fun and easy! You can find the full recipe in this article. - Preheat your oven to 400°F (200°C). - In a large mixing bowl, combine these ingredients: - 1 pound ground beef (or ground turkey) - 1/2 cup panko breadcrumbs - 1/4 cup green onions, finely chopped - 2 cloves garlic, minced - 1 tablespoon ginger, grated - 1/4 cup soy sauce - 1 tablespoon sesame oil - 1 tablespoon brown sugar - 1 large egg, beaten - Salt and pepper to taste Mix all the meatball ingredients until they blend well. This step is vital for flavor. - Shape the mixture into small meatballs, about 1 inch in diameter. - Place them on a parchment-lined baking sheet. - Bake for 15-20 minutes until cooked through. They should be browned on the outside. Keep an eye on them, as oven times can vary. - In a small bowl, mix together: - 1/2 cup mayonnaise - 1 tablespoon sriracha (adjust for spice) - 1 teaspoon lime juice Stir well until smooth. Taste it and adjust the spice level by adding more sriracha if you like. These steps lead you to delicious Korean BBQ meatballs with spicy mayo. For the complete recipe, check the Full Recipe section. To make the best Korean BBQ meatballs, use a mix of ground beef and turkey. This mix gives great flavor and texture. When you mix the meatball mixture, do not overmix it. Overmixing can make the meatballs tough. Just mix until everything is combined, and you will have tender meatballs. Serve your meatballs drizzled with spicy mayo for a burst of flavor. To make them extra special, garnish with sesame seeds and chopped green onions. This adds color and a nice crunch. You can also serve them on a platter for sharing or as an easy snack. If you want more heat, add more sriracha to the spicy mayo. You can also try different hot sauces based on your taste. Each sauce can change the flavor, so feel free to experiment. Just remember to taste as you go to find your perfect heat level. {{image_2}} You can make simple swaps in the meatball recipe. If you prefer a leaner option, use ground chicken or pork instead of beef. Each brings its own flavor. If you need a gluten-free meal, use gluten-free breadcrumbs instead of panko. This keeps the meatballs tasty without gluten. While spicy mayo is a star, you can switch things up. Try a tangy soy sauce for a different taste. Teriyaki sauce also pairs well with the meatballs. Each sauce adds its own unique flavor, making your meal more fun. For added nutrition, mix in some veggies. Shredded carrots or finely chopped bell peppers work great. They not only add color but also boost the flavor. Plus, you sneak in healthy ingredients, making these meatballs a bit more wholesome. For the full recipe, check out the [Full Recipe]. To store cooked meatballs, let them cool first. Place them in an airtight container. Seal it tightly and put it in the fridge. Properly stored, they last for about three days. When you're ready to eat, you can enjoy them warm again. You can freeze both uncooked and cooked meatballs. For uncooked meatballs, lay them on a baking sheet. Freeze them until firm, then transfer to a freezer bag. This way, they won't stick together. For cooked meatballs, place them in a container or bag. Make sure to remove as much air as possible. They can last in the freezer for up to three months. To reheat meatballs, use an oven or a microwave. For the oven, preheat to 350°F (175°C) and bake for about 10-15 minutes. Check if they are warm inside. In the microwave, place meatballs on a plate. Use a cover and heat in short bursts of 30 seconds. Stir in between to ensure even heating. Avoid overcooking to keep them juicy. Enjoy your meal with a drizzle of spicy mayo. For the full recipe, refer to the earlier sections. Yes, you can prepare these meatballs ahead of time. Make the meatball mixture and form the balls. Place them in a container and store them in the fridge for up to 24 hours. You can also freeze them. Just freeze the uncooked meatballs on a baking sheet, then transfer to a bag. They will last for three months. When ready to cook, bake them straight from the freezer. Increase the cooking time by a few minutes. Many sides pair well with Korean BBQ meatballs. Here are some tasty options: - Steamed rice - Kimchi - Pickled vegetables - Cucumber salad - Roasted broccoli These sides add flavor and texture. They balance the meatballs and spicy mayo. Yes, you can use other ground meats! Ground turkey is a great swap for beef. You can also try ground chicken or pork. Each meat brings a unique flavor. Just remember to adjust the cooking time if needed. This article covered making delicious Korean BBQ meatballs from scratch. We explored the key ingredients, preparation steps, and storage tips. I shared tips for the perfect meatballs, along with ideas for spice adjustments and variations. Now, you can enjoy tasty meatballs with your favorite sauces. Get creative with this recipe, and make it yours! Happy cooking!

Korean BBQ Meatballs with Spicy Mayo Delight

Are you ready for a flavor explosion? My Korean BBQ Meatballs with Spicy Mayo are a must-try! These savory meatballs

When making a low-carb fish taco bowl, you need simple and fresh ingredients. Here’s what you’ll need: - 1 lb white fish fillets (tilapia or cod) - Spices: chili powder, cumin, garlic powder - Vegetables: riced cauliflower, shredded cabbage, avocado, cherry tomatoes - Toppings: Greek yogurt, fresh cilantro, lime These ingredients come together to create a dish that is both tasty and healthy. The white fish provides a light protein source. The spices add a warm kick. Riced cauliflower acts as a great low-carb base. The veggies bring freshness and color. You might wonder about the health benefits of this dish. Here’s a quick look at the nutritional information: - Calorie count: About 350 calories per serving. - Carbohydrate content: Roughly 15 grams per serving. - Protein and fat breakdown: Each serving has about 30 grams of protein and 15 grams of fat. This bowl is not only filling but also aligns well with a low-carb diet. It is a balanced meal that keeps your body fueled. For more details, check the Full Recipe for precise quantities and cooking steps. First, preheat your oven to 400°F (200°C). In a small bowl, mix olive oil, chili powder, cumin, garlic powder, salt, and pepper. This seasoning blend is key to great flavor. Take your fish fillets and rub this mixture all over them. Make sure every part is coated well. Place the seasoned fish on a parchment-lined baking sheet. Bake the fish for about 15-20 minutes. You will know it is done when it turns opaque and flakes easily with a fork. Keep an eye on it to avoid overcooking. While the fish bakes, grab a skillet and heat it over medium heat. Add the riced cauliflower and sauté it for about 5-7 minutes. Stir it often until it becomes tender. Season it lightly with salt and pepper to bring out the flavor. Now it’s time to build your taco bowl. Start with a base of sautéed riced cauliflower in each serving bowl. Next, layer on the shredded cabbage, diced avocado, halved cherry tomatoes, and the flaked fish. This layering makes the bowl look colorful and inviting. Finish your bowl with a drizzle of fresh lime juice over the top. This adds a bright flavor. Add a dollop of Greek yogurt for creaminess. Finally, sprinkle chopped cilantro on top for a fresh touch. Serve with extra lime wedges on the side for those who want more zing. Enjoy your fresh and flavorful Low-Carb Fish Taco Bowl! For the full recipe, check out the detailed steps above. To avoid overcooking fish, keep an eye on the time. Fish cooks quickly, usually in 15-20 minutes. Check it at the 15-minute mark. If it flakes easily with a fork, it’s ready. If not, give it a few more minutes. This helps keep your fish moist. Even seasoning is key to great flavor. When you mix your spices, make sure they coat the fish well. Rub the spice mix all over the fillets. This ensures each bite is flavorful. For extra taste, add toppings like sliced jalapeños or crumbled feta. These add heat and creaminess. You can also try fresh mango salsa for a sweet twist. If you want a bolder flavor, adjust the spices. Add more chili powder for heat or extra cumin for earthiness. Small changes can make a big difference. Pair your low-carb fish taco bowl with a fresh salad or a light soup. These sides balance the meal and add more nutrients. You might enjoy a light cucumber salad for a refreshing touch. To make meal prep easy, portion out your ingredients in advance. Store the fish and veggies separately until you're ready to eat. This keeps everything fresh. Plus, you can mix and match flavors throughout the week. For the full recipe, check out the instructions above. {{image_2}} You can use different fish for your taco bowl. Salmon adds a rich flavor. Mahi-mahi has a firm texture and great taste. Shrimp is also a popular choice. Each fish cooks well with the spices in the recipe. Feel free to mix and match based on what you like. For a plant-based option, swap fish with tofu or tempeh. Tofu soaks up flavors well, making it a great choice. Tempeh has a nutty taste and adds more protein. Both options work nicely in the bowl and keep it low-carb. You can spice up your bowl with hot sauce for some heat. Adding tropical fruits like mango or pineapple brings a sweet touch. These flavors add fun to the dish. You can also try different herbs for a fresh twist. Explore your preferences and have fun with it! To keep your Low-Carb Fish Taco Bowl fresh, store leftovers in an airtight container. Place the fish, riced cauliflower, and toppings in separate containers. This helps preserve texture and flavor. Store them in the refrigerator for up to three days. When ready to eat, make sure to check for any signs of spoilage. If you want to freeze components, first cool them completely. Wrap the fish tightly in plastic wrap, then place it in a freezer bag. You can also freeze the riced cauliflower. Avoid freezing the fresh toppings like avocado and tomatoes, as they do not freeze well. Use frozen components within three months for the best taste. To reheat your fish taco bowl, I recommend using the oven. Preheat it to 350°F (175°C). Place the fish and cauliflower on a baking sheet. Heat for about 10-15 minutes until warmed through. This method keeps the fish flaky and the cauliflower tender. For the toppings, add them fresh after reheating to maintain their crunch and flavor. For the full recipe, refer to the details above. You can pair your fish taco bowl with simple sides. Here are some great options: - Lettuce wraps: Use large lettuce leaves as a fresh wrap. - Zucchini fries: Bake thin zucchini slices for a tasty crunch. - Guacamole: A rich dip adds creaminess and flavor. - Fresh salsa: A mix of tomatoes, onions, and cilantro brings zest. - Pickled vegetables: They add a tangy twist that brightens the dish. To make this dish dairy-free, swap Greek yogurt for these options: - Avocado: Mash it for a creamy texture. - Coconut yogurt: It gives a nice flavor and is dairy-free. - Cashew cream: Blend soaked cashews with water for a rich sauce. - Tahini: This sesame paste adds depth and creaminess. Yes, you can easily meal prep this bowl. Here are some best practices: - Cook the fish ahead: Bake and store in the fridge for up to three days. - Prep veggies: Chop and store cabbage, tomatoes, and avocado in airtight containers. - Make cauliflower rice: Cook and cool it before storing. - Assemble right before eating: This keeps the ingredients fresh and crisp. You can tell the fish is done by checking the following: - Opaque color: The fish should look white or pale. - Flakes easily: Use a fork; it should break apart easily. - Internal temperature: Aim for 145°F (63°C) for safe eating. - Time: Typically, fish takes 15-20 minutes to bake at 400°F (200°C). Yes, this recipe can be adjusted for kids. Here are some tips: - Mild spices: Reduce chili powder for a milder flavor. - Fun toppings: Let kids choose their favorite toppings. - Build-your-own bowls: Kids love to customize their meals. - Fish shape: Use cookie cutters to make fish shapes for fun! This article covered a tasty low-carb fish taco bowl. We explored key ingredients, like white fish and fresh vegetables. You learned step-by-step how to prepare and bake the fish, cook riced cauliflower, and assemble a flavorful bowl. I shared tips for enhancing flavor and storing leftovers, along with different options for variations. In summary, try this dish for a healthy meal that's fun and easy to make. Enjoy the fresh tastes and feel confident to play with new flavors. Your kitchen adventures can be both yummy and simple!

Low-Carb Fish Taco Bowl Fresh and Flavorful Delight

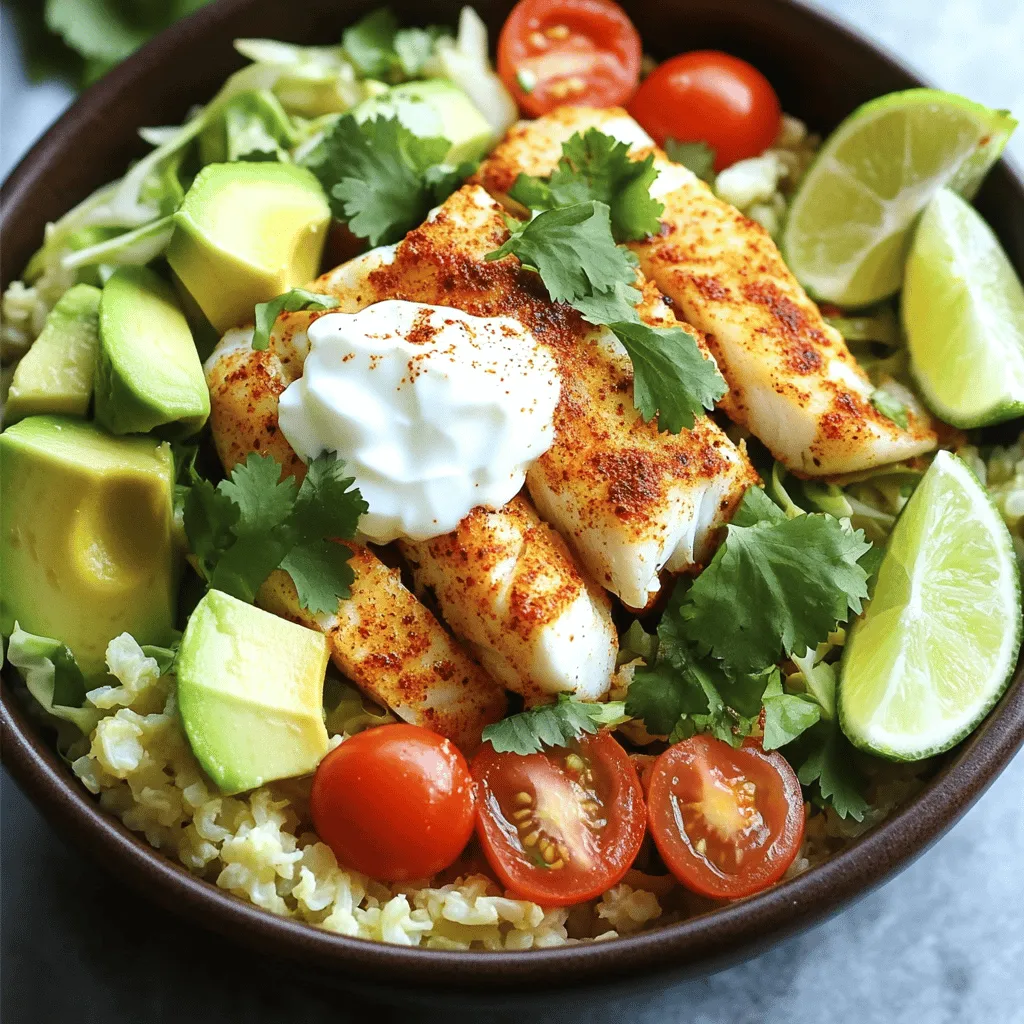
If you’re looking for a fresh and tasty meal that fits a low-carb lifestyle, you’ve come to the right place!

To make a tasty strawberry milkshake, gather these simple ingredients: - 2 cups fresh strawberries, hulled and sliced - 2 cups vanilla ice cream - 1 cup whole milk (or almond milk for a dairy-free option) - 2 tablespoons honey or agave syrup - 1 teaspoon vanilla extract - Whipped cream for topping - Fresh strawberries for garnish If you have dietary needs, you can still enjoy this milkshake. Here are some swaps: - Use coconut milk or oat milk instead of whole milk for dairy-free options. - Choose vegan ice cream to make it fully dairy-free. - Substitute honey with maple syrup for a vegan sweetener. - If you need a low-sugar option, use a sugar substitute or skip the sweetener. Choosing the right strawberries makes a huge difference. Here are some tips: - Look for bright red strawberries with no white patches. - Check for firmness; soft berries may be overripe. - Smell the strawberries; they should have a sweet, fragrant scent. - If possible, buy organic strawberries to avoid pesticides. - Buy strawberries in season for the best flavor, usually in late spring to early summer. With these ingredients and tips, you'll create a delicious and creamy strawberry milkshake! For the full recipe, check out the detailed instructions in the article. To make a great strawberry milkshake, you start with fresh ingredients. Gather your items first. You will need: - 2 cups fresh strawberries, hulled and sliced - 2 cups vanilla ice cream - 1 cup whole milk (or almond milk for a dairy-free option) - 2 tablespoons honey or agave syrup (adjust based on sweetness preference) - 1 teaspoon vanilla extract - Whipped cream for topping - Fresh strawberries for garnish 1. In a blender, combine the fresh strawberries, vanilla ice cream, whole milk, honey (or agave), and vanilla extract. 2. Blend on high speed until the mix is smooth and creamy. 3. Pause to scrape down the sides as needed. This helps blend everything well. 4. If you want a thicker milkshake, add more ice cream. For a thinner shake, add more milk. 5. Taste your milkshake. Adjust sweetness if needed by adding more honey or agave syrup. 6. Pour the milkshake into tall glasses. 7. Top with a generous swirl of whipped cream. Garnish each glass with a fresh strawberry on the rim. Blending is key to a perfect milkshake. Start on a low speed to mix the ingredients gently. Once the mix is combined, switch to high speed. This helps create the creamy texture you want. If you notice lumps, slow down and scrape the sides. Blend again until smooth. Sweetness is a personal choice. If you like it sweeter, add more honey or agave syrup. Make sure to blend after each addition to gauge the flavor. For consistency, remember, more ice cream makes it thick. More milk makes it thin. Adjust until you find your perfect mix! To make a great strawberry milkshake, start with fresh strawberries. Look for berries that are bright red and firm. Rinse them gently to keep their flavor and color. Slice them thinly to help them blend well. Use vanilla ice cream for a rich taste. Whole milk gives a creamy texture, but almond milk also works well. When blending, use high speed until the mix is smooth. Stop to scrape the sides if needed. For a thicker shake, add more ice cream. If it's too thick, pour in a bit more milk. Always taste your shake. Adjust sweetness by adding more honey or syrup if necessary. To make your milkshake even better, add a splash of vanilla extract. It boosts the flavor nicely. You can also mix in a few mint leaves for a fresh twist. If you like chocolate, add some cocoa powder. A spoonful of peanut butter can add great taste too. Feel free to experiment with different fruits. Bananas or blueberries can create a fun mix. Just remember to keep the balance of flavors. You want the strawberry to shine through. Serving your milkshake with flair is key! Use tall glasses to show off the colorful layers. Top each shake with a big swirl of whipped cream. Add a fresh strawberry on the rim for a pretty touch. For a fun detail, sprinkle crushed strawberries on the cream. Using colorful straws adds to the fun. You can even place a few whole berries in the glass. It makes the drink look inviting and fresh. Remember, we eat with our eyes first! Enjoy your Strawberry Dream Milkshake and share the joy of this delightful treat with others. For the full recipe, refer to the earlier section. {{image_2}} You can make a vegan strawberry milkshake easily. Just swap the ice cream for vegan ice cream. Use almond or coconut milk instead of whole milk. This keeps the shake creamy and delicious without any dairy. You can also add a banana for extra creaminess. Blend it all together just like in the full recipe. To lower the calories, pick lighter ingredients. Choose low-fat yogurt instead of ice cream. Use skim milk or unsweetened almond milk in place of whole milk. You can even add a few ice cubes to thicken the shake. This way, you keep the taste while cutting down on calories. Mixing in other fruits can make your milkshake special. Try adding a banana for a creamy texture. Blueberries or raspberries can add a nice twist. You can also use a spoonful of peanut butter for a different flavor. This will make your shake richer and more filling. Experiment with spices like cinnamon or nutmeg for a unique touch. After making your strawberry milkshake, you might have some left. To keep it fresh, pour it into a sealed container. Make sure to leave some space at the top, as the milkshake may expand. Store it in the fridge for up to 24 hours. If you wait too long, it may separate. Just give it a good shake or stir before drinking. Homemade milkshakes taste best fresh, but they can last a bit. When stored in the fridge, enjoy your milkshake within one day. After that, the taste and texture can change. If you notice any odd smells or flavors, it’s best to toss it out. Remember, fresh is always best for a yummy treat! If you want to save extra milkshake for later, freezing is a great choice. Pour your leftover milkshake into ice cube trays or small containers. This makes it easy to grab just what you need. When you’re ready to enjoy, blend the frozen milkshake cubes with a touch of milk. This will bring back its creamy texture. You can also try adding other fruits or flavors for a fun twist! You can use many tasty substitutes. Try yogurt for a creamy texture. Frozen bananas add sweetness and creaminess too. If you want a dairy-free option, coconut ice cream works well. Sorbet is also a good choice for a lighter drink. Each option gives your milkshake a unique flavor. To make a dairy-free strawberry milkshake, swap out the ice cream and milk. Use almond milk or oat milk instead. For the ice cream, you can use coconut milk ice cream or banana ice cream. Just blend the strawberries with your chosen dairy-free ingredients. It tastes great! Strawberries are full of vitamins and minerals. They are high in vitamin C, which helps your immune system. Strawberries also have fiber, which aids digestion. They contain antioxidants that help fight free radicals. Adding strawberries to your milkshake makes it both tasty and healthy! This article covered everything you need for a perfect strawberry milkshake. We explored the ingredients, including alternatives for dietary needs. I shared step-by-step instructions to help you blend it just right. Tips and tricks enhanced the flavor and look. We looked at delicious variations, storage methods, and answered common questions. With these insights, you're ready to enjoy your milkshake however you like it. Embrace your creativity and have fun making this classic treat!

Strawberry Milkshake Delightful and Creamy Recipe

Craving a delicious treat that’s both refreshing and creamy? You’re in the right place! Today, I’ll share my favorite Strawberry

- 2 ripe mangoes, peeled and julienned - 1 cup cucumber, julienned - 1 bell pepper (red or yellow), thinly sliced - 1 cup shredded carrots - 1 cup red cabbage, finely shredded - 1/4 cup fresh cilantro, chopped - 1/4 cup roasted peanuts, roughly chopped The heart of Thai mango salad lies in its fresh ingredients. Ripe mangoes bring sweetness and a tropical vibe. They should be soft but not mushy. Cucumber adds a refreshing crunch. Bell peppers give color and a mild flavor. Shredded carrots and red cabbage add texture and nutrients. Finally, cilantro and peanuts enhance taste and crunch. - 2 tablespoons lime juice - 1 tablespoon fish sauce or soy sauce - 1 tablespoon sesame oil - 1 tablespoon honey or agave syrup - 1 small red chili, finely sliced (optional) - Salt to taste The dressing is key to tying all flavors together. Lime juice adds tanginess. Fish sauce or soy sauce provides umami. Sesame oil brings a nutty flavor, while honey or agave syrup adds sweetness. If you like heat, consider adding red chili. - Approximately 180 calories per serving - 5g protein, 10g fat, 20g carbohydrates This salad is low in calories but high in nutrients. It offers a balance of protein, healthy fats, and carbs. Eating it can help you feel full without adding too many calories. Enjoy the fresh and colorful mix in Thai mango salad. For the full recipe, check the [Full Recipe] link. To start, you need to julienne your mangoes and vegetables. For the mangoes, peel them first. Then, cut them into thin strips. This gives the salad a nice look and texture. Next, julienne the cucumber and bell pepper. You can slice them into thin, even strips too. Also, shred the carrots and finely shred the red cabbage. Once you have all your veggies ready, grab a large mixing bowl. Combine the julienned mangoes, cucumber, bell pepper, shredded carrots, and red cabbage in the bowl. Toss them gently to mix everything together. Next, it’s time to make the dressing. In a small bowl, whisk together the lime juice, fish sauce (or soy sauce), sesame oil, and honey (or agave syrup). Mix it well until you have a smooth dressing. If you like some heat, add finely sliced red chili. This step lets you control the spice level. You can taste and adjust the ingredients to your liking. Now for the fun part! Pour the dressing over the salad mixture. Toss everything together until all the ingredients are well coated. Don't forget to season with salt to taste. Let the salad rest for about 10 minutes. This time helps the flavors meld together. Just before serving, sprinkle the chopped cilantro and roasted peanuts on top. This adds a crunchy texture and fresh flavor. Enjoy your Thai Mango Salad! For the full recipe, check out the [Full Recipe]. When picking mangoes, look for a few things. The skin should be mostly yellow or red. Give it a gentle squeeze; it should feel slightly soft, not mushy. If it’s too hard, it’s not ripe. Check for dark spots or wrinkled skin; these are signs of overripeness. For underripeness, the mango will feel very firm and not have much scent. Always trust your nose; a ripe mango has a sweet, fruity aroma. You can change up the dressing for more flavor. Try adding lime zest for a zingy kick. If you want extra crunch, toss in some toasted nuts or seeds. Chopped cashews or sunflower seeds work well. You can also mix in fresh herbs like mint for a different taste. These little tweaks can take your salad to new heights. Thai Mango Salad pairs well with grilled chicken or shrimp. It also makes a great side for rice dishes. For a pretty presentation, serve the salad in a large bowl. Garnish it with extra cilantro and peanuts on top for color. You can even use sliced mango as a border on the plate. These tips will help your salad stand out. For the full recipe, check out the detailed instructions above. {{image_2}} You can easily adapt Thai Mango Salad to fit many diets. For a vegan option, replace fish sauce with soy sauce. This keeps the flavor while making it plant-based. You can also use agave syrup instead of honey for sweetness. If you need a gluten-free salad, choose a gluten-free soy sauce. This simple swap ensures everyone can enjoy this dish without worry. Feel free to switch up the ingredients based on what you have at home. If you're out of mangoes, try papaya or even ripe peaches. They add a nice sweetness. You can also change the veggies. Use zucchini or radishes for a fresh twist. In winter, consider using roasted sweet potatoes or butternut squash. Seasonal swaps make this salad fun and unique. Adjusting the spice in your salad is easy. If you like it hot, add more red chili or even chili flakes. You can also try a dash of sriracha in the dressing for extra kick. To make it milder, skip the chili altogether or use just a pinch. This way, everyone can enjoy the salad at their own spice level. Experimenting with peppers like jalapeños or serranos can also bring different heat levels to your dish. To keep your Thai Mango Salad fresh, place it in an airtight container. This helps lock in moisture and flavor. Store it in the fridge for up to three days. If the salad starts to wilt, it’s time to toss it. I don't recommend freezing Thai Mango Salad. Freezing changes the texture of mango and cucumber. If you have dressing left, you can freeze it for later. Just pour it into an ice cube tray and freeze. Once frozen, pop them out and store in a bag. You can get creative with leftover dressing! Try it as a dip for veggies. You can also drizzle it over grilled chicken or fish. The salad ingredients are versatile. Use any leftover mango in smoothies. Cabbage can add crunch to wraps or tacos. Enjoy experimenting with your leftovers! You can use soy sauce as a great alternative. It gives a nice umami flavor. If you want a vegan option, try using coconut aminos. This sauce is sweeter and less salty than fish sauce. You can also use a mix of soy sauce and lime juice for extra tanginess. To cut down on sweetness, reduce the honey or agave syrup. You can also add more lime juice. This will balance the flavors and add more acidity. Adding extra vegetables, like cucumber or red cabbage, can help too. They will dilute the sweetness while adding crunch. Yes, you can make it in advance! Just keep the salad and dressing separate. Mix them together just before serving to keep everything fresh. This way, the veggies stay crisp and the flavors shine. If you want to save time, chop the ingredients a day before. Just store them in airtight containers. Thai Mango Salad combines fresh ingredients, a zesty dressing, and lots of flavor. You learned how to prepare ripe mangoes and veggies, mix a tasty dressing, and serve your salad. With tips for dietary needs and storage, it fits many plans. Remember, you can easily adjust spice levels and use local ingredients for a personal touch. This salad is not just nutritious; it’s fun to make and enjoy. I hope you feel ready to create your own Thai Mango Salad!

Thai Mango Salad Fresh and Flavorful Delight

Ready to enjoy a bright burst of flavors? Thai Mango Salad is your go-to dish! With its fresh mangoes, colorful

To make the Tomato Gnocchi Bake, you will need: - 1 lb (450g) potato gnocchi - 2 cups marinara sauce - 1 cup cherry tomatoes, halved - 1 cup mozzarella cheese, shredded - ½ cup Parmesan cheese, grated - 1 teaspoon dried basil - 1 teaspoon dried oregano - ½ teaspoon red pepper flakes (optional for a kick) - Salt and pepper to taste - Fresh basil leaves for garnish - 2 tablespoons olive oil These ingredients create a tasty dish that’s easy to prepare. The gnocchi gives it a soft texture. The marinara sauce adds rich flavor. The cheeses melt into a gooey topping. You will need a few simple tools: - A large pot for boiling the gnocchi - A large mixing bowl for combining ingredients - A greased baking dish for baking - A spoon for mixing - Aluminum foil to cover the dish while baking Having the right equipment makes cooking easier and more fun. You can enhance your Tomato Gnocchi Bake with these optional ingredients: - Fresh garlic, minced - Spinach or kale for greens - Sliced olives for a briny kick - Other herbs like thyme or parsley for extra freshness These options let you play with flavors and make the dish your own. Adding fresh garlic can bring out the sauce's taste. Spinach adds color and nutrition. Feel free to get creative! For the full recipe, you can check out the instructions shared above. Start by boiling water in a large pot. Add a good amount of salt to the water. Once it boils, add 1 pound of potato gnocchi. Cook for about 2 to 3 minutes. The gnocchi will float to the top when ready. This means they are done! Carefully drain the gnocchi and set them aside. You want them to be firm yet soft. In a large mixing bowl, combine the cooked gnocchi with 2 cups of marinara sauce. Next, add 1 cup of halved cherry tomatoes. Sprinkle in 1 teaspoon of dried basil and 1 teaspoon of dried oregano. If you enjoy spice, toss in ½ teaspoon of red pepper flakes. Stir gently to coat the gnocchi evenly. You want every piece to be covered with sauce and flavor. Grease your baking dish well. Spread half of the gnocchi mixture in the dish. Now, sprinkle half of the 1 cup of mozzarella cheese and ½ cup of Parmesan cheese over the top. Layer the rest of the gnocchi mixture on top. Finish with the remaining cheese. Drizzle 2 tablespoons of olive oil over everything. Season with salt and pepper to taste. Cover with foil and place in the oven at 375°F (190°C). Bake for 20 minutes, then remove the foil. Bake for another 10 to 15 minutes. Look for the cheese to be bubbly and golden brown. Once done, let it cool for a few minutes. Finally, garnish with fresh basil leaves. For the full recipe, refer to the earlier section. To make your Tomato Gnocchi Bake shine, start with fresh ingredients. Use ripe cherry tomatoes for sweetness. They burst with flavor as they cook. Choose a good quality marinara sauce. This sauce lays the base for your bake. Don't skip the cheese! Mozzarella gives it that melty texture. Parmesan adds a sharp bite. Avoid overcooking the gnocchi. They only need a few minutes in boiling water. If you let them cook too long, they become mushy. Make sure to mix the ingredients gently. Rough mixing can break the gnocchi apart. Lastly, don’t skip the foil while baking. Covering it helps the cheese melt evenly. Serve your Tomato Gnocchi Bake with a side salad for a fresh touch. A simple green salad with olive oil and lemon works well. You can also add garlic bread for a hearty meal. For a fun twist, pair it with a glass of red wine. This dish is perfect for sharing with friends. To explore more, check out the Full Recipe for extra tips! {{image_2}} You can switch up the sauce in your Tomato Gnocchi Bake. Try using pesto for a fresh twist. Alfredo sauce also works well for a creamy texture. You can blend marinara with a bit of cream for smoothness. As for cheeses, mix mozzarella with gouda or fontina for a richer flavor. You can also try mixing in some goat cheese for a tangy bite. To make this dish vegetarian, simply ensure your cheese is rennet-free. For a vegan option, use vegan gnocchi and swap cheese for a plant-based alternative. Nutritional yeast can add a cheesy flavor without dairy. You can even add extra veggies like spinach, zucchini, or bell peppers to boost nutrition and taste. Seasonal ingredients can elevate your Tomato Gnocchi Bake. In summer, use fresh basil and ripe heirloom tomatoes. In fall, swap cherry tomatoes for roasted butternut squash or pumpkin. Fresh herbs like thyme or rosemary work in winter for a hearty flavor. Use whatever is fresh and in season to make your dish shine. For the complete recipe, check out the Full Recipe section. To store leftover Tomato Gnocchi Bake, let it cool first. Then, place it in an airtight container. Keep it in the fridge. It stays good for about three days. Make sure to seal it well. This way, it won’t dry out. You can freeze the Tomato Gnocchi Bake too. First, let it cool completely. Then, cut it into serving sizes. Wrap each piece in plastic wrap. After that, put them in a freezer-safe bag. It will stay fresh for up to three months. Remember to label the bag with the date. This helps you keep track of what you have. Reheating is easy and quick. You can use the oven or microwave. For the oven, preheat it to 350°F (175°C). Place the gnocchi bake in a baking dish. Cover it with foil to keep it moist. Heat for about 20 minutes or until hot. If using a microwave, place a serving in a bowl. Heat for 2-3 minutes. Stir halfway to warm it evenly. Enjoy your leftovers just like the first time! For the full recipe, check out the section above. Yes, you can use frozen gnocchi. Just cook them straight from the freezer. Boil them for about 2-3 minutes until they float. This ensures they cook evenly and stay soft. Using frozen gnocchi saves time and makes your meal easy. Make sure to check the package for any specific cooking instructions. To make a gluten-free Tomato Gnocchi Bake, use gluten-free gnocchi. Many brands offer this type of gnocchi made from rice or corn flour. You can also make your own gnocchi using gluten-free flour. Just mix mashed potatoes with the special flour until you get a dough. This way, you enjoy the same great taste without gluten. Tomato Gnocchi Bake pairs well with salad and garlic bread. A fresh green salad adds crunch and balance to the dish. You can use mixed greens, tomatoes, and a light vinaigrette. Garlic bread is perfect for soaking up the sauce. If you want more sides, try steamed veggies or a simple soup. For the full recipe, check the detailed instructions above. This blog post covered how to make a tasty Tomato Gnocchi Bake. You learned the key ingredients, tools, and step-by-step instructions needed to create this dish. We discussed helpful tips and common mistakes, plus delicious variations to try. Lastly, we went over how to store leftovers and answered some common questions. Now, you’re ready to impress with this easy recipe. Enjoy every bite of your creation!

Tomato Gnocchi Bake Flavorful and Easy Dinner Recipe

Looking for a cozy dinner that’s both tasty and easy to whip up? This Tomato Gnocchi Bake hits the spot!

- 2 ripe peaches, sliced - 1 ball of burrata cheese, torn into pieces - 4 cups arugula or mixed greens To make the best Peach Burrata Salad, start with the freshest ingredients. Ripe peaches are key. They should be sweet and juicy. Look for peaches that give a little when you press them. This means they are ready to eat. Burrata cheese adds a rich, creamy touch. It makes the salad feel luxurious. Arugula or mixed greens serve as a fresh base. The peppery taste of arugula pairs well with the sweet peaches. - 1/2 cup olive oil - 2 tablespoons honey - 2 tablespoons apple cider vinegar - 1 tablespoon Dijon mustard These pantry staples create a tasty Champagne vinaigrette. Olive oil adds richness and depth. Honey brings sweetness to balance the tangy vinegar. Apple cider vinegar adds a bright, zesty flavor. Dijon mustard gives the dressing a little kick. Together, they form a smooth dressing that ties the salad together. - 1/4 cup toasted pistachios, roughly chopped - 1/4 cup fresh basil leaves, torn - Salt and pepper to taste To finish the salad, add toppings and garnishes. Toasted pistachios give a nice crunch. They also add a nutty flavor that complements the peaches. Fresh basil leaves bring a burst of freshness. Their aroma elevates the entire dish. Don’t forget to sprinkle salt and pepper for extra flavor. This simple step enhances all the tastes. For the full recipe, check out the details provided earlier. To make the Champagne vinaigrette, first grab a small bowl. Here, combine 2 tablespoons of honey, 2 tablespoons of apple cider vinegar, and 1 tablespoon of Dijon mustard. Whisk these ingredients together until they mix well. The honey adds a sweet touch, while the vinegar gives it a nice zing. Once combined, slowly drizzle in 1/2 cup of olive oil while whisking continuously. This helps to emulsify the dressing, making it creamy and rich. Set the vinaigrette aside for later. Now, let’s build our salad! Start with a large salad bowl. Layer 4 cups of arugula or mixed greens as the base. This will provide a fresh and peppery flavor. Next, gently arrange 2 ripe peaches, sliced, and 1 ball of burrata cheese, torn into pieces over the greens. Make sure to distribute the peaches and burrata evenly to ensure each bite is delightful. Finally, sprinkle 1/4 cup of toasted pistachios, roughly chopped, and 1/4 cup of fresh basil leaves, torn over the top for added crunch and aroma. It’s time to dress the salad! Drizzle the prepared vinaigrette over the salad, making sure to cover all the ingredients. This adds a burst of flavor to each bite. Next, season with a pinch of salt and pepper to taste. Toss the salad gently to combine everything, but be careful not to break up the burrata too much. You want those creamy pockets to stay intact! Serve immediately for a fresh and vibrant dish. For the complete recipe, check out the Full Recipe. - Look for ripe, fragrant peaches. They should feel soft but not mushy. - Buy peaches in summer for the best flavor. Local farmers’ markets often have the finest picks. Peaches are at their peak during the summer months. A ripe peach will smell sweet and have a slight give when pressed. Avoid peaches that are hard or have dark spots. Always check for a nice golden hue, which shows they are ripe and ready to enjoy. - Store burrata in the fridge and use it within a few days. - To showcase burrata, gently tear it into pieces with your hands. Burrata is a soft cheese with a creamy center. It should be used fresh for the best taste. Do not slice it with a knife; tearing it keeps its texture intact. This makes the cheese look beautiful on your salad and helps it melt into the other flavors. - Pair the salad with grilled chicken or fish for a full meal. - Enjoy a crisp white wine or sparkling water with your salad. This salad shines alongside light dishes like grilled meats or seafood. The fresh, sweet peaches balance well with savory flavors. When it comes to drinks, a chilled glass of Sauvignon Blanc or a refreshing sparkling water enhances the meal. For more detailed instructions and insights, refer to the Full Recipe. {{image_2}} You can change the cheese in this salad. Feta or goat cheese works well. Feta adds a salty kick. Goat cheese brings a creamy texture. Both options are tasty and fun. For nuts, try walnuts or sunflower seeds instead of pistachios. Walnuts offer a rich flavor. Sunflower seeds add a nice crunch. Feel free to mix and match nuts based on your taste. If you're not in the mood for Champagne vinaigrette, use balsamic vinaigrette. This dressing is sweet and tangy. It pairs well with peaches and burrata. A yogurt-based dressing is another option. It gives a creamy contrast and keeps it light. In summer, add berries for a twist. Strawberries or blueberries go great with peaches. They add color and more sweetness. You can also adapt the greens. Use spinach or kale during winter months. Each season brings new flavors and textures to enjoy. For the full recipe, check the Peach Burrata Bliss Salad section. To keep your Peach Burrata Salad fresh, store it in an airtight container. This helps prevent moisture loss and keeps the salad crisp. You can store it in the fridge for up to three days. However, the peaches may lose their texture after a day. If you want to keep the salad fresh for longer, consider adding the vinaigrette just before serving. You can prepare the salad components ahead of time. Slice the peaches and tear the burrata a few hours before serving. Store them in separate containers in the fridge. This keeps the flavors fresh and vibrant. For the vinaigrette, whisk together the honey, apple cider vinegar, and Dijon mustard. Store it in a jar and keep it in the fridge. Shake it well before use. This salad tastes best when served cold. If you have leftovers, enjoy them straight from the fridge. Avoid reheating, as it can change the texture of the burrata and greens. For a refreshing twist, add a drizzle of olive oil or honey before serving. This adds a nice touch to the leftover salad without losing its quality. For the full recipe, check out the Peach Burrata Bliss Salad instructions. This recipe yields four servings. You can easily adjust the amounts for a larger group. Just keep the ratios the same for the best results. Yes, you can make this salad vegan! Just replace the burrata cheese with a vegan cheese option. You can also try using avocado for creaminess. This salad pairs well with grilled chicken or fish. You can also serve it alongside a light pasta dish. It’s a great side for summer barbecues too! This blog post explored how to make a fresh and delicious peach salad. We covered the essential ingredients, from ripe peaches and creamy burrata to pantry staples like olive oil and honey. I shared step-by-step instructions, plus tips for choosing quality ingredients and creative variations. In my final thoughts, this salad is versatile and easy to customize. It’s a bright dish that shines in the summer months. You can enjoy it as a main or side dish. With these tips, you’ll impress your guests and enjoy a delightful meal.

Peach Burrata Salad with Champagne Vinaigrette Delight

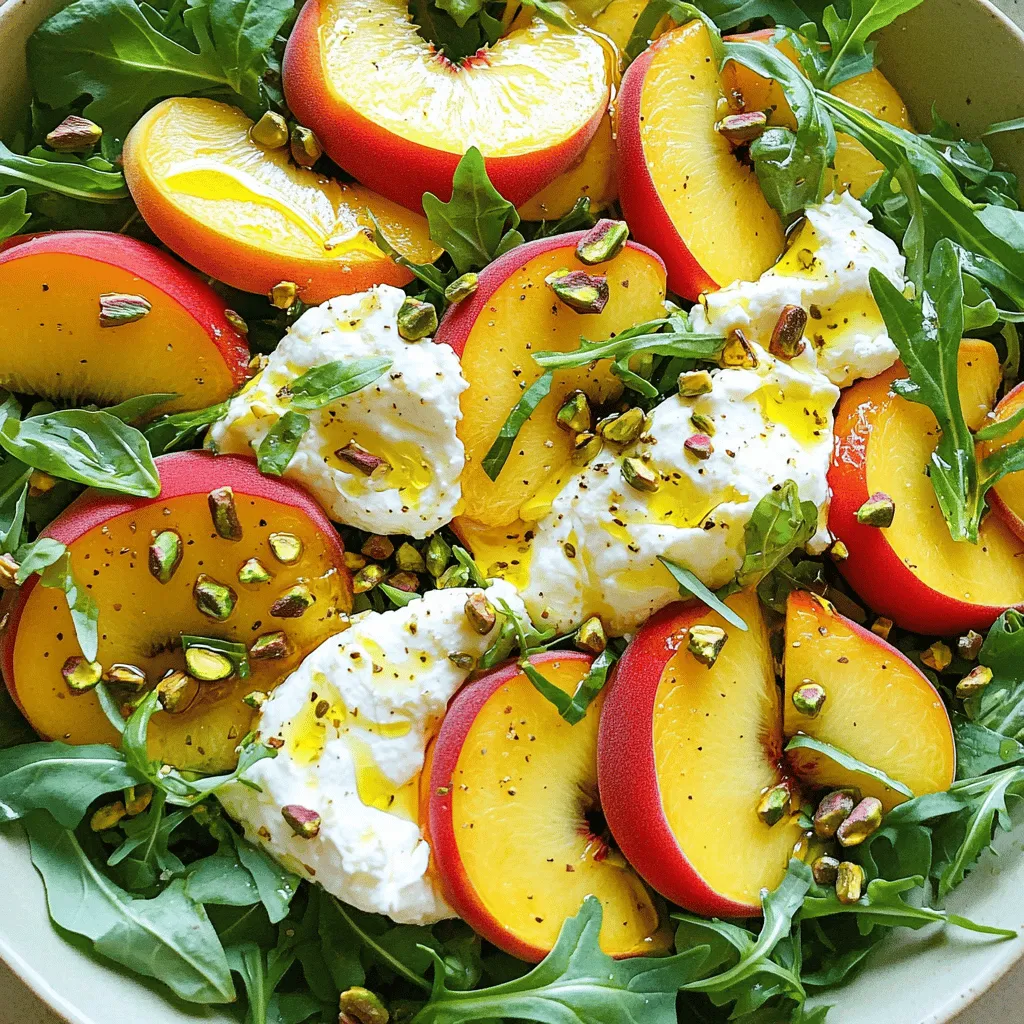
If you’re craving a fresh and vibrant dish, look no further than my Peach Burrata Salad with Champagne Vinaigrette. This

- Zucchini - Red bell pepper - Eggplant - Red onion - Ciabatta bread - Burrata cheese - Olive oil - Salt and pepper - Fresh basil leaves - Balsamic glaze - Calories: 500 - Protein: 18g - Carbs: 40g - Fats: 30g The ingredients in the Grilled Veggie Burrata Panini make it shine. Each veggie adds a unique flavor. Let’s break this down. First, the zucchini provides a soft and tender bite when grilled. It absorbs the smoky flavor well. The red bell pepper adds sweetness and color, making the dish pop. Then, there's the eggplant. It becomes creamy when cooked, adding richness. The red onion gives a slight sharpness, balancing out the flavors. Now, let's talk about the ciabatta bread. It is crusty outside and soft inside, perfect for grilling. When you bite into it, you get a nice crunch. And don’t forget the burrata cheese. This cheese is soft and creamy. It melts slightly, creating a gooey layer that ties everything together. For seasoning, we use olive oil to help the veggies grill nicely. Just a pinch of salt and pepper enhances their natural flavors. Adding fresh basil leaves gives a fragrant lift. Finally, drizzle with balsamic glaze for a sweet finish. This panini is not only tasty but also packs nutrition. With about 500 calories, it offers 18 grams of protein. You’ll also get 40 grams of carbs and 30 grams of fats. This balance makes it a filling meal. For the full recipe, check out the Full Recipe link. Enjoy cooking and savoring this fresh delight! First, we need to grill the veggies. Start by preheating your grill pan or outdoor grill over medium heat. In a large bowl, toss together the sliced zucchini, red bell pepper, eggplant, and red onion with olive oil, salt, and pepper. This will coat the veggies and help them grill nicely. Next, place the vegetables on the grill. Cook them for about 4-5 minutes on each side. You want them to be tender and have nice grill marks. This step is key for flavor and looks. Once done, remove them from the grill and set them aside. To get perfect grill marks, make sure your grill is hot enough before adding the veggies. If the heat is too low, the veggies will steam instead of grill. Avoid moving the veggies too much while they cook. Let them sit for a bit to form those beautiful lines. Now, it’s time to layer the ingredients. Take two slices of ciabatta bread. On each slice, evenly layer your grilled vegetables. Next, tear the burrata cheese into pieces and distribute it over the vegetables. Burrata adds a creamy and rich flavor. Don’t forget to add a handful of fresh basil leaves on top of the cheese. This adds freshness and aroma. Finally, place the other two slices of ciabatta on top to close the sandwiches. Let’s grill the panini for that crispy exterior. Lightly brush the outside of the sandwiches with olive oil. This helps achieve that golden-brown color. Place the paninis on the grill or use a panini press. Cook for about 3-4 minutes on each side. Keep an eye on the timing. You want perfect doneness, so check for a crispy crust. Once they are done, remove them from the heat. Slice the panini in half and drizzle with balsamic glaze before serving. For more details, check out the Full Recipe. Enjoy your flavorful and fresh Grilled Veggie Burrata Panini! Selecting fresh burrata is key. Look for burrata with a smooth outer layer and creamy inside. It should feel soft and springy. If you find burrata made the same day, grab it! Freshness matters for taste. When picking seasonal veggies, choose bright, firm produce. For this panini, zucchini, bell peppers, eggplant, and red onion work well. Visit local farmers' markets for the best picks. Seasonal veggies taste better and add nutrition. For perfect grill marks, heat your grill to medium-high. This helps achieve those nice lines. Make sure to preheat for at least 10 minutes before grilling. Common mistakes include overcrowding the grill. Give your veggies space to breathe. If you pile too many on, they won’t grill evenly. Also, avoid moving them too much. Let them sit until they get those lovely marks. Pair your panini with sides like mixed greens or chips. A fresh salad adds crunch and balance. You can also serve it with a side of balsamic glaze for dipping. For beverages, try a light white wine or sparkling water. Both go well with the fresh flavors of the panini. If you want something non-alcoholic, a lemon spritzer is refreshing. Feeling inspired? Check the Full Recipe for more details! {{image_2}} You can switch out the veggies for other tasty options. Adding spinach or arugula gives a fresh crunch. Both greens add color and flavor without overpowering the dish. Feel free to try different cheeses too. Instead of burrata, you might enjoy creamy goat cheese or sharp feta. Each choice makes the panini unique. Want to kick up the taste? Adding pesto or sun-dried tomatoes brings a burst of flavor. Both ingredients add richness and a hint of sweetness. You can also spice things up with chili flakes. Just a pinch can create a nice heat that balances the creaminess of the cheese. If you need a gluten-free choice, don't worry! You can use gluten-free bread for the panini. Look for options like almond flour bread or rice flour bread that work well. Another fun idea is to wrap your fillings in lettuce leaves. This gives you a fresh and crunchy bite without the carbs. To keep your grilled veggie burrata panini fresh, wrap it in foil or plastic wrap. Store it in the fridge within two hours of cooking. This method locks in flavors and moisture. Your panini will last for 1-2 days in the refrigerator. After that, the bread may get too soggy. When it's time to enjoy leftovers, I suggest using a skillet. Heat it over medium heat, then place the panini in it. Cook for 3-4 minutes on each side. This method keeps the outside crispy while warming the inside. Avoid the microwave; it makes the bread soggy and chewy. Yes, you can freeze the panini! Wrap it tightly in plastic wrap and then in foil. This helps prevent freezer burn. You can store it in the freezer for up to 3 months. When ready to eat, let it thaw overnight in the fridge before reheating. This keeps the flavors intact. Burrata cheese is a fresh Italian cheese. It has a soft outer shell made of mozzarella. Inside, it has a creamy, rich center. This makes it different from regular mozzarella, which is firmer and less creamy. Burrata melts beautifully when warm, adding a luxurious touch to any dish. You can enjoy burrata on its own or in salads and sandwiches. Yes, you can use other types of bread for your panini. If you can't find ciabatta, look for these options: - Focaccia - Sourdough - Whole grain bread - Baguette These breads will give you a nice crunch and absorb flavors well. Each type will add its unique taste to your grilled veggie burrata panini. You can tell your panini is done by checking a few signs: - The bread should be golden brown. - You should see grill marks on both sides. - The cheese should be oozy and slightly melted. If you see all these signs, your panini is ready to enjoy! For the best results, keep an eye on it while grilling. This blog post covered a delicious grilled vegetable panini. You learned about key ingredients like zucchini, red bell pepper, and burrata cheese. I shared the step-by-step process for preparing, assembling, and grilling your panini. You also found tips on selecting fresh ingredients and serving suggestions. In closing, enjoy creating your own veggie panini. Customize it with variations to make it yours. Share it with friends for a perfect meal. Happy grilling!

Grilled Veggie Burrata Panini Flavorful and Fresh Meal

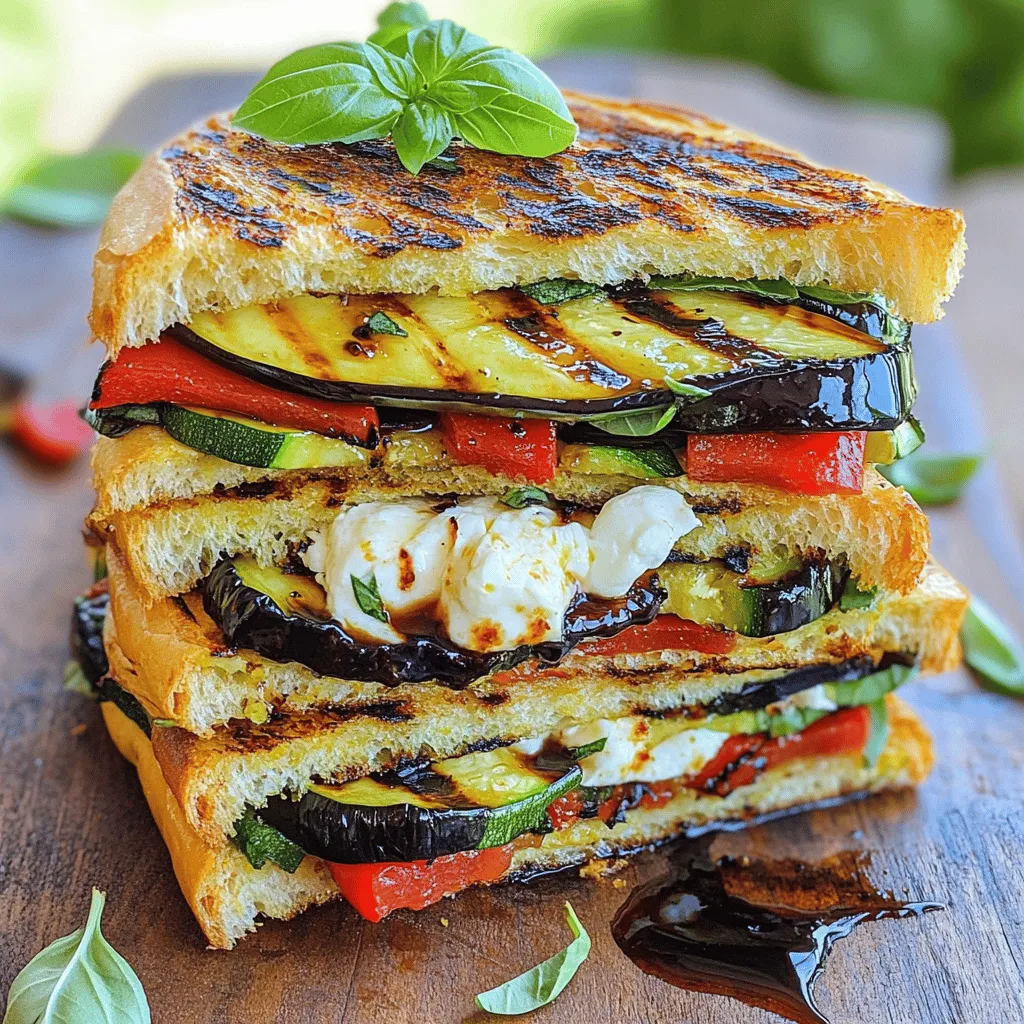
Looking for a meal that’s both tasty and fresh? Try my Grilled Veggie Burrata Panini! This sandwich packs grilled zucchini,

- Fresh baby spinach leaves - Ripe strawberries - Fresh blueberries - Toasted walnuts or pecans - Crumbled feta cheese - Red onion - Balsamic glaze - Olive oil - Salt and pepper To make a great Strawberry Spinach Salad with Blueberries, you need fresh ingredients. Start with baby spinach leaves. They give a soft and crispy base. Next, grab ripe strawberries. Their sweetness shines in this mix. Fresh blueberries add a pop of color and flavor. To bring in some crunch, use toasted walnuts or pecans. These nuts add a nice texture. Crumbled feta cheese gives a creamy touch. Red onion adds a little bite, balancing the sweetness. For the dressing, you'll need balsamic glaze and olive oil. A pinch of salt and pepper will enhance all the flavors. This combo makes the salad bright and fresh. - Add-ins for extra flavor - Seasonal fruit variations - Alternative dressings If you want to get creative, think about add-ins for extra flavor. Avocado can add creaminess. Or try sliced apples for a crunchy twist. You can also use seasonal fruits. In summer, peaches or cherries work well. For dressings, explore options beyond balsamic. Honey mustard or lemon vinaigrette can change the taste. These choices let you personalize your salad. For the full recipe, check out the details above. 1. Washing and preparing the spinach: First, rinse 4 cups of fresh baby spinach in cold water. Shake off the excess water. Dry the leaves gently using a clean kitchen towel or a salad spinner. This keeps the salad crisp and clean. 2. Slicing the strawberries: Next, take 1 cup of ripe strawberries. Remove the green tops and slice them into thin pieces. Aim for even slices to make the salad look nice. 3. Toasting the walnuts or pecans: Take 1/2 cup of walnuts or pecans. Heat a skillet over medium heat. Add the nuts to the pan and toast them for about 5 minutes. Stir often until they smell nutty. This step adds flavor and crunch. 1. Layering the ingredients: In a large salad bowl, start with the washed spinach as the base. Next, gently layer your sliced strawberries and 1 cup of fresh blueberries on top. 2. Whisking the dressing: In a small bowl, whisk together 1/4 cup balsamic glaze, 2 tablespoons olive oil, salt, and pepper. Mix until well combined. This dressing adds a sweet and tangy flavor. 3. Combining the salad just before serving: Just before you're ready to eat, drizzle the dressing over the salad. Toss gently to combine the ingredients. Be careful not to bruise the fruit. 1. Best ways to serve: Serve immediately for the best taste. This salad is fresh and bright. 2. Ideal serving dishes: Use a large, shallow bowl for serving. This showcases the colorful layers of fruit and greens. 3. Pairing options with main courses: This salad pairs well with grilled chicken or fish. It also complements a light pasta dish. Enjoy a delightful meal! To keep spinach fresh, store it in a crisper drawer. Use a paper towel to absorb moisture. This helps the leaves stay crisp. Don't wash spinach until you're ready to use it. Add dressing just before serving. This keeps the greens crunchy and vibrant. If you add it too early, the salad may get soggy. When tossing your salad, use a gentle hand. Lift the ingredients instead of stirring vigorously. This helps avoid bruising the delicate fruit. For visual appeal, use a large, shallow bowl. This showcases the bright colors of strawberries and blueberries. You can also use colorful platters for added fun. Garnish your salad with whole walnuts or a sprinkle of feta. This adds texture and makes it look fancy. You can also add a sprig of mint for a fresh touch. Try the full recipe for a delightful experience! {{image_2}} You can switch up the ingredients for your Strawberry Spinach Salad with Blueberries. In summer, add juicy peaches or nectarines. These fruits bring a sweet touch. You can also include raspberries for more color and flavor. In winter, swap spinach for kale or arugula. These greens add a nice crunch and stay fresh longer. For a crunchy twist, try flavored nuts like spicy almonds or maple pecans. They add a delightful crunch and extra flavor. Want to make the salad vegan-friendly? Simply skip the feta cheese. Replace it with avocado, which adds creaminess. To make it gluten-free, ensure your balsamic glaze has no gluten. Most brands are safe, but check the label. If you want to lower the calories, use less oil or skip the nuts. You can still enjoy all the flavors without extra calories. For a lighter dressing, mix lemon juice with a bit of mustard. This keeps the salad zesty and fresh. You can find the full recipe [here](#). To keep your strawberry spinach salad fresh, store leftovers in the refrigerator. Place it in an airtight container. This will help maintain the salad's taste and texture. Use a glass or plastic container with a tight lid. Avoid metal containers, as they can change the flavor. To keep the salad's flavor and texture, avoid dressing it until serving. If you need to reheat any leftover components, do so gently. Warm the nuts in a pan for a few minutes. This will help restore their crunch. You can also enjoy the salad cold for a refreshing bite. Can I make this salad ahead of time? Yes, you can prepare parts of this salad in advance. Wash and dry the spinach first. Slice strawberries and blueberries, but add them just before serving. This keeps them fresh. You can also mix the dressing ahead of time and store it in the fridge. Just drizzle it over the salad when you are ready to serve. What can I substitute for feta cheese? If you want to skip feta, try goat cheese or a dairy-free option. You can also use crumbled tofu for a vegan-friendly choice. Both options will give you a nice flavor and creamy texture. Is it possible to add protein to this salad? Absolutely! You can add grilled chicken, shrimp, or even chickpeas. Each choice adds great flavor and makes the salad more filling. Just be sure to toss the protein in with the other ingredients for the best taste. Overview of calories and macros A serving of this salad has about 250 calories. It has a mix of protein, healthy fats, and carbs. The exact numbers can change based on what you add or swap out. Health benefits of ingredients Spinach is packed with vitamins A and C. Strawberries and blueberries are full of antioxidants. Walnuts add healthy fats. Feta cheese offers protein and calcium. Together, these ingredients create a nutrient-rich meal. Tips for a balanced meal To make this salad even more balanced, consider adding whole grains like quinoa or farro. This will increase fiber and keep you full longer. Detailed servings explanation This recipe serves four people. Each serving gives you a nice portion that is light yet satisfying. It’s perfect as a side dish or a main meal. Adjusting recipe for bigger groups If you need to serve more people, simply double or triple the ingredients. Keep the same ratios. This ensures everyone enjoys the same great taste. For large gatherings, prepare the salad in a big bowl to make it easy to serve. This blog post covered everything you need to make a delicious salad. We reviewed the main ingredients, including baby spinach, strawberries, and feta cheese. You learned how to prepare, assemble, and serve the salad for the best results. Tips on freshness and presentation are key to wow your guests. Variations let you customize this dish for any season or diet. Finally, proper storage helps keep leftovers tasty. Stick to these steps and enjoy a flavorful salad any time!

Strawberry Spinach Salad with Blueberries Delight

Are you ready to try a salad that bursts with flavor? This Strawberry Spinach Salad with Blueberries is your go-to

Older posts
Newer posts
← Previous Page1 … Page11 Page12 Page13 … Page69 Next →

dsad

© 2025 My Saved Recipe • Built with GeneratePress

Our Policies

  • Copyright Policy
  • Cookie Policy
  • GDPR Policy
  • Privacy Policy
  • Disclaimer
  • Terms Of Use

More Information

  • Home
  • About
  • Contact
  • Appetizers
  • Dessert
  • Dinner
  • Drinks
©2025, My Saved Recipe About Back To Top