Skip to content
DisclaimerTerms Of UseGDPR PolicyCookie Policy

My Saved Recipe

  • Home
  • Drinks
  • Appetizers
  • Dinner
  • Dessert
  • About
  • Contact
  • Privacy Policy
DisclaimerTerms Of UseGDPR PolicyCookie Policy

Savannah

- 4 large heirloom tomatoes, sliced - Fresh basil leaves, for garnish - 1 ball (about 8 oz) of fresh burrata cheese - 2 tablespoons balsamic vinegar - 2 tablespoons olive oil - 1 teaspoon honey - 1 garlic clove, minced - Zest of 1 lemon - Salt, to taste - Pepper, to taste Gathering fresh ingredients is key for this salad. Start with heirloom tomatoes. They come in different colors and shapes. Their taste is sweet and juicy. Look for firm tomatoes that feel heavy for their size. Next, get fresh basil leaves. They add a burst of flavor and a lovely aroma. You can tear them by hand to release their oils. For the cheese, burrata is a must. It is creamy and rich inside. When you cut it, the soft cheese flows out. This adds a nice touch to your salad. The marinade is simple but packed with flavor. Mix balsamic vinegar and olive oil for a bright taste. Honey gives it a hint of sweetness. Minced garlic adds a punch, and lemon zest brings freshness. Finally, season with salt and pepper. These small touches make a big difference. You can find the Full Recipe above for detailed steps. Each ingredient plays an important role, so choose the best for a tasty outcome. To start, grab a mixing bowl. In it, whisk together the following ingredients: - 2 tablespoons balsamic vinegar - 2 tablespoons olive oil - 1 teaspoon honey - 1 garlic clove, minced - Zest of 1 lemon - Salt and pepper to taste Mix these well until combined. The honey adds a nice touch of sweetness. Adjust the salt and pepper to your taste. Next, take your heirloom tomatoes and slice them. Aim for thick slices for a hearty bite. Arrange the slices on a platter. Once done, pour the marinade over the tomatoes. Make sure each slice gets some of that tasty dressing. Let the tomatoes sit for at least 30 minutes. This allows them to soak up all the flavors. Now it's time to bring it all together. Take your ball of burrata cheese and carefully tear it apart. Place the pieces right in the center of your marinated tomatoes. This creamy cheese will complement the juicy tomatoes perfectly. Finish by garnishing with fresh basil leaves scattered around the plate. If you have any leftover marinade, drizzle it over the salad. This adds extra flavor and makes it look beautiful. Enjoy this dish as a starter or a light meal. For the full recipe, check out the complete guide. For this salad, heirloom tomatoes shine the brightest. I love using Brandywine, Cherokee Purple, and Green Zebra. These types have sweet flavors and unique colors. Their juicy texture makes the salad feel fresh and lively. Always pick tomatoes that feel firm but not hard. Look for bright colors and a sweet smell. This ensures you get the best flavor for your dish. To boost the taste, consider adding fresh herbs like oregano or thyme. They add a nice earthy note. You can also sprinkle in some crushed red pepper for a hint of heat. If you want a zesty twist, try a splash of lemon juice. This will brighten the entire salad. Each herb or spice can change the profile, so feel free to experiment. Serving your salad well makes it even more appealing. I like to layer the tomatoes in a circle, with burrata in the center. This creates a lovely display. Use a drizzle of the marinade around the edges for an artistic touch. Fresh basil leaves add a pop of green and contrast nicely against the tomatoes. Consider using a large, colorful platter to make it stand out. Enjoy the process and let your creativity shine! For more details about making this delightful dish, check the Full Recipe. {{image_2}} You can easily change this salad with seasonal vegetables. In summer, add sweet corn or crunchy cucumbers. In fall, try diced bell peppers or roasted squash. Each vegetable brings a new taste and texture to your salad. Mixing in these veggies also adds more color and nutrients. You’ll enjoy a fresh twist while keeping the essence of the dish. If you want a vegan option, swap the burrata for a creamy nut cheese. Cashew cheese works well, or you can use tofu for a similar texture. Just marinate the tofu to get that added flavor. This way, you can enjoy a delicious salad that fits your dietary needs. You can even use a homemade vegan cheese for a personal touch. Dressings can change the whole vibe of your salad. Try a citrus vinaigrette for a bright twist. You can mix orange or lime juice with olive oil for a zesty kick. Another great choice is a creamy avocado dressing, which adds richness. Experimenting with different herbs, like mint or oregano, can also enhance the flavor. Get creative and find the flavor pairs you love most! For the full recipe, check out the detailed instructions provided. To keep your marinated tomato burrata salad fresh, store it in an airtight container. Place any leftover salad in the fridge. It can last for up to two days. The tomatoes may lose some texture but will still taste great. This salad pairs well with crusty bread or fresh baguette. Serve it with grilled chicken for a heartier meal. You can also enjoy it alongside a light pasta dish. A crisp white wine complements the flavors nicely. Reheating is not ideal for this salad. The tomatoes can become mushy, and the burrata loses its creamy texture. If you want to warm it up, do so gently in the microwave for just a few seconds. However, I recommend enjoying it cold for the best taste experience. For the full recipe, check out the link. Burrata cheese is a fresh Italian cheese. It has a creamy center and a soft outer shell. This cheese is made from mozzarella and cream. When you slice it, the creamy filling oozes out. Burrata adds a rich and buttery taste to dishes. Its texture contrasts nicely with fresh tomatoes. This makes it a perfect choice for salads. Yes, you can use other cheeses if you like. Fresh mozzarella is a good substitute. It has a similar texture but less creaminess. Feta cheese can work too, giving a saltier flavor. Goat cheese is another option, adding tang and richness. Each cheese will change the taste and feel of the salad. Choose what you enjoy best! You can marinate tomatoes for up to two hours. This allows the flavors to soak in well. However, 30 minutes is often enough. If you marinate too long, the tomatoes may become mushy. Keep an eye on the texture. You want them to stay firm and juicy. For the best taste, serve them fresh after marinating. This post covered a delightful salad made with heirloom tomatoes, burrata cheese, and a tasty marinade. You learned how to properly prepare the ingredients, assemble the salad, and enjoy it with tips and variations. Remember, freshness matters, so choose the best produce and store your leftovers correctly. Feel free to explore different flavors or adjust diets as needed. Enjoy crafting this vibrant dish that pleases both the eyes and the palate. Dive in and savor each bite!

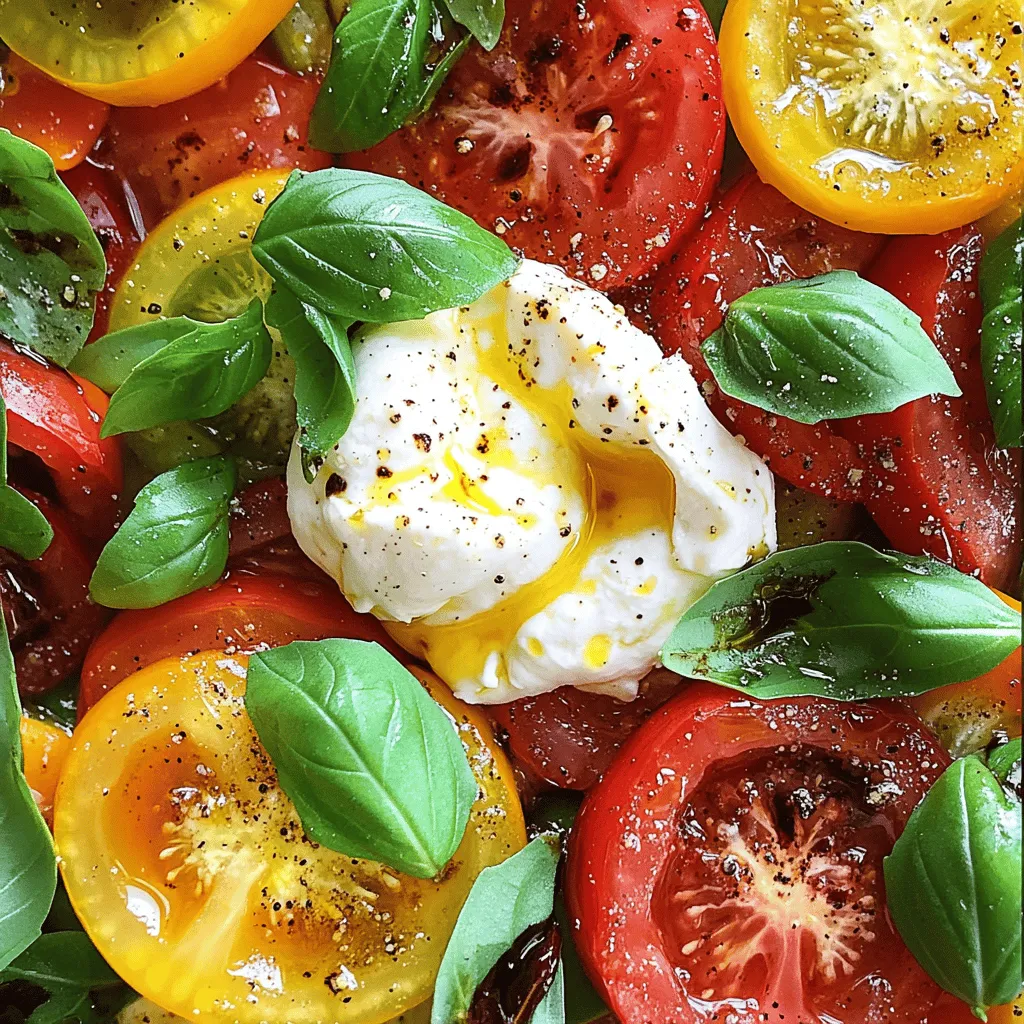
Marinated Tomato Burrata Salad Fresh and Flavorful

Looking to elevate your salad game? This Marinated Tomato Burrata Salad is a burst of fresh flavors! With ripe heirloom
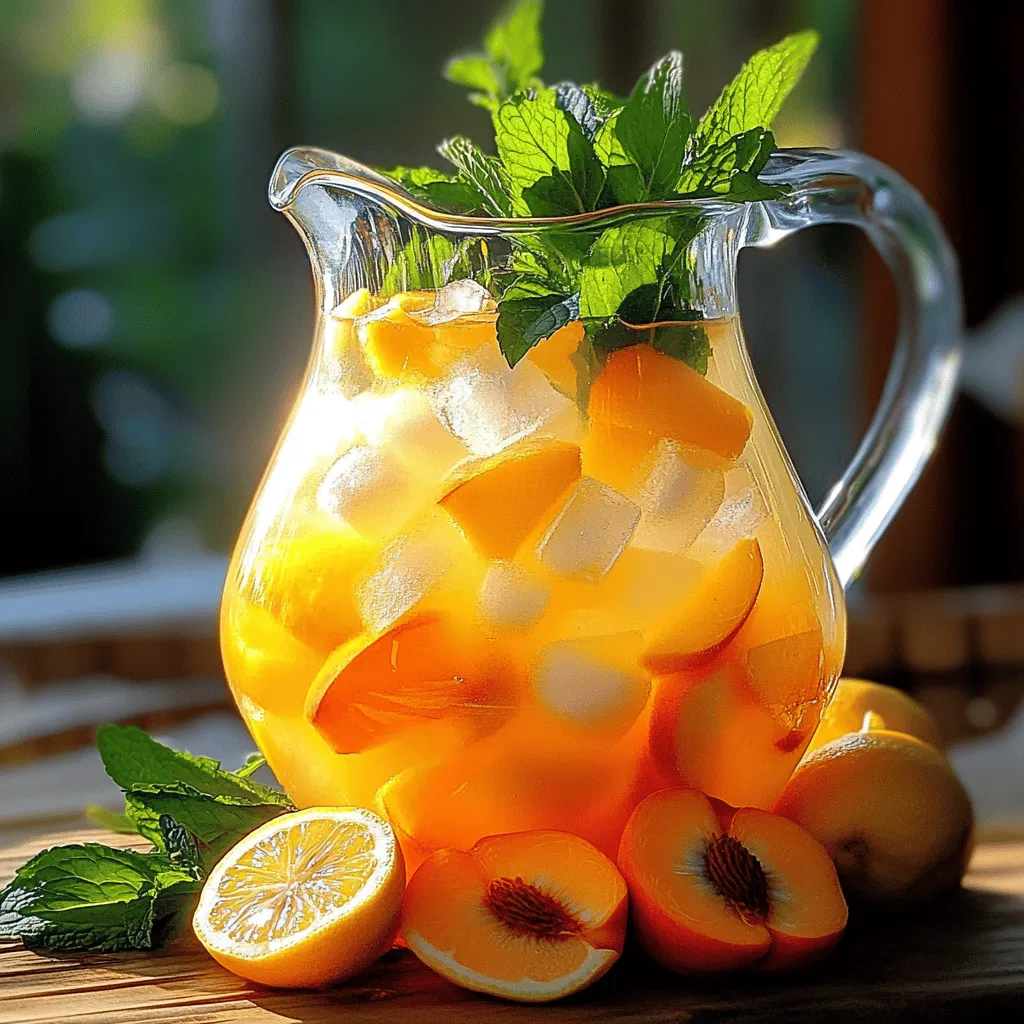
- 2 cups water - 1 cup honey or agave syrup (to taste) - 2 cups ripe fruits (e.g., watermelon, strawberries, peaches) - 1 lemon, sliced - 2 tablespoons lemon juice - 1 teaspoon ginger, finely grated (optional) - 2 cups sparkling water - Fresh mint leaves for garnish - Ice cubes as needed To make homemade Hwachae, gather these simple ingredients. Start with water and sweetener. Honey or agave syrup adds a lovely sweetness. Next, select your ripe fruits. Watermelon, strawberries, and peaches work well together. You can mix and match based on what you love. Add one sliced lemon for a zesty touch. For an extra kick, consider ginger. It gives a warm flavor that pairs nicely with the fruits. When you have everything ready, you will create a drink that bursts with color and taste. This refreshing summer punch cools you down and brings joy to gatherings. For the fizzy finish, use sparkling water. This makes the drink light and bubbly. Fresh mint leaves not only enhance flavor but also add a touch of green. Lastly, ice cubes keep your Hwachae chilled and refreshing. You can find the complete recipe in the Full Recipe section. Enjoy crafting this delightful drink! 1. Boil water and dissolve honey/agave: Start by boiling 2 cups of water in a saucepan. Once it boils, remove it from the heat. Stir in 1 cup of honey or agave syrup until it fully dissolves. This syrup is the base of your Hwachae. 2. Cool the syrup to room temperature: Let the syrup sit until it cools to room temperature. This step is important, as hot syrup can cook the fruit later. 3. Dice the selected fruits: Next, take 2 cups of ripe fruits like watermelon, strawberries, and peaches. Dice them into small, bite-sized pieces. Place these in a large pitcher. The colorful mix adds a fun touch to your drink. 4. Add sliced lemon and grated ginger (if using): Slice one lemon and add it to the pitcher. If you like a bit of spice, add 1 teaspoon of finely grated ginger. This will add a nice kick to the punch. 5. Mix syrup with fruits and lemon juice: Once your syrup is cool, pour it into the pitcher with the fruits. Add 2 tablespoons of lemon juice for extra zing. Stir gently to combine everything well. 6. Refrigerate for flavor melding: Cover the pitcher and place it in the fridge for at least 1 hour. This helps the flavors meld together. You want the fruits to soak up the sweet syrup. 7. Add sparkling water before serving: Just before serving, pour in 2 cups of sparkling water. Stir gently to mix. This adds fizz and makes your Hwachae refreshing. Serve it in clear glasses over ice cubes, and don't forget to garnish with fresh mint leaves! This is a simple way to enjoy a refreshing summer drink. For the complete recipe, check out the [Full Recipe]. To make the best Hwachae, balance is key. I recommend using about one cup of ripe fruit for every half cup of syrup. This ratio lets the fruit shine while still being sweet. You can adjust the sweetness based on your taste. If you like it sweeter, add more honey or agave. For a lighter version, use less syrup. Taste as you go, and find your perfect blend. Presentation matters! Serve your Hwachae in clear glasses. This way, everyone can see the colorful fruits inside. It’s eye-catching and fun. For a special touch, garnish each glass with a slice of lemon and a sprig of mint. This not only looks nice, but it also adds a fresh aroma. Use ice cubes to keep it cool. Everyone will love this refreshing summer drink! For the complete recipe, check out the Full Recipe section. {{image_2}} You can get creative with your Hwachae. Try using fruits like kiwi or mixed berries. They add unique flavors and colors. Seasonal fruits also make your punch fresh and fun. In summer, use peaches and nectarines. In the fall, apples and pears work well. The more colorful the fruit, the better it looks. Want to up your Hwachae game? Add fresh herbs like basil or lemongrass. These herbs give a great twist to the drink. You can also infuse your punch with flavored teas or juices. Green tea adds a subtle taste, while citrus juices give it a bright kick. Mixing different flavors keeps it exciting. The goal is to make each sip delightful. For the full recipe, check out the complete guide. Hwachae lasts about 3 to 4 days in the fridge. To keep it fresh, store it in an airtight container. This helps prevent any unwanted smells from mixing in. If you have leftover fruit, place it in a separate container. This keeps it fresh and prevents it from getting mushy. The syrup can stay with the fruit if you plan to drink it soon. Just remember, the longer it sits, the less crisp the fruit becomes. Yes, you can freeze Hwachae, but keep in mind that the texture may change. If you want to freeze it, pour the punch into ice cube trays. This makes it easy to add to future drinks. Once frozen, transfer the cubes into a zip-top bag. When you're ready to serve, just thaw the cubes in the fridge overnight. You can also add them straight to a glass. This gives you a chilled drink without watering it down. Hwachae is a traditional Korean fruit punch. It is a refreshing drink made from sweet fruits and syrup. This drink often appears in summer. You can find it at Korean festivals and special events. Yes, you can. Making Hwachae a few hours ahead is a great idea. It allows the flavors to mix well. Just remember to add the sparkling water right before serving. This keeps it fizzy and fresh. You can use many fruits for Hwachae. Some popular choices are: - Watermelon - Strawberries - Peaches - Kiwi - Berries Feel free to mix and match. The more colorful, the better! Hwachae is naturally non-alcoholic. To make it, simply follow the Full Recipe. Skip any alcoholic ingredients. Enjoy the sweet and fruity flavors without any alcohol. Hwachae offers a refreshing mix of fruit and sweet syrup. In this post, I shared how to make it step by step. You learned ingredient choices, tricks for perfecting the drink, and storage tips. Hwachae is fun to make and enjoy. Try different fruits to find your favorite flavor. This drink is sure to impress guests. Enjoy the process and share your delicious results with friends. You’ll find that this delightful drink is perfect for any occasion.

Homemade Hwachae Korean Punch Refreshing Summer Drink

Looking for a refreshing drink to cool you down this summer? Hwachae, a delightful Korean fruit punch, is the answer!

- 2 cups cooked jasmine rice - 2 medium chicken breasts, diced - 1 cup corn kernels (fresh or frozen) - 1 tablespoon chili powder - 1 teaspoon cumin - 1/2 cup cotija cheese, crumbled - Fresh cilantro and lime juice - Olive oil and butter - Salt and pepper to taste - Optional: sliced jalapeños for additional heat When you make the Chicken Rice Bowl with Street Corn, the right ingredients are key. Start with jasmine rice. It’s fragrant and fluffy, perfect for this dish. Next, use tender chicken breasts. Dice them to cook evenly and quickly. For the street corn, fresh corn kernels shine, but frozen works too. Add chili powder and cumin for a warm kick. Cotija cheese gives a creamy touch. Fresh cilantro adds a bright flavor, while lime juice brings some zest. Don’t forget cooking essentials like olive oil and butter. These fats help enhance flavors and give a nice finish. Season with salt and pepper to bring everything together. If you like heat, sliced jalapeños can add an extra punch. For the full recipe, refer to the provided details. Enjoy making this delicious meal! Start by heating 1 tablespoon of olive oil in a large skillet over medium-high heat. This oil will help the chicken cook evenly. While the oil heats, season 2 medium diced chicken breasts with salt, pepper, 1 tablespoon of chili powder, and 1 teaspoon of cumin. Once the oil is hot, add the seasoned chicken to the skillet. Cook for 6-8 minutes, stirring often. Look for the chicken to turn golden brown and be cooked all the way through. Remove it from the heat and set it aside while you cook the corn. In the same skillet, add 2 tablespoons of butter and let it melt. This will add rich flavor to the corn. Once the butter is melted, add 1 cup of corn kernels, either fresh or frozen. Cook the corn for about 5-7 minutes, stirring occasionally. You want to see some nice charred marks on the kernels. This gives the corn a great taste. Season the corn with salt, pepper, and half of a lime's juice for added zing. Now it's time to put everything together. In a serving bowl, start with a base of 2 cups of cooked jasmine rice. This rice will soak up all the flavors. Next, layer the cooked chicken on top of the rice. Follow this with the street corn mixture. For the finishing touch, sprinkle 1/2 cup of crumbled cotija cheese over the top. Add some chopped fresh cilantro for color and flavor, then drizzle the remaining lime juice over everything. If you like it spicy, feel free to add sliced jalapeños on top. This full recipe makes a wonderful meal that looks as good as it tastes! Choose the right chicken cuts for your rice bowl. I recommend using chicken breasts. They stay juicy when cooked well. To keep your chicken moist, don’t overcook it. Cook the chicken until it’s golden brown and no longer pink inside. Use a meat thermometer if you have one. Aim for 165°F for safety. Fresh herbs bring life to your dish. I love using cilantro for its bright taste. If you don’t have fresh herbs, dried spices work too. They add depth to your chicken. For extra toppings, think about sliced avocado or pickled onions. They add great color and flavor to your bowl. Pair your chicken rice bowl with a fresh salad. A simple green salad with lime dressing works great. You can also serve tortilla chips on the side for crunch. Make your meal pop by using a colorful bowl. Garnish with extra cilantro and a lime wedge for a fun touch. This gives your dish a fresh look and taste. For the full recipe, check the section above. {{image_2}} You can make this chicken rice bowl lighter by using cauliflower rice instead of jasmine rice. Cauliflower rice has fewer carbs and adds fiber. It absorbs flavors well, making it a great base. Another idea is to use grilled vegetables. Bell peppers, zucchini, and asparagus add color and nutrition. They taste great with the chicken and corn. Just toss them on the grill while you cook the other ingredients. If you need a gluten-free option, this recipe is easy to adapt. Just make sure your seasonings are gluten-free. Most spices are safe, but always check labels. For a dairy-free version, skip the cotija cheese or replace it with a dairy-free cheese. You can also use avocado for a creamy touch. If you have different protein needs, swap chicken for tofu or shrimp. Both options work well and taste amazing. To shake things up, try adding different spices. Smoked paprika or garlic powder can give your bowl a new twist. You could also add a splash of hot sauce for heat. Explore regional variations too. For a Mexican flair, drizzle with crema and sprinkle with fresh jalapeños. If you prefer Asian flavors, use soy sauce and sesame seeds. These simple changes can inspire new takes on this dish. For the full recipe, check out the Chicken Rice Bowl with Street Corn . To keep your chicken rice bowl fresh, use airtight containers. This helps stop air and moisture from getting in. Make sure to let the dish cool down first before sealing. Store in the fridge for up to three days. If you wait longer, the flavors start to fade. When you are ready to enjoy your leftovers, you can reheat them in two ways: the oven or the microwave. - Oven: Preheat your oven to 350°F (175°C). Place the bowl in an oven-safe dish. Cover it with foil to keep moisture in. Heat for about 15-20 minutes. This method helps keep the chicken juicy and the rice fluffy. - Microwave: Put the bowl in the microwave for 1-2 minutes. Stir halfway to heat it evenly. If the rice seems dry, add a splash of water to help with moisture. Both methods keep the taste and texture close to the original. Freezing is a great way to save your chicken rice bowl for later. - Freezing: First, separate the chicken, rice, and corn. This helps each part freeze better. Place them in freezer bags or containers, removing as much air as possible. Label with the date, so you remember when you froze them. They can last up to three months in the freezer. - Thawing and Reheating: To thaw, place the frozen items in the fridge overnight. You can also use the microwave on defrost mode for a quicker option. Once thawed, reheat using the methods above. This way, you can enjoy your chicken rice bowl with street corn delight anytime! To spice up your Chicken Rice Bowl, you can add sliced jalapeños. Just sprinkle them on top after you finish assembling your bowl. Another option is to use chili powder. Adjust the amount to your taste. Start with a small amount, maybe a pinch, and increase it as needed. This way, you can find the perfect heat level for you. Yes, you can use brown rice. It will change the flavor a bit. Brown rice has a nuttier taste and chewy texture. It also takes longer to cook, so plan for that. If you choose this option, just follow the cooking instructions on the package. If you don’t have cotija cheese, try feta cheese. It has a similar crumbly texture and salty taste. For a dairy-free option, use nutritional yeast. It gives a cheesy flavor without the dairy. These substitutes work well and keep your dish delicious. The total prep and cooking time is about 30 minutes. You can spend around 15 minutes getting everything ready. Cooking the chicken and corn takes another 15 minutes. It’s quick and perfect for busy days when you want a tasty meal fast. You can find Chicken Rice Bowl with Street Corn at many restaurants. Look for places that serve Mexican or Tex-Mex food. Meal delivery services may also offer this dish. Use apps or websites to check local options. It’s a great way to enjoy this bowl without cooking. Yes, you can prepare this recipe in advance. Cook the chicken and street corn, then store them in the fridge. You can also cook the rice ahead. Just reheat everything before serving. This is a smart way to save time on busy nights. This Chicken Rice Bowl with Street Corn recipe offers a tasty mix of flavors. You can easily prepare it using simple ingredients like chicken, rice, and corn. Seasonings like chili powder and cumin bring it alive. Don’t forget those toppings! Fresh cilantro and cotija cheese make it special. You can even tweak it to fit your diet. Storing leftovers is easy, and reheating takes just minutes. Enjoy making this dish for you and your loved ones! It’s a fun way to enjoy a fresh meal at home.

Savory Chicken Rice Bowl with Street Corn Delight

Craving a quick and tasty meal? You’ll love this savory chicken rice bowl topped with street corn! This dish combines

- 2 boneless, skinless chicken breasts - 2 tablespoons olive oil - 2 teaspoons dried oregano - 1 teaspoon garlic powder - 1 teaspoon paprika - Salt and pepper to taste - 4 whole grain pita breads - 1 cup cherry tomatoes, halved - 1 small cucumber, diced - 1 small red onion, thinly sliced - Fresh parsley for garnish The main ingredients for gyros focus on chicken, oil, and spices. Use fresh chicken breasts for the best flavor. Olive oil adds richness and helps the spices stick. Dried oregano gives the dish its classic taste. Garlic powder and paprika add a nice kick. Don’t forget to season with salt and pepper. Pita bread serves as the vessel for our filling. It should be soft and warm when serving. For filling, use cherry tomatoes for sweetness. Diced cucumber adds crunch, while red onion provides a zesty bite. - 1 cup Greek yogurt - 1 clove garlic, minced - 1 tablespoon fresh dill, chopped - 1 tablespoon lemon juice - 1/2 cucumber, grated and drained - Salt to taste Tzatziki sauce is the perfect cooling dip for gyros. Greek yogurt serves as the base. It’s thick and creamy, making it perfect for dipping. Minced garlic adds flavor, while fresh dill gives a fresh taste. Lemon juice adds brightness, and grated cucumber helps make the sauce refreshing. Don’t forget to season with salt to bring all the flavors together. - Fresh parsley - Extra vegetables Garnishes elevate your gyros. Fresh parsley adds color and a herbaceous touch. You can also add more vegetables if you like. Consider extra diced cucumbers or sliced bell peppers for added texture and taste. For the full recipe, refer to the Full Recipe section. This drink is best enjoyed fresh and shared with friends. To start, I combine olive oil, dried oregano, garlic powder, paprika, salt, and pepper in a bowl. This mixture creates a flavorful marinade. I then add the chicken breasts and make sure they are coated well. Marinating is key! I let the chicken sit for at least 30 minutes. For the best flavor, I recommend marinating for up to 2 hours in the fridge. Next, I prepare the tzatziki sauce. I mix Greek yogurt, minced garlic, chopped dill, lemon juice, and grated cucumber in a bowl. This sauce adds a refreshing taste to the gyros. To get the cucumber just right, I drain it properly. I squeeze out the excess water using a clean kitchen towel. This step helps the sauce stay thick and creamy. When the chicken is marinated, it's time to cook it. I preheat my grill or skillet over medium-high heat. I grill the chicken for about 6-7 minutes per side. It should look golden brown and fully cooked inside. After cooking, I let the chicken rest for a few minutes. Then, I slice it into thin strips to fit perfectly in the pita. While the chicken rests, I warm the pita bread. I place them on the grill or in a pan for 1-2 minutes on each side. This makes them soft and slightly toasted. Warm pita adds a nice touch. I suggest serving the pita alongside the gyros for a fun way to enjoy them. Now comes the fun part—assembling the gyros! I lay out the warm pita and start layering. First, I add the sliced chicken. Then, I pile on cherry tomatoes, diced cucumber, and red onion. Finally, I drizzle tzatziki sauce generously over the top. To make it look nice, I sprinkle fresh parsley. Wrapping the pita around the filling makes it easy to eat! To get the best flavor, start with a good marinade. I mix olive oil, oregano, garlic powder, paprika, salt, and pepper. This blend adds great taste. Let the chicken marinate for at least 30 minutes. If you have more time, two hours in the fridge works wonders. The longer it sits, the more flavor it absorbs. Always coat the chicken well in the marinade. For a creamy tzatziki, use full-fat Greek yogurt. I add minced garlic, fresh dill, lemon juice, and grated cucumber. Make sure to drain the cucumber well to avoid watery sauce. Mix these ingredients and let them sit in the fridge. This waiting time helps the flavors blend. The result is a rich, flavorful sauce that complements the chicken perfectly. Gyros pair well with sides like Greek salad or roasted vegetables. You can also serve them with crispy fries for a fun twist. For drinks, try a light, refreshing lemonade or iced tea. Adding these sides and drinks enhances your meal. Don’t forget to serve extra tzatziki on the side for dipping. This adds more flavor and fun to your meal. {{image_2}} You can change the chicken in gyros to other meats. Lamb makes a rich choice. It adds a strong flavor and pairs well with tzatziki. Beef is another option; it gives a hearty taste. For a vegetarian twist, use grilled veggies or falafel. These options keep the gyros tasty while catering to different diets. If you need gluten-free, you can swap out the pita bread. Look for gluten-free pita at the store. Lettuce wraps also work well. They hold all the filling while staying light and fresh. Just add your chicken, veggies, and tzatziki, and enjoy! Tzatziki is easy to personalize. You can change the herbs and spices to suit your taste. Try adding mint for a fresh twist or even some cayenne for spice. You might also use different types of yogurt, like dairy-free, for a unique flavor. Experimenting can make your tzatziki even more special. For the full recipe, check the details above. To keep your gyros fresh, store each component separately. Place the chicken in an airtight container. Wrap the pita in foil or plastic wrap. Store veggies in a sealed bag. This way, they stay fresh longer. Use them within three days for the best taste. Tzatziki lasts about three to four days in the fridge. Keep it in a sealed container. Make sure to stir it before you use it again. If you notice any changes in smell or texture, it’s best to toss it out. For reheating chicken, use a skillet over medium heat. Heat until warm, about four to five minutes. You can also use the microwave for about 30 seconds. For pita, warm it on a skillet for one minute on each side. This keeps it soft and tasty. Enjoy your gyros just as good as when they were fresh! For the full recipe, check out the details above. Gyros come from Greece. The name means "turn" in Greek. It refers to the way meat cooks on a vertical spit. The dish has roots in ancient Greece. It evolved from similar foods like döner kebab. Today, gyros use pork, chicken, or lamb. They are often served in pita bread with fresh veggies and sauce. Yes, you can prepare gyros ahead of time. Marinate the chicken a day before. Cook it and store in the fridge. You can warm it up later. Prepare the tzatziki sauce a day ahead too. Just keep it in the fridge. You can also slice your veggies early. This makes meal prep easy. Gyros pair well with many side dishes. You can serve Greek salad for a fresh touch. Roasted potatoes also go great with gyros. You might try a side of hummus and pita chips. For a light option, add a cucumber salad. These sides balance the meal well. You can add heat easily to your gyros. Mix in red pepper flakes with the chicken marinade. You might also use spicy tzatziki sauce. Just add some chopped jalapeños or hot sauce. For extra flavor, try harissa or sriracha in the sauce. Adjust the spice to your liking. Yes, you can freeze gyros for later. Cook the chicken and let it cool first. Place it in an airtight container. You can freeze the tzatziki too. Just make sure to keep it sealed. When ready to eat, thaw them in the fridge. Reheat in the oven or on the stove. Enjoy your gyros later with ease! Making gyros at home is fun and rewarding. You’ve learned about the key ingredients, from marinating chicken to preparing tasty tzatziki. I shared tips for cooking the chicken and warming pita bread perfectly. You also explored variations for different diets and preferences. Remember, you can mix and match to make gyros your own. Enjoy experimenting with flavors and sides. Your delicious gyros will impress anyone at the table. Try making this meal soon; it’s sure to be a hit!

Mediterranean Chicken Gyros with Tzatziki Delight

Craving a taste of the Mediterranean? My Mediterranean Chicken Gyros with Tzatziki Delight will transport your taste buds! In this

To make Greek chicken meatballs, you need some key ingredients. Here is the list: - 1 lb ground chicken - 1/2 cup breadcrumbs - 1/4 cup feta cheese, crumbled - 1/4 cup fresh parsley, chopped - 2 cloves garlic, minced - 1 teaspoon dried oregano - 1 teaspoon dried dill - 1 tablespoon lemon juice - Zest of 1 lemon - Salt and pepper to taste - Olive oil for frying These ingredients create a bright, zesty flavor that makes the meatballs shine. The ground chicken keeps the meatballs light. Feta cheese adds a creamy texture and a salty bite. Fresh parsley brings a burst of color and freshness. Garlic, oregano, and dill add depth and aroma. You can enhance the flavor with optional ingredients. Here are some ideas: - Red pepper flakes for spice - Chopped mint for freshness - Onion powder for extra taste Adding these ingredients can give your meatballs a unique twist. If you enjoy a bit of heat, red pepper flakes are perfect. Mint adds a refreshing taste that pairs well with the other flavors. Do you need to make changes? You can easily substitute some ingredients: - Ground turkey instead of chicken - Gluten-free breadcrumbs for a gluten-free option - Greek yogurt instead of feta for a lower-fat choice Feel free to mix and match based on what you have. Each swap brings a new flavor, making this recipe adaptable. For a different taste, try adding a pinch of cinnamon or cumin to the mix. This Greek chicken meatball recipe is all about finding what works for you. Check out the Full Recipe to explore the complete cooking process! Start by gathering all your ingredients. You need: - 1 lb ground chicken - 1/2 cup breadcrumbs (preferably whole wheat) - 1/4 cup feta cheese, crumbled - 1/4 cup fresh parsley, chopped - 2 cloves garlic, minced - 1 teaspoon dried oregano - 1 teaspoon dried dill - 1 tablespoon lemon juice - Zest of 1 lemon - Salt and pepper to taste - Olive oil for frying In a large bowl, mix the ground chicken with the breadcrumbs. Add the feta cheese and parsley. Then, toss in the minced garlic, oregano, dill, lemon juice, and zest. Season it all with salt and pepper. Use your hands to blend the mix well. This is key for great flavor and texture. Next, heat a skillet over medium heat. Add a drizzle of olive oil. While the skillet heats, scoop about 2 tablespoons of the meatball mixture and roll them into balls. Place them on a plate. When the skillet is hot, add the meatballs in batches. Do not overcrowd the pan. Cook the meatballs for about 5-7 minutes on each side. You want them golden brown outside and fully cooked inside. Once they are done, lift them out and let them rest on a paper towel-lined plate. This helps soak up any excess oil. These meatballs are delicious and versatile. Serve them warm, either on their own or with a yogurt sauce. You can also pair them with a fresh salad or warm pita bread. For a complete meal, add some roasted vegetables or a side of tzatziki. These flavors work great together and make for a delightful feast. For the full recipe, check the section above. To keep your meatballs moist, use fresh ingredients. Ground chicken can dry out, so add feta cheese and lemon juice to the mix. They bring moisture and flavor. Mix gently; overworking the meat can make it tough. Let the meatballs rest for a few minutes before cooking. This helps them hold moisture while they cook. One common mistake is not seasoning enough. Always season your mixture well with salt and pepper. Another mistake is overcrowding the pan. This leads to steaming instead of browning. Cook in batches to ensure each meatball gets the heat it needs. Finally, don’t skip the resting step after cooking. This allows the juices to settle. For a crispy exterior, make sure your skillet is hot before adding meatballs. Use enough olive oil; this helps create a nice crust. Roll the meatballs into uniform sizes to cook evenly. Flip them only once or twice during cooking. This allows that golden crust to form without breaking apart. For extra crunch, broil them for a minute after cooking. For the full recipe, check out the Mediterranean Zesty Greek Chicken Meatballs section. {{image_2}} You can swap ground chicken for other meats in this recipe. Ground turkey works well and has a similar taste. If you prefer beef, use lean ground beef for a richer flavor. Ground lamb adds a nice twist, giving you a taste of Greece. Just adjust cooking times as needed. For a vegetarian option, use chickpeas or lentils. You can mash them up and mix with breadcrumbs and spices. Another great choice is crumbled tempeh or tofu. These options keep the meatball shape and add protein. If you want it vegan, skip the feta cheese or use a plant-based version. Adding more herbs and spices can boost flavor. Fresh mint or basil makes a refreshing twist. Try adding cumin or paprika for a warm depth. You can even throw in some red pepper flakes for heat. Adjust based on your taste. These small changes make a big difference in flavor. Check out the Full Recipe for more ideas! To store leftover meatballs, let them cool first. Place them in an airtight container. You can add a paper towel to absorb moisture. This keeps the meatballs fresh. Store them in the fridge for up to three days. If you want, you can also place them in a zip-top bag. Make sure to squeeze out all the air to keep them tasty. When it’s time to eat the meatballs again, reheating is key. You can use a microwave or the oven. If you choose the microwave, heat them on medium for about one to two minutes. Check if they are warm all the way through. If using an oven, preheat it to 350°F (175°C). Place the meatballs on a baking sheet and heat for about 10-15 minutes. This way, they stay moist and delicious. Freezing meatballs is a great way to save them for later. After they cool, lay them out on a baking sheet. Make sure they do not touch each other. Freeze them for a few hours until firm. Then, transfer them to a freezer-safe bag. Label the bag with the date. They will stay good for up to three months. When you're ready to eat, thaw them in the fridge overnight before reheating. This method keeps their flavor intact. For the full recipe, check the earlier section. I cook Greek chicken meatballs for about 5-7 minutes on each side. This timing gives them a nice golden brown color. Always make sure they are cooked through, which means no pink inside. The total cooking time is around 15 minutes for a batch. Yes, you can grill Greek chicken meatballs! Grilling adds a smoky flavor and can make them even more delicious. Make sure your grill is preheated. Use skewers to keep them together while grilling. Cook them for about 10-12 minutes, turning occasionally. Watch them closely to avoid burning. Greek chicken meatballs taste great with many sauces. Tzatziki sauce is a classic choice. It’s cool and creamy, complementing the flavors well. You could also try a simple yogurt sauce with herbs. For a twist, a lemon and garlic dip works nicely too. Serve any of these sauces on the side for dipping. For the full recipe, check out the Mediterranean Zesty Greek Chicken Meatballs. In this blog post, we explored key ingredients, cooking steps, and expert tips for Greek chicken meatballs. You can use various meats and make them vegetarian. Remember to store leftovers properly and reheat them for the best taste. A few simple tricks can keep your meatballs juicy and crispy. Enjoy experimenting with flavors and make this dish your own. Cooking should be fun and tasty, and now you have the tools to succeed!

Greek Chicken Meatballs Flavorful and Easy Recipe

Do you crave a dish that’s flavorful, easy to make, and a crowd-pleaser? Look no further than Greek chicken meatballs!

- 1 pound boneless, skinless chicken thighs - 2 cups cooked quinoa or rice - Vegetables: cherry tomatoes, cucumber, red onion, parsley - Olive oil, ground cumin, paprika, turmeric, coriander, cayenne pepper - Minced garlic, lemon zest, lemon juice, salt, and pepper - Tahini sauce, pickled vegetables When making a Chicken Shawarma Bowl, the right ingredients make all the difference. First, let’s talk about the main ingredients. You need one pound of boneless, skinless chicken thighs. This cut is juicy and tender, perfect for marinating. Pair it with two cups of cooked quinoa or rice. This base adds fiber and keeps you full. Next, fresh veggies bring color and crunch. I love using cherry tomatoes, cucumbers, red onions, and parsley. They not only add flavor but also make your bowl look beautiful. Now, let’s move on to the marinade components. This is where the magic happens! You’ll need olive oil, ground cumin, paprika, turmeric, coriander, and cayenne pepper. These spices create a warm, aromatic flavor. Minced garlic adds a punch, while lemon zest and juice brighten the dish. Don’t forget to add salt and pepper for balance. For optional toppings, tahini sauce is a must. It adds creaminess and richness. If you want to kick it up a notch, you can include pickled vegetables. They add tang and a fun texture. Gather these ingredients, and you’re ready to create a delightful Chicken Shawarma Bowl that’s full of flavor and nutrition. For the full recipe, check out the complete instructions. To start, you need to make the marinade. First, grab a bowl. Then, combine 2 tablespoons of olive oil with the spices. Use 2 teaspoons of ground cumin, 2 teaspoons of ground paprika, 1 teaspoon of ground turmeric, 1 teaspoon of ground coriander, and ½ teaspoon of cayenne pepper. You can adjust the cayenne for spice level. Add 4 cloves of minced garlic, the zest, and juice of 1 lemon. Finally, sprinkle in salt and pepper to taste. Mix it well until it is smooth. Next, take 1 pound of boneless, skinless chicken thighs. Place them in the bowl and coat them fully with the marinade. Cover the bowl and let it sit in the fridge. Marinating for at least 1 hour is best, but you can leave it overnight for more flavor. Now it's time to cook the chicken. Preheat your grill or grill pan to medium-high heat. Take the chicken out of the marinade. Grill the chicken for about 6-7 minutes on each side. You want the internal temperature to reach 165°F (75°C). This ensures your chicken is safe to eat. Once done, take it off the grill and let it rest for a few minutes. After resting, slice the chicken into thin strips. This makes it easy to layer on your bowl. As you prepare to serve, grab your bowls. Start by adding a layer of cooked quinoa or rice at the bottom. Use about 2 cups for four servings. Next, add the sliced chicken on top of the grains. Now, it's time for fresh veggies! Include halved cherry tomatoes, diced cucumber, thinly sliced red onion, and chopped parsley. These will add color and crunch. Finally, drizzle tahini sauce generously over the top. You can also add some pickled vegetables if you like a little extra zing. Enjoy your Chicken Shawarma Bowl! For the complete recipe, check the Full Recipe section. To get the best taste from your chicken, marinate it well. Combine olive oil, spices, and garlic in a bowl. Coat the chicken thighs fully and let them sit in the fridge. For the best flavor, marinate for at least one hour, but overnight is even better. It allows the spices to soak in deeply. For your tahini sauce, consider adding garlic or lemon juice. This extra zing brings out the sauce's creaminess. You could also mix in a bit of yogurt for a tangy twist. If grilling isn’t an option, you can bake or cook the chicken on the stovetop. For baking, preheat your oven to 400°F. Place the marinated chicken on a baking tray. Cook for about 20-25 minutes, flipping halfway through. Always check that the internal temperature reaches 165°F. This ensures the chicken is safe to eat. When using the stovetop, heat a skillet over medium-high heat. Cook the chicken for about 6-7 minutes on each side. This method gives a nice sear, adding flavor. Pair your chicken shawarma bowl with some tasty sides. A simple cucumber salad or roasted veggies work great. These add freshness and crunch to your meal. For garnishes, sprinkle fresh parsley or mint on top. Adding pickled vegetables can also enhance the presentation and flavor. They add a bright color and a tangy taste that complements the chicken beautifully. {{image_2}} You can easily swap chicken for beef or lamb for a richer taste. If you prefer plant-based meals, try using tofu or tempeh. These options soak up flavors well. You can marinate them just like chicken for extra zest. Simply cut the tofu into cubes. Follow the same marinade steps, then grill or pan-fry until golden. While quinoa or rice are popular, you can explore other grains. Couscous cooks quickly and adds a nice texture. Cauliflower rice is a great low-carb choice. It’s light and absorbs flavors well. If you need gluten-free options, try millet or buckwheat. They will keep your bowl filling and delicious. To give your bowl a unique twist, add spices like sumac or za'atar. They bring a bright, tangy flavor. Fresh herbs like mint or dill can also enhance your dish. Explore different dressings too! A yogurt sauce can add creaminess, while a spicy harissa will give it a kick. Mix and match to find your favorite combinations. Check out the Full Recipe to get started! To keep your chicken shawarma bowl fresh, store it in the fridge. Place the chicken and veggies in separate containers. This helps keep the flavors fresh and the textures nice. Use airtight containers to prevent any odors from other foods mixing in. For best taste, eat the leftovers within three days. You can freeze chicken shawarma components for later use. First, let the chicken cool completely. Then, wrap it tightly in plastic wrap. Place it in a freezer-safe bag. You can also freeze the quinoa or rice. When ready to eat, thaw the chicken overnight in the fridge. For rice or quinoa, simply reheat in the microwave. To reheat your chicken shawarma bowl, use the microwave or an oven. If using a microwave, place the chicken in a bowl and cover it. Heat in short bursts, checking often. For the oven, preheat to 350°F (175°C). Place the chicken in a dish, cover with foil, and heat for about 15 minutes. Ensure the chicken reaches an internal temp of 165°F (75°C) for safety. A Chicken Shawarma Bowl is a tasty meal full of flavor. It features marinated chicken, often grilled to perfection. The dish usually has a base of quinoa or rice. You can add fresh veggies, like tomatoes, cucumbers, and onions. A drizzle of tahini sauce ties it all together. Each bite is a mix of spices and fresh ingredients. You can find the full recipe to make this amazing bowl at home. Yes, you can swap out chicken for other meats. Beef, lamb, or turkey work well too. For a plant-based option, try tofu or tempeh. Each meat brings its own flavor to the bowl. Just adjust the cooking time based on the meat you choose. This flexibility lets you enjoy shawarma bowls your way. To make your Chicken Shawarma Bowl healthier, choose lean cuts of meat. You can also use brown rice or quinoa for extra fiber. Add more veggies like spinach or bell peppers to boost nutrition. Use less tahini sauce or a yogurt dressing instead. These small changes keep the meal tasty and light. Many restaurants offer Chicken Shawarma Bowls. Look for Middle Eastern or Mediterranean places nearby. Food trucks often have great shawarma options too. Check local listings or apps to find the best spots. You might even find new favorites in your area. This blog post showed how to make a delicious chicken shawarma bowl. You learned about the main ingredients, marinade, and step-by-step cooking. We discussed tips to enhance flavor, variations, and storage methods. In the end, this dish is versatile and easy to customize. You can enjoy it fresh or save leftovers for later. Experiment with spices and ingredients to make it your own. Start creating your tasty chicken shawarma bowl today!

Savory Chicken Shawarma Bowl Easy Recipe to Enjoy

Craving a flavorful meal that’s both healthy and easy to make? Look no further! This savory Chicken Shawarma Bowl recipe

To make a tasty Peanut Crunch Salad, you'll need a variety of fresh and vibrant ingredients. Here’s a complete list: - 2 cups mixed greens (arugula, spinach, and romaine) - 1 cup red cabbage, thinly sliced - 1 cup carrots, shredded - 1/2 cup cucumber, julienned - 1/2 cup red bell pepper, sliced - 1/2 cup edamame, shelled - 1/4 cup fresh cilantro, chopped - 1/4 cup scallions, chopped - 1/2 cup roasted peanuts, roughly chopped - 3 tablespoons sesame oil - 2 tablespoons soy sauce - 1 tablespoon honey - 1 tablespoon lime juice - Salt and pepper to taste You can customize your salad with these add-ins: - Additional vegetables - Protein options (chicken, tofu) - Other nut varieties (cashews, almonds) Using these fresh ingredients gives the salad a great crunch and flavor. Fresh greens offer nutrients, while peanuts add protein and texture. Feel free to add your favorite veggies or proteins for a personal touch. You can find the full recipe to guide you through the steps to make this delicious dish. - First, take a large salad bowl. - Combine the mixed greens, red cabbage, shredded carrots, cucumber, red bell pepper, edamame, cilantro, and scallions. Ensure all the fresh ingredients mix well. - Next, grab a small mixing bowl. - Whisk together the sesame oil, soy sauce, honey, lime juice, salt, and pepper. This will create a tasty dressing. - Pour this dressing over the salad mixture. - Toss gently until every ingredient is coated. This step is key for flavor. - Just before serving, sprinkle the roasted peanuts on top. This adds a nice crunch. - For a beautiful presentation, use a large platter. Arrange the salad in a mound. Add a few whole peanuts on top for a striking look. - You can also add a lime wedge on the side for extra color and zest. - Enjoy this vibrant dish right away. The flavors are best when fresh. For the full recipe, check the section above. Choosing the right greens and vegetables is key to a great salad. I like to mix arugula, spinach, and romaine for a crunchy base. Each green adds its own taste and texture. Look for vibrant, crisp leaves when shopping. Avoid any greens that look wilted or brown. For veggies, fresh and colorful choices like red cabbage, carrots, and bell peppers make your salad pop. Washing and drying salad ingredients well keeps them fresh. Rinse greens and vegetables under cold water. Use a salad spinner to dry them quickly. If you don’t have one, pat them with a clean kitchen towel. This step prevents sogginess and helps the dressing stick better. Adding spices or herbs can boost your salad's taste. Fresh cilantro and scallions add a bright flavor. You can also try mint or basil for a unique twist. A pinch of chili flakes gives it a nice kick if you like some heat. Adjusting dressing ingredients for personal taste is easy. If you love sweetness, add more honey. If you prefer tanginess, increase lime juice. Experimenting with these ingredients allows you to create a dressing that suits your taste buds perfectly. You can even try different oils, like olive or avocado, to change the flavor. To get the full experience, check out the Full Recipe for Peanut Crunch Salad! {{image_2}} You can change the dressing to fit your taste. If you want to skip sesame oil, try olive oil or avocado oil. Both add a rich flavor. Instead of soy sauce, use tamari for a gluten-free option. You can also make a creamy dressing using Greek yogurt or tahini. These choices give the salad a unique twist. Do you need gluten-free options? Use gluten-free soy sauce or coconut aminos. Both are great for flavor without gluten. For a vegan version, swap honey with maple syrup. This keeps it sweet and plant-based. You can also add more veggies like bell peppers or snap peas. These changes keep the salad fresh and exciting. For the full recipe, check out the details above! To keep your Peanut Crunch Salad fresh, store it without the dressing. This helps prevent sogginess. Use an airtight container to seal in freshness. Place the salad in the fridge right away. It stays good for 2 to 3 days when stored this way. If you add dressing, the salad is best eaten the same day. Can you freeze Peanut Crunch Salad? I do not recommend freezing this salad. Freezing can change the texture of the greens and vegetables. If you want to freeze it, consider freezing the individual components. You can freeze shredded carrots, edamame, and chopped bell peppers separately. Just keep them in airtight bags. They store well for 2 to 3 months in the freezer. For best results, thaw them in the fridge before adding to your salad. How long does Peanut Crunch Salad last? Peanut Crunch Salad stays fresh in the fridge for about three days. Keep the dressing separate until serving. This helps keep the greens crisp and the salad tasty. Can I meal prep Peanut Crunch Salad? Yes, you can meal prep this salad! Make the salad base and store it in an airtight container. Add the peanuts and dressing just before eating. This makes it easy to enjoy a healthy meal all week. Is Peanut Crunch Salad gluten-free? Yes, Peanut Crunch Salad is gluten-free if you use gluten-free soy sauce. Check the label to make sure it meets your needs. Caloric value per serving Each serving of Peanut Crunch Salad has around 200 calories. This makes it a light yet filling option for lunch or dinner. Health benefits of ingredients used - Mixed greens: Packed with vitamins and minerals, they boost your immune system. - Red cabbage: Rich in antioxidants, it supports heart health. - Carrots: High in beta-carotene, good for your eyes. - Edamame: A great source of protein and fiber. - Peanuts: They provide healthy fats and keep you full longer. This salad is not only tasty but also good for your health. Enjoy the fresh flavors and benefits! You can find the Full Recipe for Peanut Crunch Salad above. Peanut Crunch Salad combines fresh greens, colorful veggies, and crunchy peanuts for a tasty meal. You can mix it up with different dressings and proteins. Use the tips for freshness and flavor to make it your own. Remember to store leftovers properly to keep them crisp. Whether you enjoy it right away or prep for later, this salad brings joy to any table. Enjoying a vibrant, healthy dish is easy and fun!

Peanut Crunch Salad Fresh and Flavorful Delight

If you’re craving a fresh and tasty dish, try my Peanut Crunch Salad! This vibrant salad blends crunchy veggies with

- 8 oz elbow macaroni or fusilli pasta - 2 cups corn kernels (fresh, frozen, or canned) - ½ cup crumbled cotija cheese - 1 red bell pepper, diced - 1 jalapeño, seeded and minced - ¼ cup cilantro, chopped - 3 tablespoons mayonnaise - 2 tablespoons sour cream - 2 tablespoons lime juice - 1 teaspoon chili powder - Salt and pepper to taste When I make Mexican street corn pasta salad, I focus on fresh, vibrant flavors. This dish is great for gatherings or a cozy dinner. First, I select my main ingredients. The pasta is the base, and I often use elbow macaroni or fusilli. They hold the dressing well. Next, I add corn. Fresh corn is best, but frozen or canned works fine. For color and crunch, I include diced red bell pepper. It adds sweetness. I also like to use jalapeño for a little heat. If you prefer less spice, remove the seeds. Finally, I sprinkle in chopped cilantro for a fresh taste. The dressing is key. I mix mayonnaise and sour cream for creaminess. Lime juice brightens the flavors, while chili powder gives it that classic street corn taste. I season with salt and pepper, making it just right. For the full recipe, check out the detailed instructions. Enjoy creating this flavorful dish! To start, boil a large pot of salted water. Add 8 ounces of elbow macaroni or fusilli pasta. Cook it according to the package instructions until it’s al dente. This means it should be firm but not hard. Once done, drain the pasta in a colander. Rinse it under cold water. This helps stop the cooking process and keeps the pasta from getting mushy. Next, grab a large skillet. Over medium heat, add 2 cups of corn kernels. You can use fresh, frozen, or canned corn. Sauté the corn for about 5 to 7 minutes. You want it to get slightly charred. This will bring out its natural sweetness and add a nice flavor. Once cooked, set it aside to cool. In a large mixing bowl, combine the cooled pasta and sautéed corn. Add in the diced red bell pepper, minced jalapeño, finely chopped red onion, halved cherry tomatoes, and chopped cilantro. This mix of colors and textures makes the salad lively. Now, let’s make the dressing. In a small bowl, whisk together 3 tablespoons of mayonnaise, 2 tablespoons of sour cream, 2 tablespoons of lime juice, 1 teaspoon of chili powder, and a pinch of salt and pepper. Make sure it's well blended. Pour the dressing over the pasta and vegetable mix. Toss everything gently until well coated. You want every bite to burst with flavor. Finally, sprinkle ½ cup of crumbled cotija cheese over the top. Give it a light toss to mix it in. This cheese adds a creamy and salty kick to the salad. For the best flavor, cover the salad and chill it in the fridge for at least 30 minutes. This allows all the flavors to meld together beautifully. For more detailed steps, check out the Full Recipe. Using fresh ingredients is key for the best flavor. Fresh corn gives a sweet crunch. Look for corn on the cob in season. If fresh corn is not available, frozen corn works well too. Just be sure to sauté it to add a bit of char. Adjusting seasoning to taste is easy. Start with salt and pepper. After mixing, taste the salad. You might want more lime juice for zing. A bit more chili powder can add heat if you like it spicy. Serving your pasta salad in a large bowl makes it inviting. For a colorful touch, add extra diced red bell pepper on top. You can also sprinkle more cotija cheese for a creamy look. Garnish with chopped cilantro for a pop of color. Lime wedges on the side add brightness. This not only looks good but also gives a fresh twist when served. For a gluten-free option, swap the pasta for gluten-free pasta. There are great options available that taste just as good. To make the salad vegan, use plant-based mayo and sour cream. You can replace cotija cheese with vegan cheese or simply leave it out. The salad will still taste great! {{image_2}} You can change the cotija cheese if you want. Feta cheese works well too. If you seek a creamier texture, try goat cheese. For pasta, elbow macaroni is great, but fusilli adds a fun twist. You can also use whole wheat pasta for a healthier option. Feel free to mix in different veggies. Try adding diced cucumbers for some crunch. Chopped radishes can give a nice bite. You can even toss in some black beans for added protein and fiber. Each swap can change the salad’s flavor and texture. For a heartier dish, add proteins. Grilled chicken or shrimp are excellent choices. They pair well with the other flavors. You can also use cooked bacon for a smoky touch. This will make your salad more filling and satisfying. If you love heat, spice it up! Add extra chilies or a splash of hot sauce. You can use your favorite chili powder or even diced serrano peppers. This will elevate the flavor and give it a nice kick. Get creative by mixing in ideas from other cuisines. How about a Mediterranean twist? Add olives and artichokes for a unique taste. You can also mix Mexican street corn flavors with a classic pasta salad. Think about adding olives, mozzarella, and basil for a fun fusion. Combining flavors from different cultures can bring fresh excitement. The key is to balance the tastes. You want to keep that beloved street corn essence while exploring new flavors. To keep your Mexican street corn pasta salad fresh, store it in an airtight container. This helps prevent it from absorbing other flavors in your fridge. It stays fresh for about 3 to 5 days. After that, the taste and texture may change. Always check for any signs of spoilage before eating. You can freeze the pasta salad, but it's best to keep the dressing separate. To freeze, place the salad in a freezer-safe bag or container. Remove as much air as possible to avoid freezer burn. When you are ready to eat, let it thaw in the fridge overnight. Reheat gently on the stove, adding a bit of lime juice to revive the flavors. Before serving leftovers, give the salad a good stir. It may need some refreshing. Add a little more lime juice or salt to boost the taste. You can also toss in some fresh cilantro or extra cheese for a flavor kick. This way, you can enjoy each bite as if it was fresh! Mexican street corn, or elote, is a popular street food in Mexico. It features grilled corn on the cob, slathered with creamy sauce. You usually find it topped with cotija cheese, chili powder, and fresh lime juice. This dish bursts with flavors and textures that create a delightful experience. Yes, you can! Frozen corn is a great option. It is sweet and tender. Using frozen corn saves time and is easy to find. Just remember to thaw it first. Fresh corn has a bit more crunch and flavor, but frozen works well too. To spice up this salad, add more jalapeños. You can use diced fresh ones or pickled ones. Another option is to sprinkle in cayenne pepper or hot sauce. If you enjoy smoky flavors, try adding smoked paprika. Adjust to your heat preference for the best flavor. This salad pairs well with grilled meats. Try serving it alongside chicken, steak, or fish. It also complements barbecued dishes or tacos. For a lighter meal, serve it with a fresh green salad. The flavors blend well together in any meal setting. You can keep leftovers in the fridge for 3 to 5 days. Store them in an airtight container to maintain freshness. If the salad looks or smells off, it’s best to toss it. Always check for any changes before enjoying leftovers. This blog post covered a tasty Mexican Street Corn Pasta Salad. We explored key ingredients, like pasta, corn, and cotija cheese. I shared step-by-step instructions for making and storing the salad. You learned tips for flavor and presentation, along with variations for your tastes. Remember, using fresh ingredients enhances the flavor and joy of cooking. Enjoy experimenting and make this salad your own!

Mexican Street Corn Pasta Salad Flavorful and Fresh Dish

If you love vibrant flavors and fresh ingredients, this Mexican Street Corn Pasta Salad is for you! This dish brings

- 4 ripe peaches, pitted and chopped - 1 cup freshly squeezed lemon juice (about 4-5 lemons) - 1 cup granulated sugar (adjust to taste) - 4 cups water - 1/2 teaspoon pure vanilla extract (optional) - Fresh mint leaves for garnish - Lemon slices for garnish - Medium saucepan - Fine-mesh strainer or cheesecloth - Large pitcher To make my homemade peach lemonade, I start with fresh, ripe peaches. The sweetness from these fruits is key to a great drink. I also use fresh lemons for their bright, zesty flavor. Granulated sugar helps balance the tartness from the lemons. Adjusting the sugar gives you control over the sweetness. Next, I add water to help blend the flavors. A splash of pure vanilla extract adds a unique twist, but it's optional. For garnishing, I love using fresh mint leaves and lemon slices. They make the drink look beautiful and add extra flavor. For equipment, you need a medium saucepan to cook the peaches. A fine-mesh strainer or cheesecloth helps to separate the liquid from the solids. Finally, a large pitcher is perfect for mixing and serving the lemonade. You can find the full recipe for this refreshing peach lemonade to get started. First, take your ripe peaches and chop them into small pieces. In a medium saucepan, combine the chopped peaches, 1 cup of water, and sugar. Place the saucepan over medium heat. Stir occasionally and let it simmer for about 10 to 15 minutes. You want the peaches to soften and release their sweet juices. This step is key for a rich flavor. After cooking, remove the saucepan from the heat. Let the mixture cool for a few minutes. Once it's cool, strain it into a large pitcher using a fine-mesh strainer or cheesecloth. Press down on the solids to get every drop of liquid. Then, add the freshly squeezed lemon juice along with the remaining 3 cups of water. Stir everything well until it's fully mixed. Taste it and adjust the sweetness if needed. Now it's time to chill your peach lemonade. Place the pitcher in the refrigerator for about 1 hour. This lets the flavors blend perfectly. When you're ready to serve, fill glasses with ice cubes. Pour the chilled lemonade over the ice. For a nice touch, garnish each glass with fresh mint leaves and lemon slices. Enjoy your refreshing summer drink! How do I adjust sugar levels? Taste is key! Start with one cup of sugar. After mixing, taste and add more sugar if needed. Remember, you can always add more, but you cannot take it out. How do I balance tartness with lemon juice? For a nice balance, use one cup of freshly squeezed lemon juice. This amount adds a bright flavor. If it’s too tart, add a little more sugar. If it’s too sweet, add more lemon juice. What are the tips for selecting ripe peaches? Choose peaches that feel soft but not mushy. Look for a rich color and a sweet scent. This means they are ripe and ready to use. Why should I use freshly squeezed lemon juice versus store-bought? Fresh lemon juice tastes better! It has a bright flavor that store-bought juice lacks. The taste difference makes your peach lemonade stand out. What is the ideal glassware for serving? Use clear glasses to show off the pretty color of the peach lemonade. Tall glasses work well. They also hold more ice and lemonade, keeping your drink cold longer. What snacks or appetizers pair well with peach lemonade? Peach lemonade goes great with light snacks. Try serving it with cheese, crackers, or fresh fruit. It also complements spicy foods nicely, balancing the heat with its sweetness. For the full recipe, check out the detailed steps above! {{image_2}} You can make your peach lemonade even better by adding flavors. Infusing herbs like basil or rosemary gives it a fresh twist. Simply add a few leaves to the peach mixture while it cooks. The herbs will add a nice depth to the drink. Another fun idea is the Georgia peach twist. Just add extra peach slices to your lemonade. This not only boosts the peach flavor but also makes it look beautiful. The more peaches, the better! If you want a grown-up version, you can add alcohol. A splash of vodka or gin creates a refreshing cocktail. Just mix in about one to two ounces per glass when serving. A peach lemonade spritzer is another option. You can combine your lemonade with sparkling water. This adds fizz and makes it a fun drink for parties. The bubbles will keep everyone refreshed. You can also make healthier choices when making this drink. Use honey or agave syrup instead of sugar. These natural sweeteners give a nice taste without the extra calories. If you want a low-calorie version, simply reduce the sugar and use more lemon juice. This keeps the drink bright and tasty while cutting down on calories. You can still enjoy a delicious homemade peach lemonade without the guilt! For the full recipe, check out the Refreshing Peach Lemonade section. To keep your peach lemonade fresh, store it in a sealed pitcher. Place it in your fridge. This way, it stays cool and tasty. Homemade peach lemonade is best enjoyed within three to five days. After this time, it may lose its bright flavor. You can freeze peach lemonade into ice cubes. Pour the lemonade into an ice cube tray. Once frozen, pop the cubes out and store them in a zip-top bag. These cubes are great for adding to drinks later. When you want to use them, just take out what you need. Let them sit at room temperature for a few minutes to thaw. You can also blend them into slushies for a fun treat. If you have leftover peach lemonade, get creative. You can make popsicles by pouring it into molds and freezing. These are great for hot days. You can also use the leftover lemonade in cocktails or spritzers. Just mix it with some sparkling water or your favorite spirit for a refreshing drink. Enjoy experimenting with your peach lemonade leftovers! Yes, you can use frozen peaches! They save time and add a sweet flavor. However, using frozen peaches can change the texture. Fresh peaches give a better taste and texture. If you choose frozen, let them thaw first. Then, chop them into smaller pieces. This helps them mix better with the other ingredients. You can store homemade peach lemonade in the fridge for up to 5 days. Keep it in a sealed pitcher or bottle. This keeps it fresh and tasty. After a few days, the flavors might change. You can also freeze it for longer storage. Pour it into ice cube trays for easy use later. Just thaw it in the fridge or at room temperature when you want some. Yes, you can use less sugar! Try honey or agave syrup as substitutes. These sweeteners add a nice flavor. Just remember, using less sugar may change the taste. Start with half the amount and taste as you go. This way, you can find what works best for you. Enjoy your peach lemonade while keeping it healthy! You can make delicious peach lemonade easily. We covered fresh ingredients, like ripe peaches and lemons. I shared steps to cook, strain, and chill for the best taste. You can also adjust sweetness and add fun flavors. Finally, think about how to store leftovers or use them in new creations. Enjoy this drink on any sunny day. It’s refreshing and simple to share with friends and family. Embrace your creativity and make this recipe your own!

Homemade Peach Lemonade Refreshing Summer Drink

When summer hits, there’s nothing better than a refreshing drink. That’s where my Homemade Peach Lemonade comes in. Imagine ripe

To create a delicious Blueberry Cheesecake Fillo Galette, gather these key ingredients: - 8 sheets of fillo dough - 1 cup ricotta cheese - 1 cup cream cheese, softened - 1/2 cup powdered sugar - 1 teaspoon vanilla extract - 2 cups fresh blueberries - 1 tablespoon lemon juice - Zest of 1 lemon - 1 egg (for egg wash) - 2 tablespoons melted butter (for brushing) - Pinch of salt - Additional powdered sugar for dusting (optional) These ingredients come together to form a creamy filling and a crispy crust. The blueberries add a sweet and tangy flavor that brightens the dish. You can elevate your galette with various toppings: - Whipped cream for a light touch - A drizzle of honey for extra sweetness - Fresh mint leaves for color and taste - A sprinkle of cinnamon for warmth These options can enhance your dessert and provide a lovely presentation. If you have allergies or preferences, consider these substitutions: - Use dairy-free cream cheese for a vegan option. - Swap out ricotta for a nut-based cheese if you're vegan. - Replace blueberries with raspberries or strawberries if desired. These adjustments keep the recipe flexible while ensuring everyone can enjoy this delightful dessert. Check out the Full Recipe for more guidance on making this treat your own! First, let's get ready to make this tasty treat. Preheat your oven to 375°F (190°C). Line a baking sheet with parchment paper to prevent sticking. Next, take one sheet of fillo dough and lay it flat on your clean surface. Brush it lightly with melted butter. Repeat this process with the remaining sheets, stacking them on top of each other. Each layer gets its own brush of butter. This helps the dough become crispy and golden. Now, let's make the cheesecake filling. In a bowl, mix the ricotta cheese, cream cheese, powdered sugar, vanilla extract, lemon juice, lemon zest, and a pinch of salt. Use a mixer or whisk until everything is smooth and creamy. This step is key for a tasty filling. Now it’s time to put everything together. Place the stack of fillo layers in the center of your baking sheet. Leave a large border around the edges. Spoon the cheesecake mixture into the middle. Spread it out evenly. Be sure to leave space around the edges for folding. Next, gently fold the edges of the fillo dough over the filling. It should create a rustic, open shape. Don’t worry if it looks imperfect; that’s the charm of a galette! Pinch the folds to keep everything secure. For a golden finish, beat an egg in a small bowl and brush it over the edges of the fillo. This will give it a lovely shine. Finally, scatter the remaining fresh blueberries over the cheesecake mixture for a pop of color and flavor. Place your galette in the preheated oven. Bake it for 25 to 30 minutes. You want it to be golden brown and crispy. Keep an eye on it to avoid burning. Once done, take it out and let it cool for a few minutes. Before serving, you can dust it with extra powdered sugar for a sweet touch. Now, slice it into pieces and enjoy this delightful blueberry cheesecake fillo galette. It’s sure to impress your friends and family! To get great fillo dough, keep it cool. Fillo dries out fast. Always cover the sheets with a damp towel while you work. This keeps them soft and easy to handle. Use at least eight layers for a nice, crunchy crust. Brush each layer with melted butter. This adds flavor and helps them stick together. For a smooth cheesecake, mix your cheeses well. Use a hand mixer for the best results. Start with room temperature cream cheese. This helps it blend easily with ricotta. Add the powdered sugar slowly. This way, it mixes in smoothly. Don’t overmix once you add the blueberries. You want to keep their shape and texture. Serve your Blueberry Cheesecake Fillo Galette warm or at room temperature. A scoop of vanilla ice cream pairs well with it. You can also serve it with fresh whipped cream. For a twist, add a drizzle of lemon glaze. It brightens the flavors. If you like, sprinkle some extra powdered sugar on top for a sweet touch. Enjoy your galette with a cup of herbal tea or coffee for a delightful treat. For the complete process, check the Full Recipe. {{image_2}} You can swap blueberries for other fruits. Raspberries, strawberries, or peaches work well. When using different fruits, adjust the sugar. Some fruits are sweeter than others. This keeps the balance right in your galette. For a fun twist, mix fruits. This adds color and flavor. Want to add some flair? Try mixing in chocolate or spices. A touch of cinnamon gives warmth. You can also use lemon zest for brightness. If you love chocolate, add cocoa powder to the filling. This creates a rich, creamy mix. You can sprinkle chocolate chips on top too! If you're gluten-free, look for gluten-free fillo dough. Many brands offer this option now. For a vegan version, swap cream cheese with cashew cream. Blend soaked cashews, lemon juice, and a touch of maple syrup. This creates a creamy filling without dairy. You can use a plant-based egg wash or skip it for a crispier finish. For the full recipe, refer to the ingredients and steps outlined above. To keep your Blueberry Cheesecake Fillo Galette fresh, place leftovers in an airtight container. Store it in the fridge for up to three days. Make sure it cools down completely before sealing it. This helps keep the fillo dough crisp as long as possible. When you're ready to enjoy your galette again, preheat your oven to 350°F (175°C). Place the galette on a baking sheet and cover it loosely with foil. Heat for about 10-15 minutes. This will warm it up and help restore some crispness to the fillo dough. You can freeze the Blueberry Cheesecake Fillo Galette if you want to save it for later. Wrap it tightly in plastic wrap and then in aluminum foil. It can last up to two months in the freezer. When you want to eat it, thaw it in the fridge overnight. Then, reheat it in the oven as mentioned above. This way, you can enjoy this delightful treat anytime! Making a Blueberry Cheesecake Fillo Galette takes about 50 minutes. This time includes 20 minutes for prep and 30 minutes for baking. You will love how fast and easy this dessert comes together! Yes, you can make this dessert ahead of time. You can prepare the cheesecake filling and the fillo dough. Store each in the fridge for up to two days. When ready to serve, assemble and bake the galette. It stays fresh and tastes great! This galette pairs well with whipped cream or vanilla ice cream. You can also serve it with fresh berries or a drizzle of chocolate sauce. These toppings add flavor and make it look even more appealing. Enjoy every bite of this tasty treat! You’ve learned all about creating a delicious Blueberry Cheesecake Fillo Galette. We covered essential ingredients, from primary components to tasty toppings. You now know the steps to prepare, assemble, and bake your dessert perfectly. I shared tips for great texture and how to store leftovers. Remember, you can explore variations to fit your taste or dietary needs. This dessert is both rewarding and fun to make. So, grab your ingredients and enjoy the process. Happy baking!

Blueberry Cheesecake Fillo Galette Delightful Recipe

Looking for a dessert that wows and delights? Meet the Blueberry Cheesecake Fillo Galette! This easy recipe combines crispy fillo

Older posts
Newer posts
← Previous Page1 … Page12 Page13 Page14 … Page69 Next →

dsad

© 2025 My Saved Recipe • Built with GeneratePress

Our Policies

  • Copyright Policy
  • Cookie Policy
  • GDPR Policy
  • Privacy Policy
  • Disclaimer
  • Terms Of Use

More Information

  • Home
  • About
  • Contact
  • Appetizers
  • Dessert
  • Dinner
  • Drinks
©2025, My Saved Recipe About Back To Top