Skip to content
DisclaimerTerms Of UseGDPR PolicyCookie Policy

My Saved Recipe

  • Home
  • Drinks
  • Appetizers
  • Dinner
  • Dessert
  • About
  • Contact
  • Privacy Policy
DisclaimerTerms Of UseGDPR PolicyCookie Policy

Savannah

- 4 boneless, skinless chicken breasts - 1 cup salsa verde (store-bought or homemade) - Olive oil - Garlic powder - Ground cumin - Lime juice - Fresh cilantro - Lime wedges for serving To make grilled salsa verde chicken, you need simple yet vibrant ingredients. The chicken breasts are the star here. They are lean and soak up flavors well. Salsa verde gives a fresh zest. You can buy it or make it at home. If you make it, fresh tomatillos and herbs shine through. For the marinade, I always use olive oil. It adds a touch of richness. Garlic powder gives it a nice kick. Ground cumin brings warm notes. Don't forget fresh lime juice for acidity. It brightens up the dish. After grilling, I like to garnish with fresh cilantro. It adds color and a fresh taste. Lime wedges on the side are perfect for squeezing over the chicken. This adds even more brightness. Check out the Full Recipe for details! To start, grab a mixing bowl. Combine one cup of salsa verde, two tablespoons of olive oil, one teaspoon of garlic powder, and one teaspoon of ground cumin. Add two tablespoons of fresh cilantro and one teaspoon of lime juice. Season with salt and pepper to taste. Mix all these ingredients well. This marinade gives your chicken its tasty flavor. Now, take your four boneless, skinless chicken breasts. Place them in a large zip-top bag or a shallow dish. Pour the marinade over the chicken. Make sure each piece is well coated. Seal the bag or cover the dish. Refrigerate for at least 30 minutes. If you have time, marinate for up to four hours. This will give the chicken a deeper flavor. Next, preheat your grill to medium-high heat. Remove the chicken from the marinade. Let any extra marinade drip off. You can discard the leftover marinade. Grill the chicken for six to seven minutes on each side. Cook until the internal temperature reaches 165°F. Look for nice grill marks on the chicken. Remember, do not press down on the chicken while it cooks. This keeps the meat juicy. After grilling, let the chicken rest for five minutes. Slice and serve with lime wedges for a fresh touch. You can also drizzle extra salsa verde on top. For the full recipe, check the earlier section. To make sure your chicken stays juicy, do not press down on it while grilling. Pressing can squeeze out the juices and make it dry. Instead, let the heat do its work. Grill until it reaches 165°F (75°C). This way, you keep all the yummy flavors inside. Want to boost the flavor of your marinade? You can add more spices to kick it up! Try adding cayenne pepper for heat or smoked paprika for a rich taste. You can also mix in lime zest for a fresh twist. Even a splash of orange juice can add a sweet touch. Get creative with your own favorite spices! Grilling at the right temperature is key. Always preheat your grill to medium-high heat. This helps the chicken cook evenly and get those nice grill marks. If the grill is too hot, the outside may burn, while the inside stays raw. Aim for a steady 375°F to 400°F (190°C to 200°C). This ensures perfect results every time. For the full recipe, check the [Full Recipe]. {{image_2}} You can switch up the protein in this dish. Chicken thighs work well for a richer taste. They stay juicy and have a nice texture when grilled. Turkey is another great option. It is leaner but still tasty. For a plant-based choice, try tofu. Firm tofu absorbs flavors well. Just marinate it like the chicken. Each option brings a unique flavor to the table. If you want to make your own salsa verde, it's simple. Blend tomatillos, jalapeños, garlic, and lime juice. Add salt and fresh herbs for flavor. You can also play with spices. Try adding avocado for creaminess or mango for sweetness. These changes can make your salsa verde unique. If you prefer a different taste, green sauce or chimichurri can also work. Think about sides when serving grilled salsa verde chicken. Rice or quinoa pairs nicely. They soak up the sauce well. You can also serve it with grilled veggies. Peppers and zucchini add color and crunch. For a fresh touch, a salad with lime vinaigrette works too. You might want to include tortillas for a fun twist. They can be used to wrap the chicken and toppings. For the full recipe, check out the complete details above. To store leftover grilled salsa verde chicken, let it cool first. Place the chicken in an airtight container. This keeps the chicken fresh and stops it from drying out. You can keep it in the fridge for up to three days. Make sure to label the container with the date. This helps you remember how long it has been there. If you want to save the chicken for later, freezing is a great option. Wrap each piece of chicken tightly in plastic wrap. Then, place them in a freezer bag. Remove as much air as possible before sealing. This helps prevent freezer burn. You can freeze the chicken for up to three months. When you're ready to use it, thaw it overnight in the fridge. To reheat the chicken, avoid using the microwave if possible. Microwaving can make the chicken dry. Instead, use the oven or a skillet. Preheat your oven to 350°F (175°C). Place the chicken on a baking sheet and cover it with foil. Heat for about 15-20 minutes or until hot. If you're using a skillet, add a splash of water and cover it. This keeps the chicken moist while reheating. Enjoy your flavorful grilled salsa verde chicken! For the full recipe, check out the earlier sections. For the best flavor, marinate chicken for at least 30 minutes. If you have more time, let it sit for up to 4 hours. This longer time helps the chicken soak up all the tasty salsa verde. It gets tender and full of flavor, which makes each bite a delight. Yes, you can use store-bought salsa verde. It saves time and still tastes great. However, homemade salsa verde often has fresher flavors. If you have the time, making your own can elevate the dish. You can control the spice and freshness, which makes a big difference in taste. I suggest serving grilled salsa verde chicken with rice or a fresh salad. Both add nice textures. You can also pair it with black beans or corn on the side for more flavor. For drinks, try a light beer or a crisp white wine. These options complement the spicy, zesty chicken very well. This blog post covered everything you need for grilled salsa verde chicken. You learned how to prepare a tasty marinade, marinate the chicken, and grill it perfectly. Plus, we explored tips for juicy chicken and different protein options. Remember to store leftovers right and reheat them well. Try out these ideas and make this dish your own. Enjoy the fresh flavors and share it with others!

Grilled Salsa Verde Chicken Flavorful and Juicy Recipe

Looking to spice up your dinner? This Grilled Salsa Verde Chicken recipe is packed with flavor and juicy goodness. You’ll

- 1 pound large shrimp, peeled and deveined - 2 tablespoons blackening seasoning - 1 tablespoon olive oil - 3 cups romaine lettuce, chopped - 1 cup cherry tomatoes, halved - 1/2 cup croutons - 1/4 cup grated Parmesan cheese - 2 tablespoons hot honey - 1 tablespoon lemon juice - Salt and pepper to taste - Optional garnish: Fresh parsley For this Hot Honey Blackened Shrimp Caesar Salad, you start with fresh, large shrimp. I prefer peeled and deveined shrimp for easy cooking. The blackening seasoning gives the shrimp a bold flavor. You can find or make your own blend using spices like paprika, cayenne, and garlic powder. Next, I use olive oil to help the seasoning stick to the shrimp and to add a hint of richness. Fresh romaine lettuce forms the base of the salad, providing a nice crunch. Cherry tomatoes add sweetness and color. Croutons bring a delightful crunch, while Parmesan cheese gives a salty finish. Hot honey is the star ingredient, adding both sweetness and heat. The lemon juice brightens the dish and balances the flavors. Lastly, season with salt and pepper to taste. For a pretty touch, I like to add fresh parsley as a garnish. This list gives you everything you need to create this tasty salad. Check out the Full Recipe for more details on making this dish! To start, toss the shrimp in a bowl with the blackening seasoning and olive oil. Mix well until each shrimp gets a good coat. This seasoning gives the shrimp a bold taste. Next, heat a skillet on medium-high heat. When the skillet is hot, add the seasoned shrimp. Cook the shrimp for about 2-3 minutes on each side. Look for them to turn opaque and slightly charred. Once cooked, remove them from heat and drizzle with hot honey while they are warm. This adds a sweet kick. In a large salad bowl, combine the chopped romaine lettuce, halved cherry tomatoes, croutons, and grated Parmesan cheese. This mix creates a fresh base for your salad. Now, let’s whisk together the dressing. In a small bowl, combine the hot honey and lemon juice. This simple dressing brightens the salad. Drizzle it over the salad and toss gently to mix everything. Season with salt and pepper to taste. It’s time for the final touches! Top the salad with the blackened shrimp. Spread them evenly across the salad for a great look. If you want, sprinkle some fresh parsley on top for color. This adds a nice touch and makes the salad pop. Enjoy your Hot Honey Blackened Shrimp Caesar Salad Delight! For the full recipe, check [Full Recipe]. To cook shrimp just right, aim for a perfect medium-high heat. This keeps them juicy. You want to cook them for about 2-3 minutes on each side. Watch for them to turn opaque and get a nice char. This char adds flavor and a lovely look. Want more heat? You can add more hot honey to the dressing. Or mix in a pinch of cayenne pepper for an extra kick. If you want a different taste, try a ranch or blue cheese dressing. These add creamy flavor and balance the spice. Make your salad look great! Serve it in a chilled bowl for a fresh touch. Arrange the shrimp on top, letting them stand out. For a colorful finish, drizzle extra hot honey or sprinkle some sliced avocado. Try using radishes or edible flowers for a unique look. {{image_2}} You can switch up proteins to fit your taste. Chicken works great in this salad. For a plant-based option, try tofu. Both absorb flavors well. If you need gluten-free croutons, use rice cakes or toasted gluten-free bread. These options add crunch without gluten. Want to kick up the spice? Add cayenne or smoked paprika to the blackening seasoning. You control the heat level. For a sweet twist, toss in fruits like mango or berries. They add juicy bursts. Nuts like almonds or walnuts offer a nice crunch and extra protein. Pair this salad with a light drink, like lemonade or iced tea. Both keep it refreshing. To make it a full meal, serve it with grains. Quinoa or brown rice complements the salad well. Enjoy the mix of textures and flavors! To keep your Hot Honey Blackened Shrimp Caesar Salad fresh, store leftovers in an airtight container. This method helps prevent moisture loss and keeps flavors intact. You can refrigerate the salad for up to 2 days. However, enjoy it sooner for the best taste. If the shrimp starts to smell or change texture, discard it. You can freeze the blackened shrimp, but it's not ideal for the salad. To freeze, put the shrimp in a freezer-safe bag. Remove as much air as possible to prevent freezer burn. When you're ready to eat, thaw the shrimp in the fridge overnight. For the salad, freezing is not recommended. The lettuce and tomatoes will lose their crunch and become soggy. Instead, prepare the salad fresh to enjoy the best texture and taste. If you want to make it ahead, store the dressing separately. This keeps everything fresh until you're ready to eat. Yes, you can make parts of this salad ahead of time. Here are the best practices: - Shrimp: Cook and cool the shrimp. Store them in an airtight container in the fridge for up to 2 days. - Lettuce: Wash and chop the romaine. Keep it dry and wrap it in a paper towel. Store in a sealed bag. - Dressing: Mix hot honey and lemon juice. Store it in the fridge for freshness. - Croutons: Keep them in a sealed container to maintain their crunch. When ready to serve, just combine all the parts. Drizzle with dressing and enjoy! Blackening seasoning is a mix of bold flavors. Here are the key spices used: - Paprika - Cayenne pepper - Garlic powder - Onion powder - Thyme - Oregano - Black pepper - Salt You can adjust the spices to suit your taste. More cayenne adds heat, while paprika gives a nice color. Hot honey brings sweet heat to dishes. The spice level varies by brand. Many have a mild to medium heat. You can use hot honey as a drizzle or in dressings. For a milder taste, mix regular honey with a pinch of chili flakes. This way, you control the heat and still get that sweet, spicy kick. This blog post covered how to make a tasty blackened shrimp salad. We went over the main ingredients you'll need, the step-by-step cooking process, and helpful tips to get it just right. You can even switch up ingredients for variety! Make sure to store leftovers properly to enjoy later. With a quick prep and easy adjustments, this salad can fit any meal. I hope you feel inspired to give it a try! Enjoy your cooking journey!

Hot Honey Blackened Shrimp Caesar Salad Delight

Are you ready to spice up your salad game? This Hot Honey Blackened Shrimp Caesar Salad Delight combines bold flavors

- 200g smoked salmon, sliced - 4 cups mixed salad greens (arugula, spinach, and butter lettuce) - 1 cup cherry tomatoes, halved - 1 cucumber, sliced - 1 small red onion, thinly sliced - 1 avocado, sliced - 1 tablespoon capers, rinsed and chopped - 1/4 cup fresh chives, finely chopped - 2 tablespoons Greek yogurt - 1 tablespoon lemon juice - 1 tablespoon olive oil - Salt and pepper to taste This salad shines with fresh ingredients. The smoked salmon adds rich flavor. Each bite bursts with freshness. I love the mix of greens. Arugula brings a peppery taste. Spinach adds earthiness, while butter lettuce gives a soft crunch. Cherry tomatoes bring sweetness and color. Their juicy pop is delightful. Sliced cucumber cools the salad. It adds a nice crunch, too. Red onion gives a sharp bite that contrasts well. Avocado brings creaminess. Its smooth texture balances the dish. When I slice it, I always choose ripe ones for the best taste. Now, let’s talk dressing. Capers give a briny kick. They pair well with the salmon. Fresh chives add a mild onion flavor. I love how they brighten the salad. Greek yogurt makes the dressing creamy without being heavy. It adds a tang that works well with lemon juice. The olive oil ties everything together, adding richness. Salt and pepper round out the flavor. Adjust to your taste. You can find the full recipe at the end of this section. In a large bowl, combine mixed salad greens, cherry tomatoes, cucumber, red onion, and avocado. Toss gently to mix all ingredients. This step is key for a fresh base. The greens should be crisp, and the veggies colorful. In a separate small bowl, whisk together chopped capers, chives, Greek yogurt, lemon juice, and olive oil. Season the dressing with salt and pepper to taste. This dressing adds a bright and tangy flavor. It lifts the salad and complements the smoked salmon beautifully. Drizzle the caper chive dressing over the salad and toss gently. This ensures every bite is full of flavor. Next, artfully lay the smoked salmon slices on top of the salad. The salmon provides a rich, savory taste. It makes the salad feel special and elegant. You can find the full recipe [here]. Enjoy this delightful dish! Serve the salad in a large, shallow bowl for visual appeal. This makes it look vibrant and inviting. Drizzle extra drops of lemon juice on top for added freshness. It brightens the dish and makes it more appealing. You can experiment with herbs like dill or parsley in the dressing. These herbs add depth and complexity to the taste. Fresh lemon zest can elevate the flavor profile too. It gives a bright and zesty kick that enhances the dish. Opt for ripe avocados for creaminess. They add a smooth texture that pairs well with the salmon. Consider toasting nuts or seeds for added crunch. This contrast makes every bite more satisfying. Feel free to check out the Full Recipe for more detailed steps and tips! {{image_2}} You can switch out the smoked salmon for grilled chicken or shrimp. Both options add unique flavors and keep the dish light. If you want a different crunch, try using kale or romaine instead of mixed salad greens. These greens bring a new texture and taste to the salad. If you want a twist on the dressing, swap Greek yogurt for sour cream or tahini. Each option gives a different flavor profile. For a bright and tangy taste, mix lemon juice, olive oil, and mustard to create a simple lemon vinaigrette. This dressing pairs well with the salad's fresh ingredients. To make the salad even healthier, toss in quinoa or chickpeas. Both add protein and fiber without compromising taste. For a sweet touch, add seasonal fruits like berries or apple slices. These fruits not only boost nutrition but also bring a delightful contrast to the savory elements in the dish. Store leftover salad without the dressing in an airtight container for up to 2 days. This helps keep the greens crisp and fresh. Keep the dressing separate for best flavor and freshness. When you’re ready to eat, just drizzle it on the salad. Avoid freezing the salad. Fresh ingredients lose texture and taste when thawed. If you want to prepare in advance, consider freezing the dressing in an ice cube tray. This way, you can easily thaw a single serving when you need it. Gently toss salad components before serving to restore freshness. This helps mix flavors and makes the salad look nice. Use fresh ingredients when prepping for maximum taste. This will ensure that each bite is as good as the first. It lasts up to 2 days when stored properly without the dressing. Keep it in an airtight container in the fridge. The flavors stay fresh, but the greens might wilt over time. Check the salad before eating. If it looks or smells off, it's best to toss it. Yes, prepare the ingredients ahead. Chop your veggies and store them separately. This keeps them crisp. Add the dressing just before serving to ensure freshness. This way, you enjoy a crunchy salad every time. You can even mix and match ingredients based on what you have. Grilled chicken, shrimp, or tofu can all be excellent substitutes for smoked salmon. Each protein brings a different taste. Chicken adds heartiness, shrimp gives a sweet touch, and tofu offers a plant-based option. Experiment with your favorite! This blog post shows how to make a delicious smoked salmon salad. We covered the ingredients, from greens to the caper chive dressing. I shared tips for great presentation and new ways to customize your salad. Keeping leftovers fresh and tasty is also easy. Remember, salads can be fun and versatile. Enjoy trying different proteins and flavors to make this dish your own. Your next meal can be simple and yummy!

Smoked Salmon Salad with Caper Chive Dressing Delight

Are you ready to enjoy a dish that’s both delicious and healthy? This Smoked Salmon Salad with Caper Chive Dressing

- Chicken and Marinade Ingredients - 4 boneless chicken thighs - 1 cup chipotle BBQ sauce - 2 tablespoons olive oil - 1 teaspoon garlic powder - 1 teaspoon onion powder - Salt and pepper to taste - Corn and Cream Ingredients - 4 ears of corn, husked - 1 cup heavy cream - 1 tablespoon butter - 1 teaspoon smoked paprika - 1 tablespoon fresh cilantro, chopped (for garnish) When I prepare Chipotle BBQ chicken with creamed grilled corn, I focus on fresh ingredients. The chicken thighs are juicy and tender, perfect for grilling. The marinade makes them flavorful. I use chipotle BBQ sauce for a spicy kick. For the corn, I choose sweet, fresh ears. It gives a bright taste to the dish. The heavy cream adds richness to the creamed corn. Smoked paprika brings a nice depth of flavor. I love adding fresh cilantro for a pop of color. Each ingredient plays a key role in making this dish special. The combination of smoky, sweet, and creamy makes every bite a delight. You can find the Full Recipe to get all the details. Enjoy creating this tasty meal! Start by mixing the olive oil, garlic powder, onion powder, salt, and pepper in a bowl. This marinade adds great flavor. Next, coat the chicken thighs well. Let them sit for at least 30 minutes. This waiting time helps the chicken absorb the flavors from the marinade. Preheat your grill to medium-high heat. This step is key for good cooking. While the grill heats, husk the corn. Once ready, place the corn on the grill. Grill the corn for about 10-12 minutes. Turn it occasionally until you see nice char marks. Once cooked, remove the corn and let it cool. Now, take the chicken thighs from the marinade. Place them on the hot grill. Brush them generously with chipotle BBQ sauce. Cook each side for about 6-7 minutes. Baste them with more sauce as they cook. Make sure the internal temperature reaches 165°F. This means the chicken is fully cooked and safe to eat. While the chicken cooks, cut the corn kernels off the cobs into a bowl. In a medium saucepan, melt the butter over medium heat. Add the corn to the pan and sauté for 3-4 minutes. This softens the corn. Pour in the heavy cream and sprinkle in the smoked paprika. Stir often for about 5 minutes. This helps the mixture thicken and become creamy. When the chicken is done, take it off the grill. Let it rest for a couple of minutes. This helps keep the juices in. Serve the BBQ chicken on a plate with a scoop of the creamed corn. To finish, sprinkle fresh cilantro over the chicken and creamed corn. This adds a nice burst of color and flavor. Enjoy your meal! For the full recipe, check the details above. When grilling, keep these tips in mind for perfect results. First, preheat your grill. A hot grill helps sear the chicken and corn. Second, oil the grill grates. This prevents sticking and makes flipping easier. Use tongs to turn the chicken, not a fork. This keeps the juices inside. Cook chicken thighs until they reach an internal temperature of 165°F. Use a meat thermometer for accuracy. For the corn, grill it until it's charred and tender. Turn it every few minutes to cook evenly. To get creamy corn, start with fresh corn. Fresh corn has the best flavor and texture. After grilling, cut the kernels off the cobs. In a saucepan, melt butter over medium heat. Add the corn and sauté it for a few minutes. Then pour in the heavy cream. Stir continuously until it thickens. This should take about five minutes. Add smoked paprika for a nice kick. Taste and adjust seasoning as needed. To boost flavor, think about adding a squeeze of lime juice. It brightens the dish and adds zing. You can also sprinkle some chili powder or cayenne for added heat. Fresh herbs like cilantro not only add color but also enhance the taste. For a smoky flavor, try adding a dash of liquid smoke to the BBQ sauce. This gives the chicken an extra layer of depth. If you want more sweetness, stir in a bit of honey or brown sugar. For the full recipe, check out Chipotle BBQ Chicken with Creamed Grilled Corn. {{image_2}} You can change up the heat level in this dish. If you want more spice, try adding cayenne pepper to your BBQ sauce. You can also mix in some diced jalapeños or use a spicier chipotle sauce. For those who love a smoky flavor, consider adding smoked paprika to the sauce. This will add depth and a kick to your BBQ chicken. You can still enjoy the flavors of this dish without meat. Swap the chicken for grilled portobello mushrooms or zucchini. Both options soak up flavors well and have a nice texture. Use the same marinade on your veggies. Grill them until tender, then brush with chipotle BBQ sauce. This keeps the dish hearty and satisfying without the meat. When serving, I love to pair this dish with a fresh salad or coleslaw. A tangy slaw complements the BBQ sauce nicely. You could also serve it with rice or quinoa for a filling meal. If you want to impress guests, add some grilled pineapple on the side. The sweetness balances the smoky and spicy flavors perfectly. For more ideas, check the Full Recipe section for extra serving tips. To keep your Chipotle BBQ chicken and creamed corn fresh, place them in airtight containers. Make sure to cool the food to room temperature first. Store the chicken and corn separately to keep their textures just right. You can keep them in the fridge for up to three days. If you want to enjoy them later, freezing is a great option. When it's time to eat again, reheat the chicken in the oven. Preheat your oven to 350°F. Place the chicken on a baking sheet and cover it with foil. Heat for about 15-20 minutes, or until warm. For the creamed corn, reheat it on the stove over low heat. Stir it often to ensure it warms evenly without burning. If it seems too thick, add a splash of milk for creaminess. To freeze the creamed corn, let it cool completely. Transfer it into a freezer-safe bag or container. Remove as much air as possible before sealing. Label the bag with the date. You can freeze it for up to two months. When ready to use, thaw it in the fridge overnight and reheat as mentioned earlier. This way, you can enjoy that sweet, creamy flavor anytime! The best way to marinate chicken is to use a mix of oil, spices, and herbs. I like to use olive oil, garlic powder, onion powder, salt, and pepper. This mix adds great flavor. Coat the chicken well and let it sit. Aim for at least 30 minutes. For even better taste, marinate it overnight in the fridge. Yes, you can use another type of sauce. If you want a different flavor, try honey mustard or teriyaki. Each sauce brings its own taste to the chicken. Just make sure to adjust the cooking time if the sauce has a lot of sugar. Sugar can burn easily on the grill. To know when chicken is done, check its internal temperature. Use a meat thermometer and aim for 165°F. If you don’t have a thermometer, cut into the chicken. The meat should be white, not pink. Juices should run clear. This ensures the chicken is safe to eat and juicy. For more details, check the Full Recipe. This post covered key steps for a tasty dish featuring marinated chicken and creamed corn. You learned about the right ingredients, how to grill chicken, and make creamy corn. I shared tips to boost flavor and ideas for variations. Proper storage advice helps keep your leftovers fresh. By using these methods, you can create a meal that satisfies everyone. Enjoy your cooking and try new twists to make it your own!

Chipotle BBQ Chicken with Creamed Grilled Corn Delight

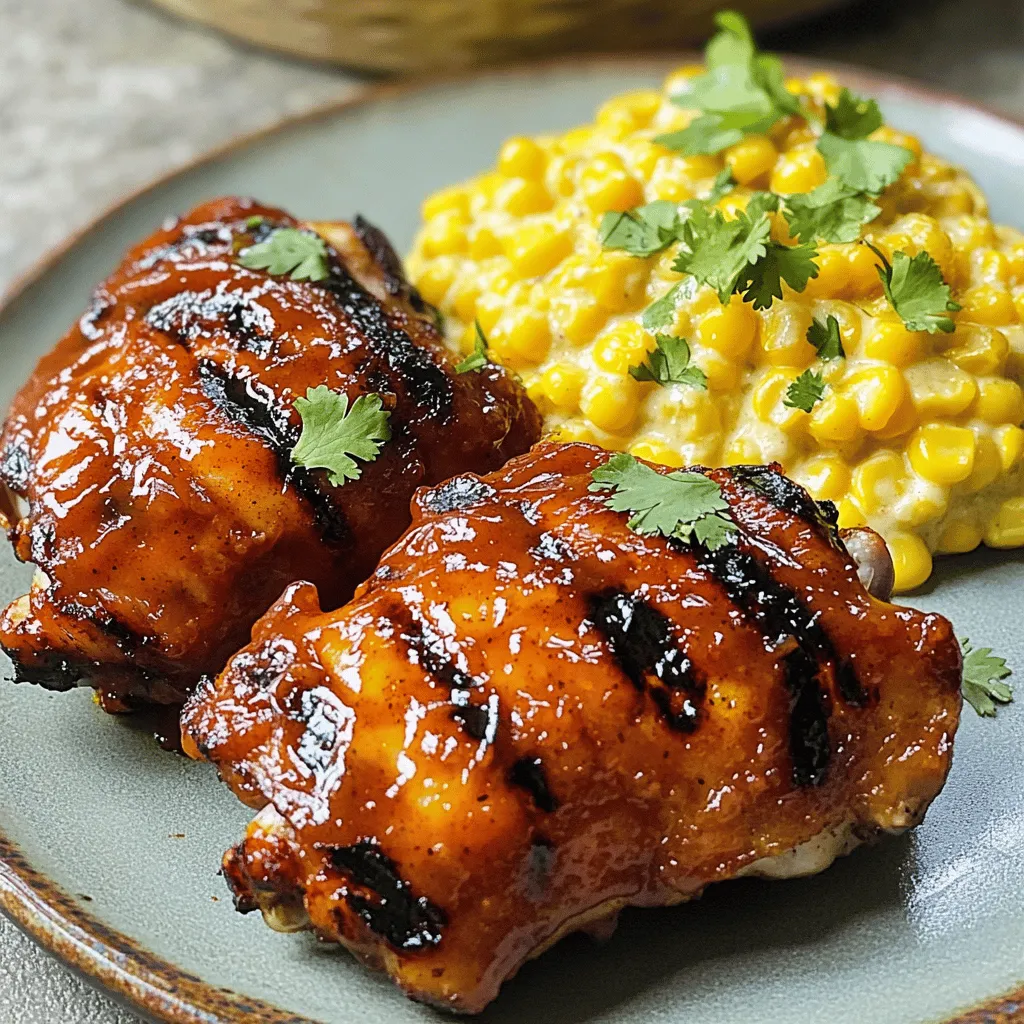
Get ready for a flavor explosion with my Chipotle BBQ Chicken and Creamed Grilled Corn Delight! This juicy chicken, paired

To make a delightful lemon posset, you need a few key items. Here’s your shopping list: - 2 cups heavy cream - 3/4 cup granulated sugar - 1/3 cup freshly squeezed lemon juice (about 2-3 lemons) - Zest of 1 lemon These ingredients create a creamy and tangy dessert. The heavy cream gives it a rich texture, while the sugar balances the tartness of the lemon. Adding garnishes can elevate your dessert. Here are some fun options: - Fresh berries (strawberries, raspberries, or blueberries) - Mint leaves for a pop of green These garnishes add color and freshness to your posset. They also provide a nice contrast to the creamy texture. Using high-quality ingredients makes a big difference. Fresh lemons give the best flavor. When you use fresh juice, the taste is bright and vibrant. Avoid bottled juice; it lacks that fresh zing. Good cream also matters. Opt for heavy cream with a high fat content. This will ensure your posset is smooth and luscious. Quality ingredients lead to a more satisfying dessert. For the full recipe, check out the complete guide! Start by gathering your ingredients. You will need heavy cream and granulated sugar. Pour the cream and sugar into a medium saucepan. Heat it over medium heat. Stir it gently as it warms. You want the sugar to dissolve completely. Keep an eye on it, so it does not boil. This should take about 5 to 7 minutes. Once the cream is hot and the sugar dissolves, remove the pan from heat. Now, add the freshly squeezed lemon juice. You can use about 2 to 3 lemons for this. Then, add the lemon zest for extra flavor. Mix this well until everything is combined. Let the mixture cool for about 5 minutes. This helps with the next step. Next, pour the mixture through a fine mesh sieve. This step catches any lumps or zest pieces. You want a smooth, creamy texture. Now, divide the mixture into small cups or ramekins. Cover them with plastic wrap and place them in the fridge. Let them chill for at least 4 hours. For the best texture, I suggest leaving them overnight. When ready to serve, top each posset with fresh berries and mint leaves. Enjoy this creamy citrus indulgence! For the full recipe, check out the details above. To get the best texture, use heavy cream. This makes the posset rich and smooth. Heat the cream gently. Stir until the sugar dissolves, but don’t let it boil. After adding the lemon juice and zest, let it cool slightly. Straining is key. It removes any bits, ensuring a silky finish. Chill until it sets. Aim for at least four hours in the fridge for the right firmness. You can play with flavors to make your posset unique. Add a splash of vanilla for warmth. Fresh herbs like basil can create an unexpected twist. If you want a sweeter taste, increase the sugar a bit. For a tangier kick, add more lemon juice or zest. Just remember, balance is key. Too much lemon can overpower the dish. Avoid boiling the cream. It can change the texture and flavor. Make sure to strain the mixture well. This prevents lumps from forming. Don’t skip the chilling time; it’s crucial for the posset to set properly. Always taste the mixture before pouring. Adjust flavors if needed. These small steps help you create a perfect lemon posset every time. Check out the Full Recipe to see how easy it is! {{image_2}} You can easily switch up lemon posset with other citrus fruits. Try orange or lime for a fun twist. Use the same amount of juice, just substitute the lemon juice. For orange posset, the flavor is sweeter and richer. Lime posset brings a zesty kick that many love. Both options keep the creamy texture and are just as delightful. If you want a grown-up version, consider adding liqueurs. A splash of limoncello gives a bright, sweet flavor. Alternatively, try a bit of gin or vodka for a unique touch. Just add about 2 tablespoons to the cream mixture. This small change makes the dessert feel more festive and special. You can also make lemon posset vegan. Use coconut cream instead of heavy cream. This gives a rich texture while keeping it dairy-free. For sweetness, maple syrup is a great choice. Use the same amount as sugar in the original recipe. This way, you keep the creamy goodness without any animal products. For the full recipe, please refer to the earlier section. To keep your lemon posset fresh, store it in the fridge. Use airtight containers, like glass jars. This helps prevent the dessert from absorbing other smells. Avoid letting it sit out for too long. Cover each dessert with plastic wrap before sealing. This adds a layer of protection against air exposure. Lemon posset can last about five days in the fridge. After that, it may lose its creamy texture and flavor. Always check for any signs of spoilage, like an off smell or unusual texture. If it looks or smells strange, it’s best to discard it. Freezing lemon posset is not recommended. The cream can separate when thawed. This may ruin the smooth texture you want. If you must freeze it, store it in small portions. When you’re ready to eat, let it thaw in the fridge overnight. Whip it gently to restore some creaminess, but it may not be the same as fresh. Enjoy your lemon posset straight from the fridge for the best flavor and texture. Lemon posset is a creamy dessert made with just three main ingredients: heavy cream, sugar, and lemon juice. You start by heating the cream and sugar until the sugar dissolves. Then, you add fresh lemon juice and zest for a zesty flavor. After mixing, you strain it to ensure a smooth texture. Finally, chill it until it sets. This dessert is rich and refreshing! While you can use bottled lemon juice, I recommend using fresh juice. Fresh lemons have vibrant flavor and aroma. Bottled juice can taste flat and may lack the brightness of fresh. If you want the best lemon posset, fresh is the way to go! I love serving lemon posset in small cups or ramekins. This makes it easy for guests to enjoy. You can top it with fresh berries and mint leaves for a pop of color and flavor. You can also add a drizzle of honey for extra sweetness. It looks lovely and tastes amazing! Yes, straining the mixture is important. It removes any curdled bits and lemon zest. This step ensures a silky-smooth texture, which is key for a great posset. It makes the dessert feel light and creamy on your palate. Absolutely! In fact, making lemon posset in advance is a great idea. You can prepare it a day ahead, allowing it to set overnight. This saves you time when hosting guests. Just remember to cover it well in the fridge to keep it fresh. For the full recipe, check out the details above! Lemon posset is a creamy, tangy treat made with simple ingredients. We explored essential ingredients, step-by-step instructions, and handy tips. I shared variations to suit different tastes and dietary needs. Proper storage helps keep your dessert fresh and tasty. Remember, using quality ingredients makes a big difference. Enjoy making this delightful dish and impress others with your skills. Keep experimenting with flavors to make it your own!

Lemon Posset Dessert Creamy Citrus Indulgence

Are you ready to indulge in a sweet treat that’s both simple and delicious? Lemon posset is a creamy, zesty

- 8 ounces whole grain pasta (penne or fusilli) - 1 cup fresh corn kernels (or frozen, thawed) - 1 red bell pepper, diced - 1/2 red onion, finely chopped - 1 avocado, diced - 1/2 cup cherry tomatoes, halved - 1/4 cup fresh cilantro, chopped - 2 tablespoons lime juice - 1 tablespoon olive oil - 1 teaspoon chili powder - Salt and pepper to taste - Crumbled feta cheese for garnish (optional) This Healthy Street Corn Pasta Salad is as vibrant as it is tasty. The ingredients provide a mix of colors and flavors. Each bite gives you a fresh crunch and a burst of flavor. You get whole grain pasta as a base, which adds fiber. Fresh corn brings sweetness, while red bell pepper adds a nice crunch. The red onion gives it a slight bite, and avocado adds creaminess. Cherry tomatoes bring juiciness, and cilantro offers an herbal touch. Lime juice and olive oil create a bright dressing. Chili powder adds just enough heat to make it exciting. This dish is not just pretty; it's packed with nutrients. Whole grain pasta is great for energy. Corn and peppers provide vitamins. Avocado adds healthy fats, and the tomatoes and cilantro are full of antioxidants. Each serving has about 250 calories, making it a light yet filling meal. You get a great mix of vitamins A and C from the veggies. This salad is perfect for a picnic or a quick lunch. You can find the Full Recipe to make this dish at home. To cook the pasta al dente, bring a pot of salted water to a boil. Add the whole grain pasta and cook it according to the package instructions. Stir the pasta occasionally. You want it firm but not hard. This should take about 8-10 minutes. Once cooked, drain the pasta in a colander. Rinse it with cold water right away. This stops the cooking process and helps keep the pasta from getting sticky. In a large mixing bowl, combine the cooked pasta with fresh corn, diced red bell pepper, chopped red onion, diced avocado, and halved cherry tomatoes. Each ingredient adds flavor and color. Next, create the dressing in a separate small bowl. Whisk together lime juice, olive oil, chili powder, salt, and pepper. This dressing brings all the flavors together. Now it’s time to toss the salad. Pour the dressing over the salad mixture and gently mix everything. This ensures each bite has great flavor. Fold in chopped cilantro for an extra fresh touch. If you like, sprinkle crumbled feta cheese on top before serving. For a beautiful presentation, serve the salad in a large bowl or on individual plates. Garnish with extra cilantro and a lime wedge. This adds a lovely pop of color and flavor. Enjoy your Healthy Street Corn Pasta Salad! For the full recipe, check out the details above. How to choose ripe avocados When picking avocados, look for ones that feel slightly soft. Gently squeeze them. If they yield to gentle pressure, they are ripe and ready to eat. Avoid hard avocados, as they need more time to ripen. If you buy hard ones, leave them on the counter for a few days. Once ripe, store them in the fridge to slow down the ripening process. Benefits of using fresh corn Fresh corn adds a sweet crunch to the salad. It tastes better than canned corn and has more nutrients. It also gives a nice pop of color. Corn is a good source of vitamins and fiber. If fresh corn is not in season, frozen corn works well too. Just make sure to thaw and drain it before using. Adding proteins (chicken, beans) You can make this salad more filling by adding proteins. Grilled chicken is a great option. Shredded rotisserie chicken works well too. If you want a meat-free option, try black beans or chickpeas. They add protein and fiber without extra fat. Adjusting spice level If you like heat, add more chili powder or diced jalapeños. For a milder taste, use less chili powder. You can also add a touch of smoked paprika for a smoky flavor. Taste as you go and adjust to your liking. Best practices for meal prep This salad is perfect for meal prep. You can cook the pasta and chop the veggies ahead of time. Store them in separate containers in the fridge. Mix them together just before serving to keep everything fresh and crunchy. How to keep ingredients fresh To keep ingredients fresh, store the dressing separately. Add it to the salad right before you eat. This way, the salad won’t get soggy. If you use avocado, add it last. This prevents browning and keeps the salad looking vibrant. For the full recipe, check below. {{image_2}} You can easily make this salad fit your needs. For a vegetarian option, substitute the feta cheese with a tangy vegan cheese. Look for one made from nuts or tofu. This change keeps the creamy texture without the dairy. For vegan dressing, use cashew yogurt or tahini instead of traditional dairy-based dressings. Both options add a nice creaminess. Just blend them with lime juice, garlic, and a touch of salt for a tasty twist. Embrace the seasons with fresh veggies! In spring, toss in peas or asparagus for a sweet crunch. Summer is perfect for adding zucchini or bell peppers. In fall, roasted butternut squash adds warmth and depth. Choose your favorite seasonal vegetables to keep it fresh. You can also switch up the pasta type. Try chickpea or lentil pasta for protein. Or use gluten-free pasta if needed. Each option brings a new flavor to your dish. To elevate your salad, spice it up! Try adding cumin or smoked paprika for a deeper taste. Fresh herbs like basil or mint can bring brightness. Mix and match herbs to fit your mood. You can also explore global flavors. Add a splash of soy sauce for an Asian twist or toss in some taco seasoning for a Mexican flair. These small changes can transform your salad into something exciting. To keep your Healthy Street Corn Pasta Salad fresh, store leftovers in the fridge. Place the salad in an airtight container. This helps keep moisture in. Use glass or BPA-free plastic containers. They seal well and make it easy to see what's inside. In the fridge, your pasta salad lasts about three days. After that, the veggies may get soggy. You can freeze the salad, but it’s not ideal. Freezing may change the texture of the pasta and veggies. If you choose to freeze it, eat it within a month. To reheat your pasta salad, use the microwave. Heat in short bursts of 30 seconds. Stir between each burst. This helps warm evenly. Avoid reheating for too long to keep the texture nice. If you want to eat it cold, just toss it with a little olive oil. This keeps it from getting soggy. Enjoy your vibrant dish! For the full recipe, check out the Healthy Street Corn Pasta Salad. Can I use canned corn? Yes, you can use canned corn. Just drain and rinse it before adding. Fresh corn has a great crunch, but canned corn works well too. Is this recipe gluten-free? No, this recipe is not gluten-free. Whole grain pasta contains gluten. You can use gluten-free pasta for a safe option. How many servings does the recipe yield? This recipe yields four servings. It is perfect for a small gathering or meal prep. Can I prepare this salad the night before? Yes, you can make this salad the night before. Just keep the dressing separate until serving. This keeps the salad fresh and crunchy. What can I pair with this pasta salad? This pasta salad pairs well with grilled chicken or fish. It also works great as a side dish for tacos or burgers. Can I substitute whole grain pasta with regular pasta? Yes, you can substitute regular pasta for whole grain. Just keep an eye on the cooking time, as it may differ. What other dressings can I use? You can use ranch, balsamic vinaigrette, or a simple olive oil and vinegar mix. Choose a dressing that suits your taste. This blog post detailed a tasty and healthy street corn pasta salad. We explored each ingredient and its benefits, along with step-by-step cooking instructions. Tips for perfecting the salad were included, as well as customization options for varying diets. I shared storage information to help keep leftovers fresh. Enjoy creating this dish. It fits many tastes and occasions. Share it with family and friends for the best experience. You can make it your own!

Healthy Street Corn Pasta Salad Vibrant and Flavorful Dish

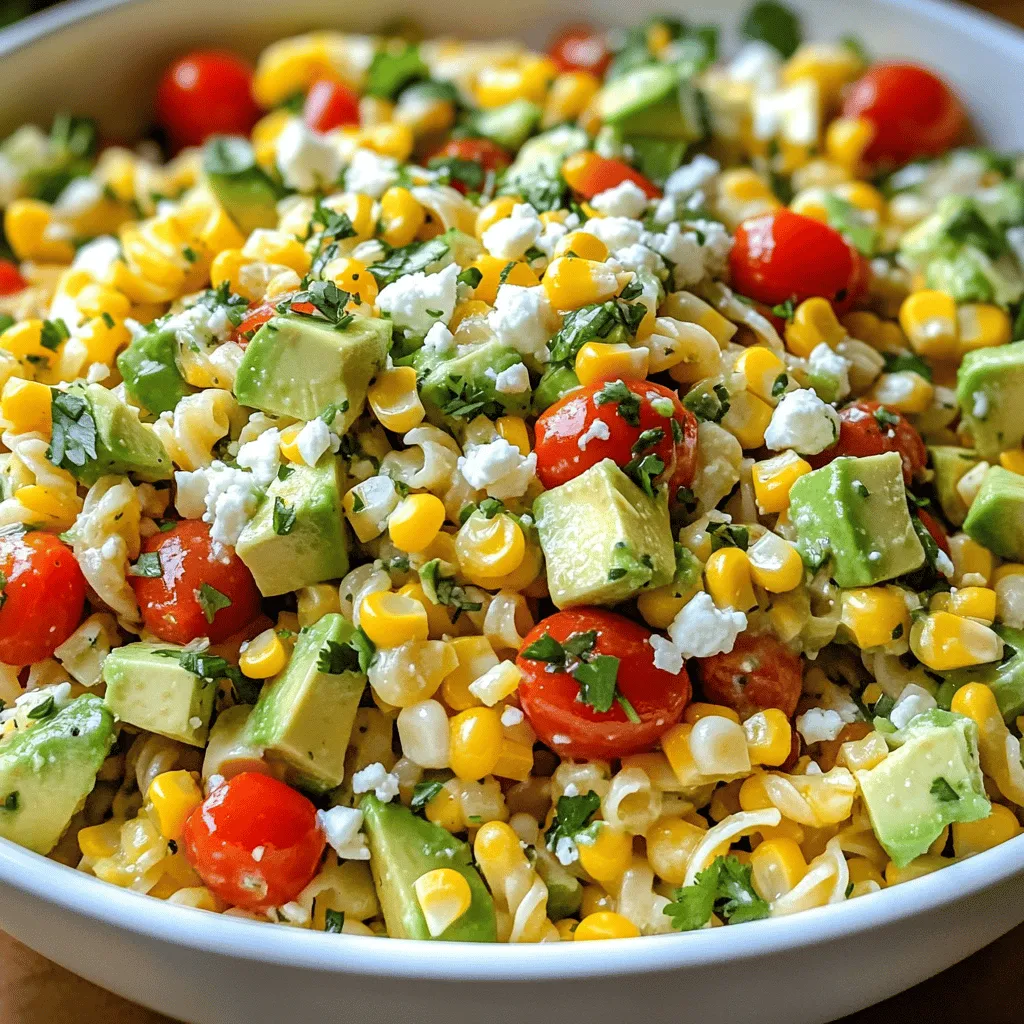
Looking for a fresh and vibrant dish to liven up your meals? My Healthy Street Corn Pasta Salad is packed

To make a tasty Grilled Lemon Herb Chicken Avocado Orzo Salad, gather these ingredients: - 2 boneless, skinless chicken breasts - 1 cup orzo pasta - 1 ripe avocado, diced - 1 cup cherry tomatoes, halved - ½ cup cucumber, diced - ¼ cup red onion, finely chopped - 3 tablespoons olive oil - 2 tablespoons fresh lemon juice - 1 teaspoon dried oregano - 1 teaspoon dried thyme - Salt and pepper to taste - Fresh parsley, chopped (for garnish) The fresh herbs and seasoning bring life to this salad. I use dried oregano and thyme for a lovely, warm flavor. They add depth and aroma. Fresh lemon juice creates brightness and zest. It cuts through the richness of the avocado and chicken. Don’t forget salt and pepper! They enhance all the flavors. Always taste as you go. Adjust the seasoning if needed. Fresh parsley adds a nice touch as a garnish. It brings color and freshness. You can add more ingredients to make this salad your own. Consider including: - Feta cheese for creaminess - Black olives for a briny kick - Spinach or arugula for extra greens - Bell peppers for crunch These add-ins can change the salad’s texture and flavor. Feel free to mix and match based on what you have at home. Each choice will create a new twist on this classic dish. Check out the Full Recipe for more ways to enjoy this meal. Start by making the marinade. In a bowl, mix 2 tablespoons of olive oil, lemon juice, oregano, thyme, salt, and pepper. Place the chicken breasts in the bowl and coat them well. This step is key for flavor. Let the chicken marinate for at least 30 minutes. For a deeper flavor, marinate for up to 2 hours. Boil a pot of salted water. Once it boils, add the orzo. Cook it according to the package instructions. Usually, it takes about 8 to 10 minutes to reach al dente. After cooking, drain the orzo. Rinse it under cold water to stop the cooking process. Set it aside. Heat your grill or grill pan to medium-high. Remove the chicken from the marinade and place it on the grill. Cook for about 6 to 7 minutes on each side. You want the internal temperature to reach 165°F (75°C). Once done, let the chicken rest for a few minutes. Then slice it into strips. Grab a large bowl. Combine the cooked orzo, diced avocado, halved cherry tomatoes, diced cucumber, and finely chopped red onion. Mixing these fresh ingredients adds color and taste to your salad. In a small bowl, whisk together the remaining tablespoon of olive oil, salt, and pepper. Drizzle this dressing over the orzo mixture. Toss everything gently to combine. This step enhances the flavors of your salad. Now it’s time to put everything together. Take the sliced grilled chicken and arrange it on top of the salad. Finish by garnishing with chopped fresh parsley. This adds a lovely touch and brightens the dish. For the full recipe, check out the details provided earlier. To get juicy grilled chicken, start by marinating it well. Use a mix of olive oil, lemon juice, dried herbs, salt, and pepper. This blend adds flavor and keeps the chicken moist. Allow it to sit for at least 30 minutes. For best results, let it marinate for up to 2 hours. When grilling, preheat your grill to medium-high. Place the chicken on the grill and cook for 6-7 minutes per side. Check the internal temperature; it should reach 165°F (75°C). Let the chicken rest before slicing to keep the juices inside. Cooking orzo is simple. First, boil a pot of salted water. Add the orzo and stir. Cook for 8-10 minutes until it is al dente. Be sure to follow the package instructions for best results. After cooking, drain the orzo and rinse it under cold water. This stops the cooking process and keeps the orzo from getting mushy. Set it aside to cool while you prepare the salad. For a beautiful presentation, arrange the salad on a large platter. Start with the orzo as a base, then add diced avocado, cherry tomatoes, cucumber, and red onion. Slice the grilled chicken and place it on top. Drizzle the dressing over the salad and toss gently. Garnish with fresh parsley for a pop of color. You can serve this dish warm or chilled. It’s perfect for picnics, lunch, or dinner. Check out the Full Recipe for detailed steps on making this delightful dish. {{image_2}} You can switch the chicken for other proteins. Grilled shrimp works great. It adds a nice, sweet flavor. You might also try tofu. It absorbs the marinade well. Cook it until golden. Another option is chickpeas. They add protein and are plant-based. Feel free to add more veggies to your salad. Bell peppers bring color and crunch. You can also add spinach or arugula for extra greens. Roasted sweet potatoes add a sweet touch. Try adding radishes for a spicy kick. Each veggie makes the salad unique and fun. The dressing is simple but can change. Try adding honey for sweetness. A splash of balsamic vinegar can give it depth. You can also use yogurt for a creamier texture. Experiment with garlic or mustard for extra flavor. Each change can give the salad a new twist. Check out the Full Recipe for more ideas. To keep your grilled lemon herb chicken avocado orzo salad fresh, store it in the fridge. Place the salad in an airtight container. Make sure to cover it well. This helps keep flavors intact. If you have leftover chicken, store it separately. This prevents sogginess in the salad. Enjoy your leftovers within three days for the best taste. When reheating, do it gently. Use the microwave on low heat. Heat until warmed through but not hot. This keeps the chicken from drying out. If you want, you can eat it cold, too! The flavors blend nicely when chilled. I recommend using glass containers. They do not stain or retain odors. They also seal tightly, keeping your food fresh. If you prefer plastic, choose BPA-free options. Make sure they are microwave-safe for easy reheating. These containers make it easy to organize your fridge. You can easily stack them, saving space. For the full recipe, check out the complete guide. Yes, you can use other pasta types. If you like, try penne or farro. These options give the salad a new twist. Just remember to cook them until they are al dente, like the orzo. Grilled chicken lasts about 3 to 4 days in the fridge. Make sure you store it in an airtight container. This keeps the chicken fresh and safe to eat later. If you need a substitute for avocado, try using diced cucumbers or cooked peas. These options add a nice texture. Another choice is to add a sprinkle of feta cheese for a creamy bite. Absolutely! This salad works great for meal prep. You can store the salad in portions. Just keep the dressing separate until you are ready to eat. This keeps everything fresh and crisp. Yes, making the dressing in advance is a smart idea. Whisk the olive oil, lemon juice, salt, and pepper together. Store it in a jar in the fridge. It will stay fresh for about a week, ready for your salad. Check out the Full Recipe for all the details! This blog post covered how to make a tasty grilled chicken salad with orzo. We discussed all the key ingredients and shared step-by-step cooking instructions. I gave you helpful tips for grilling chicken and perfecting the orzo. You can mix in veggies or try different dressings for variety. For leftovers, I shared best storage methods and reheating tips. Remember, this salad is versatile and great for meal prep. Now, get cooking and enjoy a fresh, healthy meal!

Grilled Lemon Herb Chicken Avocado Orzo Salad Delight

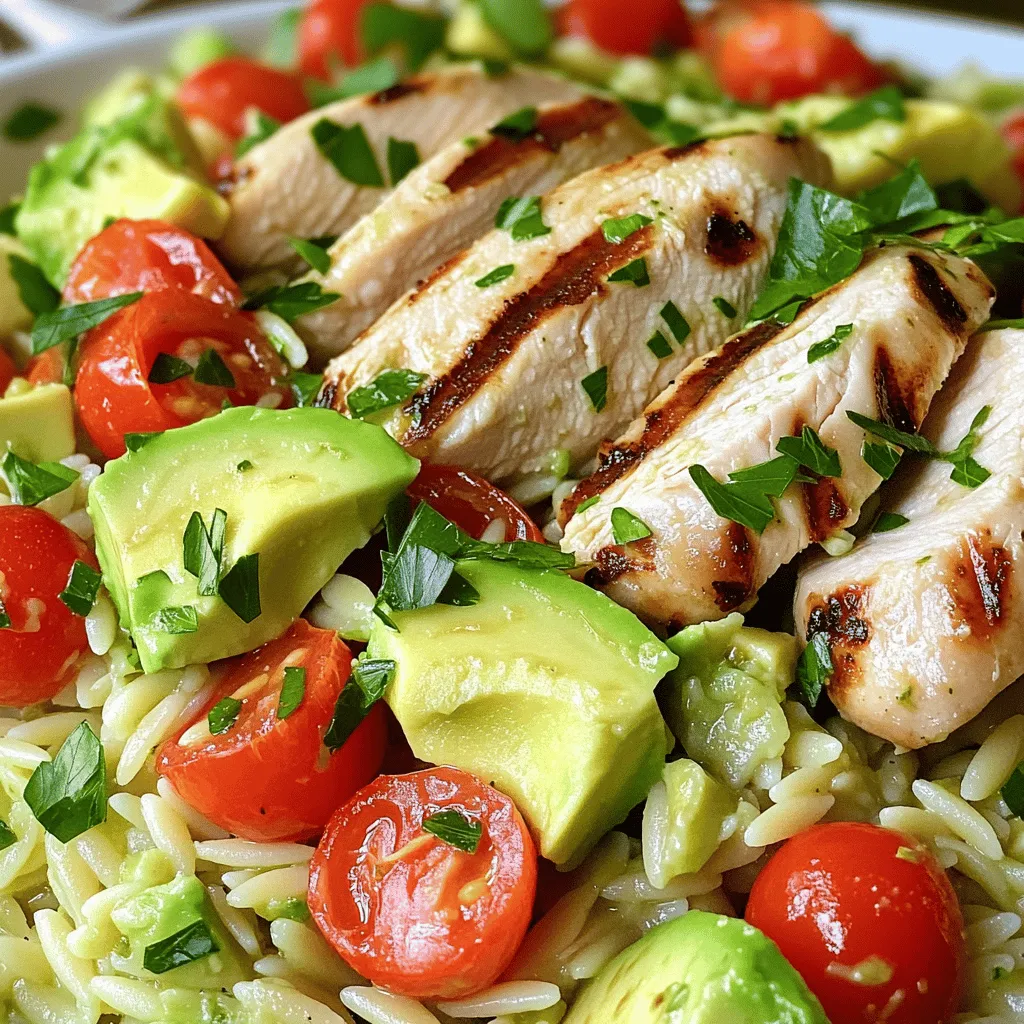
Welcome to your new favorite dish! In this blog post, I’ll show you how to make a Grilled Lemon Herb

- 1 cup Biscoff cookie crumbs - 4 tablespoons unsalted butter, melted - 16 oz cream cheese, softened - 1 cup powdered sugar - 1 teaspoon vanilla extract - 1 cup heavy whipping cream - 1/2 cup Biscoff spread - Whipped cream for topping - Extra Biscoff cookies for garnish When making Biscoff cheesecake, the ingredients matter. Each one plays a key role in flavor and texture. - Alternatives for cream cheese: You can use mascarpone or a thick dairy-free cream cheese. Both will work well and keep your cheesecake creamy. - Vegan options for the crust: Swap unsalted butter for coconut oil or a vegan butter. Use vegan cookies to keep it plant-based. - Using gluten-free cookies: Look for gluten-free cookies that have a similar taste to Biscoff. They make a great base for the crust. These options help you customize the cheesecake to fit your needs. Whether you're vegan or gluten-free, you can enjoy this treat! For the full recipe, check out the Biscoff Bliss Cheesecake . To start, gather your ingredients. You need Biscoff cookie crumbs and melted butter. In a medium bowl, mix the crumbs with the butter. Stir until every crumb is coated. This step is key to a tasty crust. Next, take a 9-inch springform pan. Press the crumb mixture firmly into the bottom. Make sure it is even and packed tightly. This helps the crust hold together. Place the pan in the refrigerator. Let it chill while you prepare the filling. Now, let's make the filling. In a large bowl, add softened cream cheese. Use an electric mixer to beat it until smooth. This step is important for a creamy texture. Gradually, add the powdered sugar. Keep mixing until it is fully combined. Then, mix in the vanilla extract and Biscoff spread. This adds great flavor and makes it silky. In a separate bowl, whip the heavy cream. Beat it until stiff peaks form. This means it should hold its shape well. Now, gently fold the whipped cream into the cream cheese mixture. Be careful! You want to keep the air in the whipped cream. This gives the cheesecake a light texture. Once combined, pour the cheesecake filling over your chilled crust. Smooth the top with a spatula. Cover the pan and place it in the refrigerator. Chill for at least 4 hours, or overnight if you can wait. When it’s set, carefully remove the cheesecake from the springform pan. Top with whipped cream and sprinkle crushed Biscoff cookies on top. For the full recipe, check here: [Full Recipe]. Enjoy your delicious Biscoff cheesecake! To get the best Biscoff cheesecake, use room temperature ingredients. This helps everything mix well and makes your filling smooth. Cream cheese that is too cold can cause lumps. Always let your cream cheese sit out for about an hour before using it. Next, whip your cream carefully. Use a clean bowl and beaters for the best results. Whip the cream until it forms stiff peaks, but don’t overdo it. If you whip too much, it can turn grainy. Gently fold the whipped cream into the cream cheese mixture. This keeps the filling light and airy. For a lovely presentation, top your cheesecake with whipped cream. Use a piping bag to create swirls for a nice touch. You can also crush extra Biscoff cookies and sprinkle them on top. This adds texture and flavor. Drizzle warm Biscoff spread over the cheesecake for an appealing look. It creates a beautiful pattern and tastes great too. You can place whole Biscoff cookies around the edge of the cheesecake. This makes it look even more tempting. One common mistake is overmixing the batter. Once you fold the whipped cream in, stop mixing right away. Overmixing can make the cheesecake dense instead of creamy. Another mistake is not chilling long enough. Always chill your cheesecake for at least four hours. For the best results, chill it overnight. This helps the flavors meld together and improves the texture. Trust me, it’s worth the wait! {{image_2}} For a quick no-bake version, start with the same crust. Use 1 cup of Biscoff cookie crumbs and 4 tablespoons of melted unsalted butter. Press this mixture into the bottom of a 9-inch springform pan. For the filling, beat 16 oz of softened cream cheese with 1 cup of powdered sugar until smooth. Add 1 teaspoon of vanilla extract and 1/2 cup of Biscoff spread. Mix until well combined. Then, whip 1 cup of heavy cream until stiff peaks form. Gently fold the whipped cream into the cream cheese mixture. Spread the filling over the crust and chill for at least 4 hours. This method saves time while still delivering amazing taste. You can make mini Biscoff cheesecakes using muffin tins. Line each muffin cup with cupcake liners. Prepare the same crust as before and divide it among the cups. For the filling, simply follow the steps from the full recipe. Pour the filling over the crusts and smooth the tops. Chill them in the fridge for about 4 hours. These mini treats are perfect for parties or for a single serving. They also make great gifts! To create a vegan version, substitute the cream cheese with vegan cream cheese. Use coconut cream in place of heavy whipping cream. For the crust, check that your Biscoff cookies are dairy-free or replace them with vegan cookies. The rest of the process remains the same. This version keeps the rich flavor while being friendly for those avoiding animal products. Enjoy all the delight of Biscoff cheesecake without compromising your diet! To keep your Biscoff cheesecake fresh, refrigerate it right after serving. Use an airtight container or cover it well with plastic wrap. This method helps keep moisture in and prevents drying out. If you want to save leftovers, you can freeze slices. Wrap each slice in plastic wrap and place them in a freezer-safe bag. This way, you can enjoy it later! Stored in the fridge, your cheesecake lasts about 5 to 7 days. If frozen, it can stay good for up to 3 months. Always check for signs of spoilage before eating. If you see any discoloration or bad odor, it’s best to throw it out. Freshness is key! If you froze the cheesecake, thaw it in the fridge overnight for the best texture. Avoid the microwave as it can make it soggy. Instead, let it come to room temperature before serving. This way, you can enjoy every creamy bite just like fresh! Yes, you can use a store-bought cookie crust. This saves time and effort. Just make sure it fits a 9-inch springform pan. The Biscoff flavor will still shine through. The cheesecake needs at least 4 hours to set. For the best results, chill it overnight. This allows the flavors to meld and the texture to firm up nicely. If you can’t find Biscoff spread, use Nutella or cookie butter. Both options give a similar flavor profile. You can also try almond butter for a different taste. This cheesecake is not naturally gluten-free or vegan. However, you can adjust it easily. Use gluten-free cookies for the crust and vegan cream cheese for a dairy-free option. Absolutely! You can make this cheesecake a day or two in advance. It keeps well in the fridge. Just cover it tightly to keep it fresh. Check out the Full Recipe for detailed steps. This blog post covered how to make a delicious Biscoff cheesecake. You learned about the key ingredients, including cream cheese and Biscoff spread. I shared easy steps for making the crust and filling. Remember to avoid common mistakes, like overmixing. You can also explore variations to fit your taste or diet. Enjoy experimenting with this recipe and impressing your friends and family! Happy baking!

Biscoff Cheesecake Delight Easy and Decadent Treat

Craving a dessert that’s easy to make and absolutely scrumptious? You’re in for a treat! This Biscoff Cheesecake is a

- 4 salmon fillets (about 6 ounces each) - 1 tablespoon olive oil - Salt and black pepper to taste - 1 teaspoon garlic powder - 1 teaspoon paprika - Juice of 1 lime - 1 ripe mango, diced - 1 small red onion, finely chopped - 1 red bell pepper, diced - 1 jalapeño, deseeded and minced - 1/4 cup fresh cilantro, chopped - 2 tablespoons lime juice (for salsa) - Salt to taste (for salsa) You can swap out salmon for trout or even chicken. Both options work well with the same spices. If you prefer a different fruit, try pineapple or peach in the salsa. These fruits add a sweet twist. For a milder taste, use green bell pepper instead of red. Each serving of this salmon dish has about 350 calories. It also provides a good mix of protein and healthy fats. You’ll find around 30 grams of protein per serving. The mango salsa adds vitamins and fiber, making this dish not just tasty but also healthy. First, preheat your grill or skillet over medium-high heat. This step makes your salmon cook evenly and adds flavor. While the grill heats, prepare the marinade. In a small bowl, mix together olive oil, garlic powder, paprika, lime juice, salt, and pepper. Brush this mixture on both sides of your salmon fillets. This adds a tasty layer to the fish. Place the salmon on the grill or skillet. Cook it for about 4-5 minutes on each side. You want the internal temperature to reach 145°F (63°C). When it is ready, the fish should flake easily with a fork. To check for doneness, use a fork to see if the fish separates easily. If it does, it’s done! While the salmon cooks, let’s make the mango salsa. In a medium bowl, combine diced mango, red onion, red bell pepper, jalapeño, cilantro, and lime juice. This mix brings a fresh taste to your dish. A pinch of salt will enhance the flavors. Gently toss the ingredients to combine them well. For the best flavor, use ripe mango and fresh cilantro. You can find the full recipe for Tropical Salmon Delight [here](#). Grill vs skillet methods Grilling salmon gives it a nice char and smoky flavor. A skillet works well for a quick cook. Both methods are tasty. Use medium-high heat for the best results. Ensuring the salmon remains moist To keep salmon moist, don’t overcook it. Aim for an internal temperature of 145°F (63°C). Use a meat thermometer to check. Basting with olive oil and lime juice adds flavor and moisture, too. Suggested spices and seasonings I love using garlic powder and paprika for extra flavor. They blend well with salmon. You can also try cumin or lemon zest for a fresh twist. Pairing suggestions for the salsa Mango salsa pairs perfectly with the salmon. It brings sweetness and acidity. You can add avocado for creaminess or a dash of chili powder for heat. These flavors enhance your dish. Serving suggestions and garnishes Serve salmon on a white plate for a great look. Place the mango salsa on top. Add lime wedges on the side for color and freshness. Plating tips for appealing presentation For a stunning plate, use a ring mold. Layer the salsa in the mold, then gently lift it off. This creates a beautiful tower of salsa. Garnish with cilantro leaves for a pop of green. For the full recipe, check out the Tropical Salmon Delight. {{image_2}} If you want to switch up the mango salsa, try these options. You can use pineapple, peach, or avocado. These fruits will add a fun twist. Each option brings new flavors to your dish. For a seasonal touch, think about using berries in summer. In fall, try apples with a hint of cinnamon. Each fruit gives a fresh take on the classic salsa. You can bake or broil your salmon for a different taste. Baking keeps the fish moist and soft. Broiling gives it a nice, crispy top. If you like heat, add spices like cayenne or chili powder. A splash of lemon or orange juice adds a bright, citrus twist. These methods will change how your salmon tastes and feels. Pair your salmon with rice or a mix of veggies. Brown rice or quinoa can give you extra nutrition. Steamed broccoli or grilled asparagus work well, too. For a drink, white wine is a great match. A light Sauvignon Blanc or a crisp Pinot Grigio will enhance the meal. These choices bring a balance to the rich flavors of the salmon. For the complete experience, check out the Full Recipe. To keep your salmon fresh, place it in an airtight container. This helps stop air from making it dry. Store it in the fridge. You can keep it for up to three days. If you want to keep it longer, freezing is a good option. To freeze cooked salmon, wrap each fillet tightly in plastic wrap. Then, place the wrapped salmon in a freezer-safe bag. This method protects it from freezer burn. You can freeze it for up to three months. When you’re ready to eat it, the best way to thaw is in the fridge overnight. This helps keep the texture nice. To reheat salmon, use the oven for best results. Preheat your oven to 275°F (135°C). Place the salmon on a baking sheet and cover it with foil. Heat for about 15 minutes. This keeps the fish moist and tasty. You can also use a skillet. Just warm it up on low heat for a few minutes. Avoid using the microwave, as it can dry out the fish. Enjoy your salmon with the mango salsa for a fresh and flavorful dish! You can find the Full Recipe to enjoy this meal anytime. To make salmon with mango salsa, follow these simple steps: 1. Prep the Salmon: Start by mixing olive oil, garlic powder, paprika, and lime juice. Brush this mix on both sides of the salmon fillets. 2. Cook the Salmon: Grill or pan-cook the salmon for about 4-5 minutes on each side. Aim for an internal temperature of 145°F (63°C). 3. Make the Salsa: In a bowl, mix diced mango, red onion, red bell pepper, jalapeño, cilantro, and lime juice. Season with a bit of salt. 4. Serve: Top the cooked salmon with the mango salsa just before serving. These steps give you a bright and tasty dish. For the full recipe, check the details above. Yes, you can prepare the salsa ahead. Making it a few hours before serving helps the flavors mix well. Just store it in the fridge. If you want, you can make it a day before. Just leave out the cilantro until you are ready to serve. This keeps it fresh and green. To complement your salmon with mango salsa, consider these side dishes: - Rice: Fluffy white or brown rice works well. - Vegetables: Grilled or roasted veggies add color and nutrients. - Salad: A light green salad with a lemon dressing is refreshing. - Quinoa: This adds a nutty flavor and is packed with protein. These sides enhance the meal and match the flavors of the salmon and salsa. This article covered how to make delicious salmon with mango salsa. We explored the best ingredients, substitutions, and nutritional facts. You learned step-by-step cooking instructions and tips for the perfect dish. I shared variations, storage info, and answers to common questions. Remember, cooking is about joy and creativity. Use this guide to create meals that impress and satisfy. Enjoy your cooking journey!

Salmon with Mango Salsa Fresh and Flavorful Dish

Craving a dish that’s both fresh and full of flavor? Look no further! Salmon with Mango Salsa is your perfect

To make your mini chocolate tarts, you need these key ingredients: - For the tart crust: - 1 ½ cups all-purpose flour - ½ cup unsweetened cocoa powder - ½ cup powdered sugar - ½ cup unsalted butter, cold and diced - 1 large egg yolk - 3 tablespoons ice water - For the chocolate ganache: - 1 cup dark chocolate chips - 1 cup heavy cream - 1 tablespoon vanilla extract - Pinch of salt - Optional garnishes: - Fresh raspberries (these add a sweet and tart flavor) - Mint leaves (they bring a fresh touch) Each ingredient plays a vital role in achieving rich flavor and texture. The cocoa powder in the crust gives it a deep chocolate taste. The heavy cream and chocolate chips create a smooth, luscious ganache that fills each tart. Raspberries and mint not only enhance the look but also elevate the taste. For a more detailed guide, check out the Full Recipe. This will help you gather everything you need for your baking adventure! To start, combine the dry ingredients. I use a food processor for this. Add 1 ½ cups of all-purpose flour, ½ cup of unsweetened cocoa powder, and ½ cup of powdered sugar. Pulse these until mixed. Next, add ½ cup of cold, diced unsalted butter. Pulse again until the mixture looks like coarse crumbs. Now, add 1 large egg yolk and 3 tablespoons of ice water. Pulse until the dough comes together. If it feels too dry, add a bit more water, one teaspoon at a time. Once you have your dough, form it into a disk. Wrap it in plastic and chill it in the fridge for at least 30 minutes. This step helps the butter firm up, making a crisp crust. After chilling, preheat your oven to 350°F (175°C). On a floured surface, roll out the dough to about 1/8 inch thick. Use a cutter to make circles that fit in your mini tart pan. Press the dough circles into the molds. Trim off any excess dough and prick the bottoms with a fork. This prevents bubbling while baking. Bake the tart shells for 10 to 12 minutes. They should feel firm to the touch. Allow the shells to cool completely before filling. For the ganache, heat 1 cup of heavy cream in a saucepan over medium heat. You want it just to simmer but not boil. Once it’s hot, remove it from the heat and add 1 cup of dark chocolate chips along with 1 tablespoon of vanilla extract and a pinch of salt. Let this sit for about a minute. Now, stir the mixture until it's smooth and fully combined. The ganache should be glossy and thick. This rich chocolate filling is what makes the tarts so special. Once your tart shells are cool, pour the ganache into them, filling each about ¾ full. Chill the tarts in the refrigerator for at least one hour, or until the chocolate is set. After that, you can garnish them as you like. For the full recipe, check out the detailed instructions above. Enjoy your mini chocolate tarts! To make mini chocolate tarts, you need some key tools. Here’s what you should have: - Food processor - Mini tart pans or molds - Rolling pin - Mixing bowls - Baking sheets - Parchment paper These tools help you create perfect tarts. A common mistake is overworking the dough. This makes the crust tough. Always handle it gently. Another mistake is not chilling the dough. Chilling helps keep the crust flaky. You can easily change up the taste of your ganache. Try adding these flavors: - A splash of espresso for a coffee kick - Orange zest for a zesty twist - A bit of sea salt to enhance the chocolate flavor For those with dietary needs, consider using these crust options: - Almond flour for a gluten-free crust - Coconut oil instead of butter for a dairy-free choice These simple changes keep the mini chocolate tarts fun and exciting. If you want the full recipe, it includes all the steps to make these delicious treats. {{image_2}} You can easily change the taste of your mini chocolate tarts. Adding flavors like orange zest or a splash of coffee can enhance the chocolate. Orange zest gives a bright, fresh touch. Coffee adds depth and richness. For toppings, think outside the box. Chopped nuts add a nice crunch. A sprinkle of sea salt balances the sweetness and enhances the chocolate flavor. You can also try fresh fruits, like berries or banana slices, for a fruity twist. These little changes make each tart unique and fun. If you need a gluten-free option, there are great crust alternatives. You can use almond flour or gluten-free flour blends. These options keep your tarts tasty without gluten. For a vegan twist, make your chocolate ganache with coconut cream and dairy-free chocolate. This way, everyone can enjoy a delicious treat. These adaptations let you share mini chocolate tarts with all your friends and family. For more details, check out the Full Recipe. To keep your mini chocolate tarts fresh, use these best practices: - Refrigerating: Place the tarts in an airtight container. This keeps them moist and tasty. They stay fresh for up to 3 days in the fridge. - Freezing: If you want to save some for later, freeze the tarts. Wrap each one in plastic wrap tightly. Then, place them in a freezer-safe bag. This method preserves their flavor and texture for up to 2 months. After freezing, note that the tarts may lose some texture. To maintain quality, freeze them without the garnish. Add fresh raspberries and mint leaves just before serving. To revive your tarts after freezing, follow these steps: 1. Thawing: Take the tarts out of the freezer. Let them sit in the fridge overnight or at room temperature for a couple of hours. 2. Reheating: Warm them up in the oven. Preheat your oven to 350°F (175°C). Place the tarts on a baking sheet. Heat for about 10 minutes. This helps restore their original taste and texture. For serving, consider drizzling extra ganache on top. You can also pair them with a scoop of vanilla ice cream. This adds a nice contrast and elevates the dessert experience. Whether you enjoy them fresh or after storage, mini chocolate tarts are always a delightful treat! For the full recipe, check out the details above. How to prevent the crust from becoming soggy? To keep your crust crisp, avoid adding too much liquid. Use cold butter and chill the dough. When baking, prick the bottom of the crust with a fork. This helps steam escape. You can also blind bake the shells. This means baking them empty for a bit before adding the ganache. Can I use milk chocolate instead of dark chocolate? Yes, you can use milk chocolate. It will make the ganache sweeter and creamier. If you want a richer flavor, try mixing both chocolates. This way, you enjoy the best of both worlds. Best accompaniments for mini chocolate tarts Pairing these tarts with fresh berries is delightful. Raspberries or strawberries add a nice tartness. You can also serve them with whipped cream for extra richness. A sprinkle of sea salt can enhance the chocolate flavor too. Suggestions for beverages that pair well Coffee is a classic choice. The bitterness balances the sweetness of the tarts. You can also enjoy them with a glass of dessert wine. A rich red wine complements the chocolate well. Recommended stores for purchasing high-quality tarts Look for local gourmet shops or specialty bakeries. These places often sell fresh mini tarts. Whole Foods and Trader Joe's are good options too. They usually have a nice selection of desserts. Local bakers or bakeries that specialize in mini desserts Check out your area’s local bakeries. Many bakeries offer mini desserts that are delicious. You can find unique flavors and styles that are hard to resist. Ask around for recommendations or look online for reviews. You now have all the steps to make delicious mini chocolate tarts. We covered ingredients, from the crust to the ganache, and even some tasty garnishes. I shared baking tips and tricks to help avoid common mistakes. Remember to try different flavors and adapt for dietary needs. Proper storage will keep your tarts fresh longer. Now, get creative and enjoy sharing these treats with friends and family! Your next dessert is sure to impress.

Mini Chocolate Tarts Irresistible Decadent Delight

Are you ready to indulge in a sweet treat that’s both easy to make and downright delicious? Mini Chocolate Tarts

Older posts
Newer posts
← Previous Page1 … Page15 Page16 Page17 … Page70 Next →

dsad

© 2025 My Saved Recipe • Built with GeneratePress

Our Policies

  • Copyright Policy
  • Cookie Policy
  • GDPR Policy
  • Privacy Policy
  • Disclaimer
  • Terms Of Use

More Information

  • Home
  • About
  • Contact
  • Appetizers
  • Dessert
  • Dinner
  • Drinks
©2025, My Saved Recipe About Back To Top