Skip to content
DisclaimerTerms Of UseGDPR PolicyCookie Policy

My Saved Recipe

  • Home
  • Drinks
  • Appetizers
  • Dinner
  • Dessert
  • About
  • Contact
  • Privacy Policy
DisclaimerTerms Of UseGDPR PolicyCookie Policy

Savannah

To make a great Mediterranean chicken pasta salad, gather these fresh ingredients: - 2 cups of cooked penne pasta - 1 cup cooked, shredded chicken breast - 1/2 cup cherry tomatoes, halved - 1/2 cup cucumber, diced - 1/4 cup red onion, finely chopped - 1/3 cup Kalamata olives, pitted and sliced - 1/4 cup feta cheese, crumbled - 1/4 cup olive oil - 2 tablespoons red wine vinegar (optional) - 1 teaspoon dried oregano - Salt and pepper to taste - Fresh parsley for garnish These ingredients work together to create a colorful and tasty dish. The penne pasta serves as a hearty base. Shredded chicken adds protein, making it filling. Fresh veggies, like cucumbers and cherry tomatoes, give crunch and flavor. Kalamata olives add a briny touch, while feta cheese brings creaminess. I love using olive oil and red wine vinegar for the dressing. They bring a rich, tangy flavor to the salad. Dried oregano adds an herbal note that ties everything together. Make sure to use fresh parsley for garnish. It brightens the dish and adds a pop of color. Together, these ingredients create a vibrant Mediterranean chicken pasta salad that bursts with flavor. For the detailed preparation steps, check out the Full Recipe. To make this Mediterranean Chicken Pasta Salad, follow these easy steps. You will love how simple and tasty it is! - Combine pasta and chicken: In a large bowl, mix the cooked penne pasta and shredded chicken. This is the base of your salad. - Add vegetables and olives: Next, toss in the halved cherry tomatoes, diced cucumber, finely chopped red onion, and sliced Kalamata olives. These ingredients add color and crunch. - Whisk dressing ingredients: In a small bowl, whisk together the olive oil, red wine vinegar (if using), dried oregano, salt, and pepper. This dressing brings all the flavors together. - Toss pasta salad: Pour the dressing over the pasta mixture. Toss gently to coat each part well. This step ensures every bite is full of flavor. - Add feta cheese: Sprinkle crumbled feta cheese on top. Gently stir it in. The feta adds a creamy, salty touch to the dish. - Adjust seasoning: Taste the salad and add more salt and pepper if needed. This will help balance the flavors. - Let it sit: Cover the bowl and let the salad sit for about 20 minutes. This resting time allows the flavors to meld beautifully. - Serve with garnish: Before serving, sprinkle fresh parsley on top. It looks nice and adds a fresh taste. For the complete recipe, check out the [Full Recipe]. Enjoy your Mediterranean Chicken Pasta Salad! To make your Mediterranean Chicken Pasta Salad even better, start with the dressing. You can mix olive oil with lemon juice or yogurt. This adds a fresh twist. Marinating your chicken for at least one hour helps it taste amazing. Use herbs like oregano and thyme for a punch of flavor. Also, balance textures by adding crunchy cucumbers and soft feta cheese. This makes each bite exciting. Cooking pasta perfectly is key. Boil water and add salt for flavor. Cook until al dente, then drain and rinse in cold water. This keeps the pasta firm. For shredding chicken, use two forks to pull it apart easily. It’s quick and effective. Prepping your ingredients in advance saves time. Chop veggies and shred chicken the day before. This way, you’ll have everything ready when it’s time to mix the salad. For the full recipe, check the complete instructions above. {{image_2}} You can switch up the pasta in this dish. Try whole wheat, gluten-free, or even spiralized veggies. Each option adds a fun twist. For proteins, consider using tofu or shrimp instead of chicken. Tofu absorbs flavors well, making it a great choice. Shrimp cooks fast and gives a nice texture. If you want to skip dairy, use non-dairy cheese options like almond or cashew cheese. These give a creamy taste without the milk. To add more crunch, mix in nuts or seeds like pine nuts or sunflower seeds. They add a nice bite and extra nutrients. You can also use fresh herbs like basil or mint for a burst of flavor. These herbs brighten the dish and add freshness. Try different vinaigrette styles too! A lemon garlic dressing or a balsamic glaze can change the whole taste. Experiment to find your favorite combination. For the full recipe, check out the Mediterranean Chicken Pasta Salad section above. To keep your Mediterranean chicken pasta salad fresh, store it in an airtight container. Make sure it cools down to room temperature before sealing it. This step helps prevent moisture buildup. You can also separate the dressing from the salad if you want extra freshness. Just add it when you're ready to eat. If you have leftover ingredients, like chicken or olives, you can freeze them. Cooked chicken freezes well for about 2-3 months. Just chop it up and place it in a freezer bag. Olives can also freeze, but their texture may change slightly. In the fridge, your salad can last about 3-5 days. Always check for signs of spoilage. If you see any mold or smell something off, it’s best to toss it. Additionally, if the vegetables look mushy or slimy, that’s another sign it’s time to say goodbye. For the freshest taste, enjoy your Mediterranean chicken pasta salad within a couple of days. For the full recipe, check out the complete guide! Can I make this salad in advance? Yes, you can make this salad in advance. It tastes better after chilling. I suggest letting it sit for at least 20 minutes. This helps the flavors mix well. You can store it in the fridge for up to three days. Just remember to add fresh parsley before serving. What can I serve with Mediterranean Chicken Pasta Salad? This salad pairs well with grilled vegetables or a slice of crusty bread. You can also serve it with a light soup. A side of hummus and pita chips adds a nice touch. These options complete your meal and enhance the Mediterranean vibe. Is it gluten-free? No, this salad is not gluten-free. The penne pasta contains gluten. However, you can use gluten-free pasta instead. This swap keeps the dish tasty and safe for those with gluten allergies. How do I make it vegetarian? To make this salad vegetarian, remove the chicken. You can add chickpeas for protein. They provide a great texture and flavor. You can also add more veggies, like bell peppers or artichokes, to keep it hearty. Caloric content per serving One serving of Mediterranean Chicken Pasta Salad has about 350 calories. This value may change based on portion size and added ingredients. Key health benefits of ingredients - Chicken: High in protein, helps build and repair muscles. - Olive oil: Contains healthy fats, good for heart health. - Cherry tomatoes: Packed with vitamins A and C, great for skin health. - Cucumber: Hydrating and low in calories, perfect for weight management. - Feta cheese: Offers calcium and protein, supporting bone health. This salad is not just tasty; it also fuels your body well! For the full recipe, check out the Mediterranean Chicken Pasta Salad. This Mediterranean Chicken Pasta Salad is simple and tasty. You learned about the key ingredients and how to prep them. You can customize flavors and textures to suit your taste. Remember, storing leftovers properly keeps them fresh longer. With these tips, you can enjoy this dish multiple times. Explore varieties to find your favorite version. This salad is not just a meal; it’s a way to create joy in cooking and eating. Enjoy making it again and again!

Mediterranean Chicken Pasta Salad Flavorful and Fresh

Looking for a meal that’s both flavorful and fresh? You’ve found it with my Mediterranean Chicken Pasta Salad! Packed with

To make a delicious homemade strawberry lemonade, you need fresh and simple ingredients. Here is the list of what you’ll need: - 2 cups fresh strawberries, hulled and sliced - 1 cup freshly squeezed lemon juice (about 4-6 lemons) - 3/4 cup granulated sugar - 4 cups cold water - Ice cubes - Fresh mint leaves (for garnish) - Lemon slices (for garnish) I love using fresh strawberries because they make the drink sweet and bright. Fresh lemon juice adds a zesty touch that makes everything pop. The sugar balances the tartness of lemons, creating a perfect drink. When picking strawberries, look for ones that are bright red and firm. Avoid any that have bruises. For lemons, choose ones that feel heavy for their size, as they are juicier. This recipe is easy, and you can adjust the sugar based on your taste. You can find the full recipe and instructions in the section above. Enjoy making this refreshing drink! 1. Start by washing 2 cups of fresh strawberries. Remove the green tops and slice them. 2. In a blender, add the sliced strawberries and 1 cup of cold water. Blend until smooth to create a puree. 3. Next, pour the strawberry mixture through a fine-mesh sieve into a large pitcher. This helps remove the seeds. Use a spoon to press the mixture through the sieve for better extraction. 1. Now, take 1 cup of freshly squeezed lemon juice. This is about 4-6 lemons. Add the lemon juice to the pitcher with the strawberry puree. 2. Add 3/4 cup of granulated sugar to the mixture. Stir until the sugar fully dissolves. 3. Pour in the remaining 3 cups of cold water. Mix well until everything is combined. Taste your drink and add more sugar if you want it sweeter. 1. Chill the mixture in the refrigerator for at least 30 minutes. This makes it refreshing. 2. When ready to serve, pour the lemonade into glasses filled with ice cubes. 3. Garnish with fresh mint leaves and lemon slices. Enjoy your homemade strawberry lemonade! For the complete recipe, check out the [Full Recipe]. When choosing strawberries, look for ripe, bright red ones. Ripe strawberries have more flavor. They should feel firm and fresh. Avoid any that have bruises or soft spots. Soft strawberries can spoil faster. The best time to buy them is in late spring or early summer. You can easily customize the sweetness of your lemonade. Start with the suggested amount of sugar. After mixing, taste it. If you want it sweeter, add more sugar. You can also try alternatives like honey or agave syrup. Both options add their unique flavors. They can make your drink tastier and healthier. To make your lemonade even better, think about adding herbs or other fruits. Fresh mint leaves can give a cool twist. You could also add a few slices of cucumber for freshness. If you want to mix flavors, try adding raspberries or blueberries. They pair well with strawberries and lemons. Infusing these flavors naturally makes your drink special and unique. {{image_2}} Adding fresh mint brings a bright note to your strawberry lemonade. Start by gently muddling a handful of mint leaves in the bottom of your pitcher. This helps release the mint's oils. Then, follow the full recipe to blend the strawberries and mix in the lemonade. The mint adds a refreshing twist that pairs nicely with the sweet strawberries and tart lemons. You can mix in other fruits for a fun flavor twist. Raspberries and blueberries work great. Simply add one cup of either fruit to the blender with the strawberries. Blend and strain just like before. This gives your drink a unique taste and a colorful look. Each fruit adds its own charm, making your lemonade even more exciting. For a fizzy delight, swap still water for sparkling water. This simple change adds bubbles that make your drink feel special. After you mix the puree, lemon juice, and sugar, pour in the sparkling water gently. This keeps the bubbles intact. Serve over ice for a festive touch. Sparkling strawberry lemonade is perfect for parties or hot days. You can store leftover strawberry lemonade in the fridge. Use a glass container with a tight lid. This helps keep the drink fresh. It lasts for about 3 to 5 days. Make sure to give it a good shake before serving again. Freezing is a great way to save extra lemonade. To freeze, pour it into ice cube trays or freezer-safe containers. Leave some space at the top for expansion. When you want some, simply thaw it in the fridge overnight. This keeps the taste fresh. Avoid using a microwave to thaw, as it can change the texture. Strawberry lemonade can separate over time. To avoid this, stir it well before serving. You can also add a bit of lemon juice each time you serve to keep it mixed. If you notice separation, just give it a good shake. Enjoy your refreshing drink! For a full recipe, check out the [Full Recipe]. Yes, you can use frozen strawberries! They work well in this recipe. Just remember to let them thaw a bit before blending. This helps them blend easier. - First, measure 2 cups of thawed frozen strawberries. - Then, blend with 1 cup of cold water as you would with fresh strawberries. - Strain the mixture to remove seeds, just like before. Frozen strawberries may be a little less sweet, so you might want to add a bit more sugar. If you prefer a less sweet drink, you have options. You can cut back on the sugar or use natural sweeteners. - Start with 1/2 cup of sugar instead of 3/4 cup. - Taste the mixture and add more if needed. - You can also try honey or agave syrup for a different flavor. These alternatives can help you control the sweetness and enjoy the drink more. Bottled lemon juice is fine, but fresh lemon juice tastes better. Fresh lemons give you brighter flavor and more nutrients. - If you use bottled juice, check for additives or preservatives. - Fresh juice adds a zesty kick that makes your lemonade special. I recommend using fresh lemon juice whenever you can for the best taste. To make a larger batch, simply double or triple the recipe. This is great for parties or gatherings. - For a double batch, use 4 cups of strawberries, 2 cups of lemon juice, and 1.5 cups of sugar. - Adjust the water to 8 cups total. - Mix well and taste to adjust sweetness as needed. This way, you can share the joy of homemade strawberry lemonade with everyone! This blog post shared a simple and tasty strawberry lemonade recipe. You learned how to prepare fresh strawberry puree, mix the ingredients, and serve your drink. I also provided tips for selecting strawberries, adjusting sweetness, and flavoring. You can explore fun variations, from using mint to trying sparkling options. Lastly, I covered storage methods for fresh and frozen lemonade. Enjoy making this refreshing drink at home, and don’t hesitate to experiment with your own twists!

Homemade Strawberry Lemonade Refreshing and Sweet Drink

Looking for a drink that’s both refreshing and sweet? Homemade Strawberry Lemonade is your answer! With fresh strawberries and tangy

- Pineapple juice - Coconut cream - Orange juice - Grenadine syrup - Ice cubes - Garnish options: Orange slices, maraschino cherries, fresh mint leaves When making a Malibu Sunset Mocktail, you need fresh ingredients. The sweet pineapple juice gives a bright taste. Coconut cream adds a creamy texture. Orange juice brings a citrusy zing. Grenadine syrup provides a lovely color and sweetness. Don’t forget ice cubes to keep it cool. For garnish, orange slices, maraschino cherries, and fresh mint leaves add a fun touch. - Best brands for coconut cream: Look for brands like Thai Kitchen or Aroy-D. They have great flavor and texture. - Fresh vs. bottled juices: Fresh juices taste better. They also have more nutrients. Use fresh oranges and pineapples when you can. - Choosing the right grenadine: Go for real pomegranate grenadine. It tastes better than the fake ones. - Alternative juices: You can swap pineapple juice for mango or passionfruit juice. They add different flavors. - Low-calorie versions: Use low-fat coconut milk instead of coconut cream. It cuts calories while still tasting great. - Non-dairy options: If you want a non-dairy drink, try almond milk. It gives a nice flavor and keeps it creamy. Making the Malibu Sunset Mocktail is simple. It takes about 10 minutes. You will need a few kitchen tools: - Blender - Measuring cups - A glass for mixing When using sharp tools or blending, be careful. Always keep your hands away from the blades. To start, grab your blender. Add 1 cup of pineapple juice and 1/2 cup of coconut cream. Blend until smooth. You want a creamy base without lumps. This mixture should be thick but pourable. Now, it’s time for the fun part—layering! Pour 1/2 cup of orange juice into a tall glass. Slowly add the blended pineapple and coconut mixture on top of the orange juice. Hold the blender lid slightly above the glass. This helps create a layered look. Next, take 1/4 cup of grenadine syrup and drizzle it into the glass. Pour it slowly down the side. The syrup will sink and give a lovely sunset effect. The colors should blend beautifully, like a sunset over the ocean. To make the Malibu Sunset Mocktail truly shine, you can adjust the sweetness and flavor easily. If you like it sweeter, add more grenadine or coconut cream. If you prefer a tangy kick, a splash of lime juice works wonders. For a beautiful drink, focus on presentation. Use a tall glass to showcase the layers. Garnish with an orange slice, a maraschino cherry, and fresh mint leaves. This adds color and makes it look special. Serving temperature matters too. Serve this mocktail chilled, but not too cold. Ice cubes keep it cool without watering it down too fast. Layering can be tricky. Many people pour too fast, which mixes the colors. Pour slowly, starting with the heaviest liquids first. This keeps the layers distinct. Another mistake is over-blending the base. Blend just until smooth and creamy. If you blend too long, it can lose its nice texture. Also, be careful with grenadine. Too much can make it overly sweet and mask other flavors. Start with a little and taste before adding more. To make it even better, consider adding spices or herbs. A sprinkle of coconut flakes on top gives a tropical vibe. You can also use fresh basil or mint for a fresh touch. Think about complementary flavors too. A little lime juice can balance the sweetness. This makes each sip refreshing and bright. {{image_2}} To keep the Malibu Sunset Mocktail exciting, consider adding seasonal fruits. In summer, add fresh mango or strawberries. These fruits can enhance the tropical vibe of your drink. Just chop them up and mix them in. The bright colors will make your mocktail even more inviting. In winter, you can spice things up. Use cinnamon or nutmeg for warmth. A dash of ginger can also give it a cozy twist. Mix in some apple cider for a festive touch. This makes your mocktail perfect for holiday gatherings. You can easily turn this mocktail into a cocktail. Adding a splash of rum will give it that classic tropical flair. I suggest starting with one ounce of rum for each serving. This keeps the drink balanced. If you prefer a stronger flavor, you can add more. For a unique twist, try coconut rum or spiced rum. They pair well with the coconut cream and pineapple juice. Just remember to adjust the other flavors to match. If you want a non-alcoholic option, consider using non-alcoholic bitters. They add depth without the alcohol. You can also try flavored sparkling waters for a fizzy touch. Explore other fruity mocktails inspired by tropical flavors. A watermelon cooler or a passionfruit spritzer can be great alternatives. Both are refreshing and fun, just like the Malibu Sunset Mocktail. For the Full Recipe, check back on the main sections! After making the Malibu Sunset Mocktail, you might have some leftovers. To keep it fresh, store the drink in a sealed container in the fridge. It’s best to drink it within 24 hours. The individual ingredients have their own shelf lives: - Pineapple juice: up to 5 days - Coconut cream: up to 1 week once opened - Orange juice: about 3 days after opening - Grenadine syrup: lasts several months Yes, you can make this mocktail ahead of time! To save time, pre-mix the pineapple juice and coconut cream. Store this mix in the fridge. You can also combine the orange juice in another container. Just keep the grenadine separate. Mix everything before serving to keep the layers pretty. You can freeze the individual juices for later use. Pour them into ice cube trays and freeze. This way, you’ll always have fresh juice on hand! When you’re ready to use them, thaw the cubes in the fridge overnight. Avoid using a microwave, as this can change the texture. For the coconut cream, freeze it in an airtight container. Let it thaw in the fridge before using. The Malibu Sunset Mocktail is a fruity, vibrant drink. It mixes pineapple juice, coconut cream, and orange juice. Grenadine gives it a beautiful, layered look. This drink is perfect for hot days or parties. It feels tropical and refreshing, making you think of warm beaches. You can enjoy this drink without alcohol, so everyone can sip it. Yes, you can make this mocktail without a blender. Instead of blending, shake the pineapple juice and coconut cream in a jar. Alternatively, use a whisk to mix them in a bowl. Just make sure to stir well until it's smooth. Pour over the orange juice, then add grenadine slowly. This way, you still get the lovely layers. Besides orange slices and maraschino cherries, you have many options. Fresh berries like strawberries or blueberries can add a nice touch. You can also use pineapple wedges for a fun look. Try adding edible flowers for a fancy flair. Fresh mint leaves give it a nice aroma and color. You can easily change the flavors of your Malibu Sunset Mocktail. If you want it sweeter, add more grenadine. For a tangy taste, squeeze in some lime juice. To make it creamier, increase the coconut cream. Taste as you go to find the perfect balance for your preference. Yes, the Malibu Sunset Mocktail is very kid-friendly. It has no alcohol, so it’s safe for children. The fruity flavors and fun colors make it appealing to kids. Just make sure to supervise younger children with any garnishes, like cherries or mint leaves. The Malibu Sunset Mocktail draws inspiration from tropical drinks. These drinks often feature bright colors and fruity flavors. Similar beverages have been enjoyed in beach areas for years. The combination of coconut and pineapple is popular in many cultures. This drink stands out for its layered look and refreshing taste. The Malibu Sunset Mocktail offers a tasty, vibrant drink. We covered ingredients and tips for the perfect mix. Quality matters, so use the best ingredients. You can also customize flavors and avoid common mistakes. With practice, your mocktail will impress anyone. Enjoy experimenting with variations and pairings. This drink is great for gatherings or relaxing at home. Make it your own and share with loved ones!

Malibu Sunset Mocktail Refreshing and Flavorful Drink

Looking for a drink that shouts summer without the buzz? My Malibu Sunset Mocktail is the perfect choice! It’s a

- Baby potatoes - Fresh basil pesto (store-bought or homemade) - Cherry tomatoes - Red onion - Pine nuts - Feta cheese - Olive oil - Lemon juice - Salt and pepper When you make pesto potato salad, you need fresh and simple ingredients. Each one adds flavor and texture. - Calories per serving: This salad has about 250 calories per serving. - Macronutrient breakdown: You get around 10g of protein, 15g of fat, and 30g of carbs. - Health benefits of key ingredients: - Baby potatoes provide energy and fiber. - Basil pesto has healthy fats from nuts and oils. - Cherry tomatoes offer vitamins A and C. - Feta cheese adds protein and calcium. These ingredients make the dish tasty and help you stay healthy. If you want more details, check the Full Recipe. 1. Start by placing the halved baby potatoes in a large pot. Cover them with cold water. 2. Add a pinch of salt to the water. This adds flavor to the potatoes. 3. Bring the water to a boil. Watch closely, as it will boil quickly. 4. Once boiling, reduce the heat to a simmer. Cook the potatoes for about 10-15 minutes. 5. Check if the potatoes are fork-tender by poking one with a fork. If it goes in easily, they are ready. 6. Drain the potatoes in a colander. Allow them to cool slightly so you can handle them. 1. In a large mixing bowl, combine the warm potatoes with the fresh basil pesto. Toss gently to coat all the potatoes. 2. Next, add the halved cherry tomatoes, diced red onion, and toasted pine nuts to the bowl. Stir gently to mix everything well. 3. Drizzle olive oil and lemon juice over the salad. Sprinkle with salt and pepper to taste. 4. Finally, gently fold in the crumbled feta cheese. This adds a nice creamy texture. 1. To chill the salad, place it in the refrigerator. This helps the flavors meld together. 2. Aim to chill the salad for at least 30 minutes. This wait makes a big difference in taste. Now you're ready to serve a refreshing and flavorful dish! For the complete process, check the Full Recipe. To keep your potatoes firm, follow these steps: - Use baby potatoes. Their size helps them cook evenly. - Boil them just until they are fork-tender. This usually takes 10-15 minutes. - Avoid overcooking. Check them often, as mushy potatoes are not tasty. Coating the potatoes with pesto can be tricky. Here’s how to ensure an even coat: - Mix the warm potatoes with the pesto right after draining. The heat helps the pesto stick. - Toss gently to coat each potato piece without breaking them. Want to kick up the taste? Consider these optional ingredients: - Add diced bell peppers for a sweet crunch. - Sprinkle in some capers for a salty bite. - Fresh herbs like parsley or chives can brighten the flavor. For serving, enjoy the salad chilled. Pair it with grilled chicken or fish for a complete meal. Make your salad look as good as it tastes. Here are some tips: - Use a bright, large bowl to serve. This makes the colors pop. - Garnish with fresh basil leaves and extra toasted pine nuts. This adds appeal. - Serve it chilled for the best flavor and texture. These tips will help you create a delightful pesto potato salad that impresses everyone. For the full recipe, check out the instructions above. {{image_2}} You can change up the pesto in your salad. Try using sun-dried tomato pesto for a bold twist. If you want a nut-free option, use a pumpkin seed or spinach pesto. For those who can’t eat dairy, try using a vegan feta cheese or even firm tofu. These alternatives keep the salad creamy and tasty. Add new veggies to change the flavor. Bell peppers and cucumbers add crunch. Chopped spinach or arugula can boost freshness. If you want some heat, mix in sliced jalapeños or a dash of sriracha. Both add a fun kick that makes the dish exciting. Make the salad fit the season. In summer, add corn or avocado to brighten the dish. These ingredients add a creamy texture and a sweet flavor. For winter, try roasted vegetables like carrots or Brussels sprouts. They give a warm, hearty feel that’s perfect for colder days. You can find the full recipe above to try these variations and more! To keep your pesto potato salad fresh, store it in an airtight container. This helps seal in moisture and flavor. When stored properly, it lasts about 3 to 5 days in the fridge. Always check for any signs of spoilage before eating. You can freeze pesto potato salad, but some texture changes may occur. To freeze, place the salad in a freezer-safe container. It’s best to consume it within one month for the best taste. When you’re ready to eat, thaw it overnight in the fridge. For reheating, use the microwave or a stovetop. If using a microwave, heat in short bursts and stir often. This helps keep the salad from getting too hot and soggy. If you use the stovetop, add a splash of olive oil to maintain moisture. Enjoy the salad warm or cold, as both options are tasty! For the full recipe, check out the Pesto Potato Salad section. To make homemade pesto, you need fresh basil, garlic, pine nuts, olive oil, and Parmesan cheese. Start by washing 2 cups of fresh basil leaves. In a food processor, add the basil, 2 cloves of garlic, and 1/4 cup of pine nuts. Pulse until finely chopped. While the processor runs, slowly drizzle in 1/2 cup of olive oil. Then, add 1/2 cup of grated Parmesan cheese and pulse again until smooth. Season with salt and pepper to taste. This bright green sauce adds a fresh kick to your Pesto Potato Salad. Yes, you can make Pesto Potato Salad in advance. It tastes even better after sitting in the fridge. I recommend making it up to 24 hours ahead of when you plan to serve it. Just keep it covered in the fridge. This way, the flavors fully blend, making each bite more delicious. Pesto Potato Salad pairs well with many dishes. Grilled chicken or fish makes a great main dish. You can also serve it with fresh bread or a crisp side salad. For a complete meal, try adding roasted vegetables or a quinoa salad. These sides complement the flavors of the potato salad nicely. This blog post shared a delicious recipe for Pesto Potato Salad. We covered each ingredient, cooking steps, and tips for enhancing flavor. I hope the variations inspire you to make it your own. Remember, this salad offers tasty nutrition and is easy to store. Whether you enjoy it fresh or as a leftover, it will satisfy your taste buds. Dive in, experiment, and share your tweaks for a salad that shines at your table. Your creation can become a favorite for family and friends.

Pesto Potato Salad Refreshing and Flavorful Dish

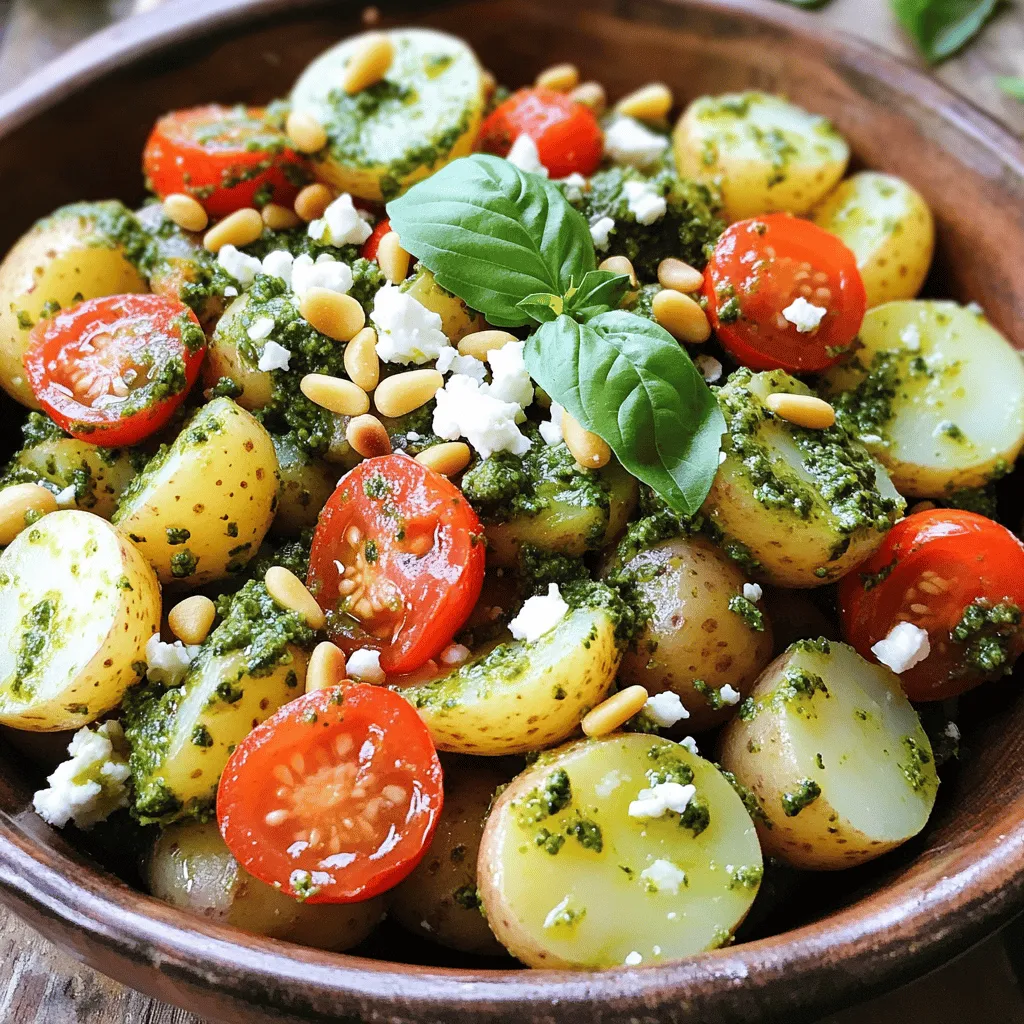
Looking for a dish that’s both refreshing and flavorful? My Pesto Potato Salad is your answer! This dish combines tender

For this healthy summer salad bowl, we use a mix of vibrant, fresh ingredients. Here's what you will need: - 1 cup quinoa, rinsed - 2 cups water or vegetable broth - 1 cup mixed berries (strawberries, blueberries, raspberries) - 1 cup cucumber, diced - 1 cup cherry tomatoes, halved - 1/2 cup red bell pepper, diced - 1/4 cup red onion, finely chopped - 1 avocado, diced - 1/4 cup fresh mint leaves, chopped - 1/4 cup feta cheese, crumbled (optional) - 3 tablespoons olive oil - 1 tablespoon lemon juice - Salt and pepper to taste Each ingredient brings unique health benefits. - Quinoa is a great source of protein and fiber. It helps keep you full. - Berries are full of antioxidants. They boost your immune system and support heart health. - Cucumber keeps you hydrated. It’s low in calories and high in vitamins. - Cherry tomatoes are rich in vitamins C and K. They also support skin health. - Red bell pepper is high in vitamin A. It helps with vision and skin health. - Red onion contains antioxidants. It can help lower blood pressure. - Avocado is packed with healthy fats. It promotes heart health and skin glow. - Mint leaves can aid digestion. They also add a refreshing flavor. - Feta cheese adds calcium and protein. It enhances flavor and richness. - Olive oil is a heart-healthy fat. It can reduce inflammation and improve heart health. - Lemon juice adds vitamin C and brightens flavors. It helps with digestion. You can customize your salad to fit your taste. Here are some great ideas: - Protein Options: Add grilled chicken, chickpeas, or shrimp for extra protein. - Nutty Crunch: Toss in some walnuts or almonds for a delightful crunch. - Greens: Spinach or arugula can add more nutrients and flavor. - Cheese Alternatives: Use goat cheese or skip cheese for a dairy-free option. - Herbs: Try basil or parsley for a different twist. - Dressings: Explore balsamic vinaigrette or yogurt-based dressings for variety. Feel free to mix and match based on what you enjoy! For the full recipe, check out the detailed instructions to create this refreshing quinoa and berry bliss salad. First, rinse the quinoa in cold water. This helps remove any bitter taste. Next, take a medium pot and add the rinsed quinoa and two cups of water or vegetable broth. Bring this mixture to a boil over medium-high heat. Once it starts boiling, lower the heat and cover the pot. Let it simmer for about 15 minutes. You want the quinoa to be fluffy and the liquid should be gone. After cooking, remove it from heat and let it cool for a few minutes. While the quinoa cools, chop up the fresh vegetables and berries. Dice the cucumber, red bell pepper, and avocado. Halve the cherry tomatoes. Then, rinse your mixed berries. I like to use strawberries, blueberries, and raspberries for a bright mix. Make sure to use a sharp knife for clean cuts. This keeps everything looking fresh and tasty. Now, it's time to bring everything together. In a large mixing bowl, combine the cooled quinoa, chopped vegetables, and berries. Add in the fresh mint leaves for a burst of flavor. In a small bowl, whisk together three tablespoons of olive oil, one tablespoon of lemon juice, salt, and pepper to taste. Pour this dressing over your salad and toss gently. If you like, sprinkle some crumbled feta cheese on top for extra flavor. You can serve it right away or let it chill in the fridge for about an hour. This helps the flavors mix well. Enjoy your refreshing quinoa & berry bliss salad! For the full recipe, check out the detailed instructions. To cook quinoa well, start with rinsing it. Rinsing helps remove any bitter taste. Use a medium pot for cooking. Combine one cup of quinoa with two cups of water or vegetable broth. Bring it to a boil over medium-high heat. Once it boils, lower the heat, cover, and let it simmer for 15 minutes. After that, let it sit off the heat. This resting time lets the quinoa fluff up nicely. You can boost flavors in your salad bowl. Try adding a splash of balsamic vinegar. It adds a sweet and tangy twist. Fresh herbs like basil or cilantro work well too. They bring bright flavors that pop. For a little heat, add chopped jalapeños or a dash of hot sauce. You can also switch up the berries. Use blackberries or diced apples for a new taste. A beautiful salad is all about how you serve it. Use a large bowl to mix your ingredients. This helps with tossing and keeps it colorful. Layer the salad for a stunning look. Start with quinoa at the base, then add the veggies and berries. Finish with avocado and feta on top. For the final touch, sprinkle fresh herbs over everything. This not only looks great but also adds more flavor. For more on how to make this salad, check out the Full Recipe. {{image_2}} You can change ingredients based on what’s fresh. In summer, use ripe tomatoes. Swap berries for fresh peaches or watermelon in your salad. When autumn rolls around, consider using roasted squash or apples. These swaps keep your salad bright and exciting all year round. To make this salad more filling, add protein. Grilled chicken or shrimp pairs well with the flavors. If you want a plant-based option, try chickpeas or black beans. These additions bring texture and keep you satisfied for longer. A scoop of Greek yogurt can also add creaminess and flavor. Making this salad vegan is simple. Just skip the feta cheese and add more nuts or seeds for crunch. You can use gluten-free grains like millet or brown rice instead of quinoa. This keeps the meal light and healthy while catering to different diets. With these options, everyone can enjoy a bowl of this fresh salad. To keep your salad fresh, place leftovers in an airtight container. If you have dressing left, store it separately. Adding dressing too soon will make the salad soggy. Your salad can stay fresh in the fridge for up to three days. If you notice any changes in smell or look, toss it out. Meal prepping makes life easier. Cook and cool the quinoa ahead of time. Chop the veggies and berries, then store them in separate containers. When you're ready to eat, mix everything in a bowl. You can also pack the quinoa and veggies together for easy lunches. This way, you can enjoy a fresh meal without much fuss. Use glass or BPA-free plastic containers. They keep food fresh and help you see what’s inside. Choose containers with tight lids to avoid spills. For salads, I recommend using containers with dividers. This keeps the salad and dressing separate until you are ready to eat. The salad stays fresh for about three days. Store it in an airtight container. Keep it in the fridge. The veggies and fruits maintain their crunch and taste. However, the avocado may brown. To slow down browning, add lemon juice to the avocado before mixing it in. Yes, you can prepare the salad in advance. I recommend making it a day before you plan to eat. Just keep the dressing separate until serving. This will help keep everything crisp and fresh. Mix the dressing right before you’re ready to dig in. Several dressings pair nicely with this salad. A balsamic vinaigrette adds a sweet tang. A honey mustard dressing gives a nice twist. You can also try a simple olive oil and vinegar mix. Just ensure the dressing complements the fresh flavors of the salad. For more ideas, check out the Full Recipe. In this post, we explored fresh ingredients and their benefits. I shared step-by-step instructions for making a delicious salad. You learned tips for perfect quinoa and ways to enhance flavors. We discussed seasonal swaps and protein options for variety. Finally, we covered storage tips to keep your salad fresh. Now, as you enjoy your salad, remember the endless possibilities. Experiment and have fun with your ingredients. With these skills, you can make tasty meals anytime. Happy cooking!

Healthy Summer Salad Bowls Fresh and Flavorful Meal

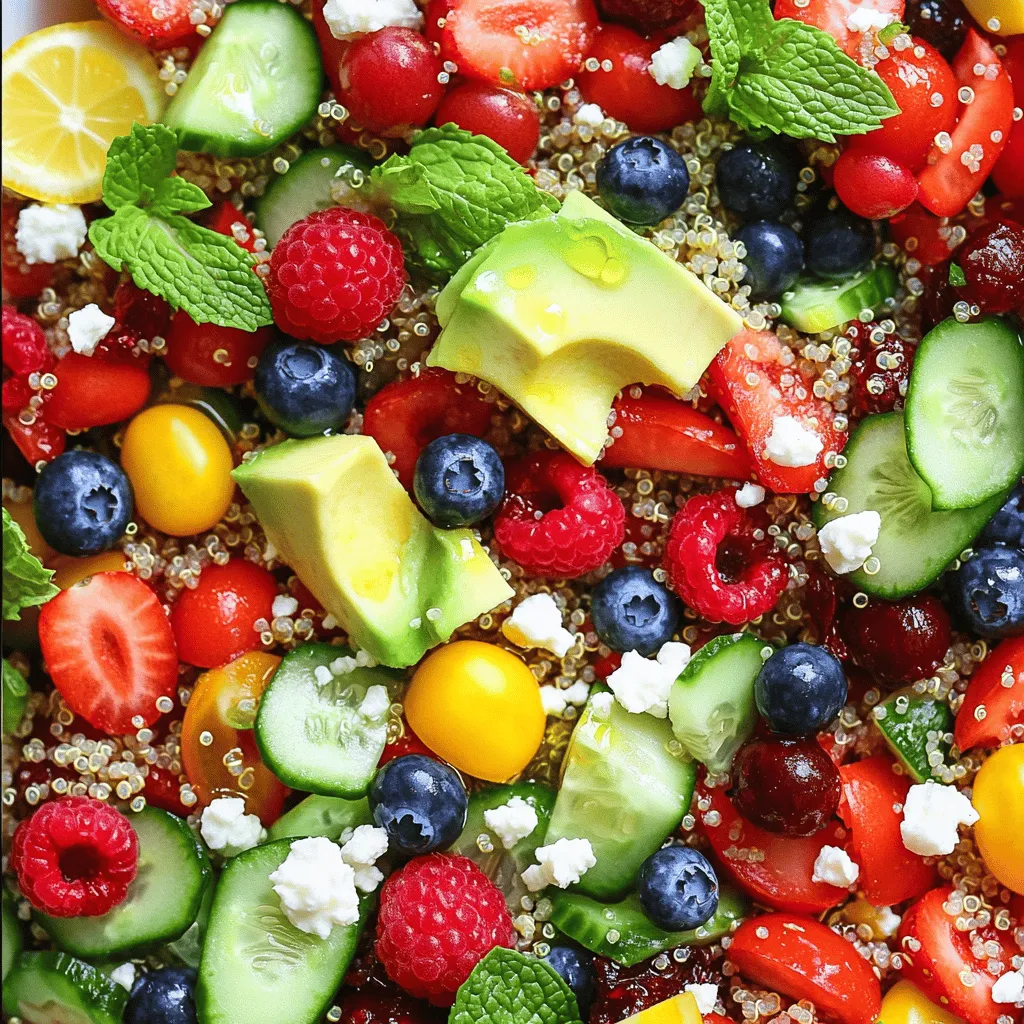
Looking for a tasty way to stay healthy this summer? You’re in the right place! In this article, I’ll guide

- Grapes: 2 cups of seedless green grapes - Sweetener and Flavorings: 1/2 cup granulated sugar and 1/4 cup citric acid - Additional Flavor Enhancers: 1 teaspoon lemon juice and optional food coloring To make Vegan Sour Patch Grapes, start with fresh, seedless green grapes. You can use other grape types, but green gives a nice tart flavor. You will need 2 cups. Next, sweetener and flavorings play a big role. You will use 1/2 cup of granulated sugar. This adds sweetness to balance the sour. You also need 1/4 cup of citric acid. This is key for that sour punch. Adjust the citric acid to fit your taste. For extra flavor, add 1 teaspoon of lemon juice. It brightens the taste and enhances the sourness. You can also use food coloring for fun. It’s totally optional, but it makes the grapes look great. This mix of ingredients brings a fun, tangy treat to life. You can find the full recipe at the end of this section. Enjoy making these sweet and sour bites! First, wash the grapes well. Use cold water to rinse them. Make sure to remove any dirt. After washing, dry them with a clean towel. This step is key because moisture can affect the coating. Next, place the grapes on a baking sheet. Arrange them in a single layer. Freeze the grapes for about 2 hours. They should feel firm when done. If you want the best results, check them after an hour. If they are cold but not frozen, leave them longer. To make the sour coating, grab a medium saucepan. Combine 1 cup of water and 1/2 cup of sugar in it. Heat over medium. Stir the mix until the sugar dissolves fully. This creates a simple syrup. Once the sugar is dissolved, remove the pan from heat. Let the syrup cool for a few minutes. This cooling step is important for the next part. When the syrup is cool, add 1/4 cup of citric acid. Stir in 1 teaspoon of lemon juice, too. If you want a pop of color, add a few drops of food coloring. Mix well until everything blends together. Now, it's time to coat the grapes. Take the frozen grapes out of the freezer. Dip each grape into the syrup mix. Make sure it is well coated. After dipping, roll the grape in the citric acid-sugar mix. This gives it that fun sour patch taste. Place the coated grapes back on the baking sheet. Let them set for about 10 minutes. Serve them chilled for a tasty treat! For the full recipe, check out the details above. To make the best Vegan Sour Patch Grapes, citric acid is key. You can adjust the amount to fit your taste. If you want a stronger sour flavor, add more citric acid. For a milder taste, cut back a bit. This gives you control over the sourness. When using food coloring, start with just a drop. Mix it well, and add more if needed. This way, you avoid overdoing it. A little color goes a long way for that fun look! Pair these grapes with salty snacks like popcorn or chips. The sweet and sour mix makes a great contrast. You can also serve them with a fruity drink for a fun party treat. Serve the grapes chilled. This keeps them fresh and enhances their flavor. You can take them out of the freezer right before serving for the best taste. One common mistake is over-coating the grapes. Make sure to dip them just right. If you coat them too much, they may feel too sticky. Under-coating is also a problem. You want enough syrup on each grape to hold the sour mix well. Freezing time is important too. If you don’t freeze the grapes long enough, they won't be firm. Aim for at least 2 hours. This ensures the best texture and taste in your Vegan Sour Patch Grapes. {{image_2}} You can change the flavor of your Vegan Sour Patch Grapes by using different fruits. Instead of green grapes, try using red or black grapes. Each type of grape adds its unique taste. You can also mix in other fruits like strawberries or blueberries for a fun twist. Experimenting with natural sweeteners can also add a new layer of flavor. You might want to try agave syrup or maple syrup instead of granulated sugar. These options can create a different taste that pairs well with the tartness of the citric acid. For a unique twist, use flavored sugars or salts. You can find strawberry or watermelon-flavored sugars at many stores. These flavors will enhance the taste of your grapes. You can also try using sea salt for a savory touch. Exploring different citrus juices offers even more options. Lime juice can give a zesty kick, while orange juice adds a sweet hint. Mixing juices with the syrup can create a fresh and vibrant taste. Celebrate the seasons with holiday-themed variations. For example, you can use fall fruits like apples or pears for a festive touch. You can also create summer vibes by adding tropical fruits like mango or pineapple. Color variations make your Vegan Sour Patch Grapes even more fun. Use food coloring to match the theme of your party. For Halloween, go for orange and purple hues. For Christmas, try red and green. These ideas make your treats festive and appealing! To keep your Vegan Sour Patch Grapes fresh, use airtight containers. Glass jars or plastic containers work well. Make sure the grapes are fully cooled before storing them. In the fridge, they stay fresh for about 3 to 5 days. Check them often for any signs of spoilage. If you have leftover coated grapes, freezing them is easy. Place them in a single layer on a baking sheet and freeze until solid. Then, transfer them to a freezer-safe bag or container. They can last up to 3 months in the freezer. When you’re ready to eat them, let them thaw in the fridge for best taste. Avoid microwaving to keep their texture. To stop your coated grapes from sticking together, use parchment paper. Lay out the grapes on a sheet of parchment when coating. This keeps them separate and helps with easy handling. If they stick after freezing, gently toss them to break apart. Enjoy your tangy treat without the mess! Yes, you can use other fruits! Some great substitutes for grapes include: - Strawberries - Blueberries - Raspberries - Cherries These fruits can hold up well when coated. They offer unique flavors and textures. Just ensure they are fresh and firm. Freezing them helps achieve that perfect sour patch feel. Each fruit adds its own twist to the treat! You can easily change the sweetness level. To reduce sweetness, use less sugar in the syrup. You can also add more citric acid for a tangy kick. If you want it sweeter, add more sugar. You could also try using agave or maple syrup. These options bring different flavors too. Just remember to taste as you go. This way, you can find your perfect balance! Yes, these treats are healthy! Here are some benefits: - Grapes are high in vitamins C and K. - They contain antioxidants that help your body. - The coating uses simple ingredients with no animal products. With low calories, they make a perfect snack. You get all the fun with none of the guilt. Enjoy them without worry! Vegan Sour Patch Grapes last about 3 to 5 days in the fridge. Store them in an airtight container to keep them fresh. They may lose some crunch over time but will still taste great. If you want to keep them longer, freeze them! Just remember to separate them to avoid clumping. Enjoy these treats for days to come! For the complete recipe, check out the Full Recipe. You learned how to make Vegan Sour Patch Grapes with simple ingredients. We covered how to prepare grapes, create your sour coating, and combine flavors. Remember to adjust the sourness to your taste and store the grapes properly for freshness. Feel free to experiment with different fruits and flavor combinations. Enjoy these sweet and sour treats at parties or as a fun snack. Now, get creative with your own variations and have fun making them!

Vegan Sour Patch Grapes Tangy Treat for Everyone

Looking for a fun and tasty treat that everyone can enjoy? Try Vegan Sour Patch Grapes! With just a few

- Skirt steak (1 lb) - Olive oil (2 tablespoons) - Fresh lemon juice (2 tablespoons) - Lemon zest (from 1 lemon) - Garlic (2 cloves, minced) - Smoked paprika (1 teaspoon) - Salt and pepper to taste - Couscous (1 cup) - Vegetable broth (1 ¼ cups) - Cherry tomatoes (1 cup, halved) - Cucumber (½ cup, diced) - Fresh parsley (¼ cup, chopped) - Fresh mint (¼ cup, chopped) - Cumin (½ teaspoon) - Extra lemon wedges for serving The main ingredients for your grilled skirt steak are simple yet full of flavor. The skirt steak, rich and tender, is the star of the dish. The olive oil helps the meat grill nicely, while lemon juice and zest add brightness. Minced garlic and smoked paprika bring depth, creating a tasty marinade. For the couscous, the key is using vegetable broth. It gives the couscous a lovely flavor. The cherry tomatoes and cucumber add freshness, while parsley and mint create a vibrant herb mix. Finally, a touch of cumin ties everything together, giving it warmth. Using fresh ingredients makes a big difference. Choose ripe tomatoes and crisp cucumbers. Fresh herbs elevate the dish, making it bright and inviting. This combination of flavors and textures creates a delightful meal that’s easy to make. Check out the Full Recipe for detailed instructions on how to prepare this delicious dish. To start, gather your marinade ingredients. You will need olive oil, fresh lemon juice, lemon zest, garlic, smoked paprika, salt, and pepper. Mix these well in a bowl. Then, take your skirt steak and place it in a resealable plastic bag or a shallow dish. Pour the marinade over the steak, ensuring it gets fully coated. Seal the bag or cover the dish tightly. Now, refrigerate it for at least 30 minutes. For deeper flavor, let it sit for up to 2 hours. Next, let’s prepare the lemon herb couscous. In a medium saucepan, bring the vegetable broth to a boil. Once boiling, remove it from the heat. Stir in the couscous and cover the pan. Let it sit for about 5 minutes. After that, fluff the couscous with a fork to break up any clumps. Now, it’s time to grill the steak. Preheat your grill or grill pan over medium-high heat. Remove the steak from the marinade, discarding any leftover marinade. Place the steak on the grill. Grill it for about 3-4 minutes on each side for medium-rare. If you prefer it more done, leave it on a bit longer. After grilling, let the steak rest for 5 minutes before slicing. Slice the steak thinly against the grain for the best texture. Arrange it on a plate, placing a generous portion of lemon herb couscous beside it. For a fresh touch, garnish your dish with extra lemon wedges. This will add a burst of flavor and a lovely look to your meal. Enjoy your grilled skirt steak with lemon herb couscous delight! For more details, check the Full Recipe. To make a great marinade, you can add spices like chili powder or cumin. These spices boost the flavor of the steak. For best results, let the steak marinate for at least 30 minutes. If you have time, two hours works even better. This helps the flavors soak in, making your steak taste amazing. When grilling skirt steak, avoid overcooking it. Keep an eye on the grill and check the time. A good tip is to use a meat thermometer. For medium-rare, aim for 130°F. If you want it more done, cook it a bit longer. This way, you ensure a tender and juicy steak. To get couscous just right, follow the cooking instructions closely. Let it sit for five minutes after boiling. Then use a fork to fluff it gently. This helps separate the grains and gives it a nice texture. If you prefer, you can also cook couscous in a rice cooker. It’s easy and saves time. {{image_2}} You can switch up the marinade to keep things fun. Try using lime juice or orange juice instead of lemon. Each citrus gives a unique taste to the skirt steak. If you want some heat, add chili powder or a splash of hot sauce. This kick can take your dish to a new level. Instead of couscous, you could use quinoa or rice. Both are great bases and bring their own flavors. You can also add seasonal vegetables to the couscous. Peppers, zucchini, or asparagus can add color and nutrients. This makes your meal even better. Pair your grilled skirt steak with a fresh salad. A simple green salad with a lemon vinaigrette works well. If you want something special, try a tabbouleh salad for a Middle Eastern twist. When serving wine, a light red like Pinot Noir complements the steak nicely. A crisp white like Sauvignon Blanc also goes well with the couscous. Explore these variations to make your grilled skirt steak with lemon herb couscous even more delightful! For a full recipe, check the details above. After enjoying your grilled skirt steak and lemon herb couscous, store any leftovers in the fridge. Place the steak in an airtight container to keep it fresh. The couscous should also go in a separate airtight container. This keeps both items from drying out. You can store the leftovers for up to three days. Can you freeze grilled steak? Yes, you can freeze grilled steak! Wrap it tightly in plastic wrap or aluminum foil, then place it in a freezer bag. This will help prevent freezer burn. When you are ready to eat it, just thaw it in the fridge overnight. To keep the flavor and texture, reheat the steak gently. The best method is to use a skillet or grill. Heat it on low, adding a splash of broth or water to keep it moist. You can also use the microwave, but be careful! Heat in short bursts to prevent overcooking. Always check the steak's temperature. It should reach at least 165°F to ensure safety. When reheating couscous, add a little water to keep it fluffy. Stir it gently while heating. For fresh ingredients, the general rule is: - Grilled skirt steak: 3-4 days in the fridge - Lemon herb couscous: 3 days in the fridge Look for signs of spoilage. If the steak has an off-smell or slimy texture, it’s best to throw it away. For couscous, if it looks dry or has mold, it is no longer safe to eat. Enjoy your delicious dish while keeping food safety in mind! For the full recipe, check out the recipe section. The best way to cook skirt steak is on a grill or grill pan. These methods give it a nice char and keep it juicy. - Preheat your grill to medium-high heat. - Cook the steak for about 3-4 minutes on each side for medium-rare. - Use a meat thermometer to check for doneness. Aim for 130-135°F. Grilling enhances the natural flavors of the steak. Plus, it adds a smoky taste that pairs well with the couscous. Yes, you can use other cuts of steak if needed. Flank steak or ribeye work well too. - Flank steak is lean and has a similar texture to skirt steak. - Ribeye is fattier, which makes it very tender and flavorful. Keep in mind that cooking times may vary. Adjust them based on the thickness of the steak you choose. To make this dish gluten-free, swap couscous with quinoa. Quinoa is a great alternative and packs protein. - Use gluten-free vegetable broth for cooking. - Check sauces and condiments for hidden gluten. You still get a tasty and filling dish without the gluten. Yes, you can prepare the marinade ahead of time. This saves you time and enhances flavor. - Mix all marinade ingredients in a bowl. - Store it in the fridge in an airtight container. You can marinate the skirt steak for up to 2 hours before grilling. This allows the flavors to soak in well. Check the [Full Recipe] for exact measurements and more details. Grilling skirt steak and pairing it with lemon herb couscous is simple and rewarding. You learned how to marinate the steak, prepare flavorful couscous, and grill to perfection. With tips on variations and storage, you can easily enjoy this dish multiple ways. Whether you're hosting or cooking for yourself, this meal offers fresh flavors that impress. Embrace the cooking process, experiment with spices, and enjoy your delicious creation. With easy steps and variations, you’re set for success in your kitchen!

Grilled Skirt Steak with Lemon Herb Couscous Delight

If you’re ready to elevate your grilling game, my Grilled Skirt Steak with Lemon Herb Couscous Delight is the perfect

- 2 ripe kiwis, peeled and chopped - 10 fresh mint leaves - 1 tablespoon honey (or to taste) - 1 tablespoon lime juice - Sparkling water - Ice cubes - Extra mint sprigs and kiwi slices for garnish The Kiwi Mint Mojito Mocktail is all about fresh, vibrant flavors. The key ingredients bring a fun twist to your drink. Ripe kiwis give this mocktail a sweet and tangy base. The mint leaves add a refreshing touch. You can easily find these at your local market. I use honey for sweetness, but you can adjust it to your taste. Lime juice gives a zesty kick, balancing the sweetness of the kiwi and honey. Sparkling water adds a fizzy element that makes this drink lively. Don’t forget the ice cubes to keep it chilled. The extra mint sprigs and kiwi slices serve as a gorgeous garnish, enhancing the drink's look. - Fresh lemon juice - Flavored sparkling water options - Sweeteners alternatives like agave syrup You can customize your mocktail with optional add-ins. A splash of fresh lemon juice boosts the citrus flavor. Flavored sparkling water can add fun twists like berry or lime. If you prefer sweeteners, try agave syrup. It blends well and gives a mild sweetness. These options let you create a drink just right for you. Check out the Full Recipe for more details! First, gather all your ingredients and tools. You need: - 2 ripe kiwis, peeled and chopped - 10 fresh mint leaves - 1 tablespoon honey (or to taste) - 1 tablespoon lime juice - Sparkling water - Ice cubes - Extra mint sprigs and kiwi slices for garnish Next, prepare your glassware. A sturdy glass or cocktail shaker works best. Step 1: Muddling kiwi and mint Start by adding the chopped kiwis and mint leaves to your glass. Use a muddler or the back of a spoon to gently mash them. This step releases the sweet juices and refreshing mint aroma. Step 2: Mixing in honey and lime juice Now, add the honey and lime juice to the glass. Muddle again to mix all the flavors. This makes the drink sweet and tart. Step 3: Filling with ice and sparkling water Fill your glass with ice cubes to the brim. Pour sparkling water over the ice until the glass is full. This adds fizz and makes the drink refreshing. Step 4: Stirring and garnishing Gently stir the drink to mix the kiwi-mint base with the sparkling water. Taste it and adjust sweetness if needed. Add more honey for extra sweetness. Finally, garnish with mint sprigs and kiwi slices on the rim. For a detailed guide, check the Full Recipe. Muddling is key to making a great Kiwi Mint Mojito Mocktail. To get the best flavor, press gently on the kiwi and mint. You want to release the juices without shredding the mint leaves. If you don’t have a muddler, you can use the back of a spoon. This works well to break down the fruit and herbs. Everyone has different tastes when it comes to sweetness. If you prefer a sweeter drink, add more honey. Start with one tablespoon, then taste. You can always add more! If you want a sugar-free option, try using agave syrup or a sugar substitute. These will keep your drink sweet without extra calories. A beautiful drink looks more inviting. For garnishing, use extra mint sprigs and kiwi slices. Place them on the rim of the glass for a pop of color. When serving, consider using clear glasses. This way, the vibrant green drink shines. It makes a great presentation for parties or gatherings. {{image_2}} You can easily mix up the Kiwi Mint Mojito Mocktail by adding different fruits. - Berry Kiwi Mint Mojito Mocktail: Add a handful of fresh berries like strawberries or blueberries. The berries add sweetness and a pop of color. Muddle them with the kiwis and mint for a fun twist. - Citrus Kiwi Mojito Mocktail: Use orange or grapefruit juice along with lime juice. This gives a bright and zesty flavor that makes your drink refreshing and tangy. You can change your Kiwi Mint Mojito Mocktail to fit the seasons. - Summer-themed mocktail: In summer, toss in extra fruits like watermelon or peach. This adds a fresh burst of flavor and makes it feel like a summer party. - Winter twist with spices: In winter, try adding a pinch of cinnamon or nutmeg. These spices warm the drink and create a cozy vibe. Don't be afraid to swap ingredients to fit your taste. - Substituting mint with basil: If you can’t find mint, use fresh basil. It has a sweet, herbal flavor that works well with the kiwi. - Using other fruits: You can also use pineapple or mango instead of kiwi. These fruits bring their own sweetness and tropical vibe to the drink. Explore these variations to keep your Kiwi Mint Mojito Mocktail exciting and fresh. Check out the Full Recipe for the basic version! You can prepare the kiwi mint base ahead of time. Start by mashing the kiwis and mint leaves as per the recipe. Then, store this mixture in an airtight container. Keep it in the fridge for up to two days. This way, you save time when making the mocktail. To maintain freshness, avoid adding sparkling water until just before serving. This keeps the fizz nice and bubbly. If you have leftover mocktail, store it in a clean, airtight container. I recommend using glass jars or bottles. These keep the flavors intact. Place it in the fridge and use it within 24 hours for the best taste. If you notice any changes in color or smell, it’s best to discard it. You can freeze extra kiwi and mint for later. Chop the kiwis and rinse the mint leaves. Spread them on a baking sheet and freeze until solid. Then transfer to a freezer bag. This way, you can have fresh flavors ready for future drinks. When you want to use them, thaw in the fridge overnight. Avoid using hot water, as it can change the taste. A mocktail is a non-alcoholic drink that mimics cocktails. It combines flavors, colors, and garnishes like a cocktail but leaves out the alcohol. Mocktails are great for everyone. They are fun and refreshing. You can enjoy them at parties or just while relaxing at home. Yes, you can make this mocktail ahead of time. Start by preparing the kiwi and mint base. Muddle the kiwis and mint together, then mix in the honey and lime juice. Store this base in the fridge for up to a day. When you are ready to serve, add ice and top with sparkling water. This keeps the drink fresh and bubbly. Kiwi is rich in vitamins C and K. It supports your immune system and helps digestion. Mint adds flavor without extra calories. It may also aid digestion and freshen your breath. Together, they make this mocktail not just tasty but also healthy. To change the drink's acidity, adjust the lime juice. If you want a sweeter drink, reduce the lime juice. You can also add a bit more honey to balance it out. For a more tart flavor, add extra lime juice. Just taste as you go to find your perfect balance. In this blog post, we explored how to create a refreshing kiwi mint mocktail. You learned about the key ingredients, detailed steps to prepare it, and tips for customizing flavors. We also shared variations for different seasons and occasions. This drink is easy to make and perfect for any gathering. With your creativity, you can adjust the flavors to suit your taste. Enjoy mixing and sipping your new favorite mocktail!

Kiwi Mint Mojito Mocktail Refreshing and Fun Drink

Looking for a refreshing drink that’s both fun and flavorful? Dive into the world of mocktails with my Kiwi Mint

To make a delicious grilled shrimp bowl with avocado and corn salsa, you need fresh, simple ingredients. Here’s what you'll need: - 1 lb large shrimp, peeled and deveined - 2 tablespoons olive oil - 2 teaspoons garlic powder - 1 teaspoon smoked paprika - 1 teaspoon cumin - Salt and pepper to taste - 1 cup cooked quinoa or brown rice - 1 ripe avocado, diced - 1 cup cherry tomatoes, halved - 1 cup corn (fresh, frozen, or canned) - 1/4 cup red onion, finely chopped - 1 jalapeño, seeded and minced - Juice of 1 lime - Fresh cilantro, for garnish These ingredients come together to create a feast for the eyes and palate. Each item brings its own unique flavor, making your bowl both tasty and vibrant. You can mix it up even more with optional ingredients. Add extra spices for marinating if you like some heat. If you want to switch it up, consider substitutes for avocado or corn. You can also drizzle on dressings or sauces to enhance the flavor even more. For more details, check the Full Recipe to guide you in making this delightful dish. To start, mix your marinade. In a bowl, combine 2 tablespoons of olive oil, 2 teaspoons of garlic powder, 1 teaspoon of smoked paprika, and 1 teaspoon of cumin. Add salt and pepper to taste. Toss in 1 pound of large shrimp, peeled and deveined. Make sure each shrimp gets coated well. Let it marinate for at least 15 minutes. This step adds bold flavor. Next, grab another bowl for the salsa. Mix together 1 ripe avocado, diced, and 1 cup of halved cherry tomatoes. Add 1 cup of corn, which can be fresh, frozen, or canned. Toss in 1/4 cup of finely chopped red onion and 1 minced jalapeño. Squeeze the juice of 1 lime over the mix. Gently combine everything and season with salt to taste. For the best taste, fresh corn is always a winner, but canned works too. Now, it's time to grill. Preheat your grill or grill pan over medium-high heat. Once it's hot, place the marinated shrimp on the grill. Cook for 2-3 minutes on each side. You know they’re done when they turn opaque. This method keeps them juicy and tasty. To put everything together, start with a base. In serving bowls, layer 1 cup of cooked quinoa or brown rice. Next, add the grilled shrimp. Spoon a generous amount of your corn salsa on top. For an eye-catching finish, garnish with fresh cilantro and a lime wedge on the side. This adds a splash of color and flavor. Enjoy the bright flavors and lovely presentation of this dish. You can find the Full Recipe for more detailed instructions. To grill shrimp well, you need some good tools. A grill pan or outdoor grill works best. Use skewers or a grilling basket for easy handling. This keeps shrimp from falling through the grates. To avoid overcooking shrimp, keep an eye on the time. Grill shrimp for just 2-3 minutes on each side. They cook fast and turn pink when done. If they curl too tightly, they are likely overcooked. For a fun twist, you can change up the salsa. Try adding mango or pineapple for a sweet touch. You can also use different herbs like mint or basil for a fresh taste. If you like it hot, add more jalapeño or even a dash of hot sauce. To balance flavors, mix in a pinch of sugar. This can help round out the taste and enhance sweetness, especially if your corn is not sweet enough. When serving, choose vibrant bowls to make your dish stand out. Start with a layer of quinoa or rice, then add the shrimp. Spoon the colorful salsa on top for a great look. Garnish with fresh cilantro for a pop of color. A lime wedge on the side adds extra flair and flavor. This makes your grilled shrimp bowl not just tasty but also beautiful. {{image_2}} If you want to switch things up, you can easily replace shrimp with chicken or tofu. Both options work great on the grill. For chicken, use boneless, skinless thighs or breasts. Marinate them just like the shrimp. Grill for about 6-8 minutes on each side. If you choose tofu, use firm or extra-firm tofu. Cut it into cubes or slices, marinate, and grill for about 3-4 minutes on each side. This gives you a tasty alternative that still packs a punch. Choosing the right grain can change the whole bowl. Brown rice and quinoa are both excellent choices. Brown rice has a nutty flavor and is high in fiber. Quinoa is lighter and packed with protein. If you're looking for a low-carb option, try cauliflower rice. It cooks up quickly and adds a nice texture to the dish. Each option offers different health benefits while keeping the bowl satisfying. To keep things exciting, mix up the herbs and spices you use. Adding fresh cilantro or parsley can brighten the dish. If you like heat, consider adding cayenne or a dash of hot sauce. You can also create a zesty sauce with Greek yogurt and lime juice. Drizzle it over the bowl for an added kick. These changes keep your grilled shrimp bowl fresh and flavorful. To store leftovers, first let the shrimp bowl cool down. Place the shrimp and corn salsa in separate airtight containers. This keeps the shrimp tender and the salsa fresh. You can refrigerate them for up to three days. When reheating shrimp, do it gently. Use a skillet over low heat to keep them tender. Avoid the microwave, as it can make shrimp rubbery. For the salsa, heat it briefly on low to keep its fresh taste. Stir often to prevent burning. Yes, you can freeze grilled shrimp. Place them in a single layer on a baking sheet. Freeze for an hour, then transfer to a freezer bag. This method prevents clumping. For salsa, blend the ingredients and put them in a freezer-safe container. This way, you can enjoy it later! Grill shrimp for about 2 to 3 minutes on each side. You want them to turn pink and opaque. This quick cook time keeps shrimp tender and juicy. Overcooking shrimp makes them rubbery, so watch closely! Yes, you can prep some parts ahead. Marinate the shrimp a few hours in advance for better flavor. You can also make the corn salsa ahead. Just keep it in the fridge. Adding diced avocado right before serving keeps it fresh and green. Side dishes that pair well include: - A light salad - Grilled veggies - Fresh bread - Cold drinks like lemonade or iced tea These options add balance and freshness to your meal. Absolutely! You can make multiple servings and store them. Use airtight containers to keep everything fresh. Layer quinoa or rice, grilled shrimp, and salsa in each container. This makes for easy lunches or dinners throughout the week. You can find the Full Recipe with all the steps and ingredients in this article. Enjoy making your Grilled Shrimp Bowl with Avocado and Corn Salsa! You can now make a delicious shrimp bowl using simple ingredients and steps. We discussed marinating shrimp, preparing a fresh corn salsa, and grilling methods to keep shrimp tender. Remember, you can switch proteins or grains based on your taste. Don't forget to store your leftovers correctly for future meals. Cooking can be fun and easy, and I hope you feel inspired to try this recipe. Enjoy your shrimp bowl creation and get creative with variations!

Grilled Shrimp Bowl with Avocado and Corn Salsa Delight

Looking for a fresh and tasty meal? Dive into my Grilled Shrimp Bowl with Avocado and Corn Salsa Delight! This

- 1 pre-made pizza dough - 1/2 cup fresh ricotta cheese - 1 cup shredded mozzarella cheese - 1 lemon, zested and juiced - 2 tablespoons olive oil - 1 tablespoon honey - 1 teaspoon sea salt - 1/2 teaspoon black pepper - Fresh arugula for topping - 1 tablespoon fresh basil leaves, chopped - Optional: red pepper flakes for a kick Lemon pizza is fresh and bright. Each ingredient plays a role in this dish. The pre-made pizza dough gives a nice base. Ricotta cheese adds creaminess, while mozzarella melts beautifully. Zesting and juicing the lemon brings a punch of flavor. Olive oil adds richness to the mix. Honey balances the tartness of the lemon. Sea salt and black pepper enhance all the flavors. Fresh arugula on top provides a peppery bite. Chopped basil adds a nice herbal touch. If you like some heat, try red pepper flakes. This lemon pizza has a lot of delicious layers. - Calories per serving: About 300 calories - Macronutrient breakdown: - Protein: 12g - Fat: 15g - Carbohydrates: 30g - Other nutritional benefits of lemon and arugula: - Lemons are high in vitamin C, which helps boost your immune system. - Arugula is packed with vitamins A and K, great for bone health. This lemon pizza is not just tasty; it's good for you too! Enjoy each fresh, flavorful slice as a treat. 1. Preheat your oven to 475°F (245°C). If using a pizza stone, put it in the oven as it heats. 2. On a floured surface, stretch or roll out your pizza dough. Aim for a 12-inch round. 3. Move the dough to a parchment-lined baking sheet or a pizza peel if you’re using a stone. 4. In a bowl, mix the ricotta cheese, lemon zest, and half of the lemon juice. Add a pinch of salt and black pepper. 1. Spread the lemon-ricotta mixture over the stretched dough. Leave a small border around the edges. 2. Sprinkle the mozzarella cheese evenly on top. 3. Drizzle the olive oil and honey over the cheese. Then, add the rest of the lemon juice. 4. Add more sea salt and black pepper to boost the flavors. 5. Carefully place the pizza into the hot oven or on the pizza stone. Bake for 12-15 minutes until the crust is golden and the cheese bubbles. 6. After baking, let the pizza cool for a minute. Top with fresh arugula and chopped basil. If you like spice, add some red pepper flakes. 7. Slice the pizza and enjoy the bright, zesty flavors! This simple Lemon Pizza Delight is a fresh take on a classic dish. To make your Lemon Pizza shine, consider these tips: - Balancing the sweetness with honey and lemon: Honey adds a nice touch of sweetness. It pairs well with the tartness of lemon. A drizzle before baking brings out the flavors. - Using fresh herbs for extra flavor: Fresh herbs like basil or arugula boost the taste. They add a bright, fresh note. Don’t skip this step! Here are some common pitfalls to dodge: - Over-topping the pizza: Adding too many toppings can make your pizza soggy. Stick to the recipe for the best result. Less is often more! - Not preheating the oven properly: Your oven needs to be hot before you bake. This helps create a crispy crust. Preheat it to 475°F (245°C) for the best results. Enjoy your Lemon Pizza with these ideas: - Best pairings with drinks: This pizza goes well with a light white wine or sparkling water. The acidity of the drink complements the lemon. - Serving it as an appetizer or main course: You can serve it as a light appetizer at a party or as a main dish. It works well for any occasion! {{image_2}} You can easily mix lemon with other great flavors. One popular choice is Lemon Chicken Pizza. This version adds grilled chicken strips for protein. The tangy lemon pairs well with the savory chicken. Use the same lemon-ricotta base for a creamy touch. Add some fresh herbs on top for added flavor. Another fun idea is Lemon Basil Pesto Pizza. Swap the ricotta with basil pesto. The bright lemon taste shines through. Top with mozzarella and fresh basil leaves. This twist brings a fresh spin to your pizza night. Need a gluten-free option? You can find many gluten-free pizza doughs at stores. Just be sure to check the label. They work well with the lemon-ricotta mix. For a vegan alternative, try cashew cheese or tofu. Both options can mimic ricotta's creaminess. You can also use vegan mozzarella for the cheese topping. This way, everyone can enjoy a slice of lemon pizza. Explore these variations and adaptations to create your perfect Lemon Pizza Delight! To keep your lemon pizza fresh, store any leftovers in an airtight container. Place a layer of parchment paper between slices to prevent sticking. Store it in the fridge for up to three days. When you want to reheat, preheat your oven to 350°F (175°C). Place the pizza on a baking sheet. Heat for about 10 minutes or until the cheese is bubbly. This keeps the crust crispy and the toppings fresh. Yes, you can freeze lemon pizza! It’s great for meal prep. First, let the pizza cool completely. Then, wrap it tightly in plastic wrap. Place it in a freezer bag or airtight container to prevent freezer burn. To defrost, move the pizza to the fridge for several hours or overnight. When ready, reheat it in the oven at 350°F (175°C) for about 15 minutes. This method ensures you enjoy that delicious lemon flavor even after freezing. For more details on making this delightful pie, check out the Full Recipe. Lemon pizza is a fresh twist on traditional pizza. It features a creamy, zesty topping that shines with lemon's bright flavor. This dish likely started in Italy, where lemons grow abundantly. Over time, it gained popularity in various regions, attracting food lovers who love unique tastes. Many enjoy lemon pizza for its refreshing taste, especially during warm months. Yes, you can use other cheeses if you like! Instead of ricotta, try goat cheese for a tangy flavor. Cream cheese also works for a smooth texture. If mozzarella is not your choice, feta adds a salty kick. Experiment with different options to find your favorite blend. Making lemon pizza from scratch is fun and easy. Here’s the Full Recipe to guide you through the process: 1. Prepare the dough: Start with a pre-made pizza dough. 2. Mix the toppings: Blend fresh ricotta with lemon zest and juice. Season with salt and pepper. 3. Assemble the pizza: Spread the lemon-ricotta mixture over the dough. Add shredded mozzarella on top. 4. Bake: Heat your oven to 475°F (245°C) and bake for 12-15 minutes. 5. Add fresh toppings: After baking, add arugula and basil for a fresh finish. Enjoy the delightful, tangy flavors of lemon pizza! Lemon pizza is a fun twist on tradition. We explored its key ingredients, benefits, and steps to make it. Flavorful toppings, like honey and herbs, can elevate this dish. Always remember to preheat your oven for the best crust. Try different variations to keep it exciting. From pairing suggestions to storage tips, you can enjoy this pizza—a simple dish with big taste. Embrace the zest and make your own lemon pizza today!

Lemon Pizza Delight Fresh and Flavorful Slice

If you’re ready for a pizza that bursts with fresh flavor, then lemon pizza is for you! This unique dish

Older posts
Newer posts
← Previous Page1 … Page16 Page17 Page18 … Page70 Next →

dsad

© 2025 My Saved Recipe • Built with GeneratePress

Our Policies

  • Copyright Policy
  • Cookie Policy
  • GDPR Policy
  • Privacy Policy
  • Disclaimer
  • Terms Of Use

More Information

  • Home
  • About
  • Contact
  • Appetizers
  • Dessert
  • Dinner
  • Drinks
©2025, My Saved Recipe About Back To Top