![- 2 boneless, skinless chicken breasts - 2 cups fresh tortellini (cheese or spinach-filled) - 1 cup cherry tomatoes, halved - 1 cup fresh spinach - 1 cup zucchini, sliced When making One-Pan Pesto Chicken with Tortellini and Veggies, fresh ingredients make a big difference. I love using juicy chicken breasts as the main protein. They cook well, stay tender, and absorb all the flavors. Tortellini adds a nice touch. You can choose cheese or spinach-filled ones, depending on your taste. Cherry tomatoes give a burst of sweetness. Fresh spinach adds color and nutrition. Zucchini is crisp and pairs well with the other veggies. - 2 tablespoons olive oil - 1 teaspoon garlic powder - 1/2 cup store-bought basil pesto - Salt and pepper to taste Pantry staples keep this dish simple and quick. Olive oil is perfect for sautéing, adding a rich flavor. Garlic powder gives a nice kick without the fuss of fresh garlic. Basil pesto is the star of the dish. It brings all the flavors together. Don’t forget salt and pepper! They enhance the taste of every ingredient. - Grated Parmesan cheese - Fresh basil leaves for garnish Optional add-ons can elevate your meal. Grated Parmesan cheese adds creaminess and a salty bite. It melts beautifully on top. Fresh basil leaves are perfect for garnish. They add a pop of color and a fresh aroma. You can choose to use these or skip them based on your preference. For the full recipe, check out the detailed instructions and enjoy this delicious meal! To start, heat two tablespoons of olive oil in a large skillet over medium heat. While the oil warms, season two boneless, skinless chicken breasts with garlic powder, salt, and pepper. When the oil shimmers, add the chicken to the skillet. Cook each side for about six to seven minutes. The chicken should turn a lovely golden brown and be fully cooked through. Once done, remove the chicken and let it rest on a plate. In the same skillet, add one cup of sliced zucchini and one cup of halved cherry tomatoes. Sauté these for about three to four minutes. You want them to soften but still hold their shape. Next, stir in one cup of fresh spinach. Cook until the spinach wilts, which should take just one to two minutes. This mix adds a burst of color and flavor. While the veggies cook, bring a pot of water to a boil. Add two cups of fresh tortellini and cook according to the package instructions, about three to five minutes. Once done, drain the tortellini and add it to the skillet with the veggies. Slice the rested chicken and return it to the skillet, too. Then add half a cup of basil pesto and gently mix everything together. Heat for about two minutes, ensuring all ingredients are well combined. Taste and adjust the seasoning if needed. Serve warm, topped with grated Parmesan cheese and fresh basil leaves for a delightful finish. For the full recipe, click here. To get juicy chicken, cook the breasts for 6 to 7 minutes on each side. Use medium heat to avoid burning. Check if the chicken is done by cutting into it; the juices should run clear. Let the chicken rest after cooking. This keeps it moist and tasty. Overcooked tortellini can become mushy. Follow the package instructions closely. Usually, it takes 3 to 5 minutes to cook. Taste a piece to see if it's al dente, or firm to the bite. Drain it right away for the best texture. Want to boost the taste? Try adding fresh herbs like thyme or parsley. A squeeze of lemon juice can brighten the dish. For a bit of heat, sprinkle in some red pepper flakes. Don’t forget, you can always adjust the salt and pepper to your liking. For the full recipe, check the instructions above. {{image_2}} For a vegetarian twist, swap the chicken for chickpeas or tofu. Both add protein and texture. You can also load up on more veggies. Try bell peppers, broccoli, or mushrooms. These will give your dish a great taste and extra color. To make this dish low-carb, you can replace tortellini with zucchini noodles or cauliflower rice. This keeps the meal light while still being filling. You will still enjoy the pesto flavor and veggies without the carbs from pasta. If you like heat, add chili flakes or diced jalapeños to your dish. This simple change can make your meal exciting. You can even try different spices like smoked paprika for a unique flavor. Just sprinkle them in while cooking, and enjoy the kick! For the complete recipe, check out the [Full Recipe]. To store leftovers, let the dish cool down. Use an airtight container. Place it in the fridge. It will stay fresh for about three days. Keep in mind, the tortellini may absorb some moisture. This might change the texture, but the taste will still be great. Always label your container with the date. This helps you track freshness. You can freeze this dish if you want to save some for later. First, let it cool completely. Then, portion it into freezer-safe containers. Leave some space at the top, as the meal will expand when frozen. Seal tightly to avoid freezer burn. It will last for about two months. When you're ready to eat, thaw it overnight in the fridge. Reheating needs care to keep flavors intact. You can use the stovetop or microwave. For the stovetop, add a splash of water or broth in a pan. Heat on low, stirring gently. For the microwave, cover the dish with a damp paper towel. Heat in short bursts, stirring in between. This helps keep the tortellini tender and the veggies vibrant. Enjoy your meal just like when it was fresh! Yes, you can use homemade pesto. Homemade pesto tastes fresher and brighter. You control the ingredients, allowing for more flavor. Plus, making it can be a fun cooking project. Blend fresh basil, garlic, nuts, olive oil, and Parmesan cheese for a rich taste. This adds a personal touch to your dish. You can add many veggies to this dish. Consider bell peppers for sweetness or broccoli for crunch. Carrots add color and vitamins. Peas bring a pop of green. Feel free to mix your favorites. This recipe is flexible. Use what you have on hand for a unique twist. You can keep leftovers in the fridge for about three days. Store them in an airtight container. If you want to keep it longer, consider freezing it. In the freezer, it lasts up to three months. Just remember to thaw it before reheating. Enjoy your meal anytime! This blog post shared a tasty recipe using fresh, simple ingredients. You learned how to cook chicken and mix it with tortellini, veggies, and pesto. I also offered tips for tender chicken and perfectly cooked pasta. Remember, you can swap ingredients to fit your diet, and leftovers can be stored easily. Enjoy making this flavorful dish for a quick meal anytime. Your kitchen is ready for fun and delicious cooking!](https://mysavedrecipe.com/wp-content/uploads/2025/06/46a9a28b-9313-4af7-b6f4-469fa6dcf004.webp)
One-Pan Pesto Chicken with Tortellini and Veggies Delight
Looking for a quick and tasty meal? This One-Pan Pesto Chicken with Tortellini and Veggies will be your new go-to
Looking for a quick and tasty meal? This One-Pan Pesto Chicken with Tortellini and Veggies will be your new go-to

Looking for a drink to cool you down this summer? Try my Strawberry Lychee Lemonade! This refreshing blend of sweet
![- 2 tablespoons ceremonial grade matcha powder - 1 cup hot water (not boiling) - 1 cup milk (dairy or plant-based) - 2 tablespoons honey or maple syrup - 1/2 teaspoon vanilla extract - 1/4 cup mini marshmallows - A pinch of sea salt - Ice cubes (optional for iced version) To make the toasted marshmallow matcha, gather all your ingredients first. Start with the ceremonial grade matcha powder. This type of matcha is the best for flavor and quality. Next, use hot water that is not boiling. Water that is too hot can make the matcha taste bitter. The right temperature is about 175°F. This will help bring out the matcha's rich green color and fresh taste. You can choose any milk you like. Dairy milk gives a creamy texture. Plant-based milk, like almond or oat, works well too. For sweetness, I prefer honey or maple syrup. Both bring a nice taste to the drink. If you like less sweetness, adjust the amount to your liking. Don't forget the vanilla extract! It adds a warm flavor that pairs well with matcha. The mini marshmallows are the star of this drink, giving it that toasted sweetness. Finally, a pinch of sea salt balances the flavors. If you want to make an iced version, add ice cubes at the end. For the full recipe, check out the detailed section above! To start your toasted marshmallow matcha, sift the matcha powder. This step helps remove lumps and creates a smooth drink. Use a fine mesh sieve or a small sifter to do this. Next, grab a small bowl. Add about 1 cup of hot water, but not boiling. Water around 175°F works best. Whisk the matcha and water together. Use a bamboo whisk or a frother. Whisk until it becomes frothy and fully dissolved. This will give you a bright green matcha base. Now, let's sweeten the drink. In a separate saucepan, heat 1 cup of milk over medium heat. Be careful not to let it boil. Once warm, add 2 tablespoons of honey or maple syrup. You can adjust this based on how sweet you like it. Next, add in 1/2 teaspoon of vanilla extract. Stir the mixture well until everything combines. This will add a lovely flavor to your matcha. It’s time to bring it all together. Pour the whisked matcha into the warm milk mixture. Stir gently until everything is fully mixed. If you want a cool drink, you can blend in ice cubes at this stage. This will give you a refreshing iced version of the drink. Otherwise, keep it warm for a cozy treat. Now, let’s toast the marshmallows. Preheat your broiler on high. Line a baking sheet with parchment paper. Spread 1/4 cup of mini marshmallows evenly on the sheet. Place them under the broiler for about 1-2 minutes. Watch closely, as they can burn quickly. You want them golden brown and slightly charred for that perfect toasted flavor. Pour the warm matcha mixture into a mug. Make sure to fill it to your liking. Top generously with the toasted marshmallows. This is where the fun happens! The marshmallows will float on top, adding a sweet touch and great texture. For a delightful surprise, add a pinch of sea salt over the marshmallows. This contrast between sweet and salty makes each sip special. Enjoy your toasted marshmallow matcha! If you're interested in more details, check out the Full Recipe. To get that perfect froth, you can use a bamboo whisk or a frother. A bamboo whisk helps you feel connected to the process. It gives a nice, traditional touch. Whisk the matcha and water together in a bowl. Move fast in a zig-zag pattern. The frother is quick and easy. It mixes well, too. Use it if you want speed. Both methods work great. To toast marshmallows well, watch the broiler closely. The heat can change fast. They can burn in just seconds. Place your marshmallows on a lined baking sheet. Spread them out evenly for even toasting. Turn the pan halfway through to brown all sides. Keep a close eye on them. Once they are golden brown, take them out. They should look soft and gooey! You can change how sweet your drink is. Start with two tablespoons of honey or maple syrup. Taste it after mixing. If you want it sweeter, add more. If you prefer less sweetness, use less syrup. You can also try natural sweeteners like agave or stevia. Each choice gives a unique taste. Adjust until you find your perfect balance. For the [Full Recipe], check out the detailed steps above. Enjoy making this delightful warm drink! {{image_2}} To make an iced version, follow these steps. First, prepare the matcha as usual. Sift 2 tablespoons of ceremonial grade matcha powder. Whisk it with 1 cup of hot water until frothy. Next, heat 1 cup of milk with 2 tablespoons of honey or maple syrup. Stir in 1/2 teaspoon of vanilla extract. Now, cool the matcha and milk mixture. Pour it over a glass filled with ice cubes. Top with toasted marshmallows just like in the warm version. This drink is refreshing and still sweet. To make this drink vegan, choose plant-based milk. Almond, oat, or coconut milk all work well. You can also switch honey for maple syrup or agave nectar. These options keep your drink sweet without using animal products. Feel free to adjust the sweetness to your taste. This way, you can enjoy the flavor without any dairy. Get creative with flavors! You can add a bit of cocoa powder for a chocolate twist. Just mix in 1 tablespoon of cocoa with the matcha before whisking. Another idea is to add spices. A pinch of cinnamon or nutmeg can give it a warm kick. You can also try a few drops of peppermint extract for a minty touch. Each addition will change the drink's taste, making it unique every time. Explore and find your favorite combinations! To store any leftover matcha mixture, let it cool to room temperature. Pour it into an airtight container. Make sure to seal it well. Refrigerate it for up to two days. When you want to enjoy it again, check the smell before using. If it smells off, it’s best to toss it. To keep matcha powder fresh, always store it in a cool, dry place. Use an airtight container to prevent moisture and light exposure. Avoid storing it near heat sources. If you buy in bulk, consider splitting it into smaller containers. This will help keep the rest fresh while you use the first batch. To reheat your stored matcha mixture, pour it into a saucepan. Use low heat to warm it gently. Stir it often to prevent burning. Avoid boiling, as high heat can ruin the flavor. If it’s too thick, add a splash of hot water or milk to loosen it up. Enjoy your warm drink without losing any taste! Toasted Marshmallow Matcha is a warm drink that mixes matcha with sweet marshmallows. The drink looks beautiful and tastes amazing. It blends the earthy flavor of matcha with the sweetness of toasted marshmallows. You get a cozy feel with every sip. This drink is perfect for chilly days or when you want a special treat. Yes, you can prepare some parts ahead of time. You can whisk the matcha and store it in the fridge for about a day. Just warm it up before serving. You can also toast the marshmallows in advance. Store them in an airtight container. This way, you can assemble your drink quickly when you are ready. Yes, matcha is quite healthy. It is packed with antioxidants that help your body. Matcha can boost your energy and focus without the jitters you get from coffee. It also supports heart health and can help with weight management. Plus, it has calming effects, making it a great choice for relaxation. If you want a less sweet drink, you can cut back on the honey or maple syrup. Start with just one tablespoon and taste it. You can also skip the sweetener entirely if you prefer. Another option is to use unsweetened milk or add more matcha. This will help balance the flavors without adding extra sweetness. This blog post walked you through making a tasty toasted marshmallow matcha drink. You learned about the key ingredients, step-by-step prep, and some fun variations. I shared tips on frothing, toasting marshmallows, and customizing your sweetness. Remember, this drink can fit your taste and dietary needs. Experiment with flavors and enjoy the process. Now, grab your ingredients and start mixing!](https://mysavedrecipe.com/wp-content/uploads/2025/06/cb00c730-f7c9-4f47-afea-c308670adeca.webp)
Warm your soul with a cozy cup of Toasted Marshmallow Matcha! This delightful drink blends rich matcha powder and creamy

Warm up your day with a Honey Ginger Pear Tea Latte, a drink that feels like a cozy hug. This
![To make a tasty Blackberry Coconut Chai Smoothie, gather these key ingredients: - 1 cup blackberries, fresh or frozen - 1 banana, sliced - 1 cup coconut milk (canned or cartoned) These ingredients bring flavor and creaminess to your smoothie. Blackberries add a sweet-tart taste, while the banana gives it a creamy texture. Coconut milk adds richness and a tropical touch. Next, you will need a few additional ingredients to enhance the flavor: - 1 teaspoon chai tea powder or 1 chai tea bag (brewed and cooled) - 1 tablespoon honey or maple syrup (adjust to taste) - 1 tablespoon chia seeds - ½ teaspoon vanilla extract Chai tea offers warm spice notes that pair well with the fruit. Sweeteners like honey or maple syrup help balance the flavors. Chia seeds add a boost of nutrition and thickness, while vanilla extract adds a lovely aroma. You can also include some optional ingredients for a fun twist: - Ice cubes (optional, for a chilled smoothie) - Garnishes for presentation Adding ice cubes makes the smoothie colder and more refreshing. You can garnish your drink with whole blackberries or chia seeds to make it look beautiful and inviting. For the complete recipe, check out the [Full Recipe]. To start, brew the chai tea. If you use a tea bag, steep it in one cup of hot water. Let the tea cool to room temperature. This step gives your smoothie the warm spices needed for a great flavor. Next, gather all your ingredients. In your blender, add these items: - 1 cup blackberries, fresh or frozen - 1 sliced banana - 1 cup coconut milk - 1 teaspoon chai tea powder or the cooled brewed tea - 1 tablespoon honey or maple syrup - 1 tablespoon chia seeds - ½ teaspoon vanilla extract Blend until everything is well mixed. If you like it colder, toss in a handful of ice cubes. When blending, keep an eye on the texture. Blend on high speed until smooth and creamy. You want to avoid any large blackberry chunks. If it’s too thick, add a bit more coconut milk. Taste your smoothie. If you want it sweeter, add more honey or syrup. Pour it into glasses and let it sit for a few minutes. This way, the chia seeds can expand, adding a nice texture. You can also garnish with whole blackberries or a sprinkle of chia seeds for a pretty touch. For the complete recipe, check out the Full Recipe section above. To adjust sweetness in your smoothie, start with honey or maple syrup. Add one tablespoon at first. Blend and taste. If it needs more sweetness, stir in a bit more. Remember, you can always add, but you can't take away. You can boost this smoothie’s nutrition easily. Leafy greens like spinach or kale work well. They blend smoothly and add vitamins without changing the taste much. You could also toss in a tablespoon of protein powder or flaxseeds for extra goodness. These small changes make a big difference. If you have leftover smoothie, store it in an airtight container. It will keep in the fridge for up to one day. However, smoothies taste best fresh. If you want to save it for later, pour it into ice cube trays. Freeze them, then blend the cubes later for a quick treat. {{image_2}} You can switch up the fruit in your blackberry coconut chai smoothie. Try using raspberries for a tart kick. Strawberries add sweetness and a lovely color. If you want tropical vibes, add some mango or pineapple. Each fruit brings its own flavor and health benefits. Mix and match to find your favorite combination. If you're looking for dairy-free options, try almond milk or oat milk. Both work well with the smoothie. Coconut milk is creamy, but almond milk is lighter. Oat milk adds a nice, smooth texture. You can even use rice milk if you need a nut-free option. Choose what fits your diet best. Want to play with flavors? Adjust the spices in your smoothie. Try adding a pinch of cinnamon for warmth. A dash of nutmeg can give a cozy feel. For extra kick, add a bit of ginger. These spices not only add flavor but also pack in health benefits. Experiment to find what you love. For the full recipe, check out the details above. You can keep this smoothie in the fridge for up to 24 hours. After that, it may lose some flavor and texture. I suggest you store it in an airtight container. This helps keep the smoothie fresh longer. If you see separation, just give it a good shake before drinking. To freeze your smoothie for later, pour it into an ice cube tray or a freezer-safe container. Leave some space at the top, as liquids expand when frozen. You can freeze the smoothie for up to three months. This way, you can enjoy a quick treat anytime! When you're ready to use your frozen smoothie, take it out of the freezer. The best way to thaw it is in the fridge overnight. If you’re in a hurry, you can also use the microwave on low. Just be careful not to overheat it. After thawing, blend it again to regain that creamy texture. Enjoy your refreshing drink! Yes, you can make this smoothie ahead of time. To do this, blend all the ingredients and pour it into a jar. Seal it tightly and store it in the fridge. It tastes best if you drink it within 24 hours. If you want it colder, you can freeze it in ice cube trays. When ready, blend the frozen cubes with a little water for a quick treat. If you don’t have coconut milk, try using almond milk or oat milk. Both options work well and keep the smoothie creamy. You can also use soy milk or cashew milk. Each of these choices gives a unique twist to the flavor. Just make sure to choose unsweetened versions to control the sweetness. Absolutely! Kids love the taste of blackberries and bananas. To make it even more fun, you can add a colorful straw or a cute cup. You can also let them help with blending. Kids enjoy being part of the cooking process. If they want more sweetness, you can add extra honey or maple syrup. They might even want to add sprinkles or whipped cream on top for a treat! You learned about the key ingredients for a tasty Blackberry Coconut Chai Smoothie. We explored preparation steps, tips for flavor, and ways to store your smoothie. You can mix different fruits and adjust sweetness to suit your taste. Remember to keep it fresh in the fridge or freeze for later. Smoothies can be made ahead of time, and there are easy ways to soften them when you're ready to enjoy. Get creative and have fun with flavors that you love!](https://mysavedrecipe.com/wp-content/uploads/2025/06/910be64e-7677-4211-84e2-073cf5e80335.webp)
Looking for a delicious way to cool off? My Blackberry Coconut Chai Smoothie is both refreshing and creamy, perfect for
![For the best flavor in your Mocha Coconut Cold Drip Tonic, choose a medium roast coffee. Medium roast gives a balanced taste with nice acidity. Look for coarsely ground coffee. This helps with cold brewing, allowing water to extract flavors well. Brands like Stumptown or Blue Bottle have great options for cold brew. Use full-fat coconut milk for creaminess. It adds a rich texture to your drink. You can find it in cans at most grocery stores. If you prefer a lighter version, try light coconut milk. Sweeteners like maple syrup add a natural sweetness. Adjust the amount based on your taste. You can also use honey or agave syrup. For extra flavor, add vanilla extract. It pairs well with chocolate and coconut. To make your drink pop, top it with toasted coconut flakes. They add crunch and a nice flavor. Dark chocolate shavings are also a great choice. They give a sweet finish that enhances the mocha taste. You can easily make them with a vegetable peeler. Just shave off some chocolate bar pieces. Enjoy these garnishes to elevate your drink's look and taste. For a complete Mocha Coconut Cold Drip Tonic recipe, check out the [Full Recipe]. To start, you need to combine coffee grounds and water. Use 1 cup of coarsely ground coffee and 4 cups of cold water. Stir gently to wet all the grounds. Cover it and let it steep in the fridge for at least 12 to 24 hours. This long steeping time helps create a rich coffee flavor. After steeping, it is time to filter the coffee. You can use a fine mesh strainer or a coffee filter. Pour the coffee mixture through the filter to remove the grounds. This step gives you a smooth and rich coffee concentrate. Make sure to press down gently on the grounds for the best flavor. Next, whisk together the coconut milk, cocoa powder, maple syrup, and vanilla extract. Use a bowl and a whisk for this. Start slowly and then speed up. Whisk until everything is smooth and well mixed. A smooth consistency is key for a great drink. Now, it is time to mix your cold brew and coconut cream. Use equal parts of both. This means if you have 1 cup of cold brew, add 1 cup of coconut cream mix. Stir gently to combine. For serving, fill a glass with ice cubes and pour the mocha coconut blend over the ice. If you want a creamier drink, add more coconut milk. Enjoy this refreshing drink and garnish it with toasted coconut flakes and dark chocolate shavings for a special touch. You can find the [Full Recipe] for more details. To make the best cold brew, start with fresh coffee. Use coarsely ground coffee for a smooth drink. A medium roast works well, as it balances flavor and acidity. Mix one cup of coffee with four cups of cold water. Let it steep for at least 12 hours in the fridge. The longer it steeps, the richer the flavor. Common mistakes to avoid include using hot water. Hot water can lead to bitter coffee. Also, don’t rush the filtering process. Take your time to ensure a clean concentrate without grounds. You can adjust the sweetness and creaminess of your tonic. If you prefer a sweeter drink, add more maple syrup. For a creamier texture, mix in additional coconut milk. Feel free to experiment with flavors too. Try adding a pinch of cinnamon or nutmeg for warmth. You can also swap cocoa powder for chocolate syrup for a different taste. Garnishes can elevate your drink. Consider using toasted coconut flakes for a crunchy touch. Dark chocolate shavings add a rich visual and taste. When serving, use a clear glass to show off the layers. You can even rim the glass with chocolate or coconut for a fun twist. Enjoy making your drink beautiful and tasty! {{image_2}} You can easily make this drink dairy-free. Use almond milk, oat milk, or any nut milk you prefer. These options give you a great taste and keep the drink creamy. If you want to make it vegan, just skip any animal products. This way, you can enjoy a delicious Mocha Coconut Cold Drip Tonic that fits your diet. Want to switch things up? Try adding spices like cinnamon or nutmeg. These spices add warmth and depth to your tonic. You can also mix in flavors like almond or mint for a fun twist. A splash of almond extract or a few mint leaves can take your drink to the next level. Experimenting with flavors makes this drink even more exciting. This tonic is perfect for hot or cold drinks. For a hot version, heat the cold brew and mix it with the coconut cream blend. Serve it in a cozy mug. If you want it iced, just follow the regular recipe and pour it over ice. Keep it cool and refreshing for warm days. Enjoy this drink any way you like! To keep your cold brew fresh, store it in an airtight jar. Glass jars work best because they do not absorb flavors or odors. Ensure the jar is sealed tightly. Refrigerate the concentrate. It stays fresh for about one week. After that, the flavor may fade. If you notice a sour smell, it’s time to toss it. For the coconut cream, store it in a separate airtight container. Keep it in the fridge for up to five days. To keep it fresh longer, consider freezing it. Simply pour it into ice cube trays. Once frozen, transfer the cubes to a freezer bag. This way, you can grab a cube when you need it. If you have a party or gathering, prepare the cold brew and coconut cream in advance. Make a large batch of cold brew by doubling the recipe. Store it in the fridge. For the coconut cream, you can also batch prepare it. Freeze it in cubes for easy use. This will save you time and effort when serving your guests. For cold brew, I recommend a medium roast coffee. It gives a nice balance of flavor. Brands like Stumptown and Blue Bottle are great choices. Use coarsely ground coffee for the best results. A grind size similar to sea salt works well. This helps avoid a bitter taste while steeping. Yes, you can! If you want a coffee-free drink, try using herbal tea or chai. These options provide unique flavors and still feel refreshing. You can also use roasted barley or dandelion root for a coffee-like taste. They add a nutty and rich flavor to your tonic. To adjust sweetness, use natural sweeteners like honey or agave. Start with a little and add more if needed. You can also use stevia or monk fruit for a low-calorie option. Taste as you go to find the perfect balance for your drink. You can find ready-made versions at specialty coffee shops or local grocery stores. Brands like Nitro Cold Brew and La Colombe offer pre-made options. Check the refrigerated section for these drinks. Online retailers like Amazon also carry ready-made versions. To make a larger batch, simply double or triple the ingredients. Use a big jar or pitcher for steeping. Keep the same coffee-to-water ratio for best flavor. This way, you can serve many guests without extra effort. We explored the essential steps for making a delicious Mocha Coconut Cold Drip Tonic. You now know the best coffee types, coconut milk choices, and how to customize your drink with sweeteners or spices. Remember to experiment with garnishes for a special touch. As you prepare this refreshing iced beverage, keep in mind storage tips for optimal freshness. Enjoy crafting your tonic and share it with friends for a delightful treat! Embrace your creativity and enjoy every sip.](https://mysavedrecipe.com/wp-content/uploads/2025/06/ba28db61-4742-41d3-b9a2-3276fe182343.webp)
Craving a refreshing drink that blends rich flavor with tropical goodness? Say hello to the Mocha Coconut Cold Drip Tonic!
![To make the Tangerine Mint Cooler, gather these fresh and tasty ingredients: - Fresh tangerine juice - Sparkling water or club soda - Fresh mint leaves - Honey or agave syrup - Lime juice - Ice cubes - Tangerine slices for garnish Each ingredient plays a key role. The fresh tangerine juice gives a bright and sweet flavor. Sparkling water adds fizz and lightness. Fresh mint leaves bring a cool touch. Honey or agave syrup sweetens the drink, while lime juice adds a zesty kick. Ice cubes keep everything chill, and tangerine slices make it look pretty. For the full recipe, check my detailed instructions to enjoy this refreshing drink. To start, grab your fresh tangerines. Cut each one in half. Juice them until you have 2 cups of fresh juice. If you like, strain the juice to remove pulp and seeds. This step helps create a smooth drink. Next, take a medium bowl. Pour in the fresh tangerine juice. Add honey or agave syrup, along with lime juice. Stir it all together until the sweetener dissolves. This mixture should taste bright and sweet with a hint of tartness. Now, let’s get to the mint. In a pitcher, gently muddle the fresh mint leaves. Use the back of a spoon or a muddler. The goal is to release the mint's oils without tearing the leaves. This step adds a lovely aroma to your drink. After muddling, pour the tangerine juice mixture over the mint in the pitcher. Then, add sparkling water or club soda. Stir gently to mix everything. You want to keep the fizz, so be careful not to stir too hard. To serve, fill glasses with ice cubes. Pour the tangerine mint mixture over the ice. Finally, garnish each glass with extra mint leaves and a slice of tangerine on the rim. This adds a nice touch and makes the drink look fancy. For the full recipe, check out the [Full Recipe]. To pick the best tangerines, look for firm ones. They should feel heavy for their size. A bright orange color shows ripeness. Avoid any with soft spots or wrinkles. Fresh tangerines taste sweet and juicy, making your drink great. You can change the sweetness to fit your taste. Start with two tablespoons of honey or agave. Stir until it dissolves. Taste the mix and add more sweetener if needed. Keep in mind that tangerines can vary in sweetness. You can add fun flavors to your cooler. Try a splash of ginger for warmth. A hint of vanilla can add depth. If you love spice, a pinch of cayenne pepper can give it a kick. Fresh herbs like basil can also complement the mint. To present your drink nicely, use tall glasses. Fill them with ice cubes first. Pour the tangerine mint mix over the ice. Garnish with mint leaves and tangerine slices on the glass rim. This adds a pop of color and charm. For a fun twist, serve with colorful straws or drink stirrers. Check out the Full Recipe for more tips! {{image_2}} You can add more fruit to your Tangerine Mint Cooler. Fruits like pineapple, strawberries, or mango can bring new flavors. Just blend them into the juice mixture. For a tropical twist, try using coconut water instead of sparkling water. This will give your drink a sweet, creamy taste. Mix and match to find your favorite combo! For a fun twist, you can make this drink boozy. Adding vodka or rum can elevate your cooler. Start with one ounce of your choice of spirit per glass. Stir it in after combining the tangerine juice and mint. Adjust the amount based on your taste. You can also try flavored spirits like coconut rum or peach vodka to add a new layer of flavor. You can swap mint for other herbs as well. Basil, rosemary, or cilantro can create exciting new flavors. Muddle the herbs just like you do with mint. Each herb brings a unique taste to the drink. Pair them with citrus for refreshing results. Don’t be afraid to experiment! To store your Tangerine Mint Cooler, pour any leftovers into a clean jar. Seal it tightly with a lid. Keep the jar in the fridge. This helps maintain the drink's freshness and flavor. Always use a glass container for the best results. The Tangerine Mint Cooler stays fresh for up to three days in the fridge. After that, the mint may wilt and the flavor can fade. To enjoy the best taste, consume it within this time frame. Before serving, give it a gentle stir to mix the flavors again. If you have extra tangerine juice, consider freezing it. Pour the juice into ice cube trays. Once frozen, transfer the cubes to a freezer bag. This way, you can use them later in smoothies or other drinks. Frozen tangerine juice lasts for about six months. Yes, you can make Tangerine Mint Cooler in advance. Prepare the juice mixture and muddle the mint leaves. Store them in the fridge for up to two days. Add the sparkling water just before serving. This keeps the drink fizzy and fresh. To make a non-carbonated Tangerine Mint Cooler, skip the sparkling water. Instead, use still water or coconut water. This gives you a smooth and refreshing drink. Mix the juice with your choice of water and muddle in the mint leaves. Serve it over ice for a tasty treat. Tangerines are packed with vitamins and nutrients. They are high in vitamin C, which helps boost your immune system. Tangerines also have antioxidants that help fight free radicals. Their fiber content aids digestion and keeps you feeling full. Enjoying tangerines can support your overall health. Making the Tangerine Mint Cooler vegan is easy. Use agave syrup instead of honey. This keeps your drink plant-based while still being sweet. All other ingredients are already vegan-friendly. Enjoy your refreshing drink without any animal products. Yes, you can use bottled tangerine juice for convenience. However, fresh juice has a brighter flavor. If you choose bottled juice, look for 100% pure juice without added sugars or preservatives. This way, you still get a tasty drink. For the best taste, I recommend using fresh juice when possible. In this post, I covered how to make a refreshing Tangerine Mint Cooler. We discussed ingredients, steps for preparation, and tips for the best taste. Remember, fresh ingredients like mint and tangerines make a big difference. Adjust the sweetness to your liking for the perfect drink. You can even explore fun variations or store extras for later. With these ideas, you can create a delightful drink that impresses everyone. Enjoy crafting your cooler!](https://mysavedrecipe.com/wp-content/uploads/2025/06/6a4a261f-e87c-4db2-94af-95050f5a7755.webp)
Looking for a refreshing drink to sip on during hot summer days? I’ve got just the thing! This Tangerine Mint

Craving a cool, sweet treat that’s also unique? Let’s whip up a Salted Pistachio Caramel Frappe! This delightful drink combines
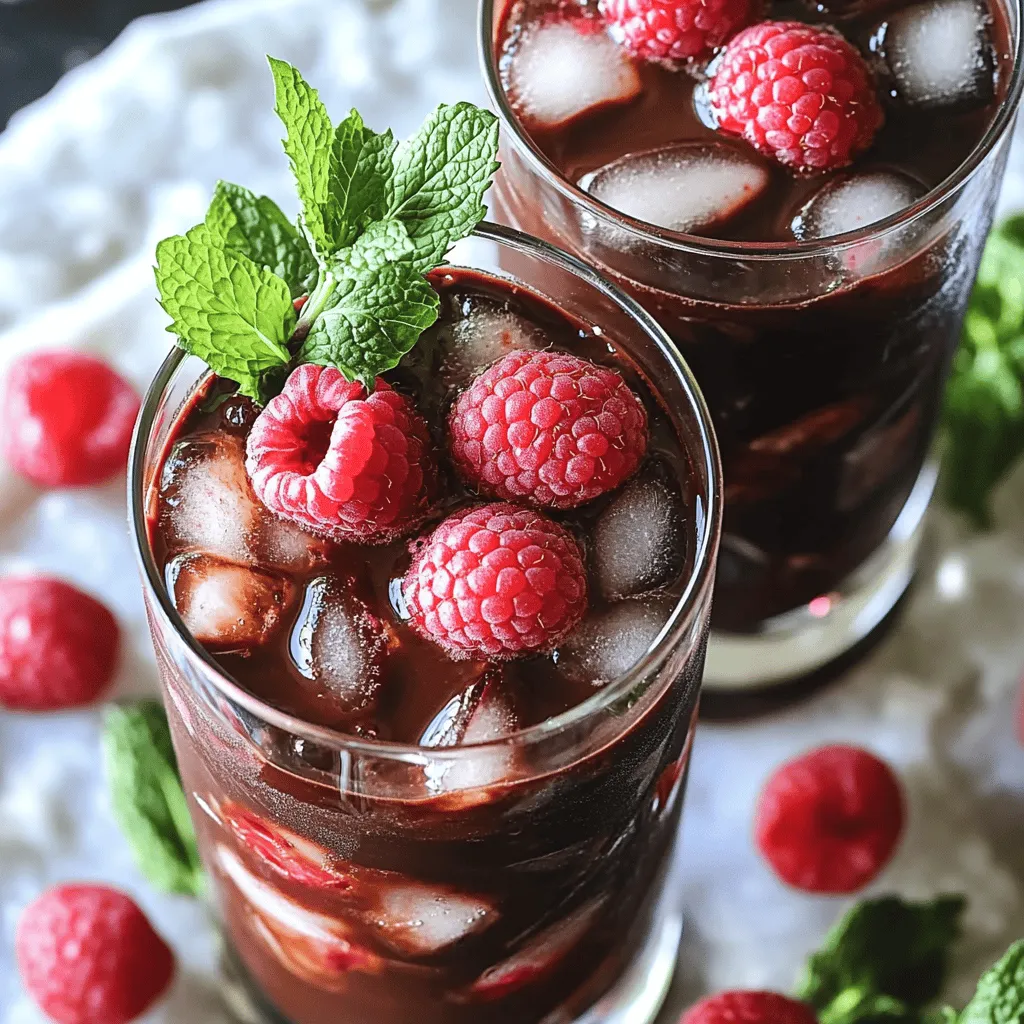
Are you ready for a drink that’s both simple and delicious? The Dark Chocolate Raspberry Refresher combines rich dark chocolate
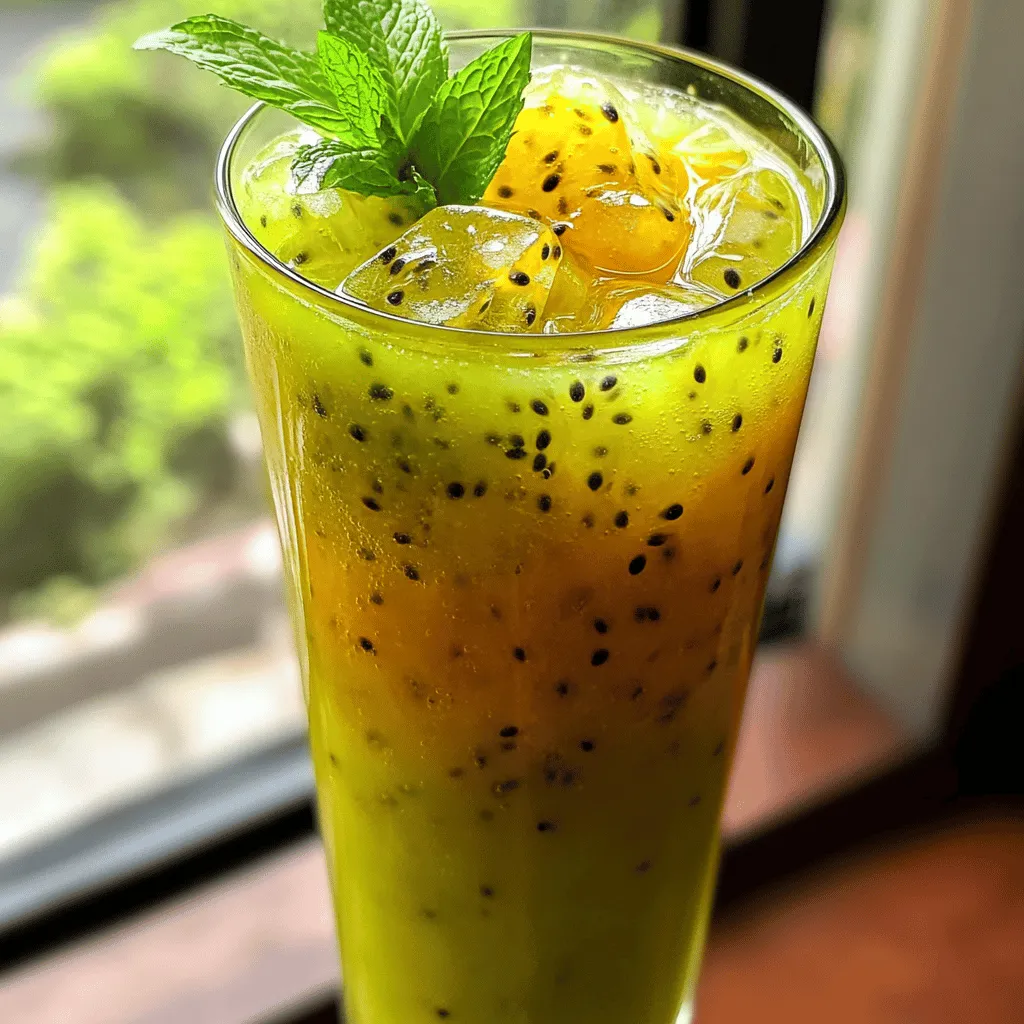
Are you ready to beat the summer heat with a refreshing treat? Kiwi Passionfruit Agua Fresca is the perfect way
