Skip to content
DisclaimerTerms Of UseGDPR PolicyCookie Policy

My Saved Recipe

  • Home
  • Drinks
  • Appetizers
  • Dinner
  • Dessert
  • About
  • Contact
  • Privacy Policy
DisclaimerTerms Of UseGDPR PolicyCookie Policy

Savannah

- 2 medium yellow squash - 1 medium zucchini - 1 cup all-purpose flour - 1 cup cornmeal - 1 teaspoon garlic powder - 1 teaspoon onion powder - 1 teaspoon paprika - 1/2 teaspoon cayenne pepper (optional, for spice) - Salt and black pepper to taste - 2 large eggs, beaten - Vegetable oil for frying - Fresh parsley, chopped (for garnish) Yellow squash and zucchini both work well. Yellow squash has a mild flavor. It is tender and sweet. Zucchini is also mild but boasts a firmer texture. You can mix both for a colorful dish. Other squash types can add fun twists. Consider pattypan or acorn squash for a change. Each type will give a unique taste and texture. Experimenting with different squash can lead to delightful surprises. For the best results, choose squash that is firm and unblemished. Fresh squash will yield the crispiest results. Make sure to slice them thinly for even cooking. Enjoy exploring these options and make the crispy fried squash your own! To see the full recipe, check out the [Full Recipe]. Start by slicing the squash and zucchini. Use two medium yellow squash and one medium zucchini. Cut them into thin, even rounds, about 1/4 inch thick. Make sure the slices are similar in size to cook evenly. Set them aside on a plate. Next, mix the coating ingredients. Take a shallow bowl and add 1 cup of all-purpose flour. Then, add 1 teaspoon of garlic powder, 1 teaspoon of onion powder, and 1 teaspoon of paprika. If you like some heat, sprinkle in 1/2 teaspoon of cayenne pepper. Finally, add salt and black pepper to taste. Stir the mixture well to combine all the flavors. Now it's time to dip the slices. You will need three bowls. In the first bowl, you have your flour mixture. In the second bowl, add 2 large eggs and beat them until they are mixed. The third bowl should have 1 cup of cornmeal. Take each slice of squash and zucchini. First, dip it into the flour mixture, coating it evenly. Next, dip it in the beaten eggs. Finally, roll it in the cornmeal, making sure it is well coated. Now, let's fry! In a large skillet or deep frying pan, heat about 1 inch of vegetable oil over medium-high heat. Wait until the oil shimmers. Carefully add the coated slices to the hot oil. Don’t overcrowd the pan; this helps them get crispy. Fry for about 3-4 minutes on each side until golden brown. Use a slotted spoon to transfer the fried slices to a plate lined with paper towels to drain excess oil. For a nice presentation, serve the crispy fried squash on a large platter lined with parchment paper. This not only looks good but also helps with cleanup. Garnish with fresh chopped parsley for a pop of color. Don’t forget the dipping sauces! A small bowl of ranch or garlic sauce pairs well with the crispy squash, enhancing the flavor. Enjoy your dish! For the full recipe, check the earlier sections. To get that amazing crunch, keep an eye on your oil temperature. Heat it to around 350°F (175°C). If the oil is too cool, your squash will soak up oil and become soggy. If it's too hot, the outside will burn before the inside cooks. Next, avoid overcrowding the pan. Frying too many pieces at once drops the oil temperature. Fry in small batches. This way, each piece gets the heat it needs to crisp up nicely. You can play with flavors by adding different seasonings. Try extra spices like cumin or Italian herbs. You can also swap in Parmesan cheese for a cheesy twist. For an even crispier bite, use panko bread crumbs instead of cornmeal. This adds extra texture and crunch. Timing is key when frying multiple batches. After frying the first batch, keep them warm in a low oven (about 200°F or 93°C) while you cook the rest. This keeps them crispy and hot. To maintain that crunch, avoid stacking the fried squash on top of each other. Lay them out on a rack or a paper towel-lined plate. This allows air to circulate and keeps them from getting soggy. For the full recipe, check out the detailed instructions in the [Full Recipe]. {{image_2}} You can make crispy fried squash gluten-free. Use gluten-free flour and cornmeal. This way, everyone can enjoy this dish. You can also add cheese to the coating. Grated Parmesan or cheddar adds a rich flavor. Spices can boost taste too. Try adding Italian herbs or chili powder for a kick! You can choose between air frying and deep frying. Air frying gives a lighter option. It uses less oil but still gets crispy. Deep frying creates a classic crunch. Both methods work well. You can also try oven-baking. Coat the squash and place it on a baking sheet. Bake at 425°F until golden for a healthier twist. Crispy fried squash pairs well with many dishes. Serve it alongside a fresh salad for a light meal. It also goes great with grilled chicken or fish. For a vegetarian option, pair it with quinoa or beans. This adds protein and keeps the meal satisfying. Don't forget to dip it in ranch or garlic sauce for extra flavor! To store leftover crispy fried squash, you must act fast. Place the squash in an airtight container. This helps keep it fresh and prevents moisture. You can store the container in the fridge. Use the squash within three days for the best taste. Do not stack the pieces too high. This will help keep them from getting soggy. When reheating, you want to keep the crunch. The best way is to use an oven. Preheat the oven to 350°F (175°C). Place the squash on a baking sheet in a single layer. Heat for about 10 minutes. This keeps the texture crispy. Avoid using the microwave, as it makes the squash soggy. If you must use a microwave, use a paper towel to soak up some moisture. Yes, you can freeze crispy fried squash, but it’s tricky. Freezing can change the texture. For best results, freeze before frying. Slice the squash and flash freeze the pieces on a baking sheet. Once frozen, transfer them to a freezer bag. To thaw, leave them in the fridge overnight. If you freeze after frying, eat within a month. To reheat, use the oven method mentioned earlier. To make crispy fried squash, start by slicing the squash and zucchini. Aim for thin, even rounds. Next, mix flour, garlic powder, onion powder, paprika, salt, and black pepper in one bowl. In a second bowl, beat the eggs. In a third bowl, place cornmeal. Now, dip each slice in the flour mix first. Then, coat it in the beaten eggs. Finally, roll it in cornmeal for a nice crunch. Heat vegetable oil in a large pan until it shimmers. Fry the slices in batches to avoid crowding. Cook until golden brown, about 3-4 minutes on each side. Drain on a paper towel before serving. For the full recipe, check out the steps above. If you don’t have cornmeal, you can use breadcrumbs or panko for a crispy texture. Both options work well as a coating. They give a nice crunch, just like cornmeal. You can even try crushed crackers or cornflakes for a fun twist. Yes, you can make this recipe vegan! Instead of eggs, use a flax egg or a mixture of water and cornstarch. This helps bind the coating. For the flour, use a plant-based option. The flavor will still shine through, and your friends will love it! The squash is done frying when it turns golden brown. You can also check the texture; it should be crispy and firm. If it looks too pale, give it a bit more time. When you take a bite, it should crunch. Enjoy the perfect crispy fried squash! Frying squash can be fun and easy with the right steps. We've covered key ingredients, preparation, and cooking tips. From choosing the best squash to achieving that perfect crunch, you have all the tools you need. Remember to try different methods and flavors to keep things exciting. Store and reheat properly for the best taste later. With practice, you'll serve up crispy fried squash that everyone will love. Enjoy experimenting with this recipe!

Crispy Fried Squash Simple and Tasty Recipe

Are you ready to bite into something delicious? Crispy fried squash is a simple and tasty treat that’ll impress everyone.

For this recipe, you need 1 pound of fresh okra. Look for firm pods that are bright green. The size should be about 2 to 4 inches long. Avoid any okra with dark spots or blemishes. Trim the stems carefully to keep the pods intact. Fresh okra gives the best crunch and flavor in your pickles. Next, you'll need 1 cup of distilled white vinegar and 1 cup of water. The vinegar gives the okra its tangy taste. It also helps preserve the okra. Use equal parts vinegar and water for the best balance. This mix makes a great base for the pickling brine. This recipe calls for a few spices to boost flavor. Gather these: - 2 tablespoons sugar - 2 tablespoons salt - 1 teaspoon mustard seeds - 1 teaspoon coriander seeds - 1 teaspoon black peppercorns - 2 cloves garlic, peeled and smashed - 1 teaspoon red pepper flakes (optional for extra heat) - Fresh dill sprigs (for garnish) The sugar balances the vinegar's sharpness. Salt helps with flavor and preservation. Mustard and coriander seeds add depth. Garlic gives a nice aroma. Red pepper flakes add heat if you like spice. Dill sprigs make for a pretty topping. For the full recipe, check out the Zesty Quick Pickled Okra 🥒 recipe. Start with fresh okra. Look for bright green pods. Wash them well under cold water. This step is key for cleanliness. Next, trim the stems. Be careful not to cut into the pods. This keeps the okra intact during pickling. Grab a medium saucepan. Pour in 1 cup of distilled white vinegar and 1 cup of water. Add 2 tablespoons of sugar and 2 tablespoons of salt. Turn the heat to medium and stir until the sugar and salt dissolve. Once it boils, add 1 teaspoon of mustard seeds, 1 teaspoon of coriander seeds, and 1 teaspoon of black peppercorns. Toss in 2 smashed garlic cloves and optional red pepper flakes. Let it simmer for 2-3 minutes. This helps blend all the flavors together. Now it's time to jar the okra. Layer the prepared okra in clean, sterilized jars. Pack them tightly but leave some space at the top. Pour the hot pickling brine over the okra, making sure they are fully submerged. Let the jars cool to room temperature. Once cooled, seal them with lids. Store your pickled okra in the fridge for at least 24 hours. For the best flavor, wait a few days. You can find the full recipe for more details. To keep your pickled okra fresh, you must sterilize your jars. Start by washing them in hot, soapy water. Rinse well to remove any soap. Next, place the jars in a large pot filled with water. Bring the water to a boil and let the jars boil for 10 minutes. This method kills germs. After boiling, let the jars cool on a clean towel. Always use dry jars when packing your okra. This step ensures your pickles stay tasty and safe to eat. You can easily change the flavor of your pickled okra. If you like it sweet, add more sugar. For a stronger taste, increase the mustard seeds and garlic. Want some heat? Add more red pepper flakes. Start with small amounts. Taste as you go to find your perfect mix. Remember, pickling is about balance. You want tangy, sweet, and spicy all at once. This way, your okra will burst with flavor in every bite. Timing is key to getting the best flavor from your pickled okra. After you make them, let the jars sit in the fridge for at least 24 hours. This wait time allows the flavors to blend. However, they taste better after three to five days. The longer they sit, the more intense the flavors become. Just remember not to rush this step. Good things take time, and your pickled okra will reward you for your patience. For the full recipe, check the earlier sections. {{image_2}} To make spicy pickled okra, add more heat. You can use extra red pepper flakes. Some like to use sliced jalapeños. This twist gives your okra a fiery kick. Adjust the heat to your taste. You can always add more later, but you can’t take it away! For herbed pickled okra, try adding fresh herbs. Dill is a great choice, but basil works well too. You can add thyme or rosemary to change the flavor. Each herb adds a unique twist. This is a fun way to personalize your pickles. Mix it up by adding other veggies. Carrots, cauliflower, or bell peppers work well. Cut them into bite-sized pieces and pack them with the okra. You can create a colorful jar. This adds more crunch and flavor to your pickled snack. These variations can enhance your pickled okra experience. Explore each option to find your favorite. You can find the full recipe to get started! Once you finish making your quick pickled okra, you need to store it properly. Always keep the jars in the fridge. The cold helps maintain the crunchiness and flavor of the okra. Make sure the lids are tight to prevent air from getting in. This simple step keeps your pickled okra fresh and tasty. Homemade pickled okra lasts about 2 to 3 weeks in the refrigerator. After that, the flavor might fade. For best taste, try to eat them within the first week. If you want to store them longer, consider canning for shelf stability. This way, you can enjoy your pickled okra even after a few months. It’s important to check your pickled okra before eating. Look for any changes in color or texture. If the okra looks slimy or has an off smell, it’s best to toss it out. Also, if you see bubbles or mold, do not eat it. These signs mean the okra has spoiled. Safety first! Enjoy your zesty quick pickled okra while it’s fresh. For the full recipe, check the previous sections! It takes at least 24 hours for pickled okra to be ready. This time allows the flavors to blend well. However, if you wait a few days, the taste improves even more. After a few days, your okra will be zesty and full of flavor. I do not recommend using frozen okra for pickling. Frozen okra often becomes mushy when thawed. Fresh okra stays crisp and crunchy in the pickling process. For the best texture and flavor, always choose fresh okra. You can serve pickled okra in many fun ways. They make a great snack on their own. You can also add them to salads for a tangy kick. They work well as a garnish for cocktails, too. If you are having a barbecue, serve them alongside meats for a tasty contrast. You learned how to make pickled okra in this blog post. Fresh okra, vinegar, and spices are key. We discussed steps like preparing the okra and making pickling brine. I shared tips on jar sterilization and flavor tweaks. Remember, you can try spicy or herbed variations. Store your pickled okra correctly to keep it fresh. Lastly, check for spoilage signs to enjoy your okra safely. By following these steps, you can create your own tasty pickled okra at home. Enjoy experimenting and sharing your results!

Quick Pickled Okra Flavorful and Easy Recipe

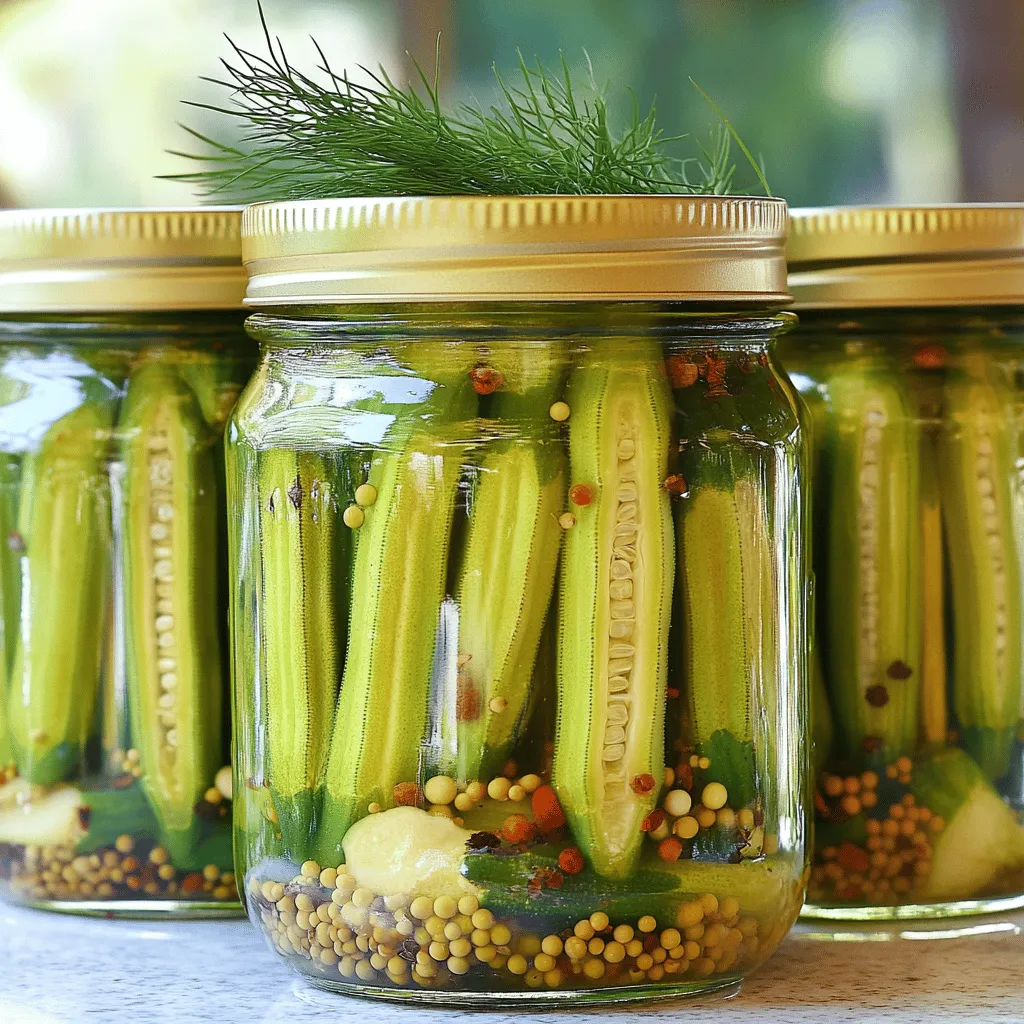
Are you ready to add a zesty twist to your meals? My Quick Pickled Okra recipe is both flavorful and

- 2 boneless, skinless chicken breasts, diced - 2 medium summer squashes, sliced into half-moons - 1 medium red bell pepper, diced - 1 small onion, thinly sliced - 3 cloves garlic, minced - 1 teaspoon Italian seasoning - ½ teaspoon smoked paprika - 2 tablespoons olive oil - Salt and pepper to taste - Fresh basil leaves for garnish How to properly measure ingredients Measuring ingredients correctly helps your dish taste great. Always use dry measuring cups for solids and liquid measuring cups for liquids. When measuring dry items, like flour, spoon it into the cup and level it off with a knife. This method keeps your dish from being too dry or too wet. Importance of fresh herbs Fresh herbs add bright flavor. Use fresh basil for this skillet dish. Dried herbs can work, but they often lack the vibrant taste of fresh. If you can grow herbs at home, it’s easy to have them on hand. Just a little fresh basil can change your meal from good to great. First, heat the skillet over medium heat. Add two tablespoons of olive oil. Let the oil get hot. Next, add the diced chicken. Season the chicken with salt, pepper, Italian seasoning, and smoked paprika. Cook the chicken for about 5 to 7 minutes. Stir it occasionally until the chicken is browned. Ensure the chicken is cooked through and no longer pink inside. After cooking the chicken, take it out of the skillet. Place it on a plate and set it aside. In the same skillet, add the thinly sliced onion and diced red bell pepper. Sauté these for about 3 to 4 minutes. You want them to start softening. Next, add the minced garlic and sliced summer squash. Cook these together for another 5 to 7 minutes. Stir often until the squash is tender but still bright in color. Now, return the cooked chicken to the skillet. Mix all the ingredients well. Allow everything to cook for an additional 2 to 3 minutes. This will heat everything through. Taste and adjust the seasoning with more salt or pepper as needed. Once done, remove from heat and garnish with fresh basil leaves. Enjoy your flavorful chicken and summer squash skillet! You can find the Full Recipe for detailed steps. To cook juicy chicken, start with fresh chicken breasts. Cut them into small, even pieces. This helps them cook evenly. Season them well with salt, pepper, Italian seasoning, and smoked paprika. Use medium heat to avoid burning. Cook until they are golden brown and no longer pink inside. For tender summer squash, cut them into half-moons. This shape helps them cook quickly. Add them to the skillet after the onion and bell pepper. Cook just until they are bright and soft, about five to seven minutes. Don't rush this step, as overcooking will make them mushy. One common mistake is overcooking the vegetables. This can lead to a loss of flavor and texture. Always keep an eye on them. They should be soft but still vibrant. Another mistake is not seasoning at each step. Season your chicken before cooking, then the veggies as they sauté. This builds layers of flavor, making your dish shine. For herbs, fresh basil is a great choice. It adds a pop of color and flavor. You can also try parsley or rosemary for a different taste. When serving, arrange the chicken and squash on a large plate. Drizzle with a little extra olive oil for shine. This makes your dish look as good as it tastes. For a fun touch, add a sprinkle of crushed red pepper for a bit of heat. This enhances the overall flavor and visual appeal. {{image_2}} You can change the vegetables in this dish. Try using zucchini or bell peppers. Both add great flavors and colors. You can also replace the chicken with shrimp or tofu. Shrimp cooks fast and adds a nice taste. Tofu absorbs flavors well and is a great option for vegans. Want to boost the taste? Consider adding cheese or nuts. Feta cheese brings a salty kick, while pine nuts add crunch. You can also add more spices if you like heat. Red pepper flakes or cayenne pepper work well to spice things up. This dish pairs well with rice, pasta, or salads. Rice soaks up all the juice and makes each bite tasty. Pasta adds a different texture and makes it filling. For drinks, try iced tea or a light white wine. Both refresh your palate and enhance the meal. After cooking, let the Chicken and Summer Squash Skillet cool. Place it in an airtight container. This keeps your food fresh and safe. Store it in the fridge for up to three days. If you want to keep it longer, freezing is a good option. To freeze, use a freezer-safe container. Make sure to leave some space for expansion. You can freeze it for about three months without losing flavor. When you are ready to eat your leftovers, use a few methods to reheat. The best way is to use a skillet. Heat it over medium heat, add a splash of water or broth, and cover. This keeps the chicken moist. Stir occasionally until it’s heated through. You can also use the microwave. Place the dish in a microwave-safe bowl and cover it. Heat in short bursts, stirring between each, until warm. To avoid dry chicken, don't overheat it. Always check the temperature. You want it warm but not hot enough to dry out. Enjoy your meal just like it was fresh! Yes, you can meal prep this dish. Cook the chicken and squash first, then cool them down. Store them in airtight containers in the fridge. You can reheat them in a skillet or microwave. This dish tastes great even after a day or two. Just make sure to add fresh herbs before serving to keep it bright. Yes, this recipe is gluten-free. Just check your spices to ensure they are gluten-free. For a quick swap, you can use tamari instead of soy sauce if you want a savory touch. This way, everyone can enjoy it, even those with gluten sensitivities. You can serve this dish with many sides. Here are a few ideas: - Quinoa or rice for a hearty option - A fresh green salad to add crunch - Crusty bread to soak up the juices - Steamed broccoli for a colorful plate You can find the complete details in the Full Recipe. This will guide you through each step for perfect results. This blog post walks you through making a tasty Chicken and Summer Squash Skillet. We covered all the ingredients, measuring tips, and cooking steps. You now have an easy recipe with practical advice to avoid common mistakes. Try swapping ingredients or adding spices to cater to your taste. Remember, proper storage and reheating keep your dish fresh. Enjoy cooking and sharing this meal with friends and family for a delightful experience!

Chicken and Summer Squash Skillet Flavorful Delight

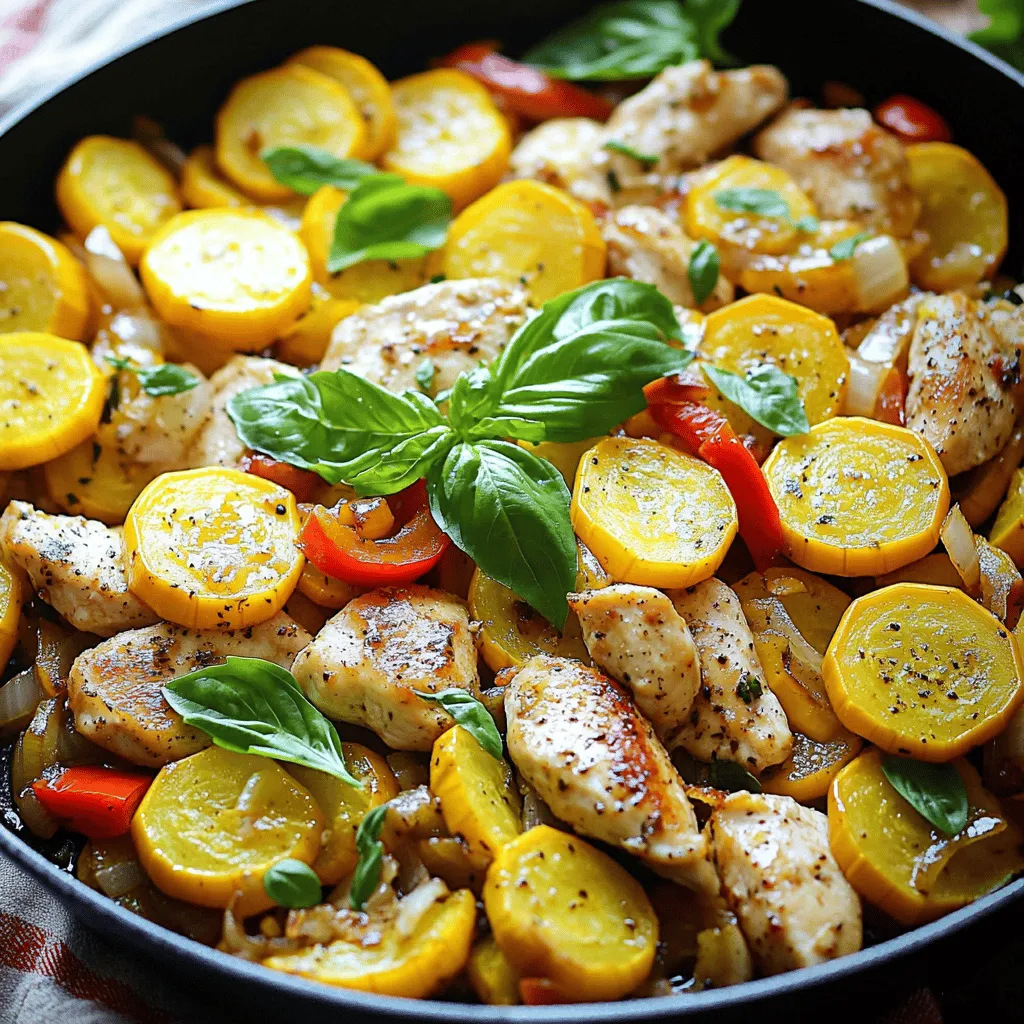
Looking for a quick and tasty meal? The Chicken and Summer Squash Skillet is your answer! This dish combines juicy

- 4 medium yellow squash, sliced into thin rounds - 1 medium red bell pepper, diced - 1 medium onion, thinly sliced - 2 cloves garlic, minced - 1 tablespoon olive oil - 1 tablespoon butter - 1 teaspoon dried oregano - 1 teaspoon chili flakes (adjust for spice preference) - Salt and pepper to taste - Fresh parsley for garnish Yellow squash is not just pretty; it also tastes great! When you pick your squash, look for ones that feel firm and have bright skin. This dish uses simple, fresh ingredients. The red bell pepper adds a nice color and sweet flavor. Onions and garlic give it a tasty base. For cooking, I always use a mix of olive oil and butter. The olive oil keeps it healthy, while the butter adds that lovely richness. You can adjust the chili flakes based on how spicy you like your food. I often use fresh parsley. It brightens the dish and makes it look nice. You can find the full recipe and instructions to make this dish shine in the [Full Recipe]. Enjoy the cooking! - Heat the olive oil and butter in a skillet. - Add onions and garlic; sauté until translucent. First, I use a large skillet for this dish. I pour in the olive oil and butter, letting them heat up over medium heat. This mix gives a rich flavor. Once the oil shimmers, I toss in sliced onions and minced garlic. As they cook, the smell fills the kitchen, creating a warm atmosphere. I watch for the onions to turn translucent, which usually takes about three to four minutes. - Incorporate red bell pepper; cook until softened. - Mix in yellow squash and seasonings; combine well. Next, I add diced red bell pepper. It adds both color and sweetness to the dish. I let it cook for another two to three minutes until it softens. Then, I stir in the star of our recipe: sliced yellow squash. The squash should be fresh and firm. I also sprinkle in dried oregano, chili flakes, salt, and pepper. Mixing it all well is key. I want every piece of squash coated with flavor. - Sauté until squash is tender. - Adjust seasoning; garnish with parsley. Now comes the fun part. I sauté everything together for about five to seven minutes. I keep stirring occasionally, making sure the squash stays tender but not mushy. Once it’s done, I taste to see if it needs more salt or pepper. Lastly, I take it off the heat and sprinkle fresh parsley on top. It adds a pop of color and a fresh note. This dish is now ready to serve warm. You’ll love how simple it is to make this sautéed yellow squash medley. For a full recipe, check out the details provided. When picking yellow squash, you want the best. Look for squash that feels firm and has a bright color. A good squash should not have any blemishes or soft spots. This means it's fresh and ready for cooking. To sauté yellow squash well, use medium heat. This helps cook it evenly without burning. Stir the squash occasionally to keep it from sticking to the pan. This simple step makes a big difference in how your dish turns out. Want to take flavor to the next level? Try adding fresh herbs or spices. Basil, thyme, or even a bit of cumin can make a tasty difference. Also, a splash of lemon juice brightens the dish. It brings out the squash's natural sweetness. For more ideas, check the Full Recipe for creative twists. {{image_2}} You can easily swap yellow squash for zucchini or even mix both. This gives a nice twist to the dish. Different colored bell peppers also add great visual appeal. Try using green or yellow peppers to make the dish more vibrant. Want a heartier meal? Add cooked chicken or shrimp to the sauté. This will not only boost flavor but also make it more filling. If you prefer a vegetarian option, try adding tofu or beans. Both will give you protein while keeping the dish light. For a burst of flavor, try adding cheese like feta or parmesan. They melt beautifully and enhance the taste. You can also include nuts or seeds for a nice crunch. Pine nuts or sunflower seeds work well and add texture to your sautéed yellow squash. For the full recipe, check out the details above! Store your sautéed yellow squash in an airtight container. It will stay fresh for up to 3 days. When you reheat, do it gently. This helps keep the texture just right. You can freeze your sautéed squash in portions. It will last up to 2 months in the freezer. When ready to eat, thaw it overnight in the fridge. This slow thaw helps maintain flavor. For the best results, use a microwave or stovetop to reheat. Add a splash of water while reheating. This step prevents the squash from drying out. Enjoy your tasty dish again! For the full recipe, check the earlier section. Rinse thoroughly under cold water. Pat dry before slicing. This step is key to remove any dirt or residues. I prefer to slice the squash into thin rounds for even cooking. It makes for a lovely presentation too! Yes, you can sauté yellow squash ahead of time. Cook it and store in the fridge for reheating later. This saves you time on busy days. Just warm it up in a pan for the best texture. Sautéed yellow squash pairs well with rice, pasta, or grilled meats. It adds a nice color and flavor to any meal. You can also serve it with a drizzle of balsamic glaze for extra zing. Yellow squash is low in calories and a good source of vitamins A and C. It also offers high levels of antioxidants and fiber. These nutrients support digestive health and boost your immune system. Enjoying yellow squash helps keep your meals both tasty and nutritious! This blog post covers how to make a tasty sautéed yellow squash dish. We discussed the main ingredients, essential cooking supplies, and seasonings. The step-by-step instructions guide you through preparation and cooking. I shared tips on choosing squash and perfecting your sauté. You can also make variations by swapping ingredients or adding proteins. For storage, I provided tips for keeping leftovers fresh. In short, this dish is easy to make and versatile. Give it a try, and enjoy the flavors!

Sautéed Yellow Squash Tasty and Simple Side Dish

Looking for a quick and tasty side dish? Sautéed yellow squash is your answer! This simple recipe combines vibrant veggies

- 2 large cucumbers, diced - 3 ripe tomatoes, diced - 1 red onion, thinly sliced To make a great salad, fresh ingredients are key. The cucumbers give a cool crunch. The tomatoes add sweet juiciness. The red onion brings a bit of sharpness. You can mix them all together for a colorful base. - 3 tablespoons olive oil - 1 tablespoon apple cider vinegar - 1 teaspoon honey - Salt and pepper to taste The dressing ties everything together. Olive oil adds richness, while apple cider vinegar offers tang. Honey gives a hint of sweetness. Don't forget salt and pepper to taste. This simple mix makes the salad pop! - 1/4 cup fresh parsley, chopped - 1/4 cup crumbled feta cheese For a twist, add fresh parsley. It brightens flavor and adds color. Feta cheese is a great choice, too. It adds creaminess and a salty bite. These extras are not must-haves, but they elevate your salad. For the full recipe, check out the complete instructions above. First, grab your mixing bowl. Combine the diced cucumbers, diced tomatoes, and sliced onions. This mix brings fresh flavors together. Each bite offers a crisp, juicy taste. You can choose any cucumbers you like, but I prefer Persian cucumbers for their sweetness. Next, find a small bowl or jar. Whisk together the olive oil, apple cider vinegar, honey, salt, and pepper. This dressing adds a tangy sweetness. Adjust the honey to your taste for a hint of sweetness. Now, drizzle the dressing over your salad mix. Toss everything gently until well coated. Let the salad sit for 10-15 minutes. This resting time allows the flavors to blend. For a touch of creaminess, sprinkle crumbled feta cheese on top. Serve in a clear bowl to show off those vibrant colors. Enjoy your refreshing cucumber tomato salad! Check out the Full Recipe for more details. To make the best salad, use ripe, seasonal tomatoes. Look for tomatoes that are firm yet slightly soft. Their smell should be sweet and fresh. Crisp cucumbers add crunch. Select cucumbers with bright skin and no soft spots. They should feel firm in your hand. You can take this salad to the next level by adding feta cheese or olives. Feta brings creaminess and a salty punch. If you want a briny taste, add olives. Both ingredients add depth and make the salad more enjoyable. You can also try adding bell peppers or avocados for more flavor and texture. A clear salad bowl makes your salad stand out. It shows off the vibrant colors of the veggies. You can also garnish with extra parsley or a sprinkle of feta on top. This small touch adds beauty and makes it more appealing. For a fun twist, serve it in small mason jars for individual portions. For the full recipe, check out the Refreshing Cucumber Tomato Fusion Salad. {{image_2}} You can make your salad heartier by adding protein. Grilled chicken works well. It brings a nice flavor and texture. You can also use chickpeas. They add protein and a bit of creaminess. Just mix them in with the veggies. They make the salad more filling. To change the flavor, try adding fresh herbs. Basil gives a sweet touch, while mint adds freshness. Both herbs pair well with tomatoes and cucumbers. Just chop them finely and mix them in. You can really transform the taste with these simple herbs. The dressing can also change the salad’s taste. Using lemon juice adds a bright, tangy kick. You can also swap apple cider vinegar for balsamic vinegar. This gives a richer flavor. Just whisk the new dressing ingredients as you did before. These small changes keep your salad exciting and fresh. For the full recipe, check out the details above. You can keep leftovers of this salad in the fridge for 2-3 days. The salad stays fresh for a short time. After that, the cucumbers may become soggy. Store it in the fridge right after serving. Use an airtight container to keep the salad fresh. This will help prevent the salad from absorbing other odors in the fridge. A good seal will keep the flavors intact. If you want, you can store the dressing separately. This helps keep the salad crisp and bright. Freezing this salad is not a good idea. The texture of cucumbers and tomatoes changes when frozen. They become mushy and lose their crunch. Enjoy this salad fresh instead! You can make it quickly anytime you like. For the full recipe, check out the section above. Yes, you can prepare this salad ahead of time. To keep it fresh, chop the veggies and store them in separate containers. Mix the veggies right before serving. This way, the salad stays crisp. You can also make the dressing in advance. Just store it in a jar in the fridge. When you're ready to serve, combine everything and toss. Letting it sit for a few minutes helps the flavors blend. If you want a dairy-free option, try using avocado or sunflower seeds. Both add creaminess and flavor. You can also use tofu crumbles for a non-dairy cheese feel. Nutritional yeast is another great choice. It gives a cheesy taste without dairy. These options keep your salad tasty and fresh. You can easily change the dressing to fit your taste. Want it zingier? Add more apple cider vinegar or a splash of lemon juice. If you like sweetness, add more honey. For some heat, mix in a pinch of red pepper flakes. You can also try adding fresh herbs like basil or oregano for a different flavor. Adjust it to make it your own! This salad combines fresh ingredients and a simple dressing. You start by preparing your veggies, then mix the dressing, and toss everything together. For added flavor and texture, consider using feta cheese or protein options. Keep leftovers fresh in the fridge for a few days, but avoid freezing. Eating fresh salads leads to a healthier you. Get creative with your ingredients and enjoy! Your salad can be a fun way to experiment with flavors.

Simple Cucumber Tomato Salad Fresh and Flavorful Mix

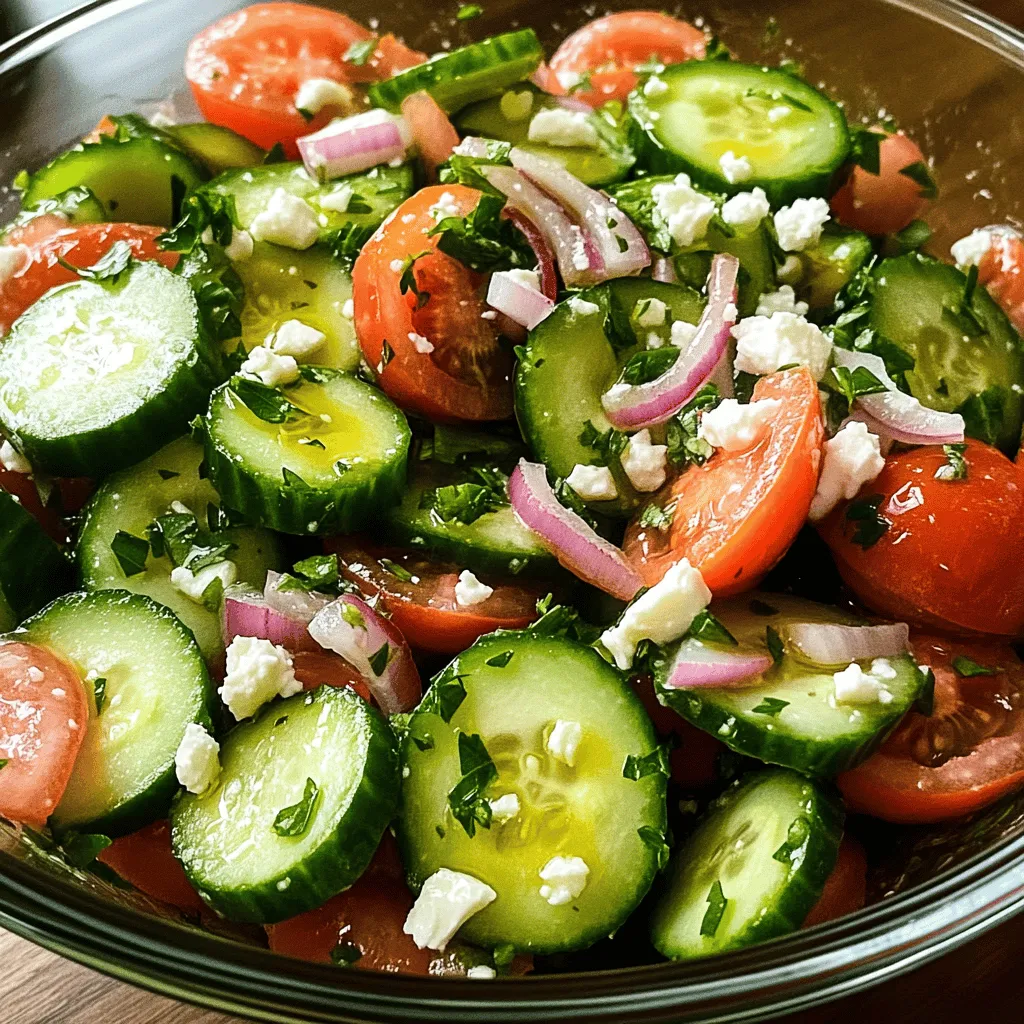
Looking for a quick and tasty salad? My Simple Cucumber Tomato Salad is fresh, flavorful, and super easy to make.

- 2 large cucumbers, thinly sliced - 1 cup Greek yogurt - 2 tablespoons apple cider vinegar - 1 tablespoon honey - 1 clove garlic, minced - 1 tablespoon fresh dill, chopped - Salt and pepper to taste - 1/2 teaspoon red pepper flakes (optional) - 1/4 cup red onion, thinly sliced To make this creamy marinated cucumber salad, gather these fresh ingredients. Start with the cucumbers. They add crunch and a refreshing taste. Greek yogurt gives the salad its creamy texture. Apple cider vinegar adds a tangy kick, while honey brings in sweetness. Minced garlic enhances the flavor profile. Fresh dill offers a lovely herb note. Salt and pepper balance everything out. If you like spice, add red pepper flakes for an extra zing. Lastly, red onion provides a nice bite and color. You can swap out some ingredients if needed. If you want a dairy-free option, use coconut yogurt or almond yogurt. For the vinegar, lemon juice works well if you want a different flavor. You can also use white wine vinegar. If you prefer a different sweetener, maple syrup or agave can replace honey. These swaps keep the salad tasty while meeting your needs. For the full recipe, refer to the section above. Salting and draining cucumbers Start by washing your cucumbers. Slice them thinly and place them in a large colander. Sprinkle a pinch of salt over the cucumbers. Let them sit for 15 to 20 minutes. This step helps draw out moisture and keeps the salad crisp. Making the creamy dressing While the cucumbers drain, it’s time to whip up the dressing. In a medium bowl, mix together 1 cup of Greek yogurt, 2 tablespoons of apple cider vinegar, and 1 tablespoon of honey. Add 1 clove of minced garlic and 1 tablespoon of chopped fresh dill. Season with salt and pepper. If you like some heat, toss in 1/2 teaspoon of red pepper flakes. Whisk everything until it’s smooth and creamy. Combining cucumbers and onions After the cucumbers have drained, rinse them under cold water to remove extra salt. Pat them dry with a clean kitchen towel. In a large mixing bowl, add the sliced cucumbers and 1/4 cup of thinly sliced red onion. Tossing with dressing Pour the creamy dressing over the cucumbers and onions. Gently toss everything together. Make sure each slice of cucumber is coated with the creamy goodness. Importance of chilling time Cover the salad and place it in the refrigerator for at least 30 minutes. Chilling lets the flavors blend beautifully. It also makes the salad refreshingly cool when served. Presentation tips for serving When you are ready to serve, use a glass bowl. This lets the vibrant green color shine through. For a nice touch, garnish with extra dill on top. It adds a fresh aroma and makes the dish look inviting. Enjoy your creamy marinated cucumber salad! For the complete recipe, refer to the Full Recipe section. For the best texture in your creamy marinated cucumber salad, you must salt the cucumbers well. Salting draws out extra water, preventing your salad from becoming soggy. Place the thinly sliced cucumbers in a colander, sprinkle with salt, and let them sit for 15-20 minutes. Rinse them afterward to remove excess salt and pat them dry with a towel. Next, ensure your dressing is smooth. Use Greek yogurt as the base for a creamy texture. Whisk together yogurt, apple cider vinegar, honey, minced garlic, and fresh dill until there are no lumps. This smooth dressing will coat the cucumbers nicely. To boost the flavor of your salad, consider adding herbs and spices. Fresh parsley or chives can add a nice touch. For more depth, try a splash of lemon juice or a hint of mustard. Want a spicy kick? Add red pepper flakes or even sliced jalapeños. Garnish your salad with extra dill or even thin slices of radish. This adds color and makes for a beautiful presentation. This creamy marinated cucumber salad pairs well with grilled meats, like chicken or fish. It's a refreshing side dish for a summer barbecue. You can also serve it with pita bread and hummus for a light lunch. For a fun twist, consider serving it in individual cups. This makes it easy for guests to enjoy and adds a touch of elegance. For the full recipe, check out the detailed instructions in the earlier section. {{image_2}} You can easily customize your creamy marinated cucumber salad. Here are some fun ideas! - Adding feta cheese: Crumble feta cheese into the salad. It adds a salty flavor. The creamy cheese pairs well with the crunchy cucumbers. - Including olives: Toss in some Kalamata olives. They bring a briny taste that elevates the dish. You can slice them or leave them whole for a pop of flavor. - Emphasizing avocado as a base: Use mashed avocado instead of yogurt. This makes the salad rich and creamy. It also adds healthy fats. - Adjusting seasoning accordingly: You may need to add more lemon juice. This helps balance the avocado's creaminess. Taste as you mix to get it just right. - Adding jalapeños or hot sauce: For a spicy kick, mix in diced jalapeños. This adds heat and flavor to every bite. You can also drizzle in your favorite hot sauce. - Experimenting with different pepper types: Try using serrano or habanero peppers instead. Each pepper gives a unique flavor. Adjust the amount based on your heat preference. These variations let you explore new tastes and keep the salad fresh. For the full recipe, don't forget to check out the instructions! To keep your creamy marinated cucumber salad fresh, store it in an airtight container. Glass containers work great as they don't stain or retain odors. Avoid plastic containers if possible, as they can trap moisture. To prevent mushy cucumbers, always drain them well after salting. This salad lasts about three to five days in the fridge. Always check for signs of spoilage before eating. If the cucumber becomes slimy or the dressing separates, it’s time to toss it out. Look for any off smells, too. Freezing cucumbers isn’t the best idea. They become mushy once thawed. However, you can freeze the dressing. To do this, pour it into an ice cube tray and freeze. When ready to use, thaw the dressing in the fridge overnight. Then, mix it with fresh cucumbers for the best taste. For the full recipe, check out the Creamy Marinated Cucumber Salad. You can store creamy marinated cucumber salad in the fridge for about three days. Keep it in an airtight container to maintain freshness. Look out for signs of spoilage, like a sour smell or slimy texture on the cucumbers. If you see any of these signs, it’s best to throw it away. Yes, you can use other types of cucumbers. English cucumbers are longer, thinner, and have fewer seeds. They are great for salads. Persian cucumbers are smaller and sweeter, adding a nice crunch. Regular garden cucumbers are also fine, but they have more seeds and a thicker skin. Choose what you like best! Yes, this salad is gluten-free. The main ingredients, like cucumbers and Greek yogurt, do not contain gluten. However, always check labels on any added items, like vinegar or spices, to ensure they are gluten-free. If you are sensitive to gluten, it’s best to verify every ingredient. You can find the full recipe for creamy marinated cucumber salad in the earlier sections. This blog post covered how to make a creamy marinated cucumber salad. We looked at ingredients, steps, tips, variations, and storage info. Remember, you can easily swap ingredients or kick up the spice. With every bite, you enjoy a refreshing dish perfect for any meal. Explore different flavors and make it your own. Enjoy the crisp taste and healthy benefits of this salad. Your kitchen can create this delicious dish with confidence!

Creamy Marinated Cucumber Salad Refreshing Side Dish

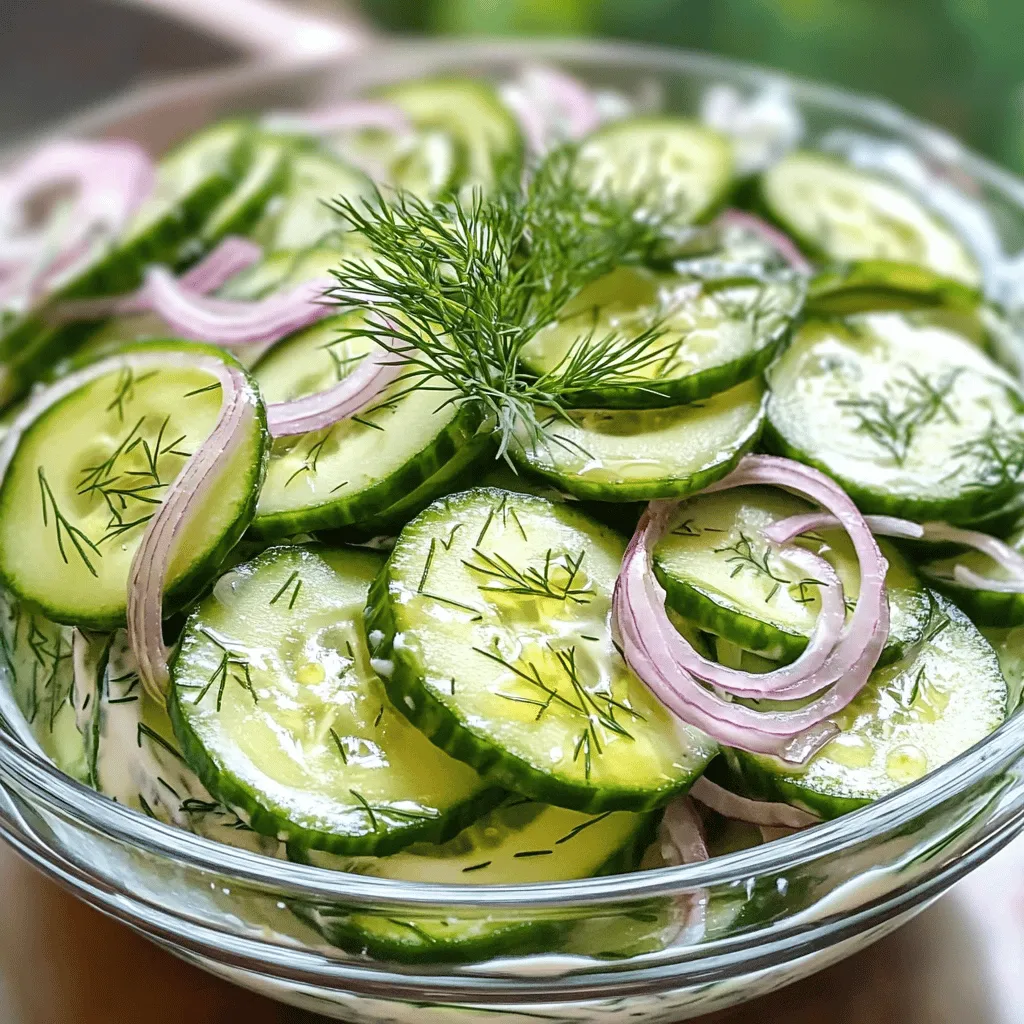
Looking for a refreshing side dish that’s easy to make? This Creamy Marinated Cucumber Salad will impress your friends and

To make a delicious vegetable frittata, you'll need the following: - 6 large eggs - 1/2 cup milk - 1 cup spinach, chopped - 1/2 cup bell peppers (red, yellow, and green), diced - 1 small zucchini, diced - 1 small red onion, finely chopped - 1/2 cup cherry tomatoes, halved - 1/2 cup feta cheese, crumbled - 1 tablespoon olive oil - Salt and pepper to taste - Fresh herbs (such as basil or parsley) for garnish You can easily swap ingredients to fit your taste. If you're dairy-free, use almond or oat milk instead of regular milk. For cheese, try goat cheese or dairy-free options. Use seasonal vegetables like asparagus in spring or squash in fall for more flavor. Using fresh ingredients makes a big difference in taste and texture. Fresh vegetables have a crisp bite and vivid color. They also bring out the best flavors. Frozen veggies can work in a pinch but may lose some texture. If you use frozen, thaw and drain them well before adding to the mix. This step helps keep your frittata from being watery. First, gather your ingredients. You need 6 large eggs, 1/2 cup milk, and a mix of veggies. This includes 1 cup of chopped spinach, 1/2 cup of diced bell peppers, 1 small diced zucchini, and 1 small finely chopped red onion. You will also need 1/2 cup of halved cherry tomatoes and 1/2 cup of crumbled feta cheese. Don’t forget 1 tablespoon of olive oil, salt, and pepper to taste, plus some fresh herbs for garnish. 1. Preheat your oven to 350°F (175°C). This step is key for even cooking. 2. In a large mixing bowl, whisk the eggs and milk together. Blend until smooth. Add a pinch of salt and pepper for taste. Set this mix aside. 3. Heat the olive oil in a large, oven-safe skillet over medium heat. Add the chopped red onion and sauté for about 3-4 minutes. You want them to look translucent. 4. Next, toss in the diced bell peppers and zucchini. Cook for about 5 minutes until they soften. 5. Stir in the chopped spinach and halved cherry tomatoes. Cook for another 2-3 minutes until the spinach wilts. Once your veggies are ready, it’s time to assemble. 1. Remove the skillet from heat and sprinkle the crumbled feta cheese over the vegetables. 2. Now, pour the egg mixture over the veggies and cheese. Make sure it spreads evenly in the skillet. 3. Place the skillet in your preheated oven. Bake for 20-25 minutes. 4. Check for doneness by inserting a knife in the center. If it comes out clean, your frittata is ready. When it’s done, let it cool for a few minutes. Then, slice it into wedges. - Plating Ideas: Serve the frittata on a colorful plate. Add a sprig of fresh herbs on top to make it look nice. - Accompaniments: Enjoy it with a side salad or some toast to complete the meal. - Breakfast vs. Brunch Options: This dish works well for both. It’s hearty enough for breakfast and fancy enough for brunch. For the full recipe, check out the details above. To make a fluffy frittata, use fresh eggs and whisk them well. This creates air bubbles that help it rise. Adding milk makes it creamier. Bake the frittata at 350°F (175°C) for best results. Check it after 20 minutes. If it jiggles in the center, give it more time. A toothpick inserted should come out clean. Spices and herbs bring your frittata to life. Try adding salt, pepper, or paprika for a kick. Fresh herbs like basil or parsley add brightness. If you want a deeper flavor, use umami boosters. Consider adding sun-dried tomatoes, olives, or nutritional yeast. These will enhance the taste without overpowering it. Using an oven-safe skillet is key for a great frittata. Cast iron and non-stick pans work best. They heat evenly and help the frittata cook properly. Plus, you can start on the stove and finish in the oven. This two-step cooking method gives you a lovely texture. It keeps the bottom crispy while the top stays soft. For more details, refer to the Full Recipe. {{image_2}} You can add protein to your frittata for more flavor and nutrition. Ham and bacon are classic choices. They add a savory taste that pairs well with eggs. If you prefer a plant-based option, try tofu. Crumbled tofu can soak up flavors well. Just sauté it with your veggies for a hearty bite. The beauty of a frittata lies in its versatility. You can use any vegetables you have on hand. Seasonal veggies work great. Think about asparagus in spring or squash in fall. Roasted vegetables add a rich, deep flavor. Sautéed veggies bring a fresh crunch. Mix and match to suit your taste or use what’s in your fridge. You can change the whole vibe of your frittata with different flavor profiles. For a Mediterranean twist, add olives and sun-dried tomatoes. An Italian frittata shines with basil and mozzarella. For a spicy Mexican flair, include jalapeños and cheddar cheese. These options let you explore new tastes while keeping it simple. Be sure to check out the Full Recipe for a delicious base to start with! To keep your vegetable frittata fresh, let it cool first. Then, cut it into slices. Place the slices in an airtight container. Store them in the fridge for up to three days. This keeps the frittata moist and flavorful. You can freeze your frittata for later use. Here’s how: 1. Cool completely: Allow the frittata to cool down. 2. Slice and wrap: Cut it into portions. Wrap each slice in plastic wrap. 3. Use a freezer bag: Place the wrapped slices in a freezer bag. Remove as much air as possible. 4. Label and date: Write the date on the bag for reference. To reheat, take a slice from the freezer. Let it thaw in the fridge overnight. Then, you can warm it in the oven at 350°F (175°C) for about 10-15 minutes. This keeps the texture nice. In the fridge, your vegetable frittata lasts about three days. If you freeze it, it can stay good for up to three months. After that, it may lose its taste and texture. Always check for any signs of spoilage before eating. Yes, you can make a frittata ahead of time. It's perfect for meal prep. Once baked, let it cool. Then slice it and store in an airtight container. Keep it in the fridge for up to four days. You can reheat slices in the microwave or oven. For the oven, set it to 350°F (175°C) and heat for about 10 minutes. This keeps the texture nice. A frittata is thicker than an omelet. It uses more eggs and has fillings mixed in. You cook it slowly, letting it set in the oven. An omelet is often folded over and cooked on the stovetop. It cooks quickly and is usually filled with ingredients at the end. Frittatas are great for serving multiple people. Omelets are often made for one serving. If your frittata is runny, it may not have cooked long enough. Check if it's set in the middle. If it moves like jelly, it needs more time. You can also bake it longer at a lower heat. Another trick is to cover it with a lid for a few minutes. This helps steam it and set the eggs. Lastly, be sure to use fresh eggs for the best results. For a delicious frittata, check out the Full Recipe. In this post, we covered essential frittata tips, ingredients, and cooking steps. You learned about ingredient substitutions and the benefits of fresh versus frozen options. We also explored styling your frittata for any meal and provided helpful storage advice. Remember to try different flavors and variations to keep things exciting. A well-made frittata can please anyone at the table. Now, get cooking and enjoy every bite of your delicious creation!

Vegetable Frittata Flavorful and Easy Breakfast Recipe

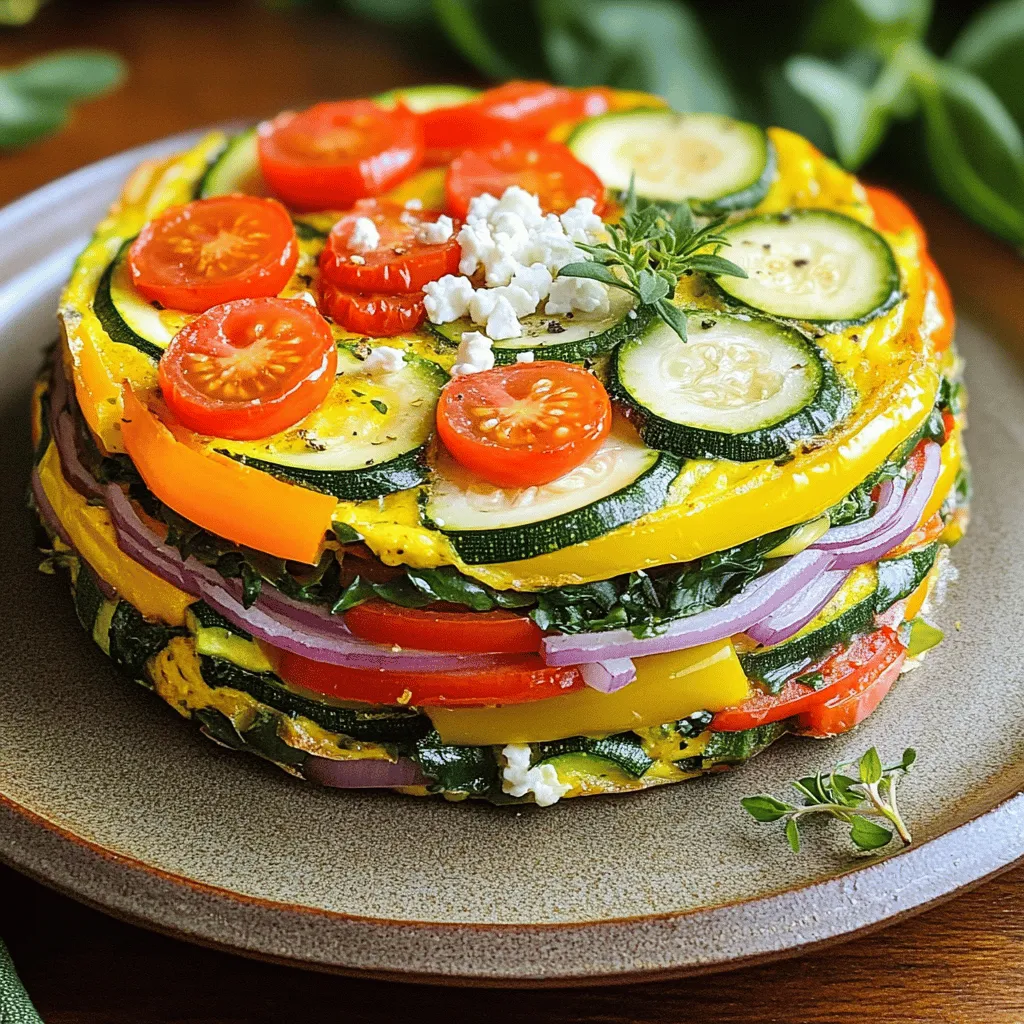
Looking for a quick and tasty breakfast? This Vegetable Frittata is your answer! With simple ingredients like eggs, milk, and

- 2 cups fresh figs, chopped - 1 tablespoon lemon juice - 1 teaspoon vanilla extract To make Quick Fig Jam, fresh ingredients matter. I love using ripe, sweet figs. They give the jam its rich flavor and color. When choosing figs, look for ones that are plump and slightly soft. They should smell sweet and fragrant. Lemon juice adds a nice tartness. It helps balance the sweetness of the figs. The vanilla extract brings warmth and depth to your jam. Don't skip it; it makes a big difference. - 1 cup granulated sugar - 1/2 teaspoon cinnamon (optional) For pantry staples, granulated sugar is key. It helps the figs break down and creates a thick jam. You can adjust the sugar amount based on your taste. If you like a bit of spice, add cinnamon. It pairs well with figs and gives the jam a cozy flavor. - How to measure figs accurately To measure figs, chop them first and then pack them into a cup. Do not press down too hard. You want them to be loosely packed for the best flavor. - Importance of ingredient quality Quality matters in cooking. Always use fresh figs and good sugar. The better the ingredients, the better your jam will taste. This is key to making your Quick Fig Jam shine. For the [Full Recipe], follow the steps outlined, and enjoy making this delightful spread! To start, wash your fresh figs under cool running water. Gently rub them to remove any dirt. Next, cut off the stems and chop the figs into small pieces. This helps them break down easily during cooking. Before you begin cooking, prepare your area. Gather all your ingredients and tools. This includes a medium saucepan, a wooden spoon, and a clean jar for storage. Keeping everything in reach makes the cooking process smooth and fun. In your medium saucepan, combine the chopped figs, granulated sugar, and lemon juice. Stir the mixture well to ensure the sugar coats the figs. Next, place the saucepan over medium heat. Bring the mixture to a gentle boil while stirring occasionally. Once it starts boiling, lower the heat. Allow the mixture to simmer for about 15 to 20 minutes. Stir frequently to prevent it from sticking to the bottom. You want it to thicken to a jam-like consistency. After the jam thickens, remove it from heat. Add the vanilla extract and cinnamon, if you like. These flavors enhance the jam's taste. Stir well to combine. Let the jam cool slightly before transferring it to a clean, sterilized jar. Allow it to cool completely at room temperature. Once cooled, seal the jar and store it in the fridge. Your quick fig jam will stay fresh for about two weeks. - Overcooking your fig jam: Cooking too long can turn your jam into a hard mass. Stay close to the stove as it simmers. Stir often and keep an eye on the time. Aim for a 15-20 minute cook time to achieve that perfect spreadable consistency. - Using unripe figs: Unripe figs lack the sweetness and flavor you want. Always choose ripe, soft figs. They will give your jam a rich taste and smooth texture. Check your figs carefully before using them. - Balancing sweetness with acidity: Figs are sweet, so adding a touch of lemon juice helps balance that sweetness. It makes the flavor pop and keeps it from being too sugary. Adjust the lemon juice to find your perfect balance. - Flavor variations with spices or herbs: You can spice things up by adding cinnamon, nutmeg, or even a hint of ginger. These spices add warmth and depth. Feel free to experiment. Just remember to start small and taste as you go. - Best cookware for making jam: Use a heavy-bottomed saucepan. It distributes heat evenly and helps prevent burning. A wide pan also allows moisture to escape, helping the jam thicken faster. - Recommended storage containers: Glass jars are best for storing your fig jam. They keep the jam fresh and let you see the beautiful color. Make sure to sterilize the jars to ensure safety and longevity. {{image_2}} You can enhance your quick fig jam by adding other fruits. Try chopping apples, pears, or peaches. These fruits pair well with figs. The sweetness and texture give your jam a new twist. Mix and match until you find your favorite blend. Adding spices can elevate your fig jam. Consider using ginger or nutmeg for a warm flavor. When you add spices, reduce the sugar a bit. This balance lets the spices shine without being too sweet. Experiment with different spices to discover your unique blend. You can also try using honey or maple syrup instead of sugar. These natural sweeteners can change the flavor profile. When using them, cook your jam a little longer. This helps to achieve the right thickness. Adjusting the cooking time is key for perfect consistency. Check out the Full Recipe for tips on making quick fig jam. How long does Quick Fig Jam last in the fridge? Quick Fig Jam lasts for up to two weeks in the fridge. Make sure to keep it in a sealed jar. This keeps it fresh and safe to eat. Best practices for sealing jars When sealing your jars, always use clean, sterilized jars. Fill them to about half an inch from the top. Wipe the rim with a clean cloth to remove any jam. Finally, screw the lid on tightly to keep air out. Guidelines for freezing your jam You can freeze Quick Fig Jam for up to six months. Use freezer-safe containers or jars. Leave some space at the top of the jar. The jam will expand as it freezes. Thawing tips for best texture To thaw frozen jam, place it in the fridge overnight. This helps keep the texture smooth. You can also thaw it in a bowl of warm water. Avoid microwaving, as it may change the jam's texture. How to recognize spoilage Look for changes in color or smell. If the jam has an off odor or looks cloudy, it may be spoiled. Mold on the surface is also a clear sign that it’s time to toss it. Proper disposal methods If your jam has spoiled, throw it away in the trash. Do not compost it, as this can attract pests. Always clean the jar before recycling to keep it safe. Making Quick Fig Jam takes about 30 minutes in total. You will spend 10 minutes preparing the figs and other ingredients. The cooking takes about 15-20 minutes. This quick process means you can enjoy your jam in no time. Yes, you can make fig jam without sugar. You can use honey, maple syrup, or agave nectar. These options add sweetness but may change the jam's thickness. Sugar helps create the right texture, so you may need to cook it longer. Always taste as you go to achieve the flavor you like best. If your jam doesn’t thicken, don’t worry! You can cook it longer over low heat. Keep stirring to avoid burning. If it still seems runny, mix in a bit of pectin. You can also let it cool to see if it firms up. If not, you can use it as a sauce instead. This article covered everything you need to make quick fig jam. We discussed fresh ingredients, pantry staples, and measurement tips to ensure you get it right. I shared step-by-step instructions on preparation and cooking, along with helpful tips to avoid common mistakes. We explored tasty variations and how to store your jam safely. Remember, quality ingredients make the best jam. With these tips, you can create a delicious treat that impresses anyone. Enjoy your cooking adventure with figs and have fun experimenting!

Quick Fig Jam Easy and Flavorful Homemade Delight

Make your mornings sweeter with my Quick Fig Jam! This easy and flavorful treat transforms fresh figs into a delicious

For this recipe, you will need 1 pound of fresh okra. Look for firm, green pods. They should be smooth and bright. Fresh okra makes the best pickles. It stays crunchy and tasty. If you can, buy them from a local market. Local okra will taste better. Next, gather your liquids. You will need 1 cup of apple cider vinegar and 2 cups of water. The vinegar adds tangy flavor and helps preserve the okra. Mixing it with water softens the strong taste. We also use 1 tablespoon of kosher salt. This salt helps with flavor and crunch. Finally, add 1 tablespoon of sugar. The sugar balances the vinegar's sharpness. Now, let's add some spices. You will need: - 1 tablespoon mustard seeds - 1 teaspoon dill seeds - 1 teaspoon red pepper flakes - 4 cloves of garlic, peeled and smashed - 1 small onion, sliced - 1 bay leaf These spices give the pickled okra a unique taste. Mustard seeds add a nice crunch. Dill seeds bring a fresh aroma. Red pepper flakes add some heat. Garlic and onion give depth to the flavor. The bay leaf ties everything together. You can find these spices at any store or your pantry. For the full recipe, check out the section titled Full Recipe. To start, gather your ingredients for the brine. You will need water, apple cider vinegar, kosher salt, and sugar. In a medium saucepan, mix together 2 cups of water, 1 cup of apple cider vinegar, 1 tablespoon of kosher salt, and 2 teaspoons of sugar. Heat this mixture over medium heat. Stir it gently until the salt and sugar dissolve. Once they dissolve, remove the pan from heat. Let it cool for a bit. You want the brine to be warm, not hot, when you pour it over the okra. Next, take a clean quart-sized mason jar. Start layering the okra into the jar. You should use about 1 pound of fresh okra, washed and trimmed. After placing the okra, add the smashed garlic cloves, sliced onion, mustard seeds, dill seeds, red pepper flakes, and the bay leaf. Make sure to pack it tightly but not too tightly. This helps the flavors mix well. Now, check the brine. When it has cooled to room temperature, carefully pour it over the okra in the jar. Ensure that all the okra is fully submerged in the liquid. Seal the jar tightly with its lid. Allow it to cool at room temperature for about 30 minutes. After that, place the jar in the fridge. Your pickled okra will start to taste great in 24 to 48 hours, but you can enjoy it even after just a few hours. Don't worry, just follow the full recipe for the best results! To keep your pickled okra crunchy, use fresh okra that is firm and bright. Look for pods that are no longer than 4 inches. Wash and trim them before using. The key is to avoid overcooking them during the pickling process. When you add them to the jar, make sure they are packed tightly but not smashed. This helps them stay crisp as they soak in the brine. You can easily boost the flavor of your pickled okra. Add spices like cumin, coriander, or even a touch of turmeric. Try using different vinegars, like rice or white wine, for a unique taste. If you want a spicy kick, toss in some sliced jalapeños or more red pepper flakes. Experimenting with herbs like thyme or rosemary can also add depth to the flavor. For pickling, I recommend using glass mason jars. They are easy to clean and seal well. A quart-sized jar is perfect for this recipe. Make sure the jar is clean and dry before you start. You can also use a wide-mouth jar, which makes layering the ingredients easier. Just remember to leave some space at the top to allow for expansion. For the complete process, check the Full Recipe for Crunchy Pickled Okra! {{image_2}} To make your okra spicy, add sliced jalapeños. You can also increase the red pepper flakes. This boost of heat makes each bite exciting. I recommend adding one or two whole peppers per jar. You’ll enjoy the kick and flavor they bring. Adjust the spice level to suit your taste. If you love garlic, this variation is for you. Simply increase the garlic cloves in the recipe. Try adding six or eight cloves for a richer taste. Smashed garlic releases more flavor into the brine. Let it sit longer for a stronger garlic punch. This option is perfect for garlic lovers. Adding fresh herbs can elevate your pickled okra. Dill, thyme, or even rosemary work well. Just toss in a few sprigs when layering the ingredients. The herbs will infuse the okra with delightful aromas. This variation adds a fresh twist to the classic recipe. Experiment with different herbs to find your favorite combination. For the base recipe, refer to the Full Recipe. To store pickled okra, keep it in the fridge. Use a clean jar with a tight lid. Make sure the okra is fully submerged in the brine. This keeps it fresh and tasty. Pickled okra lasts about 1 month in the fridge. After that, it may lose crunchiness and flavor. Always check for any signs of spoilage before eating. If you see mold or off smells, throw it away. You can reuse the brine! It’s great for pickling other veggies like carrots or green beans. Just strain the brine and pour it over your new veggies in a clean jar. The flavors will blend well, giving you a tasty treat. For more ideas, check out the Full Recipe for Crunchy Pickled Okra! The best okra for pickling is fresh and young. Look for okra that is firm and bright green. Smaller pods, about 2-4 inches long, work best. They stay crunchy and absorb flavors well. If you find larger okra, it may be tough or not as tasty. Yes, you can make pickled okra spicy! To add heat, use red pepper flakes in the brine. You can also add sliced jalapeños or habaneros. Adjust the amount to your taste. If you love spice, don't hold back! Pickled okra can stay crunchy for weeks when stored properly. The vinegar brine helps maintain that crisp texture. Keep the jar sealed and in the fridge. The longer it sits, the more flavor it gains, but it will still be crunchy. Enjoy your pickled okra within a month for the best taste. Check out the Full Recipe for more tips! Pickling okra is simple and fun. You need fresh okra, vinegar, and spices. Follow clear steps to prepare the brine and layer your ingredients. Remember to refrigerate for the best crunch. Use tips for flavor and the right jar. Try different variations like spicy or garlic-infused. Store your pickled okra properly to keep it fresh. With these easy steps, you'll enjoy tasty pickled okra in no time. Happy pickling!

Crunchy Pickled Okra Flavorful and Easy Recipe

If you love bold flavors and crave a crunchy snack, you’ll enjoy this crunchy pickled okra recipe. It’s easy to

To make Moroccan frittata, gather these key ingredients: - 6 large eggs - 1/2 cup milk - 1/2 cup cooked chickpeas, mashed - 1 small red onion, finely chopped - 1 red bell pepper, diced - 1 medium zucchini, grated - 1/2 cup fresh cilantro, chopped - 2 tablespoons olive oil These ingredients bring flavor and nutrition to the dish. The eggs form the base, while the chickpeas add creaminess and protein. The veggies add crunch and color, making each bite delightful. Moroccan dishes shine with unique spices. For this frittata, use: - 1 teaspoon ground cumin - 1 teaspoon smoked paprika - 1/2 teaspoon cinnamon - Salt and pepper to taste These spices create depth and warmth. Cumin brings an earthy taste. Smoked paprika adds a hint of smokiness, and cinnamon offers a subtle sweetness, enhancing the overall flavor. You can elevate your frittata with these optional garnishes: - Crumbled feta cheese Feta adds a tangy bite that pairs well with the spices. You can also try adding sliced olives or a dollop of yogurt for extra richness. Feel free to mix and match based on your taste! For the complete dish, check out the Full Recipe. To start, gather your ingredients. You will need: - 6 large eggs - 1/2 cup milk - 1/2 cup cooked chickpeas, mashed - 1 small red onion, finely chopped - 1 red bell pepper, diced - 1 medium zucchini, grated - 1/2 cup fresh cilantro, chopped - 1 teaspoon ground cumin - 1 teaspoon smoked paprika - 1/2 teaspoon cinnamon - Salt and pepper to taste - 2 tablespoons olive oil - Optional: crumbled feta cheese, for garnish First, preheat your oven to 375°F (190°C). This step is key to ensuring your frittata cooks evenly. Next, whisk the eggs and milk in a large bowl. Mix until they are smooth. Then, fold in the mashed chickpeas. This adds a creamy texture. Heat the olive oil in a large oven-safe skillet over medium heat. Add the chopped red onion and cook for about 2-3 minutes until it turns soft and clear. Next, toss in the diced red bell pepper and grated zucchini. Cook for another 3-4 minutes. This will soften the veggies while keeping them bright. Now, add the spices: ground cumin, smoked paprika, and cinnamon. Season with salt and pepper. Stir well to coat the vegetables. This step brings out the rich flavors of Moroccan cuisine. After that, pour the egg and chickpea mixture over the veggies. Make sure it covers everything evenly. Cook on the stovetop for about 5 minutes. You want the edges to start setting. Once the edges are set, remove the skillet from heat. Sprinkle the chopped cilantro on top. If you like, add crumbled feta cheese for a boost of flavor. Now, transfer your skillet to the oven. Bake for 15-20 minutes. Look for a puffed and golden top. Let it cool for a few minutes before slicing. This helps the frittata hold its shape. Serve warm and enjoy your Moroccan frittata! For the full recipe, check the details above. To get the best flavor in your Moroccan frittata, use fresh ingredients. Fresh herbs, like cilantro, make a big difference. Always toast your spices before adding them. This step releases their oils and enhances their taste. For a richer flavor, try adding crumbled feta cheese on top. It adds a nice creaminess and tang. Many people overlook the egg mixture. Whisk the eggs and milk well for a smooth blend. Don’t skip sautéing the vegetables. This adds depth to the dish. Also, avoid overcooking the frittata. If you cook it too long, it can become dry and rubbery. Finally, remember to cool it slightly before slicing. This helps the frittata hold its shape. You can serve your Moroccan frittata warm or at room temperature. Pair it with a fresh salad for a light meal. A yogurt sauce also adds a cool touch. For breakfast, enjoy it with toast or fruit. Leftovers are great in a wrap for lunch. Be sure to check the Full Recipe to explore all options! {{image_2}} You can easily make this frittata vegetarian. Just swap out any meat for more veggies. Try using spinach, mushrooms, or artichokes. You can also use silken tofu instead of eggs for a vegan twist. This keeps the dish light and fresh. If you need to avoid dairy, use almond or oat milk. These options keep the flavor while changing the texture. To boost the protein, add meat or seafood. Cooked chicken or lamb works well. Just chop it into small pieces and mix it in with the veggies. If you like seafood, try shrimp or smoked salmon. These add a nice salty touch. Remember to adjust the spices a bit. This way, you can balance strong flavors with the proteins. Feel free to get creative with flavors! Add olives or sun-dried tomatoes for a Mediterranean flair. You can also mix in different cheeses, like goat cheese or cheddar, for a richer taste. For a spicy kick, toss in some diced jalapeños. This dish is all about your taste. The Full Recipe allows you to play with the ingredients you love. Your Moroccan frittata can be unique and personal! To store leftover Moroccan frittata, let it cool to room temperature. Then, wrap it tightly in plastic wrap or place it in an airtight container. This helps keep the frittata fresh. You can store it in the fridge for up to 3 days. To reheat, preheat your oven to 350°F (175°C). Place the frittata in an oven-safe dish. Cover it with foil to keep moisture. Heat for about 15-20 minutes or until warm. You can also microwave it on medium power for 1-2 minutes. Make sure to check that it heats evenly. If you want to freeze the frittata, slice it into wedges first. Wrap each piece in plastic wrap, then place them in a freezer bag. Remove as much air as possible. You can freeze it for up to 2 months. When ready to eat, thaw it in the fridge overnight and reheat as needed. For the full recipe, check out the earlier sections. A Moroccan frittata is a tasty egg dish. It blends eggs with spices and veggies. You can find flavors like cumin and paprika. This dish often includes chickpeas for creaminess. It’s easy to make and great for any meal. You can serve it warm or cold. I love how it brings a taste of Morocco to my kitchen. You can find the full recipe to try at home. To make your frittata fluffier, use fresh eggs. Whisk them well with milk until frothy. You can add a bit of baking powder too. This will help it rise more in the oven. Also, avoid overcooking the eggs on the stovetop. Cook just until the edges set, then bake it. This method keeps the frittata light and airy. Yes, you can use different vegetables in your frittata. Feel free to swap zucchini with spinach or kale. You can also add mushrooms or tomatoes for extra flavor. Just remember to sauté them first. This helps release their moisture and enhances taste. Mix and match to create your perfect dish! You have learned how to make a Moroccan frittata, including key ingredients, spices, and cooking steps. We discussed tips for adding flavor and avoiding common mistakes. You also explored tasty variations and how to store leftovers. Enjoy trying this dish, and don’t hesitate to get creative. Each frittata can be different, so have fun with it! Happy cooking!

Moroccan Frittata Flavorful Dish for Easy Meals

Looking for a simple, tasty dish? Try a Moroccan frittata! This vibrant meal bursts with flavor and uses easy ingredients.

Older posts
Newer posts
← Previous Page1 … Page21 Page22 Page23 … Page71 Next →

dsad

© 2025 My Saved Recipe • Built with GeneratePress

Our Policies

  • Copyright Policy
  • Cookie Policy
  • GDPR Policy
  • Privacy Policy
  • Disclaimer
  • Terms Of Use

More Information

  • Home
  • About
  • Contact
  • Appetizers
  • Dessert
  • Dinner
  • Drinks
©2025, My Saved Recipe About Back To Top