Skip to content
DisclaimerTerms Of UseGDPR PolicyCookie Policy

My Saved Recipe

  • Home
  • Drinks
  • Appetizers
  • Dinner
  • Dessert
  • About
  • Contact
  • Privacy Policy
DisclaimerTerms Of UseGDPR PolicyCookie Policy

Savannah

Here’s what you need to make classic fried okra that is crispy and delicious: - 1 pound fresh okra, sliced into ½ inch rounds - 1 cup buttermilk - 1 cup cornmeal - ½ cup all-purpose flour - 1 teaspoon paprika - ½ teaspoon garlic powder - ½ teaspoon onion powder - ½ teaspoon cayenne pepper (adjust for spice preference) - Salt and pepper to taste - Vegetable oil for frying I love using fresh okra for this recipe. The flavor is just better. Soaking the okra in buttermilk is key. It helps the coating stick and gives a nice taste. The cornmeal gives that perfect crunch. You can adjust the cayenne pepper for your spice level. Want it spicy? Add more! Make sure you have all the ingredients ready before you start cooking. This helps keep things smooth and fun in the kitchen. You can find the full recipe above to guide you through the cooking process. Enjoy your crispy fried okra! - First, wash the okra under cold water. - Cut the okra into ½ inch rounds and place them in a bowl. - Pour buttermilk over the sliced okra and let it soak for 15 minutes. This helps with flavor and keeps the coating on. - In a separate bowl, mix together the cornmeal and flour. - Add paprika, garlic powder, onion powder, cayenne pepper, salt, and pepper. - Stir all ingredients together until the spices are evenly distributed. - Heat about ½ inch of vegetable oil in a large skillet over medium-high heat. - To check if the oil is ready, drop in a tiny bit of the cornmeal mixture. If it sizzles, it’s hot enough. - Take the okra from the buttermilk, letting the extra liquid drip off. - Dredge each piece in the cornmeal mixture, coating it well. - Shake off any extra coating to avoid clumps. - Carefully place the coated okra in the hot oil in small batches. This helps keep them crispy. - Fry the okra until it turns golden brown, about 3-4 minutes per side. - Once cooked, move the fried okra to a plate lined with paper towels. This absorbs extra oil. - Repeat the frying with any remaining okra. For the complete recipe, refer to the Full Recipe section. To make crispy okra, start by soaking the sliced okra in buttermilk. This step is key. Let it soak for about 15 minutes. This helps the coating stick and adds flavor. Next, focus on the coating. Mix cornmeal and flour well. You want a nice, even blend of spices. If the coating is too thick, it won't be crunchy. If it's too thin, it won't stick well. The oil temperature matters a lot for crispy okra. Heat the oil in a large skillet over medium-high heat. To check if the oil is ready, drop a pinch of the cornmeal mixture in the oil. If it sizzles right away, it’s hot enough. Avoid adding too much okra at once. Fry in small batches to keep the oil hot. Overcrowding leads to soggy okra. When serving your fried okra, think about dips. Ranch dressing pairs well with the crispy texture. You can also try a spicy sauce for a kick. For a great look, use a rustic basket lined with parchment paper. Adding fresh herbs on top brightens the dish and makes it pop. These small touches make your fried okra even more inviting. For the full recipe, check out the details provided. {{image_2}} To make your fried okra spicy, add more cayenne pepper to the mix. You can also stir hot sauce into the buttermilk. This will give your okra a nice kick. I love this twist for those who enjoy bold flavors. If you need a gluten-free option, substitute the all-purpose flour with gluten-free alternatives. Almond flour or chickpea flour works well. You may need to adjust the seasoning to keep the flavor just right. For a healthier option, try baking your okra. Preheat your oven to 425°F. Instead of frying, spread the coated okra on a baking sheet. Bake for about 20-25 minutes, flipping halfway through. You may need to adjust the seasoning to keep it tasty. To keep your leftover fried okra fresh, store it in an airtight container. Place a paper towel at the bottom to absorb moisture. This helps prevent sogginess. Refrigerate the container for up to three days. After that, the okra may lose its taste and crunch. When it’s time to enjoy your leftovers, reheating is key. Use an oven or air fryer for the best results. Preheat the oven to 400°F (200°C). Place the okra on a baking sheet and heat for about 10 minutes. This method keeps the okra crispy. Avoid using a microwave, as it can make the okra mushy. If you choose to use a skillet, add a bit of oil and heat over medium heat. This helps to revive the crispy texture. Enjoy your delightful fried okra again! To cut okra for frying, slice it into ½ inch rounds. This size helps it cook evenly. Use a sharp knife to keep the cuts clean. Avoid cutting too thin; this can lead to soggy okra. The thicker rounds hold up better during frying. Yes, you can use frozen okra. Frozen okra is convenient and saves time. However, there are some downsides. Frozen okra may have a bit more moisture. This can make your fried okra less crispy. If you use frozen, thaw and drain it well before frying. To enhance the flavor of fried okra, consider adding herbs and spices. You can mix dried oregano or thyme into the coating. A splash of hot sauce in the buttermilk adds a nice kick. For a zesty touch, try lemon zest or garlic. Adjust these to your taste for the best results. This blog covered everything you need for perfect fried okra. We explored the important ingredients, step-by-step cooking instructions, and essential tips. You can make spicy or gluten-free versions, and enjoy tips on storage and reheating. Remember, proper soaking and oil temperature make a big difference. Don't hesitate to get creative with flavors. Fried okra can be a tasty dish that impresses anyone. Use this guide to enjoy crispy, delicious okra anytime.

Classic Fried Okra Crispy and Flavorful Delight

Are you ready to discover a crispy, flavorful delight that you can make at home? Classic fried okra is a

- 6 fresh peaches, peeled and sliced - 1 cup granulated sugar, divided (1/2 cup for peaches, 1/2 cup for batter) - 1 teaspoon cinnamon - 1 teaspoon vanilla extract - 1/2 cup unsalted butter, melted - 1 cup all-purpose flour - 1 tablespoon baking powder - 1/2 teaspoon salt - 1 cup milk - 1 tablespoon lemon juice - Optional: Vanilla ice cream for serving Fresh peaches are the star of this dish. Their juicy sweetness brings life to your cobbler. You can choose ripe, fragrant peaches for the best flavor. If you can't find fresh peaches, you can use canned peaches. Drain them well to avoid too much juice. For a healthier twist, you can replace granulated sugar with honey or maple syrup. Adjust the amount to taste since these alternatives are sweeter. - Measuring cups and spoons - Mixing bowls and whisk - Baking dish These tools help you measure and mix with ease. A good baking dish ensures even cooking. With the right tools, your peach cobbler will turn out perfect every time. For the full recipe, check out the details above. To make peach cobbler, start by peeling and slicing the peaches. Use fresh, ripe peaches for the best flavor. A ripe peach feels slightly soft to the touch and smells sweet. To peel, you can blanch the peaches in boiling water for 30 seconds. Then, place them in ice water. The skin will slip off easily. Slice the peaches into thin wedges. This helps them cook evenly. Next, mix the dry and wet ingredients for the batter. In a bowl, combine flour, sugar, baking powder, and salt. Whisk these together until they blend well. In another bowl, mix melted butter and milk. Pour the wet mix into the dry mix. Stir gently until just combined. Remember, do not overmix! Lumpy batter is okay. Overmixing can make the cobbler tough. Now, it's time to assemble the cobbler. Pour the batter into a greased baking dish. Spread it evenly. Spoon the sliced peaches over the batter, including their juices. Do not stir; let the peaches rest on top. Drizzle lemon juice over everything to boost the flavor. Bake in a preheated oven at 375°F for 35 to 40 minutes. You want the cobbler to be golden and bubbly. Let it cool slightly before serving. For a treat, add a scoop of vanilla ice cream on top. For the complete recipe, refer to the Full Recipe. To enhance the flavor of your peach cobbler, try adding spices. A pinch of nutmeg or allspice can create a warm taste. You can also mix in a bit of ginger for a fresh kick. Each spice adds layers of flavor, making your dessert memorable. Achieving a golden crust is key. Use melted butter in your batter. This not only adds flavor but also helps create that crispy top. Bake until the edges bubble and the color turns golden brown. The aroma will fill your kitchen and make your mouth water. Pair your warm peach cobbler with ice cream or whipped cream. The coolness balances the warm, sweet cobbler perfectly. You can also sprinkle some toasted nuts on top for added crunch. For a complete meal, serve it with fresh lemonade or sweet tea. These drinks complement the sweetness of the cobbler. If you want to add a twist, try serving it with a splash of sparkling water. One common mistake is overmixing the batter. This can lead to a tough cobbler. Mix just until the dry ingredients are combined. Remember, a few lumps are fine! Another mistake is underbaking the cobbler. It should be golden brown and bubbly. If you take it out too soon, the batter may not cook through. Always check the center with a toothpick; it should come out clean. Enjoy your peach cobbler with these tips for the best results! For the full recipe, check out the details above. {{image_2}} For a gluten-free peach cobbler, you can easily swap out regular flour. Use almond flour or coconut flour instead. These flours add a nice texture. You should also check if your baking powder is gluten-free. This makes it safe for those with gluten concerns. You might want to adjust the liquid. Almond flour absorbs more moisture than regular flour. Start with a little less milk. You can add more if the batter seems too thick. Peach cobbler is tasty on its own. But you can mix it up with other fruits. Try adding berries like blueberries or raspberries. They add a nice tartness. You can also use apples for a crunchier texture. Mixing fruits can make the cobbler even more colorful. You could also add some chopped strawberries. Just remember to adjust the sugar based on how sweet the fruits are. To make your peach cobbler unique, you can add nuts. Chopped pecans or walnuts give a nice crunch. They also add a rich flavor. You can also experiment with extracts. A hint of almond extract can add depth. You might even try a touch of bourbon for a warm flavor. Just a little goes a long way! For the full recipe, check the previous section. Enjoy making these variations! To keep your peach cobbler fresh, store it in an airtight container. A glass dish with a lid works well. If you don't have one, cover the dish tightly with plastic wrap. Make sure it cools to room temperature first. This way, it won't trap steam and get soggy. Leftover peach cobbler can last for about three to four days in the fridge. When reheating, I suggest using the oven or microwave. If you use the oven, preheat it to 350°F (175°C). Place the cobbler in an oven-safe dish and cover it with foil. This helps keep the moisture in. Heat for about 15-20 minutes or until warm. For the microwave, heat in short bursts of 30 seconds. Check it often to avoid drying it out. If you want to keep it longer, freezing is a great option. Allow the cobbler to cool completely. Cut it into serving pieces and wrap each piece in plastic wrap. Then, place the wrapped pieces in a freezer-safe bag. Label the bag with the date. The cobbler can last for up to three months in the freezer. When you're ready to enjoy it, let it thaw overnight in the fridge. Then reheat as mentioned before. Peach cobbler can last for about 3 to 4 days when stored properly. To keep it fresh, cover the dish with plastic wrap or aluminum foil. You can also place it in an airtight container. Make sure to store it in the fridge to slow down spoilage. Reheat it in the oven or microwave before serving. This helps restore its warm and tasty texture. Yes, you can use frozen peaches for your cobbler. Just remember to thaw them first. Drain any excess liquid after thawing, as this helps prevent a soggy cobbler. You may need to adjust the sugar slightly since frozen peaches can be sweeter. Using frozen peaches is a great way to enjoy peach cobbler any time of year. A runny peach cobbler often comes from excess moisture. This can be caused by using too many juicy peaches or not draining them well. To fix this, you can add a bit of cornstarch to the peach mixture. This will help thicken the juices. Another tip is to bake the cobbler a little longer to let it set up. Absolutely! This recipe is perfect for novice bakers. The steps are simple and easy to follow. Just remember not to overmix the batter. It’s okay if it’s a little lumpy. Keep an eye on the baking time to avoid underbaking. With these tips, you'll create a lovely peach cobbler. For a complete guide, check out the Full Recipe. This blog post covered everything you need to make a delicious peach cobbler. We discussed the key ingredients, essential tools, and step-by-step instructions. I shared tips to perfect your cobbler and offered variations to suit different diets. Storing and reheating methods ensure you enjoy every bite. Remember, baking is about experimenting and having fun. With practice, you'll find joy in creating the perfect peach cobbler. Now it's your turn to try it out!

Peach Cobbler with Fresh Peaches Easy Dessert Recipe

Craving a sweet treat? This Peach Cobbler with Fresh Peaches is your answer! It’s an easy dessert perfect for any

To make Southern Peach Bread, you need these simple ingredients: - 2 cups all-purpose flour - 1 teaspoon baking soda - 1/2 teaspoon baking powder - 1/2 teaspoon salt - 1 teaspoon ground cinnamon - 1/2 teaspoon ground nutmeg - 1/2 cup unsalted butter, softened - 1 cup brown sugar, packed - 2 large eggs - 1 teaspoon vanilla extract - 1 cup ripe peaches, peeled and diced (fresh or canned) - 1/2 cup chopped pecans (optional) - 1/4 cup buttermilk - 1/4 cup granulated sugar (for topping) If you run out of an ingredient, don’t worry! Here are some easy swaps: - Use whole wheat flour instead of all-purpose for a healthier twist. - Coconut oil can replace unsalted butter for a dairy-free option. - Swap brown sugar with white sugar if you don’t have it. - Applesauce can stand in for buttermilk; just use 1/4 cup. - Pecans can be replaced with walnuts or omitted entirely. Choosing the right peaches makes a big difference. Here’s how to pick the best ones: - Look for peaches that are firm but slightly soft. - Choose peaches with a bright, vibrant color. - The skin should be smooth and free from blemishes. - Smell the peach; it should have a sweet, fragrant aroma. - If you can, buy local peaches in season for the best flavor. Using fresh peaches elevates your Southern Peach Bread, making it truly special. For the complete recipe, check out the Full Recipe. 1. Preheat your oven to 350°F (175°C). This helps the bread rise just right. 2. Grease and flour a 9x5-inch loaf pan. This keeps the bread from sticking. 3. In a medium bowl, whisk together the flour, baking soda, baking powder, salt, cinnamon, and nutmeg. Set this mix aside. 4. In a large bowl, cream the softened butter and brown sugar until fluffy. This step adds air to the mix. 5. Beat in the eggs one at a time. Then add the vanilla extract. Mix until well combined. 6. Gradually add the dry mix to the wet mix. Stir gently until just combined. Do not overmix. 7. Fold in the diced peaches and chopped pecans if you like. This adds great texture. 8. Pour in the buttermilk and stir until everything is well mixed. The buttermilk keeps the bread moist. 1. Transfer the batter to the prepared loaf pan. Smooth the top with a spatula. 2. Sprinkle granulated sugar on top for a sweet crust. This adds a nice crunch. 3. Bake in the oven for 55-60 minutes. A toothpick should come out clean when done. 4. Keep an eye on it. If the top browns too fast, cover it with foil. 1. Cool the bread in the pan for about 10 minutes. This makes it easier to handle. 2. Transfer to a wire rack and let it cool completely. This keeps the bread from getting soggy. 3. Slice the bread and serve warm or at room temp. Garnish with fresh peach slices or powdered sugar. 4. Enjoy this Southern peach bread as a snack or with your morning coffee. To keep your peach bread moist, follow these tips: - Use ripe, juicy peaches. They add natural moisture. - Don’t overmix the batter. Mix just until combined. - Add buttermilk for extra moisture. It makes the texture light. - Let the bread cool in the pan briefly. This helps it stay moist. Here are mistakes to watch out for: - Skipping the flour sifting. This can lead to a dense loaf. - Using cold butter. Softened butter mixes better and adds air. - Overbaking the bread. Keep an eye on the time. - Forgetting to grease the pan. This can cause sticking. Spices can elevate your peach bread. Here’s how: - Add more cinnamon for warmth. It pairs well with peaches. - Include a pinch of nutmeg. It adds depth to the flavor. - Try a splash of vanilla extract. It enhances sweetness. - Consider ginger for a zesty twist. It brings a nice kick. You can find the full recipe to create this delightful bread. Enjoy your baking! {{image_2}} You can use many fruits instead of peaches. Try ripe bananas for a sweet twist. Apples add a crisp bite. Blueberries offer a burst of juicy flavor. Each fruit gives a new taste to your bread. Just remember to adjust the sugar based on the fruit's sweetness. For example, bananas are sweeter than peaches. This way, you keep the bread moist and tasty. To make this bread gluten-free, swap all-purpose flour with a gluten-free mix. Many brands work well for baking. Look for a blend with xanthan gum to help the bread rise. You can also use almond flour for a nutty flavor. This adds a nice richness to the bread. The texture may change slightly, but it will still be delicious! Want to make a vegan version? Replace the butter with coconut oil or vegan butter. Instead of eggs, use flax eggs. Just mix one tablespoon of ground flaxseed with three tablespoons of water. Let it sit for five minutes to thicken. You can also use almond milk instead of buttermilk. These simple swaps keep the bread moist and flavorful. Enjoy your plant-based delight! For the full recipe, check out the Sweet Southern Peach Bread above. To keep your peach bread fresh, wrap it tightly in plastic wrap. You can also place it in an airtight container. Store it at room temperature for up to three days. If you live in a warm area, refrigerate it to prevent mold. This bread stays moist and tasty when stored properly. If you want to save peach bread for later, freezing works great. After it cools completely, slice the bread. Wrap each slice in plastic wrap, then place them in a freezer bag. Make sure to remove as much air as possible. You can freeze peach bread for up to three months. When you want to enjoy it, simply thaw it in the fridge overnight. Reheating peach bread is simple. For a warm slice, use a microwave. Heat it for about 15-20 seconds. If you prefer it crispy, place it in the oven. Preheat the oven to 350°F (175°C) and bake for about 10 minutes. This method keeps the crust nice and crunchy. Enjoy your peach bread warm for the best flavor! Yes, you can use canned peaches. Just make sure they are in juice, not syrup. Drain and chop them before mixing into your batter. Canned peaches work well, but fresh ones have a better flavor and texture. If you have fresh peaches, I always recommend using them for the best taste. They add a nice sweetness and moisture to the bread. Check the bread at 55 minutes. Insert a toothpick into the center. If it comes out clean, the bread is ready. If there is batter on the toothpick, bake for a few more minutes. The top should be golden brown and feel firm to the touch. Letting it cool slightly in the pan helps it set better. Southern Peach Bread pairs well with a few things. Try it warm with butter for a classic taste. You can also serve it with whipped cream or ice cream for a sweet treat. A dollop of yogurt adds a nice tang and creaminess. For drinks, enjoy it with a cup of coffee or tea. Each bite is a delight! In this post, we covered how to make tasty peach bread. We listed the key ingredients and suggested some easy substitutions. You learned the best ways to prepare, bake, and serve your bread. We shared tips for keeping it moist and common mistakes to avoid. You also discovered fun variations and how to store leftovers. Try making this peach bread your own and enjoy each bite. Getting creative can make your baking even more fun!

Southern Peach Bread Irresistible and Moist Delight

If you’ve ever tasted Southern Peach Bread, you know it’s a treat you can’t resist. Imagine moist, fluffy slices loaded
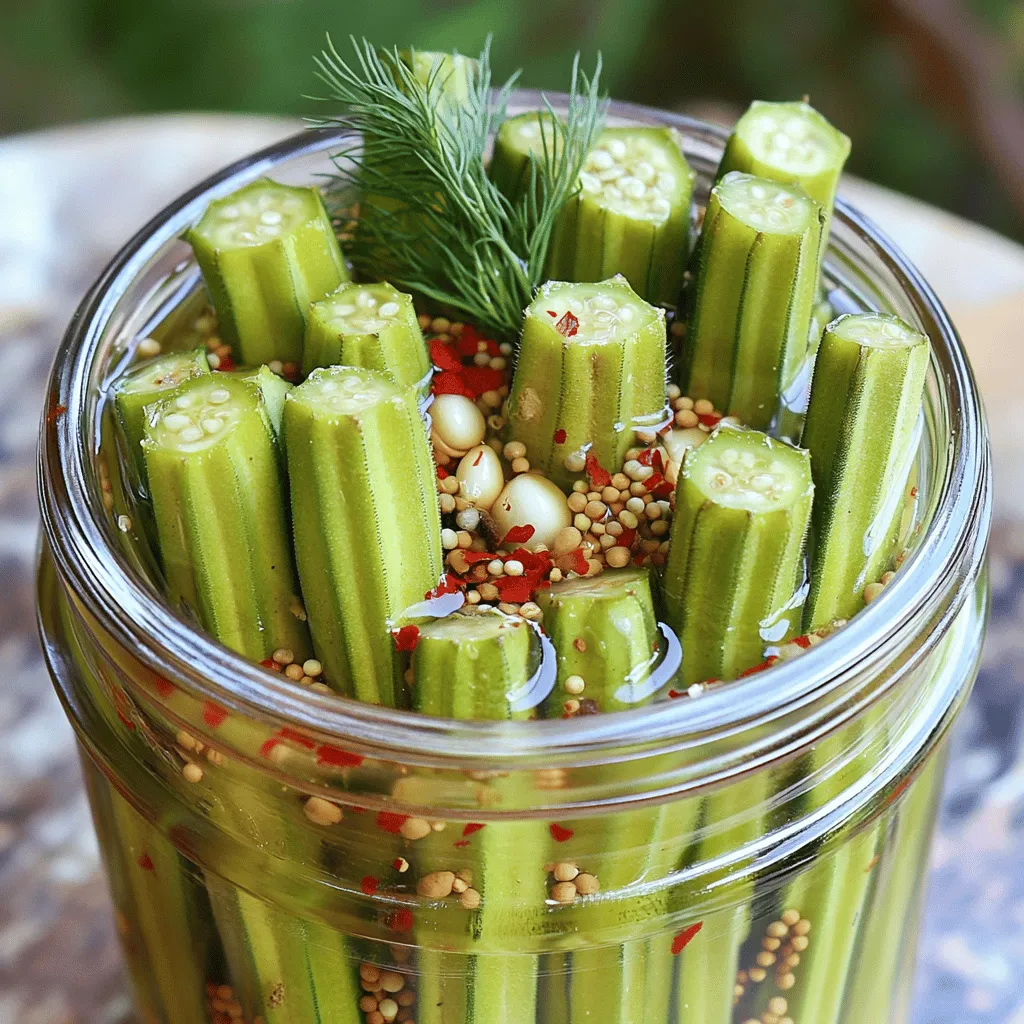
- 2 cups fresh okra, finely chopped - 1 cup cornmeal - 1/2 cup all-purpose flour - 1/2 cup buttermilk - 1 large egg - 1 small onion, finely diced - 1 clove garlic, minced - 1 teaspoon cayenne pepper - 1 teaspoon baking powder - Salt and pepper to taste - Vegetable oil for frying Southern Okra Patties are simple to make. The main ingredient is fresh okra. You can find it at most grocery stores during the summer months. Cornmeal gives these patties their crunchy texture. All-purpose flour helps bind the mixture. Buttermilk adds a nice tang. The egg helps hold everything together. Chop your okra finely. This helps it mix well with the other ingredients. Dice the onion small for even cooking. Mince the garlic for a strong flavor. For spice, add cayenne pepper. You can adjust it based on how spicy you like your food. Don't forget the baking powder. This helps the patties puff up during cooking. Salt and pepper are essential. They enhance the flavors of the dish. - Fresh herbs (parsley, cilantro) for garnish - Additional spices (paprika, black pepper) for extra heat Feel free to customize your patties! Fresh herbs add brightness to the dish. You can use parsley or cilantro as a garnish. If you love heat, add more spices. Paprika or black pepper can give a nice kick. This recipe is versatile. Enjoy making it your own! For the full recipe, check the earlier section. - In a large bowl, combine 2 cups of fresh okra, 1 small diced onion, 1 minced garlic clove, and 1/2 cup of buttermilk. Mix well. - In another bowl, whisk together 1 cup of cornmeal, 1/2 cup of all-purpose flour, 1 teaspoon of baking powder, 1 teaspoon of cayenne pepper, and salt and pepper to taste. - Add the dry mixture to the wet okra mixture. Stir until just combined. - Heat about 1/4 inch of vegetable oil in a large skillet over medium heat. - Once the oil is hot, drop spoonfuls of the batter into the skillet, flattening them slightly. Fry in batches to avoid crowding. - Cook each patty for 3-4 minutes on each side, until they are golden brown and crispy. - Serve the patties warm with your favorite dipping sauces. - For best presentation, garnish with fresh herbs like parsley or cilantro. Pair with a spicy sauce or homemade ranch for added flavor. This recipe gives you a taste of the South right at home. Enjoy this easy and tasty dish! For the full recipe, check out the detailed instructions above. - To get the perfect crispiness, heat your oil well. A hot skillet helps the patties fry evenly. - Avoid soggy patties by not overmixing the batter. Letting it rest for 10 minutes helps too. - Want more spice? Adjust the cayenne pepper to your taste. Start with less and add more if needed. - You can add other vegetables like bell peppers or corn for extra flavor and texture. Cheese works great too! Try cheddar for a rich twist. - Use a heavy skillet, like cast iron, for even heat. It keeps the oil temperature steady while frying. - A slotted spatula is helpful for turning and removing patties. It lets excess oil drain away easily. For a full recipe with detailed steps, check out the [Full Recipe]. {{image_2}} If you need to make some changes to the recipe, you can easily swap ingredients. - For flour, use almond flour or rice flour for a gluten-free option. - Instead of buttermilk, try using almond milk or coconut milk with a splash of vinegar to mimic the tangy taste. These substitutions keep the essence of the dish while meeting dietary needs. You can cook these patties in several ways. Each method gives a unique taste and texture. - Frying: This is the traditional way. It gives a crispy outside but can be greasy. - Baking: A healthier option, but it may not get as crispy. Set your oven to 400°F. Bake for 15-20 minutes, flipping halfway. If you want to try a modern method, use an air fryer. - Air fryer instructions: Preheat the air fryer to 375°F. Place the patties in a single layer and cook for 10-12 minutes, flipping halfway. This method keeps them crispy with less oil. Every region has its unique flavors. You can easily put your spin on Southern okra patties. - In Louisiana, add Cajun spices like thyme and oregano for a kick. - In Texas, try mixing in jalapeños for added heat. These local twists can transform the dish and make it even more exciting. To keep your leftover Southern okra patties fresh, store them in the fridge. Place the patties in an airtight container. This helps keep them from drying out or absorbing other smells in the fridge. I recommend using glass containers or heavy-duty plastic ones. Just make sure the lid seals tightly. You can store them for up to three days. If you want to save some patties for later, freezing is a great option. First, let the cooked patties cool completely. Then, place them in a single layer on a baking sheet. Freeze them for a couple of hours until solid. This helps keep their shape. After that, transfer them to a freezer-safe bag. Squeeze out as much air as possible. You can freeze them for up to three months. When you’re ready to eat, take out the number of patties you want. Place them in the fridge overnight to thaw. This keeps them from getting too soggy. To reheat your patties, the best method is to use a skillet. Heat a little oil in the pan over medium heat. Place the patties in the skillet and cook for about 3 minutes on each side. This helps them stay crispy. If you want to use the oven, preheat it to 350°F (175°C). Place the patties on a baking sheet and heat for about 10-15 minutes. Cover them with foil to avoid moisture loss. Enjoy your tasty Southern okra patties! Southern okra patties come from the rich food culture of the South. Okra is a staple in many Southern dishes. It is often used in gumbo or fried as a side. The patties reflect the blend of African, Native American, and European cuisines. They are a way to celebrate local ingredients and traditions. People in the South have enjoyed these patties for generations. They hold cultural significance and represent home cooking. Yes, you can prepare these patties in advance. Mix the batter and store it in the fridge for a day. When you're ready, just fry them up. If you want to freeze them, form the patties first. Place them on a baking sheet and freeze until firm. Then, transfer them to a freezer bag. When you're ready to eat, just thaw and cook. Reheating is easy; just fry them again until warm and crispy. You can make this dish vegan with simple swaps. Replace the egg with a flax egg or applesauce. Use almond milk or soy milk instead of buttermilk. For a gluten-free option, try using chickpea flour or a gluten-free flour blend. These changes keep the flavor while making the dish plant-based. You still get a tasty and satisfying meal. To add heat, increase the cayenne pepper in the recipe. You can also mix in diced jalapeños or hot sauce. Another option is to serve the patties with a spicy dipping sauce. Adding spices like smoked paprika can enhance the flavor too. Adjust the spice level to match your taste and enjoy the kick. Southern okra patties pair well with many sides. Try serving them with coleslaw for a crunchy contrast. A fresh salad with tomatoes and cucumbers works nicely too. You can also enjoy them with grits or rice. For a snack, serve them with a flavorful dip, like ranch or hot sauce. These choices complement the flavors of the patties wonderfully. Southern Okra Patties are a tasty treat that brings comfort and flavor. We explored their key ingredients, preparation steps, and cooking methods. You can customize them with spices or herbs. Remember to store leftovers properly and even try different cooking methods. Whether frying or baking, these patties can fit anyone’s taste. I encourage you to experiment with variations and find your ideal version. Enjoy making and sharing these delicious treats!

Savory Southern Okra Patties Easy and Tasty Recipe

Are you ready to dive into a tasty Southern treat? My Savory Southern Okra Patties recipe is easy to follow

- 1 pound fresh figs - 1 cup granulated sugar - 1/4 cup fresh lemon juice - 1 teaspoon vanilla extract - 1/2 teaspoon cinnamon - 1/4 teaspoon nutmeg - A pinch of sea salt When choosing figs, look for ones that are firm but slightly soft. The color should be rich, often purple or green, depending on the variety. Avoid figs that are too mushy or have dark spots. Fresh figs should smell sweet and earthy. If you can, buy figs from a local market for the best flavor. You can add other flavors to your jam. Try using a splash of brandy for richness. If you like spice, add a pinch of ground ginger or cloves. For a citrus twist, mix in some orange zest. These options can help you create a unique taste in your French fig jam. For the full recipe, refer to the previous section. Start by washing the figs under cold water. Make sure to pat them dry. Next, remove the stems. Cut each fig into quarters. This helps the figs break down easier when cooked. In a medium-sized saucepan, combine your quartered figs, sugar, lemon juice, vanilla extract, cinnamon, nutmeg, and sea salt. Stir gently. You want all the figs to be coated evenly with the sugar and spices. This mixture will pack in flavor. Place the saucepan over medium heat. Cook for about 10 minutes. Watch as the sugar dissolves and the figs begin to release their juices. Stir occasionally. Keep an eye on it to prevent sticking. Reduce the heat to low. Let the mixture simmer for about 30 to 35 minutes. Stir frequently. The jam should thicken and become syrupy. This slow cooking brings out the fig's natural sweetness. If you want a smoother jam, grab an immersion blender. Blend until you reach your desired texture. If you like it chunky, skip this step. Both versions taste great! Once the jam reaches the right thickness, take the saucepan off the heat. Carefully ladle the hot jam into sterilized jars. Leave about 1/2 inch of space at the top. Let the jars cool to room temperature. Seal them up for storage. You can keep them in the fridge for about three weeks. Make sure to follow the Full Recipe for a complete guide! When making fig jam, some common mistakes can ruin your batch. First, don’t rush the cooking. Figs need time to break down and release their juices. If you cook them too quickly, the jam may burn. Second, avoid using under ripe figs. They lack the sweetness and flavor you want. Lastly, don’t forget to taste. Adjusting the sugar or spice can make a big difference. To achieve the perfect texture, focus on cooking time. The jam should simmer slowly, allowing it to thicken naturally. If it seems too runny, keep simmering. A quick tip: test the consistency on a cold plate. If it holds its shape, it’s ready. If not, give it a few more minutes. You can also use an immersion blender for a smoother jam if you prefer. Enhancing the flavor of your fig jam is easy. Try adding a splash of port wine or a hint of rosemary for a unique twist. A touch of citrus zest, like orange or lemon, can brighten the flavor too. Experiment with spices, such as cardamom or ginger, to create your own signature jam. Remember, the key is to balance sweetness with just the right notes of spice. For more ideas, check out the Full Recipe. {{image_2}} You can play with flavors in your fig jam. Adding spices can bring warmth. For example, try a pinch of cardamom for a unique twist. You can also use fresh herbs like rosemary or thyme. Just add a few sprigs while cooking. Remove them before jarring the jam. This brings a fresh taste that's unexpected and delightful. Figs are great, but you can mix them with other fruits. Pears add a nice texture and subtle sweetness. Apricots give a bright flavor. You can also use berries for a tangy twist. Just keep the same ratios in the recipe. This way, your jam stays balanced and tasty. Not a fan of sugar? You can use honey or maple syrup instead. Both sweeteners work well with figs. They add a unique flavor while keeping it sweet. If you want to go low-carb, try monk fruit sweetener. It can replace sugar one-to-one. This way, you can enjoy your fig jam without the extra sugar. Explore all these variations to make your French fig jam special. You can find the full recipe to guide your cooking. Once you make your French fig jam, you should store it in the fridge. Use clean, sterilized jars for the best results. Seal the jars tightly. This way, your jam can stay fresh for up to three weeks. Always label the jars with the date to track freshness. If you notice any changes in color or texture, it might be time to toss it. If you want to keep your jam longer, consider canning it. To do this, you will need to process your jars in a water bath. First, fill a big pot with water and bring it to a boil. Place the filled jars into the pot, making sure the water covers the jars by at least an inch. Boil them for 10 minutes. This method can help your jam last for up to a year if stored in a cool, dark place. Knowing how to spot spoiled jam is key. If you see mold on top, throw it away. If the jam smells off or has a strange color, it's best to discard it too. A change in texture may also indicate spoilage. Always trust your senses. If it looks or smells bad, do not taste it. Stay safe and enjoy your jam! Homemade French Fig Jam lasts about three weeks in the fridge. Store it in a sealed jar. If you process it in a water bath, it can last for up to a year. Always check for mold before using. You can use dried figs, but the jam will taste different. Dried figs are sweeter and have less water. Use about 1 cup of chopped dried figs. You may need to add more water to help them cook down. Serve French Fig Jam with cheese, toast, or yogurt. It pairs well with goat cheese or brie. You can also use it in baking or drizzled over desserts. You can buy French Fig Jam at specialty food stores or online. Look for artisanal brands for the best taste. Many local farmers' markets may also sell homemade jams. To adjust sweetness, add more sugar if it's too tart. If it’s too sweet, add a bit more lemon juice. Always taste as you go to find the right balance. You can find the Full Recipe in the previous section. In this post, we covered how to make French Fig Jam with fresh figs and simple ingredients. You learned how to select figs, avoid common mistakes, and enhance flavor. Remember to store your jam properly for the best taste. Trying different fruits and flavors can make this recipe your own. Enjoy your homemade jam on toast or with cheese. Dive into this fun cooking project, and you’ll impress everyone with your tasty treat!

French Fig Jam Simple Recipe for Delicious Flavor

If you crave a simple yet delicious spread, this French Fig Jam recipe is for you. Made with fresh figs,

To make dark chocolate zucchini brownies, gather these simple ingredients: - 1 cup grated zucchini (about 1 medium zucchini, excess moisture squeezed out) - 1/2 cup coconut oil, melted - 1/2 cup brown sugar - 1/4 cup maple syrup - 2 large eggs - 1 teaspoon vanilla extract - 1/2 cup all-purpose flour - 1/2 cup unsweetened cocoa powder - 1/2 teaspoon baking soda - 1/2 teaspoon baking powder - 1/4 teaspoon salt - 1/2 cup dark chocolate chips (plus extra for topping) Measuring is key in baking. Here are some tips: - Use dry measuring cups for flour and cocoa powder. Fill to the top and level off. - Use a liquid measuring cup for coconut oil and syrup. - Grate the zucchini and squeeze it to remove excess moisture. This helps prevent soggy brownies. You can swap some ingredients if needed: - Coconut oil: Use unsalted butter or vegetable oil instead. - Brown sugar: Use white sugar or coconut sugar for a different flavor. - All-purpose flour: Substitute with whole wheat flour or gluten-free flour blend. - Zucchini: You can replace zucchini with grated carrots or applesauce for moisture. These choices can still yield delicious dark chocolate zucchini brownies. Check out the Full Recipe for more guidance! Making Dark Chocolate Zucchini Brownies is fun and easy. First, you need to gather your ingredients. You will need grated zucchini, coconut oil, brown sugar, maple syrup, eggs, vanilla extract, flour, cocoa powder, baking soda, baking powder, salt, and dark chocolate chips. Start by preheating your oven to 350°F (175°C). This helps the brownies bake evenly. Grease an 8x8 inch baking dish or line it with parchment paper. This step keeps the brownies from sticking and makes cleanup easy. Next, mix the melted coconut oil, brown sugar, and maple syrup in a bowl. Whisk until everything is smooth. Then, add the eggs and vanilla extract. Whisk again until the mixture is well combined. In another bowl, mix the dry ingredients: flour, cocoa powder, baking soda, baking powder, and salt. Stir until everything is even. Now, combine the wet and dry mixtures. Add the dry mix to the wet mix gradually, stirring gently. Avoid overmixing to keep the brownies chewy. Finally, fold in the grated zucchini and dark chocolate chips. This is where the magic happens! Pour the batter into your prepared dish and spread it evenly. If you like, sprinkle a few extra dark chocolate chips on top. Now it’s time to bake! Place your dish in the preheated oven and set a timer for 25 to 30 minutes. Keep an eye on it. The edges should look set, but the center might still look moist. To check for doneness, insert a toothpick in the middle. If it comes out with a few moist crumbs, your brownies are ready. If it comes out wet, let them bake for a few more minutes. Checking doneness is key to perfect brownies. Here are some tips: - Look for the edges: They should pull away from the sides of the pan. - Check the center: It should be slightly soft but not wet. - Use a toothpick: This is the best test. Remember, some gooey bits are okay! Once baked, let the brownies cool for about 10 minutes in the pan. Then, transfer them to a wire rack to cool completely. Enjoy your rich and chewy Dark Chocolate Zucchini Brownies! For the full recipe, check out the earlier section. Ovens can vary. Some bake hotter than others. Always check your brownies a bit early. If the recipe says 25-30 minutes, start at 25 minutes. Use a toothpick to test. Insert it in the center. If it comes out with moist crumbs, they are done. If it comes out wet, bake for a few more minutes. This helps prevent overbaking. For rich and chewy brownies, avoid overmixing. Mix just until you see no dry flour. This keeps your brownies soft and moist. Using freshly grated zucchini is key. It adds moisture without a strong taste. Squeeze out excess water before adding it to the mix. This helps balance the wet and dry ingredients. Store your brownies in an airtight container. This keeps them fresh for up to five days. If you want to keep them longer, freeze them. Wrap each brownie in plastic wrap, then place in a freezer bag. They can last up to three months in the freezer. To eat, thaw them in the fridge overnight. For the full recipe, follow the steps above to enjoy these delicious treats! {{image_2}} You can make your brownies even better by adding nuts or fruits. Chopped walnuts or pecans add a nice crunch. You can mix in about half a cup of nuts right before you bake them. If you love fruit, try adding chocolate chips or dried cherries. These will add sweetness and flavor. Just remember to keep the total mix under two cups. This keeps the batter balanced and moist. If you want gluten-free brownies, it's easy to switch the flour. Use almond flour or oat flour instead of all-purpose flour. You can also try a gluten-free blend. Make sure the blend has xanthan gum. This helps the brownies hold together. The texture may change a bit, but they will still be delicious. Just remember to check the baking time, as it may vary. To make these brownies vegan, you can swap the eggs. Use flax eggs or applesauce. For each egg, mix one tablespoon of flaxseed meal with three tablespoons of water. Let it sit for five minutes to thicken. You can also use plant-based yogurt for moisture. Replace the coconut oil with coconut cream or a vegan butter. These changes will keep your brownies rich and chewy. For the Full Recipe, follow the original steps but with your vegan tweaks. To keep your dark chocolate zucchini brownies fresh, store them in an airtight container. This helps maintain moisture and taste. Place parchment paper between layers if stacking. Avoid direct sunlight, as heat can dry them out. For best flavor, enjoy them within a week. You can freeze brownies for later enjoyment. First, let them cool completely. Then, cut them into squares. Wrap each square in plastic wrap. Place the wrapped brownies in a freezer bag or container. They can last up to three months in the freezer. To thaw frozen brownies, take them out and leave them at room temperature for about two hours. For a warm treat, reheat in the microwave for about 10-15 seconds. This brings back the gooey, chewy texture. Enjoy your brownies warm and fresh! For the full recipe, check the section above. You can check the brownies by using a toothpick. Stick it in the center. If it comes out with a few moist crumbs, they are done. If it’s sticky, bake a few more minutes. Keep an eye on the time. The baking time is usually 25-30 minutes. Ovens may vary, so adjust as needed. Yes, you can use milk chocolate or semi-sweet chocolate. Just remember, this will change the flavor. Dark chocolate makes these brownies richer and less sweet. You can also try chocolate chunks for a fun texture. Just make sure it melts well into the batter. If you don’t have zucchini, you can use applesauce or mashed bananas. Both add moisture and sweetness. If you use applesauce, reduce the sugar slightly. Mashed bananas will add a nice flavor. Just make sure to keep the same amount of liquid in the batter. For the full recipe, check out the Dark Chocolate Zucchini Brownies section. In this blog post, I covered key ingredients, precise measuring tips, and useful substitutions. I outlined easy steps for baking brownies and shared tips for checking doneness. I also provided adjustments for baking times, texture tips, and storage advice. You can explore tasty variations and options like gluten-free and vegan substitutes. Remember, accurate measurements and careful baking are key for the best results. With these tips, you’ll create delicious brownies every time. Enjoy your baking!

Dark Chocolate Zucchini Brownies Rich and Chewy Treat

When you crave something sweet, these Dark Chocolate Zucchini Brownies hit the spot! Rich and chewy, they combine the goodness

To make crispy fritters, you need fresh okra. Use one pound of okra. Wash it well and slice it into half-inch pieces. This size helps the okra cook evenly and stay crispy. After slicing, sprinkle a little salt over the okra. Let it sit for about ten minutes. This step helps draw out moisture, which is key for crispy fritters. Next, gather your dry ingredients. You will need: - 1 cup chickpea flour (besan) - 1/2 cup all-purpose flour - 1 teaspoon turmeric powder - 1 teaspoon cumin powder - 1 teaspoon garam masala - 1/2 teaspoon red chili powder - 1 teaspoon baking powder - Salt, to taste These ingredients give your fritters great flavor and texture. Chickpea flour adds a nutty taste, while the spices give a warm kick. For the sauce, you will need: - 1 cup plain yogurt - 1 tablespoon lemon juice - 1 teaspoon garlic, minced - 1 tablespoon fresh cilantro, chopped (for garnish) This sauce pairs perfectly with the fritters. It adds a cool and tangy flavor that balances the spices in the fritters. Mix all the sauce ingredients in a bowl and set it aside. You can find the full recipe to make these amazing crispy okra fritters with spicy yogurt sauce . First, take your fresh okra and wash it well. Slice the okra into 1/2-inch pieces. Place the sliced okra in a large mixing bowl. Sprinkle a little salt over the okra and let it sit for about 10 minutes. This helps to draw out extra moisture. The salt will also enhance the flavor of the okra. In another bowl, start making your batter. Combine 1 cup of chickpea flour and 1/2 cup of all-purpose flour. Add 1 teaspoon of turmeric powder, 1 teaspoon of cumin powder, 1 teaspoon of garam masala, and 1/2 teaspoon of red chili powder. Then, mix in 1 teaspoon of baking powder. Sprinkle in salt to taste. Gradually add water to the dry mix until it becomes a thick batter, similar to pancake batter. Now it’s time to fry! First, coat the okra pieces in the batter, making sure each piece is well covered. Let any excess batter drip off. Heat vegetable oil in a deep frying pan over medium heat. You can test the oil’s readiness by dropping a small amount of batter in. If it sizzles, the oil is hot enough. Carefully drop spoonfuls of batter-coated okra into the hot oil. Fry them until they turn golden brown, about 3 to 5 minutes. Use a slotted spoon to remove the fritters and place them on paper towels to drain excess oil. Enjoy your crispy okra fritters! For the complete recipe, check out the Full Recipe. To make the best fritters, start by salting the sliced okra. Let it sit for about 10 minutes. This draws out moisture and helps keep the fritters crispy. When mixing your batter, make it thick but not too thick. The right consistency will coat the okra well. Heat your oil until it sizzles when you drop a bit of batter in. Fry in small batches to avoid steaming. Flip them when golden brown, about 3-5 minutes. Drain on paper towels for that extra crunch. You can change the spice level to match your taste. If you like it mild, cut back on the red chili powder. For more heat, add a bit more or try cayenne pepper. Don’t forget that the yogurt sauce cools down the heat too. Experiment until you find your perfect blend. This way, everyone at the table can enjoy these tasty bites. Serve your crispy okra fritters warm for the best taste. They pair well with the spicy yogurt sauce. You can also add a squeeze of lemon juice for brightness. These fritters make a great appetizer or snack. Try them alongside a fresh salad for a light meal. For a fun twist, serve them in a wrap with fresh veggies. Check out the Full Recipe for more ideas and tips! {{image_2}} You can switch up the spices in the batter. Try using smoked paprika for a deeper flavor. Adding a pinch of cayenne pepper can kick up the heat too. You might also enjoy adding dried herbs like oregano or thyme. Each spice brings a unique twist to the fritters. Get creative by mixing in other veggies. Chopped spinach or grated carrots work well. You can even add corn for a sweet crunch. These veggies not only add color but also boost nutrition. Just be sure to adjust the flour if the mix gets too wet. To make these fritters vegan, replace the yogurt with a plant-based option. You can use coconut yogurt or cashew cream. Ensure you pick a brand that has a nice tang. This keeps the sauce tasty and creamy. You can also add a bit of nutritional yeast to the batter for a cheesy flavor. For the full recipe, check out the details above. Enjoy creating your own savory okra fritters! To keep your crispy okra fritters fresh, store them in an airtight container. Line the container with paper towels to absorb any excess oil. Place a layer of fritters and add more paper towels on top. This method helps maintain their crunchiness. For best results, reheat your fritters in the oven. Preheat the oven to 350°F (175°C). Spread the fritters on a baking sheet and heat for about 10-15 minutes. This method keeps them crispy. Avoid using the microwave, as it can make them soggy. You can freeze these fritters for later. Let them cool completely, then arrange them in a single layer on a baking sheet. Freeze until solid, about 1-2 hours. Transfer the frozen fritters to a freezer-safe bag. They will last for up to three months. When ready to eat, reheat them directly from the freezer in the oven. Enjoy the crunch again! For the full recipe, check out the section above. To keep okra from being slimy, you should salt it first. Slice the okra and put it in a bowl. Sprinkle some salt and mix gently. Let it sit for about 10 minutes. This helps draw out moisture. After that, pat the okra dry with a towel. This step makes your fritters crispier. Yes, you can bake okra fritters. Preheat your oven to 425°F (220°C). Coat a baking sheet with oil. Place the coated okra fritters on the sheet in a single layer. Spray the tops lightly with oil. Bake for 20-25 minutes. Flip them halfway through for even cooking. They may not be as crispy as fried ones, but they will still taste great. Okra shines in many dishes. Here are a few favorites: - Gumbo: A rich stew from Louisiana with meats and spices. - Bhindi Masala: A spicy Indian stir-fry with onions and spices. - Okra Curry: A comforting dish cooked in a spiced tomato sauce. - Roasted Okra: Tossed with olive oil and spices, then roasted until tender. These dishes highlight okra's unique flavor and texture. You can explore these options for more savory delights! This blog post covered how to make delicious okra fritters. You learned about fresh ingredients, preparing the okra, and mixing the batter. We discussed tips for crispy fritters and how to spice them up. Variations allow you to change flavors or make them vegan. Lastly, we shared the best ways to store and reheat your fritters. Remember, cooking should be fun. Experiment with different spices and enjoy your tasty creations. Perfecting your fritters can lead to new culinary adventures. Enjoy every bite!

Savory Okra Recipes for Crispy Delicious Fritters

Are you ready to turn fresh okra into mouthwatering fritters? In this post, I’ll share savory okra recipes that bring

- 1 pound fresh okra, stems trimmed - 2 cups distilled white vinegar - 1 cup water - 2 tablespoons sea salt - 2 teaspoons sugar - 4 cloves garlic, crushed - 1 tablespoon dill seeds - 1 tablespoon black mustard seeds - 1 teaspoon red pepper flakes Crisp pickled okra starts with fresh okra. Look for bright green pods. They should be firm and without blemishes. Distilled white vinegar gives a tangy flavor. It helps preserve the okra and keeps it crunchy. Water balances the vinegar's strength. Next, sea salt adds flavor and helps with the pickling process. Sugar adds a touch of sweetness. Garlic cloves bring a nice aroma and taste. For extra flavor, you can try optional ingredients. Dill seeds add a unique taste. Black mustard seeds bring a slight crunch. Red pepper flakes give a kick. Adjust them to your spice level. For the full recipe, check the details above. Enjoy making your own crisp pickled okra! To start, wash the fresh okra under cold water. This step ensures you remove any dirt or debris. Next, trim the stems. Be careful not to cut too deep; you want to keep the seeds intact. This helps the okra stay crisp during pickling. Now, let’s make the pickling brine. In a medium saucepan, combine 2 cups of distilled white vinegar, 1 cup of water, 2 tablespoons of sea salt, and 2 teaspoons of sugar. Stir well. Heat this mixture over medium heat. Bring it to a gentle boil. Keep stirring until the salt and sugar fully dissolve. This brine gives the okra its tangy flavor. It’s time to pack the okra into a jar. Grab a clean mason jar or a large glass container. Layer the okra vertically, packing them tightly. Between the layers, add crushed garlic, dill seeds, mustard seeds, red pepper flakes, and a bay leaf. These spices will add great flavor. After that, pour the hot pickling brine over the okra. Make sure all the okra is covered in the liquid. If you see air pockets, tap the jar gently. Let the jar cool to room temperature before sealing it with a lid. For the full recipe, don’t forget to check the detailed instructions provided. - Fresh okra is key for a great crunch. Choose small, firm pods with bright color. - To prevent mushiness, avoid cutting the okra too deep when trimming. Keep the seeds intact. - Use a clean jar and pack the okra tightly. This helps keep them firm during pickling. - For the best flavor, refrigerate the okra for at least 24 hours. Waiting 3 to 5 days gives richer taste. - Experiment with spices like coriander or black pepper for extra depth. Adding a few slices of ginger can also elevate the flavor. - Serve pickled okra as a snack with crackers and cheese. They add a zesty crunch! - Use them as a garnish for cocktails like Bloody Marys. They also pair well with fried fish or Southern dishes. - Try adding them to salads for a fun twist. They bring a tangy bite that many will love. {{image_2}} To make your pickled okra spicy, add jalapeños or more red pepper flakes. Start with one or two sliced jalapeños. You can also mix in extra red pepper flakes if you want it hotter. This adds both flavor and heat that many people love. The spicy kick pairs well with the tangy vinegar. You can change the flavor by using different herbs and spices. Try adding garlic scapes for a fresh taste. Other great options include thyme, oregano, or even basil. Each herb will give your pickled okra a unique twist. Feel free to experiment to find your favorite mix. If you want to pickle okra fast, use a quick pickling method. This means you can skip the long wait for flavors to develop. Use the same brine but reduce the vinegar and salt. Heat it, then pour it over your okra. Let it cool and enjoy the same day. This method is great for last-minute snacks. For the full recipe, check out the Crisp Pickled Okra Delight. Store your crisp pickled okra in glass jars. Mason jars work great. They keep the pickles fresh. Make sure the jars have tight lids. This helps prevent air from spoiling your okra. Always allow the jar to cool before sealing it. You want to keep all the flavors inside. Crisp pickled okra lasts about 2 months in the fridge. After that, the taste may change. The okra might also lose its crunchiness. Be sure to check the jar often. If you see any signs of spoilage, throw it out. You can freeze pickled okra, but it may change texture. If you want to freeze, use freezer-safe bags. Remove as much air as you can. This helps keep the flavor intact. When you are ready to use it, thaw in the fridge overnight. Enjoy your pickled okra in salads or as a snack. For full recipe details, please refer to the Full Recipe. Using the right vinegar is key for pickling okra. Distilled white vinegar works great. It has a strong flavor and high acidity. Apple cider vinegar is another option. It adds a fruity taste. Rice vinegar is milder, perfect for those who want less tartness. Each vinegar gives a unique flavor, so feel free to experiment. Yes, you can reuse pickling brine! After using it, strain out any solids. Then, store it in the fridge. Use it within a week for best results. Reusing brine can save time and add flavor to new batches. Just make sure the brine hasn’t gone bad. Watch for signs of spoilage. If you see mold or off colors, it’s bad. A strange smell is also a sign. If the texture feels slimy, discard it. Always trust your senses. When in doubt, throw it out. Your health is more important than saving a jar of okra. In this post, I covered how to make crisp pickled okra. You learned about key ingredients, from fresh okra to spices. I shared a simple step-by-step guide for preparation and storage. Using the right techniques keeps your okra crunchy and flavorful. Don't hesitate to experiment with new spices or quick pickling methods. Enjoy your pickled okra as a snack or a side dish. With these tips, you'll create delicious and unique flavors at home. Happy pickling!

Crisp Pickled Okra Tangy and Tasty Recipe Guide

Looking to spice up your meals? My Crisp Pickled Okra recipe is a tangy delight! Bursting with flavors, fresh okra

- 2 cups all-purpose flour - 1/2 cup granulated sugar - 1 tablespoon baking powder - 1/2 teaspoon salt - 1/2 cup unsalted butter, melted - 3/4 cup milk - 1 teaspoon vanilla extract - 2 large peaches, peeled and diced - 1 teaspoon ground cinnamon - 1/4 teaspoon nutmeg - 1 tablespoon lemon juice - 1 egg (for egg wash) - Powdered sugar for dusting Gathering the right ingredients is key to making Peach Pie Cruffins. The flour gives the cruffins structure, while sugar adds sweetness. Baking powder helps them rise, creating a fluffy texture. Salt enhances the flavors, and butter adds richness. You need fresh peaches for the best taste. The diced fruit brings natural sweetness and juicy goodness. Cinnamon and nutmeg provide warm spice notes, balancing the sweetness of peaches. Lemon juice brightens the flavors and keeps the peaches fresh. For the egg wash, one egg brushed on top gives a lovely golden color. Lastly, powdered sugar sprinkled on top adds a sweet touch that makes them look beautiful. With all these ingredients ready, you're all set to create a delicious batch of Peach Pie Cruffins. For the full recipe, check the main section above. 1. First, you need to preheat your oven to 375°F (190°C). Grease a standard muffin tin to prevent sticking. 2. In a large bowl, mix the dry ingredients: 2 cups of all-purpose flour, 1/2 cup of granulated sugar, 1 tablespoon of baking powder, and 1/2 teaspoon of salt. Whisk these together until they blend well. 3. In another bowl, combine the wet ingredients. Mix 1/2 cup of melted unsalted butter, 3/4 cup of milk, and 1 teaspoon of vanilla extract. Stir this mixture well. 1. Now, gently fold in the diced peaches. You will need 2 large peaches, peeled and diced. Add 1 teaspoon of ground cinnamon, 1/4 teaspoon of nutmeg, and 1 tablespoon of lemon juice. Be careful not to overmix; some lumps are just fine! 2. On a clean surface, roll out your dough to about 1/2 inch thick. Cut the dough into strips that are about 2 inches wide. 3. Next, shape the cruffins. Take each strip and fold it into thirds, like a letter. Then, roll it up to create a spiral. Place each rolled dough into your prepared muffin tin. 1. To get a nice golden finish, beat 1 egg and brush a thin layer over the top of each cruffin. This is called an egg wash. 2. Bake your cruffins in the preheated oven for 20-25 minutes, until they turn golden brown. 3. After baking, allow them to cool slightly. Remove the cruffins from the tin and dust them with powdered sugar before serving. To make these Peach Pie Cruffins, follow the full recipe for best results! To make the best Peach Pie Cruffins, you must avoid overmixing. This keeps the dough light and airy. Mix until just combined. Some lumps in the dough are okay! When cutting your dough strips, use a sharp knife for clean edges. Aim for even strips, about 2 inches wide, to ensure even baking. If you live at a high altitude, your oven temperature may need a small change. Try reducing the heat by 25°F to help your cruffins bake evenly. To know when they are done, look for a golden brown color. A toothpick should come out clean when inserted into the center. Serve your Peach Pie Cruffins warm for the best taste. You can dust them with powdered sugar for a sweet touch. Pair them with fresh peach slices or a scoop of vanilla ice cream. A cup of coffee or a glass of iced tea makes a great drink choice to enjoy with them. For a fun twist, try serving with a drizzle of caramel sauce! {{image_2}} You can easily change the flavors of your Peach Pie Cruffins. Instead of peaches, try apples, berries, or cherries. Each fruit gives a fresh twist. You can also play with spices. Swap cinnamon for cardamom or ginger for a warm kick. If you want a different sweetness, use honey or maple syrup instead of sugar. For a unique texture, try almond flour or coconut flour. These swaps help you personalize your cruffins to your taste. Making Peach Pie Cruffins for special diets is simple. For gluten-free options, use a blend of gluten-free flour. This keeps the cruffins light and fluffy. If you follow a vegan diet, replace the butter with coconut oil. Use almond milk or oat milk in place of regular milk. For the egg wash, a brush of almond milk works great. These changes keep the flavor while fitting various diets. Seasonal fruits can inspire new cruffin recipes. In summer, use ripe strawberries or juicy plums. In fall, add diced apples with a hint of nutmeg. This makes each season a reason to bake cruffins. You can also create holiday-themed cruffins. Add a pinch of nutmeg for cozy flavors in winter. For a festive touch, sprinkle some cinnamon sugar on top. These variations keep your baking exciting all year long. To keep your Peach Pie Cruffins fresh, store them in an airtight container. This helps them stay soft and tasty. For short-term storage, place them at room temperature for up to two days. If you want to keep them longer, store them in the fridge. Just remember, cold air can dry them out, so wrapping them in plastic wrap is a good idea. When you're ready to enjoy leftover cruffins, reheating is key. Preheat your oven to 350°F (175°C). Place the cruffins on a baking sheet and warm them for about 5 to 10 minutes. This method helps restore their crispiness. If you're in a hurry, use a microwave. Heat them for 10 to 15 seconds. However, this may make them a bit soft. Serve them warm with a sprinkle of powdered sugar for a treat! Freezing your Peach Pie Cruffins is a great way to enjoy them later. First, let them cool completely. Then, wrap each cruffin in plastic wrap, and place them in a freezer bag. They can last up to three months in the freezer. When you're ready to eat, take one out and let it thaw in the fridge overnight. For a quick option, you can also warm it directly in the oven at 350°F (175°C) for about 15 minutes. This way, you’ll have a fresh-tasting cruffin any time you crave one! How do you make Peach Pie Cruffins from scratch? To make Peach Pie Cruffins from scratch, start with your ingredients. You need flour, sugar, baking powder, salt, butter, milk, vanilla, peaches, spices, and an egg. First, mix the dry ingredients in one bowl. In another bowl, mix the wet ingredients. Then, combine both mixtures. Fold in the diced peaches and spices carefully. Roll out the dough, cut it, and shape the cruffins. Finally, bake them until golden. You can follow the Full Recipe for detailed steps. Can I use canned peaches instead of fresh? Yes, you can use canned peaches. Make sure to drain them well. Canned peaches can add sweetness and moisture. Just chop them into small pieces before adding them to your dough. The flavor may vary, but they still work great in cruffins. What is the origin of cruffins? Cruffins are a fun mix of croissants and muffins. They came from San Francisco, where a bakery first made them. The idea was to take the flaky texture of croissants and shape them like muffins. This unique pastry has gained a lot of fans since its creation. How long do Peach Pie Cruffins last at room temperature? Peach Pie Cruffins last about two days at room temperature. Keep them in an airtight container. If you want them to last longer, consider refrigerating them. Just remember to warm them up before eating for the best taste! Peach Pie Cruffins combine the best of muffins and pastries. We explored the ingredients, step-by-step guide, and helpful tips to make these treats perfect. Variations allow for unique flavors, while storage info ensures they stay fresh. Try making them today! Enjoy sharing these cruffins with family and friends. You’ll love how easy and fun this recipe can be. Dive into this sweet adventure, and make your kitchen the place to be.

Peach Pie Cruffins Irresistible and Easy Recipe

Welcome to a delightful world of flavors with Peach Pie Cruffins! If you love sweet treats that are easy to

- 4 medium zucchinis, sliced - 1 cup shredded cheddar cheese - 1 cup shredded mozzarella cheese - 1/2 cup grated Parmesan cheese - 1 medium onion, chopped - 2 cloves garlic, minced - 2 large eggs, beaten - 1/2 cup unsweetened almond milk (or regular milk) - 1 cup breadcrumbs (preferably whole wheat) - 1 teaspoon dried oregano - 1 teaspoon Italian seasoning - Salt and pepper to taste - 2 tablespoons olive oil - Fresh herbs (like basil or parsley) for garnish When making Cheesy Zucchini Casserole, gather these fresh ingredients. Zucchini is the star. It brings a mild taste that absorbs flavors well. The cheeses add creaminess and richness. I love using cheddar and mozzarella for a gooey finish. Parmesan gives a nice salty kick. Chopped onion and minced garlic add depth. They create a fragrant base. The eggs bind everything together. Almond milk or regular milk keeps the casserole moist. Whole wheat breadcrumbs add a crunchy topping. You also need some spices. Oregano and Italian seasoning enhance the dish's flavor. Don't forget salt and pepper to taste. Fresh herbs make a lovely garnish. They brighten the dish visually and tastefully. - Large skillet - 9x13 inch baking dish - Mixing bowl - Oven Having the right tools makes cooking easier. A large skillet is perfect for sautéing the onion and zucchini. The 9x13 inch baking dish holds all the goodness. A mixing bowl is needed to combine the wet ingredients with the zucchini. Don't forget your oven for baking the casserole. For the full recipe, check out the details above. - Preheat the oven to 375°F (190°C). - In a large skillet, heat 2 tablespoons of olive oil over medium heat. - Add 1 medium chopped onion and 2 minced garlic cloves. Sauté until the onion is translucent. This takes about 4-5 minutes. - Next, slice 4 medium zucchinis. Add them to the skillet. Cook until slightly softened, which takes about 5-7 minutes. - Season with salt, pepper, 1 teaspoon of dried oregano, and 1 teaspoon of Italian seasoning. Remove from heat and let cool slightly. - In a large mixing bowl, combine 2 large beaten eggs and 1/2 cup of unsweetened almond milk. - Add half of your cheeses: 1 cup each of shredded cheddar and mozzarella. Mix well. - Now, fold in your sautéed zucchini mixture. Make sure everything is combined evenly for great flavor. - Grease a 9x13 inch baking dish to prevent sticking. - Pour your zucchini mixture into the dish, spreading it evenly. - Top with the remaining cheeses, 1/2 cup of grated Parmesan, and the other half of the cheddar and mozzarella. - Sprinkle 1 cup of breadcrumbs evenly over the top for added crunch. - Bake in the preheated oven for 25-30 minutes. You want it golden and bubbly. - Let it cool slightly before slicing. You can garnish with fresh herbs like basil or parsley if you like. For the full recipe, check out the details above! To avoid a watery casserole, start by salting the zucchini. Place the sliced zucchini in a colander and sprinkle salt on top. Let it sit for 15-20 minutes. This process helps draw out excess moisture. Afterward, rinse the zucchini and pat it dry with a paper towel. Remember, you want the zucchini to stay firm while cooking. For evenly distributing ingredients, mix them gently but thoroughly. When you combine the sautéed zucchini with the egg and cheese mixture, fold them together. This method ensures every bite is packed with flavor. Use a spatula to scrape the sides of the bowl, so nothing gets left behind. Cheese can change the taste and texture of your casserole. Try using gouda or pepper jack cheese for a twist. These cheeses add unique flavors and can make your dish stand out. If you prefer a crunchy topping, mix breadcrumbs with a little melted butter before sprinkling them on top. This creates a golden, crispy layer. For a creamy topping, use more cheese instead of breadcrumbs. A little extra mozzarella can make it rich and gooey. Adding spices or herbs can boost flavor immensely. Try adding a pinch of red pepper flakes for heat. Fresh herbs like basil or thyme also work well. These give your casserole a fresh, vibrant taste. You can also sneak in other vegetables. Spinach or bell peppers can add color and nutrition. Make sure to chop them finely so they blend well with the zucchini. This way, you enhance both the flavor and the health benefits of your dish. For the full recipe, check out the Cheesy Zucchini Casserole 🥒 section above. {{image_2}} If you need a gluten-free option, use gluten-free breadcrumbs. Many brands offer tasty alternatives that work well in casseroles. For a dairy-free dish, you can swap cheese for plant-based versions. Look for dairy-free cheese that melts well, like cashew or almond cheese. You can switch zucchini for other veggies in this dish. Try using yellow squash, eggplant, or bell peppers for different flavors. If you want to avoid eggs, use flaxseed meal or unsweetened applesauce as a binder. These swaps keep the texture nice while adding variety. Casseroles have many styles around the world. In Mexico, add spices like cumin and chili powder for a kick. In Italy, mix in some sun-dried tomatoes and Italian herbs for a twist. Each region has unique flavors to explore, making this dish truly versatile. For the full recipe, check out the full recipe section. After you bake the Cheesy Zucchini Casserole, let it cool a bit. This helps keep the texture just right. Once cool, store it in an airtight container. You can use glass or plastic containers. Make sure they have tight lids to keep moisture out. To reheat leftovers, I suggest the oven for the best results. Preheat the oven to 350°F (175°C). Place the casserole in a baking dish, cover it with foil, and heat for about 15-20 minutes. This keeps the cheese melty and the zucchini tender. If you need to use the microwave, heat it in short bursts of 1-2 minutes. Stir in between to ensure even heating. If you want to freeze the casserole, follow these steps: 1. Let the casserole cool completely. 2. Cut it into portions for easy serving. 3. Wrap each piece in plastic wrap and place it in a freezer bag. 4. Label the bag with the date. For the best taste, use it within 2-3 months. When ready to eat, let it thaw overnight in the fridge, then reheat as mentioned above. Cheesy Zucchini Casserole lasts up to five days in the fridge. Store it in an airtight container to keep it fresh. When you are ready to eat, just reheat it in the oven or microwave. Yes, you can make this casserole ahead of time. Prepare it and store it in the fridge for up to 24 hours before baking. This way, the flavors blend well. Just pop it in the oven when you are ready to serve. Salting the zucchini helps draw out excess moisture. This keeps the casserole from being too watery. After slicing the zucchini, sprinkle salt on it and let it sit for about 10-15 minutes. Rinse and dry before cooking. Using frozen zucchini is possible, but it may change the texture. Thaw the zucchini and drain excess water before adding it to the mix. Fresh zucchini usually gives a firmer bite, but frozen can work in a pinch. Cheesy Zucchini Casserole pairs well with many dishes. You can serve it with grilled chicken, a fresh salad, or even some crusty bread. It makes a great side dish or a main meal on its own. For the full recipe, check out the complete instructions above. The Cheesy Zucchini Casserole is easy to make and delicious. We covered the key ingredients, cooking steps, and helpful tips. You can customize it with different cheeses and veggies for your taste. Remember to store leftovers properly and follow our reheating tips to keep it tasty. Enjoy this healthy dish as a meal or side. Your family will love it, and it’s perfect for busy days.

Cheesy Zucchini Casserole Easy and Flavorful Dish

Are you looking for a delicious way to enjoy zucchini? This Cheesy Zucchini Casserole is easy to make and packed

Older posts
Newer posts
← Previous Page1 … Page22 Page23 Page24 … Page71 Next →

dsad

© 2025 My Saved Recipe • Built with GeneratePress

Our Policies

  • Copyright Policy
  • Cookie Policy
  • GDPR Policy
  • Privacy Policy
  • Disclaimer
  • Terms Of Use

More Information

  • Home
  • About
  • Contact
  • Appetizers
  • Dessert
  • Dinner
  • Drinks
©2025, My Saved Recipe About Back To Top