Skip to content
DisclaimerTerms Of UseGDPR PolicyCookie Policy

My Saved Recipe

  • Home
  • Drinks
  • Appetizers
  • Dinner
  • Dessert
  • About
  • Contact
  • Privacy Policy
DisclaimerTerms Of UseGDPR PolicyCookie Policy

Savannah

Let's dive into the ingredients for this Four Cheese Mac and Cheese. Each one adds a layer of flavor and creaminess that makes this dish a delight. Here’s what you will need: - 8 oz elbow macaroni - 2 tablespoons unsalted butter - 2 tablespoons all-purpose flour - 2 cups whole milk - 1 teaspoon garlic powder - 1 teaspoon onion powder - 1 teaspoon Dijon mustard - 1 cup sharp cheddar cheese, shredded - 1 cup Gruyère cheese, shredded - 1 cup mozzarella cheese, shredded - ½ cup crumbled blue cheese - Salt and pepper to taste - ½ cup breadcrumbs - 2 tablespoons fresh parsley, chopped (for garnish) This blend of cheeses creates a rich and creamy texture. The sharp cheddar brings a bold flavor. Gruyère adds a nutty taste, while mozzarella gives that gooey stretch. Blue cheese offers a tangy kick that balances the creaminess. The pasta serves as the perfect base to soak up all that cheesy goodness. You can find the full recipe to help you make this dish shine. - Boil a large pot of salted water. - Add 8 oz elbow macaroni and cook until al dente. - This usually takes about 7-8 minutes. - Drain the pasta and set it aside. - In the same pot, melt 2 tablespoons of unsalted butter over medium heat. - Once melted, whisk in 2 tablespoons of all-purpose flour. - Stir this mix constantly for about 2 minutes until it's light golden. - Now, gradually add 2 cups of whole milk, whisking until smooth. - Keep stirring until the sauce thickens, which takes about 5-7 minutes. - Stir in 1 teaspoon each of garlic powder, onion powder, and Dijon mustard. - Season the sauce with salt and pepper to taste. - Remove the pot from heat and slowly add the cheeses: 1 cup sharp cheddar, 1 cup Gruyère, 1 cup mozzarella, and ½ cup crumbled blue cheese. - Stir until the cheese melts and the sauce is smooth. - Add the cooked macaroni to the cheese sauce, mixing well to coat. - Preheat your oven to 350°F (175°C) and pour the mac and cheese into a greased baking dish. - For a crunchy topping, mix ½ cup breadcrumbs with a little olive oil, then sprinkle over the mac and cheese. - Bake for about 25-30 minutes until the top is golden brown and crispy. You can find the Full Recipe for more in-depth steps. Enjoy your creamy and rich delight! To make a creamy cheese sauce, start with room temperature cheese. Cold cheese does not melt well. When you add it to the sauce, it can clump. Stir constantly as you cook. This helps the sauce stay smooth and avoids lumps. If you find lumps, whisk it harder until you get a smooth texture. Preheating your oven is key. Set it to 350°F (175°C) before you bake. This ensures even cooking. Once it’s in the oven, check for doneness. You want a golden top, not a burnt one. Baking time is about 25-30 minutes. Keep an eye on it as it cooks. When it's time to serve, add a sprinkle of fresh parsley on top. This adds color and freshness. You can also pair your mac and cheese with a side salad or some garlic bread. This balances the richness of the dish. For more excitement, try a crunchy topping with your favorite herbs. For the full recipe, check out the [Full Recipe]. {{image_2}} You can swap out cheeses to make your mac and cheese unique. Try using a mix of creamy brie or tangy goat cheese. Aged cheeses can add a bolder taste. The sharpness of aged cheddar or a nutty Gruyère can really enhance the flavor. Mixing different cheeses gives you a fun twist on this classic dish. Adding extras can take your mac and cheese to the next level. Cooked bacon adds a nice crunch and smoky flavor. You can also toss in some veggies like spinach or tomatoes for freshness. If you crave more spice, add some chili powder or smoked paprika. These add-ins will make your dish even more exciting. If you want a gluten-free option, you can easily adapt this recipe. Use gluten-free pasta instead of regular macaroni. For the cheese sauce, swap out regular flour for cornstarch or gluten-free flour. This way, everyone can enjoy a creamy and rich delight. Check out the Full Recipe for more tips! To keep your Four Cheese Mac and Cheese fresh, store it in an airtight container in the fridge. This helps prevent moisture loss and keeps the flavors intact. Aim to enjoy it within 3-5 days for the best quality. After that, the taste may fade, and the texture can change. If you want to save some for later, cooling it completely before freezing is key. Once cool, transfer it to a freezer-safe container. This way, you can enjoy it for a few months. When you're ready to eat it, thaw it in the fridge overnight. This ensures even reheating and keeps it tasty. For the best results, reheat your mac and cheese in the oven. This method helps restore the crispy topping that makes it so good. If you prefer the microwave, add a splash of milk to keep it moist. This simple trick brings back some creaminess and prevents it from drying out. Enjoy the rich, cheesy goodness again! The best cheese for mac and cheese is a mix of flavors and textures. I love using: - Sharp cheddar cheese for a strong flavor - Gruyère cheese for its nutty taste - Mozzarella cheese for creaminess - Blue cheese for a bold kick This blend creates a rich and complex taste. You can also try other cheeses like fontina or gouda for fun variations. Yes, you can make this recipe ahead of time. Here’s how: - Prep the dish: Follow the recipe until you mix in the cheese and macaroni. - Store: Place it in a greased baking dish. Cover it tightly with foil and keep it in the fridge. - Reheat: When ready to serve, preheat the oven. Bake it for 30-40 minutes at 350°F (175°C). This way, you save time and still enjoy a delicious meal. To make mac and cheese creamy, follow these tips: - Use room temperature cheese: This helps the cheese melt smoothly without clumps. - Don’t rush the sauce: Cook it slowly, stirring constantly. This helps prevent lumps. - Add milk gradually: Pour in the milk a little at a time. This keeps the sauce smooth and creamy. These steps will ensure your mac and cheese is a rich delight every time. For the full recipe, check out the Four Cheese Mac and Cheese. This recipe offers a simple guide to making delicious mac and cheese. We covered the necessary ingredients, how to cook the pasta, and how to create a tasty cheese sauce. Tips like using room temperature cheese help you get a smooth sauce. You can also make this dish your own with different cheeses and add-ins. Finally, the right storage and reheating methods keep your leftovers fresh. Enjoy making this classic dish that never gets old!

Four Cheese Mac and Cheese Creamy and Rich Delight

Craving a comforting bowl of pasta? Dive into my Four Cheese Mac and Cheese Creamy and Rich Delight! This rich

- Ripe bananas: Use ripe bananas for the best flavor. They should be soft and brown. This ripeness adds natural sweetness and moisture. The more spots, the better! - Coconut oil vs. butter: I love using coconut oil instead of butter. It makes the bread moist and adds a hint of coconut flavor. Coconut oil also helps keep it dairy-free for those who need it. - Sweeteners: Brown sugar is my go-to sweetener. It gives the bread a rich taste. The molasses in brown sugar makes it moist too. White sugar can work, but brown sugar is better. - Nuts: You can add walnuts or pecans. They add crunch and flavor. If you prefer no nuts, that’s okay too! - Spices: Adding cinnamon enhances the flavor. A little bit goes a long way. It makes your banana bread feel cozy and warm. - Substitute ingredients: If you need gluten-free options, use gluten-free flour. You can also try oat flour. These substitutes keep your banana bread tasty and safe for all diets. For the full recipe, make sure to check the Banana Bliss Bread 🥖 section above! Preheating the oven: Importance of temperature Preheat your oven to 350°F (175°C). This step is key. The right temperature ensures your banana bread rises well and bakes evenly. If your oven is too cool, the bread will not set properly. If it’s too hot, the outside will burn before the inside cooks. Mixing wet ingredients: How to properly combine bananas and oil In a mixing bowl, mash three ripe bananas until smooth. Next, add 1/3 cup of melted coconut oil. Mix these two ingredients well. This combination gives the bread moisture and flavor. Make sure there are no lumps. A smooth batter will help your bread bake evenly. Pouring and spreading batter: Ensuring even baking Once your batter is ready, pour it into a greased 4x8 inch loaf pan. Use a spatula to spread the batter evenly. This step helps the bread bake evenly. If the batter is uneven, some parts may cook faster than others. Checking doneness: How to use a toothpick test effectively Bake the banana bread for about 50 to 60 minutes. To check if it’s done, use a toothpick. Insert it into the center of the loaf. If it comes out clean, your bread is ready. If it has batter on it, bake a bit longer. Let the bread cool in the pan for 10 minutes. Then, turn it out onto a wire rack to cool completely. For the full recipe, follow the steps above. Enjoy making your banana bread! To make the best banana bread, avoid overmixing the batter. When you mix too much, the bread turns out tough. Mix just until the flour disappears. This keeps the bread light and fluffy. For moisture retention, use ripe bananas. The riper they are, the sweeter and softer your bread will be. Also, melt coconut oil instead of using solid butter. Coconut oil adds moisture and a slight flavor twist. To serve banana bread, slice it warm. A thin layer of butter or a drizzle of honey makes it special. You can also garnish it with sliced bananas and a sprig of mint for a fresh look. For storage, keep banana bread in an airtight container. This helps it stay soft and fresh. If you want to store it longer, freeze slices. Wrap each slice in plastic wrap and place them in a freezer bag. {{image_2}} Chocolate chip banana bread: This variant adds chocolate chips for extra sweetness. You can mix in about 1 cup of semi-sweet chocolate chips into your batter. They melt and create delicious pockets of flavor. This version is perfect for those who love a rich treat. Vegan adaptation: For a vegan option, replace the egg with flaxseed meal or applesauce. Use 1 tablespoon of flaxseed meal mixed with 2.5 tablespoons of water. Let it sit for a few minutes to thicken. You can also use almond milk or oat milk instead of dairy. This keeps your banana bread soft and yummy. Pumpkin spice banana bread: Add 1 cup of pure pumpkin puree and 1 teaspoon of pumpkin spice to your classic recipe. This gives your bread a cozy autumn flavor that warms the heart. Serve it with cream cheese for an extra treat. Tropical banana bread: To create a tropical twist, add 1/2 cup of shredded coconut and 1/2 cup of crushed pineapple. This addition brings a bright flavor that dances on your taste buds. It's perfect for summer gatherings or a sunny day at home. These variations keep your banana bread exciting and tasty, letting you explore new flavors. Try these ideas for a delightful twist on the classic banana bread! For the full recipe, check the details above. To keep your banana bread fresh, you have a couple of choices. You can store it on the counter or in the refrigerator. - Counter Storage: Place banana bread in an airtight container. It stays moist for about 3-4 days. - Refrigerator Storage: If you want it to last longer, store it in the fridge. This can keep it fresh for about a week, but it may dry out a bit. If you want to freeze banana bread, here’s how to do it: 1. Cool Completely: First, let the banana bread cool fully on a wire rack. 2. Wrap it Up: Wrap the bread tightly in plastic wrap. Make sure it is sealed well. 3. Use Freezer Bags: Place the wrapped bread in a freezer-safe bag. Squeeze out as much air as you can. 4. Label and Freeze: Mark the date on the bag, then place it in the freezer. Frozen banana bread keeps well for about 2-3 months. When you're ready to eat it, just thaw it at room temperature or in the fridge overnight. Now, how long does banana bread last? - When stored on the counter, banana bread lasts about 3-4 days. - In the fridge, it can last up to a week. Knowing when to toss it out is key. Here are signs of spoilage: - Mold: If you see any green or black spots, throw it away. - Dryness: If it feels hard and dry, it may not taste good. - Smell: A sour or off smell means it's time to let it go. Keeping these points in mind will help you enjoy your banana bread at its best! - Can I use frozen bananas? Yes, you can use frozen bananas! Just thaw them first. This makes them soft and easy to mash. They will work great in your banana bread. - How ripe should bananas be for banana bread? Look for bananas that are very ripe. They should have brown spots and feel soft. The riper the bananas, the sweeter your bread will taste. - Can I substitute the all-purpose flour? Yes, you can! Try using whole wheat flour or gluten-free flour. Each type may change the texture, so keep that in mind. - Why is my banana bread too dense? Dense banana bread often happens from overmixing the batter. Mix just until combined for a lighter texture. Also, make sure your baking soda is fresh. - How can I make my banana bread rise more? Ensure your baking soda is active. You can also add a bit more baking soda or a pinch of baking powder for extra lift. - Can I double the recipe for larger batches? Yes, you can double the recipe. Just use a larger mixing bowl and a bigger loaf pan. Baking time may change, so check with a toothpick. For the full recipe, check out the Banana Bliss Bread section. Enjoy your baking! In this post, we covered how to make delicious banana bread. We discussed key ingredients like ripe bananas, coconut oil, and brown sugar. You learned about helpful tips to improve texture and moisture. We also explored fun variations, storage options, and common questions. Banana bread is simple but rewarding. Follow these steps, and enjoy a warm slice soon. Happy baking!

Classic Banana Bread Delightfully Moist Recipe

Craving a warm slice of banana bread that melts in your mouth? Look no further! In this guide, I’ll share

- 1 cup unsalted butter, softened - 1 cup brown sugar, packed - 1/2 cup granulated sugar - 2 large eggs - 2 teaspoons vanilla extract - 2 1/2 cups all-purpose flour - 1 teaspoon baking soda - 1/2 teaspoon salt - 1 cup semi-sweet chocolate chips - 1 cup mini marshmallows - 1/2 cup crushed graham crackers When I make S'mores Cookie Bars, I start with these simple ingredients. Each one plays a key role. The unsalted butter gives a rich flavor and soft texture. Brown sugar adds moisture and a slight caramel taste. Granulated sugar makes the bars sweet and chewy. Eggs help bind everything together. The vanilla extract adds warmth and depth. All-purpose flour gives structure to the bars. Baking soda makes them rise. Salt brings out all the flavors. Then come the fun parts! The chocolate chips melt into gooey pockets of sweetness. Mini marshmallows give that classic s'mores feel. The crushed graham crackers add a delightful crunch. For more flavor, you can switch up the chocolate. Try dark chocolate or white chocolate for a tasty twist. If you have dietary needs, use gluten-free flour. This way, everyone can enjoy these yummy bars. These ingredients make S'mores Cookie Bars a treat for all ages. You can find the full recipe to help you create this easy dessert. Enjoy the process and have fun baking! 1. Preheat your oven to 350°F (175°C). Grease a 9x13 inch baking pan. You can also line it with parchment paper for easy removal. 2. In a large bowl, beat together 1 cup of softened unsalted butter, 1 cup of brown sugar, and 1/2 cup of granulated sugar. Mix until the blend is light and fluffy. 1. Add 2 large eggs into the butter mixture, one at a time. Mix well after each egg. Then stir in 2 teaspoons of vanilla extract. 2. In a separate bowl, whisk together 2 1/2 cups of all-purpose flour, 1 teaspoon of baking soda, and 1/2 teaspoon of salt. Gradually add this dry mix to the wet mix. Combine until just mixed. 1. Pour half of the cookie dough into your prepared pan. Spread it evenly. Then, sprinkle half of the 1 cup of mini marshmallows on top. 2. Pour the rest of the dough over the marshmallows. Gently press it down. Add the reserved mini marshmallows and 1 cup of semi-sweet chocolate chips on top. 3. Bake in the preheated oven for 25-30 minutes. They are ready when golden brown and a toothpick comes out clean. 1. Let the bars cool in the pan for about 15 minutes. After that, transfer them to a wire rack to cool completely. 2. Once cool, cut them into squares for serving. You can serve the bars on a rustic wooden platter. Drizzle with melted chocolate for an extra treat. Sprinkle with more crushed graham crackers and mini marshmallows to make them look great! For the complete process, check the Full Recipe for S'mores Cookie Bars. To get the right dough consistency, start with softened butter. Mix it well with sugars until it’s creamy. This step adds air, which helps the bars rise. If your dough feels too dry, add a splash of milk or an extra egg. For an even bake, spread the dough in the pan evenly. Press it down gently but firmly. Check your oven temperature with a thermometer. Ovens can vary, and you want the perfect heat. Bake until golden brown for the best taste and texture. Serve these bars on a rustic wooden platter. It adds a cozy touch. Drizzle melted chocolate over the top for a rich look. You can also sprinkle crushed graham crackers around the edges. Add a few mini marshmallows on top for a fun finish. If your bars turn out too doughy, they may need more baking time. Check them with a toothpick. If it comes out wet, bake a few more minutes. For dry bars, take care not to overmix. This can lead to dryness. If your oven runs hot or cold, adjust the bake time. Keep an eye on the bars as they bake. Set a timer for a few minutes before the suggested time. This way, you can catch them at just the right moment. {{image_2}} You can change the chocolate in your S'mores Cookie Bars. Try dark chocolate for a rich taste. White chocolate gives a sweet twist. You can also add fun mix-ins. Peanut butter adds creaminess. Chopped nuts give crunch, and dried fruit adds sweetness. These changes make your bars even more special. Make seasonal bars with different flavors. For fall, try pumpkin spice. It brings warmth and a cozy feel. You can also create mini versions. S'mores cookie bites are fun for parties. They are easy to eat and perfect for kids. Want gluten-free bars? Use gluten-free flour instead of all-purpose flour. This keeps the taste and texture yummy. If you want vegan bars, swap eggs with flaxseed meal or applesauce. Use plant-based butter and dairy-free chocolate. These changes help everyone enjoy this treat. For the full recipe, check out the details above! To keep your S'mores Cookie Bars fresh, store them in an airtight container. This helps keep them soft and tasty. You can stack the bars with parchment paper between layers to prevent sticking. These bars stay fresh for about 5 days at room temperature. Want to save some for later? You can freeze S'mores Cookie Bars easily. First, let them cool completely. Then, cut them into squares and wrap each piece in plastic wrap. Place the wrapped bars in a freezer bag. They will stay good for about 3 months in the freezer. When you're ready to eat them, thaw the bars overnight in the fridge. For a warm treat, pop them in the microwave for just a few seconds. These cookie bars go great with many things! Pair them with a glass of cold milk or hot chocolate. They also taste amazing with a scoop of vanilla ice cream on top. For gatherings, serve them on a fun platter. Drizzle melted chocolate over the bars and sprinkle crushed graham crackers for a special touch. Your friends and family will love this treat! For the full recipe, check out the complete instructions above. To make your s'mores cookie bars chewy, use more brown sugar than white sugar. Brown sugar adds moisture. Avoid overbaking them; take them out when they are just golden. Let them cool in the pan for a while before cutting. This helps keep them soft. Yes! You can use dark chocolate, milk chocolate, or even white chocolate. Each type gives a unique taste. Dark chocolate adds a rich flavor, while white chocolate is sweeter. Mix and match to find your favorite blend! S'mores cookie bars stay fresh for about 5 days at room temperature. Store them in an airtight container to keep them soft. If you want them to last longer, you can freeze them for up to 3 months. Absolutely! If you use a smaller pan, your bars will be thicker. Adjust your baking time to about 5-10 more minutes. If you use a larger pan, make them thinner and check them 5 minutes earlier. You can make s'mores cookie bars gluten-free by using gluten-free flour. Look for a 1:1 gluten-free baking flour. This makes it easy to swap. The taste and texture will still be great, so everyone can enjoy them! In this post, I shared how to make S'mores Cookie Bars with simple steps and tips. We covered all the essential ingredients, including tasty options to switch things up. The step-by-step instructions help you bake perfectly every time. Remember to cool and cut the bars right for the best results. You can store leftovers well or even freeze them for later. Enjoy experimenting with flavors and textures. Happy baking!

S’mores Cookie Bars Irresistible Treat for All Ages

Do you love s’mores? Who doesn’t? Today, I’ll show you how to turn that classic treat into S’mores Cookie Bars,

- 2 cups shredded cooked chicken (preferably rotisserie) - 1 cup cream cheese, softened - 1/2 cup Greek yogurt (or sour cream) - 1/2 cup hot sauce (like Frank's RedHot) - 1 cup shredded cheddar cheese - 1/2 cup crumbled blue cheese (optional) - 1 tablespoon ranch seasoning mix - 1/4 teaspoon garlic powder - Salt and pepper to taste - Fresh chives or green onions for garnish When making Buffalo Chicken Dip, the right ingredients matter. The chicken gives it a hearty base. I like using rotisserie chicken for ease and flavor. Cream cheese adds a rich creaminess. Greek yogurt can bring tang and lightness, but sour cream works too. Hot sauce is key for that spicy kick. I recommend Frank’s RedHot for its classic flavor. Cheddar cheese melts beautifully, adding a savory depth. Blue cheese adds an extra layer of flavor but is optional. Ranch seasoning ties it all together, while garlic powder enhances the taste. Don’t forget salt and pepper for balance. Finally, fresh chives or green onions bring color and freshness to the dip. - Alternatives for Greek yogurt: You can use plain yogurt or buttermilk. These will give you a similar tang. - Low-fat options for cream cheese: Try low-fat cream cheese or a blend with cottage cheese. This will lighten the dip while keeping it creamy. - Different types of hot sauce: You can swap it for any hot sauce you like. Sriracha or a chipotle sauce can add a unique twist. For the full recipe, check out the detailed steps to make this dip shine! 1. Preheating the oven Start by preheating your oven to 350°F (175°C). This step helps create a nice, warm dip. 2. Mixing ingredients in a bowl In a large mixing bowl, combine your shredded cooked chicken, softened cream cheese, and Greek yogurt. Mix these ingredients well until the texture is smooth. Then, add the hot sauce, shredded cheddar cheese, and optional blue cheese. Don’t forget the ranch seasoning mix and garlic powder! Season with salt and pepper to taste. 1. Transferring the mixture to a baking dish Once your mixture is ready, transfer it to a baking dish. Spread it out evenly so it heats well all over. 2. Baking time and temperature Place the baking dish in your preheated oven. Bake for 20-25 minutes. You want it to be bubbly and light golden on top. Keep an eye on it to avoid burning. 1. Cooling the dip before serving After baking, remove the dip from the oven. Let it cool for a few minutes. This helps prevent burns when you serve it. 2. Garnishing with chives or green onions Finally, garnish your dip with chopped chives or green onions for a fresh touch. This adds color and flavor to your dish. You can now enjoy your Buffalo Chicken Dip warm and creamy! For the complete recipe, check the Full Recipe section. To make your Buffalo chicken dip extra creamy, use a mix of cream cheese and Greek yogurt. This blend gives you a rich taste without being too heavy. If you want it even creamier, add more cream cheese. You can also stir in a touch of heavy cream for that dreamy texture. Adjusting spice levels is easy. Start with half the hot sauce to see how it tastes. If you like it hotter, mix in more sauce until it suits your taste. You can also add a pinch of cayenne for extra heat. For the best dippers, tortilla chips work wonders. They add crunch and flavor. Celery sticks are great for a fresh bite. Carrot sticks also pair nicely, adding a hint of sweetness. When it comes to drinks, cold beer is a classic match. You can also serve soda or iced tea for a non-alcoholic option. These drinks help balance the heat of the dip. Get creative with your serving vessels! A cast-iron skillet gives a rustic feel. You can also use a colorful bowl to brighten the table. Arrange dippers around the dip for a fun look. To make it visually appealing, sprinkle chopped chives or green onions on top. This adds a pop of color and freshness. You can even place some extra cheese on top before baking for a golden finish. For the full recipe, check out the details above! {{image_2}} To make your Buffalo Chicken Dip unique, try different cheese blends. You can mix cheddar, mozzarella, or pepper jack. Each cheese adds its own taste and creaminess. Adding veggies can also enhance the dip. Chopped celery, bell peppers, or green onions give a fresh crunch. If you want more protein, throw in some black beans or shredded pork. These swaps keep the dip exciting every time you make it. If you need gluten-free options, this dip is perfect! All the ingredients are naturally gluten-free. Just check your hot sauce label. For a vegetarian version, swap out the chicken for canned chickpeas or lentils. You still get that great flavor without meat. Use a plant-based cream cheese and Greek yogurt for a fully vegetarian dip. These changes help everyone enjoy this dish. You can cook this dip in different ways. The slow cooker is great for a hands-off approach. Just mix your ingredients, set it to low, and let it warm for a few hours. If you're short on time, use the microwave. Combine everything in a microwave-safe bowl. Heat in 30-second bursts, stirring in between, until warm and creamy. These methods let you enjoy this dip no matter your schedule. For the full recipe, refer back to the ingredients and steps shared. To keep your Buffalo Chicken Dip fresh, use airtight containers. Glass containers work best. They don't retain odors and are easy to clean. If you use plastic, ensure it's BPA-free. Before sealing, let the dip cool to room temperature. This step helps prevent condensation. Store it in the fridge for up to 4 days. You can reheat Buffalo Chicken Dip in two main ways: the microwave or the oven. - Microwave: Place the dip in a microwave-safe bowl. Heat in short bursts of 30 seconds, stirring in between. This method warms it quickly but may dry it out. - Oven: Preheat the oven to 350°F (175°C). Place the dip in an oven-safe dish and cover it with foil. Bake for about 15 minutes or until heated through. The oven keeps the dip creamy and maintains the texture. For the best results, always stir the dip before serving. This ensures even heat distribution. Freezing Buffalo Chicken Dip is easy and great for meal prep. - Guidelines for freezing: Allow the dip to cool completely. Then, transfer it to a freezer-safe container. Leave some space at the top for expansion. Seal tightly and label it with the date. The dip can last up to 3 months in the freezer. - Thawing and reheating frozen dip: When ready to use, thaw the dip in the fridge overnight. Reheat it in the microwave or oven as described above. Stir well after reheating to blend the flavors. Enjoy your Buffalo Chicken Dip anytime by following these simple storage tips! For the full recipe, check out the earlier section. Buffalo chicken dip is a creamy and spicy dip made with shredded chicken, cream cheese, and hot sauce. It’s a crowd-pleaser at parties and game days. The dip has a rich, tangy flavor, often enhanced with cheese and spices. You can serve it warm with chips or veggies for dipping. Yes, you can make Buffalo chicken dip ahead of time. Prepare the dip and store it in the fridge for up to two days. When ready to serve, just bake it until hot and bubbly. This way, you save time on the day of your gathering. Buffalo chicken dip lasts about three to four days in the fridge. Make sure to store it in an airtight container to keep it fresh. If you notice any off smells or changes in texture, it’s best to toss it. Safety first! Buffalo chicken dip can be spicy, depending on the hot sauce you use. If you prefer less heat, try using less hot sauce or a milder brand. You can also mix in some creamy ingredients like sour cream or yogurt to tone down the spice. Adjust the flavor to suit your taste! Buffalo Chicken Dip is a tasty dish made with simple ingredients. We covered what you need, how to prepare it, and tips for perfecting the flavor. Remember, you can easily swap some ingredients or adjust the spice to suit your taste. Whether you serve it at a party or enjoy it at home, you can make this dip your own. Follow these steps, and you’ll have a dish everyone will love. Enjoy your cooking and impress your guests!

Savory Buffalo Chicken Dip Easy and Creamy Recipe

Craving a dip that packs a punch? My Savory Buffalo Chicken Dip recipe is your answer! It’s creamy, easy to

To make honey garlic glazed salmon, you need a few key ingredients. Each one brings its own special flavor. Here is the list of ingredients: - Salmon fillets - Honey - Soy sauce - Garlic - Fresh ginger - Sesame oil - Olive oil - Lime juice - Salt and pepper - Green onions - Sesame seeds Using fresh ingredients makes a big difference. Fresh salmon fillets are the star of the dish. They provide a rich taste and firm texture. Honey adds sweetness, while soy sauce gives depth. Garlic and ginger bring warmth and zest. The sesame oil adds a nutty flavor that pairs well with the salmon. Olive oil helps to cook the fish evenly. Lime juice brightens the dish and cuts through the richness. Salt and pepper enhance all the flavors. For garnish, green onions and sesame seeds add color and crunch. These small touches make your meal look beautiful. You can check the [Full Recipe] for more details. With this list, you are ready to create a tasty and simple meal. Each ingredient works together to make honey garlic glazed salmon a favorite dish. To start, you need to make the marinade. In a small bowl, whisk together the honey, soy sauce, minced garlic, grated ginger, sesame oil, lime juice, salt, and pepper. Mix it well. This sauce is sweet and savory. It adds great flavor to the salmon. You can taste it to see if it needs more salt or honey. Next, take your salmon fillets and place them in a shallow dish or a resealable bag. Pour the marinade over the salmon. Make sure each piece is well-coated. This helps the flavors soak in. Cover the dish or seal the bag. Place it in the fridge for at least 30 minutes. You can marinate for up to 2 hours for a stronger flavor. Now it’s time to cook the salmon. Preheat your oven to 400°F (200°C). Heat olive oil in an oven-safe skillet on medium-high heat. Once hot, take the salmon out of the marinade. Let the excess marinade drip off. Place the salmon in the skillet, skin-side down. Sear the salmon for about 3-4 minutes. The skin should be crispy. Carefully flip the fillets and pour any leftover marinade over them. Transfer the skillet to the oven. Bake for 8-10 minutes. The salmon is ready when it flakes easily with a fork. For a caramelized glaze, broil it for 1-2 minutes. Just watch it closely so it doesn’t burn. After cooking, let it rest for a minute. Garnish with sliced green onions and sesame seeds before serving. Enjoy this delicious meal! For the full recipe, refer to the earlier section. When you pick salmon, look for bright colors. Fresh salmon should have a deep pink or red hue. The flesh must feel firm and moist. Avoid fish that smells too strong or looks dull. If possible, buy from a trusted local market or fishmonger. They often have the best quality. To get a great glaze, start with the right marinade. Mix honey, soy sauce, garlic, and ginger well. Let your salmon soak in this mix for at least 30 minutes. The longer it sits, the more flavor it gets. When cooking, sear the skin side first. This step helps the glaze stick and gives you that crispy texture. Tweak the taste based on your liking. If you want it sweeter, add more honey. For more saltiness, increase the soy sauce. Remember, balance is key. Taste the marinade before you add the salmon. You can always adjust it. These small tweaks can make a big difference in your meal. For the full recipe, check the detailed instructions. {{image_2}} You can use other fish for this dish. Options like trout or tilapia work well. Both fish have mild flavors and absorb the marinade nicely. The cooking time may change. Check for doneness often to avoid overcooking. Adding vegetables can make your meal more colorful and healthy. Try bell peppers, broccoli, or snap peas. Toss them in the marinade too. Bake them alongside your fish for a full meal. You can also stir-fry them separately with a bit of olive oil. You can change this dish to fit the season. In spring, use fresh asparagus or peas. In summer, add zucchini or tomatoes. For fall, try sweet potatoes or Brussels sprouts. In winter, root veggies like carrots or parsnips work great. These swaps keep the dish exciting and fresh. For the full recipe, visit the link above. Store leftover honey garlic glazed salmon in an airtight container. I recommend placing it in the fridge within two hours of cooking. It will stay fresh for 2 to 3 days. To keep the fish moist, add a splash of lime juice before sealing. You can freeze honey garlic glazed salmon for up to 3 months. Wrap each fillet tightly in plastic wrap. Then, place them in a freezer-safe bag. Remove as much air as possible to prevent freezer burn. Label the bag with the date before freezing. To reheat, take the salmon out of the fridge or freezer. If frozen, let it thaw overnight in the fridge. Once thawed, preheat your oven to 350°F (175°C). Place the salmon on a baking sheet and cover it with foil. Heat for about 10-15 minutes, or until warmed through. This method keeps the fish tender and juicy. You can also microwave it on a low setting for quick reheating, but it may dry out. For the full recipe, check out the complete details above. Yes, you can use other fish. Try trout, tilapia, or cod. Each fish has its own flavor. These options work well with honey and garlic. Just adjust cooking times as needed. Thinner fish may cook faster, while thicker ones may take longer. You can marinate the salmon for 30 minutes to 2 hours. Longer marinating gives more flavor. Just don’t marinate too long. The fish may become mushy. Always keep it in the fridge while marinating. Many sides pair nicely with honey garlic glazed salmon. Here are a few great options: - Steamed broccoli - Roasted asparagus - Garlic mashed potatoes - Rice or quinoa - Mixed green salad These sides bring balance to the meal. They add freshness and texture. You can mix and match based on what you like or have on hand. This post shared a simple recipe for honey garlic glazed salmon. We covered the ingredients, marinating steps, and cooking methods. I also provided tips to choose fresh salmon and create the perfect glaze. You learned about tasty variations and how to store leftovers properly. Experiment with this dish to make it your own. Enjoy the flavors, and share it with others!

Honey Garlic Glazed Salmon Delicious and Simple Meal

Are you ready to impress your taste buds with a simple yet delightful dish? Honey Garlic Glazed Salmon is just

This One-Pot Cajun Sausage Pasta is a quick and tasty meal. It uses simple ingredients and cooks in about 30 minutes. The blend of spices and cream makes it rich and satisfying. You only need one pot, which means less cleanup! - 12 ounces penne or fusilli pasta - 1 tablespoon olive oil - 1 pound smoked sausage, sliced (try andouille or kielbasa) - 1 medium onion, diced - 1 red bell pepper, diced - 1 green bell pepper, diced - 3 cloves garlic, minced - 1 can (14.5 ounces) diced tomatoes (with juice) - 3 cups chicken broth - 1 tablespoon Cajun seasoning (adjust to taste) - 1 teaspoon dried oregano - ½ teaspoon cayenne pepper (optional, for extra spice) - Salt and pepper to taste - 1 cup heavy cream - 1 cup shredded cheddar cheese - Fresh parsley, chopped (for garnish) You can add more veggies to boost nutrition. Try adding spinach or zucchini. For a smoky kick, consider adding a dash of smoked paprika. You might also swap out cheddar for pepper jack cheese for more heat. These small changes can make this dish even better! First, gather all your ingredients. You will need: - 12 ounces penne or fusilli pasta - 1 tablespoon olive oil - 1 pound smoked sausage, sliced (try andouille or kielbasa) - 1 medium onion, diced - 1 red bell pepper, diced - 1 green bell pepper, diced - 3 cloves garlic, minced - 1 can (14.5 ounces) diced tomatoes (with juice) - 3 cups chicken broth - 1 tablespoon Cajun seasoning (adjust to taste) - 1 teaspoon dried oregano - ½ teaspoon cayenne pepper (optional) - Salt and pepper to taste - 1 cup heavy cream - 1 cup shredded cheddar cheese - Fresh parsley, chopped (for garnish) Next, chop the onion, bell peppers, and garlic. Slice the sausage too. This makes cooking easier. In a large pot, heat the olive oil over medium heat. Add the sliced sausage. Cook it until it turns brown, about 5 minutes. Then, add the diced onion, red bell pepper, and green bell pepper. Sauté these veggies until they soften, which takes around 4-5 minutes. Stir in the minced garlic and cook for 1 more minute. Now, pour in the diced tomatoes with their juice. Add the chicken broth, Cajun seasoning, oregano, cayenne pepper, salt, and pepper. Bring this mixture to a boil. Once it boils, stir in the uncooked pasta. Lower the heat to a simmer and cover the pot. Cook for 12-15 minutes, or until the pasta is tender. Stir occasionally to prevent sticking. After the pasta cooks, stir in the heavy cream and shredded cheddar cheese. Mix well until the cheese melts and everything is combined. Taste it and adjust the seasoning if needed. Finally, garnish with fresh parsley before serving. Check out the Full Recipe for more details and tips. Enjoy your tasty One-Pot Cajun Sausage Pasta! When you cook pasta, always use a large pot. This gives the pasta room to move. Add enough water to cover the pasta. Use about 4-6 quarts of water for every pound of pasta. Salt the water well before adding pasta. This adds flavor right from the start. Stir the pasta often while it cooks. This helps prevent sticking. Cook it until it's al dente, meaning it still has a slight bite. Drain the pasta but save a cup of the cooking water. This starchy water can help thicken your sauce if needed. To boost flavor, use high-quality ingredients. Fresh vegetables and good sausage make a big difference. Adding fresh herbs at the end, like parsley, brightens the dish. You can also add a splash of lemon juice for a fresh kick. If you like heat, consider more Cajun seasoning or some hot sauce. For a touch of creaminess, mix in more heavy cream or cheese. This will make each bite rich and satisfying. One common mistake is not salting the water. This can leave your pasta bland. Also, don’t let the water boil too hard after adding pasta. It can break the noodles apart. Avoid rinsing your pasta after cooking. Rinsing removes the starch that helps sauces stick. Lastly, don't skip tasting your dish before serving. Adjust the seasoning as you go to ensure each bite is perfect. Following these tips will help you make a delicious one-pot Cajun sausage pasta. For the full recipe, check out the complete guide above. {{image_2}} You can add more veggies to boost nutrition. Try spinach, zucchini, or mushrooms. These add color and flavor. Add them when you cook the sausage. This way, they soften and blend well. It’s a great way to sneak in healthy foods. Want a meat-free version? Swap the sausage for plant-based options. Use lentils or chickpeas for protein. You can also use a variety of beans. This keeps the dish filling and tasty. Add a touch of smoked paprika for that Cajun flavor. You won’t miss the meat! If you want a lighter dish, use half-and-half or coconut milk instead of heavy cream. This gives a unique twist and still makes the dish creamy. For cheese, try goat cheese or a dairy-free cheese option. Each choice changes the flavor nicely. You can have fun experimenting with these options! After enjoying your One-Pot Cajun Sausage Pasta, let it cool. Place leftovers in an airtight container. This helps keep the pasta fresh. Store it in the fridge. It will last for about three to four days. If you want to save some for later, consider freezing it. First, let the pasta cool completely. Then, pack it in freezer-safe bags or containers. Try to remove as much air as possible. This will prevent freezer burn. Your pasta will stay good for up to three months in the freezer. When you're ready to eat the leftovers, it's easy to reheat. You can use the microwave or the stove. For the microwave, heat in short bursts, stirring in between. If using the stove, add a splash of water or broth to help it heat evenly. Stir often until it's warm throughout. Enjoy your meal again! To spice up your One-Pot Cajun Sausage Pasta, you can add more Cajun seasoning. A sprinkle of cayenne pepper boosts the heat too. If you like heat, add diced jalapeños when you sauté the vegetables. For an even bolder flavor, toss in some hot sauce before serving. Taste as you go, so you find that perfect heat level for you. Yes, you can use other pasta shapes! While penne or fusilli work best, you can try rotini or even spaghetti. Just adjust your cooking time based on the shape you choose. Smaller pasta may cook faster, while larger shapes may take a bit longer. Always check the package for cooking time to ensure it's just right. In this recipe, pasta cooks for about 12 to 15 minutes. After adding the uncooked pasta, lower the heat and cover the pot. Stir occasionally to prevent sticking. You want the pasta to be tender but not mushy. It should absorb some liquid for that creamy texture. Check it after 12 minutes to see if it's ready! For the full recipe, be sure to check out the details I’ve provided above! This blog post covered everything you need for making One-Pot Cajun Sausage Pasta. We explored key ingredients, step-by-step cooking, and smart tips for success. Remember, you can enhance flavors and make variations to suit your taste. Proper storage will keep your leftovers fresh, and our FAQs addressed common questions. Enjoy making this dish your own. Cooking can be fun and rewarding when you know the basics and have the right tools. Embrace your creativity and have a great time in the kitchen!

One-Pot Cajun Sausage Pasta Quick and Flavorful Meal

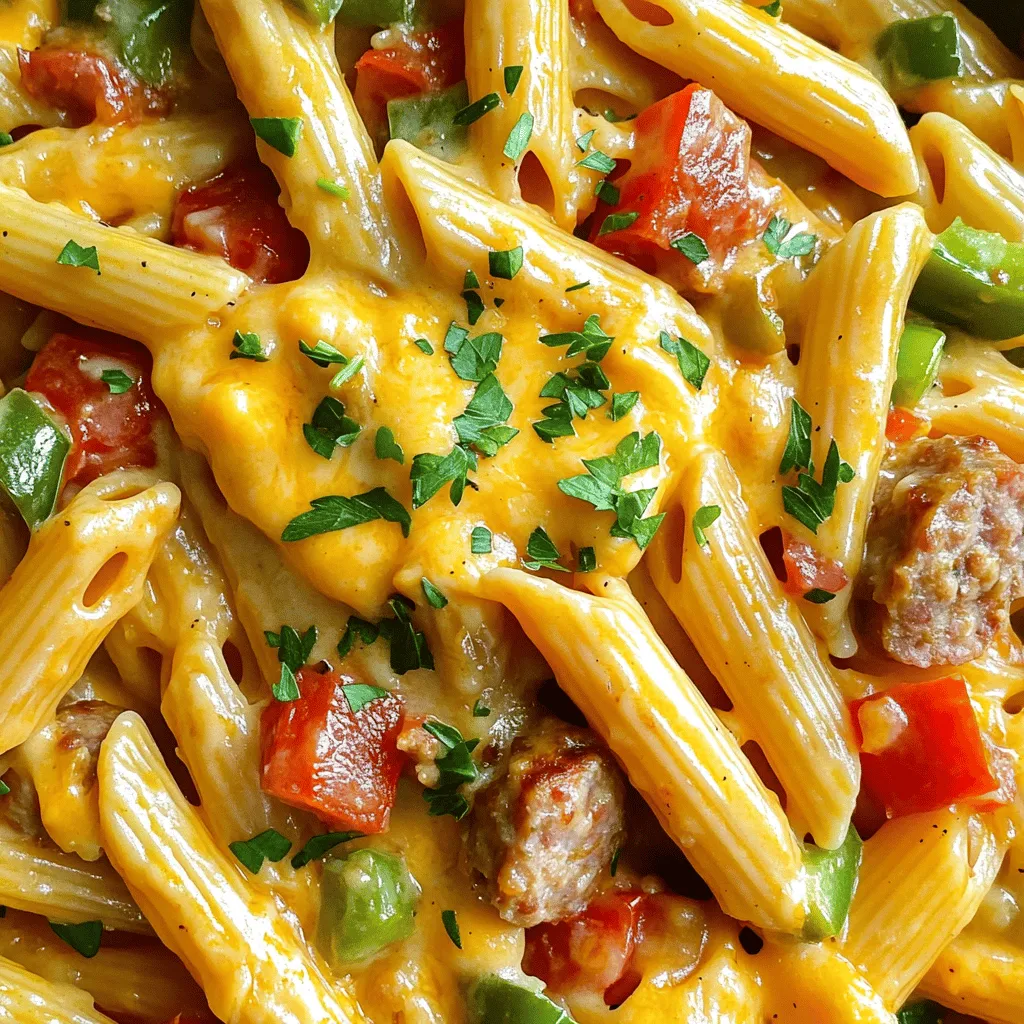
Looking for a quick and tasty meal? One-Pot Cajun Sausage Pasta is your answer! This dish brings together bold flavors

For this dish, you need large shrimp. I recommend using one pound of shrimp that are peeled and deveined. Fresh shrimp makes a big difference. It gives better taste and texture. If you can't find fresh shrimp, frozen works too. Just make sure to thaw them properly before cooking. You will need a few key spices. Here’s a list of what to grab: - 4 tablespoons unsalted butter - 4 cloves garlic, minced - 1 teaspoon lemon zest - 2 tablespoons lemon juice - 1/2 teaspoon red pepper flakes (adjust for spice preference) - Salt and pepper to taste These spices bring out the shrimp's flavor. Garlic adds a nice aroma, while lemon gives a fresh kick. The red pepper flakes add a touch of heat that you can change based on your taste. To complete your dish, you'll want a base. I suggest serving over cooked rice or pasta. These sides soak up the delicious garlic butter sauce. You can also add fresh parsley on top for a colorful finish. It makes the dish look pretty and adds a nice herb flavor. For a fun twist, you can serve it with lemon wedges on the side. This gives your guests a zesty option to enhance their meal. For the full recipe, check out Garlic Butter Shrimp Delight. To make easy garlic butter shrimp, start by gathering your ingredients. You will need one pound of large shrimp, four tablespoons of unsalted butter, four minced garlic cloves, and chopped parsley. Also, grab some lemon zest and juice, red pepper flakes, salt, and pepper. 1. Heat a large skillet over medium heat. 2. Melt the unsalted butter in the skillet. 3. Add the minced garlic and stir for one to two minutes. Do not let it burn. 4. Raise the heat to medium-high. Place the shrimp in a single layer. Season with salt and pepper. 5. Cook the shrimp for two to three minutes on one side. They should turn pink and opaque. 6. Flip the shrimp and sprinkle in red pepper flakes, lemon zest, and lemon juice. 7. Cook for one to two more minutes. The shrimp should be fully cooked and coated in sauce. 8. Take the skillet off the heat and mix in the chopped parsley. 9. Serve the shrimp over cooked rice or pasta. Drizzle extra sauce on top. For shrimp that are juicy and tender, avoid overcooking them. Cook just until they turn pink. They cook quickly, so watch them closely. If they curl tightly, they may be overdone. I love serving garlic butter shrimp in a large shallow bowl. Garnish with extra parsley and lemon wedges for a pop of color. You can also add a side salad or garlic bread to complete the meal. For the full recipe, refer to the instructions above. When picking shrimp, look for a firm texture and shiny skin. Fresh shrimp should smell like the ocean, not fishy. Always buy shrimp that are kept on ice. If you can, ask your fishmonger for wild-caught shrimp. They often taste better than farmed shrimp. For rich flavor, use high-quality unsalted butter. Start with fresh garlic, as it packs more punch. Sauté the garlic until just golden, about one to two minutes. This step brings out the garlic's natural sweetness. Don't let it burn, as burnt garlic tastes bitter. If you're feeling adventurous, add a splash of white wine for depth. To control heat, use red pepper flakes wisely. Start with a half teaspoon and taste your dish. You can always add more if needed. For a milder flavor, skip the red pepper flakes entirely. If you like more heat, try fresh chili or hot sauce. Adjusting spice levels lets you create the perfect shrimp dish for your taste. {{image_2}} You can boost the health of your garlic butter shrimp by adding veggies. Spinach, bell peppers, or zucchini work well. Just chop them into bite-sized pieces. Add the vegetables to the skillet after the garlic. Cook them for a few minutes before adding the shrimp. This way, you keep the shrimp tender and juicy while adding fiber and vitamins. You can change the taste of this dish easily. For a spicy kick, use chili garlic sauce instead of red pepper flakes. If you want a sweeter flavor, add some honey or a dash of soy sauce. You can also try herbs like thyme or basil for a fresh twist. Each change gives you a new dish, keeping it fun and exciting. Garlic butter shrimp tastes great with many sides. Rice or pasta is classic, but you can also serve it with a fresh salad or crusty bread. The bread is perfect for soaking up all that delicious sauce. If you want a hearty meal, consider pairing it with quinoa or a veggie stir-fry. Each option makes the dish more filling and satisfying. To keep your garlic butter shrimp fresh, cool it first. Use an airtight container. This prevents air from getting in and keeps the shrimp safe. You can also use plastic wrap to cover the dish tightly. Store it in the fridge for best results. Avoid leaving it out at room temperature. Garlic butter shrimp lasts about three days in the fridge. After that, the quality may drop. You can enjoy it for lunch or dinner within that time. If you want to keep it longer, consider freezing it. It can last up to three months in the freezer. Just remember to label the container with the date! When you’re ready to eat, reheat the shrimp gently. The best way is to use a skillet over low heat. Add a little butter or oil to keep it moist. Stir it often to avoid burning. You can also use a microwave. Heat it in short bursts, checking often to ensure it warms evenly. This way, you keep the flavor and texture great! For the full recipe, check out the Garlic Butter Shrimp Delight! Yes, you can use frozen shrimp. Just thaw them first. Place them in cold water for about 15 minutes. This helps them cook evenly. Pat them dry before adding to the skillet. Frozen shrimp can be just as tasty as fresh. You can add many things to garlic butter shrimp. Here are some ideas: - Cherry tomatoes for a sweet touch. - Spinach for a pop of color. - Mushrooms for an earthy flavor. - Zucchini for extra crunch. These additions make the dish more colorful and nutritious. You can mix and match based on your taste. To know when shrimp are done, look for a few signs: - They turn pink and opaque. - They curl into a C shape. - They firm up when touched. Cooking shrimp usually takes about 4-5 minutes. Don’t overcook them, or they become rubbery. Be sure to check them closely for perfect results. This blog post covered how to prepare garlic butter shrimp. We discussed fresh shrimp, essential spices, and serving ideas. You learned tips for cooking shrimp perfectly and making the dish shine. We explored variations, storage, and reheating methods. Remember, fresh shrimp and quality spices make a big difference! Enjoy your cooking journey and feel free to experiment with flavors. Your garlic butter shrimp will surely impress!

Easy Garlic Butter Shrimp Tasty and Quick Recipe

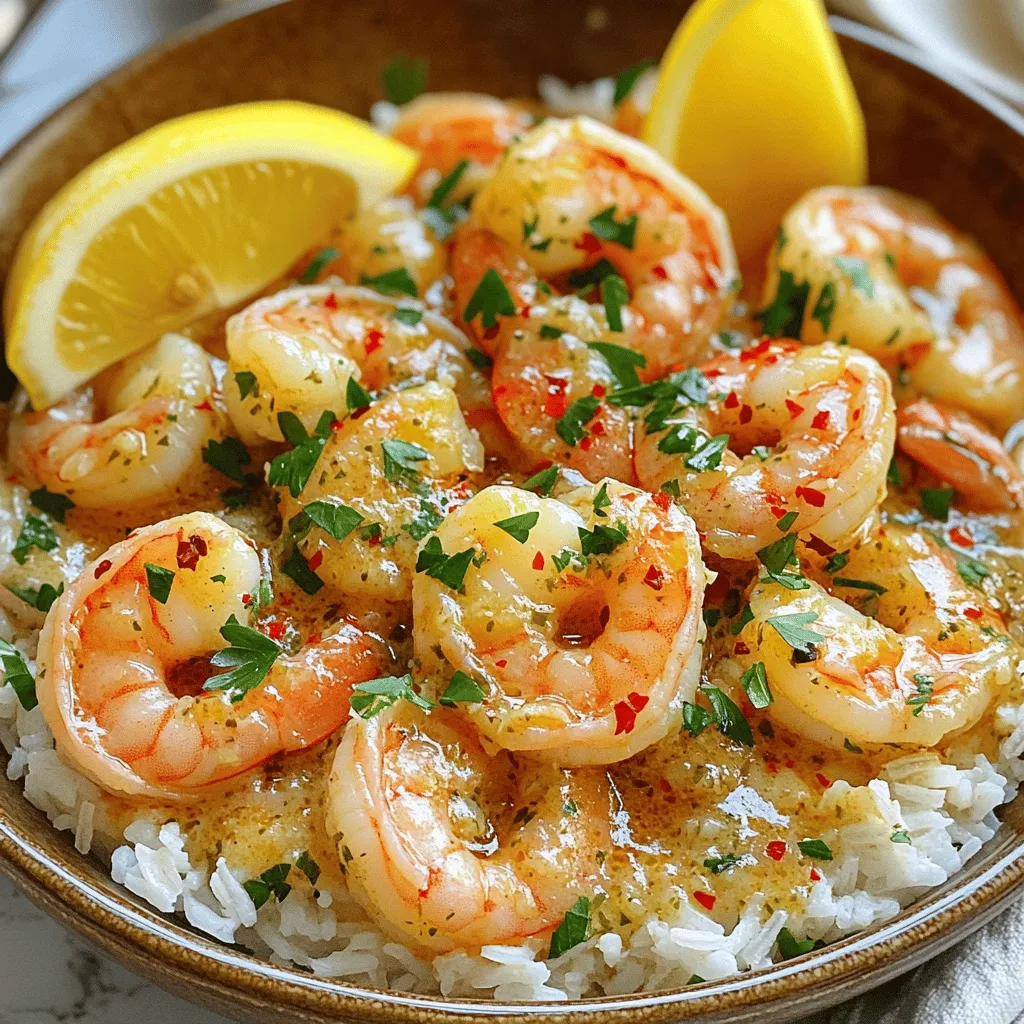
If you’re craving a quick and tasty meal, you’ve found it! This Easy Garlic Butter Shrimp recipe is the perfect

- 2 cups cooked chicken, shredded - 1 cup carrots, diced - 1 cup green peas (fresh or frozen) - 1 cup potatoes, diced (Yukon Gold or Russet work well) - 1 small onion, finely chopped - 2 cloves garlic, minced - 1 package (2 crusts) refrigerated pie crusts (or homemade if you prefer) Classic chicken pot pie starts with simple, fresh ingredients. You can use leftover chicken or rotisserie chicken. Fresh veggies add flavor and color. I love using carrots, peas, and potatoes for texture. The onion and garlic give a nice base flavor. - 1/4 cup butter - 1/4 cup all-purpose flour - 2 cups chicken broth - 1 cup milk You need butter to sauté the veggies and make a creamy sauce. Flour helps thicken the filling. Chicken broth adds depth. Milk brings it all together, making it rich and smooth. - 1 teaspoon dried thyme - Salt and pepper to taste A touch of dried thyme elevates the dish with earthy notes. Salt and pepper enhance all the flavors. These simple seasonings make a huge difference in taste. For the full recipe, you can check the detailed instructions to create this warm, cozy meal. To start, I melt butter in a large pot over medium heat. I add the chopped onion and minced garlic. Sauté for about 2-3 minutes until the onions turn soft and clear. Then, I stir in the diced carrots and potatoes. I let them cook for about 5 minutes until they begin to soften. Next, I sprinkle flour over the veggie mix. I stir well to coat all the pieces. This helps to thicken the sauce later. I let it cook for 1-2 minutes to get rid of the raw flour taste. After that, I am ready to add the chicken broth and milk. I whisk it in slowly, stirring constantly. This keeps the sauce smooth. I cook it until it thickens, which takes about 5-7 minutes. Finally, I mix in the shredded chicken, green peas, thyme, salt, and pepper. I stir until everything is well combined. Then, I remove it from heat and let it cool slightly. Now comes the fun part! I roll out one pie crust and place it into a 9-inch pie dish. I pour the chicken filling right into the crust. It should fill the dish nicely. Next, I roll out the second pie crust. I place it over the filling and seal the edges. I like to crimp them with a fork or my fingers. This keeps the filling inside. I also cut a few small slits in the top to let steam escape. To make it shine, I brush the top crust with a beaten egg. This gives it a beautiful golden color when baked. Before I bake, I preheat my oven to 425°F (220°C). This ensures the pie cooks evenly. I then bake the pot pie for 30-35 minutes. It is done when the crust is golden brown and smells amazing. After baking, I let the pot pie cool for about 10 minutes. This helps the filling settle. It also makes slicing easier. For a full recipe, check out the complete cooking directions in the section above. To get a golden color on your crust, brush it with a beaten egg. This step makes a lovely shine. It also helps the crust brown nicely in the oven. Bake your pie at 425°F (220°C) for about 30-35 minutes. Keep an eye on it as it cooks. To prevent a soggy bottom, make sure to cook your filling until it thickens. Pour the filling into the crust only after it cools slightly. This way, steam escapes and does not make your crust wet. Adjusting the thickness of your filling is key. If it feels too thin, add a bit more flour when cooking. If it’s too thick, add a splash of broth or milk. Stir well to mix. Cooling time is important. Let the filling cool for about 10 minutes before pouring it into the crust. This helps the filling set and keeps the crust crispy. Chicken pot pie pairs well with a fresh side salad. Toss mixed greens with a simple vinaigrette for a light touch. You can also serve it with roasted vegetables for extra flavor. For presentation, slice the pie into wedges and place them on individual plates. A sprinkle of fresh parsley on top adds color. This makes the dish look even more inviting. For the full recipe, check out the detailed cooking instructions. {{image_2}} You can change the protein in your pot pie. Instead of chicken, try turkey or even beef. For a lighter dish, shrimp adds a nice twist. If you want a meatless option, use tofu or chickpeas. They soak up flavors well. You can also use lentils for a hearty and satisfying meal. For vegan or vegetarian options, swap out chicken broth for vegetable broth. Use a plant-based milk too. You can try mushrooms for a meaty texture. Adding more fresh veggies like zucchini or bell peppers gives great flavor. Adding herbs or spices is a fun way to boost taste. Fresh thyme or rosemary can make your pot pie sing. A pinch of nutmeg adds warmth. You can also use a dash of hot sauce for a little kick. Experiment with garlic powder or onion powder for extra depth. Cheese can elevate the dish too. Try adding grated cheddar or mozzarella to the filling. This brings a creamy texture and rich flavor. A sprinkle of Parmesan on top before baking gives a nice crust. If you want a homemade crust, it’s quite simple. Mix flour, butter, and a pinch of salt. Add cold water until it forms a ball. Roll it out and fit it into your pie dish. This gives a fresh taste that store-bought crusts can’t match. For those avoiding wheat, use alternative grains. Try crust made from almond flour or oats. You can even use mashed potatoes as a topping. This adds a unique twist and makes your pot pie gluten-free. For the full recipe, click here. To store leftovers, let the chicken pot pie cool. Then, cover it tightly. Use plastic wrap or aluminum foil. You can also use an airtight container. This keeps the pie fresh for up to three days. Make sure to keep it in the fridge. When you want to eat it again, just reheat it. To freeze chicken pot pie, let it cool completely. Wrap it well with plastic wrap, then foil. This helps prevent freezer burn. You can also freeze it before baking. It lasts for about two months in the freezer. When you are ready to eat, thaw it overnight in the fridge. For reheating from frozen, bake it at 375°F (190°C) for about 50-60 minutes. Cover it with foil for the first half to avoid burning. Then, remove the foil to brown the crust. Enjoy your comforting meal! To make a gluten-free chicken pot pie, start with gluten-free pie crusts. You can find these in stores or make your own with gluten-free flour. For the filling, use the same ingredients. Just replace all-purpose flour with cornstarch or a gluten-free flour blend. Mix the cornstarch with a bit of cold broth before adding it to the pot to avoid lumps. Cook until thickened, just like in the regular recipe. Yes, you can prepare the filling ahead of time. Cook the filling and let it cool. Store it in an airtight container in the fridge for up to two days. This saves time on the day you bake the pot pie. When ready to bake, just fill the crust with the cold mixture. Chicken pot pie pairs well with many side dishes. Here are some great options: - Fresh green salad - Steamed broccoli - Roasted Brussels sprouts - Mashed potatoes These sides add color and balance to your meal. For complete cooking directions, check out the Full Recipe. It gives you all the steps and tips to make a perfect chicken pot pie. Making a chicken pot pie is simple and fun. We covered key ingredients like chicken, veggies, and crust. I shared how to prepare the filling and put it all together. You learned tips to get the crust just right and enjoyed some variations for extra flavor. I also gave advice on storage and answered common questions. With this guide, you can create your own tasty chicken pot pie. Enjoy the cooking process and savor each bite!

Classic Chicken Pot Pie Simple and Tasty Comfort Dish

Are you craving a warm, hearty meal that feels like a big hug? Look no further than classic chicken pot

To make a tasty Cheesy Broccoli Rice Casserole, you need some key ingredients. Each one plays a big role in flavor and texture. Here’s what you will need: - 2 cups of cooked white or brown rice - 3 cups of fresh broccoli florets - 1 cup of shredded sharp cheddar cheese - 1 cup of cream of mushroom soup - 1/2 cup of milk - 1/2 teaspoon garlic powder - 1/2 teaspoon onion powder - 1/4 teaspoon black pepper - 1/2 teaspoon salt - 1/2 cup of breadcrumbs - 2 tablespoons melted butter - Optional: 1/4 cup grated Parmesan cheese for an extra cheesy topping Using the right amounts is key to a great casserole. Here are the suggested measurements for each ingredient: - Rice: Use 2 cups of cooked rice to form the base. - Broccoli: Three cups of broccoli adds color and nutrients. - Cheddar cheese: One cup gives that creamy, cheesy goodness. - Cream of mushroom soup: One cup adds moisture and flavor. - Milk: Half a cup helps blend everything together. - Spices: Use half a teaspoon of garlic powder and onion powder for depth. - Black pepper and salt: Add 1/4 teaspoon and 1/2 teaspoon, respectively, for seasoning. - Breadcrumbs and butter: Half a cup of breadcrumbs mixed with two tablespoons of butter creates a crispy topping. - Parmesan cheese: Add a quarter cup for extra flavor if you like. Sometimes, you might need to swap out ingredients. Here are some ideas: - Rice: Try quinoa or cauliflower rice for a low-carb option. - Cheese: Use dairy-free cheese for a vegan version. - Cream of mushroom soup: Swap with a homemade or store-bought vegan cream soup. - Milk: Almond or oat milk works well for dairy-free needs. - Breadcrumbs: Gluten-free breadcrumbs are great for those avoiding gluten. These substitutions can help you enjoy this dish no matter your dietary needs. For the full recipe, check the detailed instructions that follow. Start by gathering all your ingredients. You need cooked rice, broccoli, cheese, soup, and spices. In a large bowl, mix the cooked rice with the broccoli florets. Add the cheddar cheese, cream of mushroom soup, and milk next. Sprinkle in garlic powder, onion powder, black pepper, and salt. Stir everything well until it looks smooth. This step makes sure every bite is tasty. Now, pour the mixture into a greased baking dish. Spread it out evenly to avoid uneven cooking. This dish should be about 9x13 inches for the best results. Preheat your oven to 375°F (190°C). This ensures your casserole cooks evenly. Once the oven is ready, cover your baking dish with aluminum foil. Bake for 25 minutes to let all the flavors blend. After that, remove the foil to let the top brown. Bake for another 10-15 minutes until the top is golden and bubbly. This step gives the casserole a nice crunch on top. Once baked, take the casserole out and let it cool for a few minutes. This helps the dish set and makes it easier to serve. For a fun touch, you can add extra cheese or fresh parsley on top before serving. Serve it straight from the baking dish for a cozy feel. This cheesy broccoli rice casserole is sure to be a hit at your table. For the complete recipe, refer to the Full Recipe section. To boost the taste of your Cheesy Broccoli Rice Casserole, try adding spices. A pinch of cayenne can add warmth. A splash of lemon juice brings brightness. Fresh herbs like thyme or parsley can make it fresh. You can also use a mix of cheeses for more depth. If you have some garlic cloves, sauté them before adding to the mix. This can bring a rich, savory flavor to every bite. One common mistake is not cooking the rice fully. If it’s undercooked, the casserole can turn out hard. Overbaking is another issue; keep an eye on it after you remove the foil. You want the top golden, not burnt. Not seasoning enough can leave the dish bland. Always taste your mixture before baking. Lastly, don't skip the breadcrumbs. They add a nice crunch that balances the creamy texture. Serve this casserole hot from the oven. It pairs well with grilled chicken or fish. A fresh green salad can add a nice crunch. You can even serve it as a side dish for a holiday meal. For something simple, a slice of crusty bread works great too. If you want to make it special, drizzle some balsamic glaze on top. This will give the dish a sweet and tangy twist. For the full recipe, check out the [Full Recipe]. {{image_2}} You can make this dish gluten-free with a few simple swaps. Replace regular breadcrumbs with gluten-free breadcrumbs. You can find these in most grocery stores. Ensure your cream of mushroom soup is also gluten-free. Many brands offer this option. If you want to make your own soup, you can use cornstarch instead of flour as a thickener. This keeps your casserole creamy and delicious. Adding protein to your Cheesy Broccoli Rice Casserole boosts flavor and nutrition. You can use cooked chicken, tofu, or ham. If using chicken, shred or chop it into small pieces. For tofu, press it to remove water, then cube it. If you choose ham, diced pieces work best. Mix your protein choice into the casserole before baking. This makes it heartier and more filling. If you love spicy food, add some heat to your casserole. You can mix in diced jalapeños or red pepper flakes. Both add a nice kick. If you want a smoky flavor, try adding chipotle peppers in adobo sauce. Chop them finely and mix them in. This adds depth to the taste. Adjust the amount based on your heat preference. Enjoy exploring these spicy options! To keep your cheesy broccoli rice casserole fresh, let it cool first. Once cool, place it in an airtight container. This step helps stop moisture loss and keeps flavors locked in. Make sure to cover it well before storing it in the fridge. Leftovers can stay fresh for up to four days. If you want to save some for later, freezing is a great option. Divide the casserole into smaller portions. Use freezer-safe containers or bags for easy storage. You can freeze it for up to three months. When ready to eat, thaw it in the fridge overnight. Reheat in the oven at 350°F (175°C) until heated through, about 20-25 minutes. You can also microwave individual servings for quick meals. The shelf life of cheesy broccoli rice casserole depends on how you store it. In the fridge, it lasts about four days. If you freeze it, it can last up to three months. Always check for any off smells or changes in texture before eating. This way, you ensure your meal is both safe and delicious. You can prepare this casserole ahead of time. First, follow the recipe steps until you get to the baking part. Instead of baking, cover the dish and refrigerate it. You can store it for up to 24 hours. When ready to bake, heat your oven to 375°F (190°C). Bake the casserole for about 30-35 minutes, or until hot and bubbly. This makes it easy for busy nights. Yes, you can use frozen broccoli! It is a great option when fresh broccoli is not available. Just make sure to thaw and drain the frozen broccoli before mixing it into the casserole. You want to avoid excess water in the dish. This small step helps keep your casserole creamy and tasty. This casserole works well with many side dishes. Here are some ideas: - Grilled chicken or fish - A fresh garden salad - Roasted vegetables - Garlic bread These sides add variety and make your meal more complete. Yes, this casserole is vegetarian-friendly. It uses broccoli, rice, cheese, and soup, all of which are plant-based. If you want to keep it vegetarian, ensure your cream of mushroom soup does not contain meat products. This dish is a great choice for family dinners or potlucks. You can make a few simple swaps to make it healthier. Consider these options: - Use brown rice instead of white for more fiber. - Swap out regular cheese for low-fat cheese. - Use a low-sodium soup to cut down on salt. - Add more veggies like carrots or bell peppers for extra nutrients. These changes can help you enjoy this comfort food while keeping it nutritious. For the detailed recipe, check out the Full Recipe. This blog post shared all you need for a tasty Cheesy Broccoli Rice Casserole. We covered the must-have ingredients, helpful cooking steps, and fun tips to boost flavor. You learned about tasty variations like gluten-free or spicy options. Proper storage keeps your leftovers fresh and tasty. Remember, this dish is great for any meal. With these tips, you can enjoy a warm and comforting casserole any time. Keep experimenting and share your favorite twists!

Cheesy Broccoli Rice Casserole Simple Comfort Food

Welcome to your next comfort food obsession: Cheesy Broccoli Rice Casserole! This dish combines creamy cheese and tender broccoli, making

For a delicious No Bake Oreo Cheesecake, you need these simple ingredients: - 24 Oreo cookies, crushed - 5 tablespoons unsalted butter, melted - 16 oz cream cheese, softened - 1 cup powdered sugar - 1 teaspoon vanilla extract - 1 1/2 cups heavy whipping cream - 12 Oreo cookies, roughly chopped for filling - Extra Oreo cookies for topping These ingredients create a rich and creamy cheesecake. The crushed Oreos form the base, while the cream cheese provides a smooth filling. The heavy cream adds fluffiness, making each bite a delight. You can find the full details in the Full Recipe section. Feel free to experiment with the toppings. You can use chocolate sauce or fresh fruit for a fun twist. Remember, the key to the best cheesecake is using high-quality cream cheese and fresh ingredients. Enjoy creating your masterpiece! To make the crust, start with 24 crushed Oreo cookies. Mix them with 5 tablespoons of melted butter in a bowl. Stir well until it looks like wet sand. This is key for a good base. Next, press this mixture evenly into the bottom of a springform pan. Make sure it is firm and packed tight. Place the pan in the freezer while you prepare the filling. This helps the crust set better. Now, let’s make the creamy filling. Take 16 oz of softened cream cheese and beat it in a large bowl. Use an electric mixer to get it nice and smooth. Gradually add 1 cup of powdered sugar. Keep beating until everything is mixed well. Then, add in 1 teaspoon of vanilla extract. This adds a lovely flavor to your cheesecake. Next, it’s time to make it fluffy. In another bowl, whip 1 1/2 cups of heavy whipping cream until stiff peaks form. This means it should hold its shape well. Once it’s ready, gently fold the whipped cream into the cream cheese mixture. Be careful not to deflate it. Then, add in 12 roughly chopped Oreo cookies. Fold them in evenly so every bite has some cookie goodness. Finally, pour the creamy filling over your crust. Use a spatula to smooth the top. Cover the cheesecake with plastic wrap and put it in the fridge. Let it chill for at least 4 hours. If you have time, overnight is even better. This will help it set perfectly. For the full recipe, you can refer to the earlier sections. Softening the cream cheese is key. It blends smoothly into the mix. Leave it out for about an hour before using it. This lets it reach room temperature. To achieve stiff peaks in whipped cream, start with cold cream. Use a chilled bowl and beaters for better results. Whip it until you see peaks that stand tall. Don't stop too early, or it will be too soft. Serving your cheesecake can be fun! Drizzle chocolate sauce over each slice for a sweet touch. A dollop of whipped cream adds creaminess and flair. For a pretty look, garnish with extra Oreos. You can place them whole or roughly chopped on top. This adds a nice crunch and makes it more appealing. If your cheesecake hasn’t set properly, don’t panic. You can fix it by chilling it longer. Sometimes, overnight is best for it to firm up. To minimize cracks on the surface, avoid overmixing. Also, let the cheesecake cool slowly in the fridge. Cover it loosely to prevent condensation from forming on top. For more details on making this dessert, check the Full Recipe. {{image_2}} You can easily change the flavor of your No Bake Oreo Cheesecake. Try adding mint extract for a fresh twist. Just a little can create a cool taste. Peanut butter is another fun choice. It adds a rich, nutty flavor that pairs well with Oreos. You can also mix in different cookies or candies. Consider crushed mint Oreos or even chocolate chip cookies for a fun texture. Snickers or Reese's Pieces can add a sweet surprise. Experiment to find your favorite combination! For toppings, fresh fruit works great. Slices of strawberries or raspberries add color and taste. You can also use chocolate shavings for a rich finish. They look pretty and taste amazing. Sauces can enhance the flavors too. Caramel or chocolate sauce drizzled on top makes the dessert even more special. You can serve it on the side for guests to add as they like. If you need gluten-free options, use gluten-free Oreo cookies. They work just as well and keep the taste the same. You can also lower the sugar content by using less powdered sugar. This way, you can enjoy the cheesecake without guilt. These variations let you personalize your dessert. No Bake Oreo Cheesecake is fun to make and share, and you can make it your own! For the detailed recipe, check out the Full Recipe. To keep your No Bake Oreo Cheesecake fresh, follow these steps: - Use an airtight container to store the cheesecake. This helps lock in moisture and flavor. - If you don’t have a container, cover the cheesecake with plastic wrap. Make sure it seals well to prevent air from getting in. - Keep the cheesecake in the fridge. It will stay fresh and tasty for days. You can freeze your cheesecake for longer storage: - Slice the cheesecake into pieces. This makes it easy to thaw just what you need. - Wrap each slice tightly in plastic wrap. Then, place them in a freezer-safe bag. - To thaw, place a slice in the fridge overnight. This helps maintain the creamy texture. In the fridge, your cheesecake can last: - Up to five days if stored properly. Check for freshness before eating. - Signs that the cheesecake has gone bad include changes in color or a sour smell. If you see these signs, it’s best to throw it away. For the complete recipe, check the Full Recipe. Yes, you can make this cheesecake ahead of time. I recommend making it the day before you plan to serve it. This gives the cheesecake enough time to set. It will taste even better after chilling overnight. Just cover it well to keep it fresh. To check if the cheesecake is set, gently press the center with your finger. It should feel firm but not hard. You can also lightly jiggle the pan. If it wobbles slightly, it needs more time. Chill for another hour, then check again. If you want a lighter version, you can use half-and-half or coconut cream. These options work well but will change the texture a bit. For a dairy-free choice, try using whipped coconut cream. It adds a nice flavor and keeps it creamy. In this post, we covered the key ingredients and steps to make a No Bake Oreo Cheesecake. You learned how to prepare the crust, mix the filling, and set the cheesecake properly. We also shared tips to perfect the texture and ideas to customize flavors. Store your cheesecake wisely and follow our FAQs for best results. With these insights, you can create a delicious dessert that impresses everyone. Enjoy your baking journey!

No Bake Oreo Cheesecake Simple Dessert Delight

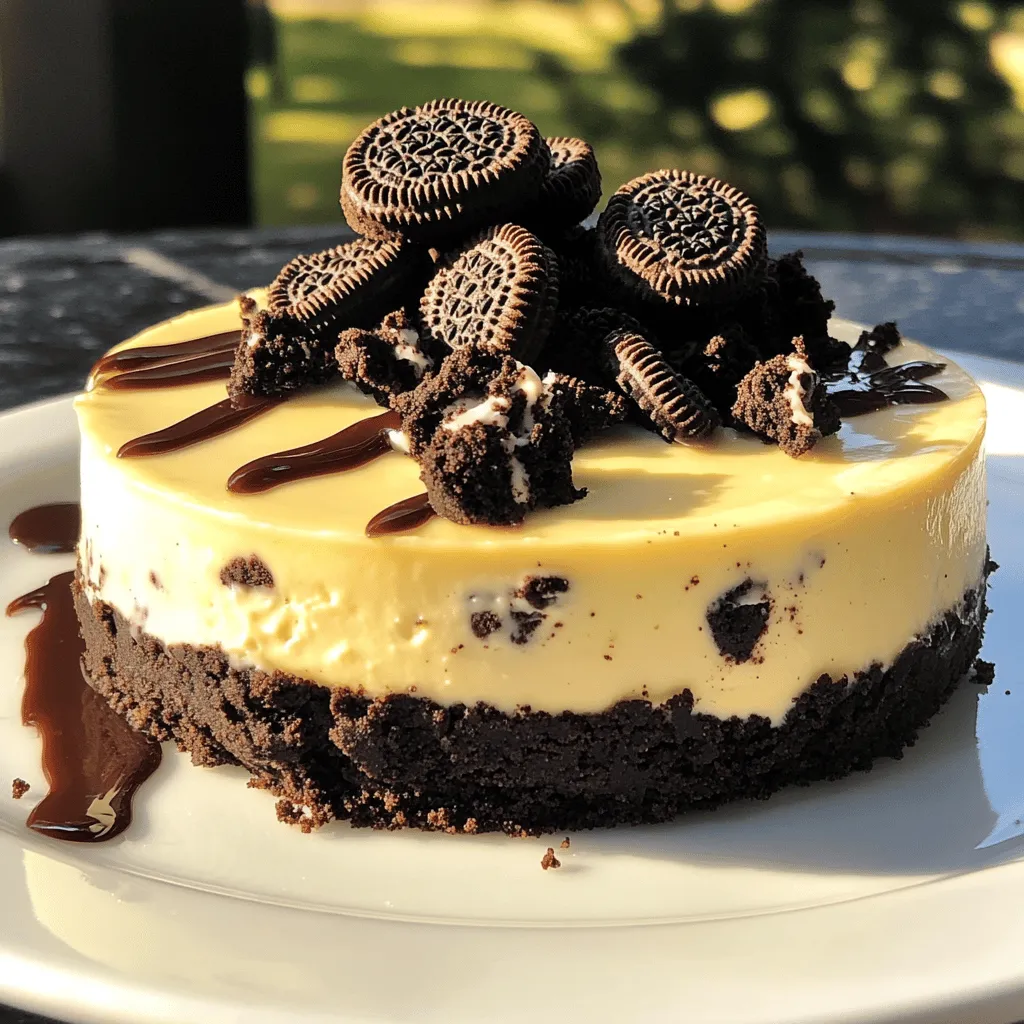
Craving a dessert that’s easy and delicious? Look no further than this No Bake Oreo Cheesecake! With just a few

Older posts
Newer posts
← Previous Page1 … Page31 Page32 Page33 … Page75 Next →

dsad

© 2025 My Saved Recipe • Built with GeneratePress

Our Policies

  • Copyright Policy
  • Cookie Policy
  • GDPR Policy
  • Privacy Policy
  • Disclaimer
  • Terms Of Use

More Information

  • Home
  • About
  • Contact
  • Appetizers
  • Dessert
  • Dinner
  • Drinks
©2025, My Saved Recipe About Back To Top