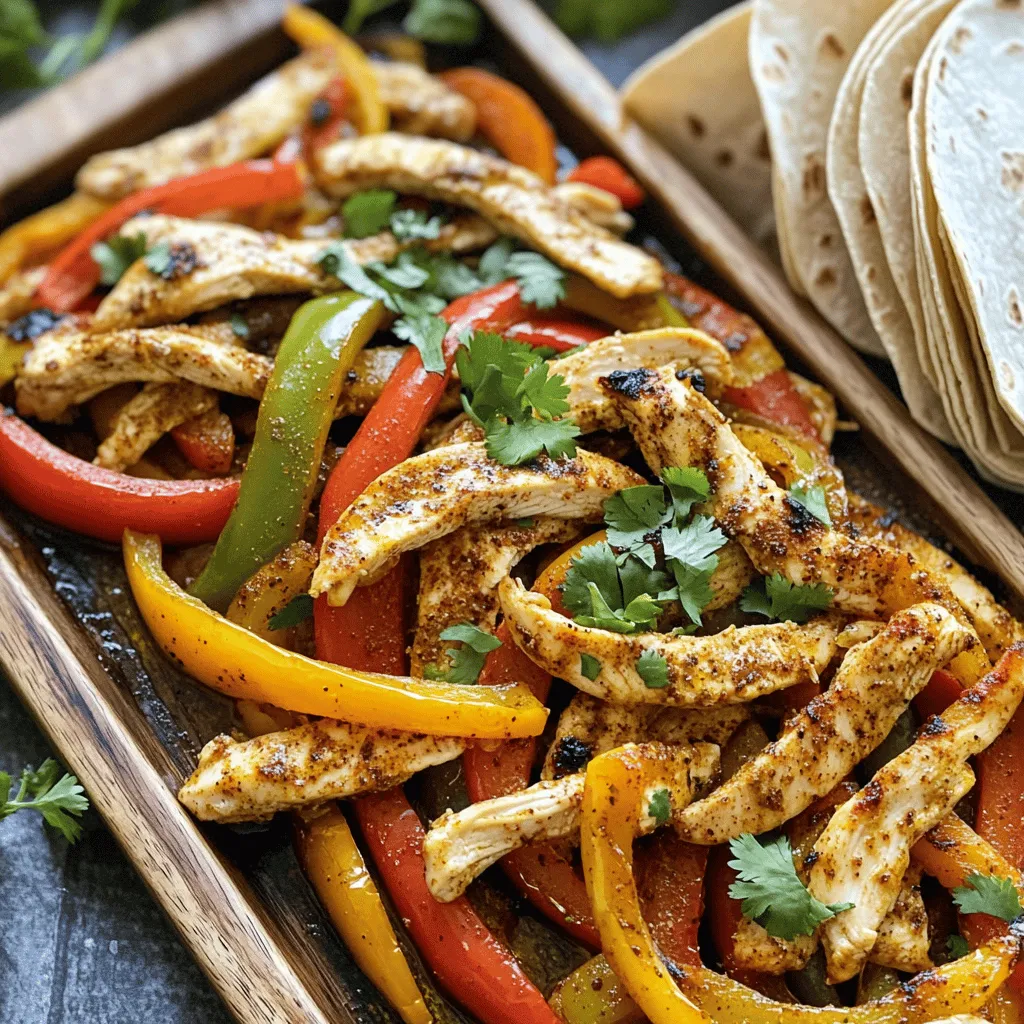
Easy Sheet Pan Chicken Fajitas Flavorful and Quick Meal
Craving a tasty meal that’s quick and easy? You’re in the right place! My Easy Sheet Pan Chicken Fajitas recipe
Craving a tasty meal that’s quick and easy? You’re in the right place! My Easy Sheet Pan Chicken Fajitas recipe
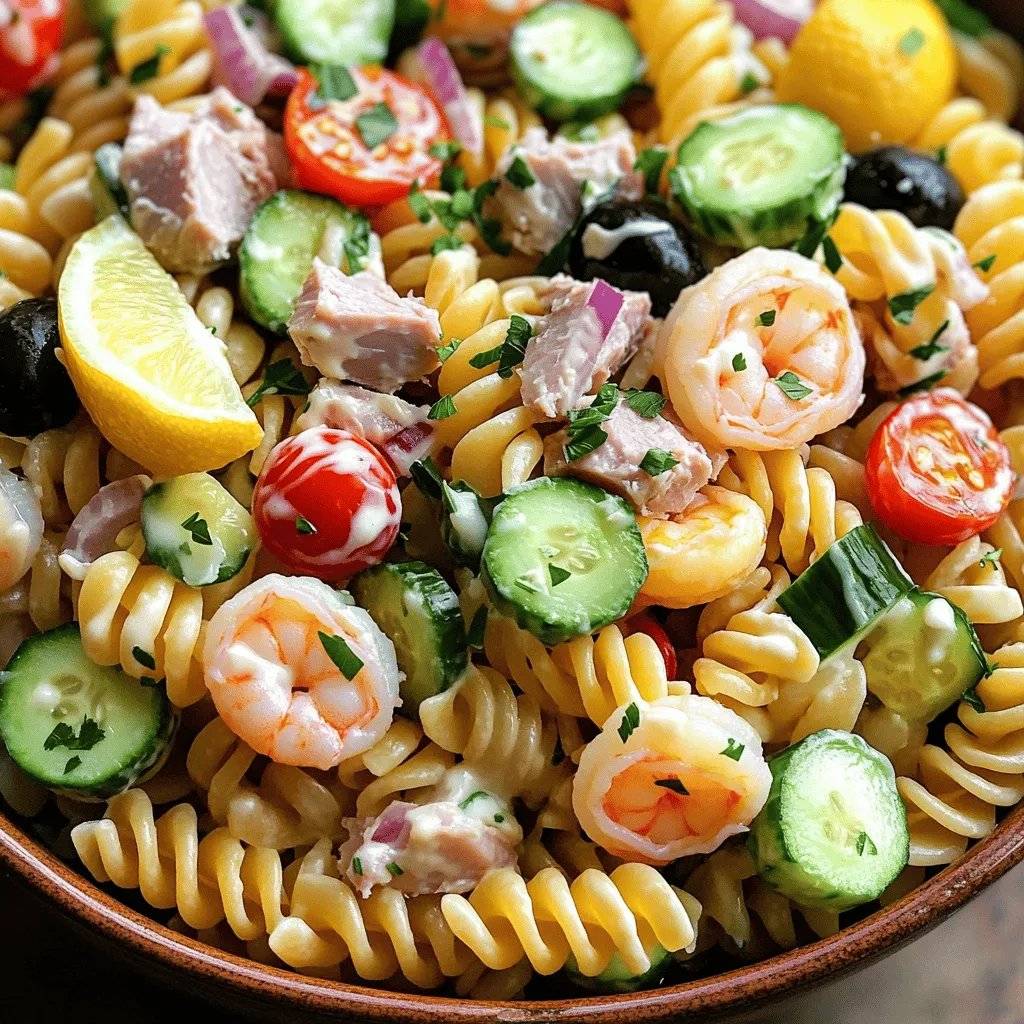
Craving a meal that’s both vibrant and simple? I’ve got you covered with my Quick and Easy Seafood Pasta Salad.
![To make creamy avocado pasta, you'll need some simple ingredients. Here’s what you will need: - Ripe avocados: 2 - Garlic: 3 cloves, minced - Lemon juice: 1 tablespoon - Fresh basil leaves: 1/4 cup - Grated Parmesan cheese: 1/4 cup (or nutritional yeast for vegan option) - Fettuccine or spaghetti: 8 ounces - Olive oil: 1/4 cup - Salt and pepper: to taste - Cherry tomatoes: halved (for garnish) - Extra basil leaves: for garnish These fresh ingredients create a rich, creamy sauce that brings out the best flavors. Ripe avocados give the dish its smooth texture. Garlic adds a nice kick. Lemon juice brightens the dish, while basil gives a fresh taste. You can use grated Parmesan or switch to nutritional yeast for a vegan version. The olive oil helps blend everything smoothly. I love adding cherry tomatoes for a pop of color and taste. They make the dish look beautiful and add a sweet touch. You can find the full recipe to guide you through every step. - Bring a large pot of salted water to a boil. - Cook the fettuccine or spaghetti until al dente. Start by filling a pot with water. Add a good amount of salt. I use about a tablespoon for flavor. Once it boils, toss in your pasta. Stir it up so it doesn’t stick. Check the package for cooking time. You want it firm but not hard. When done, save a cup of water. Drain the rest and set the pasta aside. - Blend avocados, garlic, lemon juice, basil, and Parmesan. - Add olive oil and adjust consistency. Now, grab your food processor. Cut the ripe avocados in half and scoop them out. Add the avocados, garlic, lemon juice, basil, and Parmesan to the bowl. Blend until smooth. You want a creamy texture. While blending, drizzle in olive oil. This makes it even silkier. If it’s too thick, add some of that reserved pasta water. Blend again until it’s just right. - Toss pasta with avocado sauce. - Adjust with reserved pasta water if necessary. In a big mixing bowl, add your pasta. Pour the creamy avocado sauce over it. Use tongs or a spoon to mix it well. If the sauce is too thick, add more pasta water. This helps coat the pasta nicely. Taste it! Adjust salt and pepper as needed for flavor. This creamy avocado pasta is ready to enjoy. It looks bright and tastes amazing! For the full recipe, check out the details above. To get that perfect creamy texture, start with ripe avocados. They should feel soft but not mushy. When you blend them, add lemon juice right away. This keeps the color bright and adds taste. If the sauce is thick, pour in some of the reserved pasta water. Blend again until smooth. Be sure to taste as you go. Add salt and pepper gradually. This step helps you reach the flavor balance you want. For a beautiful presentation, serve the pasta in a large bowl. Drizzle olive oil on top for shine. Sprinkle more Parmesan or nutritional yeast to enhance the look. Fresh garnishes make a big difference too! Use halved cherry tomatoes and extra basil leaves. These add color and freshness. If you want a heartier meal, mix in protein like grilled chicken or shrimp. This turns your creamy avocado pasta into a filling dish that everyone will love. For the complete recipe, check out the [Full Recipe]. {{image_2}} You can make this dish vegan by swapping Parmesan cheese with nutritional yeast. Nutritional yeast adds a cheesy flavor without dairy. You can use about 1/4 cup to match the taste. This simple swap makes the dish creamy and rich. For a fully vegan experience, check your pasta. Some brands add eggs, so look for pasta marked vegan. Also, use fresh veggies like spinach or arugula for extra nutrients. If you need a gluten-free option, choose gluten-free pasta like rice or quinoa noodles. These alternatives work well with the creamy avocado sauce. When using gluten-free pasta, follow the package instructions. Cooking times may differ, so keep an eye on it. Rinse the pasta briefly after cooking to avoid sticking. To jazz up your creamy avocado pasta, try adding spices like red pepper flakes or smoked paprika. These spices give a nice kick to the dish. Seasonal ingredients can also help. In summer, toss in fresh tomatoes or corn. In fall, add roasted butternut squash or pumpkin. These swaps make the dish exciting and fresh while keeping it creamy. For the full recipe, check the earlier section. Enjoy making this delightful meal! To store leftovers, place the creamy avocado pasta in an airtight container. This helps keep it fresh. You can keep it in the fridge for up to three days. If you notice that the pasta starts to brown, that’s normal. The avocado may oxidize, but it still tastes great. For reheating, use a microwave or stovetop. If using the microwave, heat it for 30 seconds at a time, stirring in between. This helps heat it evenly. If you use the stovetop, add a splash of water or olive oil to avoid drying out. Be careful not to overcook the pasta. This could make it mushy and less tasty. Enjoy your creamy avocado pasta warm and fresh! For the complete dish, check the full recipe. If you don’t have avocados, you can use silken tofu. It gives a similar creaminess. You can also try mashed banana, though it will change the flavor. Another option is cashew cream, made by blending soaked cashews with water. Each substitute will create a different taste, but they can work in a pinch. Yes, you can prepare this dish ahead of time. Cook the pasta and make the avocado sauce separately. Store them in the fridge for up to two days. When you are ready to eat, combine them and heat gently. Just be careful not to overcook the pasta. You can add a splash of pasta water to revive the sauce. Creamy avocado pasta is quite healthy! Avocados are full of good fats, fiber, and vitamins. They can help with heart health and digestion. This dish also includes garlic and basil, both of which have health benefits. Overall, it’s a tasty way to enjoy a nutritious meal. In this article, I shared a simple way to make creamy avocado pasta. You learned about the ingredients and steps needed to prepare it. I discussed tips to perfect the texture and how to serve it nicely. Variations like vegan and gluten-free options were highlighted, along with storage tips. This pasta dish is tasty, healthy, and versatile. You can easily make it your own while enjoying the rich flavors of avocados. I hope you try this recipe soon!](https://mysavedrecipe.com/wp-content/uploads/2025/06/c19706a9-5e79-4299-b286-dd731c6cb435.webp)
Craving a quick and tasty meal? Look no further than creamy avocado pasta! This dish packs flavor and nutrients into
![- 1 loaf of Italian or French bread - 1 cup shredded mozzarella cheese - 1 cup shredded cheddar cheese - 1/2 cup unsalted butter, melted - 4 cloves garlic, minced - 1 tablespoon fresh parsley, finely chopped - 1/2 teaspoon dried oregano - Salt and black pepper to taste - Optional: red pepper flakes for added spice To make Cheesy Garlic Pull Apart Bread, you need a few key ingredients. The base is one loaf of Italian or French bread. This bread gives a nice texture and flavor. You also need a cup each of shredded mozzarella and cheddar cheese. These cheeses melt well and create that gooey goodness we love. Next, you’ll whip up a garlic butter mixture. For this, melt half a cup of unsalted butter. Add in four cloves of minced garlic for a punch of flavor. This mixture infuses the bread with rich, savory notes. Don’t forget the seasonings! Use one tablespoon of fresh parsley, finely chopped. It adds a fresh touch. You also need half a teaspoon of dried oregano. Finally, season with salt and black pepper to taste. If you like spice, add red pepper flakes. These ingredients create a delightful balance of flavors. These simple yet bold ingredients make the dish special. For the full recipe, check out [Full Recipe]. Enjoy the process of making this cheesy, garlicky delight! - Preheat your oven to 350°F (175°C). - In a small bowl, mix the melted butter, minced garlic, chopped parsley, oregano, salt, and black pepper. If you want it spicy, add red pepper flakes. To cut the loaf properly, start by placing it on a clean cutting board. Slice it horizontally and vertically. Make small cuts, like a grid, but do not cut all the way through the bottom crust. This keeps the loaf intact while allowing the flavors to seep in. Now for the fun part! Take your garlic butter mixture and drizzle it into each cut of the bread. Use a spoon or pastry brush for this. Make sure each section gets enough butter. Next, stuff the shredded mozzarella and cheddar cheese into the cuts. Spread the cheese evenly throughout the loaf for the best flavor. Wrap the prepared bread tightly in aluminum foil. This keeps it moist while baking. Place it on a baking sheet to catch any drips. Bake in the preheated oven for 15-20 minutes. You want the cheese to melt and the bread to toast. For a golden finish, unwrap the foil and bake for 5 more minutes. Enjoy your delicious Cheesy Garlic Pull Apart Bread! Check out the Full Recipe for more details. For the best taste, use fresh herbs. Fresh parsley and oregano add bright notes. Dried herbs work too but lack the same punch. When it comes to cheese, balance is key. I love mixing mozzarella and cheddar. Mozzarella adds stretch, while cheddar brings sharpness. This combo makes each bite rich and flavorful. To get that cheese melting just right, place the bread in the center of the oven. The heat should surround it evenly. Wrapping the bread in aluminum foil helps keep moisture in. This makes the cheese gooey inside, while the crust gets crispy. For extra crunch, unwrap the bread for the last few minutes. This gives you a golden, crunchy crust that everyone will love. Dips can make your Cheesy Garlic Pull Apart Bread even better. Try serving it with marinara sauce or a creamy ranch dip. These add great flavor contrasts. This dish shines at parties or family gatherings. It’s perfect for game nights or movie marathons. Everyone loves tearing off pieces and sharing. For the full recipe, check out the instructions above to create this crowd-pleaser. {{image_2}} You can change the cheese for different flavors. Try using gouda or pepper jack for a twist. You can also mix in cream cheese for a richer taste. If you want a healthier option, use low-fat cheese. For the bread, Italian or French works best. But you can also try sourdough or whole wheat. Each bread type gives a different flavor and texture. Add herbs like thyme or rosemary to boost the taste. You can also use spices like smoked paprika for depth. If you want a kick, black pepper or red pepper flakes work great. Incorporating vegetables can add a fun twist. Try adding sautéed spinach or roasted peppers. You could also mix in cooked bacon or ham for a savory bite. For holidays, shape the bread into festive forms. You can twist it into a wreath or roll it into a log. This adds a fun touch to your table. Explore cultural twists too. For a Mediterranean flair, add feta cheese and olives. Or, mix in sun-dried tomatoes for a burst of flavor. Each theme brings its own unique taste to the dish. For the full recipe, check out the earlier sections. To keep Cheesy Garlic Pull Apart Bread fresh in the refrigerator, wrap it tightly in plastic wrap or aluminum foil. This keeps the bread from drying out. Place it in an airtight container for extra protection. It can last up to 3 days in the fridge. For long-term storage, you can freeze the bread. First, let it cool completely. Then, wrap it in plastic wrap and aluminum foil. This double wrapping prevents freezer burn. You can store it in the freezer for up to 3 months. When you're ready to enjoy it, thaw it in the fridge overnight. To rewarm leftovers, preheat your oven to 350°F (175°C). Unwrap the bread and place it on a baking sheet. Cover it with aluminum foil to keep it moist. Bake for 10-15 minutes until heated through. If you want a crispy crust, remove the foil for the last 5 minutes. Enjoy your cheesy goodness warm! You can use olive oil instead of butter. It adds flavor and keeps the bread moist. Mix minced garlic with olive oil, parsley, and spices. Drizzle this mixture into the bread cuts just like the butter version. The taste will be slightly different but still delicious. Yes, gluten-free bread works well. Choose a soft, high-quality loaf. Make sure it's fresh for the best texture. Follow the same steps as with regular bread. The cheese and garlic will still give it a tasty flavor. This bread is best eaten fresh. If you have leftovers, store them in an airtight container. It can last for about 2-3 days in the fridge. Reheat in the oven for a few minutes to regain its texture. To add more cheese, mix different types. Try gouda, parmesan, or cream cheese. You can also layer cheese between the cuts. This makes every bite extra cheesy and fun. For a twist, add some cooked bacon bits for extra flavor. Yes, you can prep the bread a few hours ahead. Slice and fill it with cheese and garlic mixture. Wrap it tightly in foil and store it in the fridge. When ready, just bake it as directed. This makes it great for parties or gatherings. For the full recipe, refer to the main article. Cheesy Garlic Pull Apart Bread is a fun and tasty recipe. We covered the key ingredients, from the fresh bread to the gooey cheese. I shared steps to prepare, cut, assemble, and bake your bread. You learned helpful tips for flavor and baking techniques. Plus, we explored variations and storage for leftovers. This dish is a crowd-pleaser at any occasion. Get creative and enjoy every bite of this cheesy goodness!](https://mysavedrecipe.com/wp-content/uploads/2025/06/07f459e8-ade0-4f5d-b9d3-dfd4ed7bcb4b.webp)
If you’re craving a warm, cheesy delight, you’ve found it! Cheesy Garlic Pull Apart Bread is the perfect comfort dish
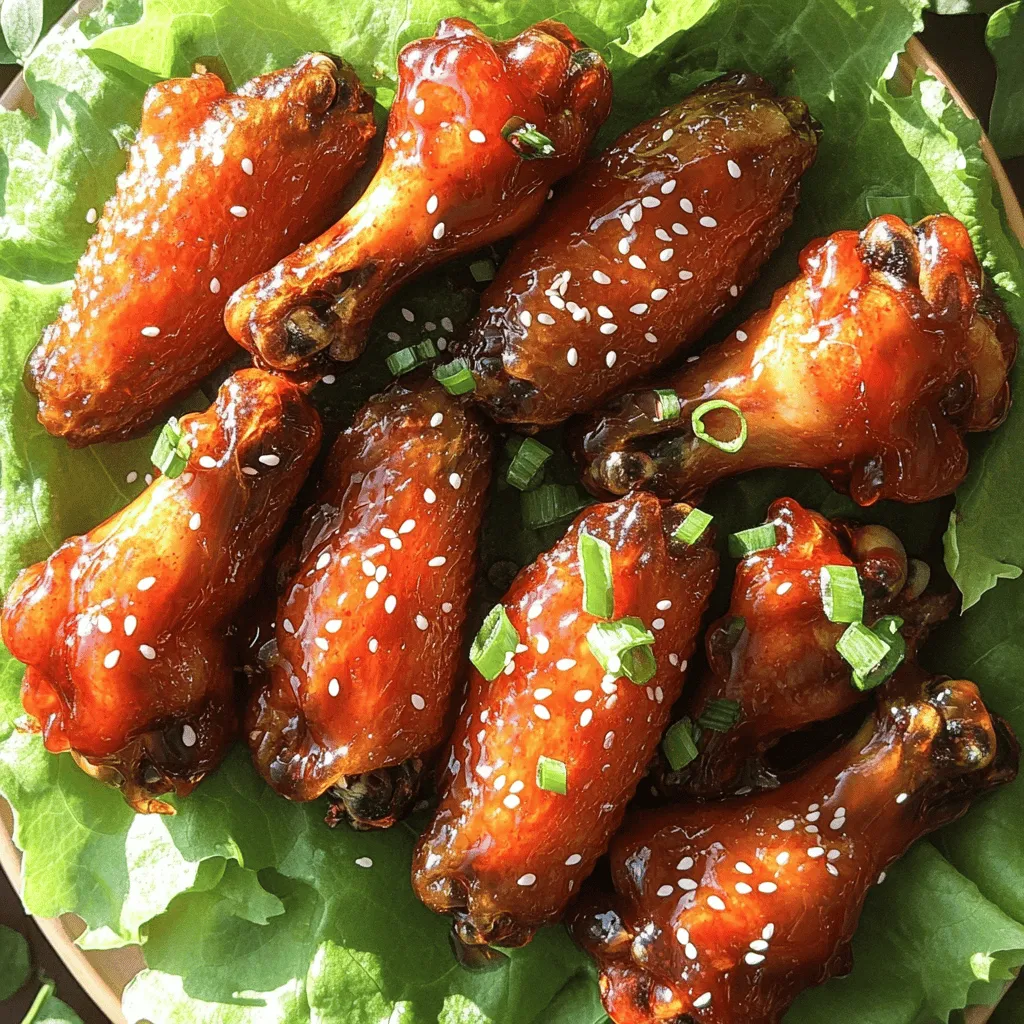
Craving a flavor explosion? These Spicy Sriracha Honey Wings are your answer! This easy recipe combines the sweet kick of
![- 1 1/2 cups all-purpose flour - 1 cup granulated sugar - 1/2 cup packed brown sugar - 1 teaspoon baking powder - 1 teaspoon baking soda - 1 teaspoon ground cinnamon - 1/2 teaspoon ground nutmeg - 1/4 teaspoon ground ginger - 1/2 teaspoon salt - 1/2 cup unsalted butter, softened - 2 large eggs - 1 cup pumpkin puree - 1 teaspoon vanilla extract - 1/2 cup strong brewed coffee, cooled - 1/4 cup milk - Cream cheese frosting - Cinnamon sprinkle - Optional: mini marshmallows Each of these ingredients plays a key role in making the perfect Pumpkin Spice Latte Cupcakes. The all-purpose flour gives structure, while the sugars add sweetness. Baking powder and baking soda help the cupcakes rise and stay fluffy. Spices like cinnamon, nutmeg, and ginger bring that warm fall flavor. The salt balances the sweetness and enhances taste. For the wet ingredients, unsalted butter provides richness, while eggs add moisture and help with rising. Pumpkin puree is the star, offering flavor and a lovely color. Vanilla extract adds depth, and the brewed coffee enhances the cupcakes' flavor profile. Milk rounds out the batter, ensuring a soft texture. For toppings, cream cheese frosting brings a tangy sweetness. A sprinkle of cinnamon adds a nice touch. You can even add mini marshmallows for a fun twist. Check the [Full Recipe] for more details! - Preheat your oven to 350°F (175°C). - Line a muffin tin with cupcake liners. - In a large bowl, whisk together the dry ingredients. This includes the flour, granulated sugar, brown sugar, baking powder, baking soda, cinnamon, nutmeg, ginger, and salt. Make sure everything is well mixed. - In another bowl, cream the softened butter. It should be light and fluffy. Add the eggs, one by one. Mix well after each egg. - Next, mix in the pumpkin puree and vanilla extract. Stir until everything is combined. - Gradually add the dry mix to the wet mix. Alternate this with the cooled coffee and milk. Start and end with the dry mix. Mix until just combined; avoid overmixing. - Fill each cupcake liner about two-thirds full with the batter. - Bake for 18 to 20 minutes. Check doneness by inserting a toothpick into the center. It should come out clean. - Let the cupcakes cool in the tin for 5 minutes. Then, transfer them to a wire rack to cool completely. For the full recipe, refer to the ingredients section above. To get the best cupcakes, avoid overmixing your batter. Overmixing adds too much air, making your cupcakes dense. Mix until just combined for a fluffy texture. When you cream the butter, use a room temperature stick. Beat it well until it’s light and smooth. This step is key for a soft, airy cupcake. You can make these cupcakes your own by adjusting spices. Try adding more cinnamon or a pinch of cloves for warmth. If you want to use fresh pumpkin, it packs more flavor. Simply roast a pumpkin, scoop it out, and mash. If you choose canned pumpkin, look for 100% pumpkin without additives for the best taste. Frosting can be fun! Cream cheese frosting pairs well with these cupcakes. You can add a sprinkle of cinnamon on top for flair. For a festive look, place mini marshmallows on each cupcake. They add a cute touch and a hint of sweetness. Enjoy making these treats as much as eating them! {{image_2}} You can make your Pumpkin Spice Latte Cupcakes healthier. Try using whole wheat flour instead of all-purpose flour. This adds fiber and nutrients. You can also swap granulated sugar with a sugar substitute, like stevia or monk fruit sweetener. For a dairy-free option, use almond milk or oat milk. If you want an egg-free version, substitute eggs with applesauce or flaxseed meal mixed with water. To add extra flavor, consider mixing in chocolate chips or chopped nuts. Chocolate adds sweetness, while nuts give a nice crunch. You can also switch up the spices. Try cardamom or allspice for a unique twist. These changes can give your cupcakes a brand-new taste without losing that fall vibe. Cupcake cakes are a fun way to present these treats. Simply bake the batter in a round cake pan and frost it like a cake. Mini versions are great for parties, too. Bake smaller cupcakes and serve them on a colorful platter. Both options make your fall gathering feel special and festive. To keep your pumpkin spice latte cupcakes fresh, store them in an airtight container. Place a piece of wax paper between layers if stacking. This will help avoid sticking. Keep them at room temperature for up to three days. If you want to store them longer, freezing is a great option. To freeze cupcakes, wrap each one tightly in plastic wrap. Then, place them in a freezer-safe bag or container. They can last in the freezer for up to three months. When you are ready to enjoy them, just remove the cupcakes from the freezer and let them thaw at room temperature. If you want to reheat your pumpkin spice latte cupcakes, the oven is the best choice. Preheat your oven to 350°F (175°C). Place the cupcakes on a baking sheet and cover them with foil. Heat for about 10 minutes or until warm. This method helps keep the texture soft and the flavor rich. You can also use a microwave. Place a cupcake on a microwave-safe plate. Heat it in short bursts of 10-15 seconds. Check to see if it feels warm. This method is quick but may change the texture slightly, so keep an eye on it. Enjoy your delicious cupcakes warm! To make these cupcakes from scratch, start by gathering your ingredients. You will need flour, sugars, spices, butter, eggs, pumpkin puree, coffee, and milk. Mix the dry ingredients in one bowl. In another bowl, cream the butter and add the eggs. Then, mix in the pumpkin and vanilla. Combine both mixtures, adding coffee and milk. Fill your cupcake liners with the batter and bake at 350°F for 18-20 minutes. You can find the full recipe for detailed steps. Yes, you can use a box cake mix to save time. Choose a spice or vanilla cake mix. Add pumpkin puree and coffee to the mix for flavor. Adjust the liquid amounts according to the box instructions. This method gives you a quick and tasty option for pumpkin spice latte cupcakes. The best toppings for these cupcakes include cream cheese frosting. You can sprinkle cinnamon on top for added flavor. Mini marshmallows also make a fun and cute addition. Whipped cream can be used for a café-style touch. Feel free to get creative with your toppings! These cupcakes last for about 3-4 days when stored in an airtight container. Keep them in a cool, dry place. If you want to keep them longer, you can freeze them for up to 3 months. Just make sure to wrap them well to avoid freezer burn. Yes, you can make these cupcakes ahead of time. Bake them a day or two in advance and store them properly. You can also prepare the batter and refrigerate it for a day before baking. This gives you flexibility and makes serving easy for gatherings or special events. You learned how to make Pumpkin Spice Latte Cupcakes. We covered ingredients, tips, variations, and storage. Remember to mix the batter gently for the best texture. Feel free to customize flavors and toppings to your taste. Now you can impress your friends with delightful treats. Enjoy baking, and share your tasty creations!](https://mysavedrecipe.com/wp-content/uploads/2025/06/f58d2e27-c337-4c6e-8a7f-0b3f217815af.webp)
Fall is the perfect time for a cozy treat, and nothing beats Pumpkin Spice Latte Cupcakes! These cupcakes blend warm

Are you ready to wow your guests with a timeless appetizer? My Classic Deviled Eggs recipe is both flavorful and
![- 1 lb chicken breast, cut into strips - 1 cup buttermilk - 1 cup all-purpose flour - 1 cup breadcrumbs (panko for extra crunch) - 1 teaspoon garlic powder - 1 teaspoon onion powder - 1 teaspoon paprika - 1 teaspoon dried oregano - Salt and pepper, to taste - Cooking spray (optional) Using these ingredients gives you a tasty base. The chicken breast is lean and full of protein. Buttermilk adds moisture and flavor. Flour gives the chicken a good coating. The breadcrumbs, especially panko, create that desired crunch. The seasoning ingredients add depth. Garlic powder and onion powder boost the flavor. Paprika gives the chicken a nice color and a hint of spice. Oregano adds a fresh note. Salt and pepper enhance everything. If you want even less sticking, use cooking spray. It helps the tenders crisp up nicely in the air fryer. This list will help you prepare for a fun cooking session. For the full recipe, check out the detailed steps to create these crunchy chicken tenders. Start by taking your chicken strips and placing them in a bowl. Add one cup of buttermilk to the chicken. Mix well to coat each piece. This step is key for flavor and moisture. Let the chicken marinate for at least 30 minutes. You can even let it sit overnight for extra flavor. While the chicken marinates, set up your breading stations. In one bowl, mix one cup of flour with garlic powder, onion powder, paprika, oregano, salt, and pepper. Stir it well to combine the spices and flour. In another bowl, place one cup of breadcrumbs. I recommend using panko for that extra crunch. Preheat your air fryer to 400°F (200°C) for about five minutes. After the chicken has marinated, take it out of the buttermilk. Let any excess liquid drip off. Now, dredge each chicken strip in the flour mixture. Make sure to coat it well. Then dip it back into the buttermilk and finally coat it with breadcrumbs. This double coating gives you a great crunch. Next, lightly spray the air fryer basket with cooking spray to prevent sticking. Arrange the chicken tenders in a single layer in the basket. Don't overcrowd; work in batches if needed. Air fry the chicken tenders at 400°F for 10-12 minutes. Flip them halfway through cooking. They should turn golden brown and be fully cooked. Enjoy your crispy air fryer chicken tenders! For the complete recipe, check [Full Recipe]. To boost flavor, add some spices. Here are my top picks: - Cayenne pepper for heat. - Italian seasoning for a herb mix. - Lemon zest for a fresh taste. - Parmesan cheese in the breadcrumbs for a cheesy kick. You can blend these spices into your flour mix. This adds layers of flavor to every bite. Panko breadcrumbs are key for crunch. Here’s how to use them well: 1. Double coat your chicken. After the flour, dip in buttermilk, then coat in panko. This adds that extra layer of crunch. 2. Press firmly on the chicken when coating. This helps the panko stick better. 3. Air fry in batches. Avoid overcrowding the basket. This ensures each piece gets hot air and stays crispy. For a fun presentation, serve your chicken tenders on a wooden platter. Here are some garnish ideas: - Fresh parsley for color. - Lemon wedges for a zesty touch. - Pickles for a tangy crunch. Pair your chicken with dipping sauces like: - Honey mustard for sweetness. - Barbecue sauce for a smoky flavor. - Ranch dressing for a classic choice. These additions make your meal not just tasty but visually appealing too. {{image_2}} You can change the coating for your chicken tenders. Instead of regular breadcrumbs, try coconut flakes for a tropical twist. They add a nice crunch and sweetness. Crushed cornflakes also work great. They give a crispy texture and a fun flavor. You can mix and match these options for different tastes. Changing the flavor is easy with marinades and spices. Try using hot sauce in the buttermilk for a spicy kick. You can also add lemon juice for a fresh taste. For a sweet option, mix honey into the buttermilk. When mixing the flour, add more spices like cumin or chili powder for warmth. Experiment with different herbs too, like thyme or rosemary, to find your favorite flavor. If you don’t have an air fryer, don’t worry! You can bake the chicken tenders. Preheat your oven to 425°F (220°C). Place the coated chicken strips on a baking sheet. Bake for about 20-25 minutes, flipping halfway through. For frying, heat oil in a pan over medium heat. Fry the chicken tenders in batches until golden brown. This way, you can still enjoy crispy chicken tenders, even without an air fryer. Check out the Full Recipe for more details! To keep your chicken tenders fresh, place them in an airtight container. This helps to lock in moisture. If you plan to store them for a long time, consider freezing them. Wrap each tender in plastic wrap before placing them in a freezer bag. This will prevent freezer burn. When reheating, avoid using the microwave. Instead, use the air fryer to keep them crispy. Preheat the air fryer to 350°F (175°C). Place the tenders in a single layer and heat for about 5-7 minutes. This method helps maintain their crunchy texture. You can also use an oven at the same temperature for better results. Cooked chicken tenders will last in the fridge for 3-4 days. If you freeze them, they can last up to 2-3 months. Just make sure to label the bags with the date. This makes it easy to track how long they have been stored. Enjoy your crispy chicken tenders later with the Full Recipe! You can use frozen chicken breasts for this recipe. However, fresh chicken works better. If you choose frozen, be sure to thaw them fully first. This helps the chicken marinate well in buttermilk. Proper marination ensures the meat stays juicy and flavorful. Just remember, cooking time might change slightly. Always check for doneness to be safe. To check if your chicken is done, use a meat thermometer. The center should reach 165°F (75°C). If you don’t have one, cut into a tender. Make sure the juices run clear and there’s no pink meat. Cooking times may vary based on the size of your strips. Flipping halfway helps ensure even cooking. Dipping sauces can elevate your chicken tenders. Here are my top picks: - Honey mustard - Barbecue sauce - Ranch dressing - Buffalo sauce - Sweet and sour sauce Each sauce adds a different flavor and flair. Feel free to mix and match to find your favorite! For an extra touch, garnish with herbs or fresh veggies. Enjoy exploring different tastes! In this blog post, we explored how to make delicious chicken tenders from scratch. We covered the main ingredients, the steps for preparing and cooking, and ways to enhance flavor. We also discussed storage tips to keep your tenders fresh. Remember, experimentation is key. Feel free to try new spices or cooking methods. Your kitchen is your playground. Enjoy your tasty chicken tenders with your favorite sauces.](https://mysavedrecipe.com/wp-content/uploads/2025/06/c5be8f72-db5e-4335-9ab7-cab3ec23900f.webp)
You deserve delicious meals that are easy to make. Today, I’ll show you how to whip up crunchy and mouthwatering

Looking for a fresh and tasty side dish? My Caprese Pasta Salad is perfect for you! It’s simple, colorful, and
![For the ultimate chocolate fudge brownies, you need some core ingredients. These ingredients create a rich and delicious treat. - 1 cup unsalted butter (2 sticks) - 2 cups granulated sugar - 1 cup packed light brown sugar - 4 large eggs - 1 tablespoon vanilla extract - 1 cup all-purpose flour - 1 cup unsweetened cocoa powder - 1 teaspoon baking powder - 1/2 teaspoon salt - 2 cups semi-sweet chocolate chips Butter gives the brownies their rich flavor and fudgy texture. Sugar adds sweetness and helps create a shiny crust. Eggs bind all the ingredients together, making the brownies moist. Vanilla extract adds depth to the flavor. Flour gives structure, while cocoa powder provides that intense chocolate taste. Baking powder helps the brownies rise slightly, but we want them dense. Lastly, chocolate chips add extra chocolate goodness. You can enhance your brownies with some optional add-ins. Here are a few ideas to make them even better: - 1/2 cup chopped walnuts (optional) Adding nuts gives a nice crunch and flavor contrast. You can also consider these options: - Sea salt on top for a sweet-salty kick - Caramel swirls for a gooey texture - Peanut butter swirls for a nutty flavor These additions can take your brownies from great to spectacular. Feel free to mix and match based on what you enjoy! For the complete recipe, check out the [Full Recipe]. 1. Preheat your oven to 350°F (175°C). This step is key for even baking. 2. Prepare your baking pan. Grease a 9x13 inch pan or line it with parchment paper. This helps with easy removal of brownies later. 3. Melt the butter. Use a medium saucepan over low heat to melt 1 cup of unsalted butter completely. This gives the brownies a rich texture. 4. Combine wet ingredients. Remove the butter from heat and let it cool slightly. In a large bowl, mix the melted butter, 2 cups of granulated sugar, and 1 cup of packed light brown sugar. Stir until well mixed. 5. Add eggs and vanilla. Crack 4 large eggs into the bowl one at a time. Make sure to whisk well after each egg. Finally, stir in 1 tablespoon of vanilla extract. 1. Sift dry ingredients. In a separate bowl, sift together 1 cup of all-purpose flour, 1 cup of unsweetened cocoa powder, 1 teaspoon of baking powder, and 1/2 teaspoon of salt. This helps avoid lumps. 2. Incorporate dry ingredients into wet. Gradually add the dry mixture to your wet ingredients. Stir until just combined. Be careful not to overmix. This keeps the brownies fudgy and soft. 3. Fold in extras. If you want extra flavor, fold in 2 cups of semi-sweet chocolate chips and 1/2 cup of chopped walnuts, if desired. This adds crunch and richness. 1. Pour and spread. Pour the brownie batter into your prepared baking pan and spread it evenly. 2. Bake. Place the pan in your preheated oven. Bake for 25-30 minutes. To check for doneness, insert a toothpick in the center. It should come out with a few moist crumbs, not wet batter. 3. Cool properly. After baking, remove the brownies from the oven. Let them cool in the pan for 15 minutes. Then, transfer them to a wire rack to cool completely before slicing. This cooling step is important for the best texture. You can find the full recipe for Ultimate Chocolate Fudge Brownies to ensure you get every detail right! To get the perfect brownie texture, you need to choose between fudgy and cakey. For fudgy brownies, use more fat and less flour. This gives you a chewy, dense treat. For cakey brownies, use more flour and add baking powder. This makes them light and airy. Make sure your ingredients are at room temperature. Cold eggs or butter can affect how they mix. If you melt your butter, let it cool slightly before adding it to the mix. This helps keep your brownies rich and moist. Using the right tools is key for great brownies. I recommend using a metal or glass 9x13 inch baking pan. Metal pans heat evenly, while glass lets you see the bottom. Always grease your pan or line it with parchment paper. This makes it easy to lift out the brownies. To check if your brownies are done, use a toothpick. Insert it into the center of the brownies. If it comes out with a few moist crumbs, they are ready. If it comes out wet, they need more time. For a beautiful presentation, cut your brownies into squares and arrange them on a platter. You can dust them with powdered sugar for a nice touch. Drizzle some chocolate sauce on top for extra flair. Brownies pair wonderfully with ice cream or coffee. A scoop of vanilla ice cream on top makes them even more decadent. You could also enjoy them with a cup of strong coffee to balance the sweetness. For the ultimate treat, try both! For the full recipe, check out the Ultimate Chocolate Fudge Brownies! {{image_2}} You can change the taste of your Ultimate Chocolate Fudge Brownies in fun ways. One idea is to add mint extract. This gives a fresh, cool flavor that pairs well with chocolate. You can also swirl in peanut butter for a rich, nutty taste. Just drop spoonfuls of peanut butter into the batter and swirl with a knife before baking. Switch up the chocolate you use, too. Try dark chocolate for a deeper flavor. White chocolate chips can add a sweet touch to your brownies. Mixing different types of chocolate creates a rich, layered taste that excites your palate. If you need gluten-free brownies, you can use almond flour or coconut flour instead of all-purpose flour. These flours give a nice texture without gluten. Just make sure to adjust the amount since these flours absorb more liquid. For vegan brownies, swap the eggs with flaxseed meal. Mix one tablespoon of flaxseed with three tablespoons of water. Let it sit for a few minutes until it thickens. You can replace the butter with coconut oil or vegan butter. This keeps your brownies rich and moist without any animal products. These variations allow you to enjoy brownies that suit your taste and dietary needs. Check the Full Recipe for more details! To keep your brownies fresh, store them properly. Place them in an airtight container. This helps to lock in moisture. You can also wrap them tightly in plastic wrap. Avoid letting them sit out too long, as they can dry out. For best results, store brownies at room temperature for up to four days. If you want to keep them longer, refrigeration is an option, but it may change the texture slightly. Freezing brownies is a great way to save some for later. First, let the brownies cool completely. Then, cut them into squares. Wrap each piece in plastic wrap. This helps keep the flavor and texture. Next, place the wrapped brownies in a freezer-safe bag or container. They can last up to three months in the freezer. When you are ready to enjoy them, simply take them out and thaw them at room temperature. For a warm treat, you can microwave them for a few seconds. This will bring back some of that fudgy goodness. You can use many things in place of eggs. Common substitutes include: - Applesauce: Use 1/4 cup for each egg. It adds moisture and sweetness. - Mashed banana: A ripe banana works well. Use 1/2 banana per egg. - Yogurt: Use 1/4 cup of plain yogurt for each egg. It keeps brownies soft. - Flaxseed meal: Mix 1 tablespoon of flaxseed with 2.5 tablespoons of water. Let it sit until it thickens. These substitutes change the texture. Applesauce and banana add moisture. Flaxseed gives a slight nuttiness. Choose based on your taste and what you have at home. Watch for these signs when baking brownies: - Edges pull away: The edges will look firm and pull from the pan. - Shiny top: The surface will have a glossy sheen. - Toothpick test: Insert a toothpick into the center. It should come out with a few moist crumbs, not wet batter. These signs help you catch the perfect bake. Overbaking will make them dry. Keep an eye on your brownies during the last few minutes. Yes, you can use cocoa powder as the main chocolate source. Cocoa gives a rich chocolate flavor, but balance is key. - Dry to wet ratio: Cocoa is dry, so you need enough wet ingredients. - Add extra fat: Consider using more butter or oil for moisture. This method can make a delicious brownie, but adjust your other ingredients. Too much cocoa can lead to a dry brownie. Aim for that perfect balance! For the full recipe, check out the Ultimate Chocolate Fudge Brownies. In this post, we covered all you need to make Ultimate Chocolate Fudge Brownies. You learned about essential ingredients, the mixing process, and baking tips. We explored variations and how to store your brownies for later. Remember, choose your flavors and store them well for the best taste. Enjoying brownies can bring joy, whether alone or with friends. Get baking today and share your delicious results! Your taste buds will thank you.](https://mysavedrecipe.com/wp-content/uploads/2025/06/ecf212a4-d0fa-4c74-8ed0-c26c3d044df8.webp)
Are you ready to make the ultimate chocolate fudge brownies? This recipe brings you rich, gooey goodness that’s hard to
