Skip to content
DisclaimerTerms Of UseGDPR PolicyCookie Policy

My Saved Recipe

  • Home
  • Drinks
  • Appetizers
  • Dinner
  • Dessert
  • About
  • Contact
  • Privacy Policy
DisclaimerTerms Of UseGDPR PolicyCookie Policy

Savannah

For a tasty Loaded Nacho Casserole, you need the right base. Here are the must-haves: - 1 lb ground beef or turkey - 1 packet taco seasoning - 1 can (15 oz) black beans, drained and rinsed - 1 can (10 oz) diced tomatoes with green chilies These ingredients give your casserole its rich flavor. The ground meat provides protein and substance. Taco seasoning adds a kick, while black beans offer fiber. Diced tomatoes bring moisture and zest. Cheese makes everything better! For this dish, use: - 2 cups shredded cheddar cheese - 1 cup shredded Monterey Jack cheese - 3 cups tortilla chips, crushed - 1 cup sour cream - ½ cup green onions, chopped The cheese melts into gooey perfection. Cheddar adds sharpness, while Monterey Jack smooths it out. Tortilla chips give a crunchy layer, and sour cream cools the spice. Green onions add a fresh crunch. Want to take your casserole up a notch? Consider adding: - 1 jalapeño, sliced (optional for heat) - 1 cup corn (fresh or frozen) - Fresh cilantro for garnish (optional) Jalapeños add heat and depth. Corn brings sweetness and texture. Fresh cilantro gives a burst of freshness. You can mix and match these extras based on your taste. For the full experience, follow the [Full Recipe]. It guides you through the process step by step! 1. First, preheat your oven to 350°F (175°C). This helps your casserole cook evenly. 2. Next, in a skillet over medium heat, brown 1 lb of ground beef or turkey. Stir it well until it is fully cooked. Drain any extra fat. 3. Add 1 packet of taco seasoning and ¼ cup of water. Stir and let it simmer for about 5 minutes. This thickens the sauce and adds flavor. 4. Now, in a large bowl, combine the cooked meat, 1 can of black beans (drained and rinsed), 1 can of diced tomatoes with green chilies, and 1 cup of corn. If you want some heat, add 1 jalapeño, sliced. Mix it all well and season with salt and pepper. 1. In a baking dish, spread half of 3 cups of crushed tortilla chips evenly on the bottom. This creates a nice base. 2. Next, layer half of the meat and bean mixture over the chips. Then, sprinkle half of 2 cups of shredded cheddar cheese and half of 1 cup of shredded Monterey Jack cheese on top. 3. Repeat these layers with the remaining chips, meat mixture, and cheeses. The more layers, the better the flavor! 1. Cover your baking dish with aluminum foil. This keeps the moisture in while it cooks. Place it in the preheated oven and bake for 20 minutes. 2. After 20 minutes, remove the foil. Bake uncovered for an additional 10-15 minutes. You want the cheese to bubble and turn slightly golden. This gives it a great look and taste. Enjoy your delicious Loaded Nacho Casserole! For the full recipe, check out the details above. To keep your chips crisp, layer them wisely. Place them at the bottom of the dish. The warm toppings should not sit long on the chips. This helps avoid soggy chips. You can also bake the casserole for a shorter time. It allows chips to stay crunchy. For the perfect cheese melt, use a mix of cheeses. Cheddar and Monterey Jack work best together. Spread cheese evenly on each layer. This ensures that every bite is cheesy. Bake until the cheese bubbles. It should look golden brown. Want to spice up the meat mixture? Add chili powder or smoked paprika. These spices give extra depth. You can also mix in some chopped bell peppers or onions. They add crunch and flavor too. Using different cheeses can change the taste. Try pepper jack for a kick. You can also use queso fresco for a fresh twist. Don’t forget toppings like sliced olives or diced tomatoes. They add color and flavor. Pair your loaded nacho casserole with guacamole or salsa. Both add freshness and creaminess. You can also serve it with a side salad. This gives a nice balance to the meal. This dish is great for game days or family movie nights. It’s fun and easy to share. You can also serve it at potlucks. Everyone loves a hearty, cheesy dish. Try the Full Recipe to make your own! {{image_2}} To make a vegetarian version of this dish, swap ground meat for lentils or quinoa. These options provide protein while keeping the dish hearty. Lentils cook fast, while quinoa adds a nice texture. You can also add more vegetables. Consider bell peppers, zucchini, or mushrooms. They enhance flavor and add nutrition. If you like heat, try a spicy version. Add more jalapeños or a splash of hot sauce. This gives the casserole a kick. You can also use pepper jack cheese instead of cheddar. It melts well and adds extra spice. Make sure to taste as you go, so it suits your heat level. For a low-carb meal, replace tortilla chips with cauliflower. Simply steam or roast the cauliflower and chop it into bite-sized pieces. This keeps the texture fun while lowering carbs. You can also choose alternative cheese options, like mozzarella or cream cheese. Both melt nicely and keep the dish creamy without the extra carbs. Feel free to explore these variations. Each one adds a unique twist to the original Loaded Nacho Casserole, making it a hit for every family meal. For the complete recipe, check out the Full Recipe. To keep your Loaded Nacho Casserole fresh, store leftovers in the fridge. Use airtight containers to prevent air and moisture from ruining the taste. Make sure to let the casserole cool before sealing it. This way, you save all the great flavors for later. When it's time to eat again, reheating is easy. The best way is in the oven. Preheat it to 350°F (175°C). Place the casserole in an oven-safe dish and cover it with foil. Heat for about 20 minutes. If you want the cheese to melt nicely, remove the foil for the last 5 minutes. This keeps the texture and flavor just right. If you want to save your Loaded Nacho Casserole for a longer time, freezing works well. Cut it into portions before freezing. Wrap each piece in plastic wrap, then place it in a freezer bag. When you are ready to eat, thaw it in the fridge overnight. Reheat it in the oven using the same steps as before. Enjoy your dish even after a long time! Loaded Nacho Casserole can last for about 3 to 4 days in the fridge. To keep it fresh, store it in an airtight container. Make sure to let it cool before placing it in the fridge. This helps prevent condensation and sogginess. Always check for any signs of spoilage before eating leftovers. If it smells off or looks strange, it's best to toss it out. Yes, you can prepare Loaded Nacho Casserole ahead of time. You can assemble it and store it in the fridge for up to a day before baking. Just cover it tightly with foil or plastic wrap. When you're ready to bake, add a few extra minutes to the cooking time, since it will be cold. This makes it a great option for busy days or family gatherings. If you're looking for alternatives to ground beef, you have a few great options. Ground turkey is a lean choice that works well. For a vegetarian option, try cooked lentils or quinoa. You can also use crumbled tofu or tempeh for a meatless meal. Each substitute adds its own flavor, so feel free to experiment! Yes, Loaded Nacho Casserole is great for freezing. To freeze, let it cool completely and then wrap it tightly in plastic wrap and foil. This helps prevent freezer burn. It can stay in the freezer for about 2 to 3 months. When you're ready to eat, thaw it in the fridge overnight. Then, bake it until it's hot and bubbly again. Loaded nacho casserole is a fun dish packed with flavor. We covered essential ingredients, preparation steps, and baking tips for the perfect casserole. You can switch it up with variations like vegetarian or spicy options. Storing leftovers is easy if you follow the right methods. This dish is versatile and fits many occasions. I hope these tips inspire you in the kitchen. Enjoy crafting your loaded nacho casserole!

Loaded Nacho Casserole Flavorful Family Favorite Dish

Craving a quick and tasty meal? Loaded Nacho Casserole is your answer! This dish brings all your favorite nacho flavors

To make One-Pot Creamy Tuscan Pasta, gather these simple ingredients: - 12 oz penne or fusilli pasta - 2 cups vegetable broth - 1 cup heavy cream - 1 cup cherry tomatoes, halved - 2 cups fresh spinach - 4 cloves garlic, minced - 1 teaspoon dried basil - 1 teaspoon dried oregano - 1/2 teaspoon red pepper flakes (optional) - 1/2 cup grated Parmesan cheese - 2 tablespoons olive oil - Salt and pepper to taste You can easily swap some ingredients if needed. For the pasta, you can use any short pasta like rotini or rigatoni. If you want a lighter dish, you can use half-and-half instead of heavy cream. Fresh herbs will give the best flavor, but you can use dried herbs if that’s what you have. For a dairy-free option, try coconut cream and nutritional yeast instead of cheese. This recipe serves four people. If you want to make more, just double the amounts. Keep the same ratios to ensure the dish turns out great. It’s also good to note that the pasta absorbs liquid as it cooks. If it seems dry, you can add a splash of broth or cream to keep it creamy. Adjust salt and pepper to your taste after cooking for the best flavor. Start by heating olive oil in a large pot over medium heat. Once the oil is hot, add minced garlic. Sauté the garlic for about one minute. You want it fragrant but not burnt. Next, toss in halved cherry tomatoes. Cook these for three to four minutes. You want the tomatoes to soften and release their juices. This step builds a great flavor base for your pasta. Now, it's time to add the vegetable broth to the pot. Bring the mixture to a boil. Once boiling, stir in your pasta, dried basil, oregano, and red pepper flakes if you like some heat. Lower the heat to medium-low. Cover the pot and let it cook for about ten to twelve minutes. Stir occasionally to keep the pasta from sticking. Cook until the pasta is al dente, which means it's still firm to the bite. When the pasta is ready, stir in the heavy cream and fresh spinach. Cook this mixture for another two to three minutes. This will help the spinach wilt and the sauce thicken slightly. Remove the pot from the heat. Now, add the grated Parmesan cheese and mix well. This will make your dish creamy and rich. Finally, season to taste with salt and pepper. Let the pasta sit for a couple of minutes. This allows the sauce to thicken more. For the full recipe, check the section above. To make a smooth and creamy sauce, use heavy cream. It blends well and adds richness. After cooking the pasta, stir in the cream slowly. This helps it mix evenly. Keep the heat low when adding cream. High heat can cause it to separate. Seasoning makes a big difference in flavor. I love using dried basil and oregano for a classic taste. They mix well with the cream and broth. Red pepper flakes add a nice kick if you like spice. Don't forget to taste and adjust salt and pepper. This step is key to bringing out all the flavors. One common mistake is overcooking the pasta. Keep an eye on it as it cooks. Pasta should be al dente, or firm to the bite. Another mistake is not letting the sauce thicken. After you add the cream, let the dish sit for a few minutes. This gives the sauce time to become creamy. Finally, make sure to mix the cheese in well. It should melt and blend smoothly into the sauce. For the full recipe, check out the One-Pot Creamy Tuscan Pasta details. Enjoy cooking! {{image_2}} You can easily add protein to your One-Pot Creamy Tuscan Pasta. Chicken, shrimp, or sausage work great. For chicken, use diced breast or thighs. Cook them in the pot before adding garlic. For shrimp, add them after the pasta cooks. They only need a few minutes to become tender. If you prefer sausage, slice it and brown it in the pot first. This will add a nice flavor to the dish. Feel free to mix in different vegetables. Broccoli, bell peppers, or zucchini make great choices. Chop them into small pieces so they cook well. You can add them along with the tomatoes. If you want a stronger flavor, try sun-dried tomatoes or artichoke hearts. These add depth and taste to the dish. If you need a gluten-free meal, swap the pasta for gluten-free options. Brown rice pasta or chickpea pasta work well. Just follow the cooking times on the package. You can also use spiralized veggies like zucchini or carrots for a lower-carb choice. These keep the dish light and fresh. For a creamy texture, add a bit more cream or a splash of dairy-free milk. This One-Pot Creamy Tuscan Pasta is adaptable. You can make it fit your tastes and needs while keeping it quick and easy. For the full recipe, check the details above! You can keep your One-Pot Creamy Tuscan Pasta in an airtight container. Make sure it cools down first. Store it in the fridge for up to three days. Label the container with the date, so you know when to eat it. When you want to enjoy your leftovers, reheat them on the stove. Add a splash of broth or cream to keep it creamy. Heat over low to medium heat, stirring often. You can also use a microwave, but cover it to avoid drying out. If you want to save it for later, freeze the pasta in portions. Use freezer-safe bags or containers. Remove as much air as possible to prevent freezer burn. This dish can last for up to three months in the freezer. When ready to eat, thaw it overnight in the fridge before reheating. For best results, reheat directly from frozen on the stove with a bit of liquid. Enjoy your tasty meal anytime! One-Pot Creamy Tuscan Pasta lasts in the fridge for about three to four days. Make sure you store it in an airtight container. This keeps the pasta fresh and tasty. Over time, the sauce may thicken. You can add a bit of broth when reheating. Yes, you can make this dish ahead of time. Just cook it, let it cool, and store it in the fridge. The flavors will blend nicely if you let it sit overnight. When you are ready to eat, simply reheat it on low heat. Stir in a splash of broth to keep it creamy. You can serve One-Pot Creamy Tuscan Pasta with a simple salad. A green salad adds freshness. You could also pair it with garlic bread for some crunch. For a heartier meal, grilled chicken or shrimp works well too. Try to keep sides light to balance the creamy pasta. You learned about the key ingredients, steps, and tips for making One-Pot Creamy Tuscan Pasta. Remember to use the right measurements for the perfect sauce. Don’t forget to add your favorite proteins or veggies for a twist. Store your leftovers properly so you can enjoy them later. This dish is easy and fun to make. Enjoy the creamy goodness and share it with your friends and family. You'll impress everyone with your cooking skills!

One-Pot Creamy Tuscan Pasta Quick and Flavorful Meal

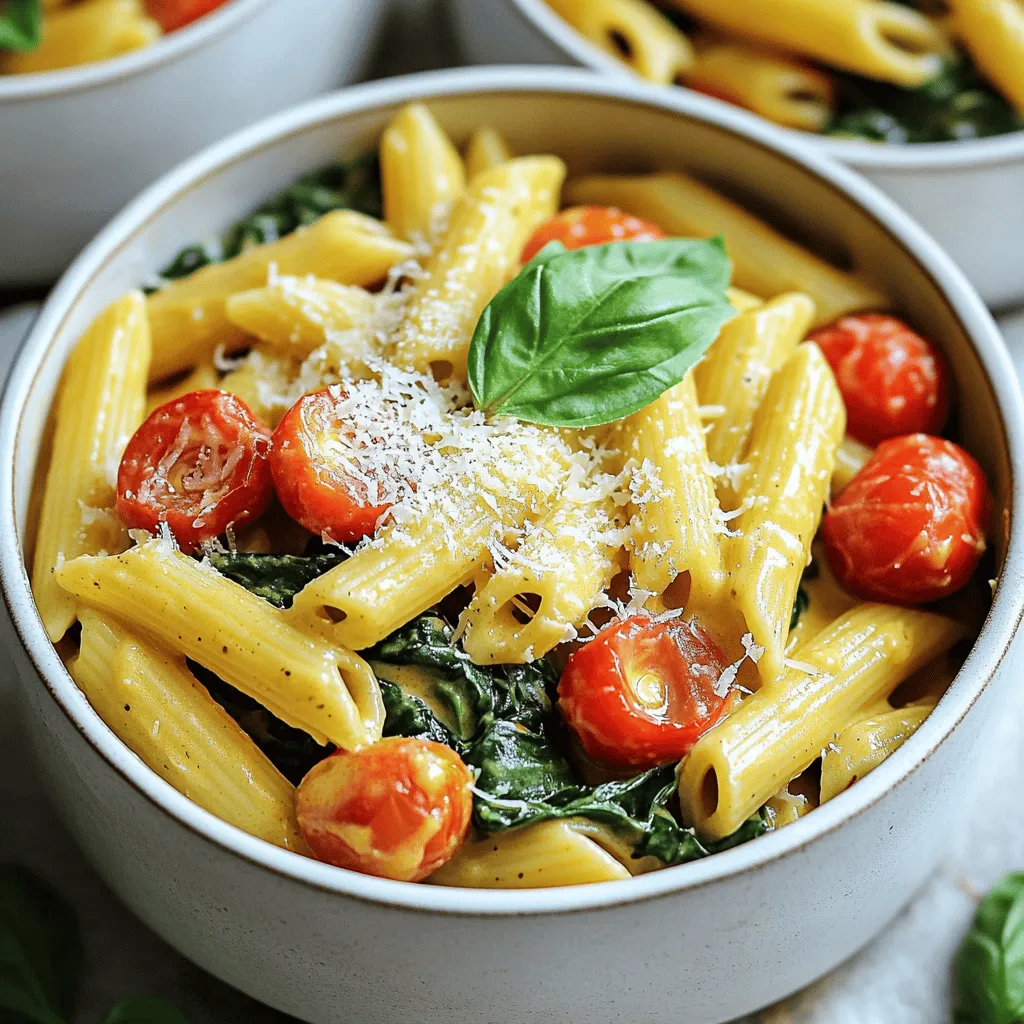
Craving a warm, comforting meal that’s ready in no time? One-Pot Creamy Tuscan Pasta is your answer! This dish combines

- 1 cup dried red lentils, rinsed - 1 can (13.5 oz) coconut milk - 1 medium onion, diced - 2 cloves garlic, minced - 1 tablespoon fresh ginger, grated - 1 tablespoon red curry paste (adjust to taste) - 1 teaspoon turmeric powder - 1 teaspoon ground coriander - 1/2 teaspoon cumin - 4 cups vegetable broth - 1 cup diced tomatoes (fresh or canned) - 1 cup spinach, chopped - 2 tablespoons lime juice - Salt and pepper to taste - Fresh cilantro, for garnish The ingredients in this Coconut Curry Lentil Soup work together to create a warm, rich flavor. Lentils provide protein and fiber, which makes them a great base. Coconut milk adds creaminess and a tropical taste, while the spices bring a kick. - Calories per serving: Around 300 calories - Macros breakdown: - Carbohydrates: 45g - Protein: 12g - Fats: 10g The health benefits of the main ingredients are impressive. Lentils are high in protein and fiber, which help you feel full. Coconut milk offers healthy fats that are good for your heart. Turmeric is known for its anti-inflammatory properties, while spinach gives you essential vitamins. You can find the full recipe and more details to help you make this dish. To make Coconut Curry Lentil Soup, start by gathering your ingredients. Here’s what you need: - 1 cup dried red lentils, rinsed - 1 can (13.5 oz) coconut milk - 1 medium onion, diced - 2 cloves garlic, minced - 1 tablespoon fresh ginger, grated - 1 tablespoon red curry paste (adjust to taste) - 1 teaspoon turmeric powder - 1 teaspoon ground coriander - 1/2 teaspoon cumin - 4 cups vegetable broth - 1 cup diced tomatoes (fresh or canned) - 1 cup spinach, chopped - 2 tablespoons lime juice - Salt and pepper to taste - Fresh cilantro, for garnish First, heat a little oil in a large pot over medium heat. Add the diced onion. Sauté until the onion looks soft and translucent, which takes about 5 minutes. This step builds a rich base for your soup. Next, add the minced garlic and grated ginger to the pot. Cook for one more minute. This will release a lovely aroma. Now it’s time to add spices! Stir in the red curry paste, turmeric, ground coriander, and cumin. Cook while stirring for about 2-3 minutes. Toasting the spices makes them pop, enhancing the flavor. After the spices are toasted, pour in the vegetable broth. Then, add the rinsed lentils and diced tomatoes. Bring this mixture to a boil. Once boiling, reduce the heat to low. Cover the pot and let it simmer for around 20 minutes. This is the perfect time for the lentils to become tender. As the lentils cook, you will see them soften and swell. This means they’re cooking well. When the lentils are tender, stir in the coconut milk and chopped spinach. Cook for an additional 5 minutes until the spinach wilts. This adds a nice green color and boosts nutrition. Finally, remove the pot from heat and stir in the lime juice. Season with salt and pepper to taste. Now that your soup is ready, let’s talk about how to serve it. For garnishing, sprinkle fresh cilantro on top. This adds color and a fresh taste. For serving sizes, this recipe makes about four servings. You can portion it into bowls that are perfect for sharing. Pair your Coconut Curry Lentil Soup with warm naan bread or steamed rice. These sides complement the soup’s flavors and make the meal more filling. For the full recipe, you can check the detailed instructions. Enjoy your delicious and nourishing soup! How can you adjust the spiciness levels? Use different curry pastes. Each paste has its own heat. If you like it mild, use less red curry paste. For a kick, add more. What about enhancing flavors? Fresh herbs help a lot. Try cilantro or basil. Spices like cumin and turmeric add depth. They work well with coconut milk. Don’t have all the ingredients? No problem! You can swap items. If you lack lentils, chickpeas work too. Missing spinach? Use kale or any greens you like. What if you want to cook differently? Try an instant pot or slow cooker. These methods save time. The flavors blend well in these pots. Are there time adjustments? Yes! An instant pot cooks it in about 10 minutes. A slow cooker may take 6 to 8 hours on low. How do you reheat without losing flavor? Use low heat. Add a splash of broth if it’s too thick. Stir well to keep it creamy. For the full recipe, check the section above. Enjoy your nourishing meal! {{image_2}} You can change up the Coconut Curry Lentil Soup in fun ways. Try adding different proteins. Chickpeas are a great choice. They add texture and protein. If you want meat, diced chicken works too. Switching veggies is easy. You can add kale for a boost of greens. Carrots add sweetness and color. Bell peppers give a nice crunch. Feel free to mix and match based on what you have. If you're looking for dairy-free options, coconut milk already makes this soup creamy. You can skip the lime juice if you want less acidity. Always taste your soup as you go. Spices are the heart of this soup. You can add more spices to change the flavor. Try a pinch of cinnamon for warmth. A dash of chili flakes can kick up the heat. Coconut curry has many regional styles. In Thailand, you might use lemongrass or kaffir lime leaves. In India, add garam masala for a deeper flavor. Each twist gives your soup a new life. For serving, get creative! Serve it over rice for a filling meal. You can also use bowls and top with fresh herbs. A squeeze of lime right before eating brightens the dish. For the full recipe, check back to make the most out of this nourishing meal. After you enjoy your Coconut Curry Lentil Soup, store any leftovers in the fridge. Use an airtight container to keep it fresh. The soup tastes even better the next day as the flavors meld together. When you’re ready to freeze, let the soup cool completely first. Portion it into freezer-safe bags or containers. This way, you can thaw just what you need later. When reheating, do it gently over low heat. Stir often to keep the soup smooth. If it looks too thick, add a splash of vegetable broth or water. This step helps the soup stay creamy and delicious. In the fridge, your Coconut Curry Lentil Soup lasts about 3 to 4 days. If you freeze it, expect it to stay good for 2 to 3 months. Always check for signs of spoilage before eating. Look for off smells, changes in color, or mold. If you see any of these signs, it’s best to discard the soup. Food safety is key to enjoying every bite! What can I use instead of red lentils? If you can't find red lentils, try green or brown lentils. They work well too, but remember they take longer to cook. Adjust your cooking time to ensure they become tender. Is Coconut Curry Lentil Soup gluten-free? Yes, this Coconut Curry Lentil Soup is gluten-free. All the ingredients listed, like coconut milk and vegetable broth, are safe for a gluten-free diet. This makes it a great choice for those with gluten sensitivity. Can I make this soup in advance? Absolutely! You can make this soup ahead of time. Just store it in the fridge for up to three days. You can also freeze it for longer storage. Just thaw and reheat when you are ready to enjoy. Can I adjust the consistency of the soup? Yes, you can adjust the soup’s thickness. If you want it thicker, cook it a bit longer without the lid. For a thinner soup, add more vegetable broth or water and stir. What to serve with Coconut Curry Lentil Soup? This soup pairs well with warm naan or rice. You might also enjoy it with a fresh salad. The flavors blend well and make for a complete meal. How spicy is this Coconut Curry recipe? The spice level depends on the amount of red curry paste you use. Start with one tablespoon and taste as you go. You can always add more if you like it spicier! This blog post has covered a complete guide to Coconut Curry Lentil Soup. We explored key ingredients, cooking steps, and nutrition facts. You learned tips for perfecting the soup and creative variations. Enjoying this dish means not only a warm meal but also a hearty boost. With simple swaps and methods, you can make it unique. I hope you feel inspired to try this recipe. It’s a tasty way to nourish body and soul.

Coconut Curry Lentil Soup Flavorful and Nourishing Meal

If you’re craving a meal that’s both flavorful and nourishing, you’ve come to the right place! My Coconut Curry Lentil

- 1 cup ricotta cheese - 1 cup all-purpose flour - 2 tablespoons sugar - 2 teaspoons baking powder - 1/2 teaspoon baking soda - 1/4 teaspoon salt - 1 cup milk - 3 large eggs - 1 teaspoon vanilla extract - 2 tablespoons unsalted butter, melted - Extra butter or oil for cooking Ricotta alternatives You can use cottage cheese if you want a similar taste. Just blend it to make it smoother. Cream cheese also works, but it will change the flavor. Gluten-free options For a gluten-free version, swap all-purpose flour with a gluten-free blend. Make sure it has xanthan gum for binding. Dairy-free suggestions Try using almond milk or oat milk instead of regular milk. For the ricotta, use a plant-based ricotta. These swaps keep the taste great while catering to dietary needs. Fluffy Ricotta Pancakes are easy to make and versatile. You can enjoy them for breakfast or brunch. Remember, you can find the full recipe above. Combining wet ingredients Start by taking a large bowl. Add the ricotta cheese, milk, eggs, and vanilla extract. Whisk them together until the mixture is smooth. This step brings out the creamy texture of the ricotta. Mixing dry ingredients In a separate bowl, mix the all-purpose flour, sugar, baking powder, baking soda, and salt. Stir these dry ingredients well to ensure they are evenly blended. This helps create a uniform pancake. Combining mixtures without overmixing Now, gradually add the dry mix to the wet mix. Stir gently until just combined. You want small lumps to remain, as overmixing can make the pancakes dense. A light touch is key here. Preheating your skillet Heat a non-stick skillet or griddle over medium-low heat. Lightly grease it with butter or oil. This ensures that your pancakes cook evenly and don’t stick. Cooking time per pancake Pour about 1/4 cup of batter for each pancake onto the skillet. Cook until bubbles form on the surface, which takes about 2 to 3 minutes. Flipping and checking doneness Once you see bubbles, it’s time to flip! Cook for another 2 minutes until golden brown on both sides. Check for a light brown color and a fluffy texture. Recommended toppings Serve warm pancakes with your favorite toppings. Maple syrup, fresh fruits, or a dusting of powdered sugar work well. You can also add a dollop of whipped cream for extra flair. Plating ideas for presentation For a beautiful presentation, stack the pancakes on a plate. Drizzle them with syrup and top with mixed berries. This not only looks great but also adds flavor. Enjoy your fluffy ricotta pancakes with these simple tips! To make your pancakes light and fluffy, avoid overmixing the batter. When you mix too much, you create gluten, which can make the pancakes tough. You want to mix just enough to combine the ingredients. Small lumps are fine! Using room temperature ingredients also helps. If you take your eggs and milk out of the fridge before you start, they blend better. Warm ingredients create a smoother batter and help the pancakes rise. Getting the heat right is key. Use medium-low heat for cooking. If the heat is too high, the pancakes can burn on the outside while staying raw inside. Non-stick cookware is your best friend. It helps prevent sticking and makes flipping easier. If your skillet isn’t non-stick, add a little butter or oil before pouring in the batter. To store pancakes, let them cool first. Place the pancakes in a single layer in an airtight container. This keeps them fresh and prevents sogginess. For reheating, you have options. The microwave is quick but might make them a bit tough. Instead, use a skillet over low heat. This keeps them soft and warm. For the best results, add a little butter to the skillet before reheating. {{image_2}} You can make your fluffy ricotta pancakes even more fun. Adding lemon or orange zest brightens the flavor. Just mix in a teaspoon or two of zest to the batter. This gives your pancakes a fresh, zesty taste that pairs well with syrup. Another great idea is to fold in chocolate chips or nuts. Use semi-sweet chocolate chips for a sweet twist. Chopped walnuts or pecans add a nice crunch. These flavors make each pancake a delightful surprise. If you want a vegan option, you can adapt the recipe. Use a plant-based ricotta made from nuts or tofu. Substitute the eggs with flaxseed meal or applesauce. This keeps the pancakes fluffy and delicious. For those on a low-carb or keto diet, try using almond flour instead of all-purpose flour. You can also replace the sugar with a low-carb sweetener. These changes keep the pancakes light while fitting your dietary needs. Toppings can change with the seasons, adding fun to each meal. In spring, fresh berries like strawberries and blueberries are a hit. In summer, sliced peaches and whipped cream make a lovely dish. For fall, try warm spiced apples or pumpkin puree. In winter, top with candied citrus peels or maple syrup. Festive presentations can include stacking pancakes high and drizzling syrup on top. Add a dusting of powdered sugar for a beautiful touch. For the full recipe, check out the full recipe section. Enjoy experimenting! After making your fluffy ricotta pancakes, store them properly to keep them fresh. Here are some simple guidelines: - Refrigeration: Let the pancakes cool completely. Place them in an airtight container. They will last in the fridge for about 3 days. You can stack them with parchment paper in between to prevent sticking. - Freezing your pancakes for later: If you want to save pancakes for a longer time, freezing is a great option. Place cooled pancakes in a single layer on a baking sheet. Freeze for about an hour, then transfer them to a freezer-safe bag or container. They can last up to 2 months in the freezer. When you’re ready to enjoy your pancakes again, reheating them correctly is key to keeping them fluffy. - Microwave vs. stovetop: For quick reheating, the microwave works well. Place pancakes on a microwave-safe plate and cover with a damp paper towel. Heat for about 20-30 seconds. For a crisper texture, use the stovetop. Heat a non-stick skillet over low heat and warm each pancake for about 1-2 minutes on each side. - How to retain texture after reheating: Always cover pancakes while reheating. This keeps moisture in, preventing them from drying out. If using the stovetop, a little butter can help add flavor and keep them soft. Yes, you can use other cheeses. Cream cheese gives a rich taste. Cottage cheese adds a lighter texture. You can even try goat cheese for a tangy twist. Each cheese will change the flavor and texture of your pancakes. Just remember to keep the same amount, about one cup. This will help you maintain the right balance. Making pancakes ahead is easy. You can cook them, let them cool, then stack them. Place parchment paper between each pancake. This will stop them from sticking together. Store the stack in an airtight container in the fridge. When you want to eat them, just reheat in the microwave or on a skillet. They will taste fresh and delicious! Dense pancakes often come from overmixing the batter. Mix just until the ingredients blend. Some lumps are okay; they help keep pancakes fluffy. Another reason could be old baking powder. Always check the date on the package. If they are still dense, add a bit more milk to lighten the batter. Following these tips will help you achieve light, fluffy pancakes. You’ve learned how to make light, fluffy pancakes with simple ingredients. We discussed ingredient swaps for dietary needs and shared tips for perfecting your cooking technique. Remember, avoid overmixing to keep your pancakes fluffy. Use fresh toppings to make each serving special. With these ideas, you can enjoy pancakes any time. Try different flavors and find your favorites. Happy cooking!

Fluffy Ricotta Pancakes Perfectly Light and Delicious

Are you ready to flip the best pancakes of your life? These Fluffy Ricotta Pancakes are light, airy, and oh-so-delicious!

To make savory stuffed peppers, you will need: - 4 large bell peppers (any color) - 1 cup quinoa, cooked - 1 can (15 oz) black beans, drained and rinsed - 1 cup corn kernels (fresh or frozen) - 1 cup diced tomatoes (canned or fresh) - 1 small onion, finely chopped - 2 cloves garlic, minced - 1 teaspoon cumin - 1 teaspoon smoked paprika - 1 teaspoon chili powder - Salt and pepper to taste - 1 cup shredded cheese (cheddar or Monterey Jack) - Fresh cilantro for garnish - 1 tablespoon olive oil Using fresh ingredients makes a big difference in flavor. Fresh bell peppers taste sweet and crunchy. They add color to your dish, making it look great. Fresh garlic and onion bring out the best flavors. The spices, like cumin and smoked paprika, add warmth. When you pick fresh items, you also get more nutrients. This means your meal is not only tasty but healthy too. Always choose the freshest produce you can find. It transforms a simple dish into something special. When selecting bell peppers, look for firm ones. They should feel heavy for their size. Check for smooth skin without blemishes. Bright colors indicate ripeness and sweetness. Green, red, yellow, and orange peppers all have different tastes. Red peppers are the sweetest, while green ones have a slight bitterness. Choose colors based on your flavor preference and recipe needs. If possible, smell them. Fresh peppers have a nice, sweet scent. For the best results in your savory stuffed peppers, use high-quality ingredients. This will ensure a delicious meal every time. For the full recipe, check out the details I shared earlier. Start by preheating your oven to 375°F (190°C). This helps cook the peppers evenly. Next, take your bell peppers and slice the tops off. Remove all seeds and membranes. If the peppers wobble, trim a bit off the bottoms to help them stand upright. This step is key for a stable dish. In a large skillet, heat one tablespoon of olive oil over medium heat. Add the chopped onion and minced garlic. Sauté until they become soft and clear, which takes about 3 to 4 minutes. Next, stir in the cooked quinoa, black beans, corn, and diced tomatoes. Add cumin, smoked paprika, chili powder, salt, and pepper. Cook everything together for about 5 minutes until it all heats through. This mix is where the magic happens. Once done, take the skillet off the heat. Mix in half of the shredded cheese with the filling. This adds creaminess. Carefully spoon the filling into each bell pepper. Pack it down slightly so it fits well. Place the stuffed peppers upright in a baking dish. Finally, sprinkle the remaining cheese on top of each pepper. Cover the baking dish with aluminum foil. Place it in the preheated oven and bake for 25 minutes. After that, remove the foil and bake for another 10 to 15 minutes. You want the peppers to be tender and the cheese bubbly and golden. Once finished, take the peppers out of the oven and let them cool for a few minutes. Garnish with fresh cilantro before serving. For the full experience, try the Full Recipe for more details. To stuff your peppers well, start by prepping them. Cut the tops off and remove the seeds. Make the filling dense, but not too packed. You want it to fit snugly without spilling. Use a spoon to push the filling deep into each pepper. This gives them a nice shape and ensures each bite is full of flavor. Choosing cheese is key. I love using cheddar or Monterey Jack for their melting qualities. Both add great flavor and texture. For a twist, try pepper jack for some heat. To melt the cheese perfectly, cover the peppers with foil for the first part of baking. This helps the cheese bubble without burning. Spice levels can change a dish. Start with mild spices like cumin and smoked paprika. If you want heat, add chili powder or even jalapeños. Taste the filling before stuffing. You can easily adjust with more spices if needed. This way, everyone enjoys their meal just how they like it. For a full recipe, check out the Savory Stuffed Peppers. {{image_2}} You can easily make stuffed peppers vegan. Simply skip the cheese and use plant-based options. For protein, replace black beans with lentils or chickpeas. Use a mix of veggies, like mushrooms or spinach, to add texture and flavor. This keeps the dish hearty and satisfying without meat. You can change the filling to suit your taste. Try ground turkey or beef for a meaty option. For grains, consider rice or farro for a different texture. Mix in some herbs or spices to match your favorite flavors. This lets you create a stuffed pepper that feels new each time. Experiment with different seasonings to make your peppers unique. Swap cumin for Italian herbs like oregano or basil. You can add a kick with red pepper flakes or hot sauce. Fresh herbs, like parsley or cilantro, can brighten the dish. Tailoring the spices helps you create a flavor that you love. For the complete recipe, check out the Full Recipe section. You can keep your stuffed peppers in the fridge. Place them in an airtight container. They stay fresh for up to four days. Make sure they cool down first before sealing. This keeps the flavors locked in. Freezing is another option if you want to save some for later. Wrap each pepper tightly in plastic wrap. Then, place them in a freezer-safe bag. They can last for up to three months in the freezer. Thaw them in the fridge overnight when you're ready to eat. To reheat, the oven works best. Preheat it to 350°F (175°C). Place the peppers in a baking dish. Cover them with foil to keep moisture in. Heat for about 20 minutes. If you like, add more cheese on top before reheating for extra flavor. Enjoy the rich taste just like when you first made them! For the complete method, check the Full Recipe. Yes, you can use other types of peppers. Try poblano or banana peppers for a twist. Each type brings a new flavor. Poblano peppers are slightly spicy and add depth. Banana peppers are milder and sweet. You can also use mini peppers for small bites. Just remember to adjust cooking times based on size. To make this dish gluten-free, use gluten-free grains. Quinoa is already a great choice. Check the label on canned goods. Some canned beans or tomatoes may contain gluten. Always select brands marked as gluten-free. You can also use rice instead of quinoa if you prefer. Savory stuffed peppers pair well with many sides. A fresh green salad adds crunch and color. You can also serve rice or quinoa as a side. Cornbread or crusty bread gives a hearty touch. For a light drink, serve iced tea or lemonade. Each option complements the flavors in the peppers. For the full recipe, check the earlier section. In this article, we explored the key components of making stuffed peppers. We examined the right fresh ingredients and shared practical steps for preparation and baking. I provided tips to enhance your dish, from selecting the best cheese to adjusting spice levels to your taste. You can also find tasty variations and storage methods for leftovers. Remember, using fresh ingredients makes a big difference in flavor. With these tips, you can create a meal that's not only delicious but also fun to make. Enjoy your cooking adventure!

Savory Stuffed Peppers Flavorful and Easy Recipe

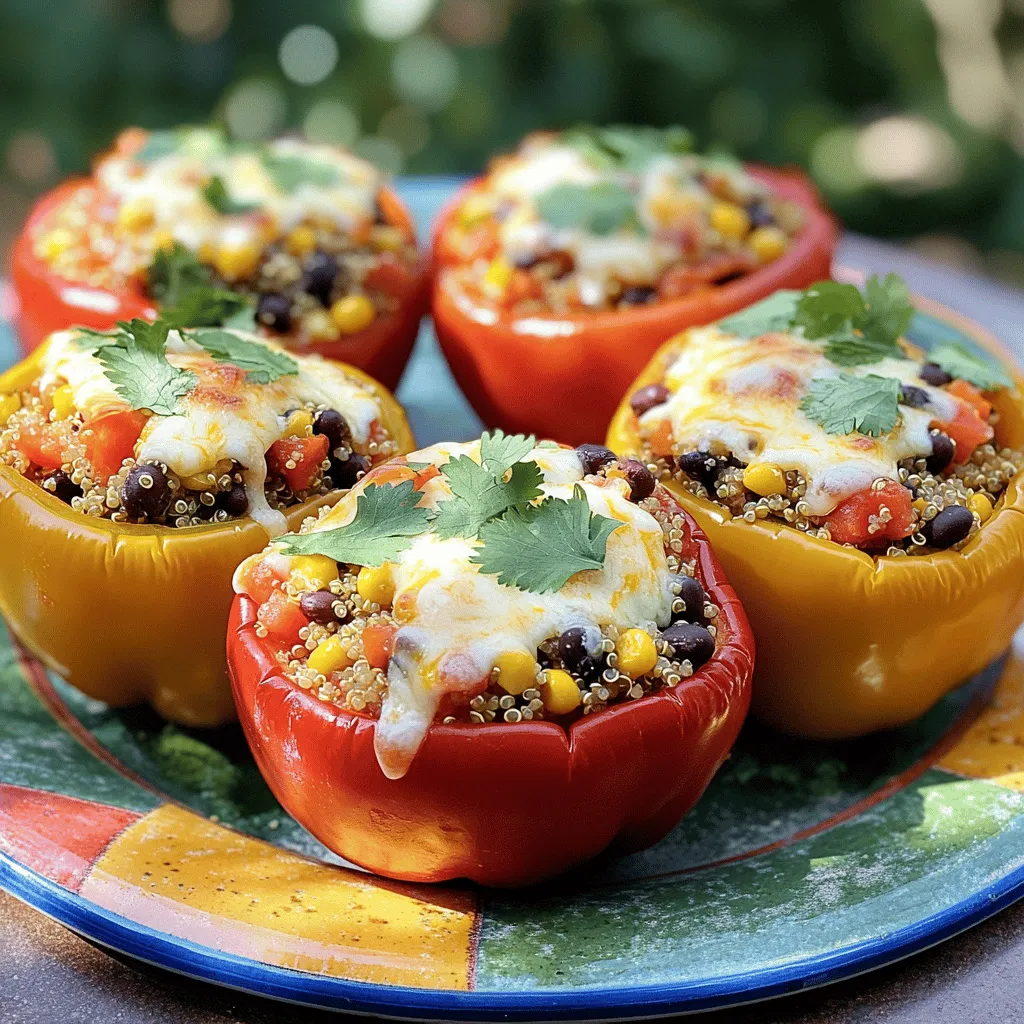
If you love bold flavors and easy meals, you’ll adore this savory stuffed peppers recipe. With fresh ingredients and simple

- 2 pounds boneless, skinless chicken thighs - 1 cup jasmine rice, rinsed - 1 medium onion, diced - 4 cloves garlic, minced For a delicious Instant Pot chicken and rice, you'll need chicken thighs. They stay juicy and tender. Rinsed jasmine rice gives the dish a lovely texture. Aromatics like onion and garlic add depth to the flavor. - 1 teaspoon dried thyme - 1 teaspoon dried oregano - ½ teaspoon smoked paprika Herbs and spices bring life to your meal. Dried thyme and oregano add a fresh taste. Smoked paprika gives a hint of warmth and richness. These simple additions make every bite tasty. - 2 cups chicken broth - Juice and zest of 1 lemon - 2 tablespoons olive oil Liquid ingredients are key for a great result. Chicken broth provides a savory base. Lemon juice and zest brighten the dish. Olive oil helps in sautéing and adds flavor. For the complete recipe, check the Full Recipe. Start by setting the Instant Pot to Sauté mode. Add two tablespoons of olive oil. Once the oil is hot, toss in one diced onion. Sauté the onion for about 3-4 minutes until it becomes soft and clear. Then, add four minced garlic cloves. Cook for one more minute until the garlic smells great. This step builds a strong flavor base for our dish. Next, season two pounds of boneless, skinless chicken thighs. Sprinkle salt, pepper, one teaspoon of dried thyme, one teaspoon of dried oregano, and half a teaspoon of smoked paprika. Mix it well. Add the seasoned chicken to the pot. Brown it for about 3 minutes on each side. This step is key for adding depth to the flavor. Now, stir in one cup of rinsed jasmine rice. Pour in two cups of chicken broth, the juice, and zest of one lemon. Make sure to scrape up any bits stuck to the bottom of the pot. This prevents burning and ensures a tasty meal. Close the lid and set the valve to Sealing. Select Pressure Cook on high for 8 minutes. It's crucial to follow this timing for best results. Once the cooking time is up, let the pressure release naturally for 10 minutes. This step helps keep the chicken tender. After 10 minutes, switch the valve to Venting to release any remaining steam. Always be careful when doing this. Open the lid and add one cup of frozen peas. Gently fold everything together. The heat from the dish will warm the peas quickly. Finally, serve the chicken and rice in bowls. Garnish with freshly chopped parsley for a nice touch. Enjoy this easy family meal! To make fluffy rice, rinse the jasmine rice well before cooking. Rinsing removes extra starch. This helps prevent clumping. The right liquid ratio is key too. For jasmine rice, use a 1:2 ratio of rice to liquid. If you want softer rice, add a little more broth. If the rice is too wet, reduce the liquid next time. To boost flavor, add herbs like basil or cilantro. Fresh herbs can brighten the dish. You can also try spices like cumin or curry powder. To make it spicy, add red pepper flakes or diced jalapeños. Start with a small amount and adjust to your taste. To keep your Instant Pot in good shape, clean it after every use. Wash the inner pot and lid with warm soapy water. Avoid using abrasive tools. If you face issues like the pot not sealing, check the rubber ring. Make sure it’s clean and properly placed. If your Instant Pot doesn't come to pressure, ensure the valve is set to Sealing. {{image_2}} You can swap chicken for other meats. Turkey thighs work well in this dish. They have a similar texture and flavor. If you prefer fish, try salmon. It cooks quickly and adds a nice twist. - Cooking times for various proteins: - Turkey thighs: Cook for 10 minutes on high pressure. - Salmon fillets: Cook for just 3 minutes on high pressure. To make this dish vegan, skip the chicken and use chickpeas. They add protein and fiber. You can also use tofu for a different texture. - Protein substitutes for vegetarian diets: - Chickpeas: Use 1 can, drained and rinsed. - Tofu: Use 14 ounces, cubed and pressed. You can change the flavors easily by adding different spices. Try curry powder for a warm taste. Smoked paprika adds a rich, smoky flavor. - Using different broths for variety: - Use vegetable broth for a vegan option. - Try coconut milk for a creamy texture and tropical taste. For more ideas, check out the Full Recipe for Instant Pot Lemon Herb Chicken & Rice . To store leftovers of your Instant Pot chicken and rice, let it cool first. Place it in an airtight container. This keeps your meal fresh. Glass or BPA-free plastic containers work best. Make sure to seal them tight to avoid air exposure. For freezing, portion the chicken and rice into smaller containers. Leave some space in the container for expansion. You can freeze it for up to three months. When ready to eat, thaw it in the fridge overnight. Reheat in the microwave or on the stove until hot. Stir it well to heat evenly. In the fridge, your chicken and rice can last about three to four days. If it smells off or looks discolored, do not eat it. Signs of spoilage include a slimy texture or sour smell. Always check before serving leftovers! Yes, you can use brown rice. However, you need to change the cooking time. Brown rice takes longer to cook than jasmine rice. Set the Instant Pot for 22 minutes on high pressure instead of 8 minutes. Also, add a bit more liquid. Use 2.5 cups of chicken broth instead of 2 cups. This ensures the rice cooks well and stays tender. If your Instant Pot fails to reach pressure, check a few things. First, make sure the lid is on tight and the valve is set to Sealing. If it still doesn’t work, look for food blocking the steam release. This can keep pressure from building. If the pot is too full, it might also cause issues. Make sure not to fill it over halfway with ingredients. To prep in advance, you can chop your onion and garlic the night before. Store them in the fridge in a sealed container. You can also season the chicken and keep it in the fridge. Just remember to add the rice and broth on the day you cook. This keeps everything fresh. You can also cook the dish and store leftovers for later. You learned how to make Instant Pot chicken and rice with simple steps. We covered essential ingredients, from chicken and jasmine rice to herbs and spices. I shared tips for perfect cooking, like sautéing aromatics and browning chicken. Variations let you swap proteins or go vegetarian, while proper storage keeps leftovers fresh. Embrace this dish for its flavor and ease. With practice, you can create a meal everyone will love.

Instant Pot Chicken and Rice Easy Family Meal Recipe

Are you looking for a simple, delicious family meal? Look no further! This Instant Pot Chicken and Rice recipe is

To make these no-bake chocolate oat bars, you need just a few key ingredients: - 2 cups rolled oats - 1 cup almond butter (or peanut butter) - 1/2 cup honey or maple syrup - 1/4 cup cocoa powder - 1 teaspoon vanilla extract - 1/4 teaspoon salt - 1/2 cup dark chocolate chips (dairy-free if preferred) These items create a tasty, chewy, and satisfying treat. The rolled oats provide texture and fiber. Almond butter adds creaminess, while honey or maple syrup offers natural sweetness. Cocoa powder gives a rich chocolate flavor that you’ll love. If you want to switch things up, consider these alternatives: - Nut Butters: You can use peanut butter, cashew butter, or a seed butter for a nut-free option. - Sweeteners: Try agave syrup or brown rice syrup if you prefer different sweeteners. - Chocolate: Use white chocolate chips or carob chips for a different flavor twist. These swaps can help cater to your taste or dietary needs without losing the treat's goodness. Enhance your bars with these fun toppings: - Shredded coconut for a tropical flair - Chopped nuts for extra crunch - Extra chocolate chips for a double chocolate treat These toppings not only add flavor but also make your bars look even more appealing. You can mix and match based on what you have at home or what you enjoy. For the full recipe, check out the detailed steps! Making no-bake chocolate oat bars is simple and quick. You can prepare these bars in just 15 minutes. The mixture sets in the fridge for two hours. You will enjoy a tasty treat in no time. Start with a large mixing bowl. Add the rolled oats, almond butter, honey, cocoa powder, vanilla extract, and salt. Mix them well until they blend nicely and feel sticky. This step is key to holding the bars together. Next, fold in the dark chocolate chips. Make sure they spread evenly throughout the mix. Line an 8x8 inch baking dish with parchment paper. Leave some paper hanging over the edges. This will help you lift the bars out later. Press the mixture into the bottom of the dish firmly. You can use your hands or a spatula for this. For extra flavor, add toppings like shredded coconut or chopped nuts on top. Refrigerate the dish for at least two hours. This helps the bars set. Once they are firm, lift them out using the parchment paper. Cut into squares or rectangles. Store any leftovers in an airtight container in the fridge for up to a week. For the full recipe, check out the earlier section. To get the best texture for your no-bake chocolate oat bars, follow these tips: - Use rolled oats for a chewy base. - Make sure your nut butter is creamy and smooth. - Mix until the blend is sticky but not too wet. - Pack the mixture firmly into the dish for a solid bar. These steps ensure your bars hold shape and have a great bite. You can make these bars your own by changing some ingredients: - Swap almond butter for peanut butter or sunflower seed butter. - Try agave nectar or brown rice syrup instead of honey. - Add spices like cinnamon or nutmeg for warmth. - Mix in dried fruits, like raisins or cranberries, for extra sweetness. This lets you create a flavor that suits your taste. Watch out for these common mistakes: - Not using enough nut butter can make the bars crumbly. - Forgetting to pack the mixture tightly can lead to loose bars. - Skipping the fridge time will result in soft bars that fall apart. - Using old or stale oats can affect the taste and texture. Avoiding these pitfalls will help you make perfect bars every time. For the full recipe, check out the instructions above. {{image_2}} You can easily make vegan and nut-free options for these bars. Instead of almond butter, use sunflower seed butter. It gives a rich taste and helps bind the bars. For sweeteners, choose agave nectar instead of honey. This swap keeps the recipe plant-based. Always check labels to ensure nut-free ingredients. This way, everyone can enjoy these tasty treats. You can mix up the flavors in these bars. Try adding a pinch of cinnamon for warmth. You can also use different extracts like almond or mint. Swapping cocoa powder for carob powder gives a unique twist. For a fruity touch, fold in dried fruit like cranberries or raisins. Each flavor change can give a new experience to your snack. Seasonal ingredients can elevate your bars. In fall, add pumpkin spice or pureed pumpkin for a cozy flavor. During summer, consider mixing in fresh berries for a burst of freshness. In winter, try adding crushed peppermint for a festive touch. These seasonal changes keep your bars exciting and fun to eat all year long. To keep your no-bake chocolate oat bars fresh, store them in an airtight container. Place the bars in the fridge right after they set. This helps maintain their texture and flavor. Keeping them cool also prevents spoilage. If you plan to eat them within a week, the fridge is perfect. You can freeze these bars for longer storage. First, cut them into squares. Wrap each piece tightly in plastic wrap. Then, place the wrapped bars in a freezer-safe bag. Label the bag with the date. They will stay good for up to three months. When you are ready to eat, just thaw them in the fridge overnight. These bars last about a week in the fridge. Check for signs of spoilage before eating. If you see mold or any strange smell, do not eat them. Also, if the texture becomes very hard or dry, it's best to toss them. Always trust your senses; they can help you avoid spoiled food. Yes, you can use other grains like quinoa or barley. Just make sure they are cooked and cooled. This change will alter the taste and texture slightly. Quinoa gives a nice crunch, while barley has a mild flavor. To make these bars gluten-free, use certified gluten-free oats. Some oats can have gluten due to cross-contact. Always check the packaging to ensure you have a safe option. This simple swap works well, keeping the bars tasty and safe for those with gluten issues. You can use agave syrup or brown rice syrup as alternatives. Both will give sweetness without changing the flavor too much. If you prefer a sugar option, try granulated sugar mixed with a bit of water. Just adjust the amount to get the right sweetness. These bars can last up to a week in the fridge. Store them in an airtight container to keep them fresh. If you notice any changes in texture or smell, it’s best to toss them. Enjoy them within the week for the best taste. Yes, adding protein powder is a great idea! You can mix in about 1/4 to 1/2 cup of your favorite protein powder. It boosts nutrition without changing the flavor much. Just adjust any liquid to keep the right texture. For the full recipe, check the ingredients above. This article covered how to make no-bake chocolate oat bars. We discussed key ingredients, alternatives, and toppings. I shared step-by-step instructions and tips for the best texture. Customizations and variations let you explore flavors. I also highlighted storage tips for freshness and answered common questions. These bars are an easy, tasty treat. Make them your own with fun changes! Enjoy your delicious creation and share it with others.

No-Bake Chocolate Oat Bars Delightful Sweet Treat

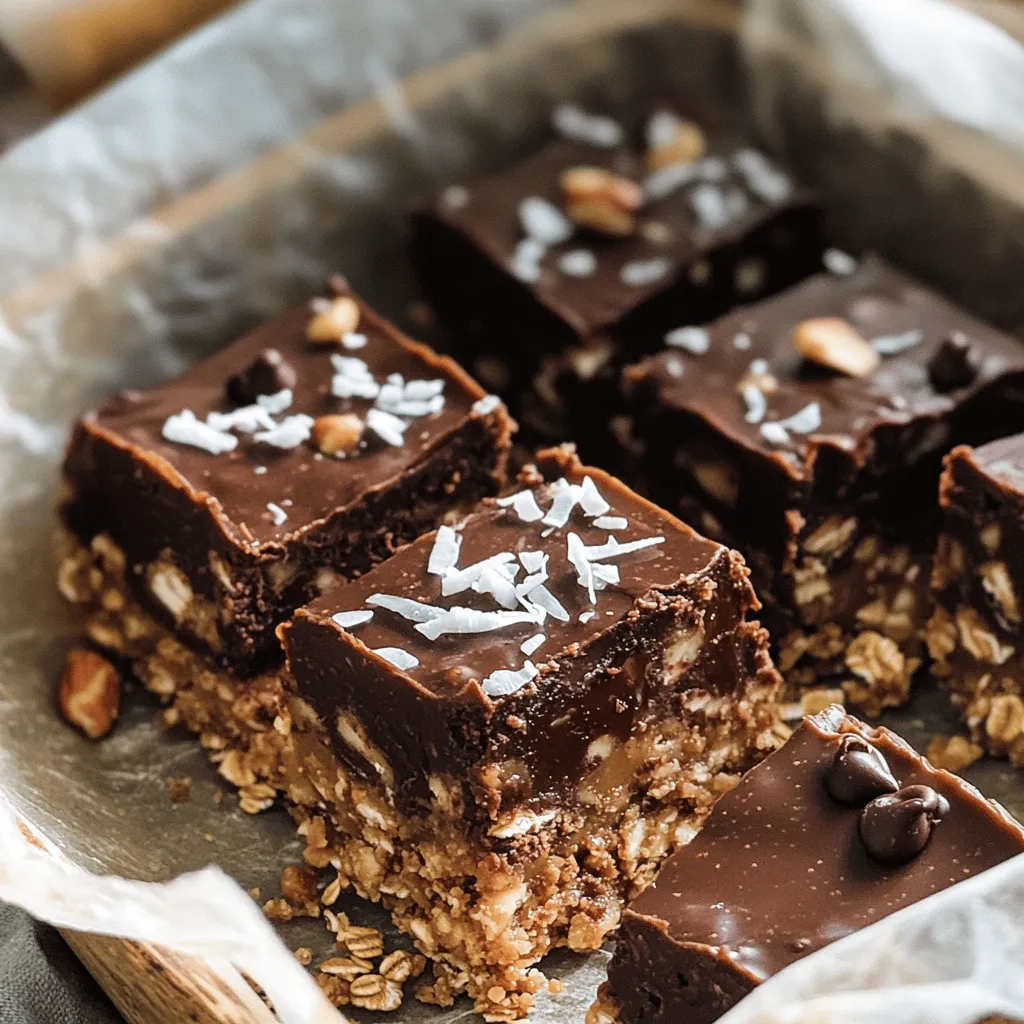
Are you ready for a sweet treat that’s easy to make? My No-Bake Chocolate Oat Bars are not just delicious;

- 1 pound large shrimp, peeled and deveined - 2 tablespoons olive oil - 2 tablespoons chili powder - 1 teaspoon cumin - 1 teaspoon smoked paprika - ½ teaspoon cayenne pepper - Salt and pepper to taste - 8 small corn tortillas - 1 cup shredded red cabbage - 1 avocado, sliced - ¼ cup fresh cilantro, chopped - 1 lime, cut into wedges - Spicy mayo (1/4 cup mayonnaise mixed with 1 teaspoon sriracha) Each serving of Spicy Shrimp Tacos has about 350 calories. You also get 25 grams of protein and 15 grams of fat. This meal is rich in flavor and nutrients, making it a great option for a quick lunch or dinner. You can find the full recipe above to guide your cooking! To start, gather your shrimp and a bowl. Add the shrimp to the bowl along with the olive oil and spices. I use chili powder, cumin, smoked paprika, cayenne pepper, salt, and pepper. Mix well until each shrimp is coated evenly. This step is crucial for great flavor. Next, heat a skillet over medium-high heat. Once it’s hot, add the shrimp in a single layer. Cook them for about 2-3 minutes on each side. You’ll know they are done when they turn pink and opaque. This quick cooking keeps them tender. While your shrimp cook, it’s time to warm the corn tortillas. Use a separate dry skillet for this. Warm them for about 30 seconds on each side. You want them pliable but not crispy. Now, let’s assemble your tacos. Start by placing a good amount of shredded red cabbage on each tortilla. Then, add the spicy shrimp on top. Next, add a few slices of avocado and a sprinkle of fresh cilantro. For a kick, drizzle some spicy mayo over each taco. Squeeze fresh lime juice on top for added flavor. Once you follow these steps, you’ll have delicious spicy shrimp tacos ready to enjoy. For the full recipe, refer to the earlier section. To make the best spicy shrimp, you can adjust the spice levels to your taste. If you like it hot, add more cayenne pepper. If you prefer mild, cut back on the chili powder or cayenne. Always taste the shrimp mixture before cooking to find your perfect balance. For tender shrimp, avoid overcooking. Cook them for just 2-3 minutes on each side. They should turn pink and opaque. Remove them from heat right away to keep them juicy. Warming tortillas is easy. You can use a dry skillet over medium heat. Heat each tortilla for about 30 seconds on each side. This softens them and makes them easier to fold. Store-bought tortillas are quick, but homemade ones taste great. If you have time, try making your own. They add a personal touch to your tacos. Presentation matters when serving. Start with a layer of shredded red cabbage on each tortilla. This adds color and crunch. Then, place the spicy shrimp on top. For garnishing, add slices of avocado and fresh cilantro. A drizzle of spicy mayo gives it a nice finish. Serve lime wedges on the side for extra zing. This makes your tacos look beautiful and appetizing, making every bite a delight. {{image_2}} You can swap shrimp for fish or chicken. Fish, like tilapia, cooks fast and tastes great. Chicken is another tasty option. Just cut it into small pieces. Use the same spices and cooking method. This makes it easy to enjoy different flavors. If you want a plant-based meal, try tofu or jackfruit. Tofu soaks up flavors well. Press it to remove water and then season it. Jackfruit has a meaty texture and works nicely in tacos. For sides, replace red cabbage with lettuce or add diced tomatoes. This keeps your tacos fresh and vibrant. Get creative with sauces and toppings. Try different salsas like mango or pineapple for sweetness. You can also add jalapeños for more heat. Seasonal veggies, like bell peppers or zucchini, add crunch and color. Mix and match to find your favorite combination! For the full recipe, check out the Spicy Shrimp Tacos details above! Store your leftover spicy shrimp tacos in the fridge. Use an airtight container for best results. This helps keep the shrimp and toppings fresh. I recommend consuming them within 2 days. The shrimp can lose their texture over time. The cabbage may wilt, but it still tastes good. You can freeze these tacos if you want to save some for later. For assembled tacos, wrap them tightly in plastic wrap and place them in a freezer bag. Remove as much air as possible. You can also freeze the shrimp separately. Thaw them overnight in the fridge before reheating. To reheat, you can use a skillet over medium heat. Warm the tortillas for a few seconds on each side until soft. To keep your tacos fresh, store the shrimp and toppings separately. This prevents the tortillas from getting soggy. Use containers that allow some airflow, like vented plastic or glass. Also, only assemble tacos when you are ready to eat. This way, you keep the crunch of the cabbage and tortillas. Enjoy your meal without worrying about sogginess! The best toppings really make your tacos pop! Here are some popular choices: - Shredded red cabbage: Adds crunch and color. - Sliced avocado: Creamy texture balances the spice. - Fresh cilantro: Brightens the flavor. - Diced tomatoes: Adds freshness and juiciness. - Spicy mayo: Gives a zesty kick. - Lime wedges: A squeeze of lime gives a fresh burst of flavor. These toppings work together to create a tasty bite. Feel free to mix and match to find your favorite combo! Yes, you can prepare some parts ahead of time. Here’s how to do it right: - Cook the shrimp: You can cook them a day before. Just store them in the fridge. - Prep the toppings: Chop veggies and make spicy mayo ahead of time. - Warm the tortillas: Warm them right before serving for the best taste. This way, you can save time and enjoy your meal with friends or family! You can easily change the spice level to suit your taste. Here are some tips: - Lower the heat: Use less cayenne pepper in the shrimp mix. - Add toppings: Use cooling toppings like avocado or sour cream. - Increase the heat: Add more cayenne or even some chopped jalapeños if you like it spicy. Adjusting the heat makes these tacos fun for everyone at your table! In this post, we explored how to make spicy shrimp tacos. We covered the main ingredients, detailed step-by-step instructions, and offered tips for perfection. I shared ways to customize flavors and gave storage advice for leftovers. These tacos are not only tasty but also fun to make and share. Enjoy experimenting with the recipe to match your taste. Happy cooking!

Spicy Shrimp Tacos Flavorful and Easy Meal Recipe

Get ready for a flavor explosion with my easy Spicy Shrimp Tacos! This dish packs a punch, featuring juicy shrimp

To make a delicious creamy tomato basil soup, you need simple, fresh ingredients. Each item plays a key role in bringing out rich flavors. Here’s what you will need: - Olive Oil - Onion - Garlic - Diced Tomatoes - Vegetable Broth - Sugar - Dried Oregano - Cream - Fresh Basil - Optional Toppings Using quality ingredients makes a huge difference. Olive oil adds a nice richness. Onions provide sweetness, while garlic gives depth. Diced tomatoes are the base of the soup, bringing acidity and flavor. Vegetable broth enhances the overall taste and keeps it light. Sugar balances the acidity of the tomatoes. Dried oregano adds a hint of earthiness. Cream makes the soup velvety and smooth. Finally, fresh basil adds a burst of freshness and aroma. You can also top your soup with grated Parmesan cheese for extra flavor. For the complete recipe, check out the Full Recipe section. It guides you through each step to make this comforting meal with ease. Sautéing Onions and Garlic Start by heating 2 tablespoons of olive oil in a large pot over medium heat. Once the oil is hot, add 1 chopped onion. Cook it for about 5 minutes. You want the onion to be soft and translucent. Next, add 3 minced garlic cloves. Stir and cook for 1 more minute. The smell will be amazing! Adding Tomatoes and Broth Now, add 2 cans of diced tomatoes, undrained, to the pot. Pour in 2 cups of vegetable broth, too. Mix in 1 teaspoon of sugar and 1 teaspoon of dried oregano. This helps balance the flavors. Season with salt and pepper to taste. Simmering the Soup Bring the mixture to a simmer. Let it cook for about 15 minutes. This step lets all the flavors come together nicely. You’ll notice the rich aroma filling your kitchen. Pureeing the Mixture After simmering, take the pot off the heat. Use an immersion blender to puree the soup until it’s smooth. If you don’t have one, carefully transfer it to a countertop blender in batches. Be careful with the hot liquid! Incorporating Cream and Basil Return the pureed soup to the pot over low heat. Stir in 1 cup of heavy cream or coconut cream if you want a dairy-free option. Add 1 cup of fresh basil leaves, packed. Heat gently for about 5 minutes. This makes the soup creamy and flavorful. Final Heating and Seasoning Make sure the soup is warmed through. Taste and adjust seasoning if needed. Serve hot! You can garnish with grated Parmesan cheese and a few extra basil leaves for a nice touch. For more details, check out the full recipe! - Choosing Fresh Basil: Always use fresh basil. It gives the soup a bright taste. Look for vibrant green leaves. Avoid any that are brown or wilting. - Adjusting Seasoning: Taste your soup as it cooks. Add salt and pepper to enhance the flavor. A pinch of sugar balances the acidity of tomatoes too. - Alternative Cream Substitutes: If you want a lighter soup, use coconut cream. It adds a nice twist and is dairy-free. You can also try cashew cream for a nutty flavor. - Cooking on Low Heat: After blending, keep the soup on low heat. This helps the flavors blend well without burning. Stir occasionally to prevent sticking. - Soup Too Thick Solutions: If your soup is too thick, add more vegetable broth. Stir well to get the right consistency. - Adjusting Acidity: If the soup tastes too acidic, add a pinch of sugar. It offsets the tanginess from the tomatoes. - Avoiding Burnt Garlic: Be careful when cooking garlic. Add it after the onions are soft. Cook it just until fragrant to avoid burning. This will help you make a perfect creamy tomato basil soup. For more details, check the Full Recipe. {{image_2}} For a vegan option, swap heavy cream with coconut cream. This change keeps the soup creamy and rich, while also making it dairy-free. Coconut cream adds a slight sweetness that goes well with the tomatoes. If you need a gluten-free version, you are in luck! This creamy tomato basil soup naturally fits the bill. Just make sure your vegetable broth is gluten-free. Many brands are safe, but always check the label. You can add more veggies to boost nutrition. Carrots and celery work great in this soup. Chop them up and sauté them with the onion. This step brings out their natural sweetness. Herbs can also change the flavor profile. You might try thyme or parsley for a different taste. These herbs add freshness and depth, making the soup even more delightful. If you like heat, spice it up! Add crushed red pepper flakes or a dash of cayenne. Start with a little, taste, and add more if you want. This way, you can control the spice level to your liking. Feel free to explore these variations to make the creamy tomato basil soup your own. Each option adds a unique twist, while still keeping the comfort of this classic dish. For the full recipe, check out the [Full Recipe]. To keep your creamy tomato basil soup fresh, store it in the right containers. Use airtight containers to avoid any spills or odors. Glass jars or BPA-free plastic containers work well. Let the soup cool to room temperature before sealing. For freshness, the soup lasts about 3 to 5 days in the fridge. Always check for any changes in smell or color before eating. If you want to save some soup for later, freezing is a great option. First, let the soup cool completely. Then, pour it into freezer-safe containers or heavy-duty freezer bags. Leave some space at the top, as the soup will expand when frozen. For thawing, move the soup to the fridge overnight. If you're in a hurry, you can use the microwave on defrost mode. Reheat it on the stove until it’s piping hot. Stir often to keep the texture creamy. Enjoy your soup anytime! For the full recipe, check out the details above. To boost flavor, use fresh herbs. Add more garlic and onion for depth. A splash of balsamic vinegar adds tang. You can also try a pinch of red pepper flakes for warmth. Don’t forget to taste and adjust salt and pepper as you go. Yes, you can use fresh tomatoes! For best results, use ripe, juicy tomatoes. Peel and chop them before cooking. Fresh tomatoes may take longer to cook down, so adjust your simmer time. Creamy tomato basil soup stays fresh for about 3 to 4 days in the fridge. Store it in an airtight container. Reheat gently on the stove, adding a splash of broth if it seems too thick. This soup pairs well with crusty bread or grilled cheese. A simple salad adds freshness. You can also serve it with crackers for a fun crunch. For a complete meal, try it with a side of roasted vegetables. This blog post covered how to make a delicious creamy tomato basil soup. We went over the key ingredients you need, from olive oil to fresh basil. I shared step-by-step instructions to make it easy. Think about tips for flavor and common issues you might face. You can also explore variations, storage tips, and FAQs to make this soup your own. Enjoy creating this dish, and feel confident in customizing it to fit your taste!

Creamy Tomato Basil Soup Hearty and Comforting Meal

There’s nothing quite like a warm bowl of homemade creamy tomato basil soup. This dish is perfect for any day

- 1½ cups all-purpose flour - ½ cup granulated sugar - ¼ cup brown sugar, packed - 2 teaspoons baking powder - ½ teaspoon baking soda - ½ teaspoon salt - 1 tablespoon lemon zest - ½ cup buttermilk - ⅓ cup unsalted butter, melted and cooled - 2 large eggs - 1 teaspoon vanilla extract - 1½ cups fresh blueberries - 2 tablespoons lemon juice - Optional: 1 tablespoon coarse sugar for topping Gather these ingredients before you start. Fresh blueberries burst with flavor, and lemon zest adds a bright touch. Using both granulated and brown sugar gives depth to the sweetness. Buttermilk makes the muffins tender and moist. The baking powder and baking soda help them rise perfectly, while salt balances the flavors. Mixing these ingredients together creates a delightful batter. You can find the full recipe to guide you in making these treats. Enjoy the process! First, you need to preheat your oven to 375°F (190°C). This step warms the oven and helps the muffins rise well. While the oven heats, prepare your muffin tin. Line it with paper liners or lightly grease it. This prevents the muffins from sticking and makes cleanup easy. Next, let’s combine the dry ingredients. In a large mixing bowl, whisk together: - 1½ cups all-purpose flour - ½ cup granulated sugar - ¼ cup brown sugar, packed - 2 teaspoons baking powder - ½ teaspoon baking soda - ½ teaspoon salt - 1 tablespoon lemon zest Mix these well until they are evenly combined. Now, grab another bowl to mix the wet ingredients. Whisk together: - ½ cup buttermilk - ⅓ cup unsalted butter, melted and cooled - 2 large eggs - 1 teaspoon vanilla extract - 2 tablespoons lemon juice Make sure this mixture is smooth and well combined. Pour the wet ingredients into the dry ingredients. Gently mix until just combined. It’s okay if you still see some flour. Overmixing can make the muffins tough. Now, fold in the blueberries gently. Use about 1½ cups of fresh blueberries or thawed frozen ones. Ensure the blueberries are evenly spread throughout the batter. Now it’s time to divide the batter. Spoon it evenly into the prepared muffin cups, filling them about ¾ full. If you like, sprinkle the tops with coarse sugar for extra texture. Place the muffin tin in the preheated oven. Bake for 18 to 20 minutes. Check for doneness by inserting a toothpick into the center of a muffin. If it comes out clean, the muffins are ready. After baking, let the muffins cool in the pan for about 5 minutes. Then, transfer them to a wire rack to cool completely. Enjoy these delicious treats for breakfast or as a snack! You can find the full recipe above for more details. To make the best lemon blueberry muffins, avoid overmixing the batter. When you combine the wet and dry ingredients, mix just until you see no dry flour. A few lumps are fine. Overmixing can lead to tough muffins. Measuring flour properly is key. Use a spoon to scoop flour into your measuring cup. Avoid packing it down. Level it off with a knife for accuracy. This will help your muffins rise well. If you don't have buttermilk, use milk with vinegar or lemon juice. Just add a tablespoon of either to a cup of milk. Let it sit for five minutes, and you have a perfect substitute. For sugar, you can use coconut sugar or honey. If you choose honey, reduce the liquid in your recipe slightly. Both options add unique flavors. To add more flavor, consider spices like cinnamon or nutmeg. A dash of vanilla extract can also brighten the taste. Just be careful not to overpower the lemon. Using fresh blueberries gives the best flavor and texture. If you use frozen ones, make sure to thaw and drain them first. This prevents extra moisture in the batter. For the full recipe, check out the detailed instructions above. {{image_2}} You can easily switch up the fruit in your muffins. Raspberries add a nice tartness. Strawberries bring sweetness and a lovely color. Both fruits work well with lemon. They create a bright and fresh taste. You can also try adding nuts or chocolate. Walnuts or pecans add crunch and richness. Dark chocolate chips can give a sweet surprise. Just fold them into the batter, just like the blueberries. If you need gluten-free muffins, use a gluten-free flour mix. Look for one that has xanthan gum. This will help your muffins rise and hold together. For a vegan version, swap the eggs for flax eggs. Mix one tablespoon of ground flaxseed with three tablespoons of water. Let it sit for five minutes to thicken. Use almond milk instead of buttermilk. This keeps the muffins moist and tasty. These simple swaps let everyone enjoy lemon blueberry muffins! For the full recipe, check the recipe section above. To keep your lemon blueberry muffins fresh, store them at room temperature. Place them in an airtight container. This will keep them moist for up to three days. If you want them to last longer, you can refrigerate them. However, refrigeration can make them a bit dry. For the best taste, I recommend freezing muffins. Wrap each muffin tightly in plastic wrap. Then, place them in a freezer bag. This method helps them stay fresh for up to three months. When you're ready to eat, just thaw them overnight in the fridge. To enjoy your muffins again, reheat them properly. The best way is to use an oven. Preheat your oven to 350°F (175°C). Place the muffins on a baking sheet and heat them for about 5 to 10 minutes. This warms them up and keeps the texture nice. You can also use a microwave for quick reheating. Place the muffin on a microwave-safe plate. Heat it for about 10 to 15 seconds. Be careful not to overheat, or it may get tough. For serving, try adding a light spread of butter on top. A sprinkle of extra lemon zest can also enhance the flavor. Enjoy them warm for the best experience. Check out the Full Recipe for more detailed instructions! To make your muffins fluffy, use fresh baking powder. This helps create air pockets in the batter. Also, do not overmix your batter. Mix just until you see no dry flour. This keeps the muffins light. Adding buttermilk also helps, as it adds moisture and creates a tender crumb. Yes, you can make lemon blueberry muffins ahead of time. You can bake them a day before you plan to serve them. Store them in an airtight container to keep them fresh. You can also freeze them for later. Just thaw and warm them before serving. If you don’t have buttermilk, you can make your own. Mix one cup of milk with one tablespoon of lemon juice or vinegar. Let it sit for five minutes. This will create a similar tangy flavor and acidity that buttermilk brings to the muffins. Lemon blueberry muffins last about 2-3 days at room temperature. If you keep them in the fridge, they can last up to a week. For long-term storage, freeze them. They can last for up to three months in the freezer if sealed well. Yes, you can use frozen blueberries. Make sure to thaw and drain them first. This prevents extra moisture in your batter. Frozen blueberries may tint your muffins a bit more than fresh ones, but they will still taste great. For the full recipe, check out the section above. Enjoy baking these delightful muffins! This guide covered all you need to make delicious lemon blueberry muffins. You learned about the key ingredients, step-by-step instructions, and useful tips. Variations and storage info helped broaden your muffin-making skills. With these insights, you can create your own tasty treats. Experiment with flavors and share your creations. Enjoy your baking journey!

Lemon Blueberry Muffins Fresh and Flavorful Delight

Are you ready to bake some zesty lemon blueberry muffins? These treats burst with flavor, making them perfect for breakfast

Older posts
Newer posts
← Previous Page1 … Page39 Page40 Page41 … Page77 Next →

dsad

© 2025 My Saved Recipe • Built with GeneratePress

Our Policies

  • Copyright Policy
  • Cookie Policy
  • GDPR Policy
  • Privacy Policy
  • Disclaimer
  • Terms Of Use

More Information

  • Home
  • About
  • Contact
  • Appetizers
  • Dessert
  • Dinner
  • Drinks
©2025, My Saved Recipe About Back To Top