Skip to content
DisclaimerTerms Of UseGDPR PolicyCookie Policy

My Saved Recipe

  • Home
  • Drinks
  • Appetizers
  • Dinner
  • Dessert
  • About
  • Contact
  • Privacy Policy
DisclaimerTerms Of UseGDPR PolicyCookie Policy

Savannah

For these tasty egg rolls, you will need: - 8 egg roll wrappers - 1 pound sirloin steak, thinly sliced - 1 medium onion, thinly sliced - 1 green bell pepper, thinly sliced - 1 cup provolone cheese, shredded - 2 tablespoons olive oil - 2 cloves garlic, minced - Salt and pepper to taste - Vegetable oil for frying These main ingredients bring the classic flavors of a Philly cheesesteak into a fun snack. The sirloin steak adds rich taste, while the provolone cheese melts beautifully inside. You can also play with these add-ins: - Mushrooms, for an earthy flavor - Spinach, for a healthy twist - Hot sauce, if you want some heat These optional ingredients let you get creative. Feel free to mix and match based on what you enjoy. To make these egg rolls, you will need: - A large skillet for cooking - A sharp knife for slicing - A cutting board for prep - A deep pan or fryer for frying - Paper towels for draining Having the right tools makes cooking easier. A large skillet helps cook the filling evenly. A deep fryer can give you that perfect crunch. For the full recipe, you can refer to the detailed cooking steps. To make the filling, start by heating olive oil in a large skillet. Use medium-high heat for the best results. Next, add the thinly sliced sirloin steak. Season it with salt and pepper. Cook the steak until it turns brown, which takes about 3-4 minutes. After that, toss in the sliced onions and green bell peppers. Add the minced garlic, too. Sauté these veggies until they are tender, around 5-6 minutes. Once done, remove the skillet from heat. Let the mixture cool a bit. Stir in the shredded provolone cheese until everything blends well. Now it's time to wrap the filling. Take an egg roll wrapper and lay it flat. Spoon a heaping tablespoon of the cheesesteak mix into the center of the wrapper. Fold the bottom corner over the filling first. Then, fold in the sides tightly. Roll it up from the bottom to the top. Use a little water to seal the edge of the wrapper. Repeat this process with the rest of the filling and wrappers until you finish them all. For frying, heat vegetable oil in a deep pan or fryer. Aim for a temperature of 350°F (175°C). Carefully place the egg rolls into the hot oil. Fry them in batches to avoid crowding. Cook until they are golden brown and crispy, which takes about 3-4 minutes on each side. Once they’re done, remove the egg rolls and let them drain on paper towels. Allow them to cool slightly before serving. You can find the full recipe for more details. To get crispy egg rolls, start with dry filling. Excess moisture can make them soggy. After cooking the filling, let it cool. This step helps the cheese set and keeps the wrappers firm. When wrapping, ensure each roll is tight. A tight roll keeps the filling inside while frying. Temperature is key for even browning. Heat your oil to 350°F (175°C) before adding egg rolls. If the oil is too hot, the outside will burn. If it's too cold, they will absorb oil and turn greasy. Fry in small batches. This helps keep the oil temperature steady. Dipping sauces can enhance the flavors of your egg rolls. I recommend using hot sauce for a kick. You can also try a creamy ranch or a sweet chili sauce. Both add a nice balance to the savory filling. For a twist, mix sriracha with mayo for a spicy dip. Enjoy exploring different flavors! {{image_2}} You can make a tasty vegetarian version. Replace the steak with sautéed mushrooms or tempeh. Use bell peppers and onions for the classic flavor. Add some spinach for extra color and nutrients. Provolone cheese still works great too. This way, you enjoy the same crunch and taste but without meat. If you love heat, add jalapeños to the mix. Chop fresh jalapeños and mix them with the steak. This adds a spicy kick. You can also use pickled jalapeños for a tangy flavor. Serve these egg rolls with a side of ranch or blue cheese to cool down the heat. Your guests will love this fiery twist! Switching up cheeses can create new flavors. Try cheddar for a sharp taste. For a creamier option, use mozzarella. Mixing cheeses can also work. Blend provolone with gouda for a rich flavor. Each cheese adds its unique touch while keeping the dish fun and exciting. Explore these combinations to find your favorite! For the full recipe, check out the detailed instructions above. After you enjoy these tasty egg rolls, you may have some left. Let them cool completely before storing. Place them in an airtight container. You can keep them in the fridge for up to three days. If you want to keep them longer, freezing is the best option. To reheat, I recommend using the oven. Preheat your oven to 350°F (175°C). Place the egg rolls on a baking sheet. Heat for about 10-15 minutes until they are warm and crispy again. You can also use an air fryer for this. It will make them even crispier in just 5-7 minutes. Freezing is a great way to save egg rolls for later. To freeze, wrap each egg roll in plastic wrap. Then, place them in a freezer bag or container. They can last up to three months in the freezer. When you are ready to eat them, you can fry them from frozen. Just make sure to adjust the frying time to about 5-6 minutes per side for a golden finish. For the full recipe, check the earlier section. Yes, you can make Philly Cheesesteak Egg Rolls ahead of time. You can prepare the filling and roll the egg rolls. Store them in the fridge for up to one day. Just cover them with plastic wrap to keep them fresh. When you're ready, fry them right before serving. This saves time and makes serving easy. The best sauce to serve with cheesesteak egg rolls is hot sauce. It adds a nice kick. You can also try ranch or cheese sauce for a creamy dip. Each sauce brings out different flavors in the egg rolls. Choose what you like best to enhance your snack. Yes, you can bake Philly Cheesesteak Egg Rolls. Preheat your oven to 400°F (200°C). Place the egg rolls on a baking sheet. Brush them lightly with oil for extra crispiness. Bake for about 20-25 minutes, flipping halfway through. Baking is a healthier option and still gives you a tasty treat. For the full recipe, check the main article. Philly cheesesteak egg rolls are a fun and tasty twist on a classic dish. We covered key ingredients, from main to optional, and discussed tools you need. The step-by-step guide helped you prepare, assemble, and fry the egg rolls just right. Tips included making them crispy and pairing with great dips. You learned about variations like vegetarian options and creative flavor twists. Finally, we shared storage advice to keep leftovers fresh. Enjoy your cooking adventure and impress friends and family with these delicious bites!

Philly Cheesesteak Egg Rolls Crispy and Delicious Snack

Are you ready to put a fun twist on a classic? Philly Cheesesteak Egg Rolls are your answer! These crispy,

To make a great King Cake, you need some key ingredients. Here’s what you will need: - 4 cups all-purpose flour - 1/2 cup granulated sugar - 1 packet (2 1/4 tsp) active dry yeast - 1 cup warm milk (about 110°F) - 1/2 cup unsalted butter, softened - 3 large eggs - 1/2 teaspoon salt - 1 tablespoon ground cinnamon - 1/4 cup brown sugar - 1 teaspoon vanilla extract - 1 tablespoon lemon zest - 1/2 cup cream cheese, softened - 1 cup powdered sugar - 2 tablespoons milk (for icing) - Colored sugar (purple, green, and gold) for decoration These ingredients work together to create a soft, sweet dough. The cream cheese filling adds a rich taste that everyone loves. You can make your King Cake unique by adding a few optional ingredients. Here are some ideas: - Chopped pecans or walnuts for crunch - Dried fruits like raisins or cranberries for sweetness - Orange zest instead of lemon for a citrus twist - Different extracts like almond or coconut for flavor These options can enhance your cake and make it special for your family and friends. Using fresh ingredients is key for a great King Cake. Here are some tips to help you choose: - Flour: Check the date on the bag to ensure it’s fresh. - Yeast: Make sure it’s active by checking the expiration date. - Butter: Use unsalted butter for better control over salt levels. - Eggs: Look for eggs that are clean and uncracked. - Milk: Choose whole or 2% milk for a richer taste. Fresh ingredients will give your King Cake the best flavor and texture. Enjoy the process, and happy baking! Start by making the yeast mixture. In a small bowl, combine warm milk, 1 tablespoon of sugar, and the yeast. Wait 5 to 10 minutes until the mixture becomes frothy. This step wakes up the yeast. Active yeast is key for a light, fluffy cake. Next, mix the dry ingredients. In a large bowl, whisk together flour, remaining sugar, and salt. Make a well in the center. Add the yeast mixture, softened butter, eggs, vanilla extract, and lemon zest. Mix until everything is combined. Then, knead the dough on a floured surface for 8 to 10 minutes. This helps develop the gluten, giving the cake its structure. After kneading, place the dough in a greased bowl. Cover it with a clean cloth and let it rise in a warm spot for about 1 to 1.5 hours. Once it doubles in size, punch it down. Roll it out into a rectangle about 1/4-inch thick. Spread cream cheese over the dough and sprinkle with the cinnamon-sugar mix. Roll the dough tightly from the long side to form a log. Pinch the edges to seal and shape it into a ring. Place it on a greased baking sheet. Cover the ring with a cloth. Let it rise again for 30 to 45 minutes. Preheat your oven to 350°F (175°C). Bake the cake for 25 to 30 minutes or until golden brown. Cool it on a wire rack. For the icing, whisk powdered sugar and milk until smooth. Drizzle it over the cooled cake and sprinkle with colored sugars. You can hide a small figurine or bean inside for fun! For the full recipe, check out the complete guide. When making king cake, avoid these common mistakes: - Skipping the yeast proofing: Always let the yeast foam before mixing. This step ensures the dough rises well. - Over-kneading the dough: Knead just until smooth. Too much kneading can make the cake tough. - Not measuring ingredients accurately: Use measuring cups and spoons. This helps maintain the right balance in flavors. Here are some best practices to make your king cake shine: - Use room temperature ingredients: Let butter and eggs sit out for a bit. This helps the dough mix better. - Create a warm rising environment: A warm spot helps the dough rise faster. Try using your oven with the light on. - Monitor bake time closely: Every oven is different. Check the cake a few minutes before the timer goes off. To take your king cake to the next level, consider these tips: - Add zest for brightness: Lemon or orange zest adds a fresh note. It brightens the sweet flavors. - Use flavored cream cheese: Try using cinnamon or vanilla cream cheese in the filling. This adds depth to the taste. - Experiment with spices: Add nutmeg or allspice for a warm flavor. These spices create a cozy, aromatic cake. For more ideas, check the full recipe. Enjoy creating your delicious homemade king cake! {{image_2}} You can get creative with the filling in your King Cake. The classic option is a sweet cream cheese filling, but you can try others too. Here are some fun ideas: - Fruit Preserves: Use raspberry or strawberry for a fruity twist. - Chocolate Spread: A rich chocolate filling adds a decadent touch. - Nut Butter: Almond or peanut butter can give your cake a nutty flavor. - Dulce de Leche: This caramel-like spread brings sweetness and creaminess. Mix and match these options to find your favorite! The icing on your King Cake can also be unique. While the standard icing is simple, you can try these alternatives: - Cream Cheese Frosting: This adds a richer flavor and creaminess. - Lemon Glaze: A zesty lemon frosting brightens the cake. - Maple Icing: Use maple syrup for a warm, sweet option. - Chocolate Drizzle: A chocolate topping can appeal to chocolate lovers. Experiment with these frostings for a personal touch. You can still enjoy King Cake if you have dietary needs. Here are some ideas to make it vegan or gluten-free: - Vegan Version: Use plant-based milk and replace eggs with flax eggs or applesauce. Use vegan butter for a rich texture. - Gluten-Free Version: Substitute all-purpose flour with a gluten-free flour blend. Make sure your baking powder is gluten-free. These options keep the joy of King Cake alive for everyone! For detailed recipes, check the Full Recipe. To keep your king cake fresh, wrap it well. Use plastic wrap or foil. Store it at room temperature for up to three days. If you want to keep it longer, consider refrigeration. In the fridge, it can last for about a week. Just be aware that refrigeration can change its texture a bit. If you have leftovers, I recommend reheating slices. Preheat your oven to 350°F (175°C). Place the slices on a baking sheet. Cover them with foil to maintain moisture. Heat for about 10-15 minutes. This will bring back the warm, soft texture. Freezing is a great option for king cake. After it cools completely, wrap it tightly in plastic wrap. Then, place it in a freezer bag. It can stay frozen for up to three months. When you are ready to eat, let it thaw in the fridge overnight. For a quick reheat, warm it in the oven as mentioned before. Enjoy the fresh taste anytime! King Cake has roots in ancient traditions. It started in France and became popular in New Orleans. People made it to celebrate Epiphany, marking the visit of the Three Wise Men. The cake is often enjoyed during Mardi Gras. It has bright colors and a hidden surprise inside. This fun treat brings joy and togetherness during festive times. Yes, you can make King Cake ahead of time. Prepare the dough and fill it with cream cheese. Once you shape the cake, wrap it tightly in plastic wrap. Keep it in the fridge overnight. Before serving, let it rise and bake it fresh. This way, you can enjoy a warm cake without much fuss. The figurine in King Cake symbolizes good luck. Traditionally, the person who finds the figurine hosts the next party. Some use a small bean instead of a figurine. This adds an element of surprise and fun to the cake. It also keeps the spirit of celebration alive. In this post, we explored how to make homemade King Cake. We covered key ingredients, step-by-step instructions, and tips for avoiding mistakes. We also discussed variations, storage, and answered common questions about this festive treat. Bringing together these elements can help you create an amazing King Cake. Remember, practice makes perfect, so do not hesitate to try different flavors and styles. Enjoy your baking and celebrating!

Homemade King Cake Tasty and Fun Recipe Guide

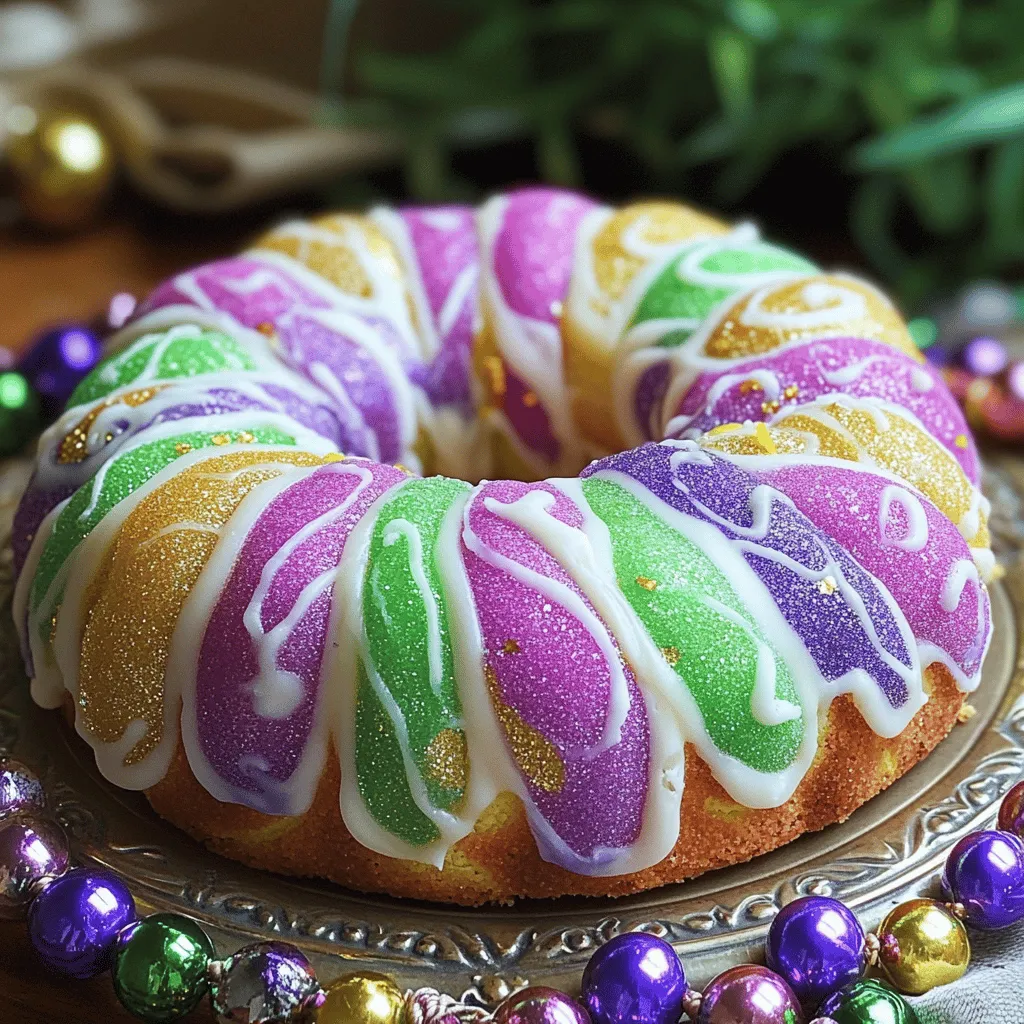
Are you ready to bake a delicious and fun Homemade King Cake? This festive treat is perfect for celebrations, and

- 1 cup unsalted butter - 2 cups granulated sugar - 4 large eggs - 1 cup all-purpose flour - 1 cup cocoa powder - 1 cup semi-sweet chocolate chips - 1 tsp vanilla extract - 1/4 tsp salt The brownie layer gives the cheesecake a rich base. I love using semi-sweet chocolate chips for extra flavor. You can melt the butter to start the process. Mixing in the sugar and eggs creates a smooth batter. - 16 oz cream cheese, softened - 1/2 cup granulated sugar - 1 cup sour cream - 3 large eggs - 1/4 cup strong brewed coffee, cooled - 1 tsp vanilla extract - 1/4 cup cocoa powder This layer makes the dessert creamy and rich. Use softened cream cheese for easy mixing. Strong brewed coffee adds depth without being too strong. Always mix on low to avoid lumps. - 1 cup heavy cream - 8 oz semi-sweet chocolate, chopped Ganache adds a smooth finish to the cheesecake. Heat the cream just until it simmers. Pour it over the chocolate and stir until smooth. It creates a shiny, decadent topping that makes the dessert look fancy. For the full recipe, check out the Coffee Chocolate Brownie Cheesecake section! To start, preheat your oven to 350°F (175°C). Grab a 9-inch springform pan and grease it well. In a saucepan, melt 1 cup of unsalted butter over medium heat. Once melted, take it off the heat and stir in 2 cups of granulated sugar. Then, add 4 large eggs and 1 teaspoon of vanilla extract, mixing until smooth. In another bowl, sift together 1 cup of all-purpose flour, 1 cup of cocoa powder, and 1/4 teaspoon of salt. Gradually mix this dry blend into the wet ingredients. Finally, fold in 1 cup of semi-sweet chocolate chips. Pour this brownie batter into your prepared pan and spread it evenly. Bake for 25 minutes and let it cool completely. In a large bowl, beat 16 ounces of softened cream cheese with 1/2 cup of granulated sugar until creamy. Next, add 1 cup of sour cream, 1/4 cup of cooled strong brewed coffee, and 1 teaspoon of vanilla extract. Mix until everything is combined well. Add 1/4 cup of cocoa powder and mix again. Then, add 3 large eggs one at a time, mixing on low speed. Be careful not to overmix. Once done, pour this cheesecake mixture over the cooled brownie layer, smoothing the top. Now, lower the oven temperature to 325°F (160°C). Bake the cheesecake for 50-60 minutes. The edges should be set, but the center can still jiggle a bit. After baking, let it cool at room temperature for about an hour. Then, place it in the fridge for at least 4 hours or even overnight. For the ganache topping, heat 1 cup of heavy cream in a small saucepan until it simmers. Remove it from the heat and stir in 8 ounces of chopped semi-sweet chocolate until smooth. Let it cool slightly before pouring it over the chilled cheesecake. Once the ganache has set, carefully remove the sides of the springform pan. Slice your coffee chocolate brownie cheesecake and enjoy! To make perfect brownies, start with quality ingredients. Use unsalted butter for better control over salt levels. Melt the butter gently; this keeps the brownies moist. Mix your dry ingredients well. Sifting flour and cocoa powder helps prevent lumps. When combining wet and dry, mix just enough. Overmixing can lead to tough brownies. Bake until the edges are set, but the center should still jiggle slightly. This ensures a fudgy texture. For a creamy cheesecake, room temperature cream cheese is key. It blends better and creates a smooth texture. Beat the cream cheese and sugar until fluffy. Add eggs one at a time. This prevents overmixing, which can create cracks. After you pour the cheesecake mixture onto the brownie layer, gently tap the pan. This releases any trapped air bubbles. Bake until the edges are firm, but keep the center soft. This makes for a melt-in-your-mouth experience. When making ganache, heat the cream until just simmering. Pour it over chopped chocolate and let it sit. Stir gently until smooth. For even pouring, let the ganache cool slightly. Start at the center of the cheesecake and let it flow to the edges. This gives a nice, even layer. If you want a thicker ganache, let it cool longer before pouring. A well-set ganache adds a rich finish to your dessert. For the best results, chill the cheesecake before adding the ganache. This helps it set nicely. {{image_2}} You can add a nice crunch by mixing in nuts. I suggest walnuts or pecans. Chop them finely and fold them into the brownie layer before baking. This gives a rich texture and taste. For a fun twist, add chocolate swirls. To do this, melt some chocolate and swirl it into the cheesecake layer before you bake it. This creates beautiful designs and enhances the chocolate flavor. If you want a gluten-free treat, swap the all-purpose flour with gluten-free flour. Look for blends that work well in baking. Make sure all your other ingredients are gluten-free too. This allows everyone to enjoy the cheesecake without worry. The taste will remain rich and wonderful, just like the original recipe. You can change the coffee flavor to match your taste. Use different types of coffee, like espresso or dark roast. Each type brings its own unique notes. For a sweet twist, try flavored coffee, like vanilla or hazelnut. This will add a lovely depth to your cheesecake. Experimenting with coffee flavors can make this dessert truly special. To keep your cheesecake fresh, cover it well. Use plastic wrap or foil. Store it in the fridge. It will last for about five days. If you have a whole cheesecake, keep it in the springform pan. This helps avoid drying out. You can freeze leftover cheesecake too! First, let it cool completely. Cut it into slices for easy serving. Wrap each slice in plastic wrap. Then place them in a freezer bag. Make sure to press out the air. This will help prevent freezer burn. Your cheesecake can last up to three months in the freezer. When ready to enjoy your cheesecake again, take it out of the fridge. Let it sit at room temperature for about 30 minutes. This helps bring back its creamy texture. If it’s frozen, thaw it in the fridge overnight. Avoid using the microwave, as it can change the texture. Enjoy your coffee chocolate brownie cheesecake delight at its best! For the full recipe, check the earlier section. Yes, you can use dark chocolate. It adds a rich taste. You may also try milk chocolate for a sweeter flavor. Just remember, the type of chocolate changes the final taste. If you prefer a less bitter flavor, go for milk chocolate. The cheesecake is done when the edges are set. The center should still jiggle slightly. It will firm up as it cools. You can also use a toothpick. Insert it in the center; it should come out mostly clean. You can use Greek yogurt as a great substitute. It adds creaminess and tang. Cream cheese can also work in a pinch, though it may be thicker. If you want a dairy-free option, try coconut cream. This blog post shared how to make a delicious brownie cheesecake. We looked at key ingredients, simple steps, and helpful tips. Each layer brings a special taste. You can even explore fun variations to match your style. Remember to store leftovers properly to enjoy them later. With these ideas, your cheesecake will impress everyone. Dive in and start baking today!

Coffee Chocolate Brownie Cheesecake Delight Recipe

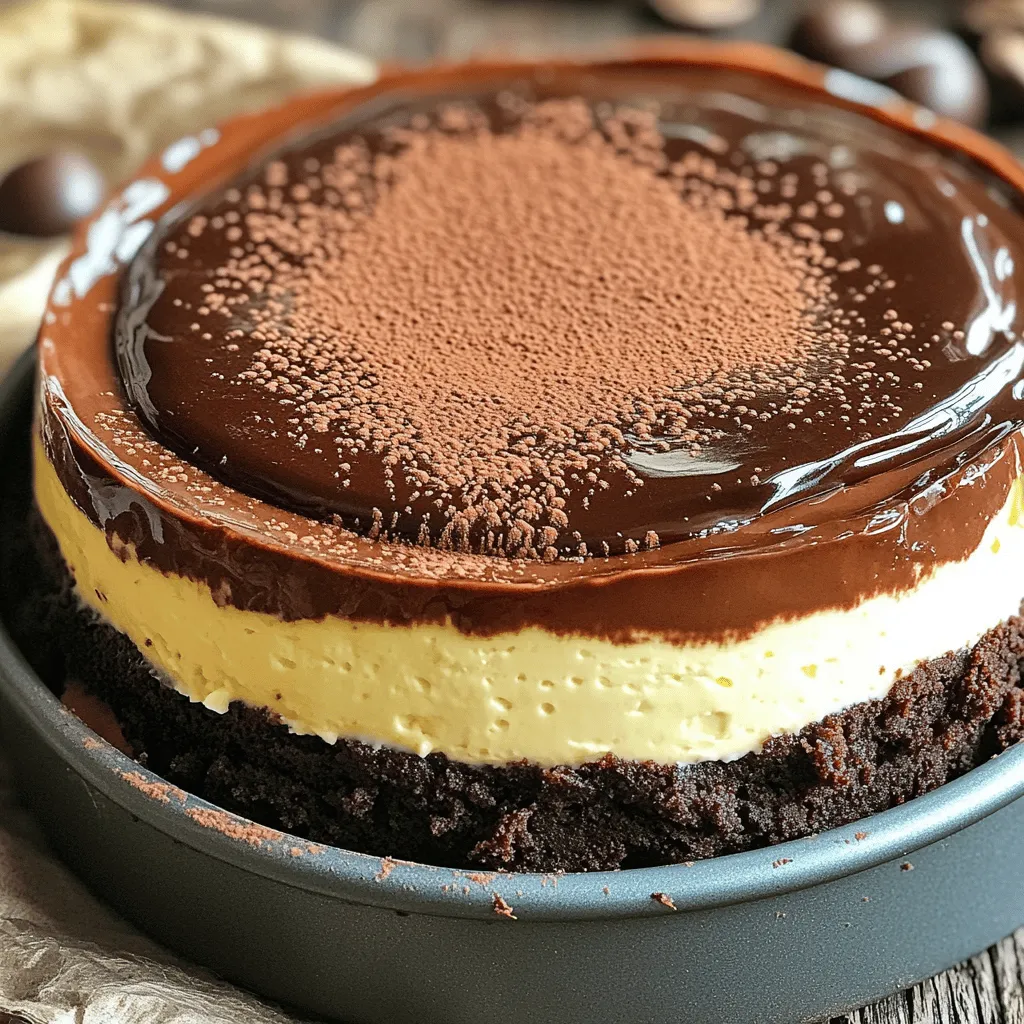
Are you ready for a dessert that takes indulgence to another level? The Coffee Chocolate Brownie Cheesecake Delight combines rich

- 1 ½ cups all-purpose flour - 1 cup granulated sugar - ½ cup unsweetened cocoa powder - 1 teaspoon baking powder - 1 teaspoon baking soda - ½ teaspoon salt - 2 large eggs - 1 cup whole milk - ½ cup vegetable oil - 2 teaspoons vanilla extract - 1 cup boiling water - 1 cup semi-sweet chocolate chips These ingredients work together to create rich, moist cupcakes. The flour gives structure, while sugar adds sweetness. Unsweetened cocoa powder gives that deep chocolate flavor. Baking powder and soda help the cupcakes rise. Eggs add moisture and bind the mix. Milk and oil keep the cupcakes tender. Vanilla extract enhances all the flavors, and boiling water makes the batter smooth. Finally, chocolate chips make every bite delicious. Using high-quality cocoa powder is key. It gives the cupcakes a deep chocolate taste. Brands like Valrhona or Ghirardelli have rich flavors. The type of chocolate chips you choose also matters. Semi-sweet chips are great for balance, but dark chocolate chips can add a nice touch. If you like extra sweetness, use milk chocolate chips. If you need an egg substitute, flaxseed meal works well. Mix 1 tablespoon of flaxseed meal with 2.5 tablespoons of water and let it sit until thick. For a dairy-free option, use almond or oat milk. They both work well in this recipe. These swaps can help you enjoy these jumbo cupcakes no matter your diet. First, preheat your oven to 350°F (175°C). This ensures even baking. Next, line your jumbo muffin pan with paper liners. This step helps with easy cupcake removal. Measuring ingredients is key too. Use accurate measurements for the best results. Even a little extra flour can change the texture. In a large bowl, whisk together your dry ingredients: flour, sugar, cocoa powder, baking powder, baking soda, and salt. Mix well to avoid lumps. Next, add your wet ingredients: eggs, milk, vegetable oil, and vanilla. Stir gently until just combined. Be careful not to overmix; this keeps the cupcakes light. Now, gradually add the boiling water. Stir continuously to avoid splashes. Your batter might look thin, but that’s just right! Finally, fold in the chocolate chips. This adds extra richness to your cupcakes. Pour the batter into each muffin cup, filling them about two-thirds full. This allows space for rising. Bake in the oven for 18-20 minutes. To check if they are done, insert a toothpick into the center. If it comes out clean, they’re ready! Once baked, take them out and let them cool for 5 minutes in the pan. After that, move them to a wire rack to cool completely. Enjoy the smell as they cool! You can find the full recipe in the earlier sections. To make great jumbo cupcakes, start with an oven thermometer. This tool helps you check if your oven runs hot or cold. A consistent temperature ensures your cupcakes bake evenly. Next, use the right muffin pan. Choose a pan made for jumbo cupcakes. These pans are deeper and wider. They help your cupcakes rise perfectly, giving you that tall, fluffy look. Now, let’s talk about frosting. Two great options are buttercream and ganache. Buttercream is sweet and creamy, while ganache is rich and smooth. Both make your cupcakes look amazing. For toppings, get creative! Try chocolate shavings for an elegant touch. You can also add colorful sprinkles for fun. These little details make your cupcakes pop on the table. Watch out for these common mistakes. First, don’t overmix the batter. Mixing too much can make your cupcakes dense. Just stir until the ingredients combine, and you’re good. Another mistake is not letting the cupcakes cool properly. Cooling them in the pan for too long can make them soggy. After five minutes, move them to a wire rack to cool completely. This step keeps them light and fluffy. For the full recipe, be sure to check out the full recipe section. {{image_2}} You can boost the flavor of your jumbo chocolate cupcakes in fun ways. Adding different extracts, like almond or orange, makes a big difference. A splash of espresso extract can deepen the chocolate taste too. You can also mix in fruits or nuts. Chopped cherries or walnuts add texture and a new taste. Want a gluten-free treat? Use almond flour or a gluten-free blend instead of all-purpose flour. For a vegan version, swap eggs with flaxseed meal. You can use almond milk to replace whole milk. These adjustments make the cupcakes suitable for everyone. Get creative with themed decorations for special occasions. For Halloween, try adding spooky designs using orange frosting. For birthdays, colorful sprinkles make a great touch. You can also add spices to fit the season. A pinch of peppermint can brighten up winter treats. Cinnamon adds warmth for fall. Each change keeps your cupcakes exciting and fresh! For the complete recipe, check out the [Full Recipe]. To keep your jumbo chocolate cupcakes fresh, start by letting them cool completely after baking. Store them at room temperature if you plan to eat them within two days. Place them in an airtight container. This keeps them soft and moist. If you want to keep them longer, refrigeration is a good option. Use a container that seals tightly. This helps prevent them from drying out. Freezing your cupcakes is easy! First, let them cool down completely. Then, wrap each cupcake tightly in plastic wrap. After that, place them in a freezer-safe bag or container. Make sure to label the bag with the date. To thaw, take them out and leave them at room temperature for about an hour. This keeps the texture and flavor just right. For the best results, do not refreeze thawed cupcakes. Jumbo chocolate cupcakes can stay fresh for about 3 to 4 days at room temperature. In the fridge, they last for about a week. If you freeze them, they can last for up to three months. Watch for signs of staleness. If they smell off or feel dry, it’s time to toss them. Fresh cupcakes should smell sweet and feel soft. Enjoy your treats while they’re still delicious! For the full recipe, check the section above. Jumbo cupcakes are larger than regular ones. Regular cupcakes are about 2-3 inches tall, while jumbo ones are around 4 inches. This size difference means jumbo cupcakes need more baking time. Regular cupcakes usually bake in 15-18 minutes. Jumbo cupcakes can take 18-20 minutes or longer. Always check with a toothpick to see if they are done. Cupcakes can sink due to a few reasons. One common cause is overmixing the batter. This can make them dense. Another reason is using too much leavening agent. Stick to the recipe for baking powder and baking soda. Also, make sure your oven is at the right temperature. An oven thermometer can help you with this. Yes, you can make these cupcakes ahead of time. Bake them and let them cool completely. Store them in an airtight container at room temperature. They will stay fresh for about 2-3 days. If you want to keep them longer, consider freezing them. Wrap each cupcake tightly in plastic wrap, then place them in a freezer bag. You can find jumbo chocolate cupcakes at gourmet bakeries. Check local shops or specialty stores. Some grocery stores also carry them. If you want a specific flavor or design, consider ordering online. Many bakeries offer delivery options. You now have a complete guide to making jumbo chocolate cupcakes. We covered essential ingredients, mixing techniques, and baking tips. Remember to use quality ingredients for the best taste. Substitutions can help accommodate dietary needs. Don't forget the fun of decorating! With a few easy tips, you can avoid common mistakes. Store cupcakes properly to keep them fresh. Enjoy sharing these sweet treats with friends and family! Happy baking!

Jumbo Chocolate Cupcakes Irresistible Treat Recipe

Are you ready to indulge in the ultimate chocolate treat? My Jumbo Chocolate Cupcakes are not just big; they are

For Honey Mustard Chicken Tenders, you will need: - 1 pound (450g) chicken breast tenders - 1/4 cup honey - 1/4 cup Dijon mustard - 2 tablespoons olive oil - 1 teaspoon garlic powder - 1 teaspoon onion powder - 1/2 teaspoon smoked paprika - Salt and pepper to taste - 1 cup Panko breadcrumbs - 1/2 cup all-purpose flour - 2 large eggs Each ingredient plays a key role in the flavor and texture of the dish. Here’s a quick breakdown: - Chicken Breast Tenders: The star of the dish, tender and juicy. - Honey and Dijon Mustard: They create a perfect sweet and tangy glaze. - Olive Oil: Adds moisture and helps the coating crisp up in the oven. - Spices: Garlic powder, onion powder, and smoked paprika give depth. - Panko Breadcrumbs: They provide a light and crispy texture. - All-Purpose Flour and Eggs: These help the breadcrumbs stick well to the chicken. If you want to mix things up or have dietary needs, consider these swaps: - Chicken: You can use tofu or tempeh for a plant-based option. - Honey: Maple syrup works great if you want a vegan choice. - Dijon Mustard: Yellow mustard gives a milder taste if you prefer. - Panko Breadcrumbs: Regular breadcrumbs can be used, but they won’t be as crunchy. - Olive Oil: Avocado oil is a good substitute for a different flavor. Using these ingredients, you will create a dish that is both tasty and easy to make. For the full recipe, check the detailed instructions to guide you through the process. First, gather all your ingredients. You will need chicken breast tenders, honey, Dijon mustard, olive oil, garlic powder, onion powder, smoked paprika, salt, and pepper. You also need Panko breadcrumbs, all-purpose flour, and eggs. Preheat your oven to 400°F (200°C). Line a baking sheet with parchment paper to keep the chicken from sticking. In a medium bowl, whisk together honey, Dijon mustard, olive oil, garlic powder, onion powder, smoked paprika, salt, and pepper. This mixture will be your marinade. Set aside half of it for dipping later. Place the chicken tenders in a large bowl. Pour the marinade over them and toss to coat. Let the chicken sit for at least 15 minutes. This step helps the flavors sink in. Set up your breading station. Use three shallow bowls. Put all-purpose flour in one, whisk the eggs in another, and add Panko breadcrumbs to the last. Take each marinated chicken tender and dip it in the flour first. Shake off any extra flour. Then, dip it in the egg. Lastly, coat it with Panko breadcrumbs. Press gently so the crumbs stick well. Arrange the breaded chicken tenders on your baking sheet in a single layer. This makes sure they cook evenly. Now it’s time to bake. Place the baking sheet in your preheated oven. Bake the chicken tenders for 15 to 20 minutes. They should be golden and crispy when done. Use a meat thermometer to check. The internal temperature should reach 165°F (75°C). Once cooked, take them out and serve warm. Don’t forget to enjoy them with the reserved honey mustard dipping sauce. For the complete recipe, check out the [Full Recipe]. Marinating chicken tenders makes them juicy and full of taste. I suggest marinating for at least 15 minutes. For even more flavor, try to marinate them for an hour or overnight. Use a sealed bag to coat the tenders well in the marinade. This keeps them moist and adds depth to each bite. You can cook honey mustard chicken tenders in three ways. Each method gives a different texture and taste. - Oven: Preheat your oven to 400°F (200°C). This method offers a crispy coating with less oil. Bake for 15-20 minutes. - Air Fryer: Set your air fryer to 400°F (200°C) and cook for about 10-12 minutes. This method is quick and makes the tenders very crisp. - Pan-Frying: Heat oil in a skillet over medium heat. Cook the tenders for about 4-5 minutes on each side. This gives a rich flavor and nice golden color. Choose the method that fits your time and taste. Honey mustard chicken tenders pair well with many sides. Try serving them with: - Fresh salad for a light meal - Crispy fries for a fun treat - Creamy coleslaw for added crunch - Steamed veggies for a healthy touch For a dip, use the reserved honey mustard sauce. This adds a sweet and tangy kick that everyone loves. Enjoy your meal! {{image_2}} To make spicy honey mustard chicken tenders, add hot sauce to the marinade. A tablespoon or two will add heat without losing the sweet flavor. You can also use spicy mustard instead of Dijon. This twist gives a nice kick to your meal. Serve it with a cooling dip, like ranch or yogurt, to balance the heat. If you need a gluten-free version, swap regular flour and breadcrumbs for gluten-free ones. Use almond flour or coconut flour for breading. Make sure your mustard and honey are also gluten-free. This way, everyone can enjoy the dish without worry. Using an air fryer cooks chicken tenders quickly. It gives a crispy texture with less oil. This method is also great for busy nights. The oven takes a bit longer, but it can cook more tenders at once. You can choose based on your needs and time. Both methods will yield tasty chicken tenders. For the full recipe, check out the Honey Mustard Chicken Tenders section. After enjoying your honey mustard chicken tenders, you may have some left. To store them, let the chicken cool to room temperature. Place the tenders in an airtight container. You can keep them in the fridge for up to three days. For best taste, eat them within this time. To reheat the chicken tenders, preheat your oven to 350°F (175°C). Place the tenders on a baking sheet lined with parchment paper. Heat them for about 10-15 minutes. This method helps keep the coating crispy. You can also use a microwave, but the coating may become soft. If you want to save some chicken tenders for later, freezing works well. Allow the tenders to cool completely. Then, place them in a freezer-safe bag. Remove as much air as possible before sealing. These tenders can stay in the freezer for up to three months. When you’re ready to eat, thaw them in the fridge overnight before reheating. Enjoy your tasty meal anytime! You can make Honey Mustard Chicken Tenders healthier by swapping some ingredients. Use whole wheat flour instead of all-purpose flour. Try baked tenders instead of fried. You can also reduce the honey or use a sugar substitute. Adding more spices can enhance flavor without adding calories. Serve with a side of veggies for a balanced meal. Yes, you can use regular mustard instead of Dijon. Regular mustard will give a different taste, but it still works. It may be less sweet, so you might want to add a touch more honey. The texture and flavor may change, but it will still taste great. Feel free to experiment with other mustard types too! The best dipping sauces for chicken tenders include ranch, barbecue, and the honey mustard mix. Each sauce adds a unique flavor. If you love spicy food, try adding hot sauce to your honey mustard. You can also mix yogurt with herbs for a fresh option. Each choice can change your meal experience! This post covered simple recipes for Honey Mustard Chicken Tenders. We discussed ingredients, preparation steps, and cooking methods. You learned tips for flavor and storage. Variations for spicy or gluten-free options help you customize. As you try these recipes, remember to enjoy cooking and be creative. You can make each dish your own. Happy cooking!

Honey Mustard Chicken Tenders Delightful and Easy Meal

Are you ready to create a tasty meal that’s simple and satisfying? My Honey Mustard Chicken Tenders are easy to

To make these tasty stuffed shells, gather the following ingredients: - 12 jumbo pasta shells - 1 pound ground beef - 1 cup ricotta cheese - 1 cup shredded mozzarella cheese - 1/2 cup grated Parmesan cheese - 1 egg - 2 cups marinara sauce - 2 cloves garlic, minced - 1 teaspoon Italian seasoning - Salt and pepper to taste - Fresh basil leaves for garnish Choosing the right ingredients makes a big difference. Here are my top tips: - Pasta: Look for sturdy jumbo shells. They should not be cracked or broken. - Ground Beef: Choose lean beef for less grease. Aim for 80/20 meat-to-fat ratio. - Cheese: Fresh ricotta is creamier than packaged. Pick mozzarella that is low-moisture for better melting. - Marinara Sauce: A good sauce should have a rich tomato flavor. Check for no added sugars. - Herbs: Fresh is best. If you must use dried herbs, ensure they are fragrant. If you’re missing some items, don’t worry. Here are some easy swaps: - Ground Beef: Try ground turkey or chicken for a lighter option. - Ricotta Cheese: Cottage cheese can work. Just blend it for a smoother texture. - Italian Seasoning: Use a mix of dried oregano and basil if you don’t have it. - Marinara Sauce: You can use Alfredo sauce for a creamy twist. - Cheese: Swap mozzarella for provolone or cheddar for a different taste. Feel free to experiment with these ingredients to suit your taste. For the full recipe, check the details above. To start, you need to cook the jumbo pasta shells. Bring a large pot of salted water to a boil. Add the shells and cook them until they are al dente. This usually takes about 10 to 12 minutes. Make sure to stir them gently so they don't stick. Once cooked, drain the shells and set them aside to cool slightly. This is key, as it helps prevent burns when you stuff them later. Next, you will cook the ground beef. Heat a large skillet over medium heat. Add the pound of ground beef to the skillet. Use a wooden spoon to break it apart as it cooks. Stir it until it turns brown. This should take about 5 to 7 minutes. Once browned, drain any excess fat. This keeps your dish from being too greasy. Let the beef cool for a few minutes before mixing it with the cheese. Now, it's time to make the cheese filling. In a mixing bowl, combine the cooked ground beef with ricotta cheese, half of the mozzarella cheese, and grated Parmesan cheese. Crack in one egg and add minced garlic, Italian seasoning, salt, and pepper. Use a fork to mix everything until it is well combined. This mixture is creamy and full of flavor. You are now ready to stuff the shells. For the full recipe, refer back to the instructions above. When making stuffed shells, avoid overcooking the pasta. You want them al dente. Overcooked shells can break easily. Also, don’t skip draining the beef. Excess fat makes the filling greasy. Lastly, be careful not to overstuff the shells. They need room to expand and cook. Seasoning is key for tasty stuffed shells. Use fresh garlic for a strong flavor. Italian seasoning adds warmth and depth. Always taste your filling before stuffing. If it lacks flavor, add more salt and pepper. Fresh basil can also brighten the dish. You can mix in crushed red pepper for heat, if you like. Stuffing shells can be fun. Use a spoon or a piping bag for easy filling. Be gentle to avoid tearing the shells. Place the stuffed shells open side up in the baking dish. This helps them stay filled while baking. Pour sauce gently over the top to avoid spills. For a golden finish, sprinkle extra cheese before baking. For more details and instructions, check out the Full Recipe. {{image_2}} You can easily swap ground beef with a plant-based meat alternative. Options like lentils or mushrooms work well. They provide rich flavor and texture in the filling. You can also use crumbled tofu. This adds protein without meat. Many people enjoy the taste of these substitutes. Adding vegetables boosts nutrition and flavor in your stuffed shells. Spinach, zucchini, and bell peppers are great choices. Chop them finely and mix them with the cheese filling. They add color and moisture, making each bite delightful. Roasting the veggies first can enhance their taste. Cheese is vital in stuffed shells. While ricotta and mozzarella are classics, feel free to mix things up. You can add goat cheese for a tangy kick. Feta cheese can add a salty touch. Mixing different cheeses creates a unique flavor profile. Experiment with what you love! For the full recipe, check out the full recipe. To store leftover stuffed shells, let them cool first. Place them in an airtight container. Make sure to layer the shells with marinara sauce to keep them moist. This helps prevent drying out. You can keep them in the fridge for up to three days. If you want to enjoy them later, freezing is a great option. When you’re ready to eat your leftovers, preheat your oven to 350°F (175°C). Place the stuffed shells in a baking dish. Add a little marinara sauce on top to keep them moist. Cover the dish with foil to trap heat and steam. Bake for about 20 minutes, or until heated through. You can also use a microwave. Just place a few shells on a plate and heat them for 2-3 minutes. To freeze stuffed shells, prepare your dish as usual but do not bake it. After stuffing the shells, place them in a single layer in a baking dish. Cover with plastic wrap and then foil to keep air out. This helps keep the shells fresh. You can freeze them for up to three months. When ready to serve, bake from frozen at 375°F (190°C) for about 45 minutes, covered. Then remove the cover and bake until the cheese is bubbly. Enjoy a delicious meal anytime! Yes, you can make stuffed shells in advance. Prepare the shells and the filling. Stuff the shells and place them in a baking dish. Cover them with sauce and wrap them well. Store them in the fridge for up to two days. When ready to eat, bake them straight from the fridge. Just add a few extra minutes to the cooking time. This makes dinner easy on busy nights. Stuffed shells go well with many sides. Here are some great options: - Garlic bread for a crunchy bite - A fresh garden salad for a pop of color - Steamed vegetables like broccoli or green beans - A light Caesar salad for a tasty twist These sides balance the meal and add more flavors and textures. To make stuffed shells gluten-free, choose gluten-free pasta shells. There are many brands available now. Check the labels to ensure they are certified gluten-free. You can also make your own shells with gluten-free flour. The filling can stay the same. Just ensure all your ingredients are gluten-free. This way, everyone can enjoy your delicious stuffed shells. You learned how to make delicious stuffed shells with ground beef. Starting with quality ingredients is key. Choosing the right pasta and cheese makes a big difference. I shared tips for preparing, stuffing, and cooking these shells just right. Mistakes can happen, but now you know how to avoid them. You can even switch up the recipe with veggies or different cheeses. Whether storing leftovers or freezing for later, you'll be set. Enjoy your meal!

Savory Stuffed Shells with Ground Beef Recipe

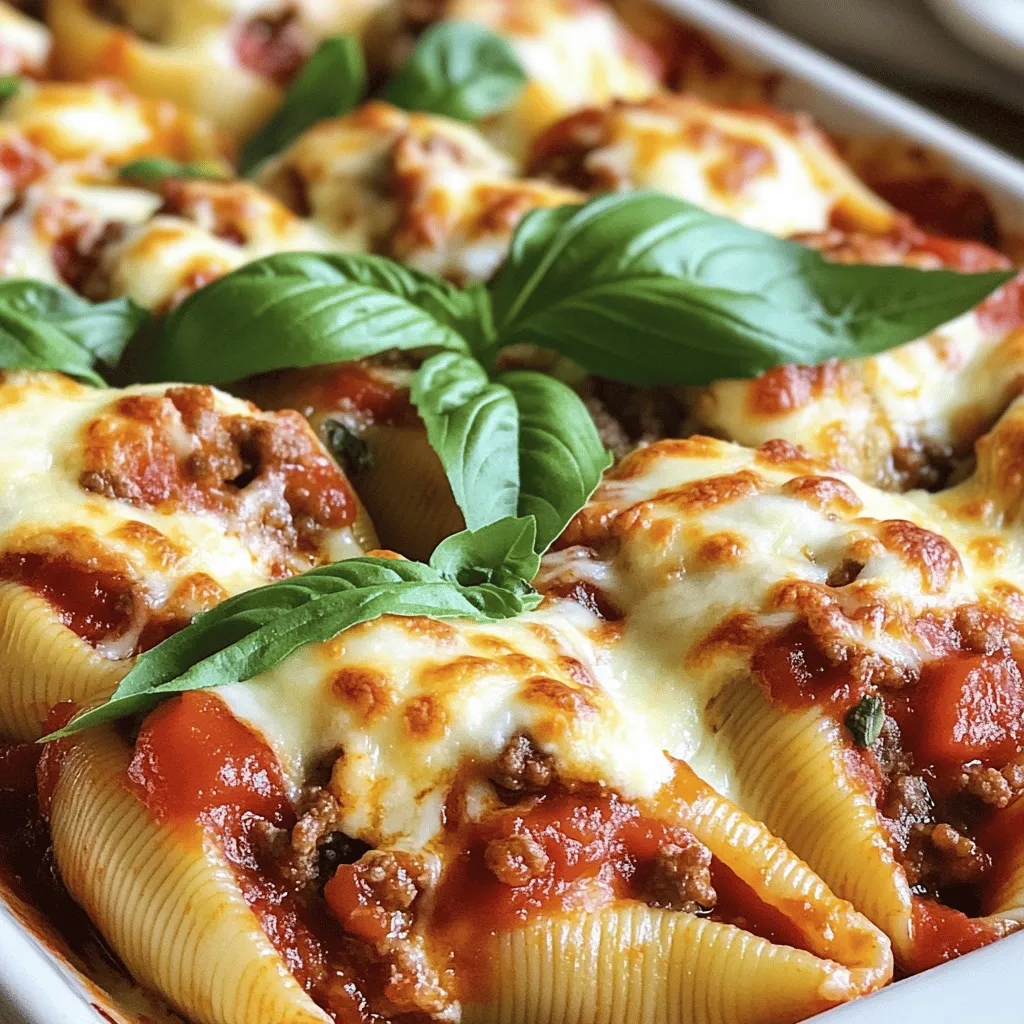
Looking for a hearty dish that packs flavor and joy? My Savory Stuffed Shells with Ground Beef recipe is just

For a rich and tasty Spicy Shrimp & Sausage Jambalaya, gather these key items: - 1 lb shrimp, peeled and deveined - 1/2 lb smoked sausage, sliced - 1 cup long grain rice - 1 medium onion, chopped - 1 green bell pepper, chopped - 2 celery stalks, chopped - 3 cloves garlic, minced - 1 can (14.5 oz) diced tomatoes with green chilies - 4 cups chicken broth - 2 tablespoons Cajun seasoning - 1 teaspoon dried thyme - 1 teaspoon paprika - 1 bay leaf - 2 tablespoons olive oil - Salt and black pepper to taste - Fresh parsley, chopped (for garnish) Each ingredient plays a big role in the flavor. The shrimp adds a sweet, ocean taste. The smoked sausage gives a hearty, smoky profile. Rice absorbs all the flavors, making each bite satisfying. The veggies—onion, bell pepper, and celery—bring freshness and crunch. Garlic adds a kick, while tomatoes and spices add depth. To cook this dish, you’ll need some basic tools: - Large pot or Dutch oven - Spatula - Measuring cups - Chopping board - Chef's knife I recommend using a heavy-bottomed pot. It helps cook evenly without burning. A good spatula is key for stirring and scraping the bottom. Brands like Lodge or Cuisinart offer great options for pots. Want to add your twist? Here are some options: - Hot sauce for extra heat - Bell peppers in different colors for sweetness - Zucchini or okra for more veggies If you're gluten-free, check the broth label. For low-carb options, swap rice with cauliflower rice. These adjustments keep the dish fresh and fun, while still being delicious! Start by prepping your ingredients. Peel and devein the shrimp. This step is key for a great dish. Next, chop the onion, green bell pepper, and celery into small pieces. This helps them cook evenly. Mince the garlic cloves for added flavor. Now, heat 2 tablespoons of olive oil in a large pot or Dutch oven over medium heat. Once the oil is hot, add the sliced sausage. Cook it until it’s browned, about 5 minutes. This adds a smoky flavor to your jambalaya. After that, remove the sausage and set it aside for later. In the same pot, add the chopped onion, bell pepper, celery, and minced garlic. Sauté these veggies for about 5 to 7 minutes. You want them softened and fragrant. After that, stir in 1 cup of long grain rice. Cook it for another 2 minutes. This lightly toasts the rice, enhancing its flavor. Next, add the can of diced tomatoes with green chilies, 4 cups of chicken broth, and the sausage back to the pot. Mix well. Then, sprinkle in 2 tablespoons of Cajun seasoning, 1 teaspoon of dried thyme, 1 teaspoon of paprika, and 1 bay leaf. Bring it all to a boil. Once it boils, reduce the heat to low. Cover the pot and let it simmer for 20 to 25 minutes. The rice should be tender and absorb most of the liquid. After the rice is cooked, gently fold in the shrimp. Cover the pot again and cook for an additional 5 to 7 minutes. The shrimp should turn pink and be cooked through. Remove the bay leaf when done. Adjust the taste with salt and black pepper as needed. For a nice finish, stir in some fresh parsley before serving. To present your dish, serve it in deep bowls. Garnish with extra parsley and a sprinkle of Cajun seasoning for an added kick. Enjoy your flavorful Spicy Shrimp & Sausage Jambalaya! For the full recipe, check the section above. To avoid overcooking shrimp, cook them just until they turn pink. This usually takes about 5-7 minutes. If you let them cook too long, they can get tough. Keep the heat moderate. For the rice, make sure to use long-grain rice. Add it to the pot after sautéing the veggies. Toast it lightly for about 2 minutes. This helps keep the rice from getting mushy. The cooking time for the rice is about 20-25 minutes on low heat. If your jambalaya is watery, you may have added too much broth. To fix this, let it simmer longer without the lid. This will help evaporate excess liquid. If your rice is undercooked, cover the pot and cook for a few more minutes. Add a splash of water if needed. For flavor, taste your dish as you cook. If it needs a boost, add more spices or salt. For garnishing, sprinkle fresh parsley on top just before serving. This adds color and freshness. You can also use extra Cajun seasoning for more flavor. For sides, serve with a simple green salad or crusty bread. A cold drink, like iced tea or a light beer, pairs well with this dish. Enjoy your flavorful feast! {{image_2}} You can switch up the protein in your jambalaya. If you want a leaner option, use chicken instead of sausage. Chicken gives a mild flavor that works well. Tofu is a great choice for a vegetarian meal. It absorbs the spices and makes the dish hearty. Remember, changing the protein affects the taste. Chicken adds a light touch, while tofu gives a soft texture. Adding veggies makes your jambalaya colorful and tasty. You can use seasonal vegetables like zucchini or corn. Bell peppers add sweetness, while carrots bring a nice crunch. Each vegetable adds its unique flavor, changing the dish. For a fresh twist, try adding spinach at the end. It wilts down and adds a nice green touch. Adjusting the spice level is easy! If you prefer less heat, use less Cajun seasoning. You can also add a dollop of sour cream to cool it down. On the other hand, if you like it spicy, add more hot sauce or cayenne pepper. Start with a little and taste as you go. This way, you can find the perfect heat for your taste. After you enjoy your Spicy Shrimp & Sausage Jambalaya, store any leftovers right away. Let the dish cool down to room temperature before putting it in the fridge. Use airtight containers to keep the flavors fresh. This helps to avoid any unwanted smells or drying out. If you want to save jambalaya for later, freezing it is a great choice. First, let the dish cool completely. Then, divide it into serving sizes for easy meals later. Use freezer bags or airtight containers to avoid freezer burn. When you're ready to eat, thaw it in the fridge overnight. Reheat it on the stove over low heat, adding a splash of broth for moisture. This keeps the texture just right. Refrigerated jambalaya lasts about 3 to 4 days. If you freeze it, you can enjoy it for up to 3 months. Always check for signs of spoilage. If you see mold or smell something off, it’s best to throw it out. Keeping an eye on your food ensures you enjoy it at its best. What is the origin of jambalaya and what distinguishes this recipe? Jambalaya comes from Louisiana. It blends French, Spanish, and African flavors. This recipe stands out for its spicy shrimp and smoked sausage. The mix of Cajun seasoning and tomatoes adds great flavor. Can I make jambalaya ahead of time? Yes, you can make jambalaya ahead. It tastes even better the next day. Store it in the fridge for up to three days. Reheat it gently on the stove. What type of pot is best for jambalaya? A large pot is best for jambalaya. It allows enough space for cooking. A heavy-bottomed pot helps cook evenly. Is a Dutch oven necessary for this recipe? A Dutch oven is not necessary, but it is great. It holds heat well and helps with browning. If you don't have one, any large pot will work. Can I use frozen shrimp instead of fresh? Yes, frozen shrimp works well. Just thaw them before using. They may not taste as fresh, but they are still good. What can I substitute for Cajun seasoning if I don’t have it? If you lack Cajun seasoning, use paprika, garlic powder, and cayenne pepper. This mix adds a similar kick. You can also try a store-bought spice blend. In closing, this jambalaya recipe brings vibrant flavors and textures to your table. You learned the main ingredients, essential tools, and how to customize the dish. I shared cooking steps, tips, and even variations for different diets. By following these guidelines, you will create a delicious and satisfying meal. Remember to store any leftovers properly for future enjoyment. Get creative with flavors and make this dish your own! Enjoy your cooking adventure!

Spicy Shrimp & Sausage Jambalaya Flavorful Dinner Treat

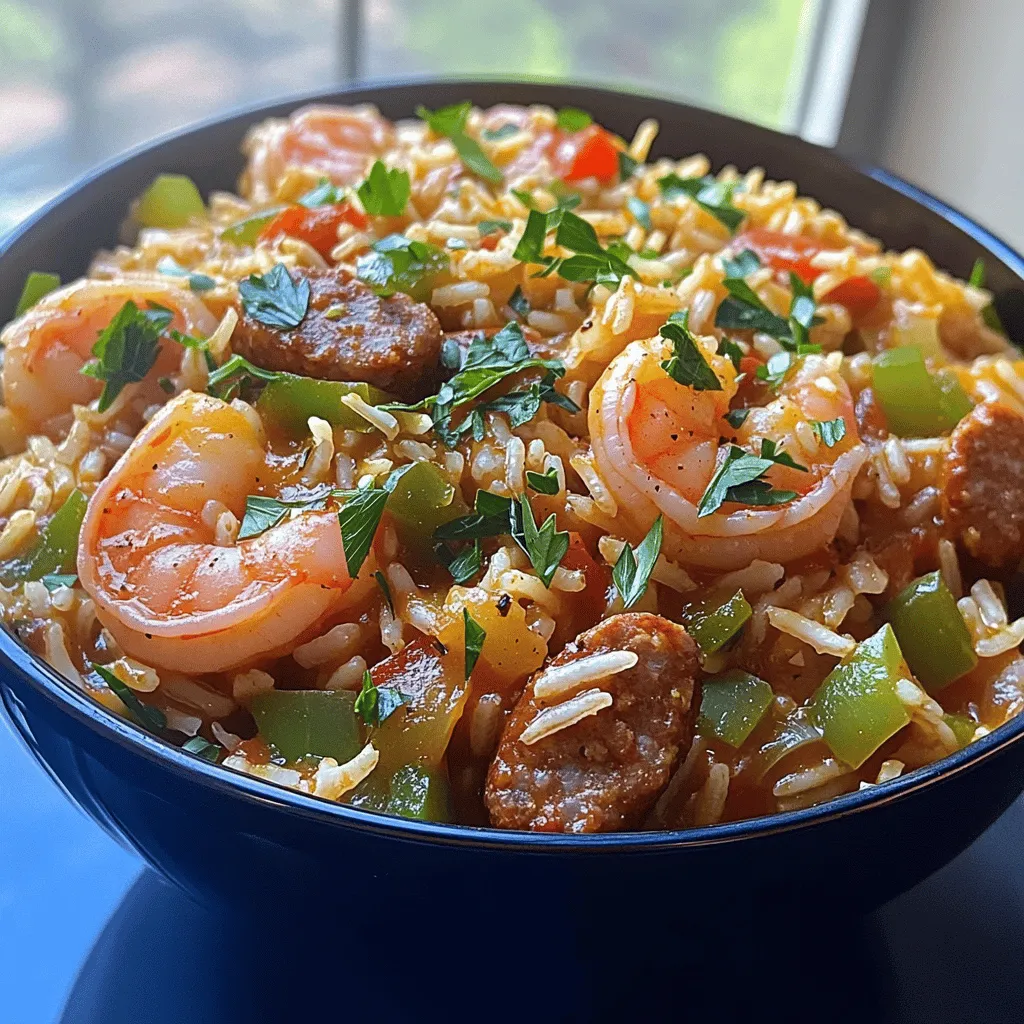
Ready to spice up your dinner routine? This Spicy Shrimp & Sausage Jambalaya is a bold, flavorful treat you won’t

To make a tasty Savory French Onion Meatloaf, you need some key ingredients: - 1 lb ground beef - 1 lb ground turkey - 1 large onion, finely chopped - 2 cloves garlic, minced - 1 cup breadcrumbs - 1/2 cup grated Parmesan cheese These ingredients give the meatloaf its rich taste and texture. The mix of beef and turkey keeps it juicy, while the onion and garlic add flavor. Don't forget the seasonings! They bring everything together: - 1 tablespoon Worcestershire sauce - 1 teaspoon dried thyme - 1 teaspoon salt - 1/2 teaspoon black pepper For the topping, use 1 cup of French onion dip. It creates a creamy finish that makes every bite delightful. You can add some sliced green onions on top for a fresh touch. This adds color and a bit of crunch. Check out the Full Recipe for more details on how to bring all these ingredients together! 1. Preheat your oven to 350°F (175°C) and lightly grease a loaf pan. This helps the meatloaf not stick. A good greasing makes serving easier. 2. In a large skillet, add a tablespoon of olive oil over medium heat. Add the chopped onion first. Cook until it is soft and turns golden, about 10 minutes. Stir in the minced garlic for the last minute. This gives a great flavor. Remove the skillet from heat and let the mixture cool slightly. 1. In a large mixing bowl, combine the ground beef and ground turkey. Add breadcrumbs, grated Parmesan cheese, chopped parsley, and eggs. Pour in the beef broth and Worcestershire sauce. Then, add dried thyme, salt, and pepper. 2. Now, add the cooled onion and garlic mixture to the meat mixture. Mix gently with your hands until everything is well combined. Be careful not to overmix, as this can make the meatloaf tough. 3. Shape the mixture into a loaf. Place it in the prepared loaf pan. Spread the French onion dip evenly over the top. This will add a rich flavor and keep the meatloaf moist. 1. Bake in the preheated oven for 1 hour. The meatloaf is done when it reaches an internal temperature of 160°F (70°C). You can check this with a meat thermometer for accuracy. 2. Once done, let the meatloaf rest for 10 minutes before slicing. This helps keep it juicy. Garnish with sliced green onions before serving. For the full recipe, check out the detailed instructions above. Enjoy your cooking! To make your meatloaf truly shine, focus on texture and flavor. First, choose a mix of ground beef and turkey. This combo gives a nice balance of flavor and moisture. The caramelized onions bring sweetness, while the garlic adds depth. Don’t rush the sautéing. Take your time to get those onions golden brown. This step is key to rich flavor. After baking, let your meatloaf rest for ten minutes. This helps keep it juicy. If you slice too soon, the juices run out. Trust me, waiting is worth it! Pair your savory French onion meatloaf with classic sides. Mashed potatoes or a fresh green salad work well. For a touch of flair, drizzle leftover French onion dip around the plate. This adds flavor and makes it look nice. You can also garnish with fresh parsley or sliced green onions. These simple touches make your dish pop! For more ways to enjoy this meal, check the Full Recipe. Try different sides or arrange your plate in fun designs. Enjoy! {{image_2}} You can use various meats for your meatloaf. Ground beef and turkey are popular choices. They give great flavor and texture. If you want a lighter option, try using only ground turkey. It will still taste good but be lower in fat. For a different twist, consider chicken. Ground chicken can make the dish lighter. If you prefer plant-based options, use lentils or chickpeas. They provide protein and fiber. You can mash them and mix with the other ingredients. Adding spices or herbs can make your meatloaf unique. Consider mixing in some smoked paprika for a hint of heat. You can also try fresh herbs like rosemary or basil. These can really brighten the dish. Topping your meatloaf can also change its taste. Besides French onion dip, you can use a mix of ketchup and mustard. It adds a tangy flavor that's very appealing. Another great option is a layer of cheese. Melted cheese on top makes it extra creamy. Experiment with these variations to find your favorite flavor. Enjoy the process of making it your own! For the full recipe, check out the details above. To keep your Savory French Onion Meatloaf fresh, store it in the fridge. Place it in an airtight container or wrap it well with plastic wrap. It can last for up to three days. When you are ready to eat, slice the meatloaf. Then, reheat it in the microwave or oven. If using a microwave, heat for about one to two minutes. In the oven, warm it at 350°F (175°C) for 15 to 20 minutes. This keeps it moist and tasty. If you want to save meatloaf for later, freezing is a great option. First, let the meatloaf cool completely. Wrap it tightly in plastic wrap, then place it in a freezer-safe bag or container. This will help prevent freezer burn. You can freeze it for up to three months. When you are ready to enjoy it, take it out and thaw in the fridge overnight. After thawing, reheat it in the oven at 350°F (175°C) for about 20 to 25 minutes. Make sure it reaches an internal temperature of 165°F (74°C) before serving. This way, you can enjoy delicious meatloaf anytime you want. For the full recipe, check out Savory French Onion Meatloaf. To make this meatloaf gluten-free, swap regular breadcrumbs for gluten-free ones. You can also use crushed gluten-free crackers or oats. Ensure all sauces, like Worcestershire sauce, are gluten-free. Check labels carefully. Yes, you can make the meatloaf the day before. Mix all the ingredients, shape it into a loaf, and cover it. Store it in the fridge overnight. This helps flavors meld. Just remember to adjust the cooking time if it's cold from the fridge. This meatloaf pairs well with many sides. Consider mashed potatoes, green beans, or a fresh salad. You can also serve it with roasted veggies. A drizzle of remaining French onion dip adds extra flavor. Yes, you can adjust the cooking time. For smaller meatloafs, reduce the time by about 15-20 minutes. For larger ones, you may need to add 10-15 minutes. Always check the internal temperature. It should reach 160°F (70°C) for safety. This blog post covered how to make a tasty Savory French Onion Meatloaf. You learned about the main ingredients like ground beef and turkey, plus the seasonings that add flavor. We went through step-by-step instructions for preparation, mixing, and baking. You also received tips for perfect texture and ideas for side dishes. In the end, this meatloaf is flexible. You can switch ingredients and customize it as you like. Enjoy your cooking!

Savory French Onion Meatloaf Flavorful and Hearty Dish

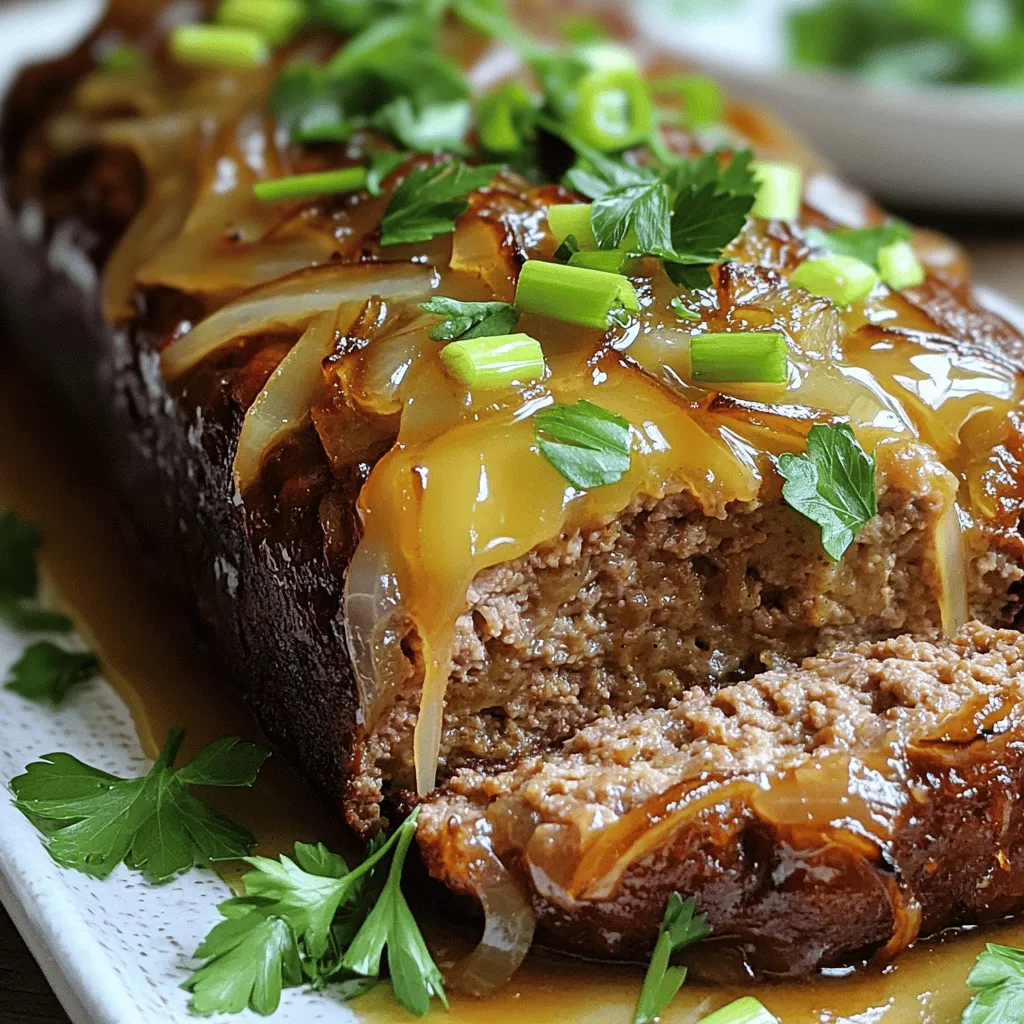
If you love comfort food, you’re in for a treat! Savory French Onion Meatloaf blends rich beef and turkey with

To make Linguini with Clam Sauce, gather these simple ingredients: - 12 oz linguini pasta - 2 cans (6.5 oz each) chopped clams in juice - 3 tablespoons olive oil - 3 cloves garlic, minced - 1 small onion, finely chopped - 1 teaspoon red pepper flakes (adjust to taste) - Zest of 1 lemon - 2 tablespoons fresh lemon juice - 1/4 cup fresh parsley, chopped - Salt and black pepper to taste - Grated Parmesan cheese for serving You can swap some ingredients for different flavors: - Use spaghetti instead of linguini for a twist. - Fresh clams can replace canned clams for a fresher taste. - Any cooking oil can work instead of olive oil. - For a milder dish, leave out the red pepper flakes. - If you don’t have fresh lemons, use bottled lemon juice. Choosing fresh ingredients makes your dish shine: - Look for linguini that is firm and free from cracks. - Choose clams that are tightly closed or slightly gaping. - Select garlic that is firm and has no sprouting. - Pick onions that feel heavy and have dry skins. - Fresh parsley should be bright green and fragrant. Using the right ingredients sets the stage for a tasty meal. Enjoy cooking! To start making your linguini with clam sauce, grab a large pot. Fill it with water and add a generous amount of salt. Bring the water to a boil. Cook the linguini as directed on the package until it's al dente. Remember to save one cup of pasta water before draining the pasta. Next, take a large skillet and heat the olive oil over medium heat. Add the finely chopped onion and sauté for about 3 to 4 minutes. You want the onion to become translucent, not brown. Once the onion is ready, stir in the minced garlic and red pepper flakes. Cook for one more minute until the garlic smells good. Then, pour in the chopped clams along with their juice. Bring the mixture to a simmer and let it cook for about 5 minutes. This step helps the flavors come together nicely. After that, add the lemon zest and lemon juice to the sauce. Mix it well. If the sauce feels too thick, use some of that reserved pasta water to loosen it up. Now, it's time to combine everything. Toss the drained linguini directly into the skillet. Make sure every strand gets coated with the clam sauce. Season with salt and black pepper to taste. Finally, take the skillet off the heat and stir in the chopped parsley for a fresh touch. To get perfect pasta, always use plenty of water and salt. This helps the pasta cook evenly. Stir the pasta while it cooks to prevent sticking. Check the cooking time on the package, but taste it a minute early. You want it firm but not hard. If you want to save time, you can start the sauce while the pasta cooks. This way, everything is ready at the same time. Use a large pot for boiling so the pasta has room to move. The right consistency is key for a great linguini with clam sauce. If your sauce is too thick, add more pasta water gradually. This water is starchy and helps the sauce cling to the pasta. Stir well after adding water to see how it changes. If you find your sauce too runny, let it simmer for a couple of minutes. This will help it thicken. Always remember, the sauce should coat the pasta nicely. Aim for a balance where it’s not too dry or too watery. To boost the flavor of your linguini with clam sauce, use fresh herbs. Fresh parsley adds brightness. You can also try fresh basil or even chives for a twist. Adding lemon zest brightens the dish and gives it a fresh taste. For a richer flavor, consider adding a splash of white wine while cooking. This adds depth and pairs well with clams. To save time, prep your ingredients first. Chop the onion and garlic before you start cooking. You can even use pre-minced garlic for quicker prep. Cook the pasta while you make the sauce. This saves time and keeps everything hot. Another tip is to use a large skillet for the sauce. This allows you to mix in the pasta easily without needing extra pots. When sautéing, heat your skillet before adding oil. This helps the oil spread evenly. Use medium heat to avoid burning garlic and onion. Garlic can turn bitter if it cooks too long. Stir often to ensure everything cooks evenly. If you want a golden color, let the onions cook until they are soft and slightly brown. This adds flavor and sweetness to your sauce. Follow these tips for a delicious and quick meal. For a detailed recipe, check out the [Full Recipe]. {{image_2}} You can switch out clams for other seafood. Shrimp and scallops work well in this dish. Both add a sweet flavor and cook quickly. Just sauté them until pink before adding to the sauce. You can also use mussels. They bring a briny taste and look great on the plate. When choosing any seafood, always pick fresh options for the best taste. If you want a vegetarian dish, skip the clams. You can use mushrooms instead. Sauté sliced mushrooms until they are golden brown. They add a nice umami flavor. Another option is to add artichoke hearts. They provide a meaty texture and pair well with lemon. For added richness, consider adding a splash of vegetable broth in place of clam juice. To change the flavor, try adding white wine. It brings a nice acidity to the dish. Just pour in half a cup after cooking the garlic. Let it simmer for a few minutes. You can also try different herbs. Basil or thyme can add new layers of taste. Don’t forget about nuts! A sprinkle of toasted pine nuts can give a delightful crunch. For a spicy kick, add more red pepper flakes or use fresh chili peppers. To keep your leftover linguini with clam sauce fresh, place it in an airtight container. Make sure to cool the dish to room temperature before sealing it. This helps to avoid moisture buildup. Store it in the fridge and eat it within three days. If you want to keep it longer, consider freezing it instead. When you’re ready to enjoy your leftovers, reheat them gently. Use a skillet over medium heat. Add a splash of olive oil or a bit of reserved pasta water to keep it moist. Stir often to avoid burning. You can also microwave it in a bowl with a damp paper towel on top. Heat in short bursts, stirring in between. You can freeze linguini with clam sauce if you want to save some for later. First, cool it completely. Then, portion it into freezer bags or containers. Remove as much air as possible to prevent freezer burn. Label the bags with the date. This dish can stay in the freezer for up to three months. When you’re ready to eat, thaw it overnight in the fridge before reheating. Yes, you can make this dish ahead. Cook the pasta and sauce earlier in the day. Store them in separate containers in the fridge. When ready to serve, reheat the sauce and toss it with the pasta. This method keeps the linguini from getting soggy. Just remember, fresh pasta tastes best when served right after cooking. Linguini with clam sauce pairs well with many sides. Here are some great options: - A fresh green salad - Garlic bread or toasted baguette - Steamed vegetables like broccoli or asparagus - A light white wine, such as Pinot Grigio These sides enhance the meal's flavors and add a nice touch. To adjust the spice level, simply change the red pepper flakes. For less heat, use less than a teaspoon. For more heat, feel free to add more. You can also try adding black pepper for a different kick. Always taste as you go to find the perfect balance for your palate! You learned about key ingredients, cooking steps, and helpful tips for making Linguini with Clam Sauce. I shared substitutions, storage tips, and how to modify the dish to fit your taste. Remember, the right ingredients and techniques make a big difference. Enjoy exploring variations and impress your friends with your cooking skills. With this knowledge, you can create delicious meals any day. Now, get in the kitchen and let the cooking begin!

Linguini with Clam Sauce Easy and Flavorful Recipe

Are you ready to whip up a delicious meal that’s both easy and flavorful? This Linguini with Clam Sauce recipe

- 200g fettuccine pasta - 150g shrimp, peeled and deveined - 150g scallops - 1 cup heavy cream - 1 tablespoon olive oil - 2 cloves garlic, minced - 1/2 teaspoon red pepper flakes - 1/2 cup cherry tomatoes, halved - 1/4 cup fresh parsley, chopped - 1/2 teaspoon lemon zest - Salt and pepper to taste - Grated Parmesan cheese for garnish When I make creamy seafood pasta, I focus on fresh and simple ingredients. The fettuccine creates a lovely base. The shrimp and scallops bring a sweet and savory taste. Heavy cream adds richness and smoothness to the dish. For flavor, I use garlic and red pepper flakes. The garlic gives a warm aroma, while the red pepper flakes add a hint of spice. Cherry tomatoes add a pop of color and freshness. Don’t forget the parsley! It brightens the dish and adds a nice crunch. A touch of lemon zest gives a refreshing hint. Pair this creamy seafood pasta with a crisp white wine. I recommend a Pinot Grigio or Sauvignon Blanc. These wines balance the richness of the cream. You can also serve a simple green salad on the side. A light vinaigrette complements the meal without overpowering it. You can play with flavors by adding some extras. Consider using crab or lobster for a twist. Fresh basil or dill can change the taste profile. If you love cheese, try adding goat cheese or feta for a tangy kick. Remember, cooking is all about creativity. Feel free to adjust these ingredients to suit your taste. You can find the full recipe to guide you through the steps. To boil fettuccine to perfection, fill a large pot with salted water. Bring it to a rolling boil. Add the fettuccine and stir to prevent sticking. Cook according to the package instructions until it reaches al dente. This means it should be firm but not hard. Once cooked, drain the pasta, but save about 1/2 cup of that pasta water. This water helps make your sauce creamy later. For sautéing shrimp and scallops, use a large skillet and heat olive oil over medium heat. Add minced garlic and red pepper flakes; cook for about 30 seconds. This step brings out flavors. Next, add the shrimp and scallops. Cook them for about 2-3 minutes on each side. The shrimp should turn pink, and the scallops should be golden. Remove the seafood and set it aside. Cooking seafood correctly keeps it tender and juicy. To achieve the ideal cream consistency, pour heavy cream into the same skillet. Bring it to a gentle simmer. Stir in the lemon zest. This adds brightness to your sauce. Let the cream cook for 2-3 minutes, stirring occasionally until it thickens slightly. When mixing pasta, seafood, and sauce, add the drained fettuccine and seafood back into the skillet. Toss everything together. If the sauce seems too thick, add some reserved pasta water. This helps reach the desired creaminess. For seasoning to taste, add salt and pepper. Make sure to taste as you go for the best flavor. Once seasoned, remove from heat. For a nice presentation, serve the creamy seafood pasta in large, shallow bowls. Drizzle a bit of olive oil on top and sprinkle with fresh parsley. You can also add lemon wedges on the side. This bright touch makes your dish look and taste even better. For the full recipe, check out the details provided earlier. For sautéing seafood, I recommend using a non-stick skillet. It helps prevent sticking and burning. When cooking shrimp, aim for about 2-3 minutes per side. They should turn pink and curl slightly. Scallops need a bit longer, about 3-4 minutes per side. They should become golden brown. Keep an eye on the time. Overcooking seafood can make it tough. To adjust the creaminess of your sauce, add more heavy cream for a thicker texture. If you prefer a thinner sauce, add reserved pasta water. You can also use dairy alternatives like coconut milk or almond milk. They can give a nice flavor while keeping things creamy. Make-ahead ingredients can save you time. Cook your pasta and seafood ahead of time. Store them in the fridge until you're ready to mix. Using frozen seafood is another great tip. It cooks quickly and is just as tasty. Just make sure to thaw it before cooking to ensure even cooking. {{image_2}} You can swap shrimp or scallops for crab or lobster. Both options add a rich flavor. They can elevate your dish and impress your guests. If you want a vegetarian option, try using zucchini and mushrooms. These veggies will soak up the sauce and keep your dish hearty. To enhance the flavor, add spices like thyme or basil. They bring a fresh twist to the dish. You can also try different cheeses. For example, use feta for a tangy taste or mozzarella for creaminess. These tweaks can make your creamy seafood pasta unique. If you want to change the sauce, consider a white wine sauce. It adds a light, bright flavor that complements seafood well. Alternatively, you can incorporate tomato-based elements. A splash of marinara or diced tomatoes can create a new taste altogether. These variations can keep your meals exciting and fresh. When you have leftover creamy seafood pasta, store it in an airtight container. This keeps the pasta fresh. Place it in the fridge right away. It will stay good for about 3 days. Make sure to cool the pasta first before sealing it. This helps prevent moisture buildup. You can freeze creamy seafood pasta, but it works best without the seafood. Cooked pasta can dry out in the freezer. To freeze, let it cool down completely. Place it in a freezer-safe container. It can last up to 2 months in the freezer. When you’re ready to eat, thaw it in the fridge overnight. Reheat in a skillet with a splash of cream. This helps keep the dish creamy and delicious. Leftover creamy seafood pasta can be used in fun ways. Mix it with fresh veggies for a new dish. You can also use it as a filling for stuffed peppers. Pair it with a light salad or garlic bread for a full meal. This makes the dish feel fresh even the next day. You can use half-and-half or coconut cream. Both options work well in this dish. Half-and-half gives a lighter taste, while coconut cream adds a rich, sweet flavor. If you want a healthier option, try Greek yogurt. Mix it with milk for a creamy texture. To spice up your creamy seafood pasta, add more red pepper flakes. You can also mix in diced jalapeños or a dash of hot sauce. If you like heat, consider using spicy sausage or chorizo. These ingredients will bring a bold kick to your meal. Yes, whole wheat pasta can be a great substitute. It adds a nutty flavor and extra fiber. Just remember to cook it slightly longer than regular pasta. This ensures it reaches the perfect texture while soaking up the creamy sauce. Pair this dish with a fresh green salad or garlic bread. A crisp salad with lemon vinaigrette balances the creaminess. Garlic bread provides a crunchy contrast and is great for mopping up the sauce. Consider pairing with a light white wine, like Pinot Grigio. Yes, you can prep parts of this dish ahead of time. Cook the pasta and seafood separately, then store them. Combine everything just before serving for a fresh taste. If you choose to make the sauce in advance, add a splash of cream when reheating to restore creaminess. For the complete recipe and detailed instructions, check out the Ocean Delight Creamy Seafood Pasta section above. Creamy seafood pasta brings together delightful ingredients and cooking techniques. You learned how to cook fettuccine perfectly, sauté seafood, and create a rich sauce. The tips shared will help you adjust creaminess, save time, and explore variations like crab or vegetarian options. Enjoy your culinary adventure. Experiment with flavors and find what you love. This dish is not only tasty but also versatile. With practice, you'll make it uniquely yours. Happy cooking!

Creamy Seafood Pasta Rich and Flavorful Delight

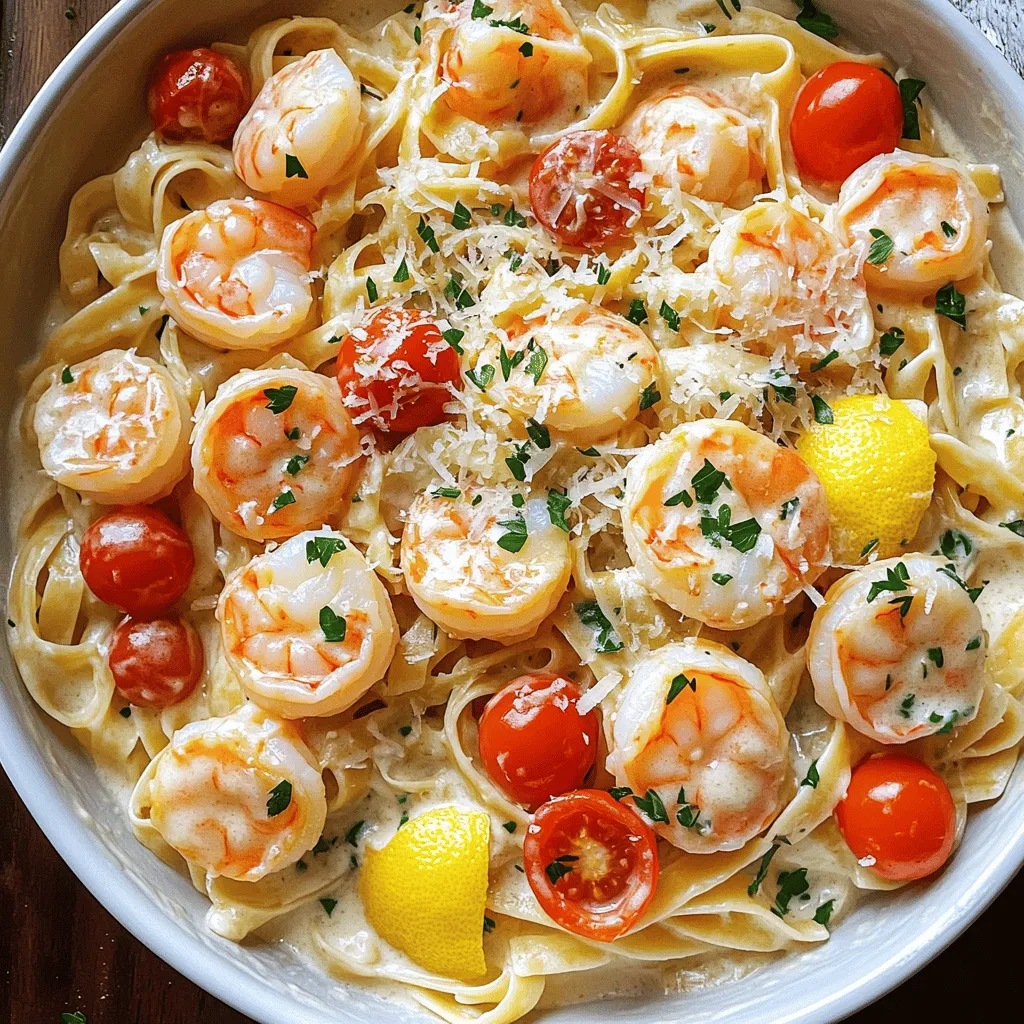
Are you ready to indulge in a dish full of rich flavors? Creamy seafood pasta is a true delight that

Older posts
Newer posts
← Previous Page1 … Page42 Page43 Page44 … Page76 Next →

dsad

© 2025 My Saved Recipe • Built with GeneratePress

Our Policies

  • Copyright Policy
  • Cookie Policy
  • GDPR Policy
  • Privacy Policy
  • Disclaimer
  • Terms Of Use

More Information

  • Home
  • About
  • Contact
  • Appetizers
  • Dessert
  • Dinner
  • Drinks
©2025, My Saved Recipe About Back To Top