Skip to content
DisclaimerTerms Of UseGDPR PolicyCookie Policy

My Saved Recipe

  • Home
  • Drinks
  • Appetizers
  • Dinner
  • Dessert
  • About
  • Contact
  • Privacy Policy
DisclaimerTerms Of UseGDPR PolicyCookie Policy

Savannah

- 2 cups rolled oats - 1 cup pecans, roughly chopped - 1/2 cup maple syrup - 1/4 cup coconut oil, melted - 1/2 teaspoon vanilla extract - 1/2 teaspoon cinnamon - 1/4 teaspoon salt - 1/2 cup shredded coconut (optional) - 1/2 cup dried cranberries or raisins (optional) These ingredients come together to create a crunchy and tasty granola. Rolled oats form the base. Pecans add a nice crunch and flavor. Maple syrup gives it sweetness, while coconut oil binds it all. Vanilla extract adds depth. Cinnamon brings warmth, and salt enhances all the flavors. This granola is not just tasty; it’s also good for you. Rolled oats provide fiber and energy. Pecans are rich in healthy fats and protein. Maple syrup offers antioxidants and is lower on the glycemic index than regular sugar. Coconut oil can support heart health. Overall, this mix helps keep you full and satisfied. Feel free to make this recipe your own! You can add shredded coconut for a tropical twist. Dried cranberries or raisins give extra sweetness and chew. Want more protein? Toss in some seeds like pumpkin or sunflower. You can even use different nuts if you like. Customize your granola to fit your taste! For the full recipe, check the earlier section. Start by preheating your oven to 300°F (150°C). This low temperature ensures even cooking. Next, line a large baking sheet with parchment paper. This step helps prevent sticking and makes cleanup easy. In a big mixing bowl, add 2 cups of rolled oats and 1 cup of chopped pecans. If you like coconut, you can add 1/2 cup of shredded coconut. Then, sprinkle in 1/2 teaspoon of cinnamon and 1/4 teaspoon of salt. Mix everything well. This blend creates a tasty base for your granola. In a different bowl, whisk together 1/2 cup of maple syrup, 1/4 cup of melted coconut oil, and 1/2 teaspoon of vanilla extract. Mix until smooth. Pour this wet mixture over the dry ingredients. Stir gently until all the dry bits are coated. This helps the granola clump together. Spread the granola mixture evenly on your lined baking sheet. Press it down gently to make a flat layer. Bake for 25-30 minutes. Stir halfway through to ensure even browning. Look for a golden color and a nice smell. Remove it from the oven and let it cool completely. It will become crunchy as it cools. For added texture, mix in dried cranberries or raisins after it cools. Store your delicious granola in an airtight container. Enjoy your crunchy maple pecan granola! For the full recipe, check out the provided details. To make your granola crunchy, use rolled oats instead of quick oats. Rolled oats hold their shape better during baking. Use enough liquid to coat the oats, but not too much. Coconut oil helps create a crisp texture. Spread the granola evenly on the baking sheet. Press it down slightly before baking. Stir halfway through baking to ensure even browning. Bake until golden brown, then cool completely. Cooling helps the granola harden. Store your granola in an airtight container. This keeps moisture out and preserves crunchiness. A glass jar or a plastic container with a tight lid works well. Place the granola in a cool, dark spot, like a pantry. Avoid direct sunlight, as it can make it stale. For the best taste, use it within two weeks. If it starts to lose crunch, you can toast it in the oven briefly. You can easily customize your granola. Try adding spices like nutmeg or ginger for warmth. Mix in seeds, like pumpkin or sunflower, for extra crunch. Dried fruits, like apricots or apples, add sweetness. For a chocolate twist, add dark chocolate chips after baking. Experiment with flavors to find your favorite mix. The Full Recipe gives you a solid base to start from. Enjoy the process of creating your unique blend! {{image_2}} You can make a nut-free granola. Just skip the pecans. Use seeds like sunflower or pumpkin seeds instead. They add a nice crunch and flavor. This swap keeps the granola tasty and safe for those with nut allergies. If you love chocolate, add some chocolate chips. Stir in the chips right after baking. This gives a sweet twist to the granola. Use dark, milk, or even white chocolate chips. They melt slightly, making every bite delightful. You can swap maple syrup for other sweeteners. Honey or agave syrup works well too. If you want a low-sugar option, try using mashed bananas or applesauce. Both will add natural sweetness and moisture to your granola. Adjust the amount based on your taste. For the full recipe, check out the Crunchy Maple Pecan Granola section. To keep your maple pecan granola fresh, use an airtight container. Glass jars work well. Store it in a cool, dry place. Avoid areas that get warm, like above the stove. Granola can lose its crunch if exposed to moisture. When stored properly, your maple pecan granola lasts up to two weeks. After that, it may lose its flavor and crunch. If you notice any odd smells or changes in texture, it’s best to toss it. Always check before enjoying! You can freeze maple pecan granola for longer storage. Place it in a freezer-safe bag or container. It can last up to three months in the freezer. When you want some, just take out what you need. Let it sit at room temperature for about 30 minutes to thaw. This helps it regain its crunchy texture. Enjoy it again, just like fresh! For the complete recipe, check out the Full Recipe. You can serve maple pecan granola in many fun ways. A great option is to enjoy it with yogurt. Just layer the yogurt and granola in a bowl. Add some fresh fruit on top for sweetness. You can also eat it with milk for a crunchy breakfast. For a snack, grab a handful straight from the jar. Yes, you can make this granola vegan easily. Use maple syrup as your sweetener, which is plant-based. For the fat, switch coconut oil with any vegetable oil you like. All the other ingredients are naturally vegan too. So, don't worry; it will still taste great without any animal products. You will know the granola is done when it turns golden brown. It should also smell sweet and nutty. Keep an eye on it while baking. Stir halfway through to help it bake evenly. If it looks golden and smells amazing, it’s ready to come out! You can find all the ingredients at your local grocery store. Look for rolled oats in the cereal aisle. Pecans are usually in the nut section. Maple syrup, coconut oil, and spices are also easy to find. You can also order ingredients online if you prefer shopping from home. Absolutely! You can switch out pecans for any nuts you like. Almonds, walnuts, or cashews work well too. Just chop them roughly, like the pecans. This will add different flavors and textures. Feel free to experiment and find your favorite nut mix! For the full recipe, check out the details provided. This blog post covers everything you need for making maple pecan granola. We explored key ingredients and their nutritional benefits. The step-by-step instructions guide you through each part of the process. Tips and tricks help you achieve that perfect crunch, while variations let you customize to your taste. Finally, we discussed best practices for storage to keep it fresh. With these insights, you can create a delicious, healthy snack that fits your needs. Dive in and enjoy your homemade granola!

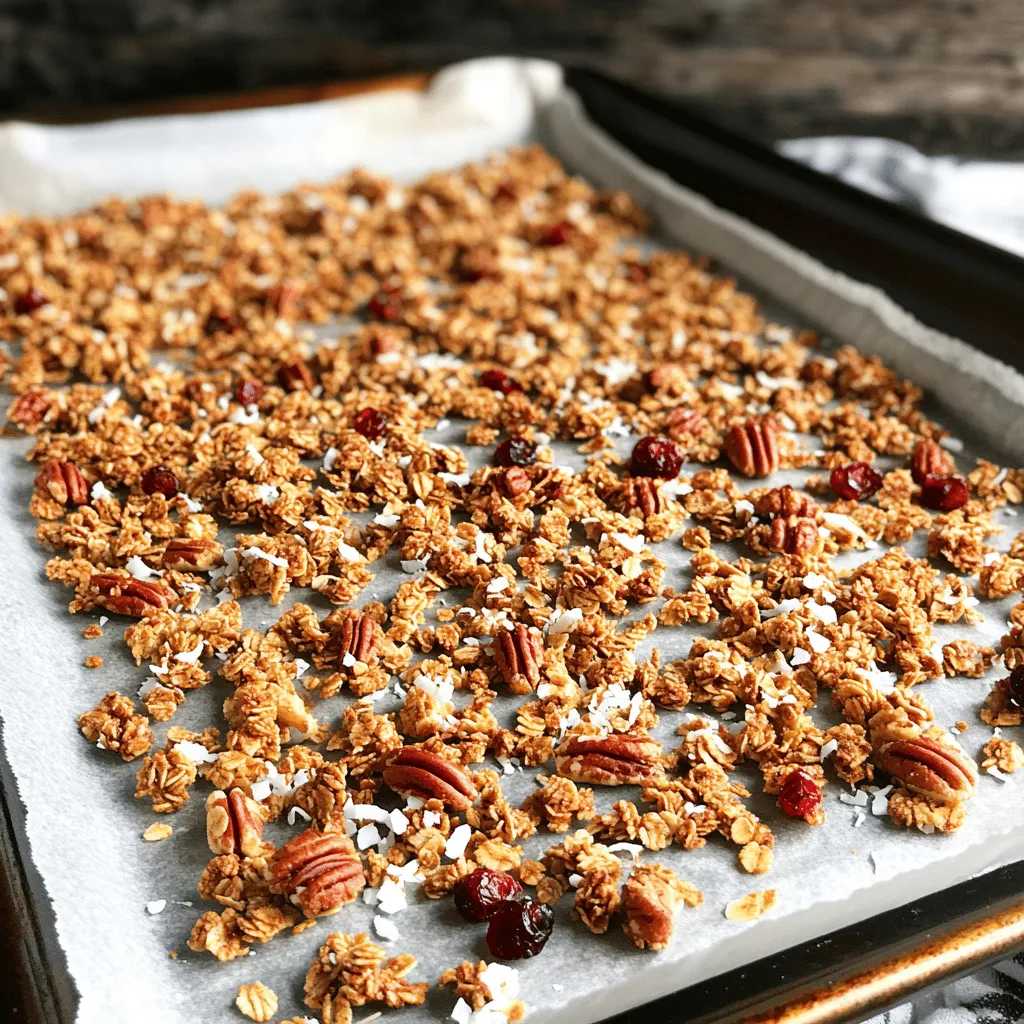
Maple Pecan Granola Crunchy and Tasty Recipe Guide

If you crave a crunchy, tasty snack, you’ve found it! This Maple Pecan Granola recipe is simple and delicious. I’ll

- 1 cup red lentils, rinsed - 1 can (13.5 oz) coconut milk - 4 cups vegetable broth - 1 medium onion, diced - 2 cloves garlic, minced - 1 inch fresh ginger, grated - 2 tablespoons red curry paste - 1 teaspoon turmeric powder - 1 teaspoon cumin powder - 1 cup diced tomatoes (fresh or canned) - 1 cup spinach, chopped - 2 tablespoons olive oil - Salt and pepper to taste - Fresh cilantro, for garnish To make Coconut Curry Lentil Soup, you need fresh, quality ingredients. I love using red lentils for their quick cooking time. They soften nicely and soak up flavors well. Coconut milk adds a rich creaminess. It balances the spices and makes the soup smooth. Vegetable broth is key. It gives depth to your soup. For the base, I use onion, garlic, and ginger. They add warmth and a fragrant aroma to the dish. The spices, like red curry paste, turmeric, and cumin, bring a world of flavor. - Fresh vegetables for added nutrition - Protein add-ins like chicken or tofu You can boost nutrition by adding fresh veggies. Think carrots, bell peppers, or kale. They add color and crunch. If you want extra protein, chicken or tofu works well. Tofu is a great plant-based choice. You can add it early in the cooking process. This way, it soaks up all the tasty flavors. For more details, check the Full Recipe. 1. Start by heating olive oil in a large pot over medium heat. 2. Add the diced onion and sauté for about 5 minutes, until it turns soft and clear. 3. Next, stir in the minced garlic and grated ginger. Cook for about 2 minutes until the smell is fragrant. 4. Now, add the red curry paste, turmeric, and cumin powder. Mix well to coat the onion and garlic with the spices. 1. Pour in the diced tomatoes and cook for about 3 minutes. This helps the flavors mix nicely. 2. Add the rinsed lentils and vegetable broth. Bring the mixture to a gentle boil. 3. Once boiling, lower the heat and let it simmer uncovered for about 20 minutes. The lentils should be tender. 4. Stir in the coconut milk and chopped spinach. Heat this through for about 5 more minutes. 1. Taste the soup and season with salt and pepper as you like. 2. Serve hot and garnish with fresh cilantro on top. 3. Pair it with crusty bread or rice for a complete meal. This recipe is easy and delicious. For the full details, check out the Full Recipe. Enjoy your cooking! To get the texture just right, you may need to adjust the liquid. If your soup feels too thick, add more vegetable broth or coconut milk. A little splash can make a big difference. If it’s too thin, let it simmer a bit longer. This will help it thicken up nicely. When it comes to spices, tasting as you cook is key. Start with the suggested amounts but feel free to add more. If you like heat, consider more red curry paste or a pinch of chili powder. If you want a milder flavor, add a bit more coconut milk. You can also try adding a squeeze of lime juice for a fresh twist at the end. Meal prepping can make cooking easier. You can wash and chop your vegetables ahead of time. Store them in the fridge to save time on cooking day. Rinsing lentils and storing them in a sealed bag can also help. If you have leftovers, store them in airtight containers. This soup keeps well in the fridge for about three days. You can also freeze it for up to a month. Just make sure to leave some space in the container for expansion. A good pot is essential for this recipe. I recommend using a heavy-bottomed pot. It helps distribute heat evenly, so your soup cooks well. A wooden spoon is great for stirring, as it won’t scratch your pot. You might also want a sharp knife for chopping. A cutting board is key for safety and ease. Finally, a measuring cup will help you get the right amounts of liquids. Having these tools ready will make your cooking experience smoother. For the full recipe, check out Coconut Curry Lentil Soup! {{image_2}} You can change the lentils or beans in this soup. Try green or brown lentils for a different texture. Black beans or chickpeas can also work well. If you want a dairy-free or vegan option, coconut milk is perfect. You can skip the cheese and use nutritional yeast for a cheesy flavor. Adding different spices or herbs can boost the soup's taste. You might try coriander or cardamom for a new twist. Fresh herbs like basil or mint add brightness too. If you like heat, adjust the chili levels. Add fresh chili for a kick or use cayenne pepper for warmth. Coconut curry has roots in many cuisines. Thai and Indian flavors shine in this dish. You can add a touch of lemongrass for a Thai vibe. Fusion ideas can be fun too! Try adding Mexican spices like cumin and paprika for a unique blend. Each change gives the soup a new personality. Check out the Full Recipe for more inspiration! You can store Coconut Curry Lentil Soup in the fridge for up to five days. Make sure to let it cool before you put it in a container. Use an airtight container to keep the soup fresh. This helps keep the flavors intact. If you want to freeze the soup, it works well! Use freezer-safe containers or bags. Fill them about three-quarters full to leave space for expansion. Coconut curry soup can last up to three months in the freezer. Thaw it overnight in the fridge before reheating. To reheat without losing flavor, use a pot on low to medium heat. Stir it often to prevent sticking. If the soup seems thick, add a splash of vegetable broth or water. This keeps it creamy and delicious. Avoid microwaving, as it can change the texture. For best results, serve it hot and fresh! For the full recipe, check out the Full Recipe section. Yes, you can make this soup ahead of time. It keeps well in the fridge for about three days. Just store it in an airtight container. When you want to enjoy it, heat it on the stove or in the microwave. The flavors will deepen, making it even tastier. This soup pairs well with several sides. You can serve it with warm naan or rice. A fresh salad also adds a nice crunch. For a complete meal, add a protein like grilled chicken or tofu. These sides enhance the soup's rich flavors. Yes, this recipe is gluten-free. It uses lentils and coconut milk, which are naturally gluten-free. Just make sure to check the vegetable broth label. Some brands may add gluten, so it's best to choose a certified gluten-free broth. To add more heat, include extra red curry paste. You can also add fresh chilies or red pepper flakes. Start with a small amount, then taste as you go. This way, you can find the perfect spice level for your taste. Yes, a slow cooker works well for this soup. Start by sautéing the onion, garlic, and ginger in a pan. Then, add all the other ingredients to the slow cooker. Cook on low for 6-8 hours or on high for 3-4 hours. This method makes the soup rich and flavorful. For the full recipe, check the cooking instructions above. In this blog post, we explored the key ingredients for Coconut Curry Lentil Soup, including red lentils, coconut milk, and spices. I shared step-by-step instructions for preparation and cooking, along with tips to enhance taste and save time. We also discussed variations and storage tips for maximizing freshness. Coconut Curry Lentil Soup is easy to make and easy to adapt. Enjoy experimenting with flavors and ingredients that suit your taste. This soup is a warm, filling dish perfect for any occasion.

Coconut Curry Lentil Soup Healthy and Flavorful Dish

Looking for a warm and tasty meal that’s also good for you? Look no further! This Coconut Curry Lentil Soup

To make a delightful strawberry shortcake trifle, you need simple, fresh ingredients. Here’s what you will need: - 2 cups fresh strawberries, hulled and sliced - 2 tablespoons granulated sugar - 1 teaspoon vanilla extract - 1 pound store-bought pound cake or sponge cake, cut into cubes - 2 cups heavy whipping cream - 1/4 cup powdered sugar - 1 teaspoon vanilla extract - Fresh mint leaves for garnish Using high-quality ingredients makes a big difference. Fresh strawberries should be ripe and sweet. Look for bright red berries with no soft spots. The pound cake should be moist and fluffy. A rich heavy cream produces the best whipped cream. Always choose pure vanilla extract for a deeper flavor. You can easily swap ingredients if needed. If you don’t have strawberries, you can use blueberries or raspberries. For a gluten-free option, try almond flour cake or gluten-free sponge cake. If you want a lighter version, use Greek yogurt instead of whipped cream. Each change can give you a new twist on this classic dessert. To start, grab your fresh strawberries. You need 2 cups that are hulled and sliced. In a mixing bowl, add the sliced strawberries, 2 tablespoons of granulated sugar, and 1 teaspoon of vanilla extract. Toss them gently. Let them sit for about 15-20 minutes. This time helps the strawberries release their delicious juices. Next, take another mixing bowl. Pour in 2 cups of heavy whipping cream. Add 1/4 cup of powdered sugar and 1 teaspoon of vanilla extract. Use an electric mixer to beat the cream. Set it to medium-high speed. Keep mixing until you see stiff peaks. This should take about 3-5 minutes. Be careful not to overbeat, or it might turn into butter! Now it’s time to build your trifle. Use a trifle bowl or individual serving glasses for this. Start with a layer of pound cake cubes. Then, add a layer of whipped cream. Next, add a layer of your sugared strawberries. Repeat these layers until you run out of ingredients. Finish with a nice layer of whipped cream on top. Don’t forget to cover the trifle with plastic wrap. Chill it in the fridge for at least 2 hours. This step lets the flavors blend well. The cake will soak up some strawberry juices, making it super tasty. To make great whipped cream, use cold cream. Cold cream whips up better. Start with heavy whipping cream for the best results. Beat it on medium-high speed until you see stiff peaks. This takes about 3 to 5 minutes. Add powdered sugar and vanilla for extra flavor. Avoid overbeating, or it will turn into butter. Layering is key for a lovely trifle. Start with cake cubes at the bottom. Then, add a layer of whipped cream. Next, spoon on the sweetened strawberries. Repeat these layers until you reach the top. Make sure to finish with whipped cream. This gives your trifle a beautiful look. Use a clear bowl so everyone can see the layers. Want to make your trifle even better? Try adding lemon zest to your cream. It adds a nice zing. You can also mix in a splash of orange juice with the strawberries. This brings out their sweetness. For a fun twist, add a layer of chocolate sauce. It adds richness and a tasty surprise. Don't forget to check the [Full Recipe] for more ideas! {{image_2}} You can make your trifle even more fun by mixing berries. Blueberries, raspberries, and blackberries work well. Just keep the same steps from the full recipe. Layer your mixed berries with cream and cake. The colors will look great, and the flavors will pop! If you need a gluten-free treat, use gluten-free cake. Many stores sell gluten-free pound cake. Just swap it in the full recipe. Make sure all other ingredients are gluten-free. Your trifle will still taste amazing! Want to add chocolate? Use chocolate cake instead of pound cake. You can also mix cocoa powder into the whipped cream. This will give your trifle a rich flavor. Layer the chocolate cake, strawberries, and whipped cream just like in the full recipe. It's a chocolate lover's dream! To keep your trifle fresh, store it in the fridge. Use a tight lid or cover it well with plastic wrap. This helps keep the whipped cream fluffy and the strawberries juicy. Avoid storing it near strong-smelling foods, as it can absorb those odors. Your strawberry shortcake trifle lasts about 3 days in the fridge. After that, the cake may become soggy. The strawberries will also start to lose their flavor and texture. For the best taste, enjoy it within this time frame. Freezing trifle is tricky because of the cream and fruit. If you want to freeze leftovers, separate the layers first. Freeze the whipped cream and strawberries in one container. Store the cake separately. When ready to eat, thaw them in the fridge overnight. The texture may change, but it will still taste good. For the full recipe, check the details above! Yes, you can make Strawberry Shortcake Trifle a day ahead. In fact, doing so helps the flavors mix well. The cake will soak in the strawberry juices overnight. This makes it taste even better when you serve it. Just cover it well with plastic wrap. Keep it in the fridge until you’re ready to enjoy. If you want a change, you can use sponge cake or angel food cake instead of pound cake. Both options are light and airy. They will soak up the strawberry juices nicely. You could even use cookies like ladyfingers for a fun twist. Each choice adds a unique flavor and texture to the trifle. Yes, making a dairy-free version is easy! Use coconut cream or almond cream in place of heavy whipping cream. For the cake, look for dairy-free pound cake or sponge cake options. Ensure the sugar and vanilla extract are also dairy-free. This way, everyone can enjoy this sweet treat without dairy. In this article, we explored how to make a delicious Strawberry Shortcake Trifle. We covered key ingredients, preparation steps, and ways to enhance flavor. You learned tips for whipped cream and layering, plus variations like a gluten-free option. Remember, you can customize the trifle with different berries or even chocolate. Creating this dessert can be simple and fun. Enjoy the process, and share this treat with others. Trust me, it’s worth the effort!

Strawberry Shortcake Trifle Delightful and Easy Recipe

Craving a sweet treat that feels fancy but is super easy to make? Strawberry Shortcake Trifle is your answer! In

- 1 cup rolled oats - 2 cups unsweetened almond milk - 1 cup fresh blueberries - 1 tablespoon chia seeds - Zest of 1 lemon - 2 tablespoons maple syrup (or honey) - Sliced almonds - Coconut flakes - Extra lemon zest To make Blueberry Lemon Overnight Oats, you need simple ingredients. Rolled oats serve as the base. They soak up the almond milk and become soft and creamy overnight. Unsweetened almond milk gives a nice flavor. You can use any milk you like, such as cow's or oat milk. Fresh blueberries add sweetness and a burst of color. They also offer many health benefits. Chia seeds help thicken the mixture and add fiber. Lemon zest brightens the oats and gives them a fresh taste. Maple syrup or honey adds sweetness, but you can adjust it to your liking. For toppings, you can get creative. Sliced almonds add a nice crunch. Coconut flakes give a tropical twist. A sprinkle of extra lemon zest brings out the flavors even more. This recipe is not only healthy but also easy to prepare. Check out the Full Recipe for more details! First, grab a large mixing bowl. Add 1 cup of rolled oats. Then, pour in 2 cups of unsweetened almond milk. Next, add 1 tablespoon of chia seeds, the zest of 1 lemon, 2 tablespoons of maple syrup, and 1/2 teaspoon of vanilla extract. Finally, sprinkle in a pinch of salt. Whisk everything together until it is well mixed. This helps the oats absorb the flavors. Now, take 1 cup of fresh blueberries. Gently fold them into your oat mixture. Be careful not to crush them. Save a handful of blueberries for topping later. This adds a nice touch and keeps your oats looking pretty. Next, divide the oat mixture into mason jars or airtight containers. Seal each jar tightly and place them in the refrigerator. Let them chill overnight. This soaking time lets the oats soften and absorb all the flavors. In the morning, just stir them up and enjoy! For the full recipe, check out the details above. To get the best texture, let your oats soak overnight. This helps them soften and absorb all the tasty flavors. If you’re short on time, soak them for at least 4 hours. If your oats feel too thick in the morning, just add a splash more almond milk. This will help you reach your perfect creaminess. For the best taste, use fresh blueberries when they are in season. They are juicy and sweet, adding great flavor. If fresh blueberries aren’t available, frozen ones work too. They can add a nice chill to your oats. When it comes to sweeteners, maple syrup is my favorite. Honey is a good choice too. Adjust the sweetness to your liking. Serve your overnight oats in clear jars. This makes them look colorful and fun. You can see the blueberries and lemon zest, which is appealing. For a nice touch, add a sprig of fresh mint on top. It adds color and a hint of freshness. Enjoy your oats cold, or warm them in the microwave if you like. {{image_2}} You can switch up the fruit in your oats. Strawberries or raspberries work well. Just chop them up and fold them in. Fresh fruits add a nice burst of flavor. You can also use seasonal fruits for variety. In summer, try peaches or cherries. In winter, consider apples or pears. Each fruit brings its unique taste to your dish. Want to spice things up? Add a dash of cinnamon or nutmeg. These spices enhance the flavor without adding calories. If you love nut butter, mix in some almond or peanut butter. It adds creaminess and healthy fats. You can even add a swirl on top for a nice touch. Experiment with different flavors to find your favorite combination. If you follow a vegan diet, use plant-based milk. Almond, oat, or coconut milk all work great. Make sure to select gluten-free oats if you need them. Some brands offer certified gluten-free options. This ensures that your breakfast stays safe and tasty. You can enjoy these oats without worry, no matter your dietary needs. For the [Full Recipe], check the original ingredients and instructions. For the best results, use airtight containers or mason jars. These keep your oats fresh and tasty. Store them in the fridge after making. They last about 3 to 5 days. This is perfect for meal prep! You can freeze blueberry lemon overnight oats too. Just pour them into freezer-safe containers. Make sure to leave space at the top for expansion. They can last up to 3 months in the freezer. When you’re ready to eat, thaw them in the fridge overnight. After thawing, give them a good stir before serving. If you want to warm your oats, use the microwave. Heat them in short bursts of 30 seconds. Stir in between to avoid hot spots. If the oats become too thick, add a splash of almond milk. This helps reach your preferred consistency. Enjoy your delicious breakfast warm or cold! You can make these oats vegan by using plant-based milk. Almond milk works great, but you can also try oat milk or coconut milk. Just replace dairy milk with your choice of plant milk. This change keeps the recipe creamy and delicious without any animal products. Yes, you can use quick oats. Quick oats cook faster and absorb liquid quickly. However, they will give your overnight oats a softer texture. Rolled oats are thicker and provide a chewier bite. I prefer rolled oats for their texture, but quick oats work well too. If you don't have chia seeds, you can use flaxseeds. Ground flaxseeds will add a similar texture and thickness. You can also use unsweetened yogurt or a mashed banana for creaminess. Each option gives a different taste, so choose what you like best! There are endless ways to customize your oats! You can add nuts like walnuts or almonds for crunch. Try different fruits like strawberries or raspberries for variety. You can also mix in spices like cinnamon or vanilla for extra flavor. Get creative with your toppings! These oats are healthy and filling. They are high in fiber and antioxidants from the blueberries. A serving typically has about 250-300 calories, depending on the toppings. They provide energy to start your day right. Plus, they keep you full until lunch! For the full recipe, check out the detailed instructions above. You learned how to make delicious Blueberry Lemon Overnight Oats. We covered key ingredients, like rolled oats and fresh blueberries. You saw step-by-step instructions to ensure the best flavor and texture. Remember, you can customize with fruits and toppings you love. Store leftovers properly, or freeze them for later. Blueberry lemon oats are easy to make and healthy. Enjoy a tasty breakfast that fuels your day. Dive in and try different variations to find your favorite! Your morning routine will thank you.

Blueberry Lemon Overnight Oats Easy Healthy Recipe

Start your day right with these Blueberry Lemon Overnight Oats! This easy, healthy recipe combines rolled oats, fresh blueberries, and

To make Garlic Herb Roasted Carrots, you need these simple ingredients: - 1 pound baby carrots (or regular carrots, peeled and cut into sticks) - 3 tablespoons olive oil - 4 cloves garlic, minced - 1 teaspoon dried thyme - 1 teaspoon dried rosemary - 1 teaspoon honey (optional for sweetness) - Salt and pepper to taste - Fresh parsley, chopped (for garnish) You can add a few fun twists to this dish. Consider using: - Fresh garlic instead of minced - Different herbs like basil or oregano - A splash of lemon juice for zest - Maple syrup instead of honey for a unique sweetness Let’s break down why these ingredients are great for you: - Carrots: Full of vitamins A and K. They help with eye health and boost your immune system. - Olive oil: A healthy fat that is good for your heart. It also adds flavor. - Garlic: Known for its health benefits, garlic can help reduce blood pressure and boost immunity. - Thyme: This herb has antioxidants and may help fight off illness. - Rosemary: It may improve digestion and memory. Plus, it smells amazing when cooked. - Honey: A natural sweetener that can give energy and has anti-inflammatory properties. - Parsley: High in vitamins C and K. It adds freshness and color to your dish. These ingredients not only taste great together, but they also offer many health benefits. With this recipe, you can enjoy a dish that is both delicious and good for you! For the full recipe, check the earlier section. To make Garlic Herb Roasted Carrots, start with fresh carrots. You can use baby carrots or regular ones. If you choose regular carrots, peel them and cut them into sticks. Gather these simple ingredients: - 1 pound baby carrots (or regular carrots, peeled and cut into sticks) - 3 tablespoons olive oil - 4 cloves garlic, minced - 1 teaspoon dried thyme - 1 teaspoon dried rosemary - 1 teaspoon honey (optional for sweetness) - Salt and pepper to taste - Fresh parsley, chopped (for garnish) In a large bowl, mix the olive oil, minced garlic, thyme, rosemary, honey, salt, and pepper. This mix will coat the carrots well. Next, preheat your oven to 425°F (220°C). After mixing the ingredients, add the carrots to the bowl. Toss them until they are fully coated in the herb mix. This step adds great flavor to the dish. Spread the carrots on a baking sheet lined with parchment paper. Make sure they are in a single layer. This helps them roast evenly. Roast the carrots for 20 to 25 minutes. Turn them halfway through cooking for even browning. You want them tender and slightly caramelized. Once the carrots are cooked, take them out of the oven. Let them cool for a few minutes. Then, transfer the carrots to a serving dish. For a nice touch, sprinkle fresh parsley on top. This makes the dish look bright and fresh. You can serve these tasty carrots as a side dish with chicken or fish. They also work great on a veggie platter. Want the full details? Check out the Full Recipe. To get the best roasted carrots, choose fresh ones. Baby carrots work well, but regular carrots are fine too. Make sure to cut them into even sticks. This helps them cook evenly. Toss your carrots well in the olive oil and herb mix. Spread them out on the baking sheet. If they are crowded, they will steam instead of roast. Aim for a single layer to get that nice caramelization. If you run out of garlic, you can use garlic powder instead. Use about 1/8 teaspoon for every clove. For herbs, fresh thyme or rosemary can replace dried ones. You can also try oregano or basil for a different taste. If you like a bit of heat, add a pinch of red pepper flakes. This will give your dish a spicy kick without losing that herb flavor. One common mistake is not prepping the carrots properly. Make sure to wash and peel them if needed. Another mistake is not seasoning enough. Taste your mix before adding the carrots. You want a good balance of salt and pepper. Lastly, don’t skip turning the carrots halfway through cooking. This step helps them cook evenly and develop that delicious golden color. For more guidance, check out the Full Recipe. {{image_2}} You can add more veggies to the garlic herb roasted carrots. Sweet potatoes work great. Just chop them like the carrots. Beets are another fun choice. They bring a deep color and flavor. You can also use parsnips for a sweet touch. Just remember to adjust cooking times for different veggies. Experiment with herbs to change the taste. Basil adds a fresh kick. Use fresh parsley for a bright flavor. Oregano can give a warm, earthy taste. You can also try dill for a unique twist. Mix and match to find your favorite blend. Boost the health factor with easy add-ins. Toss in some chopped kale or spinach. These greens cook down well and add nutrients. You can also sprinkle in some seeds like pumpkin or sunflower. They add crunch and healthy fats. Nuts like almonds or walnuts also work well. They add protein and make the dish heartier. For full details, check the Full Recipe. After enjoying your Garlic Herb Roasted Carrots, you may have some left. To store them, let the carrots cool down first. Then, place them in an airtight container. Keep the container in the fridge. They will stay fresh for about three to four days. This way, you can enjoy the flavors later. When you're ready to eat the leftovers, reheating is easy. Preheat your oven to 350°F (175°C). Spread the carrots on a baking sheet. Heat them for about 10 to 15 minutes. This method keeps them warm and tasty. You can also use the microwave if you're short on time. Just heat them in a bowl for one to two minutes. Stir halfway to ensure even warmth. If you want to prepare ahead, freezing is a great option. Start by letting the roasted carrots cool completely. Next, place them in a freezer-safe bag or container. Remove as much air as possible to avoid freezer burn. You can freeze them for up to three months. When you’re ready to eat, thaw in the fridge overnight. Then, reheat as mentioned above. This way, you can enjoy this delicious dish anytime! Yes, you can make Garlic Herb Roasted Carrots ahead of time. Just cook them and let them cool. Store them in an airtight container in the fridge. They stay fresh for up to three days. When you're ready to eat, simply reheat them in the oven. This keeps them warm and tasty. Garlic Herb Roasted Carrots go well with many meals. They complement roasted chicken or grilled fish nicely. You can also serve them with quinoa or rice dishes. The sweet and savory flavors balance well with rich meats or light salads. Try pairing them with a lemony pasta for a fresh twist. To serve more people, just double or triple the recipe. Use two or three pounds of carrots. Keep the amount of garlic and herbs the same, but feel free to taste and adjust as you cook. Spread the carrots across two baking sheets for even roasting. This way, everything cooks evenly and tastes great. Garlic herb roasted carrots are tasty and healthy. We covered the key ingredients, steps, and tips for success. You learned how to prep, roast, and serve carrots perfectly. Remember, customizing them with herbs adds fun flavors. Store leftovers well and enjoy them later. Lastly, don’t hesitate to try new variations for more nutrition. Cooking should be enjoyable, so have fun experimenting with this recipe!

Garlic Herb Roasted Carrots Flavorful and Simple Dish

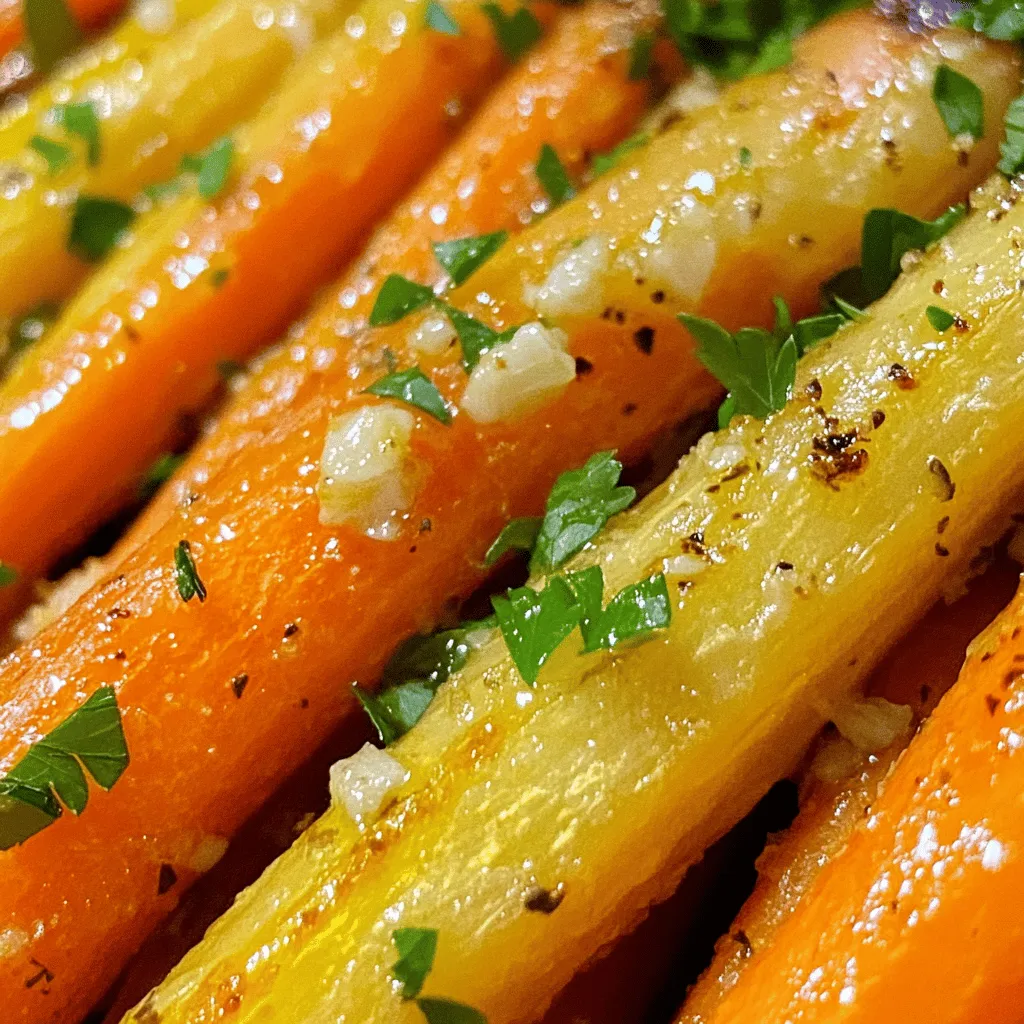
Looking for a simple yet tasty side dish? Garlic herb roasted carrots will steal the show! This dish combines sweet,

To make a tasty Spaghetti Aglio e Olio, you need these main ingredients: - 400g spaghetti - 6 cloves garlic, thinly sliced - 1/2 cup extra virgin olive oil - 1/2 teaspoon red pepper flakes - Zest of 1 lemon - Juice of 1 lemon - Salt, to taste - 1/4 cup fresh parsley, chopped You can enhance your dish with some fun extras. Here are optional ingredients to consider: - 1/4 cup grated Parmesan cheese (for creaminess) - 1 cup cherry tomatoes, halved (for freshness) These additions can bring more flavor and texture to your meal. If you don’t have a key ingredient, don’t worry! Here are some good swaps: - Use whole wheat or gluten-free pasta for dietary needs. - Swap olive oil with avocado oil for a different taste. - Try shallots instead of garlic for a milder flavor. These substitutions keep the dish tasty while catering to your needs. For the full recipe, check out the link provided. Start by bringing a large pot of salted water to a boil. I use about one tablespoon of salt for every four quarts of water. After it boils, add 400g of spaghetti. Cook it for about 8-10 minutes or until it is al dente. This means it should be firm, not mushy. Before you drain the spaghetti, save about 1 cup of pasta water. This water will help our sauce later. While the spaghetti cooks, grab a large pan. Heat 1/2 cup of extra virgin olive oil over medium heat. Once the oil is hot, add 6 cloves of thinly sliced garlic. Stir the garlic for 2-3 minutes until it turns golden brown. Watch closely! If it burns, it will taste bitter. Next, stir in 1/2 teaspoon of red pepper flakes. Cook for another 30 seconds to wake up those flavors. Now, it’s time to combine everything. Take the drained spaghetti and toss it into the pan with the garlic oil. Mix well so every strand is coated. Add the zest and juice of 1 lemon, along with 1/2 cup of the reserved pasta water. Stir until the liquid creates a light sauce. If it seems dry, add more pasta water. Finally, mix in 1/4 cup of chopped fresh parsley and 1 cup of halved cherry tomatoes. Season with salt to taste. For an extra touch, sprinkle some grated Parmesan cheese on top. You can find the [Full Recipe] for all the steps and details you need! Start with a big pot of water. Add salt until it tastes like the sea. Bring the water to a boil. Add the spaghetti and stir to keep it from sticking. Cook the pasta until it is al dente, which means firm to the bite. This usually takes about 8 to 10 minutes. Remember to save a cup of pasta water before draining. This water helps your sauce stick. Heat your olive oil over medium heat. Add your sliced garlic and watch it closely. You want it golden brown, not dark. This usually takes 2-3 minutes. If the garlic burns, it will taste bitter. Don't rush this step; patience is key. Right before it gets too dark, add the red pepper flakes. This helps to bring out their flavor. If you love heat, feel free to add more red pepper flakes. Start with a half teaspoon, then taste. You can always add more, but it’s hard to take it out. If you prefer less spice, cut back on the flakes. You can also add more lemon juice to balance the heat. This dish is all about your taste, so make it your own! For more great tips, don't forget to check out the Full Recipe! {{image_2}} You can easily add vegetables to your spaghetti. Consider including spinach, bell peppers, or broccoli. They add color and nutrition. Simply sauté them with the garlic. This way, you get a tasty and healthy dish. You can switch up the sauce for more flavor. Try adding pesto, marinara, or even a light cream sauce. Each option gives a new taste to your meal. Experiment with different sauces to find your favorite. To make this dish vegan, leave out cheese. You can also use nutritional yeast instead. For gluten-free spaghetti, choose gluten-free pasta brands. These small swaps let everyone enjoy this dish without missing out. Store leftover spaghetti Aglio e Olio in an airtight container. Keep it in the fridge. It stays fresh for about three days. Make sure to cool the pasta before sealing it. This will help keep the texture. To reheat, use a skillet over low heat. Add a splash of olive oil or water. Stir gently until warm. This helps keep the pasta moist. You can also microwave it. Use a microwave-safe bowl and cover it loosely. Heat in short bursts, stirring in between. You can freeze spaghetti Aglio e Olio, but with caution. The texture might change. Cool the pasta completely before freezing. Place it in a freezer-safe bag. Squeeze out air and seal tightly. It can last up to two months. When ready to eat, thaw it overnight in the fridge. Reheat as mentioned earlier for the best taste. Aglio e Olio is Italian for garlic and oil. This dish highlights these two simple ingredients. It shows how basic flavors can create magic. For me, it’s all about fresh garlic and good olive oil. This combo brings a rich taste that’s hard to beat. Yes, you can add protein! Grilled chicken or shrimp works great. You can also toss in sautéed mushrooms or chickpeas for a hearty touch. Just cook the protein separately and mix it in with the spaghetti. This makes your meal even more filling and satisfying. To make Spaghetti Aglio e Olio ahead of time, cook the spaghetti and garlic oil separately. Store them in airtight containers in the fridge. When you’re ready to eat, simply reheat the garlic oil and toss in the spaghetti. Add fresh parsley and cheese right before serving for the best taste. Check out the Full Recipe for more details! You learned how to make Spaghetti Aglio e Olio today. We covered the key ingredients, cooking steps, and tips for the best flavor. You saw ways to change the dish with veggies and sauces. Plus, we discussed storage, reheating, and FAQs. Now, it’s time to enjoy your meal! Experiment with variations to make it your own. Cooking should be fun, so get creative! Each bite of this dish is both simple and tasty. Enjoy your cooking journey!

Savory Spaghetti Aglio e Olio Easy Weeknight Meal

Looking for a quick and tasty dinner? Spaghetti Aglio e Olio is perfect for you! This easy weeknight meal uses

- 12 pretzel rods - 1 cup semi-sweet chocolate chips - 1 tablespoon coconut oil - 1/2 cup crushed nuts (e.g., almonds, pistachios) - 1/2 cup sprinkles (various colors) - Sea salt for sprinkling When making chocolate dipped pretzel rods, the right ingredients play a big role. You need pretzel rods to give that perfect crunch. Semi-sweet chocolate chips melt well and taste great. Adding coconut oil makes the chocolate smooth and easy to dip. Crushed nuts add a nice crunch and flavor. You can use almonds, pistachios, or any nut you love. Sprinkles bring color and fun to your pretzel rods. Finally, a sprinkle of sea salt adds a tasty contrast to the sweet chocolate. - White chocolate or milk chocolate variations - Other decoration options (coconut flakes, toffee bits) You can also get creative with your toppings. Try white or milk chocolate for a different taste. Coconut flakes or toffee bits can add extra flavor and texture. These options let you make each pretzel rod unique. You can mix and match toppings to suit your mood or occasion. For the full recipe, check out Chocolate Dipped Pretzel Rods 🥨. To start, you need to line your baking sheet. Grab a sheet of parchment paper and place it on the baking tray. This step is key. It keeps your pretzel rods from sticking. It also makes cleanup super easy. Set this aside for later. Next, it’s time to melt the chocolate. In a microwave-safe bowl, add 1 cup of semi-sweet chocolate chips and 1 tablespoon of coconut oil. The coconut oil helps keep the chocolate smooth. Heat this mixture in the microwave. Use 30-second intervals, stirring in between. Keep going until the chocolate is fully melted and smooth. You want it to be shiny and ready for dipping. Now comes the fun part! Take a pretzel rod and hold it by one end. Dip it into the melted chocolate. Aim to coat about two-thirds of the rod. Let any extra chocolate drip back into the bowl. This keeps the coat even. While the chocolate is still wet, sprinkle your choice of toppings. You can use crushed nuts or colorful sprinkles. Use a spoon to help spread them out evenly. Once you’ve dipped all your pretzel rods, place them on the lined baking sheet. Then, you'll need to chill them. Put the baking sheet in the fridge for about 20-30 minutes. This helps the chocolate set. When they are ready, you can add a sprinkle of sea salt on top for extra flavor. Now, your chocolate-dipped pretzel rods are ready to enjoy! For the full recipe, check out the details above. To get a smooth coat of chocolate, use a microwave. Melt the chocolate slowly. Stir it often. Add coconut oil to make it creamy. This keeps the chocolate from clumping. When you dip, hold the pretzel rod by one end. Dip it two-thirds into the chocolate. Let excess chocolate drip back into the bowl. This helps create a nice, even layer. For melting, I love using semi-sweet chocolate chips. They melt smoothly and taste great. Brands like Ghirardelli and Nestlé are perfect choices. They give you a rich flavor. If you want white chocolate, try Lindt or Merckens. They both melt well and taste sweet. To keep your dipped pretzel rods fresh, store them in an airtight container. Place a sheet of parchment paper between layers. This helps avoid sticking. Keep them at room temperature for up to a week. If you want them to last longer, you can freeze them. Just wrap each one in plastic wrap. This keeps them safe from freezer burn. {{image_2}} You can really mix things up with chocolate-dipped pretzel rods. Start by trying different types of chocolate. Dark chocolate gives a rich taste. White chocolate adds a sweet twist. You can even use flavored chocolates like mint or orange. Each option changes the flavor in a fun way. Make your pretzel rods special for any occasion. For Halloween, use orange and black sprinkles. At Christmas, go for red and green toppings. You can even add tiny candies to match the theme. This makes your pretzel rods festive and fun! If you want vegan options, use dairy-free chocolate. For gluten-free rods, pick gluten-free pretzels. You can also swap coconut oil for any plant-based oil. This way, everyone can enjoy this treat without worry. To keep your chocolate dipped pretzel rods fresh, store them at room temperature. Use an airtight container to prevent moisture. Avoid direct sunlight, as this can melt the chocolate. If you live in a hot area, find a cooler spot in your home, like a pantry. If you want to save them longer, you can freeze the pretzel rods. Wrap each rod in plastic wrap, then place them in a freezer bag. Make sure to squeeze out as much air as possible. When you want to eat them, take them out and let them thaw at room temperature. This helps keep the chocolate smooth. When stored properly, these treats last about one week at room temperature. In the freezer, they can stay good for up to three months. Just remember, the longer they sit, the more the texture may change. Enjoy them fresh for the best taste! Yes, you can use other pretzel types. Some fun options include: - Mini pretzel bites for a bite-sized treat. - Pretzel sticks for a thinner crunch. - Soft pretzels for a unique twist on the classic. Each choice will give your treat a different taste and texture. Sometimes, chocolate can be tricky to melt. Here are common issues and fixes: - If the chocolate seizes up, it may have moisture. Add a small amount of coconut oil to help. - If it won’t melt at all, try using shorter microwave bursts. Heat in 15-second intervals, stirring often. - Make sure your bowl is dry, as water can cause chocolate to clump. You can find pre-made chocolate-dipped pretzel rods at: - Local bakeries or gourmet shops. - Grocery stores in the snack aisle. - Online retailers like Amazon or specialty food sites. These are great if you need a quick gift or treat. Packaging your pretzel rods can be fun and creative. Here are some ideas: - Use clear cellophane bags tied with colorful ribbon. - Place them in decorative boxes with tissue paper. - Create a gift jar by layering pretzel rods with candy. These options make your gift look special and tasty! In this blog post, we covered how to make delicious dipped pretzel rods. We explored the needed ingredients, including pretzel rods and chocolate, as well as optional toppings. The step-by-step instructions guided you from melting chocolate to chilling the final product. I shared tips for storage and variations to keep things fun. Get creative with flavors or themes, and make them your own. Enjoy these sweet treats at home or share them with friends. Happy dipping!

Chocolate Dipped Pretzel Rods Easy and Fun Recipe

Looking for a sweet treat that’s easy to make and fun to eat? You’re in the right place! Chocolate dipped

To make a tasty teriyaki salmon bowl, gather these main ingredients: - 2 salmon fillets (about 6 oz each) - 1/4 cup low-sodium soy sauce - 2 tablespoons honey or maple syrup - 1 tablespoon rice vinegar - 1 tablespoon sesame oil - 1 teaspoon freshly grated ginger - 2 garlic cloves, minced - 1 cup cooked jasmine rice - 1 cup steamed broccoli florets - 1/2 cup shredded carrots - 1 avocado, sliced - 1 tablespoon sesame seeds for garnish - 2 green onions, chopped for garnish These ingredients blend to create bold flavors. The salmon stands out with a sweet and salty glaze. The vegetables add color and crunch, making each bite fun. You can make your teriyaki salmon bowls unique by adding these optional ingredients: - Edamame for extra protein - Cucumber slices for a fresh taste - Spinach or kale for greens - Pickled ginger for a tangy kick - Seaweed salad for an umami boost Feel free to mix and match these options. They can enhance flavor, texture, and nutrition. When picking salmon, focus on quality. Here are some tips: - Look for bright, vibrant color. Fresh salmon should not appear dull. - Check for firmness. Press gently; it should spring back. - Smell the fish. Fresh salmon should have a light, ocean scent, not a strong fishy odor. - Ask your fishmonger about the source. Wild-caught salmon often tastes better than farmed. Choosing fresh salmon makes a big difference in your meal. It adds depth and richness to your teriyaki salmon bowls. For the full recipe, follow the steps laid out in the earlier sections. Start by gathering your ingredients. You will need low-sodium soy sauce, honey or maple syrup, rice vinegar, sesame oil, fresh ginger, and garlic. In a small bowl, whisk these ingredients together. Mix them until they blend well. This sauce adds a sweet and salty flavor to the salmon. Next, take your salmon fillets. Place them in a shallow dish. Pour half of the teriyaki sauce over the fillets. Make sure they are well-coated. Cover the dish and let it sit in the refrigerator. Marinate the salmon for at least 15 minutes. This step helps the salmon absorb the delicious flavors. Heat a non-stick skillet or grill pan over medium-high heat. Take the salmon out of the marinade and discard the leftover sauce. Once your pan is hot, place the salmon fillets in it. Cook each side for about 4 to 5 minutes. You want the salmon to flake easily with a fork. This means it's perfectly cooked. Now it’s time to put everything together! In serving bowls, scoop in the cooked jasmine rice as your base. Top the rice with steamed broccoli, shredded carrots, and sliced avocado. Place a salmon fillet on top of the veggies in each bowl. Drizzle any remaining teriyaki sauce (not used for marinating) over everything for extra flavor. Finally, sprinkle sesame seeds and chopped green onions on top. This adds a nice crunch and fresh taste to your meal. For the full recipe, click [Full Recipe]. You can cook salmon in many ways. Grilling gives a nice char. Baking keeps it moist and tender. Pan-searing is quick and easy. I love using a non-stick skillet. It makes flipping the fillets simple. Ensure your skillet is hot before adding the salmon. This way, you get a nice crust. To boost your teriyaki sauce, try adding extra garlic or ginger. A splash of orange juice can add zest. If you like heat, add a dash of chili flakes. Let the sauce simmer to deepen the flavors. Always taste as you go. This way, you can adjust to your liking. For a full meal, pair your salmon bowl with fresh veggies. Steamed broccoli and shredded carrots are great choices. You can also add sliced cucumbers or snap peas. A sprinkle of sesame seeds adds crunch. Serve with a wedge of lime for extra brightness. Check out the Full Recipe for detailed steps. {{image_2}} If you want to switch things up, consider using chicken, shrimp, or tofu. Chicken thighs work well with teriyaki sauce, giving a juicy taste. Cook them just like the salmon. For shrimp, sauté them for about 3-4 minutes until they turn pink. Tofu is a great plant-based option. Press it to remove extra water, then cook until golden brown. Each protein adds its flavor, making your bowl unique. For a vegetarian twist, try using tempeh or mushrooms. Tempeh gives a nice texture and absorbs flavors well. Marinate it like salmon, then grill or pan-fry until crispy. Mushrooms, especially portobello, can stand in for meat. Sauté them until tender and use in your bowl. You can also add more veggies like bell peppers or snap peas for extra crunch. Teriyaki sauce can be adjusted to your taste. Want it spicier? Add a dash of sriracha or red pepper flakes. If you like it sweeter, mix in more honey or maple syrup. For a tangy kick, add some lime juice or orange zest. You can also experiment with different oils, like coconut or chili oil. Each change can make your teriyaki sauce special. For the full recipe, check out the [Full Recipe]. Store leftover salmon bowls in an airtight container. This keeps the food fresh. Let the bowls cool down first. You can keep them in the fridge for up to three days. If you think you won’t eat them soon, consider freezing them. To reheat, use the microwave or a pan on low heat. If using a microwave, cover the bowl with a damp paper towel. This keeps the salmon moist. If using a pan, add a splash of water or broth. Heat gently to keep the salmon tasty. You can freeze salmon and other ingredients, too. For salmon, wrap each piece tightly in plastic wrap. Place it in a freezer bag. For rice and veggies, let them cool before freezing. Store them in separate bags or containers. They last for up to three months. When ready to eat, thaw in the fridge overnight. Then reheat as you like. For the full recipe, check out the section above. You can make Teriyaki Salmon Bowls healthier by using less honey or maple syrup. Try using brown rice instead of jasmine rice. You can also add more veggies. Options like bell peppers or snap peas work well. Consider using baked or grilled salmon instead of pan-fried. This reduces extra oil and calories. Yes, you can use other fish for your bowls. Options like tuna, trout, or cod are great choices. Each fish gives a different taste and texture. Just adjust cooking times based on the fish you choose. For instance, tuna cooks faster than salmon. You can serve Teriyaki Salmon Bowls with a variety of sides. Steamed edamame or a fresh salad make good options. You might also add some pickled vegetables for a tangy bite. If you want more carbs, serve with rice noodles or quinoa. The best Teriyaki sauce balances sweet and salty flavors. Use low-sodium soy sauce for less salt. Honey or maple syrup adds sweetness. Fresh ginger and garlic enhance the taste. You can also add a splash of sesame oil for a nutty flavor. Yes, you can prepare the bowls in advance. Cook the salmon and rice, then store them separately. Keep the veggies fresh in the fridge. When ready to eat, assemble and warm up. This saves time on busy days. Check out the Full Recipe for details on how to make this meal. This guide shows you how to make Teriyaki Salmon Bowls from scratch. You learned about key ingredients, steps for cooking, and tips for storing leftovers. Customize your bowl with alternative proteins or flavors. Remember, cooking is about making it fun and tasty. Enjoy this simple yet delicious meal that you can share with family and friends. Now, go on, create your own Teriyaki Salmon Bowl masterpiece!

Teriyaki Salmon Bowls Flavorful and Easy Meal Prep

If you crave a tasty meal that’s quick and easy, Teriyaki Salmon Bowls are for you! I’m excited to share

To make a great Sweet and Sour Chicken Stir Fry, you need simple yet tasty items. Here’s what you will need: - 1 lb (450g) chicken breast, thinly sliced - 2 tablespoons cornstarch - 2 tablespoons vegetable oil - 1 red bell pepper, sliced - 1 green bell pepper, sliced - 1 cup pineapple chunks (fresh or canned) - 1 cup broccoli florets - 1 carrot, julienned - 4 cloves garlic, minced - 1 tablespoon ginger, grated - 4 tablespoons soy sauce - 3 tablespoons rice vinegar - 3 tablespoons honey - 1 teaspoon sesame oil - Salt and pepper to taste - 2 green onions, sliced (for garnish) - Sesame seeds (optional, for garnish) These ingredients give the dish its sweet and tangy flavor. The chicken cooks up tender, while the veggies add crunch. You can make your stir fry even better by adding a few fun items. Here are some ideas: - Snow peas for a fresh crunch - Cashews for a nutty taste - Red pepper flakes for a spicy kick - Fresh cilantro for a herbaceous touch These ingredients can enhance the flavor and make your dish unique. If you need to change some ingredients, it’s easy! Here are some swaps: - Use tofu instead of chicken for a vegetarian option. - Try gluten-free soy sauce if you avoid gluten. - Replace rice vinegar with apple cider vinegar for a different zing. - Use agave syrup instead of honey for a vegan choice. These substitutions keep the dish tasty while meeting your dietary needs. Check out the Full Recipe for more tips! Start by slicing your chicken breast into thin strips. This helps it cook quickly and evenly. In a bowl, toss the chicken pieces with cornstarch. The cornstarch gives the chicken a crispy coating. Make sure every piece is well-coated. Set the bowl aside while you prepare the rest of the ingredients. Heat a large skillet or wok on medium-high heat. Add 1 tablespoon of vegetable oil. Once the oil is hot, add the chicken in a single layer. Make sure not to crowd the pan. Sear the chicken for 5-7 minutes. Turn it occasionally until it is golden brown and cooked through. After cooking, remove the chicken from the skillet and set it aside. In the same skillet, add another tablespoon of vegetable oil. Then, add the minced garlic and grated ginger. Sauté for about 30 seconds until fragrant. Next, add the sliced red and green bell peppers, broccoli florets, and julienned carrot. Stir-fry these vegetables for about 3-5 minutes. You want them to be vibrant and slightly tender, but still crisp. Return the cooked chicken to the skillet. Now, add the pineapple chunks along with soy sauce, rice vinegar, honey, and sesame oil. Stir everything well to combine all the flavors. Let it cook for an additional 2-3 minutes. This allows the sauce to coat all the ingredients. Don’t forget to season with salt and pepper to taste. If you like it sweeter, add more honey. Remove from heat and let it rest for a minute. For the full recipe, check out the details above. To get the sweet and sour taste right, you need to mix flavors well. Start with the right sauce. Use equal parts soy sauce and rice vinegar. Add honey for sweetness. Taste as you mix. If it’s too sweet, add more vinegar. If it’s too sour, add more honey. This balance makes every bite great. Many cooks rush through the cooking process. Avoid that mistake. Cook the chicken in one layer. This helps it brown well. Don’t overcrowd the pan with too many veggies. Stir-fry small batches for good texture. Lastly, taste as you cook. Adjust flavors to suit your taste. A good pan makes a big difference. Use a large skillet or wok. A non-stick surface helps with cooking. A wooden spatula works well for stirring. Make sure your pan is hot before adding oil. This helps the chicken sear nicely. For best results, keep all tools ready before you start. For more details, check the Full Recipe. {{image_2}} If you want to switch things up, use other proteins. Try shrimp, beef, or tofu. Each option brings its own taste. Shrimp cooks quickly, making it a fast choice. Beef adds a rich flavor, while tofu is great for a veggie option. Just follow the same steps as in the recipe. Adjust cooking times based on the protein you choose. Adding different vegetables can change the dish. You can use what’s in season. Snow peas, zucchini, or mushrooms work well. For a crunch, add water chestnuts. Mix in bright colors like orange carrots or purple cabbage. This not only makes the dish look good, but it also boosts nutrition. The more colors, the more vitamins! If you love heat, add some spice! Red pepper flakes or sriracha can give your dish a kick. Start with a little and taste as you go. You can also use fresh chili peppers for a bold flavor. Just chop them finely and add them when cooking the garlic and ginger. This will wake up your taste buds! Feel free to explore these variations to make your Sweet and Sour Chicken Stir Fry your own. For the full recipe, check out the details above! To store your sweet and sour chicken stir fry, let it cool first. Then, place it in an airtight container. This keeps the flavor fresh. You can store it in the fridge for up to three days. If you want to keep it longer, freezing is a great option. When you’re ready to enjoy leftovers, reheating is key. You can use a microwave or a stovetop. If using the microwave, place the stir fry in a bowl. Add a splash of water to keep it moist. Heat for about two minutes, stirring halfway. If using the stovetop, heat in a skillet over medium heat. Stir until hot, usually about five minutes. This helps keep the chicken tender. Freezing sweet and sour chicken stir fry is easy. First, cool the dish completely. Then, transfer it to a freezer-safe container or bag. Make sure to remove as much air as possible. It can last for up to three months in the freezer. When you are ready to eat it, thaw overnight in the fridge. Reheat it using the tips above for the best taste. Sweet and sour chicken stir fry lasts about 3 to 4 days in the fridge. Store it in an airtight container. Make sure the stir fry cools down before sealing it. This helps keep the flavors fresh longer. Yes, you can use frozen vegetables! They are a great time-saver. Just add them straight to the pan. You may need to cook them a little longer to heat through. Frozen veggies can also add a nice color to your dish. The best side dish is steamed rice. Jasmine or brown rice works well. You can also serve it with noodles for a fun twist. Try adding a side of spring rolls for extra crunch. You can find the full recipe for sweet and sour chicken stir fry to enjoy these ideas! This blog post covered how to make a delicious Sweet and Sour Chicken Stir Fry. We talked about ingredients, cooking steps, and tips for the best flavor. You can even switch proteins or add spices. Remember to store leftovers properly to keep them fresh. This dish is fun to make and enjoy! I hope you feel ready to try it out and impress your family or friends. Happy cooking!

Sweet and Sour Chicken Stir Fry Flavorful and Easy Meal

Looking for a quick, tasty meal? Sweet and Sour Chicken Stir Fry is your answer! I’ll guide you through a

To make a rich and creamy chocolate avocado mousse, gather these essential items: - 2 ripe avocados - 1/3 cup unsweetened cocoa powder - 1/4 cup maple syrup (or honey) - 1/4 cup almond milk (or any milk of choice) - 1 teaspoon vanilla extract - A pinch of sea salt These ingredients work together to create a smooth and delicious treat. The ripe avocados provide a creamy base, while cocoa powder adds deep chocolate flavor. Maple syrup gives it a touch of sweetness, and almond milk keeps it light. Add a fun twist with these optional garnishes: - Fresh berries - Mint leaves These toppings not only make the mousse look pretty but also add fresh flavors. Berries bring a burst of sweetness, and mint gives a cool touch. You can also drizzle a bit of extra maple syrup for added sweetness if desired. If you're missing an ingredient, don't worry! Here are some easy swaps: - Use honey instead of maple syrup for sweetness. - Substitute coconut milk for almond milk for a different flavor. - Try using agave syrup as a vegan sweetener. These substitutions help you tailor the mousse to your taste and dietary needs. Don’t hesitate to experiment! With these ingredients, you can create a delicious chocolate avocado mousse that suits your preferences. For the full recipe, check out [Full Recipe]. To start, gather all your ingredients. You need two ripe avocados, cocoa powder, maple syrup, almond milk, vanilla extract, and sea salt. Cut the avocados in half and remove the pit. Scoop the green flesh into a food processor or a blender. Add the cocoa powder, maple syrup, almond milk, vanilla extract, and sea salt. Blend all the ingredients together until smooth. It should have a creamy texture. If the mix is too thick, add a bit more almond milk. Stop the blender and scrape down the sides to ensure all ingredients mix well. Taste the mousse to see if it’s sweet enough. If not, add a bit more maple syrup and blend again. Once you have a smooth mix, spoon it into individual serving dishes or glasses. Chill in the refrigerator for at least 30 minutes. This helps the flavors blend and the mousse to set. For a nice look, top with fresh berries and mint leaves before serving. For more details, check the Full Recipe. To make a great Chocolate Avocado Mousse, you need ripe avocados. Look for avocados that feel slightly soft when you press them gently. If they are hard, they need more time to ripen. A dark green or black skin usually means the avocado is ready. If you see any dents, it might be overripe. You can speed up ripening by placing them in a paper bag with a banana. Sweetness matters in this dessert. I often start with the suggested 1/4 cup of maple syrup. After blending, I taste the mousse. If it needs more sweetness, I add a little more syrup. Blend again until mixed well. You can also use honey if you prefer. Remember, the chocolate flavor should shine through, so don’t overdo it! Presentation makes your mousse look special. I like to serve it in small glasses. This way, you can see the rich color. Top each serving with fresh berries and a mint leaf. You can also drizzle extra maple syrup on top for a nice finish. These touches bring color and flavor, making it a delight to eat! For the full recipe, check out the details above. {{image_2}} You can easily make this mousse vegan. Simply use maple syrup instead of honey. The recipe is already dairy-free with almond milk. You can also try coconut milk for a richer taste. Both options keep the mousse creamy and smooth. To spice up your mousse, add a few fun ingredients. Try a pinch of cinnamon for warmth. A splash of espresso can deepen the chocolate flavor. You can also mix in a tablespoon of nut butter for extra creaminess. Just blend these in with the other ingredients. You can serve this mousse in many ways. For a fun touch, use small cups for individual servings. This makes each portion feel special. If you’re sharing, use a larger bowl. Scoop out servings for everyone. Either way, top with fresh berries for a burst of color. Check out the Full Recipe for more details! To keep your chocolate avocado mousse fresh, store it in an airtight container. Place a piece of plastic wrap directly on the mousse before sealing the container. This will help prevent browning and keep it creamy. When stored properly, chocolate avocado mousse lasts about three to five days in the fridge. Always check for changes in color or smell before eating. If you see any dark spots, it is best to toss it out. Yes, you can freeze chocolate avocado mousse! Place it in a freezer-safe container, leaving some space at the top for expansion. It can last for up to two months in the freezer. To enjoy, thaw it in the fridge overnight. Blend it again for a smooth texture before serving. Want the full recipe? Check the [Full Recipe]. Yes, you can use other sweeteners. Honey works well too. Agave syrup is another option. Each sweetener offers a unique flavor. Adjust the amount based on your taste. Start with a little, then add more if needed. Avocados are full of good fats. These fats help keep your heart healthy. They also provide fiber, which aids digestion. Plus, avocados are rich in vitamins and minerals. They add creaminess without dairy. This makes them great for desserts like mousse. To make it nut-free, simply swap almond milk. Use oat milk or coconut milk instead. Both work well and keep the mousse creamy. Ensure any toppings you use are also nut-free. This way, everyone can enjoy the dessert safely. Absolutely! You can mix in a bit of espresso powder for a coffee twist. Try adding a dash of peppermint extract for a fresh taste. You can also fold in some peanut butter for a rich flavor. Experiment and find what you love! Ripe avocados feel slightly soft when you press them. They should not be too mushy or hard. Look for a dark green color. If they are still bright green, they need more time. You can leave them at room temperature to ripen. Serve the mousse in small cups or bowls. Top with fresh berries for color. A sprig of mint adds a nice touch too. Drizzle a bit of maple syrup on top for extra sweetness. It makes your dessert look fancy and inviting. Yes, you can make the mousse a day ahead. Just store it in the fridge. Cover it tightly to keep it fresh. This allows the flavors to blend even better. Just give it a quick stir before serving. Fresh berries like raspberries or strawberries work well. You can also use shavings of dark chocolate. Mint leaves add a pop of color and freshness. Get creative with your garnishes for added fun! This blog post covered the essential steps to make a delicious chocolate avocado mousse. We explored key ingredients and how to choose ripe avocados. I shared tips for blending the mousse to a creamy texture and offered garnish ideas to enhance presentation. In the end, this dessert is versatile and simple to love. Feel free to experiment with flavors and serving styles. Enjoy making this healthy treat for yourself or to share with friends!

Chocolate Avocado Mousse Rich and Creamy Delight

Looking for a sweet treat that’s also healthy? You’re in the right place! My Chocolate Avocado Mousse is rich, creamy,

Older posts
Newer posts
← Previous Page1 … Page51 Page52 Page53 … Page72 Next →

dsad

© 2025 My Saved Recipe • Built with GeneratePress

Our Policies

  • Copyright Policy
  • Cookie Policy
  • GDPR Policy
  • Privacy Policy
  • Disclaimer
  • Terms Of Use

More Information

  • Home
  • About
  • Contact
  • Appetizers
  • Dessert
  • Dinner
  • Drinks
©2025, My Saved Recipe About Back To Top