Skip to content
DisclaimerTerms Of UseGDPR PolicyCookie Policy

My Saved Recipe

  • Home
  • Drinks
  • Appetizers
  • Dinner
  • Dessert
  • About
  • Contact
  • Privacy Policy
DisclaimerTerms Of UseGDPR PolicyCookie Policy

Savannah

To make Cinnamon Roll French Toast Bites, you need simple items. Here’s what you’ll need: - 1 can (12.5 oz) refrigerated cinnamon rolls - 2 large eggs - 1/4 cup milk - 1 teaspoon vanilla extract - 1 teaspoon ground cinnamon - 1 tablespoon sugar - 2 tablespoons butter (for frying) - Maple syrup, for serving - Powdered sugar, for dusting These ingredients create a sweet and warm breakfast. The cinnamon rolls give a soft base. Eggs and milk add richness. Vanilla and cinnamon boost flavor. Sugar adds a sweet touch. Butter helps fry them to a golden crisp. You can customize your bites with fun toppings. Here are some great ideas: - Fresh fruit like strawberries or bananas - Whipped cream for a rich finish - Chopped nuts for a crunchy bite - Chocolate chips for a sweet twist These toppings make your bites even more delicious. You can mix and match based on your taste. Need to swap an ingredient? Here are some easy changes: - Use almond milk or oat milk instead of regular milk. - Substitute maple syrup with honey for sweetness. - Try vanilla bean paste in place of vanilla extract. - Use brown sugar instead of white sugar for a deeper flavor. These substitutions keep your recipe flexible. They let you cater to what you have on hand or your dietary needs. For the full recipe, check out the complete guide. To start making your Cinnamon Roll French Toast Bites, gather your ingredients. You will need a can of cinnamon rolls, eggs, milk, vanilla extract, ground cinnamon, sugar, and butter. First, preheat your skillet over medium heat. Add the butter to melt as you prepare the rolls. Next, open the can of cinnamon rolls. Carefully separate each roll and cut them into quarters. This will give you bite-sized pieces that are easy to cook and eat. In a medium bowl, whisk the eggs, milk, vanilla, cinnamon, and sugar together until smooth. This mixture will coat the cinnamon roll pieces. Now it’s time to cook! Dip each piece of cinnamon roll into the egg mixture. Make sure every side gets coated. After dipping, gently shake off the extra liquid. Place the pieces in the skillet, leaving space between them. This helps them cook evenly. Cook the bites for about 3-4 minutes on each side. You want them to be golden brown and crispy. Use tongs to flip them carefully. Once cooked, remove the bites and place them on a plate lined with paper towels. This helps soak up any extra grease. To get the best texture, do not overcrowd the skillet. If you have many pieces, cook them in batches. This way, they will brown nicely. Also, make sure your skillet is hot enough before adding the bites. If it's not hot enough, they may turn out soggy. For serving, dust the warm bites with powdered sugar and drizzle with maple syrup. Enjoy this tasty breakfast treat! For the full recipe, check out the detailed instructions above. To make the best Cinnamon Roll French Toast Bites, I use fresh ingredients. Fresh eggs and milk create a richer flavor. Make sure your skillet is hot enough before adding the butter. This helps achieve that golden brown crust. I recommend using a non-stick skillet. It prevents sticking and makes flipping easier. Don't overcrowd the pan. This ensures even cooking. If you have to cook in batches, keep cooked bites warm in a low oven. One common mistake is not cutting the rolls small enough. Ensure each piece is bite-sized for even cooking. Another mistake is using too much egg mixture. Coat each piece but avoid soaking them. Excess liquid can make them soggy. Finally, don’t skip the powdered sugar. It adds a nice touch and makes the bites look fancy. Serve these bites warm. Drizzle maple syrup over them for a sweet touch. You can also add fresh fruit like strawberries or blueberries. A dollop of whipped cream works well too. For a fun twist, sprinkle some nuts or chocolate chips on top. These bites are perfect for brunch or a cozy breakfast in bed. They are sure to impress your family and friends! If you want the full recipe, check the earlier section. {{image_2}} You can switch up the flavor of your cinnamon roll French toast bites easily. Try using different kinds of cinnamon rolls. You can find rolls with cream cheese icing or even chocolate-filled ones. Each choice adds a fun twist. For a fruity touch, add some fresh berries or sliced bananas on top. You can mix in some chopped nuts, like pecans or walnuts, for crunch. If you love pumpkin spice, use pumpkin pie spice instead of cinnamon. The options are endless! If you need gluten-free options, look for gluten-free cinnamon rolls. Many brands offer these now. For a dairy-free version, use a plant-based milk, like almond or oat milk. You can also use dairy-free butter when frying the bites. If you want to avoid eggs, try using a flaxseed egg. Just mix one tablespoon of ground flaxseed with three tablespoons of water and let it sit for a few minutes. These changes make the dish friendly for more diets. Serving ideas can make your cinnamon roll French toast bites even more fun. Instead of maple syrup, try caramel sauce for a sweet twist. You can also serve the bites with a side of yogurt for a creamy dip. Arrange the bites on a platter and sprinkle with more powdered sugar for a fancy look. You can even create a breakfast bar. Set out toppings like sprinkles, chocolate chips, or coconut flakes for everyone to customize their bites. These ideas make your meal interactive and special! For the complete recipe, check out the Full Recipe. To keep your cinnamon roll French toast bites fresh, place them in an airtight container. Make sure the bites are cool before you seal the container. Store them in the fridge for up to three days. This way, they will stay tasty and safe to eat later. When you are ready to enjoy your leftovers, reheat them in a skillet. Use medium heat to warm them up. Cook for about 2-3 minutes on each side. This helps to crisp them up again. You can also use a microwave for a quick fix. Heat them for about 15-20 seconds. Just be careful, as they can get soggy. If you want to save some for later, freezing is a great option. Lay the bites on a baking sheet in a single layer. Freeze them for about an hour until they are firm. Then, transfer them to a freezer bag. They can stay in the freezer for up to three months. When you're ready to eat, thaw them in the fridge overnight before reheating. Enjoy these bites anytime! For the full recipe, visit [Full Recipe]. To make these bites from scratch, start with cinnamon rolls. I suggest using a can of refrigerated rolls. Cut each roll into four pieces. Then, whisk eggs, milk, vanilla, cinnamon, and sugar in a bowl. Dip each cinnamon roll piece into the egg mix. Cook them in a hot skillet with melted butter. Flip until golden brown. This method gives you a tasty treat that is simple and quick. For the full recipe, check the details above. Yes, you can use various types of cinnamon rolls. Try using homemade rolls or even gluten-free options. Each type will give a different taste and texture. Just make sure they are soft enough to cut easily. Experimenting can lead to fun flavors and new favorites! Serving these bites warm is key. Stack them high on a plate. Drizzle maple syrup over the top for sweetness. You can also dust them with powdered sugar for a pretty look. Pair them with fresh fruit or whipped cream for extra flavor. This makes breakfast or brunch special! You can prepare these bites ahead of time by cooking them first. Let them cool, then store in an airtight container. Keep them in the fridge for up to two days. When ready to serve, just reheat in a skillet or microwave. They will still taste great and save you time! To sum up, you've learned how to make tasty Cinnamon Roll French Toast Bites. We covered the key ingredients, step-by-step cooking, and helpful tips. I shared creative ideas for variations and storage. With these skills, you can whip up a fun dish for any meal. Take pride in making this delightful treat that impresses everyone. Now, it’s time to get cooking and enjoy your tasty bites!

Cinnamon Roll French Toast Bites Tasty Breakfast Treat

If you love breakfast treats, you’re in for a real delight! Cinnamon Roll French Toast Bites are a fun twist

- 2 cups cornmeal - 1 cup all-purpose flour - 1 tablespoon baking powder - 1 teaspoon baking soda - 1 teaspoon salt - 2 cups buttermilk - 1/2 cup granulated sugar - 2 large eggs - 1/2 cup unsalted butter, melted - 1 cup corn kernels (fresh or frozen) - 1 teaspoon vanilla extract - 1/2 cup honey - 1/2 cup unsalted butter, softened (for honey butter) To make a great layered cornbread cake, you need these ingredients. Cornmeal and flour form the base. Baking powder and soda help the cake rise. Salt enhances the flavors. Buttermilk keeps it moist and adds a nice tang. Granulated sugar balances the flavors and creates a sweet crust. You will also use eggs for structure and melted butter for richness. Corn kernels add sweetness and texture. Vanilla extract gives a warm aroma. The honey is key for the honey butter, which makes this cake truly special. - Honey for drizzling - Extra corn kernels For added flair, drizzle some honey on top. This adds sweetness and a lovely shine. You can also sprinkle extra corn kernels for a fun look and extra crunch. These toppings are not necessary, but they can make your cake pop! For the full recipe, check the section above. First, preheat your oven to 375°F (190°C). Greasing and flouring two 9-inch round cake pans is key to a smooth release. This step is often overlooked, but it makes a big difference. Next, grab a large bowl. Combine 2 cups of cornmeal, 1 cup of all-purpose flour, 1 tablespoon of baking powder, 1 teaspoon of baking soda, and 1 teaspoon of salt. Mix these dry ingredients well. In a separate bowl, whisk together 2 cups of buttermilk, 1/2 cup of granulated sugar, 2 large eggs, 1/2 cup of melted butter, 1 cup of corn kernels, and 1 teaspoon of vanilla extract until smooth. Now, gradually add the wet mix to the dry mix. Stir gently until just combined. Do not overmix, as it can make your cake dense. Divide the batter evenly between the two prepared pans. Bake in your preheated oven for 25-30 minutes. To check for doneness, insert a toothpick into the center. If it comes out clean, your cakes are ready. Once baked, allow the cakes to cool in the pans for 10 minutes. Then, transfer them to a wire rack to cool completely. This cooling step is crucial. It ensures the cakes don’t become soggy. After the cakes are cool, take a sharp knife and slice each cake horizontally in half. You will now have four layers in total. Place one layer of cornbread on a serving plate. Spread a layer of honey butter on top. Repeat this process with the remaining layers, stacking them carefully. For the final touch, spread honey butter on the top layer and along the sides of the cake. This not only makes it taste great but also looks stunning. If you like, garnish with extra corn kernels or a drizzle of honey for a beautiful finish. Enjoy this treat with your loved ones! To get the best texture in cornbread, use the right cornmeal. I like to use medium-grind cornmeal for a nice balance. This gives the cake a light, fluffy feel while keeping it moist. Also, make sure your oven is preheated before baking. This helps the cake rise well and bake evenly. Preventing overmixing is key. When you mix the wet and dry ingredients, do it gently. Stir just until you see no dry flour. Overmixing can make the cake tough. Trust me; you want it soft and tender. Making honey butter fluffy is easy. Start with softened butter for the best texture. Then, combine it with honey in a small bowl. Mix with a hand mixer or a whisk until it’s light and airy. This makes spreading it on the cake simple and fun. Adjusting sweetness in honey butter is all about taste. Start with half a cup of honey. Then, mix and taste. If you want it sweeter, add more honey. This lets you make it just right for your taste buds. For the full recipe, check out the Layered Cornbread Cake with Honey Butter. {{image_2}} You can change the flavor of your cornbread cake in fun ways. First, add spices like cinnamon or nutmeg. Just a pinch can give the cake a warm twist. If you want a kick, try adding jalapeños. They add heat and a nice crunch. You can also mix in cheese for a savory touch. Sharp cheddar works well and melts beautifully. If you need to make this cake gluten-free, use alternative flours like almond or oat flour. They work great and keep the cake moist. For those who follow a vegan diet, you can swap the eggs. Use flaxseed meal mixed with water as a binder. Instead of butter, try coconut oil or a vegan butter substitute. These options keep your cake tasty and friendly for everyone. For the complete recipe, check out the Full Recipe link. To store leftover cake in the fridge, first, let it cool completely. Once cool, wrap the cake tightly in plastic wrap. This helps keep it moist. You can also place it in an airtight container. The cake will stay fresh for up to four days in the fridge. For best flavor, take it out about 30 minutes before serving. This will bring back its texture and taste. Freezing the cornbread cake and honey butter is easy. Start by cutting the cake into slices. Wrap each slice in plastic wrap. Then, place the wrapped slices in a freezer bag. Label the bag with the date. The cake will keep well for about three months in the freezer. For the honey butter, scoop it into a small container and freeze it too. When you're ready to enjoy, thaw both in the fridge overnight. This will make your cake taste fresh again. For the full recipe, check the above section. Can I make this cake ahead of time? Yes, you can make this cake ahead. Bake it a day in advance. Let it cool completely. Store it in an airtight container. Adding honey butter just before serving keeps it fresh and tasty. What can I serve with Layered Cornbread Cake? You can serve this cake with a variety of items. Try it with whipped cream or fresh fruit. A side of extra honey butter adds sweetness. You might also enjoy it with a scoop of vanilla ice cream. Can I use regular milk instead of buttermilk? You can use regular milk, but it will change the flavor and texture. Buttermilk adds a tangy taste and keeps the cake moist. If you use regular milk, consider adding a splash of vinegar or lemon juice to mimic buttermilk's tang. What can I use instead of honey in the butter? If you prefer, you can use maple syrup instead of honey. It gives a nice flavor. You could also use agave nectar or brown sugar. Adjust the amount based on how sweet you want it. This blog post covered how to make a delicious layered cornbread cake. We looked at key ingredients, optional toppings, and step-by-step instructions. I shared tips for perfect texture and how to make fluffy honey butter. You can also explore flavor variations and dietary adaptations to suit your needs. In summary, baking this cake is fun and rewarding. Use these tips to create your own unique version. Enjoy your baking journey!

Layered Cornbread Cake with Honey Butter Delight

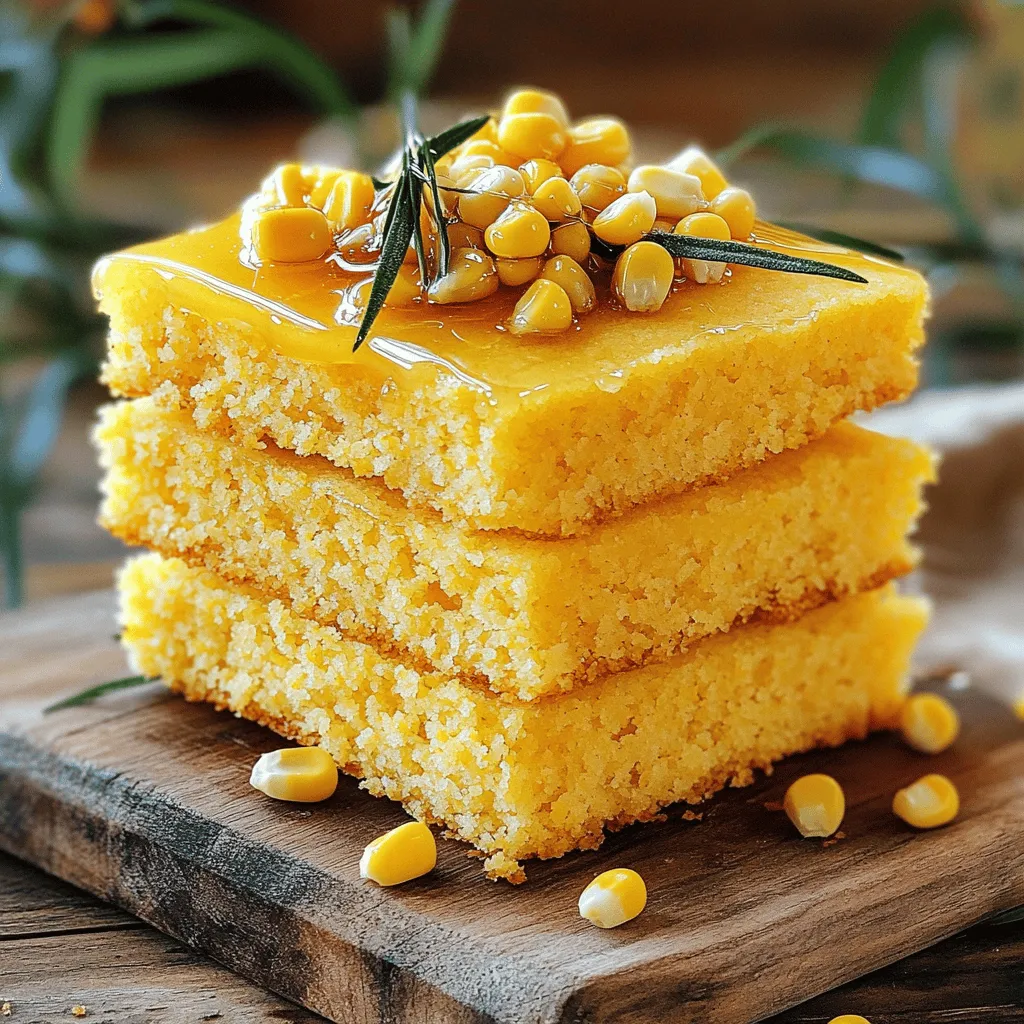
Get ready to elevate your dessert game with my Layered Cornbread Cake with Honey Butter Delight! This scrumptious cake combines

- 4 bone-in, skin-on chicken thighs - 1/4 cup honey - 4 cloves garlic, minced - 2 tablespoons soy sauce (low-sodium) - 1 tablespoon apple cider vinegar These ingredients make up the heart of the dish. Bone-in, skin-on chicken thighs give great flavor and texture. Honey and garlic blend well to create a sweet and savory taste. Soy sauce adds depth, while apple cider vinegar balances the sweetness. - 1 teaspoon ground ginger - Salt and pepper to taste - 2 tablespoons olive oil Ground ginger adds warmth and spice to your dish. Salt and pepper enhance flavor. Olive oil is key for a nice sear on the chicken. This mix of seasonings brings out the best in each bite. - 1 tablespoon chopped fresh parsley - Optional sesame seeds Fresh parsley adds a pop of color and freshness. Sesame seeds can bring a nice crunch and extra flavor. These garnishes make your meal look and taste even better. For the full recipe, you can refer to the Full Recipe section. First, I dry the chicken thighs with paper towels. This step helps the skin get nice and crispy. Next, I season both sides with salt and pepper. This adds flavor right from the start. In a small bowl, I mix honey, minced garlic, soy sauce, apple cider vinegar, and ground ginger. This honey garlic marinade is key for a tasty dish. I set the marinade aside for later use. Now, I heat olive oil in a large skillet over medium-high heat. I add the chicken thighs skin-side down. I sear them for about 5–7 minutes until they turn golden brown. Then, I flip the chicken over and sear the other side for another 5 minutes. This gives the chicken a great texture. Next, I reduce the heat to medium. I pour the honey garlic mixture over the chicken thighs. The sauce will soak into the chicken as it cooks, adding flavor. I cover the skillet and let the chicken cook for 15–20 minutes. During this time, I occasionally spoon the sauce over the chicken. This keeps it moist and flavorful. I check the internal temperature to ensure it reaches 165°F (75°C). Once the chicken is cooked, I remove the lid. I let the sauce simmer for an additional 2–3 minutes to thicken slightly. This creates a rich glaze that coats the chicken. For the full recipe, check the earlier section. Enjoy your delicious Honey Garlic Skillet Chicken Thighs! Choosing the right skillet is key. A heavy skillet helps heat evenly. I prefer cast iron or stainless steel. Both give a nice crust and hold heat well. Avoid non-stick pans for this recipe. They don’t give the same sear. Do not overcrowd the pan. This keeps the temperature steady. If you add too many chicken thighs, they will steam. This will make the skin soggy instead of crispy. Cook in batches if needed. You can substitute ingredients to change the taste. Try maple syrup instead of honey for a deeper flavor. For a spicy kick, add chili paste or red pepper flakes. Marinating chicken adds extra flavor. You can marinate it for a few hours or overnight. This allows the chicken to soak up all the deliciousness. Just remember to keep it in the fridge while marinating. Pair your honey garlic skillet chicken with sides. Rice or quinoa works well to soak up the sauce. Steamed veggies or a fresh salad add color and crunch. For presentation, place the chicken on a large platter. Drizzle with sauce and sprinkle fresh parsley on top. This makes your dish look vibrant and inviting. For dinner parties, serve with colorful side dishes to impress your guests. For the full recipe, check the details above. {{image_2}} You can use chicken breast instead of thighs. Chicken breast cooks faster and is leaner. However, it may not be as juicy. For a different taste, try pork. Pork tenderloin works well in this dish. If you prefer plant-based options, use tofu. Firm tofu soaks up flavors nicely. Quick-cooking veggies make great additions. Think about adding bell peppers, snap peas, or broccoli. These cook fast and add color to your meal. You can cook vegetables in the same skillet. After searing the chicken, add veggies. They will absorb those tasty flavors as they cook. Adjust the sweetness by using more or less honey. If you like heat, add red pepper flakes. For different flavors, try fresh herbs like basil or cilantro. You can also use spices such as cumin or paprika. Each change gives a new twist to the dish. Check the [Full Recipe](#) for more ideas! After enjoying your honey garlic skillet chicken thighs, store leftovers in the refrigerator. Place them in an airtight container. This keeps the chicken moist and tasty. You can store them for up to four days. For longer storage, consider freezing. Wrap the chicken tightly in plastic wrap, then place it in a freezer bag. This helps prevent freezer burn. You can freeze it for up to three months. To reheat the chicken, the best method is to use the oven. Preheat your oven to 350°F (175°C). Place the chicken on a baking sheet. Heat for about 20 minutes or until warm. You can also use a microwave. Place the chicken on a microwave-safe plate. Cover it with a damp paper towel. Heat in short bursts of 30 seconds, checking often. This method can dry out the chicken, so watch closely. In the refrigerator, honey garlic chicken lasts about four days. Always check for signs of spoilage before eating. If the chicken smells off or looks discolored, it's best to discard it. When freezing, remember to label the bag with the date. This helps you track how long it has been in the freezer. To be safe, if you're unsure about the chicken's freshness, throw it away. For more delicious recipes like this one, check out the Full Recipe! Using a meat thermometer is the best way to check chicken. Insert it into the thickest part of the thigh. The chicken is safe to eat when it reaches 165°F (75°C). Look for clear juices running from the chicken. If the juices are pink, it’s not done. The meat should no longer be pink, and the skin should look golden brown. Yes, you can use boneless chicken thighs. They will cook faster than bone-in thighs. You should reduce the cooking time by about 5–10 minutes. Boneless thighs may be juicier, but they can lack some flavor from the bone. Adjust your cooking time to avoid dryness. If you need a substitute for honey, try maple syrup or agave nectar. They both add sweetness but may change the flavor slightly. You can also use brown sugar mixed with water for a similar texture. This swap may impact the overall taste and consistency of your dish. You can definitely make this dish ahead of time. Cook the chicken and let it cool before storing. Use an airtight container to keep the chicken fresh in the fridge. When reheating, use low heat to avoid drying out the meat. This blog post covered essential ingredients and step-by-step cooking instructions for a delicious chicken dish. You learned about perfecting the sear, enhancing flavors with spices, and even possible variations. Remember to store leftovers properly to keep them fresh. Try different proteins or add vegetables for a unique twist. Cooking can be fun and easy with the right tips. Enjoy the process and keep experimenting with your meals!

Honey Garlic Skillet Chicken Thighs Flavorful Dinner

Looking for a quick and tasty dinner? Honey Garlic Skillet Chicken Thighs will impress everyone at your table. This dish

- Baby potatoes - Olive oil - Garlic For this dish, we start with baby potatoes. Their small size makes them tender and quick to cook. I love using them because they have a creamy texture that fits perfectly with the sauce. Next, we need olive oil. It adds flavor and helps cook the garlic. Speaking of garlic, using fresh cloves is key. Minced garlic gives the sauce a strong flavor that you will enjoy. - Heavy cream - Dried thyme and rosemary - Parmesan cheese - Fresh parsley Heavy cream is essential for making the sauce rich and smooth. It creates a luxurious feel that pairs well with the potatoes. Dried thyme and rosemary enhance the dish with earthy notes. I always add salt and pepper to taste, as these basic seasonings bring out the flavors. Lastly, we need Parmesan cheese. It melts beautifully and adds a savory touch. For a pop of color, sprinkle fresh parsley on top before serving. - Additional spices - Variations like bacon or vegetables If you want to change things up, consider adding extra spices like paprika or red pepper flakes for a kick. You can also mix in crispy bacon for a smoky flavor or add vegetables like spinach or peas for more texture. These options allow you to make the dish your own and keep it exciting! For the full recipe, check out the details above. To start, bring a large pot of water to a boil. Add a pinch of salt to it. Next, add the washed and halved baby potatoes. Cook them for about 15 to 20 minutes. You want them to be fork-tender. After they are done, drain the potatoes and set them aside. Checking for tenderness is easy. Just poke a potato with a fork. It should slide in without much effort. Now, let’s make the sauce. In a large skillet, heat three tablespoons of olive oil over medium heat. Once hot, add four cloves of minced garlic. Sauté the garlic for one to two minutes. Be careful not to burn it, as burnt garlic can taste bitter. After the garlic is fragrant, reduce the heat to low. Slowly pour in one cup of heavy cream. Stir constantly to mix it well. Then, add one teaspoon each of dried thyme and dried rosemary. Season it with salt and pepper to taste. Let the mixture simmer gently for about three to four minutes. This helps the sauce thicken a bit. Next comes the fun part! Gradually add in ¼ cup of grated Parmesan cheese. Stir until it melts and the sauce becomes creamy. Now, gently add the cooked baby potatoes to the skillet. Toss them in the creamy garlic sauce until they are evenly coated. Cook everything for an additional two to three minutes. This will heat the dish through. Finally, remove from heat and garnish with chopped fresh parsley before serving. For the full recipe, check out the complete guide above. To get soft and tasty baby potatoes, boil them well. You can tell they’re done when a fork easily goes in. For extra flavor, add salt to the water before boiling. This small step makes a big difference. You can also add a sprig of rosemary or thyme to the boiling water. This adds a nice hint of flavor to the potatoes. Stir your sauce constantly while it cooks. This helps keep the sauce smooth and prevents lumps. If you don’t have heavy cream, you can use half-and-half or even coconut cream. Both options bring a nice richness to the dish. Just keep in mind that coconut cream may change the flavor a bit. When serving your creamy garlic sauce baby potatoes, use a large, flat platter. This allows the potatoes to spread out nicely. Drizzle some extra sauce over the top for a pretty look. To finish, sprinkle fresh parsley for color. This simple garnish makes the dish look fresh and inviting. You can also add some grated Parmesan on top for extra flavor. {{image_2}} You can add lemon or lime juice for a bright kick. The citrus will balance the richness of the cream. I love using fresh herbs like basil or dill too. These add fresh notes that make the sauce pop. If you want a vegan option, try using coconut cream instead of heavy cream. Nutritional yeast can replace Parmesan cheese. Both options keep the dish creamy and flavorful. You can also swap baby potatoes for fingerling or Yukon gold potatoes. Each type has its own taste and texture. Creamy garlic sauce baby potatoes pair well with grilled chicken or fish. They also shine next to roasted vegetables. For a lighter meal, serve them with a fresh salad. You can enhance your meal by adding crusty bread to soak up the sauce. Enjoy your cooking adventure with these tasty options! For the complete recipe, check out the Full Recipe. To store your creamy garlic sauce baby potatoes, let them cool first. This step helps keep the sauce creamy. After cooling, place the potatoes in an airtight container. I recommend using glass containers for best results. They keep the taste fresh and are easy to clean. You can store them in the fridge for up to three days. When reheating, avoid the microwave if you want to keep them creamy. Instead, heat them on the stove over low heat. Stir gently to prevent sticking. You can add a splash of cream or milk to refresh the dish. This method helps keep the sauce rich and tasty. Yes, you can freeze creamy garlic sauce and potatoes. However, the texture may change slightly. To freeze, place the dish in a freezer-safe container. Make sure to leave some space for expansion. When you’re ready to eat, thaw it overnight in the fridge. Reheat gently on the stove, adding a little cream if needed to restore the creaminess. Creamy garlic sauce baby potatoes last about 3-5 days in the fridge. To store them, place the leftovers in a sealed container. Make sure they cool down before sealing. This helps keep them fresh longer. Always check for any signs of spoilage before eating. Yes, you can use other types of potatoes. Here are some great options: - Red potatoes: They are creamy and hold their shape well. - Yukon gold: These potatoes have a buttery flavor and smooth skin. - Fingerling potatoes: They add a unique shape and texture to the dish. Each type will give a slightly different taste and texture, so feel free to experiment. To reheat the dish, use a skillet over low heat. This helps keep the sauce creamy. Stir gently to prevent sticking. You can also add a splash of cream or milk for extra moisture. If you prefer, you can microwave it in a covered bowl. Heat in short bursts, stirring in between, to keep the texture nice. This blog post explored how to make creamy garlic sauce baby potatoes. We covered key ingredients like baby potatoes, garlic, and heavy cream. I shared step-by-step instructions to help you prepare them perfectly. You learned tips for cooking and storing, plus exciting variations for flavor. With this knowledge, you can create a tasty dish that impresses. Don't hesitate to experiment with flavors and substitutes. Your creamy garlic potatoes will surely be a hit! Enjoy your cooking journey!

Creamy Garlic Sauce Baby Potatoes Delightful Dish

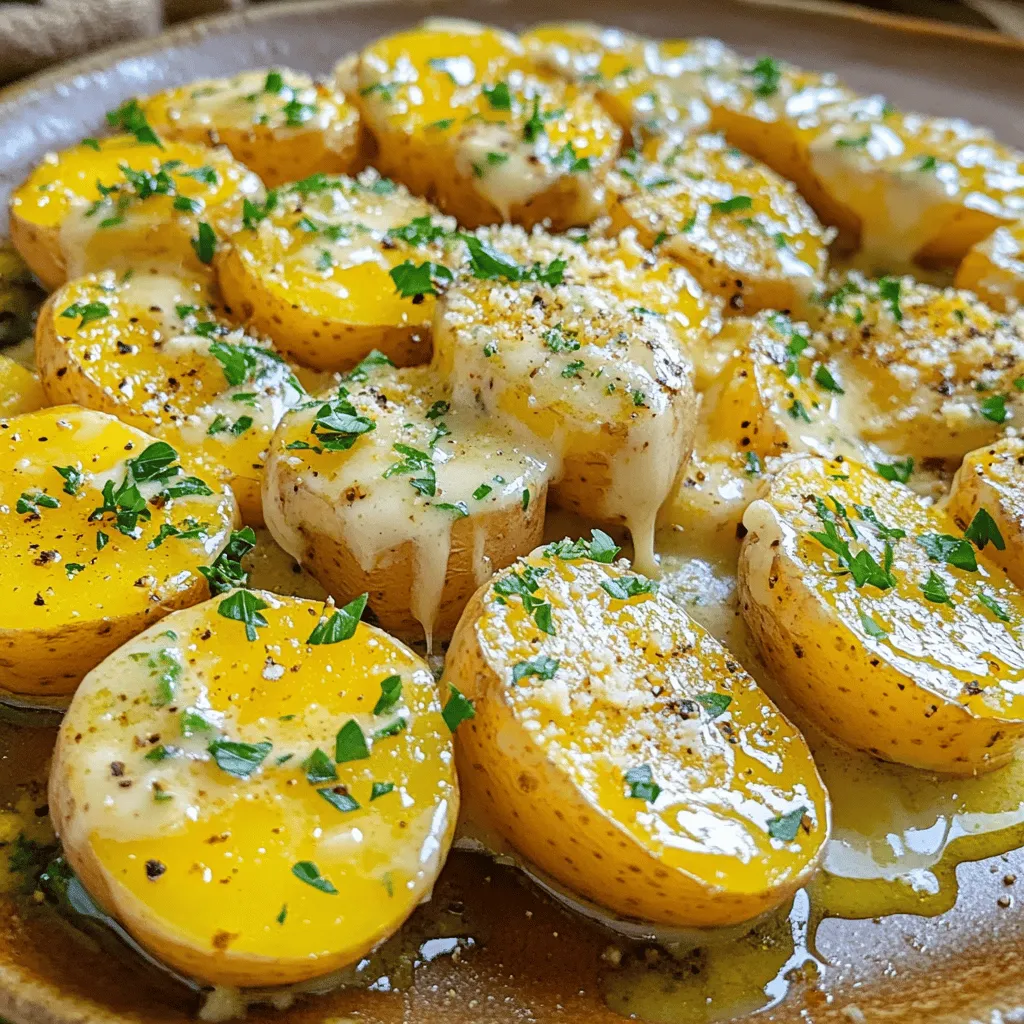
If you’re looking for a side dish that’s rich, creamy, and full of flavor, you’ve found it! Creamy Garlic Sauce

To make this quick and tasty dish, gather these simple ingredients: - 1 lb (450g) large shrimp, peeled and deveined - 2 cups broccoli florets - 1 tablespoon olive oil - 4 cloves garlic, minced - 1/4 cup honey - 1 tablespoon soy sauce (low sodium) - 1 teaspoon sesame oil - 1 tablespoon fresh ginger, grated - Salt and pepper to taste - Toasted sesame seeds for garnish - Green onions, chopped for garnish This recipe highlights fresh shrimp and bright broccoli. The honey adds sweetness, while garlic and ginger give a punch of flavor. The soy sauce and sesame oil bring it all together. You can find the full recipe linked above. Enjoy cooking! - Heat olive oil in a skillet over medium heat. - Sauté garlic and ginger until fragrant, about 1 minute. - Cook shrimp until they turn pink and opaque, about 2-3 minutes. - Steam or blanch broccoli until bright green, about 2-3 minutes. - Drain and set aside for later. - Whisk honey, soy sauce, and sesame oil together in a bowl. - Combine the sauce with cooked shrimp and broccoli in the skillet. These steps make it easy for you to create a meal bursting with flavor. The honey garlic sauce brings a sweet and savory kick to the shrimp and broccoli. For the full details, check the Full Recipe. Enjoy your cooking! - Experiment with different spices: You can add a pinch of red pepper flakes for heat. Try smoked paprika or even a dash of curry powder. Each spice brings a new twist to the dish. - Use fresh ingredients for better flavor: Fresh garlic, ginger, and broccoli give vibrant tastes. When possible, choose organic or locally sourced produce. Your taste buds will thank you! - Tips for perfect shrimp cooking: Cook shrimp over high heat. This makes them juicy and tender. Watch carefully; they only need 2-3 minutes. Remove them once they turn pink. - How to avoid overcooking broccoli: Steam or blanch broccoli for just 2-3 minutes. It should stay bright green and crisp. You want it tender but not mushy. - Serving over rice or quinoa: A bed of fluffy rice or quinoa makes a great base. It soaks up all that delicious sauce. Plus, it adds some texture to each bite. - Garnishing with sesame seeds and green onions: Sprinkle toasted sesame seeds on top for crunch. Chopped green onions add color and fresh flavor. This makes your dish look stunning and appetizing. For more details, check out the Full Recipe. {{image_2}} You can easily switch up the proteins in this dish. Chicken or tofu works great. If you choose chicken, cut it into bite-sized pieces. For tofu, press it to remove water, then cube it. Both options absorb flavor well. You can also try other veggies. Snap peas, bell peppers, or carrots add color and crunch. They cook quickly, just like broccoli. Mix and match your favorites for a fun twist. If you need gluten-free options, use tamari instead of soy sauce. Tamari has a similar taste and keeps the dish flavorful. For a low-calorie version, try using less honey or skip it altogether. You can also substitute with a low-calorie sweetener. For low-carb diets, serve the dish without rice or quinoa. Instead, use cauliflower rice. It adds texture without the carbs. This swap keeps your meal light and healthy. Want a kick? Add chili flakes to the honey garlic sauce. Start with a pinch and adjust to taste. This spice adds warmth and depth. For a fresh twist, incorporate citrus. Squeeze some lime or lemon juice over the dish before serving. The brightness contrasts nicely with the sweet sauce. You can also add zest for an extra punch. For the full recipe, check out the details above. Enjoy experimenting! To keep your Honey Garlic Shrimp and Broccoli fresh, store it in an airtight container. This helps lock in flavors and keep it safe. Place it in the fridge within two hours of cooking. It will stay good for about 3 days. If you notice any off smells or changes in color, it's best to toss it. Yes, you can freeze Honey Garlic Shrimp and Broccoli! To do this, let it cool completely. Then, place it in a freezer-safe container or bag. Make sure to remove as much air as possible. It can last in the freezer for up to 3 months. When you are ready to eat, thaw it in the fridge overnight. To reheat, use a skillet over low heat. Stir it gently until it is hot throughout. This keeps the shrimp tender and the broccoli bright. Enjoy your meal again with ease! For the full recipe, check out the earlier section. This dish is quick and easy! You need about 10 minutes to prep the ingredients. Cooking the dish takes around 15 minutes. In total, you can make Honey Garlic Shrimp and Broccoli in 25 minutes. It serves four people, making it perfect for a family meal. Yes, you can use frozen shrimp! Make sure to thaw them first. Place the shrimp in cold water for about 15-20 minutes. This helps to keep them juicy. Fresh shrimp taste great, but frozen works well too. Just be careful not to overcook them, as they can get tough. This dish pairs nicely with various sides. Here are some ideas: - Cooked white rice or brown rice - Quinoa for a healthy twist - Noodles tossed in sesame oil - A fresh salad for crunch - Steamed asparagus or green beans for color For an extra flavor boost, drizzle some of the remaining sauce over your sides. This will enhance the dish and tie all the flavors together. For the full recipe, check out the Honey Garlic Shrimp & Broccoli Delight. Enjoy! This dish features shrimp and broccoli in a sweet, tangy sauce. By following the steps, you create a quick, tasty meal. Don't be afraid to change up ingredients based on your taste. Use fresh flavors for the best results. Remember to store leftovers properly for future meals. With these tips, you can enjoy this recipe a few different ways. Easy meals like this can fit many diets. Keep experimenting in your kitchen, and have fun with it!

Honey Garlic Shrimp and Broccoli Quick Flavor Explosion

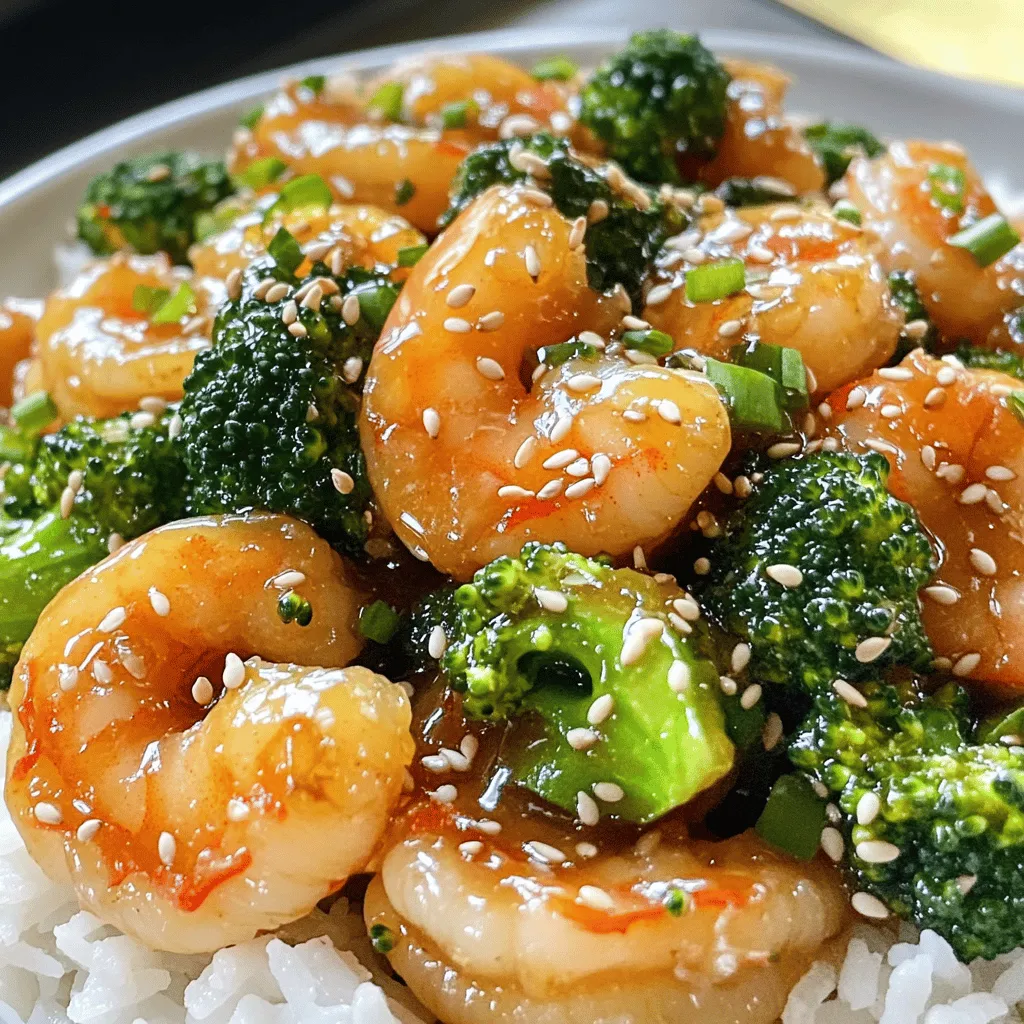
If you’re craving a quick meal that bursts with flavor, look no further than Honey Garlic Shrimp and Broccoli. This

To create a No-Bake Chocolate Eclair Cake, you need simple ingredients. Here’s what you'll need: - 1 box (14 oz) Graham crackers - 2 packages (3.4 oz each) instant vanilla pudding mix - 4 cups cold milk - 1 container (8 oz) whipped topping (like Cool Whip) - 1 cup powdered sugar - 1/2 cup unsweetened cocoa powder - 1/2 cup unsalted butter, softened - 1 tablespoon vanilla extract - A pinch of salt These ingredients work together to create a creamy, rich dessert. The Graham crackers form a crunchy base, while the pudding mix adds a lovely vanilla flavor. The whipped topping gives it a light, fluffy texture. The cocoa powder and butter come together to make a chocolate layer that is so delicious. Make sure your butter is softened for easy mixing. This cake can impress your friends and family without the need for baking. For the full recipe, check the details provided earlier. - Whisking the Pudding Mix and Cold Milk Start by taking a large mixing bowl. Add two packages of instant vanilla pudding mix and four cups of cold milk. Whisk them together until they blend well. Let the mixture sit for 2-3 minutes. This allows it to thicken, which is key to a creamy texture. - Folding in the Whipped Topping Next, take an 8 oz container of whipped topping. Gently fold it into the pudding mixture. Use a spatula to ensure it's smooth and creamy. This step makes the cake light and fluffy. - Making the Chocolate Frosting In another bowl, beat together half a cup of softened unsalted butter, one cup of powdered sugar, and half a cup of unsweetened cocoa powder. Add one tablespoon of vanilla extract and a pinch of salt. Mix until fluffy. This frosting gives a rich chocolate flavor. - Layering the Graham Crackers and Pudding Now, line the bottom of a 9x13 inch pan with a layer of Graham crackers. Spread half of the vanilla pudding mixture evenly over the crackers. Use a spatula to smooth it out. Add another layer of Graham crackers on top. Repeat this with the remaining pudding mix and finish with a final layer of crackers. - Final Assembly and Refrigeration Spread the chocolate frosting over the top layer of Graham crackers. Make sure it covers the surface well. Cover the cake with plastic wrap and place it in the fridge. Let it chill for at least 4-6 hours, or overnight if you can. This waiting time helps the layers soften and blend together perfectly. For a detailed guide, check the Full Recipe. Enjoy creating this delightful dessert! Allowing the Cake to Chill Chilling is key for this cake. It helps the layers soften and blend. I recommend letting it sit for at least 4 to 6 hours. Overnight is best! The longer it chills, the better the taste and texture. Using Fresh Ingredients Always use fresh ingredients. Fresh milk and whipped topping make a big difference. They enhance the flavor and texture, making each bite light and fluffy. Trust me, it’s worth it! Serving Suggestions When serving, cut the cake into squares. Use a sharp knife for clean edges. You can top each piece with whipped cream or chocolate shavings for a nice touch. A decorative platter also makes it look fancy! Not Allowing Enough Time to Set One common mistake is not allowing enough time for the cake to set. If you cut it too soon, the layers may not hold. This can ruin the overall look and taste. Always be patient! Overmixing Ingredients Overmixing can lead to a dense texture. When you mix the pudding and whipped topping, do it gently. You want to keep it light and airy. This ensures a creamy and smooth filling that’s just perfect! For more insights, check out the [Full Recipe]. {{image_2}} Adding different flavors can make your No-Bake Chocolate Eclair Cake even better. - Adding Fruit Layers: You can layer in some fresh fruit. Strawberries or bananas work well. These fruits add sweetness and a nice texture. Place thin slices on top of the vanilla pudding before adding the next layer of Graham crackers. - Using Different Pudding Flavors: Instant pudding comes in many flavors. Try chocolate, butterscotch, or even banana. Each flavor gives a unique twist to the cake. Mixing flavors can add depth and excitement to each bite. - Incorporating Nuts or Other Mix-Ins: Chopped nuts like pecans or walnuts can add crunch. You can also mix in chocolate chips or toffee bits for extra sweetness. Just fold them into the pudding mix before layering. You can easily modify the cake for different diets. - Gluten-Free Alternative: Use gluten-free Graham crackers instead of regular ones. This way, everyone can enjoy this tasty treat without worry. Check labels to ensure that all ingredients are gluten-free. - Dairy-Free Options: You can swap the milk and whipped topping for dairy-free versions. Use almond milk or coconut milk for the pudding. There are also great dairy-free whipped toppings available. Just make sure to choose dairy-free pudding mixes as well. These changes can make the No-Bake Chocolate Eclair Cake fit your needs while keeping it delicious. You can find the Full Recipe to try these variations. To keep your No-Bake Chocolate Eclair Cake fresh, refrigerate it right away. Place the cake in an airtight container or cover it tightly with plastic wrap. This helps avoid any odors from the fridge. How Long It Lasts In the fridge, your cake can last up to 4-5 days. The flavors meld and improve as it sits. Just remember to check for any signs of spoilage before serving. How to Freeze Layers If you want to freeze this cake, it’s best to freeze the layers separately. Wrap each layer of Graham crackers and pudding tightly in plastic wrap. Then, place them in a freezer-safe bag or container. This keeps the texture nice when you thaw. Thawing Tips for Optimal Texture To thaw, move the layers to the fridge the night before you want to eat them. This helps maintain the cake's creamy texture. Avoid thawing at room temperature, as it can make the layers soggy. Enjoy as a sweet treat when you’re ready! No-Bake Chocolate Eclair Cake lasts about 3 to 5 days in the fridge. It keeps well, thanks to the layers of Graham crackers and pudding. The longer it sits, the softer it becomes, which many people love. To enjoy it at its best, eat it within the first couple of days. Yes, you can use homemade whipped cream! It adds a fresh taste. Just whip heavy cream until it forms soft peaks. Then, fold it into the pudding mixture gently. This will make your cake even more delightful. Homemade whipped cream also gives a nice texture and flavor. For the best cuts, use a sharp knife. Run it under hot water and wipe it dry. This helps cut through the soft layers easily. Serve each piece on a plate, and you can add some extra whipped cream or chocolate shavings on top for a fun touch. It looks great and tastes amazing! Absolutely! Making this cake a day ahead works great. Just let it chill overnight. This gives the flavors time to blend and the layers to soften. The wait is worth it, as the cake becomes even more delicious. For the full recipe, check the recipe section above! This blog showed you how to make a No-Bake Chocolate Eclair Cake. We started with a simple list of ingredients and a clear step-by-step process. Tips helped you avoid common mistakes and enhance flavors. Remember to chill the cake for the best texture. You can also experiment with variations. Store leftovers properly for freshness. With these tools, you can enjoy a delicious dessert anytime. Get ready to impress your family and friends with your baking skills!

No-Bake Chocolate Eclair Cake Delicious and Easy Dessert

Craving a sweet treat that’s both easy and delicious? Look no further than this No-Bake Chocolate Eclair Cake! With layers

To make Gordon Ramsay’s pan-seared scallops, gather these key items: - 12 large sea scallops, patted dry - 2 tablespoons olive oil - Salt and freshly ground black pepper, to taste - Zest of 1 lemon - Juice of 1 lemon - 1 tablespoon unsalted butter - 2 cloves garlic, minced - 2 tablespoons fresh parsley, chopped - 1 tablespoon fresh chives, chopped These ingredients help create a bright and fresh dish. The scallops shine with their natural flavor. If you want to add some flair, consider these garnishes: - Microgreens - Extra lemon zest - Edible flowers These garnishes can enhance the look and taste. They add a pop of color and a burst of flavor. Quality is key for this dish. Look for fresh, large sea scallops. They should smell like the ocean, not fishy. Use good olive oil for cooking. Fresh herbs are best and will give more flavor than dried ones. Fresh lemons will add brightness. Always choose high-quality butter for a rich taste. 1. First, pat the scallops dry. Use paper towels to remove all moisture. 2. Season both sides with salt and black pepper. This adds flavor to your scallops. 3. Zest one lemon and set the zest aside. Squeeze the juice from the lemon into a bowl. 4. Chop fresh parsley and chives. These herbs will delight your taste buds. 1. In a large skillet, heat two tablespoons of olive oil over medium-high heat. 2. Wait until the oil shimmers. This means it’s hot enough. 3. Carefully add the scallops to the pan. Do not overcrowd them; they need space. 4. Sear the scallops for 2-3 minutes without moving them. Look for a golden brown color. 5. Gently flip them over using tongs or a spatula. 6. Add one tablespoon of butter and two cloves of minced garlic to the pan. 7. Cook for 1-2 more minutes. Baste the scallops with melted butter for extra flavor. 8. Drizzle in the lemon juice and sprinkle the zest over the scallops. 9. Cook for another minute. The scallops should feel firm yet juicy. 10. Remove the scallops from the skillet and place them on a serving plate. 1. Drizzle the garlic herb butter from the pan over the scallops. 2. Garnish with chopped parsley, chives, and microgreens if you like. 3. Serve these scallops hot, alongside your favorite sides. For the complete cooking process, check the Full Recipe. Enjoy your meal! To get a great sear, start with dry scallops. Moisture prevents browning. Use a hot skillet. Olive oil should shimmer but not smoke. Place scallops gently in the pan. Don’t move them for the first few minutes. This helps form a crust. Flip them only when golden brown. One common mistake is overcrowding the pan. This lowers the temperature and leads to steaming. Always cook in batches if needed. Another mistake is not letting the scallops rest. If they sit in the pan too long, they will overcook. Always remove them once they feel firm but still juicy. For a fresh touch, pair your scallops with lemon or lime. A light salad or roasted vegetables work well too. For drinks, white wine or a crisp sparkling water enhances the meal. If you want something richer, add a creamy risotto on the side. Check out the Full Recipe for more ideas! {{image_2}} To make your scallops pop, try adding different flavors. A splash of white wine boosts the dish. You can also add a pinch of red pepper flakes for heat. If you love sweet notes, drizzle some honey or balsamic glaze over the scallops before serving. Fresh herbs like basil or tarragon can also add a lovely twist. If you can’t find sea scallops, use bay scallops. They are smaller but still tasty. For a twist, swap olive oil for avocado oil. This adds a different flavor and is great for high heat. You can replace garlic with shallots for a milder taste. If you want a dairy-free option, use plant-based butter instead of regular butter. If you want to change how you cook your scallops, try grilling them. This gives a nice smoky flavor. Broiling is another option that cooks them quickly while keeping them juicy. You can also try sous-vide cooking for perfect textures. Just seal your scallops in a bag and cook them in water at a low temperature for a set time. Each method brings out unique flavors, so feel free to experiment. Explore the Full Recipe for more tips and ideas! To store leftover scallops, let them cool to room temperature. Place them in an airtight container. Make sure to cover them tightly. Store the container in the fridge. Leftovers can last for up to two days. When reheating scallops, use a skillet for the best results. Heat the skillet over low heat. Add a little butter or oil to prevent sticking. Place the scallops in the pan. Heat them gently for about 2-3 minutes. Avoid cooking them too long, or they will become tough. Freezing scallops is not ideal, but you can do it. First, cool them completely. Wrap each scallop in plastic wrap. Then place them in a freezer bag. Remove as much air as possible. Label the bag with the date. They can last up to three months in the freezer. When ready to use, thaw them in the fridge overnight. For the best taste, try to use them fresh. For the full recipe on Gordon Ramsay’s scallops, check the detailed guide. You should sear scallops for about 2-3 minutes per side. This timing gives them a nice golden crust. If you move them too soon, they won't sear well. A good sear is key to great flavor. Yes, you can use frozen scallops, but make sure to thaw them first. Thaw them overnight in the fridge for the best results. Pat them dry before cooking. This will help achieve a nice sear. Pan-seared scallops pair well with many sides. Consider serving them with: - Creamy risotto - Garlic mashed potatoes - Fresh green salad - Grilled asparagus - Lemon butter pasta These sides complement the scallops nicely. Gordon Ramsay starts with large sea scallops. He pats them dry and seasons with salt and pepper. He uses olive oil to heat in a skillet. When the oil is shimmering, he adds the scallops without crowding them. He lets them sear for 2-3 minutes. After flipping, he adds butter and garlic, basting the scallops. Finally, he drizzles lemon juice and zest before serving. For the full recipe, check out the Sizzling Citrus Scallops with Herb Butter. This post covered the key steps to cook great scallops. We explored essential ingredients, step-by-step instructions, and helpful tips. You learned how to avoid common mistakes and what sides pair best. Don't forget to try flavor swaps and different cooking methods for variety. Storing and reheating leftovers can keep your meal fresh. Cooking scallops can be simple and fun. With practice, you’ll serve perfect scallops every time. Enjoy your delicious dish!

Gordon Ramsay’s Pan-Seared Scallops Delicious Recipe

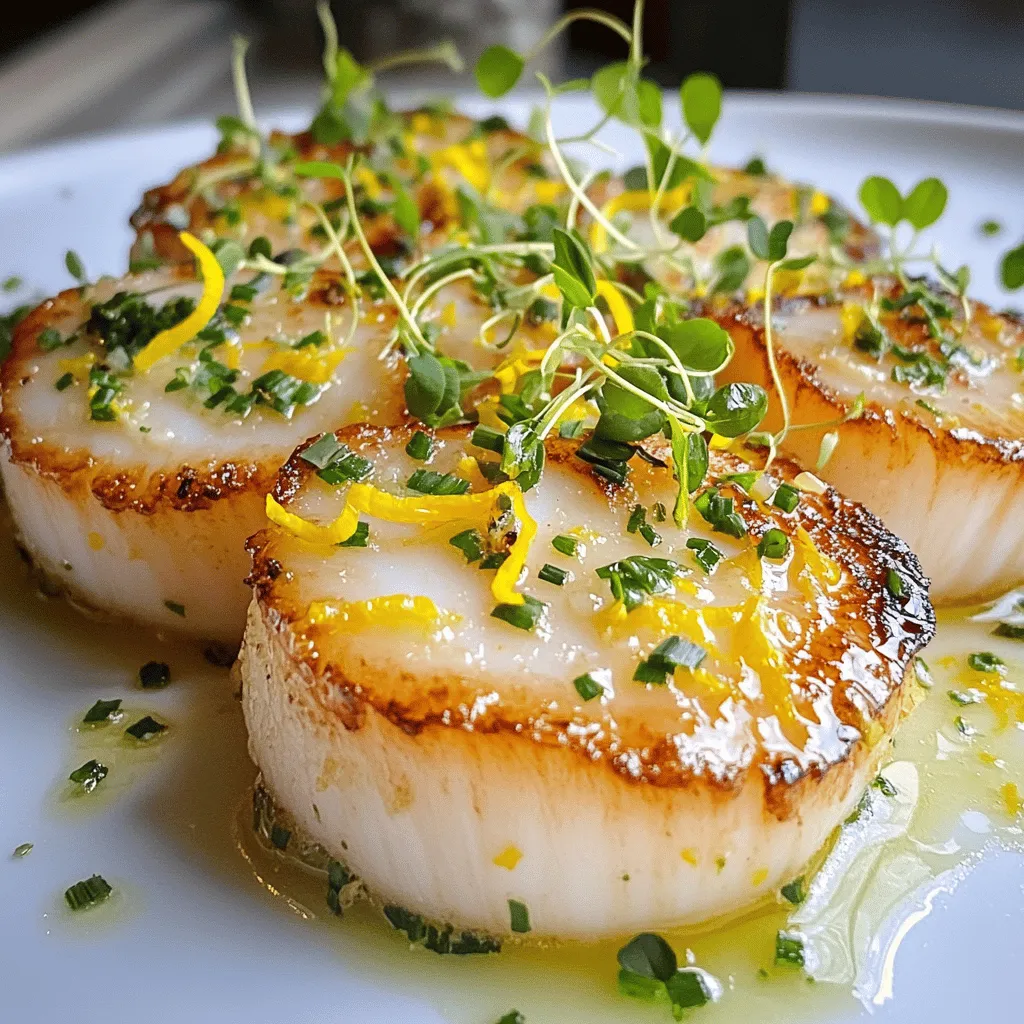
Ready to impress your friends with a stunning dish? Gordon Ramsay’s Pan-Seared Scallops are simple yet elegant. They combine fresh

To make Huli Huli Chicken, gather these key items: - 4 chicken thighs, skinless and boneless - 1/2 cup soy sauce - 1/4 cup brown sugar - 1/4 cup pineapple juice - 2 tablespoons apple cider vinegar - 2 tablespoons sesame oil - 3 cloves garlic, minced - 1 tablespoon fresh ginger, grated - 1/2 teaspoon black pepper - Green onions, for garnish - Fresh pineapple slices, for grilling You can add twists to your Huli Huli Chicken with these options: - Red pepper flakes for heat - Honey for added sweetness - Fresh herbs like cilantro for a fresh taste If you need to swap items, consider these ideas: - Use chicken breasts instead of thighs for leaner meat. - Swap soy sauce with tamari for gluten-free cooking. - Try lime juice instead of pineapple juice for a zesty kick. These ingredients make your Huli Huli Chicken fresh and flavorful. Check the full recipe to start cooking! To make Huli Huli Chicken, start with the marinade. In a big bowl, mix these ingredients: - 1/2 cup soy sauce - 1/4 cup brown sugar - 1/4 cup pineapple juice - 2 tablespoons apple cider vinegar - 2 tablespoons sesame oil - 3 cloves garlic, minced - 1 tablespoon fresh ginger, grated - 1/2 teaspoon black pepper Whisk these together until the sugar blends in. Then, add 4 skinless and boneless chicken thighs. Place them in a resealable bag or a shallow dish. Pour the marinade over the chicken, making sure it is fully coated. Seal the bag or cover the dish and put it in the fridge. Marinate for at least 1 hour, but overnight is best for flavor. When it's time to grill, preheat your grill to medium-high heat. Take the chicken out of the marinade and throw away the leftover marinade. Place the chicken on the grill carefully. Grill each side for 6-7 minutes. You want the chicken to reach an internal temperature of 165°F (75°C). Look for nice grill marks and a bit of char on each side. While the chicken grills, slice some fresh pineapple for a tasty addition. In the last few minutes of grilling, put the pineapple slices on the grill. Cook them for about 2-3 minutes per side. You want them to get caramelized and have grill marks, too. After grilling, let the chicken and pineapple rest for a few minutes. Slice the chicken and serve it with the grilled pineapple. For a pop of color, garnish with chopped green onions. This adds a fresh touch to your dish. Enjoy your Huli Huli Chicken Delight! Check out the Full Recipe for more details. For the best flavor, you should marinate the chicken for at least one hour. The longer, the better! If you can, try marinating it overnight. This lets the flavors soak deep into the meat. Each bite will burst with sweet and savory taste. Just remember to keep it in the fridge while it soaks. Grilling can be tricky, but I have some tips! If you use medium-high heat, cook the chicken for 6-7 minutes on each side. This will give you a nice char. If your grill is too hot, the outside may burn before the inside cooks. Use a meat thermometer to check the chicken's temperature. It should be 165°F (75°C) to be safe to eat. Serving Huli Huli Chicken is fun! I like to use a big platter. Place the chicken in the center and arrange grilled pineapple slices around it. This makes your dish look bright and colorful. Top it off with chopped green onions for a fresh touch. It adds a pop of green and makes it look gourmet. Enjoy your meal, and don't forget to share the Full Recipe! {{image_2}} You can change the flavor of Huli Huli chicken with different marinades. Here are a few ideas: - Teriyaki Marinade: Use soy sauce, honey, and ginger. - Spicy Sriracha Marinade: Mix soy sauce, sriracha, and lime juice for heat. - Mango Marinade: Blend mango puree with soy sauce and garlic for sweetness. These marinades can add a fun twist to your dish. Pairing is key. Here are sides that work well with Huli Huli chicken: - Coconut Rice: This creamy rice balances the chicken's flavor. - Grilled Corn: Sweet corn adds a nice crunch and sweetness. - Coleslaw: A fresh slaw gives a nice crunch and cuts through the richness. These sides make your meal even better. You can cook Huli Huli chicken in many ways. Try these methods: - Oven: Preheat to 400°F (200°C) and bake for 25-30 minutes. - Air Fryer: Set to 375°F (190°C) and cook for about 18-20 minutes. Both methods keep the chicken juicy and flavorful. If you need a detailed recipe, check out the Full Recipe. To store leftover Huli Huli chicken, let it cool first. Place the chicken in an airtight container. Keep it in the fridge for up to three days. This helps keep the chicken fresh and tasty. When you are ready to eat, take the chicken out of the fridge. You can reheat it in a few ways. The oven is best for even heating. Preheat the oven to 350°F (175°C). Place the chicken on a baking sheet. Heat for about 15-20 minutes or until hot. You can also use a microwave. Heat in short bursts, checking often. This keeps the chicken juicy. If you want to save some chicken for later, freezing is a great option. Wrap each piece of chicken tightly in plastic wrap. Then, place them in a freezer bag. Squeeze out all the air. You can freeze the chicken for up to three months. When you are ready to enjoy it, thaw it in the fridge overnight. After that, reheat it using the instructions above. For a full recipe of Huli Huli chicken, refer to the earlier section. Huli Huli Chicken comes from Hawaii. It has roots in Hawaiian culture and barbecue. The name "Huli" means "turn" in Hawaiian. This dish got its start in the 1950s. A man named Ernest Morgado created it. He cooked chicken on a grill and turned it often. The sweet and savory sauce made it special. Today, people love it for its bold flavor and juicy meat. Yes, you can use other meats for Huli Huli. While chicken is the classic choice, pork works well too. You can also try it with tofu for a vegetarian option. Just remember to adjust cooking times based on the meat. Each meat has a different cook time. Always check the safe cooking temperature to keep your food safe. You can find Huli Huli Chicken at many Hawaiian barbecue restaurants. Some grocery stores sell pre-marinated chicken. You can also make it yourself at home. Using the full recipe is easy and fun. You control the flavors and ingredients. Plus, you can impress your friends and family with your cooking skills. - Common cooking tips for beginners and experts: - Always marinate your meat for at least one hour. - Preheat the grill for even cooking. - Keep an eye on the temperature to avoid overcooking. - Let the chicken rest after grilling for juicy bites. - Experiment with extra spices to find your favorite flavor. In this blog post, we've shared all you need for great Huli Huli Chicken. I covered key ingredients, cooking steps, and important tips for flavor and grilling. We also explored fun variations, how to store leftovers, and answered common questions. Now, you can impress your family and friends with this tasty dish. Enjoy the process and experiment with different flavors. Your kitchen will become a hub of delicious meals!

Huli Huli Chicken Delight Fresh and Flavorful Recipe

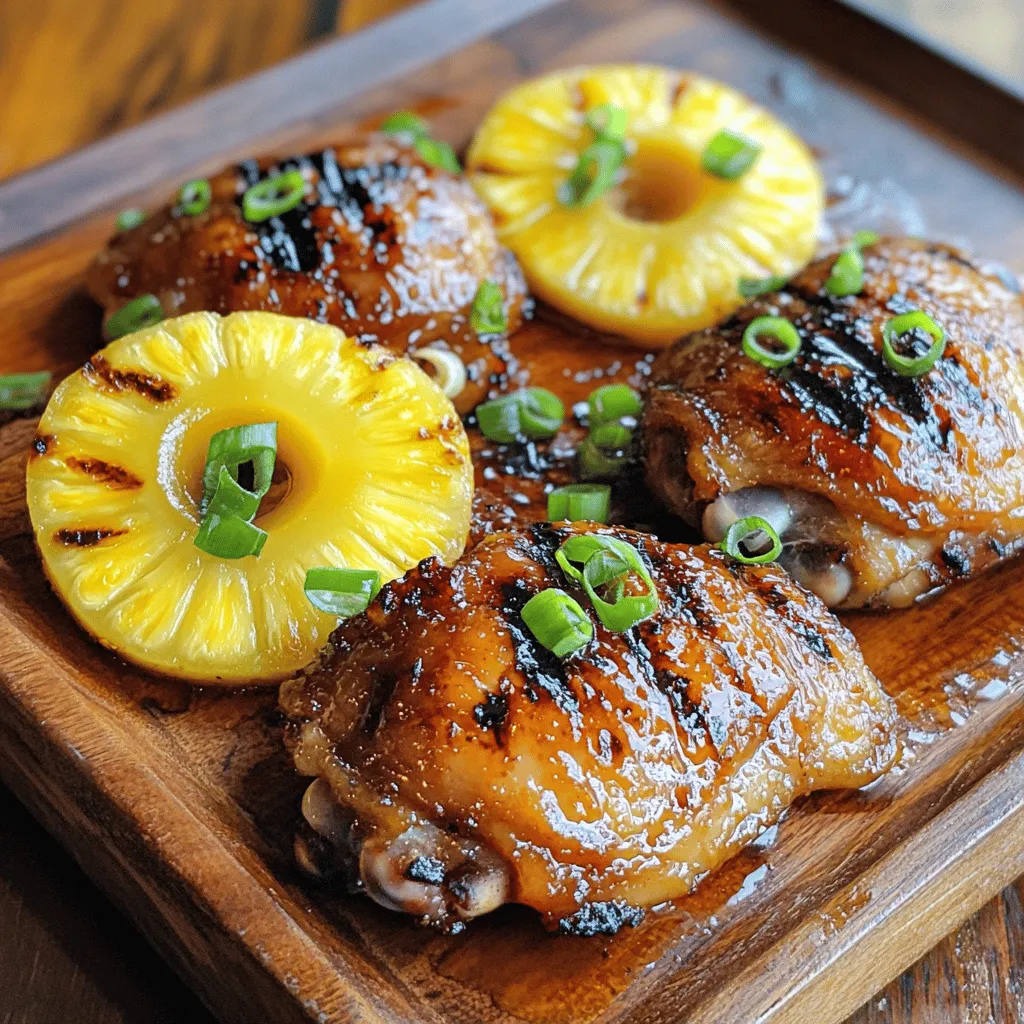
Ready to take your taste buds on a tropical trip? Huli Huli Chicken, a true Hawaiian delight, is bursting with

Shrimp and Zucchini Noodles Basics For this dish, I use: - 1 pound large shrimp, peeled and deveined - 4 medium zucchinis, spiralized into noodles Zucchini noodles, or zoodles, make a great low-carb base. They soak up flavors and add a fresh crunch. The shrimp gives the dish its protein and a sweet, salty taste. Flavor Enhancers: Garlic, Lemon, and More To boost the taste, I add: - 4 cloves garlic, minced - 2 tablespoons olive oil - 1 tablespoon unsalted butter - 1 cup cherry tomatoes, halved - 1 tablespoon lemon juice - 1 teaspoon red pepper flakes (adjust to taste) Garlic and lemon create a bright, zesty flavor. The tomatoes add a juicy pop. Olive oil and butter make the dish rich and smooth. Red pepper flakes give it a nice kick. Garnishes and Seasonings To finish, I use: - Salt and pepper to taste - Fresh parsley, chopped (for garnish) - Zest of 1 lemon (for added flavor) Fresh parsley adds color and freshness. The lemon zest enhances the citrus notes. These garnishes make the dish look and taste gourmet. For the full recipe, check our detailed guide on how to prepare this delightful dish! Spiralizing Techniques To create zucchini noodles, start with fresh zucchinis. A spiralizer is the best tool for this task. It makes long, thin noodles that mimic pasta. Simply wash the zucchini, trim the ends, and twist it through the spiralizer. If you don’t have one, don’t worry! You can use a vegetable peeler to make thin strips. Just slice the zucchini lengthwise into long ribbons. Alternative Methods for Zucchini Noodles Other tools like a julienne peeler or a box grater work well too. If you want to save time, pre-spiralized zucchini is available at many stores. Keep in mind, the thinner the noodle, the quicker they cook. Tips for Perfectly Cooked Shrimp Start by heating olive oil and butter in a large skillet. Use medium heat to avoid burning. When the butter melts, add minced garlic. Sauté for just about 30 seconds. This brings out the flavor without burning it. Next, toss in the shrimp. Cook them for about 2-3 minutes. They should turn pink and opaque. This shows they are perfectly cooked. Avoiding Common Mistakes Don’t overcrowd the pan. If the shrimp are too close, they will steam instead of sear. This can make them rubbery. Also, avoid cooking shrimp for too long. Overcooked shrimp can become tough. Timing for Adding Each Ingredient After cooking the shrimp, add halved cherry tomatoes. Cook for about 2 minutes until they soften. Next, stir in the zucchini noodles. Toss them gently to combine everything. Cook for just 2-3 minutes. The noodles should be heated but still crunchy. Heat Levels Explained It's important to keep the heat at medium throughout cooking. This helps all the ingredients cook evenly without burning. If you find it's too hot, lower the heat slightly. You want a gentle simmer, not a vigorous boil. For the full recipe, check out the [Full Recipe]. - Using Less Oil or Butter To cut calories, use less oil and butter. You can swap half the butter with vegetable broth. This keeps the dish moist but cuts down on fat. - Recommended Cooking Methods Sautéing shrimp in a non-stick pan helps reduce oil use. Steaming zucchini noodles instead of sautéing can also lower calories. This keeps the noodles crunchy and fresh. - Additional Herbs and Spices You can add fresh basil or thyme to boost flavor. A pinch of smoked paprika can give a nice twist. Always taste as you go to find the right balance. - Combining with Other Vegetables Mix in bell peppers or spinach for color and taste. These veggies add nutrients and make your dish more vibrant. You can also add a handful of arugula for a peppery kick. - Pairing with Other Healthy Dishes Serve your shrimp scampi with a side salad or whole-grain bread. You could also pair it with quinoa for a complete meal. This adds fiber and keeps you feeling full. - Presentation Ideas Use a large, shallow bowl for serving. Twirl the zucchini noodles for a fun look. Top with extra parsley and lemon zest for color and freshness. This makes the dish inviting and appetizing. For the full recipe, check out the details above and enjoy making this delightful dish! {{image_2}} Gluten-Free Options This recipe is naturally gluten-free. You can enjoy it without worry. Just make sure all ingredients are gluten-free. For example, check the labels on your shrimp and any seasonings you use. Low-Carb Adjustments Zucchini noodles are a great low-carb choice. If you want fewer carbs, skip the cherry tomatoes. They add some sugar. You can also use less lemon juice to cut carbs even more. Seafood Alternatives If you don’t like shrimp, try scallops or chicken. Both cook well in this dish. Just adjust the cooking time. Scallops need about 3-4 minutes, while chicken takes a bit longer. Vegetable Variations You can swap zucchini for other veggies. Consider using spaghetti squash or yellow squash. Each offers unique flavors while still keeping it healthy. Spicy vs. Mild I love a bit of heat in my dishes. If you do too, add more red pepper flakes. For a milder version, cut back on them or leave them out. Taste it as you go to find your perfect level. Adding Unique Ingredients Get creative! Try adding capers or olives for a briny twist. You can also mix in spinach for added greens. Just remember to cook it down with the shrimp. Each new ingredient can change the whole dish. For more ideas, check the Full Recipe for Skinny Shrimp Scampi with Zucchini Noodles. For storing your Skinny Shrimp Scampi with Zucchini Noodles, follow these tips: - Refrigeration Guidelines: Store leftovers in an airtight container. They keep well in the fridge for up to three days. Make sure to cool the dish before sealing it. This helps prevent condensation and sogginess. - Freezing Recommendations: You can freeze this dish, but I recommend freezing the shrimp and zucchini noodles separately. This way, they maintain better texture. Use freezer-safe bags or containers, and they can last up to three months. Reheating is easy if you follow a few steps: - Best Methods for Reheating: The best way to reheat is in a skillet over low heat. This keeps the shrimp tender and the zucchini noodles crunchy. You can also use a microwave, but do it in short bursts to avoid overcooking. - Preserving Flavor and Texture: Add a splash of olive oil or a bit of broth when reheating. This helps keep the dish moist and flavorful. Stir gently to avoid breaking the noodles. Knowing when to enjoy your dish is key: - Duration for Safe Consumption: If stored correctly, eat the dish within three days when refrigerated. For frozen portions, consume within three months for best quality. - Signs of Spoilage: Look for changes in smell, color, or texture. If the shrimp smells off or the noodles feel mushy, it's best to toss it. Always trust your senses; they guide you well! Can I use frozen shrimp? Yes, you can use frozen shrimp. Just thaw them before cooking. Place the shrimp in cold water for about 15 minutes. This will help them thaw quickly. Make sure they are peeled and deveined for the best results. What can I substitute for zucchini noodles? If you don't have zucchini, try using spaghetti squash or carrots. You can also use whole wheat pasta for a more traditional dish. Each option adds its own flavor and texture. Calorie count per serving Each serving of Skinny Shrimp Scampi with Zucchini Noodles has about 300 calories. This makes it a light yet filling meal option. Protein and nutrient breakdown This dish provides around 25 grams of protein per serving. It also has healthy fats from olive oil and butter. The zucchini adds fiber and vitamins, making it nutritious. What is the best way to avoid overcooking shrimp? Cook shrimp for only 2-3 minutes per side. They should turn pink and opaque. Remove them from heat as soon as they change color. This keeps them tender and juicy. How can I make this dish more flavorful? Add more garlic or lemon zest for extra taste. Fresh herbs like basil or thyme also enhance flavor. You can adjust red pepper flakes for spice. These tips help create a rich, delicious meal. This blog post detailed how to make a healthy shrimp and zucchini noodle dish. We covered ingredients, cooking steps, and storage tips. Remember, using fresh flavors like garlic and lemon makes a difference. Avoid overcooking shrimp for the best taste. You can also adjust the recipe to fit different diets. I hope these ideas inspire you to enjoy a tasty, healthy meal with ease. Try experimenting and have fun with your cooking!

Skinny Shrimp Scampi with Zucchini Noodles Delight

Looking to enjoy a light yet flavorful meal? My Skinny Shrimp Scampi with Zucchini Noodles is the perfect dish for

- Chicken and Marinade Ingredients - 1.5 lbs boneless, skinless chicken breasts, cut into bite-sized pieces - 4 tablespoons olive oil - 3 garlic cloves, minced - 1 teaspoon smoked paprika - 1 teaspoon onion powder - 1 teaspoon dried oregano - Salt and pepper to taste - Skewers (soaked in water for 30 minutes if wooden) - Ingredients for Garlic Sauce - 1/4 cup Greek yogurt - 1 tablespoon mayonnaise - 2 tablespoons lemon juice - 2 teaspoons fresh parsley, chopped - 1 garlic clove, minced - Salt and pepper to taste - Optional Garnishes - Lemon wedges - Fresh parsley for a pop of color When I start this recipe, I love the simple yet bold flavors. The chicken needs to soak up the marinade for great taste. The olive oil adds richness, while garlic gives it a nice kick. The spices bring warmth and depth. For the garlic sauce, I mix yogurt and mayo for creaminess. The lemon juice brightens it up. Fresh parsley adds a nice touch. This sauce is so good; it pairs perfectly with the chicken bites. I often add lemon wedges as a garnish. They look pretty and add extra zest. Fresh parsley also makes the dish pop. It’s all about making the meal look as good as it tastes. This recipe is great for gatherings or a fun family dinner. You can find the full recipe above for more details. Enjoy the delicious flavors and easy prep! How to Prepare the Marinade To make the marinade, mix together 4 tablespoons of olive oil, 3 minced garlic cloves, 1 teaspoon of smoked paprika, 1 teaspoon of onion powder, and 1 teaspoon of dried oregano. Add salt and pepper to taste. This mix gives the chicken a deep flavor. Proper Marinade Time Let the chicken marinate for at least 30 minutes. If you can wait longer, up to 2 hours is even better. This time helps the flavors soak into the chicken. Tips for Chicken Preparation Cut the chicken into bite-sized pieces. This allows for even cooking and makes it easy to eat. Make sure the pieces are similar in size for best results. Ingredients and Mixing Method For the garlic sauce, you need 1/4 cup of Greek yogurt, 1 tablespoon of mayonnaise, 2 tablespoons of lemon juice, 2 teaspoons of chopped fresh parsley, and 1 minced garlic clove. Mix these together in a bowl until smooth. Flavor Enhancements for the Sauce You can add a pinch of salt and pepper to taste. If you want a kick, try adding a bit of cayenne pepper. This adds heat without overpowering the garlic flavor. Prepping the Grill Preheat your grill to medium-high heat. This helps get nice grill marks on the chicken. If you use wooden skewers, soak them in water for 30 minutes to prevent burning. Skewering Techniques Take the marinated chicken pieces and thread them onto the skewers. Leave a small space between each piece to allow heat to circulate. This helps them cook evenly. Cooking Time and Temperature Place the skewers on the grill and cook for about 10-12 minutes. Turn them occasionally to get that perfect char. The chicken is done when it reaches an internal temperature of 165°F. Follow these steps for tasty grilled chicken bites with zesty garlic sauce. For the complete recipe, check out the [Full Recipe]. How to Achieve Perfect Grill Marks To get those perfect grill marks, preheat your grill to medium-high. This heat helps sear the chicken. Place the chicken on the grill and do not move it for about three minutes. Then, turn it 90 degrees to create crosshatch marks. After another three minutes, flip the chicken pieces. This method gives you great grill marks. Avoiding Dry Chicken To keep your chicken juicy, marinate it for at least 30 minutes. The olive oil in the marinade helps lock in moisture. Also, do not overcook the chicken. Use a meat thermometer to check its internal temp. Aim for 165°F. This ensures juicy bites every time. Creamy vs. Lighter Versions You can make the garlic sauce creamy or lighter. For a creamy version, add more Greek yogurt and a touch of mayonnaise. If you want a lighter sauce, skip the mayo. Use more lemon juice for brightness. Both options taste great with the chicken. Adding More Flavor to the Sauce To boost the sauce flavor, mix in fresh herbs like dill or chives. You can also add a dash of hot sauce for heat. Another option is to sprinkle in some grated Parmesan cheese. Each twist makes the sauce special. Best Side Dishes to Pair Grilled chicken bites pair well with fresh salads or roasted veggies. Try a simple green salad with lemon vinaigrette. For a hearty option, serve with rice or quinoa. These sides balance the flavors of the chicken and garlic sauce. Plating Ideas for Presentation For a pretty plate, arrange the skewers on a large platter. Garnish with lemon wedges and sprigs of parsley. Serve the garlic sauce in a small bowl at the center. This setup looks inviting and makes dipping easy. If you're interested in making this dish, check out the Full Recipe for complete details. {{image_2}} You can substitute chicken with other proteins. For example, turkey works well. Shrimp is also a delicious option. Both add unique flavors to your dish. If you want to try something new, consider tofu. It absorbs flavors well and is a great meat alternative. You can also cook these proteins in different ways. If you don't have a grill, use a skillet on the stove. Pan-searing gives a nice crust, too. Broiling in the oven works great for quick cooking. To spice up your grilled chicken bites, add heat. Consider mixing in some cayenne pepper or chili flakes. This will give an exciting kick to your dish. You can also play with herbs. Instead of oregano, try basil or thyme. Fresh herbs add a vibrant touch. Mix in cilantro for a fresh twist. Each herb brings a new flavor to your bites. Making these grilled chicken bites ahead of time is easy. Marinate the chicken and store it in the fridge for up to 24 hours. This saves time on busy days. If you have leftovers, freezing them is a smart choice. Place the bites in an airtight container. They can stay fresh for about three months. When you're ready to eat, reheat them in the oven. This method keeps them juicy. Enjoy your grilled chicken bites any time with these meal prep ideas! To keep your grilled chicken bites fresh, use airtight containers. Glass or plastic containers work well. Store the chicken bites in the fridge. They stay good for up to three days. Always let the chicken cool down before sealing it. When you're ready to eat the leftovers, use the oven or a skillet. Both methods heat the chicken evenly. If you use the oven, set it to 350°F. Bake for 10-15 minutes. If using a skillet, add a splash of water. This keeps the chicken moist and prevents dryness. You can freeze grilled chicken bites for later. First, let them cool completely. Then, place them in freezer-safe bags. Squeeze out the air and seal tightly. They can stay in the freezer for up to three months. To thaw, leave them in the fridge overnight. Reheat as needed. Enjoy your grilled chicken bites anytime! For the full recipe, check out the details above. The ideal marination duration for chicken is at least 30 minutes. This time lets the chicken soak in all those great flavors. If you can, marinate for up to 2 hours. The longer you marinate, the more flavor your chicken will have. Just don't go overboard; too long can make the chicken mushy. Yes, you can use frozen chicken for this recipe. Start by thawing the chicken in the fridge overnight. If you need it fast, you can use the microwave. Once thawed, cut it into bite-sized pieces. Then, follow the marinade steps from the Full Recipe. Grilled chicken bites are great with many side dishes. Some popular choices are: - Rice or quinoa - Grilled veggies like zucchini and bell peppers - Fresh salads with mixed greens - Garlic bread for extra flavor Absolutely! This recipe is perfect for meal prep. You can marinate and grill the chicken ahead of time. Store the bites in an airtight container in the fridge. They last well for up to four days. Just reheat and serve during the week for easy, tasty meals. This blog post covered how to make delicious grilled chicken bites. You learned about ingredients, marinating, making garlic sauce, and grilling tips. I shared ideas for variations and meal prep. Proper storage and reheating methods ensure leftovers stay tasty. In summary, these tips will help you create flavorful meals. Enjoy grilling and experimenting with new flavors! You’ll impress everyone at your next gathering.

Grilled Chicken Bites with Garlic Sauce Delightful Recipe

Get ready to impress your taste buds with my Grilled Chicken Bites with Garlic Sauce! This mouthwatering recipe packs big

Older posts
Newer posts
← Previous Page1 … Page54 Page55 Page56 … Page72 Next →

dsad

© 2025 My Saved Recipe • Built with GeneratePress

Our Policies

  • Copyright Policy
  • Cookie Policy
  • GDPR Policy
  • Privacy Policy
  • Disclaimer
  • Terms Of Use

More Information

  • Home
  • About
  • Contact
  • Appetizers
  • Dessert
  • Dinner
  • Drinks
©2025, My Saved Recipe About Back To Top