Skip to content
DisclaimerTerms Of UseGDPR PolicyCookie Policy

My Saved Recipe

  • Home
  • Drinks
  • Appetizers
  • Dinner
  • Dessert
  • About
  • Contact
  • Privacy Policy
DisclaimerTerms Of UseGDPR PolicyCookie Policy

Savannah

To make the best zesty lemon bars, gather these key ingredients: - 1 cup all-purpose flour - 1/4 cup granulated sugar - 1/2 cup unsalted butter, softened - 1/4 teaspoon salt - 2 large eggs - 1 cup granulated sugar (for filling) - 2 tablespoons all-purpose flour (for filling) - 1/2 cup freshly squeezed lemon juice - Zest of 2 lemons - 1/2 teaspoon baking powder - Powdered sugar (for dusting) These ingredients create a bright, tangy filling and a buttery crust. The lemon juice and zest bring that refreshing zing. You can add extra flavors to your lemon bars. Here are some ideas: - 1 teaspoon vanilla extract for warmth - Fresh herbs like mint or basil for a twist - A pinch of salt to balance sweetness These optional ingredients can take your lemon bars to the next level. If you have dietary restrictions, you can still enjoy lemon bars. Here are some substitutions: - For gluten-free, use almond flour or a gluten-free blend. - For dairy-free, swap butter with coconut oil or a dairy-free margarine. - For vegan, replace eggs with flax eggs (1 tablespoon flaxseed meal + 2.5 tablespoons water per egg). These substitutions allow everyone to savor the delightful taste of zesty lemon bars. For the complete recipe, check the Full Recipe. Start by preheating your oven to 350°F (175°C). This step is vital to ensure even baking. Next, take an 8x8 inch baking pan. You can grease it with some butter or line it with parchment paper. This makes it easy to lift out the lemon bars later. Now, let’s make the crust. In a mixing bowl, combine these ingredients: - 1 cup all-purpose flour - 1/4 cup granulated sugar - 1/2 cup unsalted butter, softened - 1/4 teaspoon salt Mix these until the mixture looks like coarse crumbs. Press this mixture evenly into the bottom of your prepared pan. Bake the crust for 15-18 minutes. You want it to be lightly golden. Once done, remove it from the oven and let it cool slightly. For the lemon filling, grab another bowl. Whisk together these ingredients: - 2 large eggs - 1 cup granulated sugar - 2 tablespoons all-purpose flour - 1/2 cup freshly squeezed lemon juice - Zest of 2 lemons - 1/2 teaspoon baking powder Make sure to mix until smooth and well combined. Pour this lemon filling over your baked crust. Spread it evenly. Return the pan to the oven. Bake for another 20-25 minutes. The filling should set and turn a light golden color. After baking, remove the pan from the oven. Let it cool to room temperature. For a firmer texture, refrigerate the bars for at least 2 hours. For the final touch, dust the top with powdered sugar. Cut into squares or bars and enjoy! For the full recipe, refer to the main section. To get the right lemon flavor, start with fresh lemons. The zest adds bright flavor. If you want more tartness, add more zest. Use a microplane to get fine zest. This will give you a strong lemon taste. For a milder flavor, reduce the zest to just one lemon. You want the bars to be firm but not dry. When baking, check the center. It should be set and slightly jiggly. If it looks too wet, bake a little longer. You want a light golden top. Let the bars cool completely before cutting. This helps them firm up more. Serving your lemon bars nicely makes them more inviting. Place them on a decorative platter. Dust the top with powdered sugar for a nice look. Add fresh mint leaves or edible flowers for color. These small touches make your dish pop and impress your guests. For the full recipe, check out the earlier section. {{image_2}} You can switch up the flavor by using different citrus fruits. Lime or orange can give your lemon bars a fresh twist. Lime adds a zesty kick, while orange brings a sweet note. Simply replace the lemon juice with the juice of your chosen fruit. Use the zest too for added flavor. This keeps the bars bright and fun! Pair lemon bars with other flavors for a unique treat. Fresh berries, like raspberries or blueberries, add color and sweetness. You can also drizzle chocolate on top for a rich contrast. Chopped nuts, such as almonds or pistachios, give a nice crunch. Mix and match to find your favorite flavor combo! For those with dietary needs, there are easy swaps. Use almond flour or a gluten-free blend instead of regular flour. For a vegan option, substitute eggs with flaxseed meal or applesauce. Use coconut oil in place of butter for a dairy-free version. These changes keep the bars tasty while fitting your diet! For the full recipe, check out the Zesty Lemon Bars recipe above. To keep your lemon bars fresh, store them in the refrigerator. First, cut the bars into squares. Then, place them in an airtight container. This helps keep moisture out. Always add a layer of parchment paper between layers if stacking. This prevents sticking. Your lemon bars will stay fresh for up to one week. Freezing lemon bars is simple. Start by cutting them into squares. Wrap each square in plastic wrap. Then, place the wrapped bars in a freezer bag. Make sure to remove as much air as possible. You can freeze them for up to three months. To thaw, remove the bars from the freezer and place them in the fridge for a few hours. You can also let them sit at room temperature for about 30 minutes. Lemon bars last about one week in the fridge. If they sit longer, they may spoil. Look for signs like a change in color or an off smell. If the filling feels slimy or the crust is hard, it’s time to toss them. Always trust your senses when it comes to food safety. Enjoy your zesty lemon bars while they are fresh for the best taste! Yes, you can use bottled lemon juice. However, fresh lemon juice offers a brighter flavor. Fresh juice has more aroma and zest. The taste difference can affect the final product. If you use bottled juice, choose a brand with no added sugars or preservatives. For the best taste, always try to go for fresh lemons. To adjust sweetness, you can tweak the sugar amount. If you want them sweeter, add more sugar to the filling. Start with one or two extra tablespoons. If you prefer less sweetness, cut back on the sugar in the filling. You can also balance the sweetness with a bit more lemon juice. This gives a nice tartness that balances out the sugar. To cut lemon bars evenly, first, chill them well. Cold bars are firmer and easier to cut. Use a sharp knife for clean cuts. For nice squares, score the top with a knife before cutting all the way through. Wipe the knife with a damp cloth after each cut. This keeps the edges neat. You can also use a ruler to measure even squares. Zesty lemon bars are a delightful treat you can make at home. We discussed key ingredients like flour, sugar, and fresh lemons, plus optional flavor enhancers. I provided step-by-step instructions for making the crust and filling, tips for perfect texture, and variations using other citrus fruits. Remember, storing them properly is key to keeping them fresh. Whether you prefer traditional or vegan options, lemon bars are versatile and fun to create. Enjoy your baking journey and impress others with your zesty creations!

Zesty Lemon Bars Delightful Flavor in Every Bite

Craving a treat that bursts with bright flavor and sweetness? You’ll love my Zesty Lemon Bars! These bars are easy

- 1 ½ cups all-purpose flour - 1 tablespoon matcha green tea powder - ½ cup granulated sugar - ½ cup brown sugar, packed - 1 tablespoon baking powder - ½ teaspoon salt - 2 large eggs - ¾ cup milk (dairy or non-dairy) - ⅓ cup vegetable oil - 1 teaspoon vanilla extract - ½ cup white chocolate chips (optional) - ¼ cup chopped nuts (e.g., walnuts or almonds, optional) Matcha green tea muffins are not just tasty; they are also good for you. Matcha is rich in antioxidants. It helps boost energy and focus. With just a few simple ingredients, you can create a delightful morning treat. The main ingredient is matcha powder. This bright green powder comes from finely ground green tea leaves. It gives the muffins a unique flavor and vibrant color. The blend of sugars adds a nice sweetness without being too heavy. I love using a mix of dairy and non-dairy milk. You can choose what fits your diet best. The vegetable oil keeps the muffins moist. Eggs help bind everything together and add a fluffy texture. You can add white chocolate chips or nuts for extra flavor. They make each bite even more enjoyable. Feel free to skip them if you prefer a simpler muffin. With this complete ingredient list, you are ready to bake. Check out the Full Recipe for step-by-step instructions to make your perfect matcha green tea muffins! Start by gathering all your ingredients. You will need: - 1 ½ cups all-purpose flour - 1 tablespoon matcha green tea powder - ½ cup granulated sugar - ½ cup brown sugar, packed - 1 tablespoon baking powder - ½ teaspoon salt - 2 large eggs - ¾ cup milk (dairy or non-dairy) - ⅓ cup vegetable oil - 1 teaspoon vanilla extract - ½ cup white chocolate chips (optional) - ¼ cup chopped nuts (optional) Having everything ready will make your baking smooth. In a large bowl, whisk together the flour, matcha powder, granulated sugar, brown sugar, baking powder, and salt. Make sure there are no lumps. This mix gives your muffins that lovely green color and flavor. In a separate bowl, beat the eggs. Then add the milk, vegetable oil, and vanilla extract. Mix well until everything is smooth. This step helps to create a moist muffin. Pour the wet mixture into the dry mixture. Gently mix until just combined. Do not overmix, or your muffins may turn out tough. If you want extra sweetness, fold in the white chocolate chips and chopped nuts here. Preheat your oven to 375°F (190°C). Line a muffin tin with paper liners or grease it. Fill each muffin cup about ¾ full with the batter. Bake for 18-20 minutes. Check with a toothpick. It should come out clean when done. After baking, let the muffins cool in the pan for 5 minutes. Then transfer them to a wire rack to cool completely. Serve them warm, dusted with matcha powder or powdered sugar. Pair with fresh fruit for a great breakfast. Enjoy your Matcha Magic Muffins! To get soft and fluffy muffins, mix carefully. Combine wet and dry ingredients until just blended. If you overmix, your muffins can become tough. Use room temperature eggs and milk for the best rise. Also, avoid opening the oven door while baking; heat helps them rise well. You can make these muffins your own. Add fruits like blueberries or bananas for extra flavor. Swap half the all-purpose flour for whole wheat flour for a healthier option. For a fun twist, try adding spices like cinnamon or nutmeg. Don’t forget to check the full recipe for more ideas! If your muffins sink, you might have overmixed. Check that your baking powder is fresh, too. If they are too dry, you may have added too much flour. Use a light hand when measuring. For uneven tops, ensure your oven heats evenly. Rotating the muffin tin halfway through baking helps with this. {{image_2}} You can make these matcha muffins gluten-free. Replace all-purpose flour with a gluten-free blend. Many options are available at stores. Ensure the blend has xanthan gum for structure. This small change keeps the muffins soft and tasty. Get creative with add-ins for your muffins. Fresh or frozen berries work well. Blueberries, raspberries, or strawberries add a burst of flavor. You can also use bananas or apples for sweetness. Just chop them into small pieces before adding. This makes each bite exciting! To make these muffins vegan, swap eggs and milk with plant-based options. Use flax eggs or applesauce instead of eggs. For milk, almond or oat milk works great. The muffins still turn out light and fluffy. You will love how easy this adaptation is! For the full recipe, check out Matcha Magic Muffins. Store your matcha green tea muffins in an airtight container. This keeps them fresh for about 2 to 3 days. If you want to keep them soft, place a slice of bread in the container. The bread's moisture helps the muffins stay fluffy. For longer storage, freeze your muffins. Wrap each muffin in plastic wrap or foil. Place them in a freezer-safe bag or container. You can keep them this way for up to 3 months. When you want to enjoy them, just thaw them overnight in the fridge. To reheat, use your oven or microwave. Preheat your oven to 350°F (175°C). Place the muffin on a baking sheet and warm it for about 5 to 10 minutes. In the microwave, heat for about 15-20 seconds. This brings back their soft texture. Enjoy your muffins warm for the best flavor! To make matcha muffins, start by gathering your ingredients. You will need flour, matcha powder, sugars, baking powder, salt, eggs, milk, oil, and vanilla extract. Mix the dry ingredients in one bowl and the wet ones in another. Combine them gently and fill muffin cups. Bake at 375°F for about 18-20 minutes. For the full recipe, check the section above. You can swap matcha powder with green tea, but the taste will change. Matcha has a rich flavor and bright color. Regular green tea lacks this intensity. If you use green tea, brew it strong for more flavor. However, your muffins may not be as vibrant. Store your matcha muffins in an airtight container. Keep them at room temperature for up to three days. If you want to store them longer, refrigerate them for a week. You can also freeze muffins for up to three months. Just wrap them well. A matcha muffin has about 150-200 calories, depending on the recipe. Ingredients like sugars and chocolate chips can raise the count. If you want a lighter muffin, reduce the sugar or skip the chocolate. Yes, you can make these muffins ahead of time. They stay fresh for a few days when stored properly. You can also bake them and freeze them for later. Just thaw and reheat them when you are ready to enjoy! In this article, I shared a complete guide to making matcha muffins. We covered ingredients, health benefits, and step-by-step instructions. You learned tips for perfect texture and how to customize your recipe. Making these muffins can be fun and rewarding. Plus, you get tasty treats that are good for you! Now, you have the tools to bake and store delicious matcha muffins. Enjoy your baking journey!

Matcha Green Tea Muffins Your Perfect Morning Boost

Start your day right with Matcha Green Tea Muffins! These tasty treats are not only delicious—they’re packed with health benefits,

- 2 salmon fillets - 1/3 cup soy sauce - 2 tablespoons honey - 1 tablespoon rice vinegar - 1 tablespoon sesame oil - 2 garlic cloves, minced - 1 teaspoon grated ginger - 2 cups cooked jasmine or brown rice - 1 cup steamed broccoli florets - 1 cup shredded carrots - 1 avocado, sliced - 2 green onions, sliced - Sesame seeds for garnish - Optional: pickled ginger for serving When I make my teriyaki salmon bowls, I start by picking fresh, high-quality ingredients. The salmon fillets should be bright and firm. For the sauce, I love using soy sauce for that umami flavor. Honey adds sweetness, while rice vinegar gives a nice tang. Sesame oil enriches the sauce with a nutty taste. Minced garlic and grated ginger bring a fresh zest. For the base, I often choose jasmine rice for its aroma, but brown rice works great too. I always steam my broccoli just right. It should stay vibrant green and crunchy. Shredded carrots add color and sweetness. Don't forget the avocado; its creaminess balances the dish. Lastly, the green onions add a lovely crunch and a bit of spice. For garnishes, sesame seeds provide a nice crunch. If you like a little zest, pickled ginger is a fun option to serve on the side. This combination makes a delightful meal that is simple yet packed with flavor. You can find the Full Recipe to create this dish at home. To make the teriyaki sauce, you need a small saucepan. First, combine these ingredients: - 1/3 cup soy sauce - 2 tablespoons honey - 1 tablespoon rice vinegar - 1 tablespoon sesame oil - 2 garlic cloves, minced - 1 teaspoon grated ginger Stir these well and bring to a slight simmer over medium heat. Let it cook gently for about 5 minutes. This helps the sauce thicken and blend the flavors. Once done, remove it from heat and let it cool. Now, let's marinate the salmon. You want to coat the salmon fillets with half of the teriyaki sauce. Use a shallow dish for this. Make sure the fillets are well-coated. I recommend letting them marinate for about 15 to 20 minutes. This step adds great flavor to the salmon. You have two options here: grilling or baking. Preheat your grill or oven to 400°F (200°C). - If grilling, place the salmon on the grill and cook for about 5 to 7 minutes per side. - If baking, place the salmon on a lined baking sheet. Bake for 12 to 15 minutes. You’ll know it's done when it flakes easily with a fork. Brush with more teriyaki sauce while cooking for extra flavor. Now it’s time to assemble the bowls. Start with a serving bowl and layer the cooked rice as your base. I like using jasmine or brown rice. On top of the rice, add these vegetables: - 1 cup steamed broccoli florets - 1 cup shredded carrots - 1 avocado, sliced This adds color and nutrients to the meal. Finally, let’s make it look nice. Place a cooked salmon fillet on top of the vegetables and rice. Drizzle any remaining teriyaki sauce over it. For a lovely finish, sprinkle sliced green onions and sesame seeds. If you like, add pickled ginger on the side for extra zing. Enjoy your delicious teriyaki salmon bowls! For the complete recipe, check out the Full Recipe. To make the best teriyaki sauce, you can adjust the sweetness and seasoning. If you like it sweeter, add more honey. If you want more salt, try adding a bit of soy sauce. To make the sauce thicker, let it simmer longer. If you prefer it thinner, add a little water or broth. This way, you can create the perfect sauce for your taste. Using a meat thermometer is a great way to cook salmon just right. Aim for 145°F (63°C) to ensure it’s safe and tasty. To avoid overcooking, watch the salmon closely while it cooks. Salmon can go from perfect to dry quickly. If it flakes easily with a fork, it’s done! For the best side dishes, steamed broccoli and shredded carrots work well. They add color and nutrition to your bowl. You can also try adding snap peas or sautéed bell peppers for more variety. Pair your teriyaki salmon bowl with a light beverage, like green tea or a crisp white wine. These drinks enhance the meal without overpowering it. {{image_2}} You can swap salmon for other proteins like tofu or chicken. Tofu works well for a plant-based option. It absorbs the teriyaki sauce nicely. If you choose chicken, use thin cuts for quick cooking. Adjust the marination time based on the protein. - For tofu, marinate for about 30 minutes. - For chicken, 20 minutes is enough for flavor. Feel free to change up the veggies in your bowl. You can add colorful peppers or crisp snap peas. Both of these options add great texture and flavor. More colors in your bowl mean more nutrients too. Try adding: - Red or yellow bell peppers for sweetness. - Snap peas for a crunchy bite. These additions make your meal vibrant and fun. You can use different teriyaki sauces, too. If you want a homemade sauce, it’s easy to make. Just mix soy sauce, honey, and a few spices. Store-bought options save time and still taste great. You can also try spicy or sweet sauces. A spicy sauce gives your bowl a kick. A sweet sauce makes it extra tasty. Both options can change the whole meal. Explore and find what you love! For the complete recipe, check out the Full Recipe. To keep your teriyaki salmon bowls fresh, store them in a sealed container. I recommend using glass containers. They work well and do not absorb odors. Place the bowls in the refrigerator. Your leftovers can last for about three days. After that, the flavors may fade. When you want to enjoy your leftovers, reheating is simple. You can use a microwave for quick warming. Just cover the bowl with a lid or microwave-safe wrap. Heat in short bursts, stirring in between. This helps keep the salmon moist. If you prefer, you can reheat in an oven. Place the bowl in a preheated oven at 350°F. Heat for about 10 minutes. This will help maintain the texture and flavor. If you want to save your teriyaki salmon bowls for later, freezing works great. Use airtight containers or freezer bags. Make sure to remove as much air as possible. This helps prevent freezer burn. Your bowls can stay fresh for up to three months in the freezer. When you're ready to eat, thaw them in the fridge overnight. After thawing, you can refashion them with fresh veggies or more sauce to enhance the flavor. I recommend marinating the salmon for 15 to 20 minutes. This time allows the flavors to soak in well. If you marinate it too long, the fish can become too salty. The right marination time balances the flavors perfectly. Yes, you can make teriyaki sauce ahead of time. Just store it in an airtight container in the fridge. It will last for about a week. This saves time on busy days. You can also freeze it for longer storage. Just remember to thaw it in the fridge before use. You can grill or bake the salmon for this dish. Grilling gives a nice smoky flavor and crisp skin. It takes about 5-7 minutes per side on medium heat. Baking is also great and easier for beginners. Bake it at 400°F (200°C) for 12-15 minutes. Both methods make the salmon flaky and tender. Yes, this recipe is quite healthy. Salmon is rich in omega-3 fatty acids, which are good for your heart. The veggies add vitamins and minerals. Rice provides energy through carbohydrates. Honey in the sauce offers a natural sweetness. Overall, this bowl is nutritious and tasty, making it a smart choice for meals. This blog shared a tasty recipe for teriyaki salmon bowls. We explored the key ingredients, including the salmon and flavorful sauce. I explained step-by-step instructions to prepare the dish and offered tips for success. In the end, you can make this meal in many ways, with different proteins or veggies. This recipe is not just delicious but also healthy. Enjoy making your teriyaki salmon bowls, and feel free to get creative!

Teriyaki Salmon Bowls Flavorful and Simple Recipe

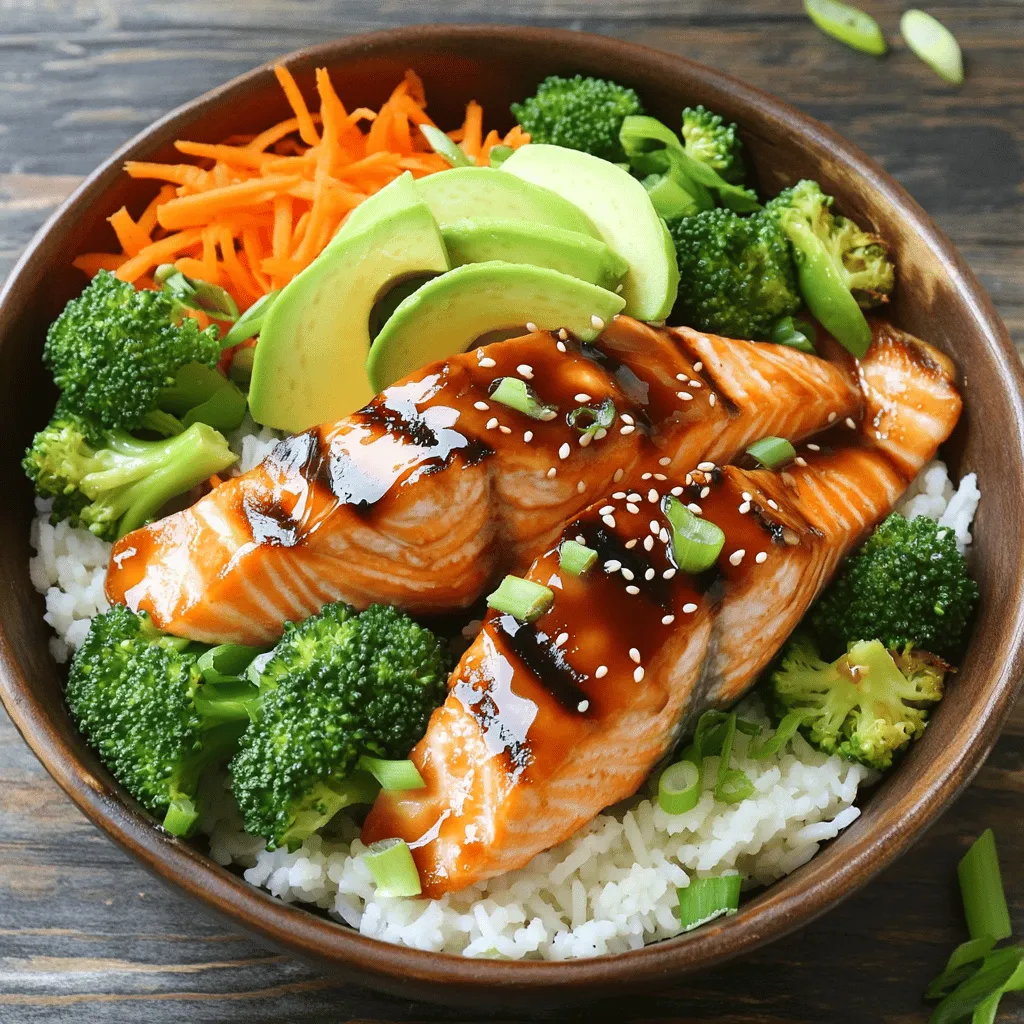
Looking for a simple and tasty meal? Teriyaki salmon bowls fit the bill perfectly! With just a few fresh ingredients,

To make this tasty Mediterranean couscous salad, you need simple, fresh ingredients. Here they are: - 1 cup couscous - 1 1/4 cups vegetable broth - 1/2 cup cherry tomatoes, halved - 1/2 cucumber, diced - 1/2 red onion, finely chopped - 1/2 cup kalamata olives, pitted and sliced - 1/4 cup feta cheese, crumbled - 1/4 cup fresh parsley, chopped - Juice of 1 lemon - 2 tablespoons olive oil - 1 teaspoon dried oregano - Salt and pepper to taste When picking your ingredients, focus on quality. Here’s what I suggest: - Look for ripe cherry tomatoes. They should be bright and firm. - Choose a cucumber with smooth skin. This adds crunch to the salad. - Use fresh parsley for a burst of flavor. Dried herbs won’t work as well. - Get good quality feta cheese. It should crumble easily and taste fresh. Feel free to get creative! Here are some add-ins and seasonings you can try: - Add bell peppers for more color and crunch. - Toss in some chickpeas for extra protein. - Use fresh mint alongside parsley for a refreshing twist. - Try a splash of red wine vinegar for added zing. These options can make your salad unique and fun. Enjoy mixing and matching flavors! For the full recipe, check out the earlier section. To start, grab a medium saucepan. Pour in 1 1/4 cups of vegetable broth. Heat it until it boils. Once boiling, remove the pan from the heat. Now, add 1 cup of couscous to the broth. Cover the pan and let it sit for about 5 minutes. This allows the couscous to soak up all the broth. After 5 minutes, fluff the couscous with a fork. This step makes it light and fluffy, ready for the salad. Next, take a large mixing bowl. In it, combine your salad ingredients. Start with 1/2 cup of halved cherry tomatoes. Add 1/2 diced cucumber and 1/2 finely chopped red onion. Toss in 1/2 cup of sliced kalamata olives, and 1/4 cup of crumbled feta cheese. Lastly, add 1/4 cup of chopped fresh parsley. Mix these ingredients gently. This creates a colorful and fresh base for your salad. Now it’s time to whip up the dressing. In a small bowl, squeeze the juice of 1 lemon. Add 2 tablespoons of olive oil, 1 teaspoon of dried oregano, and some salt and pepper to taste. Whisk the mixture together until it’s smooth. This dressing will bring all the flavors together. Now, combine the fluffed couscous with the salad mixture. Pour the dressing over it and toss gently. Ensure everything mixes well. Let your salad sit for 15 minutes at room temperature. This allows all the flavors to meld beautifully. For the full recipe, check the previous section. Enjoy this fresh, flavorful dish! To fluff couscous perfectly, follow these steps. After cooking, let it sit with the lid on for five minutes. Then, use a fork to gently separate the grains. This method keeps your couscous light and fluffy. Avoid using a spoon, as it can mash the grains. I love serving this salad chilled or at room temperature. It’s great as a side dish or a light meal. You can pair it with grilled chicken or fish for a heartier option. For a fun twist, serve it in lettuce cups. The crunchy lettuce adds a nice texture. To enhance the flavors in your couscous salad, let it sit for a bit after mixing. Allowing the salad to rest for about 15 minutes helps the flavors meld together. You can also add extra lemon juice or herbs, like basil or mint, for a fresh taste. Always taste and adjust the seasoning before serving. This ensures every bite is delicious. {{image_2}} Adding grilled chicken to your Mediterranean couscous salad makes it heartier. Just grill chicken breast until cooked. Slice it thin and mix it in with the salad. This boosts protein and flavor. You can season the chicken with lemon juice, garlic, and herbs for extra taste. This option is perfect for a filling lunch. If you want a vegan version, skip the feta cheese. Use cubed avocado instead. For a gluten-free salad, replace couscous with quinoa or rice. Both options give a nice texture and flavor. You can also add chickpeas for protein and fiber. These swaps keep the salad fresh and tasty while meeting dietary needs. Change your salad with seasonal produce. In spring, add fresh peas and asparagus. In summer, consider ripe peaches or berries for sweetness. Fall brings roasted squash, while winter allows for hearty root vegetables. Tailoring your salad to the season keeps it exciting and vibrant. It’s a fun way to enjoy fresh ingredients year-round! If you'd like to try these variations, check the Full Recipe for Mediterranean Couscous Salad to guide you. To keep your Mediterranean Couscous Salad fresh, place it in an airtight container. This helps prevent it from drying out or absorbing other odors in the fridge. Let the salad cool to room temperature before sealing it. This step helps avoid condensation inside the container. Couscous can become dry when reheated. To avoid this, add a splash of vegetable broth or water before warming it up. Use a microwave or stovetop to heat it gently. Stir it well to ensure even warmth. Do not overheat, as it can change the texture. Your Mediterranean Couscous Salad lasts about 3 to 5 days in the fridge. If you want to store it longer, freezing is a good option. However, some ingredients, like tomatoes and cucumber, may not freeze well. Instead, freeze just the couscous mixture. When ready to eat, thaw it in the fridge overnight. Then, mix in fresh veggies and dressing before serving. If you can't find couscous, try quinoa or bulgur. Both grains have a similar texture. Quinoa adds a nice protein boost. Bulgur has a nutty flavor. You can also use orzo for a pasta twist. Simply cook these grains as you would couscous. Follow the package instructions for best results. Yes, Mediterranean Couscous Salad is quite healthy. It packs in many fresh veggies. The olives and feta add healthy fats. Couscous provides carbs for energy. This dish is rich in vitamins and minerals too. Plus, it’s low in calories. Eating this salad can help you feel full and satisfied. You can store this salad in the fridge for up to four days. Keep it in an airtight container. The flavors will blend more over time. If you notice any separation, just give it a good stir. For the best taste, eat it within the first two days. You learned how to make a tasty Mediterranean Couscous Salad. We covered fresh ingredients, optional add-ins, and easy steps to cook couscous. I shared tips for fluffing couscous and serving ideas. You can even try vegan or gluten-free options. Don’t forget the best ways to store leftovers. This dish is healthy and fun to make. Enjoy your cooking and share this colorful salad with friends and family. You'll impress everyone with your new skills.

Mediterranean Couscous Salad Fresh and Flavorful Dish

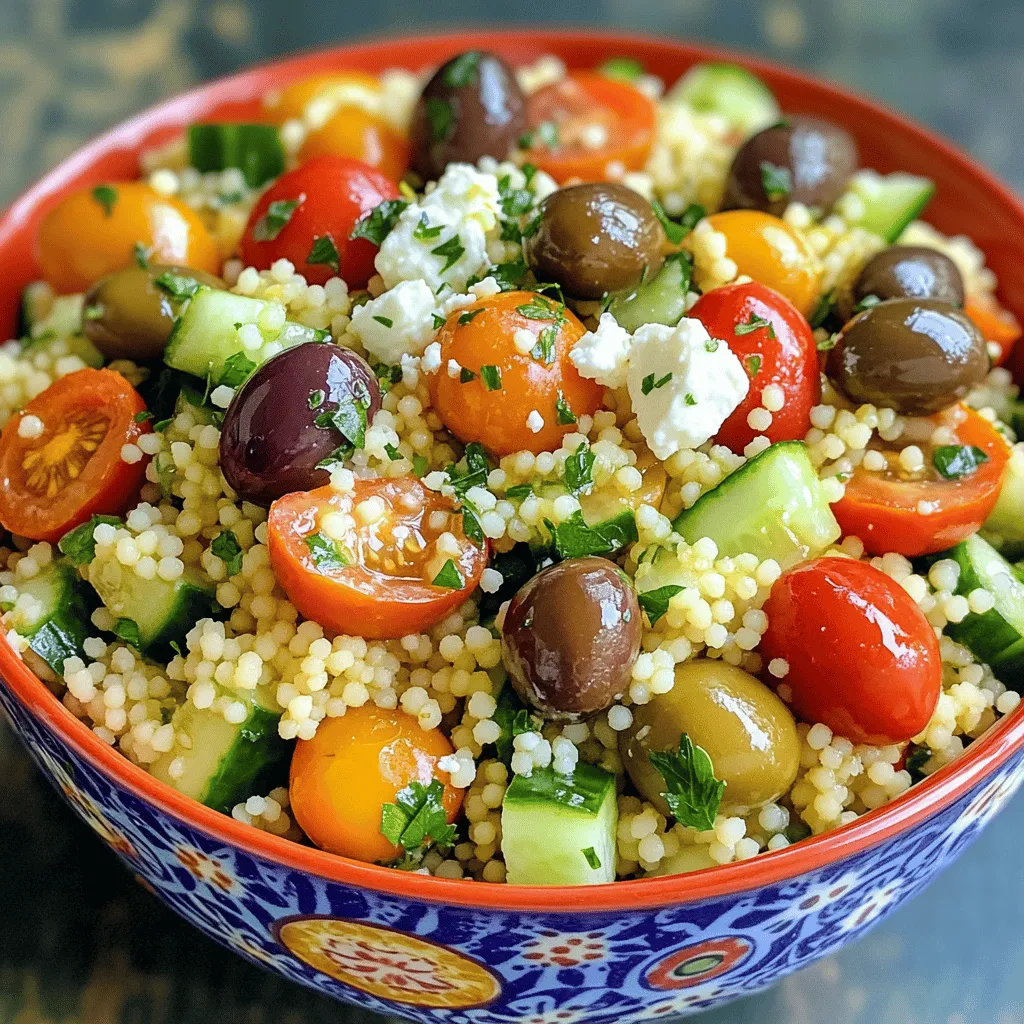
If you’re looking for a dish that bursts with flavor and freshness, you’ve found it! This Mediterranean Couscous Salad is

- Ripe peaches: Use 3 ripe peaches, diced. Ripe peaches give your salsa a sweet kick. They should be soft but not mushy. Check for a nice scent too. The more fragrant, the better they taste! - Fresh produce and seasoning essentials: You need: - 1 red bell pepper, finely chopped - 1/2 red onion, minced - 1 jalapeño, deseeded and minced - 1/4 cup fresh cilantro, chopped - 2 tablespoons lime juice - Salt and pepper to taste These veggies add crunch and flavor to your salsa. The lime juice brightens everything up. Adjust the salt and pepper for your taste. - Optional ingredients for sweetness and flavor balance: If you want a hint of sweetness, add 1 tablespoon of honey. This is great if your peaches are not as sweet. Honey balances the heat from the jalapeño. You can skip it if you prefer a more savory salsa. For the full recipe, check out the complete guide. Happy cooking! To make peach salsa, start by gathering your ingredients. You need ripe peaches, red bell pepper, red onion, and jalapeño. 1. In a medium mixing bowl, combine the diced peaches, red bell pepper, minced red onion, and jalapeño. Each ingredient brings its own flavor. 2. Next, add the chopped cilantro to the bowl. This herb adds freshness to the dish. 3. Drizzle the lime juice over the mixture. If you want a touch of sweetness, add honey. 4. Gently toss all the ingredients together until they mix well. Be careful not to mash the peaches. 5. Season with salt and pepper to taste. Adjust lime juice and honey for the best flavor balance. Let the salsa rest in the refrigerator for at least 30 minutes. This step is key. It allows the flavors to meld together and become more vibrant. For the right texture, use ripe but firm peaches. They should hold their shape but still be juicy. You want a mix of crunchy and soft textures. Serve your peach salsa in a colorful bowl. A sprig of cilantro on top looks nice. Pair it with tortilla chips or use it as a topping for grilled chicken or fish. Enjoy your peach salsa fresh and flavorful! This recipe is sure to impress. For the full recipe, check out the details above. To make the best peach salsa, choose ripe peaches. Ripe peaches are soft and have a sweet smell. Look for peaches that yield slightly to gentle pressure. Their skin should be smooth, free of blemishes. You can also check for a yellow or golden hue, which shows good ripeness. If your peaches are hard, don't worry! You can ripen them at home. Place them in a paper bag. Keep them at room temperature for a few days. Check them daily to see if they are softening. Once ripe, use them quickly for the best flavor. Peach salsa shines as a dip with tortilla chips. It also pairs well with grilled meats. Try it on chicken, pork, or fish for a fresh twist. You can also serve it on tacos or in wraps for added crunch and flavor. Get creative with peach salsa! Use it as a topping for bruschetta or mix it into salads. You can even add it to yogurt or cottage cheese for a fruity breakfast. This versatile salsa fits many dishes, making it a summer favorite. For the full recipe, check out the Peachy Fiesta Salsa section. {{image_2}} You can switch up the fruits and veggies in your peach salsa. Try using mango, pineapple, or even strawberries. Each fruit brings its own taste. For a veggie twist, consider adding cucumber or corn. These additions can change the salsa's flavor profile entirely. Adjusting spice levels is also easy. If you like it hot, add more jalapeño. You can also try serrano or habanero peppers for a kick. If you prefer mild flavors, skip the spice or use sweet bell peppers. Finding the right balance can make your salsa truly unique. Get creative with peach salsa by mixing seasonal ingredients. In summer, try adding fresh corn or zucchini. In fall, consider apples or pears. These fruits not only add flavor but also change the texture. You can also explore global takes on peach salsa. For a Mexican twist, add lime zest and cumin. If you want an Asian flair, try adding ginger and sesame oil. Each variation tells a different story and makes your salsa special. For a full recipe, check out the Peachy Fiesta Salsa. It uses classic ingredients but leaves room for your own twist. Enjoy the fun of making peach salsa your way! To keep your peach salsa fresh, store it in the refrigerator. Use an airtight container. This helps keep moisture in and air out. Make sure to consume it within 3 to 5 days for the best taste. If you want to save some for later, freezing is a great option. Pour the salsa into a freezer-safe bag. Remove as much air as possible before sealing. You can freeze it for up to three months. Homemade peach salsa usually lasts about a week in the fridge. After that, you may notice changes in taste and texture. If it looks watery or separates, it might be time to throw it out. Trust your senses. If it smells sour or off, do not eat it. Always check for mold or discoloration. Keeping an eye on these signs ensures you enjoy tasty and safe peach salsa. Can I use canned peaches instead of fresh ones? You can use canned peaches, but fresh peaches taste much better. Canned peaches may have added sugar and syrup. This can change the flavor of your salsa. If you choose canned, look for ones in juice, not syrup. How can I adjust the spiciness of my salsa? To adjust spiciness, you can add more or less jalapeño. Remove the seeds for less heat. You can also add a milder pepper like a bell pepper. If it’s too spicy, mix in more diced peaches to cool it down. Can peach salsa be made ahead of time? Yes, you can make peach salsa ahead of time. It tastes even better after resting in the fridge. Make it up to a day before serving to let flavors blend. Just remember to stir it well before serving. Peach salsa is not only tasty, but it is also healthy. A serving has about 45 calories. It has low fat, usually less than 1 gram. The main ingredients are fresh fruits and veggies, which pack nutrients. Health benefits of the ingredients used: - Peaches: Rich in vitamins A and C. They help with skin health. - Bell peppers: High in vitamin C, good for your immune system. - Onions: Can help lower blood pressure and improve heart health. - Cilantro: May help reduce inflammation and has antioxidants. Enjoying peach salsa gives you fresh flavor and great health benefits, making it a perfect summer delight! You can find the full recipe in the earlier section for a delicious experience. This blog post covered how to make delicious peach salsa. We discussed the best ingredients, like ripe peaches and fresh produce, to enhance flavor. You learned preparation techniques and tips for texture. Selecting the right peaches is key, while we explored serving suggestions too. Variations let you experiment with flavors and ingredients. In the end, peach salsa can elevate many dishes and fit any season. You now have the knowledge to create fresh, tasty salsa. Enjoy making your own unique version!

Peach Salsa Fresh and Flavorful Summer Delight

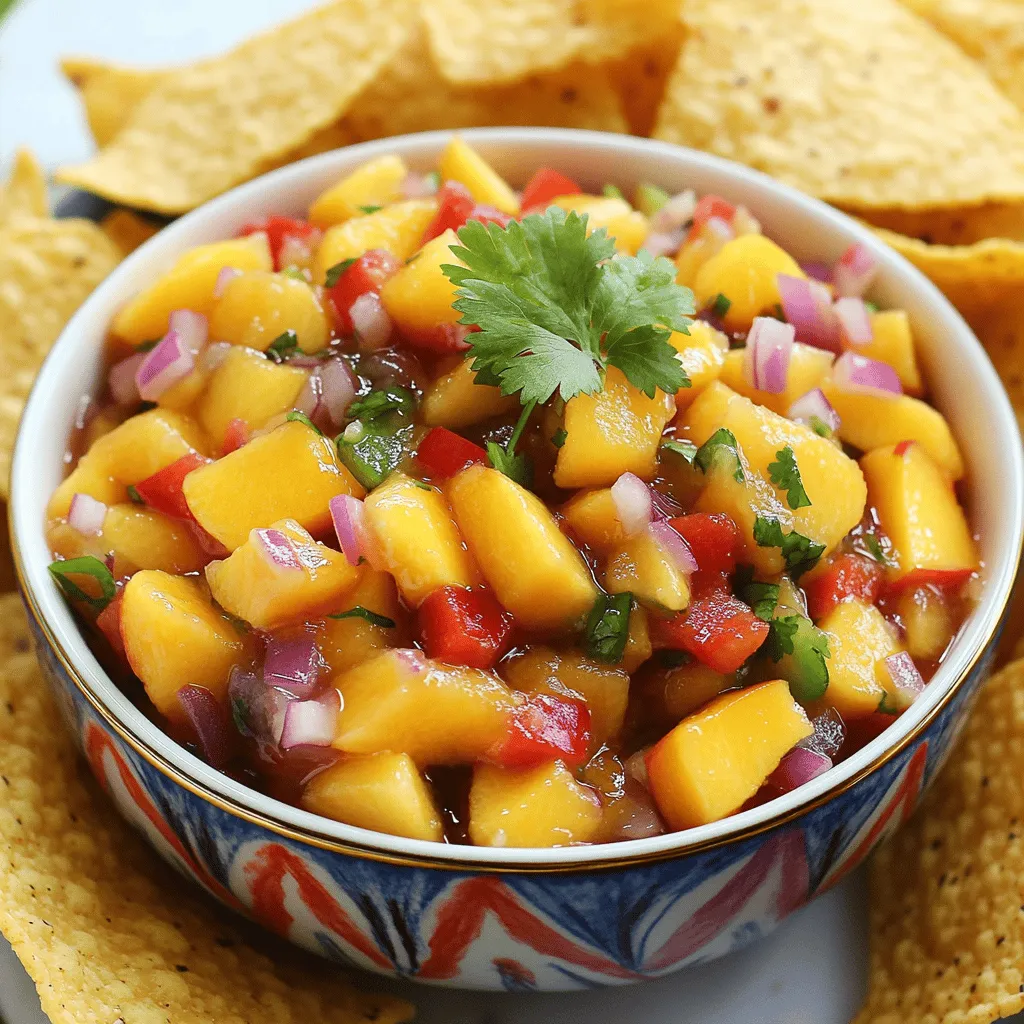
Summer is here, and there’s no better way to celebrate than with a fresh batch of peach salsa! This bright

To make a tasty sweet potato hash, you need key items. Here’s what to gather: - 2 medium sweet potatoes, peeled and diced - 1 red bell pepper, chopped - 1 yellow bell pepper, chopped - 1 small red onion, diced - 2 cloves garlic, minced - 1 teaspoon smoked paprika - 1 teaspoon ground cumin - ½ teaspoon cayenne pepper (optional, for heat) - 3 tablespoons olive oil - Salt and black pepper to taste - 1 cup kale, chopped (or spinach) - 4 large eggs (optional) - Fresh cilantro or parsley for garnish These ingredients blend well together to create a hearty meal. Sweet potatoes give a sweet taste. Bell peppers add crunch and color. Onions and garlic bring strong flavors. You can add more items for extra flavor and nutrition. Consider these options: - Chopped mushrooms for earthiness - Spinach instead of kale for a milder taste - Diced tomatoes for juiciness - Black beans for protein - Avocado slices for creaminess These extras make your hash even better. You can mix and match based on what you have. Sweet potato hash is not just tasty; it’s also good for you. Here’s a quick look at the nutrition: - High in fiber, which helps digestion - Packed with vitamins A and C from sweet potatoes and peppers - Contains healthy fats from olive oil - Provides protein from eggs, if added This dish can fit well into a balanced diet. Enjoy it as breakfast, lunch, or dinner. You can find the full recipe [here]. To start, gather all your ingredients. You need: - 2 medium sweet potatoes, peeled and diced - 1 red bell pepper, chopped - 1 yellow bell pepper, chopped - 1 small red onion, diced - 2 cloves garlic, minced - 1 teaspoon smoked paprika - 1 teaspoon ground cumin - ½ teaspoon cayenne pepper (optional, for heat) - 3 tablespoons olive oil - Salt and black pepper to taste - 1 cup kale, chopped (or spinach) - 4 large eggs (optional) - Fresh cilantro or parsley for garnish Make sure your sweet potatoes are cut into even pieces. This helps them cook at the same rate. Dice the onions and peppers small so they blend well in the hash. 1. Heat olive oil in a large skillet over medium heat. 2. Add the sweet potatoes and season them with salt and black pepper. Cook for about 10-12 minutes. Stir occasionally until they soften and turn golden. 3. Next, add the onions and garlic. Sauté for 3-4 minutes until the onion is clear. 4. Now, stir in the bell peppers, smoked paprika, ground cumin, and cayenne pepper if you like heat. Cook for another 5-7 minutes until the peppers are soft. 5. Add the kale and mix it in. It will wilt quickly, about 2 minutes. Taste and adjust seasoning as needed. 6. If you want eggs, make four wells in the hash. Crack an egg into each well. Cover the skillet and let them cook. Aim for about 5-6 minutes for runny yolks. 7. Once cooked, gently stir the hash. Be careful not to break the yolks if you cooked eggs. 8. Serve hot and garnish with chopped cilantro or parsley. Sweet potato hash is great for breakfast or brunch. You can serve it with toast or a side of fruit. For a heartier meal, add avocado slices on top. This dish is easy to share and looks colorful on your plate. For the full recipe, check out the main section. Enjoy every bite! To cook sweet potatoes just right, start by peeling and dicing them. Aim for small cubes, about half an inch. This size helps them cook evenly. Heat your skillet and add olive oil. When the oil is hot, toss in the sweet potatoes. Season them with salt and black pepper. Cook for 10 to 12 minutes, stirring often. Look for a golden color and softness. This method gives you that lovely texture and flavor. Seasoning can bring your sweet potato hash to life. Start with salt and black pepper to enhance the natural sweetness. Adding smoked paprika gives a nice smoky flavor. Ground cumin adds warmth and earthiness. If you like heat, sprinkle in some cayenne pepper. For a fresh touch, mix in chopped cilantro or parsley just before serving. Taste as you go, and adjust the spices to fit your palate. If you want eggs in your hash, it’s easy to cook them just how you like. After the sweet potatoes and veggies are ready, make little wells in the hash. Crack an egg into each well. Cover the skillet to keep the heat in. For runny yolks, cook for about 5 to 6 minutes. If you prefer firm yolks, let them cook a bit longer. This method makes the eggs part of the dish, adding creaminess and richness. Check the [Full Recipe] for more details and enjoy your cooking! {{image_2}} Sweet potato hash is great for vegetarians. You can make it meat-free by using more veggies. Try adding mushrooms, zucchini, or even some fresh corn for a nice crunch. Spinach is a fantastic green to mix in. It wilts quickly and adds flavor. For a cheesy touch, sprinkle some feta or goat cheese on top before serving. It melts just right. Want to add protein? Sausage and bacon both work well. They bring a savory taste. Cook them until crispy, then add them to the hash. If you prefer a plant-based option, use firm tofu. Dice it, season it, and pan-fry until golden. This adds a nice texture. You could also try tempeh for a nutty flavor. Any of these options make your meal heartier. Feel free to mix up the veggies! Broccoli, carrots, or even Brussels sprouts can add new flavors. Roasted vegetables can also add depth. If you have leftovers, chop those up. They make a great addition to your hash. You can even toss in some seasonal veggies like asparagus or butternut squash. The key is to experiment and find what you love best. Check the full recipe to see how to create your own unique twist! To store leftover sweet potato hash, let it cool first. Place it in an airtight container. It will stay fresh in the fridge for up to four days. Label the container with the date. This way, you won't forget when you made it. For the best taste, reheat your sweet potato hash on the stove. Heat a skillet over medium heat. Add a splash of olive oil to keep it moist. Stir the hash occasionally until it's hot. You can also use a microwave. Place the hash in a bowl, cover it, and heat it for 1-2 minutes. Yes, you can freeze sweet potato hash! It’s great for meal prep. Let it cool completely before freezing. Use a freezer-safe container or bag. It can last up to three months. To use, thaw it in the fridge overnight. Reheat it as mentioned above for the best flavor. For a full recipe, check out the hearty sweet potato hash. If you don't have sweet potatoes, try regular potatoes. Yukon gold or red potatoes work well. You can also use butternut squash for a sweet flavor. Other root veggies like carrots or parsnips are great too. Each choice brings its own taste and texture to your hash. Yes, you can make sweet potato hash ahead of time. Cook it fully, then cool it down. Store it in an airtight container in the fridge for up to three days. When you are ready, just reheat it on the stove. Add a splash of olive oil to revive the flavors. Sweet potato hash is healthy. Sweet potatoes are packed with vitamins A and C. They also have fiber for good digestion. Adding veggies like bell peppers and kale boosts nutrients even more. If you choose to add eggs, you get protein, too. This dish is colorful and good for your body. You can top your sweet potato hash in many ways. Avocado slices add creaminess and healthy fats. A dollop of sour cream or Greek yogurt gives tang. Crumbled feta cheese adds a nice salty touch. Fresh herbs like cilantro or parsley brighten the dish. You can even sprinkle hot sauce for a kick. For a full experience, check the Full Recipe. Sweet potato hash combines key ingredients, cooking tips, and variations. You can customize it to fit your taste. Remember, the right seasoning and cooking techniques can make a big difference. Store it properly for quick meals later. This dish is healthy and versatile, perfect for breakfast or dinner. Try different toppings to keep things exciting. With these steps, you can create a delicious hash every time. Enjoy exploring flavors and making this dish your own!

Sweet Potato Hash Flavorful and Simple Meal Idea

Are you ready to spice up your meals with a simple and tasty dish? Sweet potato hash is the perfect

When you make raspberry lemon bars, it's all about fresh and simple ingredients. Here's what you need: - 1 cup all-purpose flour - 1/2 cup powdered sugar - 1/4 teaspoon salt - 1/2 cup unsalted butter, melted - 2 large eggs - 1 cup granulated sugar - 1/4 cup fresh lemon juice (about 2 lemons) - Zest of 1 lemon - 1 cup fresh raspberries (or frozen, thawed and drained) - Extra powdered sugar for dusting (optional) Each ingredient plays a key role. The flour forms the crust, while powdered sugar makes it sweet. The butter lends richness, and the eggs help bind everything together. Fresh lemon juice gives that zesty kick. Raspberries add color and tartness, balancing the sweetness. If you want the full recipe, you can find it in the section above. This mix ensures your dessert is both bright and tasty. Enjoy gathering your ingredients! First, preheat your oven to 350°F (175°C). This step is key for even baking. Next, take an 8x8 inch baking dish and grease it. You can also use parchment paper for easy removal later. This helps keep the bars intact when you serve them. In a medium bowl, whisk together these three ingredients: - 1 cup all-purpose flour - 1/2 cup powdered sugar - 1/4 teaspoon salt Now, pour in 1/2 cup of melted unsalted butter. Mix until it looks like wet sand. Press this mixture into the bottom of your baking dish. Make sure it is even. Bake it for 15 minutes or until it turns light golden. While the crust is baking, grab a large bowl. Whisk together: - 2 large eggs - 1 cup granulated sugar - 1/4 cup fresh lemon juice (about 2 lemons) - Zest of 1 lemon Mix until smooth. Next, gently fold in 1 cup of fresh raspberries. Be careful not to mash them. You want them whole for nice bites in your dessert. Once the crust is ready, pour your raspberry lemon filling over it. Spread it out evenly. Now, return the dish to the oven. Bake for another 20 to 25 minutes. The filling should jiggle slightly in the center when done. After baking, let it cool completely in the pan. Refrigerate for at least 1 hour before slicing. Dust with powdered sugar for a lovely finish. Enjoy your fresh and tangy dessert! For more details, check the Full Recipe. To get the best texture for your raspberry lemon bars, focus on the crust and filling. For the crust, mix the flour, powdered sugar, and salt well. This mix should feel like wet sand. Press it firmly in the pan. Bake it until it is lightly golden. For the filling, whisk the eggs and sugars until smooth. Don't overmix after adding the raspberries. This keeps them whole and gives a nice bite. Both fresh and frozen raspberries work great. Fresh raspberries give a vibrant look and flavor. They hold their shape well in the filling. Frozen raspberries are convenient and often sweeter. If you use frozen, let them thaw first and drain any extra juice. This prevents a watery filling. Either way, the taste remains delicious! To make your raspberry lemon bars look stunning, chill them first. Once firm, slice them into neat squares. Place them on a decorative plate. A light dusting of powdered sugar adds a sweet touch. For extra flair, top with fresh raspberries and a sprinkle of lemon zest. This adds color and makes them pop! For the full recipe, check your notes. {{image_2}} To make gluten-free raspberry lemon bars, swap the all-purpose flour with a gluten-free blend. Look for a mix that includes xanthan gum for the best texture. The rest of the recipe stays the same. These bars will still be soft and tangy, perfect for everyone! For a vegan version, replace the eggs with flaxseed meal. Mix 1 tablespoon of flaxseed meal with 3 tablespoons of water. Let it sit for five minutes until it thickens. Use vegan butter in place of regular butter. This keeps the bars rich and creamy without any animal products. You can add a twist to your bars with fun flavors. Try mixing in: - Coconut: Add shredded coconut to the crust for a chewy texture. - Mint: Fold in fresh mint leaves with the raspberries for a refreshing touch. - Chia Seeds: Mix in chia seeds for extra health benefits and a little crunch. Feel free to experiment with these ideas. Each variation brings a new taste to this classic dessert. For the full recipe, check the earlier section. After making your raspberry lemon bars, let them cool completely. Place them in an airtight container. Store them in the fridge for up to five days. This keeps them fresh and tasty. If you want to serve them cold, chill for at least one hour before cutting. You can freeze raspberry lemon bars for longer storage. Cut them into squares first. Wrap each piece tightly in plastic wrap. Then, place them in a freezer-safe bag. They can last up to three months in the freezer. When you're ready to enjoy, thaw them in the fridge overnight. To keep your bars fresh, avoid exposing them to air. Always use an airtight container. If you added powdered sugar on top, wait until serving time to dust. This way, the sugar will stay fluffy and not dissolve. For the best taste, eat them within the first few days. For the full recipe, refer to the earlier section. Yes, you can use other fruits. Blueberries, strawberries, or blackberries work great. Just swap them for the raspberries. Each fruit brings its own flavor. This is a fun way to make the bars your own. The bars are done when the filling is set. It should jiggle slightly in the center. A toothpick inserted in the filling should come out clean. Keep an eye on the edges; they will look firmer. Absolutely! You can make these bars one or two days in advance. Just keep them in the fridge. This allows the flavors to mix well, making them even tastier! To cut the bars, use a sharp knife. Chill the bars in the fridge before cutting. This helps them hold shape better. Wipe the knife with a damp cloth between cuts for clean edges. These raspberry lemon bars last about a week in the fridge. Store them in an airtight container. For longer freshness, consider freezing them. Just thaw before serving for the best taste. You learned how to make delicious raspberry lemon bars. We covered the key ingredients, step-by-step instructions, and helpful tips. Variations for different diets were also shared. Proper storage methods keep your bars fresh longer. Remember, making these treats is fun and easy. Don’t be afraid to experiment with flavors. Enjoy sharing your sweet creation with friends and family!

Raspberry Lemon Bars Fresh and Tangy Dessert Treat

Are you ready for a dessert that bursts with bright flavors? My Raspberry Lemon Bars are the perfect mix of

To make these tasty Buffalo Cauliflower Tacos, you need a few simple items. Here’s what you should gather: - 1 medium cauliflower head, cut into bite-sized florets - 1 cup all-purpose flour - 1 cup milk (or plant-based milk) - 1 teaspoon garlic powder - 1 teaspoon onion powder - ½ teaspoon paprika - Salt and pepper to taste - 1 cup buffalo sauce - 8 small corn or flour tortillas - 1 cup shredded lettuce - ½ cup diced tomatoes - ½ cup crumbled blue cheese (or dairy-free alternative) - ¼ cup chopped cilantro - 1 avocado, sliced - Lime wedges for serving These ingredients come together to create a meal that bursts with flavor. The cauliflower becomes crispy and spicy, making it the star of your taco. You can make your tacos even better with some fun garnishes. Here are some ideas to try: - Sliced jalapeños for extra heat - Sour cream or a vegan alternative for creaminess - Fresh lime juice for a zesty kick - Sliced radishes for crunch - Extra cilantro for fresh flavor These toppings add color and taste, making your tacos look and taste amazing. If you can’t find some ingredients, don't worry. Here are some easy swaps: - Use chickpea flour instead of all-purpose flour for a gluten-free option. - Almond milk or soy milk can replace regular milk. - If you don’t like buffalo sauce, try barbecue sauce for a sweeter flavor. - Use feta cheese instead of blue cheese if you prefer. These substitutes help you make the recipe your own while keeping it delicious. You can find the Full Recipe to see how everything comes together beautifully. Start by preheating your oven to 425°F (220°C). This will help the cauliflower get crispy. Next, line a baking sheet with parchment paper. This makes clean-up easy. In a mixing bowl, whisk together the flour, milk, garlic powder, onion powder, paprika, salt, and pepper. The batter should be thick but pourable. It should coat the florets well. Dip each cauliflower floret into the batter. Make sure they are fully coated. Place them on the baking sheet in a single layer. Bake for 25 to 30 minutes. Flip the florets halfway through for even cooking. They should turn golden brown and crispy. Once done, take them out and toss the florets in the buffalo sauce until they are well coated. This step brings the heat and flavor to the dish. To make the tacos, warm the tortillas in a dry skillet over medium heat. This will make them soft and easier to fold. Place a generous amount of buffalo cauliflower in the center of each tortilla. Add shredded lettuce, diced tomatoes, crumbled blue cheese, and avocado slices on top. Finally, garnish with chopped cilantro. Serve with lime wedges for a fresh touch. For the full recipe, check out the detailed instructions. To boost the taste of your tacos, add spices. You can mix in cumin or chili powder. These spices add warmth and depth. Try marinating the cauliflower in buffalo sauce for a few hours. This step infuses the cauliflower with more flavor. If you like heat, add more buffalo sauce or a dash of hot sauce. Pair it with a squeeze of lime for a fresh kick. Fresh herbs like cilantro or parsley also brighten up the dish. To achieve that perfect crunch, ensure your cauliflower is dry before battering. Excess moisture can lead to soggy florets. Bake at a high temperature to get a crispy exterior. Flipping the cauliflower halfway through cooking helps it brown evenly. For extra crunch, consider a second coating of batter. You can also try adding breadcrumbs to the batter for a crunchier texture. Let the cauliflower cool slightly before tossing it in the buffalo sauce. You can make this dish healthier by using whole wheat flour. This adds fiber and nutrients. Swap out regular milk for almond or oat milk if you prefer dairy-free options. Consider using less buffalo sauce or a lighter version to cut down on calories. Load up your tacos with fresh veggies like spinach, bell peppers, or corn. These additions boost nutrition and add color. You can even skip the cheese or use a low-fat alternative. For a lighter meal, serve with a side salad instead of tortillas. {{image_2}} You can easily make gluten-free Buffalo cauliflower tacos. Simply swap the all-purpose flour for a gluten-free blend. This change keeps the batter tasty and crispy. You can also use gluten-free tortillas. Many brands now offer soft corn tortillas that are both delicious and gluten-free. If you want to make these tacos vegan, just replace the milk with plant-based milk. Almond or oat milk works well. For the blue cheese, try a dairy-free alternative. You can also leave it out if you prefer. The other toppings, like lettuce and tomatoes, add great flavor without any dairy. Experimenting with sauces can elevate your tacos. While buffalo sauce is a favorite, try using barbecue sauce or a chipotle sauce for a smoky twist. You can also add toppings like pickled onions or jalapeños for more flavor. Fresh herbs, like parsley or mint, give a nice touch too. Get creative and find what you love! Check the Full Recipe for more ideas. After enjoying your tasty Buffalo Cauliflower Tacos, you may have some left. Store the leftovers in an airtight container. Place them in the fridge for up to three days. Keep the fillings separate from the tortillas for the best taste. To reheat your tacos, use a skillet over medium heat. Warm the tortillas for about 30 seconds on each side. For the cauliflower, add it to the skillet for four to five minutes until hot. This helps keep everything crispy and fresh. You can freeze the buffalo cauliflower for later use. First, let the cauliflower cool completely. Place it in a freezer-safe bag or container. Store it in the freezer for up to three months. When ready to enjoy, thaw it overnight in the fridge before reheating. You can serve many tasty sides with Buffalo cauliflower tacos. Some great options include: - Mexican rice - Refried beans - Corn salad - Fresh guacamole - Salsa or pico de gallo These sides will add flavor and texture to your meal. You could also serve a simple green salad for some crunch. If you want to change the spice level, you have a few choices. To make it milder, use less buffalo sauce. You can also mix in some honey or maple syrup to tone it down. If you like more heat, try adding extra buffalo sauce or a sprinkle of cayenne pepper to the batter. Yes, you can prepare the full recipe ahead of time. You can make the buffalo cauliflower and store it in the fridge for up to three days. Reheat it in the oven to keep it crispy. You can also prepare the toppings and tortillas in advance. Just warm the tortillas before serving for the best taste. We covered everything you need for amazing Buffalo Cauliflower Tacos. You learned about key ingredients, optional toppings, and substitutes. Step-by-step, I showed you how to prepare, cook, and assemble them. With tips for flavor, crunch, and health, you'll enjoy every bite. Explore variations, storage methods, and answers to common questions. Enjoy these tacos for any meal. You will impress friends and family with your cooking skills!

Buffalo Cauliflower Tacos Flavorful and Easy Meal

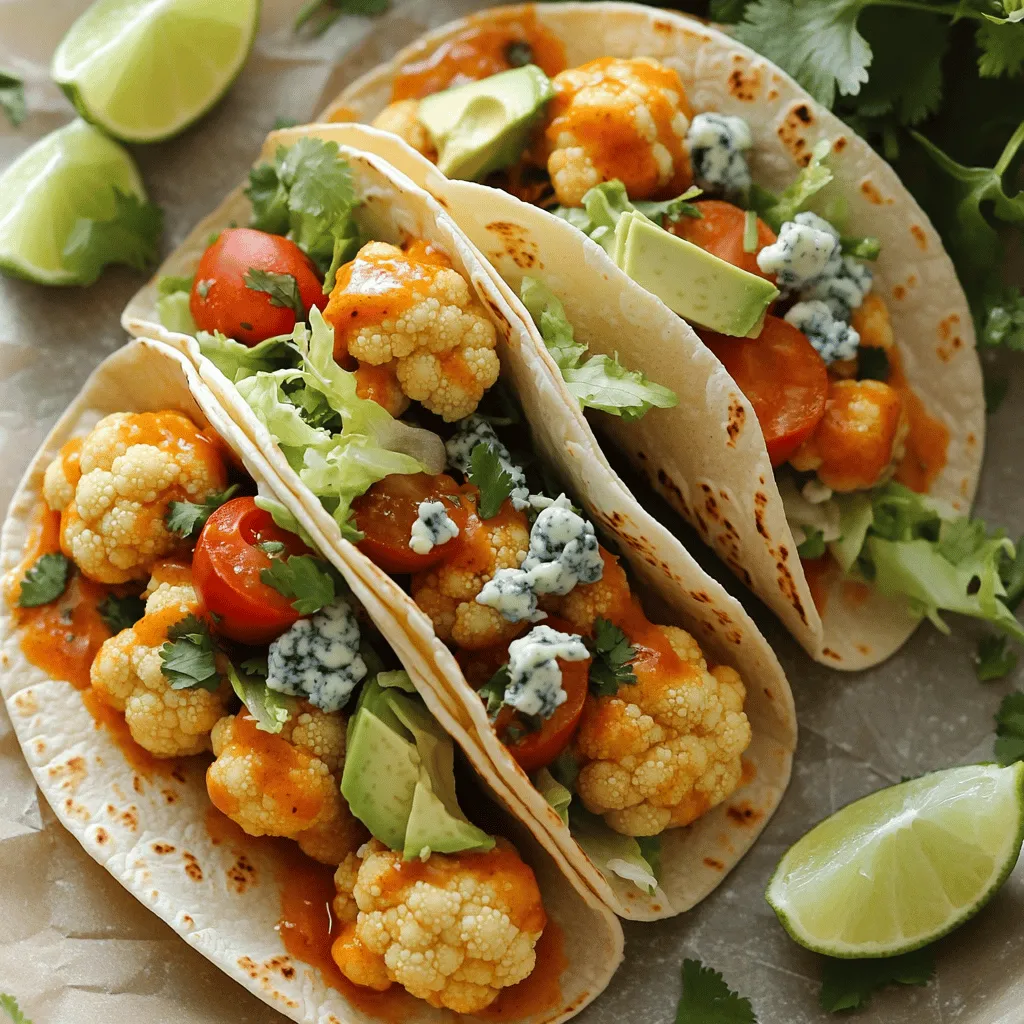
Looking for a flavorful and easy meal? Buffalo cauliflower tacos are the answer! Packed with spices and crunch, they are

To make crispy baked chickpeas, gather these main ingredients: - 1 can (15 oz) chickpeas, drained and rinsed - 1 tablespoon olive oil - 1 teaspoon garlic powder - 1 teaspoon smoked paprika - 1/2 teaspoon ground cumin - 1/2 teaspoon sea salt - 1/4 teaspoon black pepper These items create a simple and tasty base. The chickpeas give protein and fiber. Olive oil helps them crisp up. Garlic powder and smoked paprika add great flavor. Cumin and spices give a warm, earthy taste. You can switch things up with these optional ingredients: - 1/4 teaspoon cayenne pepper for spice - A sprinkle of fresh herbs for garnish Adding cayenne pepper gives a spicy kick. Fresh herbs like parsley or cilantro can brighten the dish. Feel free to mix your favorite spices, such as Italian herbs or curry powder. Each serving of crispy baked chickpeas has: - Calories: 150 - Protein: 7g - Carbohydrates: 22g - Fiber: 6g - Fat: 5g These numbers can vary based on your choices. This snack is healthy and filling. It’s perfect for when you need a crunchy treat. You can enjoy it without guilt. For the full recipe, refer to the [Full Recipe]. Start with a can of chickpeas. Drain and rinse them well. This step helps remove excess sodium. Then, pat the chickpeas dry using paper towels. It's crucial to remove all moisture. Wet chickpeas won't get crispy when baked. In a mixing bowl, combine the dried chickpeas with olive oil. Add garlic powder, smoked paprika, ground cumin, sea salt, and black pepper. If you like heat, toss in some cayenne pepper. Mix everything well. Ensure each chickpea gets coated in the tasty spices. This step brings out the best flavors. Preheat your oven to 400°F (200°C). Line a baking sheet with parchment paper. Spread the seasoned chickpeas in a single layer. Avoid overcrowding; this helps them bake evenly. Bake for 25-30 minutes. Shake the pan halfway to turn the chickpeas. They should be golden brown and crispy when done. Once out of the oven, let them cool. They will get even crispier as they cool. Enjoy your snack! For the full recipe, check the main article. To make your chickpeas extra crispy, start with dry chickpeas. After draining and rinsing, use paper towels to pat them dry. This step is very important. You want to remove as much moisture as possible. If you skip this, your chickpeas may turn out soggy. When you coat them with olive oil and spices, do so evenly. Spread them out on the baking sheet in a single layer. Avoid overcrowding the pan. This allows hot air to circulate around each chickpea, helping them crisp up well. A common mistake is not drying the chickpeas enough. If they are wet, they won’t become crispy. Another mistake is using too much oil. Stick to one tablespoon. Too much oil can lead to greasy chickpeas. Also, don’t forget to shake the pan halfway through baking. This ensures even cooking. Lastly, keep an eye on the time. Chickpeas can go from perfect to burnt quickly. Crispy baked chickpeas are great on their own. You can also serve them as a snack with your favorite dip. Try pairing them with hummus or yogurt sauce. They also make a crunchy topping for salads or soups. For a fun twist, mix in different spices. You can add cayenne for heat or herbs for freshness. Get creative and enjoy your crispy snack! Check out the Full Recipe for more details. {{image_2}} You can change the flavor of crispy baked chickpeas easily. For a spicy kick, add cayenne pepper or chili powder. A bit of heat makes snacking fun! If you prefer herbs, try dried oregano or thyme. These add a fresh taste, making them great for any dish. Want something sweet? Mix in a little cinnamon and sugar. Sweet chickpeas make a unique treat! While chickpeas are great, you can use other beans too. Canned black beans or white beans work well. Just rinse and dry them like chickpeas. Each bean has its own flavor and texture. This makes your snacks more varied and exciting. Crispy chickpeas are not just a snack! You can add them to salads for crunch. They also make a great topping for soups. Try mixing them into rice or grain bowls for added protein. The possibilities are endless. They can transform any meal into something special. For the full recipe, check out the detailed steps above! To keep your crispy baked chickpeas fresh, store them in an airtight container. This will help lock in their crunch. Make sure they are completely cool before sealing. If not, moisture will make them soggy. You can keep them on your counter for up to three days. If you want them to last longer, consider freezing them. To bring back the crunch in leftover chickpeas, you can easily recrisp them. Preheat your oven to 400°F (200°C). Spread the leftover chickpeas on a baking sheet. Bake them for about 10 minutes. Check them often to prevent burning. They will be crispy again and great for snacking! You can freeze crispy baked chickpeas, but they may lose some crispiness. Place them in a freezer-safe bag or container. Make sure to remove as much air as possible. They can last up to three months in the freezer. When you’re ready to eat them, let them thaw in the fridge, then recrisp in the oven. This method keeps the flavor intact for a tasty snack later! For the full recipe, check out the Crispy Baked Chickpeas section. You can use any oil you like. Avocado oil works well. Coconut oil adds a subtle sweetness. Sunflower oil is a good choice too. These oils will help your chickpeas crisp up nicely. Just make sure the oil you choose has a high smoke point. Yes, you can. If you prefer plain chickpeas, just use oil and salt. The natural flavor of chickpeas shines through. You might want to add some herbs after baking for extra taste. Try fresh parsley or a squeeze of lemon juice. Watch for a golden-brown color. They should feel hard and crunchy. If they look dry and sound crisp when you shake them, they’re ready. Let them cool a bit as they will get crisper. Enjoy them right after baking for the best taste. For more details, check the [Full Recipe]. Crispy baked chickpeas are easy to make and full of flavor. We covered the ingredients needed and explored how to prepare them for baking. You learned tips for crispiness and how to avoid mistakes. Variations let you spice things up or change the beans. Proper storage helps keep them fresh for later. Enjoy these crunchy snacks in your meals or as a treat. Dive into this recipe and make your own healthy, tasty chickpeas!

Crispy Baked Chickpeas Flavorful and Healthy Snack

Looking for a tasty snack that’s both crunchy and healthy? I’ve got just the thing: Crispy Baked Chickpeas! These little

- 8 ounces elbow macaroni or any pasta of choice - 1 pound ground beef or ground turkey - 1 packet taco seasoning - 1 cup salsa - 1 can black beans, drained and rinsed - 1 cup corn kernels - 1 cup diced tomatoes - 2 cups shredded cheddar cheese - Chopped green onions - Cilantro - Sour cream When I create a Cheesy Taco Pasta Bake, I always start with the main ingredients. The pasta is the base, and I love elbow macaroni for its shape. Ground beef or turkey adds protein and heartiness. The taco seasoning gives it that familiar flavor we all love. I also like to use salsa for that extra kick. Next, I mix in a few additional ingredients. Black beans add fiber and texture. Corn kernels bring sweetness and color. Diced tomatoes keep it juicy, and cheddar cheese melts beautifully on top. For garnishes, I recommend green onions and cilantro. They add freshness and make the dish look appealing. A dollop of sour cream can cool down the spice and add creaminess. You can find the full recipe with all the details you need to make this dish. - Preheat the oven to 350°F (175°C). This step is important for even cooking and melting the cheese. - Cook the pasta until al dente. Follow the package instructions. This means the pasta should be firm but not hard. - Brown the ground meat in a skillet. Use medium heat and break the meat apart with a spoon. Cook until it's no longer pink. - Add the vegetables, seasonings, and combine. Stir in onion and garlic. Cook until the onion turns soft. Then add the taco seasoning, salsa, black beans, corn, and diced tomatoes. Mix it all well. Heat for a few minutes so everything warms up. - Combine pasta with filling and transfer to a baking dish. In a bowl, mix the cooked pasta with the meat mixture. Fold in one cup of cheddar cheese and sour cream until it's all blended. - Top with cheese and bake. Pour the mixture into a greased baking dish. Spread it evenly. Sprinkle the remaining cheese on top. Bake for 25-30 minutes. Look for bubbly and slightly golden cheese. This process is simple and makes a great meal. For the full recipe, check the link above. Enjoy your cooking! - How to avoid overcooking pasta: To keep your pasta firm, cook it until al dente. This means it should still have a slight bite. Follow the package instructions, but check it a minute or two early. Drain it right away to stop the cooking process. - Tips for browning meat evenly: Use a large skillet for even cooking. Break the meat into small pieces as it cooks. Avoid overcrowding the pan; it can steam instead of brown. Stir often to get all sides nice and brown. - Suggestions for additional spices or herbs: Add garlic powder or onion powder for extra flavor. Fresh cilantro and lime juice can brighten the dish. Try adding smoked paprika for a deeper taste. - How to customize the heat level with salsa: Choose salsa that matches your taste. If you like it spicy, pick a hot salsa. For a milder version, go for medium or mild. You can also add sliced jalapeños for more heat. - Best ways to garnish the dish: Top your bake with chopped green onions and cilantro. A dollop of sour cream adds creaminess. You can also sprinkle some crushed tortilla chips for crunch. - Serving suggestions: Serve it hot right from the oven. Pair it with a fresh salad or some corn on the side. This dish is great for family dinners or potlucks. For the complete recipe, check the Full Recipe section. {{image_2}} You can switch up the meat in this dish. Ground chicken or ground pork work well. They add a nice flavor while keeping it lean. If you want a veggie option, use meat substitutes like lentils or plant-based crumbles. They soak up the spices and add great texture. The type of pasta can change this dish. Elbow macaroni is classic, but you can use penne or rotini. For a gluten-free option, choose rice or quinoa pasta. Both are tasty and hold the sauce well. Want some heat? Add diced jalapeños or a splash of hot sauce. For a Mediterranean twist, try adding feta cheese and olives. The flavors blend well and create a new dish. Get creative with your spices, and don’t be afraid to mix it up. This recipe is fun to customize! You can find the full recipe [here](#). To keep your Cheesy Taco Pasta Bake fresh, cool it first. Place it in an airtight container. This will help keep the flavors intact. Store it in the fridge for up to three days. Use glass or plastic containers with tight lids. These containers are easy to stack and save space. You can freeze the Cheesy Taco Pasta Bake for later. First, let it cool completely. Then, place it in a freezer-safe container. Make sure to leave some space at the top for expansion. Wrap it tightly with plastic wrap before sealing. When you’re ready to eat, thaw it in the fridge overnight. Reheat in the oven or microwave until hot. In the fridge, the Cheesy Taco Pasta Bake lasts about three days. In the freezer, it can stay good for up to three months. Check for signs of spoilage, like a sour smell or mold. If you see any, it’s best to throw it away. Enjoy your meal without worry! Can I make this dish ahead of time? Yes, you can make Cheesy Taco Pasta Bake ahead of time. Just prepare the dish, cover it, and store it in the fridge. When you are ready, bake it as directed. This makes it easy for busy nights. What are some side dishes that go well with it? Serve this dish with a fresh green salad or tortilla chips. You can also add some guacamole or a side of Mexican rice. These options balance the meal and add more flavor. Is Cheesy Taco Pasta Bake suitable for meal prep? Yes, this dish works great for meal prep. It keeps well in the fridge and reheats nicely. Portion it out for easy lunches or dinners. Can I make it dairy-free or gluten-free? You can make this dish dairy-free by using dairy-free cheese and sour cream. For gluten-free, choose gluten-free pasta and check labels on other ingredients. This way, everyone can enjoy it! What should I do if it’s too dry? If your pasta bake is too dry, add a splash of salsa or broth before baking. Mix it in gently. This adds moisture and keeps it creamy. How can I add more flavor? Boost the flavor by adding extra spices, like cumin or paprika. You can also mix in jalapeños for heat or fresh herbs like cilantro. These simple tweaks will enhance the taste. You now know how to make a tasty Cheesy Taco Pasta Bake. We covered the main ingredients, cooking steps, and tips for the best flavor. Remember, this dish is easy to customize. You can switch meats, try different pasta, and adjust spices to suit your taste. Plus, leftovers can be stored or frozen for later. Get creative and enjoy the process! This recipe is sure to please everyone at your table. Happy cooking!

Cheesy Taco Pasta Bake Simple and Satisfying Meal

Welcome to your new favorite dish: the Cheesy Taco Pasta Bake! This simple and satisfying meal combines the fun of

Older posts
Newer posts
← Previous Page1 … Page57 Page58 Page59 … Page67 Next →

dsad

© 2025 My Saved Recipe • Built with GeneratePress

Our Policies

  • Copyright Policy
  • Cookie Policy
  • GDPR Policy
  • Privacy Policy
  • Disclaimer
  • Terms Of Use

More Information

  • Home
  • About
  • Contact
  • Appetizers
  • Dessert
  • Dinner
  • Drinks
©2025, My Saved Recipe About Back To Top