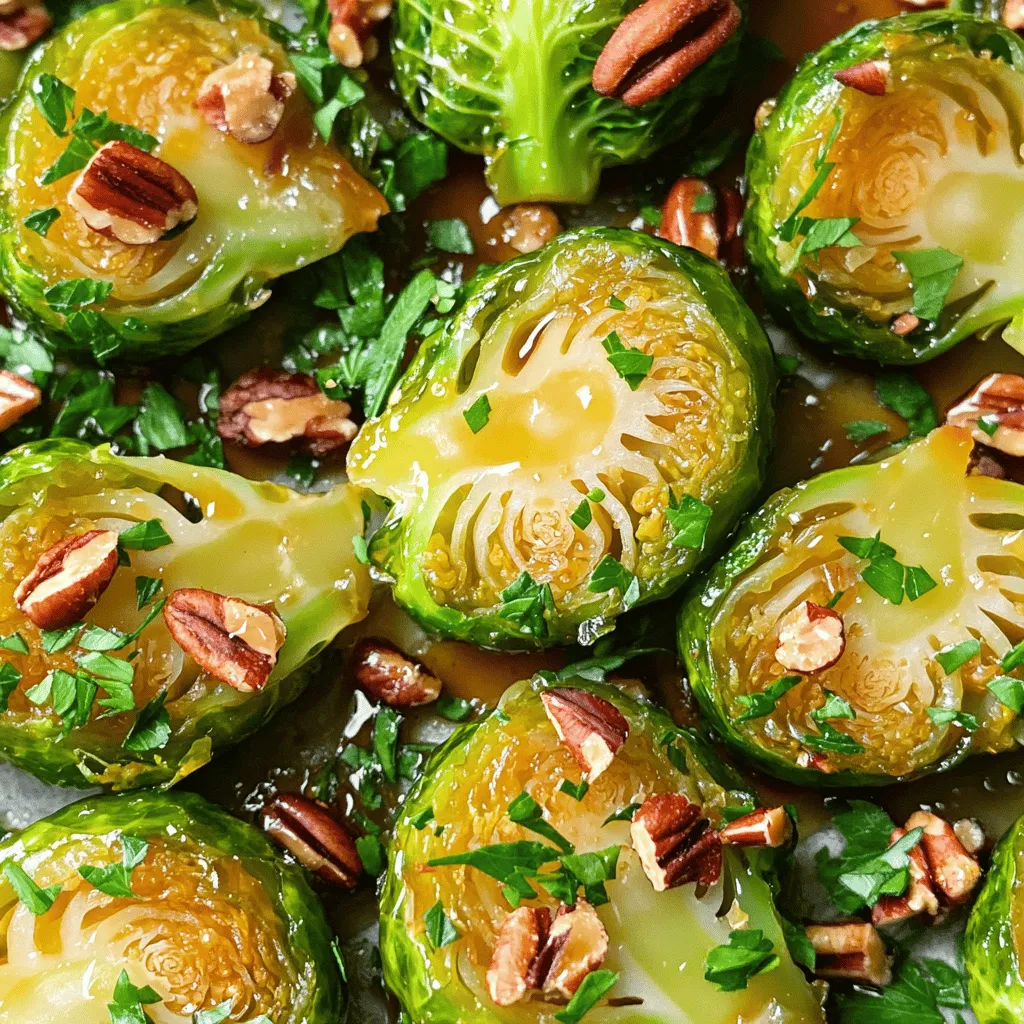
Skip to content
DisclaimerTerms Of UseGDPR PolicyCookie Policy

My Saved Recipe

  • Home
  • Drinks
  • Appetizers
  • Dinner
  • Dessert
  • About
  • Contact
  • Privacy Policy
DisclaimerTerms Of UseGDPR PolicyCookie Policy

Savannah

- 1 pound Brussels sprouts, trimmed and halved - 3 tablespoons olive oil - 4 cloves garlic, minced - Zest of 1 lemon - Juice of 1 lemon - 1 teaspoon honey - Salt and pepper to taste - 1/4 cup grated Parmesan cheese (optional) - Fresh parsley, chopped for garnish Using fresh Brussels sprouts is key. Look for tight, green heads. Avoid any yellow or wilted leaves. Fresh garlic adds a punch to the dish. Choose firm cloves. For the olive oil, opt for extra virgin. It enhances flavor and gives a nice finish. If you prefer, you can swap out honey for maple syrup to keep it vegan. For dairy-free options, skip the Parmesan cheese. You can add nutritional yeast instead for a cheesy flavor without dairy. If Brussels sprouts are not your favorite, try using cauliflower or green beans. Both will roast beautifully with the same flavor blend. First, gather your ingredients. You need 1 pound of Brussels sprouts, olive oil, garlic, lemon zest, lemon juice, honey, salt, and pepper. If you want, you can add Parmesan cheese and parsley. Trim and halve the Brussels sprouts. This helps them cook evenly. Mince the garlic. Zest and juice the lemon. Mixing these ingredients will give your dish a bright flavor. Now, preheat your oven to 400°F (200°C). In a large bowl, toss the Brussels sprouts with olive oil, minced garlic, lemon zest, lemon juice, honey, salt, and pepper. Make sure every piece gets coated. This makes them tasty! Spread the Brussels sprouts on a baking sheet. Keep them in a single layer. Roast them for about 20-25 minutes. Stir them halfway through cooking for even browning. If using cheese, add it in the last 5 minutes. This gives it a nice melt. When they look golden-brown, they are ready. Let the Brussels sprouts cool for a minute. Then, transfer them to a rustic bowl. For an extra touch, drizzle some lemon juice on top. You can also add lemon wedges on the side. Chopped parsley makes a nice garnish. This dish not only looks good but tastes amazing too. For the full recipe, check back for more details. To get that perfect crispness, start with dry Brussels sprouts. Moisture makes them soggy. After washing, pat them dry with a towel. Use enough olive oil for a nice coating. This helps to crisp them up in the oven. Spread the sprouts in a single layer on the baking sheet. This allows hot air to circulate around them. Stir halfway through roasting to ensure even browning. To boost flavor, add fresh herbs like thyme or rosemary. These herbs add a lovely aroma. You can also mix in red pepper flakes for a spicy kick. For a sweet twist, try adding a dash of balsamic vinegar. Another option is to sprinkle some nuts, like walnuts, right before serving. These little changes can make a big difference. One common mistake is overcrowding the baking sheet. This traps steam and makes the sprouts mushy. Make sure they have space to breathe. Another error is not using enough seasoning. Salt and pepper enhance all the flavors, so don’t skip them. Lastly, keep an eye on cooking time. Over-roasting can turn them too dark and bitter. Aim for golden-brown for the best taste. For the full recipe, check the [Full Recipe]. {{image_2}} You can make this dish even more colorful and tasty by adding other veggies. Carrots, bell peppers, and red onions work well. Just chop them into similar sizes as the Brussels sprouts. Mix them in with the sprouts. This gives you more flavors and textures. You can roast them all together. Enjoy the blend of tastes! While lemon and garlic shine in this recipe, you can get creative. Try adding herbs like thyme or rosemary for an earthy twist. A pinch of red pepper flakes adds some heat if you like spice. You can even use balsamic vinegar instead of lemon juice for a sweet tang. Each change can make a new favorite dish. If you want this dish to be vegan, skip the Parmesan cheese. You can use nutritional yeast instead for a cheesy flavor. It gives a nice umami taste without dairy. Also, ensure your honey is replaced with maple syrup or agave nectar for a fully vegan version. This way, everyone can enjoy the goodness of this dish. For the full recipe, check out the details above. To store leftover Lemon Garlic Roasted Brussels Sprouts, let them cool first. Place them in an airtight container. Keep the container in the fridge. They will stay fresh for about 3 to 5 days. If you want to keep them longer, consider freezing. When you are ready to eat leftovers, preheat your oven to 350°F (175°C). Spread the Brussels sprouts on a baking sheet. Heat them for about 10 to 15 minutes. This helps them get crispy again. You can also use a microwave, but they may lose some crunch. To freeze Brussels sprouts, start by letting them cool completely. Place them in a freezer-safe bag or container. Squeeze out as much air as you can. They can last up to 3 months in the freezer. When ready to cook, thaw them overnight in the fridge. Then, reheat in the oven for best results. For the full recipe, check out the Lemon Garlic Roasted Brussels Sprouts! I roast Brussels sprouts for about 20 to 25 minutes. This time works well at 400°F (200°C). The sprouts should be golden-brown and crispy. Stir them halfway through roasting. This helps them cook evenly. Yes, you can prepare this dish ahead of time. You can wash and cut the Brussels sprouts a day before. Mix them with the garlic and lemon juice. Store them in the fridge in a covered bowl. Just roast them when you are ready to eat. Lemon Garlic Roasted Brussels Sprouts go well with many dishes. They pair nicely with roasted chicken or fish. Try them with a grain salad for a fresh touch. You can also serve them with pasta or risotto. They add a nice crunch and flavor to any meal. For the full recipe, check out the Lemon Garlic Roasted Brussels Sprouts section. This blog post covered everything you need to know about making Lemon Garlic Roasted Brussels Sprouts. We discussed ingredients, cooking steps, and tips for perfect results. You learned how to enhance flavors and avoid common mistakes. Exploring variations helps you customize your dish for different diets. Finally, we shared storage and reheating tips to enjoy leftovers. Use these insights for a delicious meal every time. Cooking should be fun, so get creative and enjoy every bite!

Lemon Garlic Roasted Brussels Sprouts Simple Delight

Are you ready to transform Brussels sprouts into a tasty treat? In this post, I will guide you through my

To create a rich and flavorful creamy garlic mushroom pasta, you will need the following ingredients: - 8 oz (225g) fettuccine pasta - 2 tablespoons olive oil - 1 tablespoon butter - 4 cloves garlic, minced - 12 oz (340g) mushrooms, sliced (such as cremini or button) - 1 cup heavy cream - 1 cup grated Parmesan cheese - 1 teaspoon dried thyme - Salt and pepper to taste - Fresh parsley, chopped (for garnish) - Optional: Crushed red pepper flakes, for a spicy kick Each of these ingredients plays a key role in building flavor. The fettuccine is the perfect base, offering a chewy texture. Olive oil and butter add richness to the dish. Garlic brings aromatic depth, while mushrooms provide umami. Heavy cream makes the sauce luxuriously creamy, and Parmesan gives a savory punch. Seasonings like thyme and pepper elevate the dish to new heights. You can find the full recipe at the end of this guide to help you put it all together! Start by boiling a large pot of water. Add a generous amount of salt. This helps flavor the pasta. When the water is at a rolling boil, add 8 oz of fettuccine pasta. Cook the pasta for about 8-10 minutes until it reaches al dente. This means it should be firm to the bite. Once done, reserve ½ cup of the pasta water. Drain the rest of the water and set the pasta aside. In a large skillet, heat 2 tablespoons of olive oil and 1 tablespoon of butter over medium heat. The butter will add flavor and richness. Once the oil is hot, add 12 oz of sliced mushrooms. You can use cremini or button mushrooms. Sauté the mushrooms for about 5-7 minutes. They should brown and release their moisture. Stir them occasionally to cook evenly. After the mushrooms are browned, stir in 4 cloves of minced garlic. Sauté for 1-2 minutes until the garlic becomes fragrant. Next, lower the heat and add 1 cup of heavy cream. Mix well to combine. Then, add 1 cup of grated Parmesan cheese and 1 teaspoon of dried thyme. Stir constantly until the cheese melts and the sauce is smooth. The sauce should be creamy and rich. Now it’s time to bring everything together. Add the cooked fettuccine to the sauce in the skillet. Toss the pasta with the sauce to coat it evenly. If the sauce is too thick, use the reserved pasta water. Add a little at a time until you reach the desired consistency. Taste the pasta and season with salt, pepper, and crushed red pepper flakes if you want some heat. Enjoy your Creamy Garlic Mushroom Pasta! For the full recipe, check out the details above. Choosing the right mushrooms For the best taste, I recommend using cremini or button mushrooms. They have a rich, earthy flavor that shines in this dish. Always choose fresh mushrooms. Check for firm caps and avoid any with dark spots. Fresh mushrooms enhance the creamy garlic sauce and add depth. Timing for sautéing Timing is key when sautéing. Start with medium heat and add the mushrooms first. Let them brown for about 5 to 7 minutes. This helps release their moisture and intensifies their taste. After browning, add the garlic. Sauté for just 1 to 2 minutes, as burned garlic can turn bitter. Presentation tips To make the dish look appealing, serve the pasta in shallow bowls. Sprinkle extra Parmesan and fresh parsley on top. This adds color and makes it look gourmet. A drizzle of olive oil can also enhance the visual appeal. Pairing with side dishes Pair this pasta with garlic bread or a simple green salad. The bread is great for scooping up the creamy sauce. A salad adds freshness and balances the richness of the pasta. Adding crushed red pepper flakes For a spicy twist, sprinkle in some crushed red pepper flakes. This adds a nice kick and balances the creaminess. Start with a small pinch, and adjust to your taste. Alternate toppings like fresh herbs You can also boost flavor by adding fresh herbs. Try basil, thyme, or chives. These herbs add brightness and fresh notes to the dish. They work well with the garlic and mushrooms, adding layers of flavor. For more details, check the Full Recipe for Creamy Garlic Mushroom Pasta. {{image_2}} If you need gluten-free options, try using gluten-free fettuccine. Many brands offer tasty pasta that cooks well. For a dairy-free version, swap heavy cream with coconut cream or a nut-based cream. These options keep the dish creamy without dairy. You can add extra protein to your dish by including chicken. Simply cook bite-sized pieces in the skillet before adding the mushrooms. Spinach is another great addition. Toss in fresh spinach when you add the garlic. It wilts nicely and adds color. If you like heat, sprinkle in crushed red pepper flakes for a spicy kick. For a milder dish, just skip the spice. These variations let you customize your Creamy Garlic Mushroom Pasta to suit your taste. Explore these options to find your favorite twist! For the complete recipe, check out the Full Recipe. To keep your creamy garlic mushroom pasta fresh, store it in the fridge. Use an airtight container. It will stay good for about 3 to 5 days. When reheating, place it in a pan over low heat. Add a splash of water or cream to help the sauce stay smooth. Stir often to heat it evenly. If you want to save some pasta for later, freezing works well. First, let the pasta cool completely. Then, transfer it to a freezer-safe container. Make sure to leave some space for it to expand. It can last up to 3 months in the freezer. When you're ready to eat, thaw it in the fridge overnight. Reheat it gently in a pan, adding a little cream or water to keep it creamy. To prevent sticky pasta, follow these tips: - Use a large pot with plenty of water. - Add salt to the water before boiling. - Stir the pasta during the first few minutes. - Drain pasta and toss it with a bit of olive oil. These steps help keep the pasta separate and prevent clumping. Yes, you can use different types of pasta! - Penne, spaghetti, or even gluten-free pasta works well. - Just adjust the cooking time based on the pasta type. - Each pasta shape adds a unique texture to the dish. Feel free to experiment with what you have on hand. Mushrooms are done when they are brown and tender. - You’ll see them shrink and release moisture. - This usually takes about 5-7 minutes over medium heat. - Stir them often for even cooking. Perfectly sautéed mushrooms add great flavor to the sauce. Creamy Garlic Mushroom Pasta can be part of a balanced meal. - It contains healthy fats from olive oil and butter. - The mushrooms add fiber and nutrients. - You can use whole-grain pasta to increase fiber. - Enjoy in moderation, and add veggies for extra nutrition. - Full Recipe for Creamy Garlic Mushroom Pasta This blog post covered how to make a delicious Creamy Garlic Mushroom Pasta. You learned about the key ingredients, step-by-step instructions, and helpful tips for the best flavor. We also explored variations and storage methods to keep your dish fresh. Remember, cooking is all about fun and creativity. Feel free to mix things up and make this recipe your own. Enjoy your cooking journey and savor each bite!

Creamy Garlic Mushroom Pasta Rich and Flavorful Meal

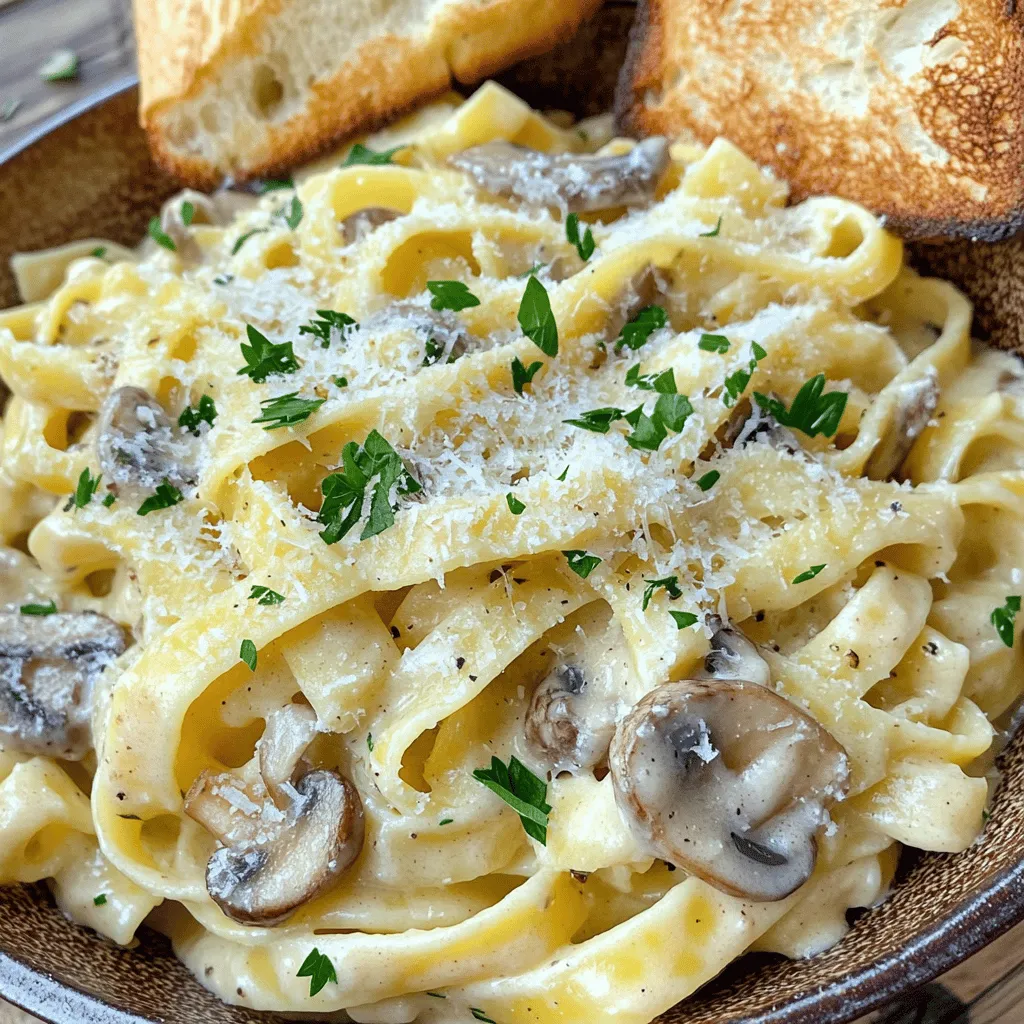
If you’re craving a rich and flavorful meal, look no further! Creamy Garlic Mushroom Pasta combines fettuccine, savory mushrooms, and

- 1 cup rolled oats - 2 cups almond milk (or milk of your choice) - 2 ripe bananas, sliced - 1/4 cup creamy peanut butter - 2 tablespoons honey or maple syrup - 1/2 teaspoon vanilla extract - 1/2 teaspoon ground cinnamon - A pinch of salt - Chopped nuts - Chia seeds - Extra banana slices - Drizzle of peanut butter This recipe for Peanut Butter Banana Overnight Oats is simple yet delicious. You need basic ingredients to make it. Rolled oats form the base. Almond milk adds creaminess. Bananas provide natural sweetness. Creamy peanut butter gives a rich flavor. Honey or maple syrup enhances the taste. For added flavor, you can mix in vanilla extract and ground cinnamon. A pinch of salt balances the sweetness. You can also get creative with your toppings. Chopped nuts add crunch. Chia seeds boost nutrition. Extra banana slices make it look pretty. A drizzle of peanut butter on top takes it up a notch. Using these ingredients, you create a filling meal. It’s perfect for busy mornings. You can find the full recipe to guide you through the steps. Enjoy this tasty dish! To start, gather your ingredients. You will need rolled oats, almond milk, peanut butter, honey or maple syrup, vanilla extract, ground cinnamon, and a pinch of salt. In a large bowl, combine these ingredients. Stir everything well. This step is very important. Mixing well ensures the peanut butter blends smoothly with the oats. You don’t want any clumps of peanut butter left behind. Next, it’s time to fold in the bananas. Take your ripe bananas and slice them. Add them to the mixture gently. This helps keep the banana pieces intact. You can save a few slices for topping later. Now, cover your bowl or container with a lid. Place it in the fridge for at least four hours or overnight. This soaking time allows the oats to soak up the milk and flavors, making them soft and tasty. When you’re ready to enjoy your oats, take them out of the fridge. Give them a good stir. If they seem too thick, add a splash of almond milk to loosen them up. Serve the oats in bowls. Top them with the reserved banana slices. You can also add chopped nuts, chia seeds, or an extra drizzle of peanut butter for more flavor. Enjoy this easy and delicious Peanut Butter Banana Overnight Oats recipe. Check out the Full Recipe for more details! You can change the sweetness of your oats. Use honey or maple syrup based on your taste. Start with two tablespoons. Adjust more or less as you like. Want to switch butters? Almond or cashew butter works great too. Each nut butter gives a different flavor. To get the right consistency, use 2 cups of almond milk. If you want it creamier, add more milk. Mix well to avoid clumps. Making ahead? Store in the fridge for up to three days. Just remember to stir before serving. Spices add a nice touch. Try adding a pinch of nutmeg or a dash of cocoa powder. These give depth to the flavor. Want more nutrition? Add chopped nuts or seeds. They make the dish crunchier and healthier. You can also mix in berries or apples for extra fun! {{image_2}} You can easily adjust this recipe to fit different diets. For a vegan option, use plant-based milk, like almond or oat milk. Replace honey with maple syrup to keep it vegan. To make it gluten-free, ensure you use certified gluten-free oats. If you need a nut-free version, try sun butter instead of peanut butter. This swap gives you a similar creamy texture without nuts. You can also use seed butter for a tasty alternative. For a fun twist, try making chocolate peanut butter banana oats. Just add cocoa powder for a rich, chocolatey taste. Mix in about 2 tablespoons of cocoa powder with the oats. You’ll love the extra flavor! Another great choice is berry banana oats. Add fresh or frozen berries, like strawberries or blueberries. They add a burst of flavor and beautiful color. Just fold them in before you let the oats sit overnight. Using seasonal fruits can really boost your oats. In summer, add fresh peaches or berries. In fall, try diced apples and a touch of nutmeg. These fruits keep your oats fresh and exciting. Spices can also add a seasonal flair. In winter, consider adding ginger or cinnamon. They warm up your oats and make them feel cozy. Mixing in seasonal ingredients keeps your breakfast creative and fun. For the complete recipe, refer to the Full Recipe section. To keep your Peanut Butter Banana Overnight Oats fresh, store them in the fridge. Use a tightly sealed container. Glass jars work well. They help keep the oats cool and tasty. Plastic containers are also fine. Just make sure they are airtight. Yes, you can freeze overnight oats! This method is great for meal prep. Use freezer-safe containers or bags. Leave some space at the top, as the oats will expand. To thaw, place them in the fridge overnight. You can also microwave them on low. Stir well after heating to avoid hot spots. In the fridge, these oats last about 3 to 5 days. Always check for signs of spoilage. If you see any mold or off smells, throw them out. Fresh oats should smell like peanut butter and bananas. Enjoy your creamy delight while it’s still fresh! Can I use instant oats instead? Yes, you can use instant oats. They will soak up liquid quickly. However, they may become mushy. Use rolled oats for a chewier texture. Can I make this recipe without bananas? Absolutely! You can swap bananas with applesauce or mashed avocado. This will change the flavor but still keep it creamy. Are peanut butter banana overnight oats healthy? Yes, they are quite healthy! They offer fiber, protein, and healthy fats. This makes them a balanced meal. What are the calorie counts and macros? One serving has about 400 calories. It contains 12g protein, 60g carbs, and 15g fat. Adjust ingredients for different macro goals. How far in advance can I prepare them? You can prepare these oats up to five days in advance. Just store them in the fridge in a sealed container. Can I double the recipe for meal prep? Yes, you can easily double the recipe. Just mix all ingredients in a larger container. Enjoy your ready-made breakfasts! This blog post shared how to make delicious overnight oats. You learned about key ingredients like rolled oats, almond milk, and bananas. You also discovered various tips for flavor and texture. Remember, you can customize your oats to fit your taste. Enjoy experimenting with toppings and flavors! These oats are a quick and healthy choice for breakfast. With the right ingredients and steps, you’ll always have a satisfying meal ready to go.

Peanut Butter Banana Overnight Oats Delightful Recipe

Looking for a quick and tasty breakfast? Peanut Butter Banana Overnight Oats are the perfect solution! With just a few

To make honey mustard chicken thighs, you need a few simple ingredients. Each one adds great flavor. Here’s what you’ll need: - 4 chicken thighs, bone-in and skin-on - 1/4 cup honey - 1/4 cup Dijon mustard - 2 tablespoons apple cider vinegar - 2 cloves garlic, minced - 1 teaspoon smoked paprika - 1 teaspoon dried thyme - Salt and pepper to taste - 2 tablespoons olive oil - Fresh parsley, chopped (for garnish) These ingredients create a dish that is sweet, tangy, and savory. The chicken thighs are juicy and full of flavor, thanks to the marinade. The honey provides sweetness, while the Dijon mustard adds a nice kick. Apple cider vinegar balances the flavors beautifully. Don’t forget to gather your spices too! Smoked paprika and dried thyme give the dish depth. The garlic adds aroma and taste. With just a few steps, you’ll have an easy dinner delight. If you want the full recipe, check the link above. To make the marinade, grab a medium bowl. In it, whisk together these ingredients: - 1/4 cup honey - 1/4 cup Dijon mustard - 2 tablespoons apple cider vinegar - 2 cloves garlic, minced - 1 teaspoon smoked paprika - 1 teaspoon dried thyme - Salt and pepper to taste Make sure everything mixes well. This sauce will give your chicken a sweet and tangy flavor. Now, take your chicken thighs, bone-in and skin-on. Place them in a large resealable bag or a shallow dish. Pour the honey mustard marinade over the chicken. Make sure each piece is fully coated. Seal the bag or cover the dish. Let the chicken sit in the fridge for at least 30 minutes. If you have time, let it marinate for up to 2 hours. This helps the flavors soak in. - Searing the chicken: Preheat your oven to 425°F (220°C). Take a large oven-safe skillet and heat 2 tablespoons of olive oil over medium-high heat. Remove the chicken from the marinade, but save that marinade for later. Place the chicken thighs skin side down in the hot skillet. Sear them for about 5 to 7 minutes until they turn golden brown. Flip them and let them cook for another 5 minutes. - Baking instructions: After searing, pour the reserved marinade over the chicken thighs. Now, transfer the skillet to your preheated oven. Bake the chicken for 25 to 30 minutes. Check the internal temperature; it should reach 165°F (75°C). The skin will be crispy and delicious. Now your honey mustard chicken thighs are ready to serve! To get that nice, crispy skin, start by patting the chicken thighs dry. This helps remove excess moisture. A hot skillet is key. Sear the thighs skin-side down for 5-7 minutes. This browns the skin and locks in flavor. After flipping, sear for another 5 minutes. Baking the chicken at 425°F (220°C) keeps the skin crisp while cooking it through. You can boost the flavor of your honey mustard chicken thighs in simple ways. Consider adding a touch of fresh herbs, like rosemary or sage. A squeeze of lemon juice brightens up the dish. You could also mix in a bit of chili powder for a spicy kick. Experimenting with these flavors elevates your meal. - Pairing with side dishes: Roasted vegetables work great with this dish. Try carrots, asparagus, or Brussels sprouts for color and crunch. A light salad with fresh greens adds a nice balance. - Presentation ideas: Serve the chicken on a large platter. Drizzle the sauce from the skillet on top. Garnish with freshly chopped parsley for a pop of color. This makes your dish look as good as it tastes! For the full recipe, check out the instructions above. {{image_2}} You can change some ingredients to suit your taste. Try using maple syrup instead of honey for a different sweet touch. For a tangy kick, swap Dijon mustard for spicy brown mustard. If you want a zestier flavor, add lemon juice or zest. Fresh herbs like rosemary or oregano can replace thyme for a unique twist. You can also use skinless chicken thighs for a lower-fat option. You have options for how to cook honey mustard chicken thighs. - Grill option: Grilling adds a lovely smoky flavor. Marinate the chicken as usual. Preheat your grill to medium heat. Cook the chicken thighs for about 6-8 minutes per side. Check for an internal temp of 165°F (75°C) to ensure they're done. - Slow cooker adaptation: This method is perfect for busy days. Simply place the marinated chicken thighs in the slow cooker. Cook on low for 6-8 hours or high for 3-4 hours. The result will be tender chicken soaked in flavor. Feel free to explore these variations to find your favorite way to enjoy honey mustard chicken thighs. You can find the full recipe above for more details! After cooking, let the honey mustard chicken thighs cool completely. Place them in an airtight container. Store in the fridge for up to three days. Make sure they are sealed well to keep their flavor. If you have some sauce left, store it separately to keep it fresh. You can freeze cooked chicken thighs for longer storage. Wrap them tightly in plastic wrap. Place the wrapped chicken in a freezer bag or container. Be sure to remove as much air as possible. They can last up to three months in the freezer. To thaw, move them to the fridge overnight before reheating. To reheat the chicken, use the oven for best results. Preheat your oven to 350°F (175°C). Place the chicken in an oven-safe dish and cover it with foil. Heat for about 15-20 minutes or until warmed through. If you want crispy skin again, remove the foil for the last 5 minutes. You can also reheat in a skillet on medium heat for about 8-10 minutes. Enjoy every bite! For the full recipe, check out the detailed instructions above. You should marinate the chicken for at least 30 minutes. This gives the flavors time to soak in. If you have more time, try marinating for up to 2 hours. The longer it sits, the bolder the taste. Yes, you can use skinless chicken thighs. They will still taste great with the honey mustard sauce. However, skin-on thighs give a nicer crunch and flavor. If you choose skinless, adjust the cooking time for best results. You can pair this dish with many sides. Here are some ideas: - Dietary considerations: If you need a gluten-free option, serve with rice or quinoa. For a low-carb meal, try steamed veggies. - Leftover usage: Leftovers are great! You can shred the chicken for salads or wraps. Add it to grain bowls or pasta for a quick meal. In this blog post, we explored making honey mustard chicken thighs. We covered key ingredients and detailed step-by-step instructions. Tips and tricks helped you achieve crispy skin and added flavor. We discussed variations, storage, and important FAQs to guide you. Cooking can be fun and simple. Enjoy experimenting with these ideas for your next meal!

Honey Mustard Chicken Thighs Easy Dinner Delight

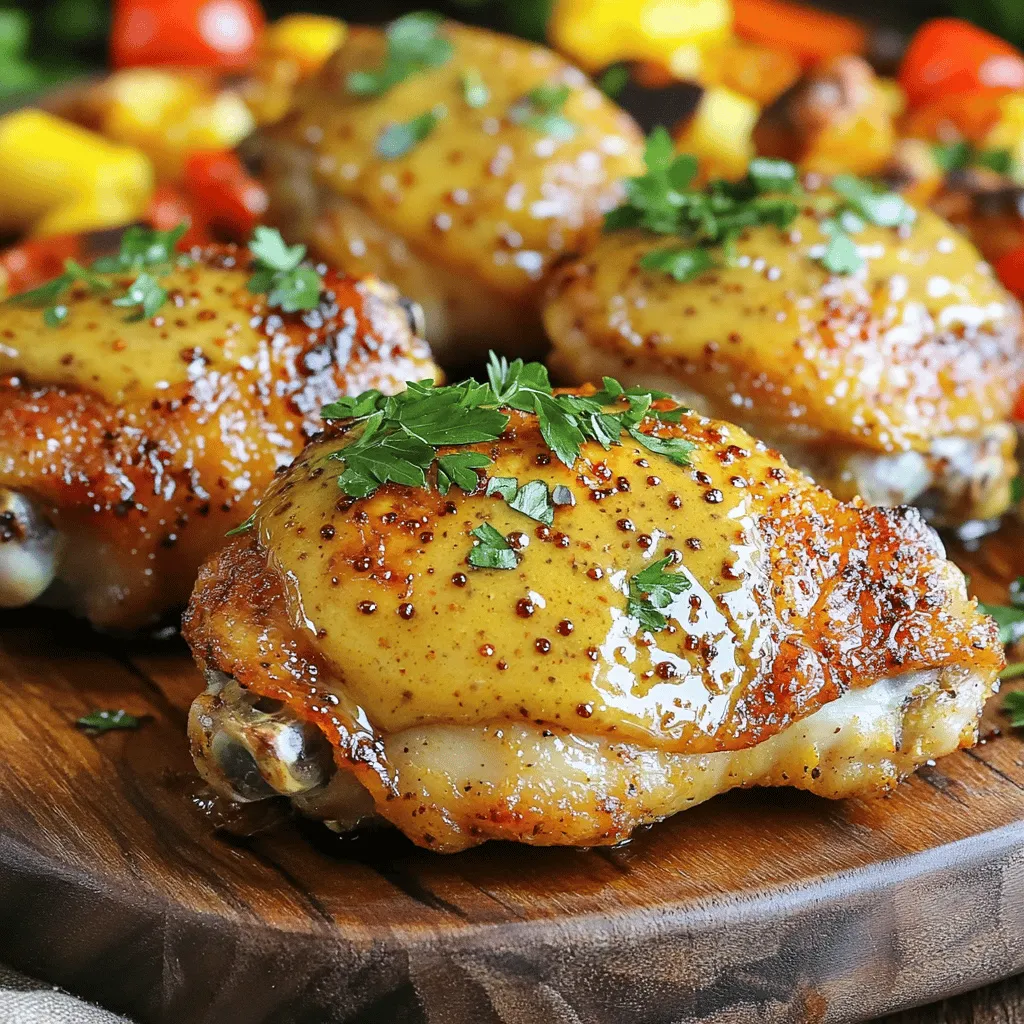
Craving a quick, tasty dinner? Honey Mustard Chicken Thighs are your answer! This easy recipe packs bold flavors and uses

- 2 boneless, skinless chicken breasts - 1 tablespoon olive oil - 1 teaspoon garlic powder - 1 teaspoon Italian seasoning - Salt and pepper to taste - 4 large whole wheat tortillas - 2 cups romaine lettuce, chopped - 1/2 cup Caesar dressing (store-bought or homemade) - 1/2 cup grated Parmesan cheese - Freshly cracked black pepper (for topping) - Cherry tomatoes, halved (for garnish) To make Grilled Chicken Caesar Wraps, you need fresh, high-quality ingredients. The chicken brings protein, while romaine adds crunch. Whole wheat tortillas provide a hearty base. Caesar dressing gives that classic flavor, and Parmesan cheese adds richness. - Sliced avocado - Croutons for extra crunch - Fresh herbs like basil or parsley - Lemon wedges for a fresh squeeze These optional ingredients can elevate your wraps. Sliced avocado adds creaminess, while croutons give a nice crunch. Fresh herbs can brighten the dish, and a squeeze of lemon can enhance the flavors. Each wrap typically contains: - Calories: 450 - Protein: 35g - Carbohydrates: 40g - Fat: 18g - Fiber: 5g This meal is both tasty and nutritious. It offers a good balance of protein, carbs, and healthy fats. You can enjoy this wrap as a satisfying lunch or dinner without guilt. For the full recipe, check the previous section. Start by preparing the chicken. In a small bowl, mix together one tablespoon of olive oil, one teaspoon of garlic powder, one teaspoon of Italian seasoning, and salt and pepper to taste. Rub this mixture all over the two boneless, skinless chicken breasts. This helps give the chicken great flavor. Next, heat your grill or grill pan to medium-high heat. Grill the chicken breasts for about 6-7 minutes on each side. You want them to be fully cooked and the juices to run clear. Once done, remove the chicken from the grill and let it cool slightly. After that, slice it into thin pieces. Now, it's time to assemble your wraps. Lay out four large whole wheat tortillas on a clean surface. Start with a generous scoop of chopped romaine lettuce in the center of each tortilla. Drizzle Caesar dressing over the lettuce, followed by a sprinkle of grated Parmesan cheese. Then, place the sliced grilled chicken on top of the salad. To wrap it up, fold the bottom of the tortilla over the filling. Next, fold in the sides and roll tightly to secure everything. Repeat this with the remaining tortillas. For easier eating, slice each wrap in half. You can serve them with extra Caesar dressing on the side for dipping. Add halved cherry tomatoes as a garnish for a fresh touch. Enjoy your tasty meal! Grilling chicken can be simple. Follow these steps for great results: - Choose the Right Cut: Use boneless, skinless chicken breasts. They grill well and stay juicy. - Marinate for Flavor: A mix of olive oil, garlic powder, and seasonings adds great taste. - Preheat the Grill: Get your grill hot before adding the chicken. This gives nice grill marks. - Check the Temperature: Cook until the chicken reaches 165°F. This keeps it safe and tender. - Let It Rest: After grilling, let the chicken rest for a few minutes. This keeps juices inside. Wrapping your Grilled Chicken Caesar Wraps is key for neatness and taste. Here’s how to do it right: - Layer Ingredients: Start with lettuce, then drizzle dressing, add cheese, and finally chicken. - Fold the Bottom: Bring the bottom of the tortilla up over the filling. - Fold in the Sides: Tuck the sides in to keep filling secure. - Roll Tightly: Roll from the bottom up to keep everything inside. A tight wrap is easier to eat. Pair your Grilled Chicken Caesar Wraps with sides that complement their flavor. Here are some ideas: - Fresh Fruit: Slices of watermelon or a mixed berry bowl add sweetness. - Chips: Serve with baked tortilla chips for a crunchy contrast. - Salad: A light side salad with vinaigrette balances the meal. - Soup: Tomato or minestrone soup makes a warm and hearty option. For a full recipe, you can check out the Grilled Chicken Caesar Wraps section. Enjoy your cooking! {{image_2}} You can swap chicken for shrimp or tofu. Shrimp grills fast and adds a nice flavor. Simply season the shrimp like the chicken and grill for about 2-3 minutes per side. Tofu is a great option for a plant-based meal. Just press and cube firm tofu, then marinate it in the same spices. Grill until it’s golden and crispy. You can use store-bought or homemade dressing. Store-bought is quick and easy. Just pour it on your salad and go! If you want to make your own, mix mayonnaise, lemon juice, garlic, and anchovy paste. This gives a fresh taste and lets you control the flavor. To make this wrap vegetarian, leave out meat and add more veggies. You can use chickpeas or black beans for protein. Add sliced bell peppers, cucumbers, or avocados for crunch. This keeps the wrap filling and tasty without using meat. Explore these variations to find your favorite twist on the Grilled Chicken Caesar Wraps! For the full recipe, check out my earlier sections. After enjoying your Grilled Chicken Caesar Wraps, you may have some leftovers. To store them safely, wrap each one tightly in plastic wrap or foil. Place the wraps in an airtight container. Keep them in the fridge for up to three days. This will keep them fresh and tasty. If you want to save your wraps for later, freezing is a great option. First, wrap each one in plastic wrap. Then, place them in a freezer-safe bag or container. Make sure to remove as much air as possible. You can freeze the wraps for up to three months. When you're ready to eat, just thaw them in the fridge overnight. Reheating your Grilled Chicken Caesar Wraps is easy. For the best taste, use an oven or a skillet. Preheat your oven to 350°F (175°C). Place the wraps on a baking sheet and heat for about 10-15 minutes. If using a skillet, heat on medium-low, turning occasionally for even warmth. You want them to be hot all the way through without getting soggy. Enjoy your meal fresh! Yes, you can make Grilled Chicken Caesar Wraps ahead of time. You can grill the chicken and prepare the wraps a few hours in advance. Keep the wraps tightly wrapped in plastic wrap or foil. This helps them stay fresh. If you want the best taste, do not add the dressing until you're ready to eat. This keeps the tortillas from getting soggy. Making Caesar dressing from scratch is easy and fun. Here’s a simple recipe: - 1/2 cup mayonnaise - 2 tablespoons lemon juice - 1 teaspoon Dijon mustard - 1 garlic clove, minced - 1/4 cup grated Parmesan cheese - Salt and pepper to taste Mix all the ingredients in a bowl. Whisk until smooth. Taste and adjust the seasoning as needed. This dressing adds great flavor to your wraps. Some great sides include: - Fresh fruit salad - Crispy sweet potato fries - Veggie sticks with dip - A light green salad These sides balance the meal and add more color. They also keep it light and fresh. Try different sides to find your favorite combo! Grilled Chicken Caesar Wraps are simple yet tasty. We covered key ingredients, from chicken to optional flavors. Next, I shared easy steps for grilling and assembling the wraps. Tips for grilling chicken and wrapping it well make a difference. You can even switch proteins or dressings to suit your taste. Proper storage ensures your leftovers stay fresh. With these tips, you can impress anyone. Enjoy your wraps or share them with friends!

Grilled Chicken Caesar Wraps Simple and Tasty Meal

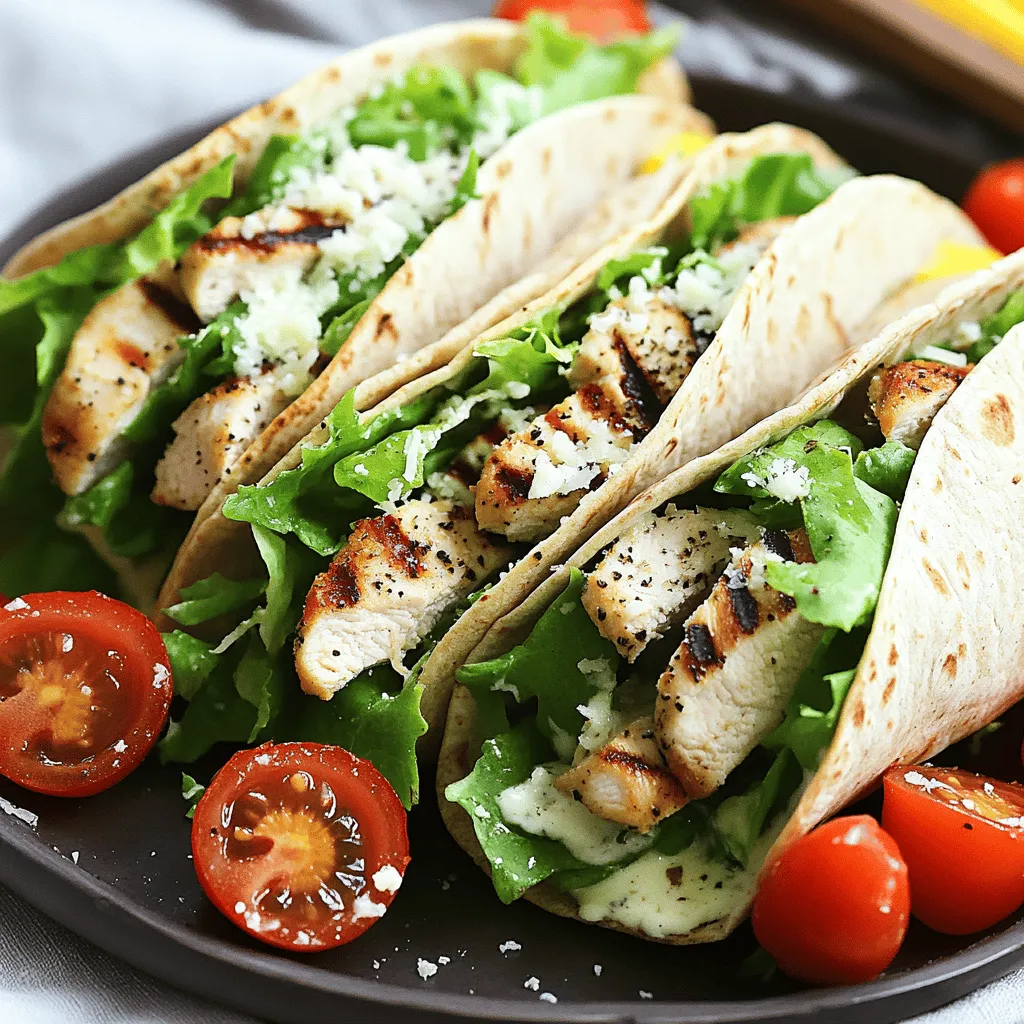
Looking for a quick and tasty meal idea? Grilled Chicken Caesar Wraps are easy to make and delicious! You can

To make the best zucchini noodles, you need: - 4 medium zucchinis These zucchinis are fresh and full of flavor. They are low in calories and packed with nutrients. You can use a spiralizer or a vegetable peeler to turn them into fun noodles. This method gives a nice shape and texture to the dish. For the vibrant pesto, gather these ingredients: - 1 cup fresh basil leaves - 1/4 cup pine nuts (toasted) - 2 cloves garlic, minced - 1/3 cup extra virgin olive oil - 1/4 cup grated Parmesan cheese - Salt and pepper to taste - 1/2 teaspoon lemon zest Each of these components brings a unique taste. Fresh basil gives a bright flavor. Toasted pine nuts add a nice crunch. The garlic, olive oil, and cheese blend together to make a creamy sauce. Lemon zest adds a refreshing touch. For a little extra flair, consider these garnishes: - Cherry tomatoes, halved - Black olives, sliced (optional) These add color and flavor to your dish. The tomatoes bring sweetness, while olives offer a salty bite. You can mix and match garnishes to suit your taste. This recipe is simple yet satisfying, perfect for a quick meal. For the full recipe, check out the detailed instructions. First, select four medium zucchinis. Wash them well. You can use a spiralizer or a vegetable peeler to make zoodles. If you want thicker strands, use the peeler. For thinner noodles, go for the spiralizer. Once you have your zoodles, set them aside. It’s best to keep them dry to avoid sogginess later. Next, grab your food processor. Add one cup of fresh basil leaves, a quarter cup of toasted pine nuts, and two minced garlic cloves. Pulse until everything is finely chopped. This mix smells amazing! Now, while the processor runs, slowly drizzle in one-third cup of olive oil. This helps to make the pesto smooth. Add a quarter cup of grated Parmesan cheese along with half a teaspoon of lemon zest. Season with salt and pepper to taste. Pulse again until creamy. This fresh pesto gives zoodles a big flavor boost. In a large skillet, heat one tablespoon of olive oil over medium heat. Once hot, add the zoodles. Sauté for about two to three minutes. You want them tender but still slightly crisp. Avoid cooking them too much. Remove the skillet from heat, then add your fresh pesto directly to the zoodles. Toss gently to coat every noodle. Now, your dish is almost ready! Plate the zoodles and garnish with halved cherry tomatoes and sliced black olives if you like. A drizzle of olive oil and more Parmesan on top adds a nice touch. Feel free to check the Full Recipe for more details! To get the best texture for your zoodles, choose firm zucchinis. Look for ones that are not too soft. Spiralize them just before cooking to keep them fresh. When cooking, sauté them quickly over medium heat for two to three minutes. This keeps them crisp. If you overcook them, they can turn mushy. Fresh basil is key for a vibrant pesto. Use bright green leaves without dark spots. Toasting the pine nuts brings out a nutty flavor. Add garlic for a nice kick. When blending, drizzle in olive oil slowly for a smooth mix. Don't forget the lemon zest! It adds a fresh, bright taste. Serve your zoodles on a large platter for a family-style meal. For a fun touch, add halved cherry tomatoes and sliced black olives on top. You can drizzle extra olive oil for richness. A sprinkle of pine nuts and Parmesan makes it even better. This dish is great warm or at room temperature. For the full recipe, check the earlier section. {{image_2}} You can make zucchini noodles with pesto a full meal by adding protein. Grilled chicken or shrimp pairs well with the fresh flavors. Try adding slices of cooked chicken breast. You can also use sautéed shrimp for a seafood twist. For a meatless option, consider chickpeas or tofu. They add protein and texture. Zucchini noodles are naturally gluten-free, making them a great choice. If you want more options, try brown rice pasta or quinoa pasta. Both provide a similar texture and taste. You can mix these in with the zoodles for a hearty dish. This way, you enjoy a gluten-free meal without losing flavor. Want to spice things up? You can add red pepper flakes for heat. Fresh herbs like parsley or cilantro can brighten the dish. Consider adding a squeeze of lemon juice for extra zing. You can also mix in sun-dried tomatoes for a rich flavor. Each of these options can take your zucchini noodles with pesto to the next level. For the full recipe, refer to the earlier section. You can store leftover zucchini noodles and pesto in the fridge. Place them in an airtight container. They stay fresh for about three days. If you notice any moisture, use a paper towel to soak it up. This helps keep the zoodles crisp. Freezing zucchini noodles is easy. Start by blanching them. Cook the zoodles in boiling water for one minute. Then, transfer them to ice water to stop the cooking. Drain and dry them. Place the zoodles in freezer bags, removing as much air as possible. They can last up to three months in the freezer. To reheat zucchini noodles, use a skillet over medium heat. Add a drizzle of olive oil. Heat them for about two to three minutes until warm. Avoid cooking them too long. This keeps their crunch and flavor intact. If using the microwave, heat them in short bursts to prevent sogginess. Enjoy your zoodles with pesto fresh and tasty! Yes, you can use store-bought pesto. It can save time and effort. Look for one with fresh ingredients. Some brands may use preservatives, so check the label. Store-bought pesto can still taste great. It won’t have the same freshness as homemade, but it works well in a pinch. To spiralize zucchinis, you’ll need a spiralizer or a vegetable peeler. A spiralizer is simple and quick. Just attach the zucchini and turn the handle. If you use a vegetable peeler, peel long strips lengthwise. Keep turning the zucchini to get more noodles. Try to make them thin for better texture. Zucchini noodles pair well with many dishes. You can serve them with grilled chicken or shrimp for protein. A light salad or crusty bread complements the meal. You can also add roasted vegetables for extra flavor. If you want, sprinkle more cheese on top for a tasty finish. This guide covered making tasty zucchini noodles with fresh pesto. You learned about key ingredients, step-by-step cooking, and helpful tips and tricks. Adding protein and flavor boosts can make your dish even better. Remember to store extras properly for future meals. Enjoy experimenting with this healthy dish and make it yours. You now have the tools to enjoy zucchini noodles anytime.

Zucchini Noodles with Pesto Fresh and Simple Recipe

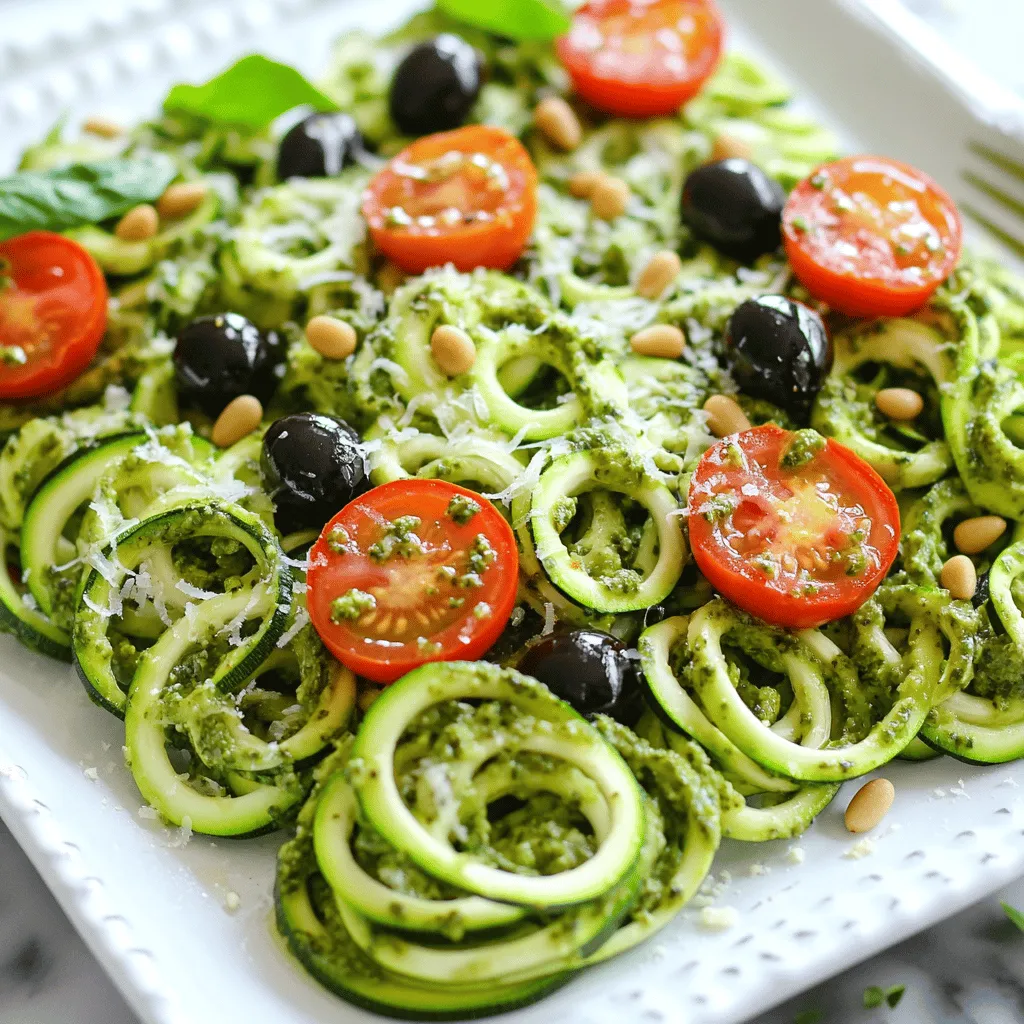
Zucchini noodles with pesto are a fresh, tasty option for a quick meal. This easy recipe brings vibrant flavors without

To make the perfect maple glazed Brussels sprouts, you’ll need these simple ingredients: - 1 pound Brussels sprouts, trimmed and halved - 3 tablespoons olive oil - 1/4 cup pure maple syrup - 1 teaspoon balsamic vinegar - 1 teaspoon Dijon mustard - 1/2 teaspoon garlic powder - Salt and pepper to taste - 1/4 cup pecans, roughly chopped (optional) - Fresh parsley, chopped for garnish These ingredients blend together to create a sweet and savory dish. The maple syrup gives a rich sweetness, while the balsamic vinegar adds a tangy note. The Dijon mustard brings a subtle kick that enhances the flavor of the Brussels sprouts. If you want to add some crunch, toss in the pecans. They add a nice texture to the dish. Fresh parsley at the end makes everything look beautiful and adds a fresh taste. You can find the full recipe above, which includes all the steps to create this tasty side dish. Enjoy cooking! - Preheat your oven to 400°F (200°C). - Prepare the baking sheet with parchment paper. This step is key. Preheating the oven helps the Brussels sprouts cook evenly. The parchment paper keeps them from sticking and makes cleanup easy. - Combine maple syrup, balsamic vinegar, Dijon mustard, garlic powder, salt, and pepper. Mix these ingredients in a bowl. The sweet maple syrup balances the tangy balsamic vinegar. The Dijon mustard adds a nice kick. Garlic powder gives it depth. Make sure to taste the glaze. Adjust the salt and pepper to your liking. - Toss Brussels sprouts with olive oil and maple glaze. - Roast for 20-25 minutes, tossing halfway through. First, toss the halved Brussels sprouts in olive oil. This helps them brown nicely. Then, add the maple glaze and mix well. Spread them out on the baking sheet. Roast until they are tender and caramelized. Halfway through, give them a gentle toss. This ensures even cooking. By following these steps, you will create a dish that bursts with flavor. For the full recipe, check the earlier section. Enjoy your delicious maple glazed Brussels sprouts! To achieve perfect caramelization, you want high heat and even spacing. Roast the Brussels sprouts at 400°F for 20 to 25 minutes. Toss them halfway to ensure all sides get that golden brown. For a great balance of sweetness, adjust the maple syrup. If it feels too sweet, add a splash more balsamic vinegar. This adds depth and a bit of tang, making each bite exciting. Maple glazed Brussels sprouts pair well with many dishes. They complement roasted chicken or fish nicely. You can serve them as a side dish for holiday meals. For festive presentations, arrange them on a large platter. Sprinkle fresh parsley on top for color. This simple touch makes them look gourmet. You can make these Brussels sprouts even better with some added ingredients. Chopped pecans add crunch and flavor. You can also try adding spices like smoked paprika for a kick. If you want more sweetness, toss in some dried cranberries. These enhancements make this dish even more special. For the full recipe, check the earlier section. {{image_2}} If you run out of maple syrup, honey or agave can work too. For a tangy kick, try using apple cider vinegar instead of balsamic vinegar. You can also swap out the pecans for walnuts or almonds. Each nut brings a different crunch and taste to the dish. For a quick meal, try the stovetop sautéing method. Heat olive oil in a pan, add the Brussels sprouts, and cook until tender. Stir often for even cooking. If you want a smoky flavor, grill the Brussels sprouts. Simply toss them in olive oil and grill until charred and tender. This recipe is vegan-friendly if you use maple syrup and skip the honey. To make it gluten-free, ensure your mustard is gluten-free. These small changes keep the dish tasty for everyone while meeting dietary needs. You can still enjoy this dish without compromising on flavor. To keep your maple glazed Brussels sprouts fresh, store them in an airtight container. Make sure they are cool before sealing. This helps prevent moisture build-up. They last in the fridge for about 3 to 5 days. If you notice any signs of spoilage, it's best to toss them. When it's time to enjoy leftovers, you can reheat them in the oven or microwave. For the oven, set it to 350°F (175°C). Place the Brussels sprouts on a baking sheet and heat for about 10 to 15 minutes. This method keeps them crispy. If you're in a hurry, the microwave works too. Heat them in a safe bowl for about 1 to 2 minutes, stirring halfway through. You can freeze maple glazed Brussels sprouts, but it's best to do it before cooking. To freeze, place the raw, unglazed sprouts in a single layer on a baking sheet. Freeze until firm, then transfer them to a freezer bag. They will stay fresh for up to 3 months. When you're ready to cook, just thaw them in the fridge overnight and roast as directed in the Full Recipe. How long do Brussels sprouts take to cook? Brussels sprouts take about 20 to 25 minutes to roast. You want them tender and caramelized. Can I use frozen Brussels sprouts for this recipe? Yes, you can use frozen Brussels sprouts. Just make sure to thaw them first. This helps them cook evenly. What can I serve with maple glazed Brussels sprouts? These Brussels sprouts pair well with roasted chicken, pork, or fish. They also work great with quinoa or rice dishes. How do I know when Brussels sprouts are done roasting? You know they are done when they are fork-tender and have a nice brown color. You can also check if they are crispy on the edges. Can I make the glaze ahead of time? Yes, you can make the glaze ahead of time. Just store it in the fridge until you're ready to use it. For the full recipe, check out the complete instructions. In this post, we explored a tasty recipe for maple glazed Brussels sprouts. We covered ingredients, step-by-step cooking, and tips to enhance the dish. You learned about serving ideas and how to adjust the recipe to fit different diets. These sprouts make a great side dish for any meal. Enjoy trying new variations and make it your own! Now, get cooking and savor each delicious bite.

Maple Glazed Brussels Sprouts Tasty Side Dish Recipe

Are you ready to transform Brussels sprouts into a tasty side dish? My Maple Glazed Brussels Sprouts recipe combines sweet

To make these delicious stuffed bell peppers, gather these items: - 4 large bell peppers (any color) - 1 cup quinoa, rinsed - 2 cups vegetable broth - 1 can (15 oz) black beans, rinsed and drained - 1 cup corn kernels (fresh or frozen) - 1 small red onion, diced - 2 cloves garlic, minced - 1 teaspoon cumin - 1 teaspoon smoked paprika - ½ teaspoon chili powder - Salt and pepper to taste - 1 cup diced tomatoes (canned or fresh) - 1 cup shredded cheese (cheddar or a blend) - Fresh cilantro or parsley for garnish The spices in this dish bring it to life. Cumin adds warmth and earthiness. Smoked paprika gives a hint of smokiness. Chili powder boosts the heat and adds depth. Diced tomatoes add juiciness and balance the flavors. Fresh herbs like cilantro or parsley give a burst of freshness. Each ingredient plays a role in making this dish irresistible. This recipe is not just tasty; it is good for you too. Quinoa is a complete protein, offering all nine essential amino acids. It is also high in fiber, which keeps you full longer. Black beans are rich in protein and fiber, supporting digestive health. Bell peppers are packed with vitamins A and C, boosting your immune system. Corn adds sweetness and fiber, making the dish even more satisfying. Together, they create a healthy meal that nourishes your body. For the full recipe and detailed cooking instructions, check out Colorful Quinoa-Stuffed Bell Peppers . To start, you need to prepare the bell peppers. Slice the tops off and remove the seeds. This step is key to making room for the tasty filling. Set the tops aside; you can use them later for a garnish or other dishes. Next, rinse your quinoa under cold water. This helps remove any bitterness. Then, boil the quinoa with vegetable broth in a medium pot. When it boils, lower the heat and cover it. In about 15 minutes, the quinoa will be fluffy and ready to use. For the filling, heat olive oil in a large skillet. Add diced red onion and cook until it turns clear. This usually takes about 3-4 minutes. Next, stir in minced garlic and spices like cumin and smoked paprika. Cook until the mixture smells great. Then, add black beans, corn, and diced tomatoes to the skillet. Mix well and cook until everything is hot. Finally, fold in half of the shredded cheese. This adds creaminess to your filling. Now it's time to stuff the peppers. Take a spoonful of the quinoa mixture and fill each pepper. Press down gently to make sure it fits well. You want every bite to be packed with flavor. Place the stuffed peppers in a baking dish and top them with the remaining cheese. Cover the dish with foil and bake it at 375°F (190°C) for 25 minutes. After that, remove the foil and bake for another 10-15 minutes. The peppers should be soft, and the cheese will be bubbly. For the full recipe, check out Colorful Quinoa-Stuffed Bell Peppers . One big mistake is not cooking the quinoa properly. Always rinse it first to remove bitterness. Another mistake is overcooking the bell peppers. They should be tender but not mushy. Avoid under-stuffing too. Press the filling down gently to pack it well. Lastly, don’t skip the cheese. It adds great flavor and creaminess. Cooking time can change based on your oven and pepper size. If your peppers are large, add 5-10 minutes to the bake time. Check them often to avoid burning. If you want a firmer bite, reduce the time. For extra cheese on top, broil the peppers for 2-3 minutes at the end. This gives a nice golden crust. Serve the stuffed peppers on a colorful platter. Garnish with fresh cilantro or parsley for a pop of color. Adding a wedge of lime on the side brightens the dish. You can pair them with a light salad or some rice for a complete meal. For more flavor, drizzle some hot sauce over the top. For the full recipe, check the section above! {{image_2}} You can easily make this dish vegetarian or vegan. Just skip the cheese or use a plant-based cheese. The rest of the ingredients are already vegan-friendly. You can add more veggies like spinach or zucchini. This keeps your meal colorful and full of nutrients. If you want more protein, add cooked chicken, beef, or turkey. You can also mix in tofu or tempeh for a meat-free option. Adding other veggies like mushrooms or carrots adds flavor and texture. These can be sautéed with the onions for a tasty kick. To boost flavor, try adding spices like oregano or coriander. A splash of hot sauce can spice things up too. You can also drizzle balsamic glaze on top before serving. This adds a sweet and tangy element to your stuffed peppers. For a richer taste, consider adding a few tablespoons of salsa or taco sauce to the filling. For the full recipe, check out the Colorful Quinoa-Stuffed Bell Peppers . After you enjoy your stuffed bell peppers, let them cool. Place any leftovers in an airtight container. Store the container in the fridge. They will stay fresh for about 3 to 5 days. Make sure to cover them well. This keeps the flavors intact. To reheat your stuffed peppers, you can use your oven or microwave. If using the oven, preheat it to 350°F (175°C). Place the peppers in a baking dish and cover with foil. Heat for about 20 minutes. If you prefer the microwave, place the peppers on a microwave-safe plate. Heat them for 2 to 3 minutes or until warm. Always check the temperature before you eat. If you want to save your stuffed peppers for later, freezing works great! Wrap each pepper tightly in plastic wrap. Then, place them in a freezer bag. Squeeze out as much air as possible. They will last about 3 months in the freezer. When ready to eat, thaw in the fridge overnight before reheating. Enjoy the flavors again with little effort! For the full recipe, check out Colorful Quinoa-Stuffed Bell Peppers . To pick the best bell peppers, look for ones that are firm and shiny. Avoid any that feel soft or have wrinkles. Choose peppers with bright, even color. The stems should be green and fresh. When you press on them, they should bounce back. This means they are fresh and ready to eat. Yes, you can use different grains instead of quinoa. Brown rice, farro, or couscous work well, too. Each grain adds a unique texture and flavor. Just make sure to cook them according to the package instructions before mixing them into your filling. This keeps your stuffed peppers tasty and well-balanced. Great side dishes to serve with stuffed peppers include a fresh salad or roasted veggies. You can also try a side of garlic bread or a grain-based salad like tabbouleh. These dishes add variety and flavor to your meal. They also help balance the hearty stuffed peppers. For a full flavor experience, try out the Colorful Quinoa-Stuffed Bell Peppers recipe! This post covered all you need for making colorful quinoa-stuffed bell peppers. We explored the key ingredients and their health benefits. The step-by-step instructions made prep easy. Tips helped you avoid common mistakes. We also shared fun variations to try. Don’t forget the proper storage and reheating methods. Now you can create tasty stuffed peppers tailored to your taste! Enjoy making this dish and impress your family and friends with your skills. Happy cooking!

Stuffed Bell Peppers with Quinoa Flavor-packed Dish

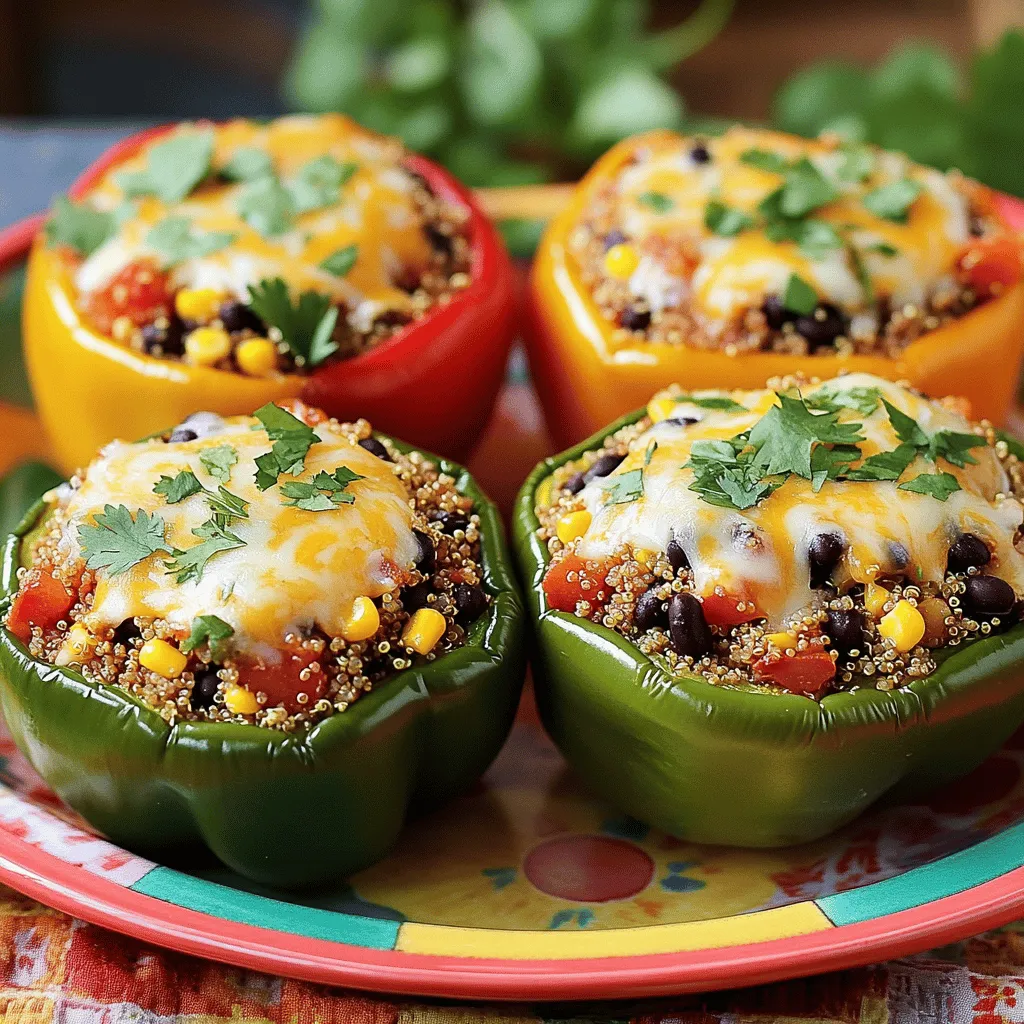
Are you ready to delight your taste buds? Stuffed bell peppers with quinoa are a flavor-packed dish that everyone loves.

To make a rich and creamy chocolate avocado mousse, you need just a few simple ingredients. Each one plays a key role in achieving that smooth texture and delightful flavor. Here’s what you will need: - 2 ripe avocados - 1/2 cup unsweetened cocoa powder - 1/2 cup maple syrup (or honey) - 1/4 cup almond milk (or any milk of choice) - 1 teaspoon vanilla extract - Pinch of sea salt - Optional toppings: whipped coconut cream, fresh berries, or shaved chocolate Ripe avocados are a must! They add creaminess and healthy fats. Cocoa powder gives the mousse its rich chocolate taste. For sweetness, you can choose maple syrup or honey. Almond milk helps blend everything smoothly. Vanilla extract adds a warm flavor. A pinch of sea salt enhances the overall taste. Feel free to get creative with toppings! Whipped coconut cream adds a light touch, while fresh berries bring a pop of color. Shaved chocolate is a fun way to finish it off. Check out the Full Recipe for detailed steps on how to make this tasty dessert. 1. Cutting and scooping avocados Start by cutting each avocado in half. Remove the pit carefully to avoid any mess. Use a spoon to scoop out the green flesh into your food processor. Make sure to get all the creamy goodness! 2. Mixing ingredients in the food processor Add the unsweetened cocoa powder, maple syrup, almond milk, vanilla extract, and a pinch of sea salt to the avocados in the food processor. This mix brings rich flavors together. 3. Blending until smooth Turn on the food processor and blend all the ingredients. Blend until the mixture is smooth and creamy. Stop to scrape down the sides as needed. This ensures everything blends well. 4. Adjusting sweetness Taste the mousse once it's smooth. If you like it sweeter, add a bit more maple syrup. Blend again to mix in the extra sweetness. It should be just right! 5. Serving and garnishing Once the mousse is creamy, transfer it to your favorite serving dishes. Chill them in the fridge for at least 30 minutes. This helps the mousse set. Before serving, add your choice of toppings like whipped coconut cream, fresh berries, or shaved chocolate. For the full recipe, check back on the ingredients and instructions you need! - Choosing ripe avocados: Select avocados that feel soft but not mushy. The skin should be dark green or black. A ripe avocado will yield gently when pressed. This ensures your mousse has a rich, creamy base. - Ensuring a creamy texture: Blend the ingredients well. Use a high-powered food processor or blender to achieve a smooth finish. Scrape down the sides to mix all parts. If the mousse is too thick, add a bit more almond milk to loosen it up. - Adjusting flavors to preference: Taste your mousse as you go. If you want it sweeter, add more maple syrup or honey. You can also add a pinch of salt to enhance the chocolate flavor. Feel free to experiment with flavors until it’s just right for you. - Best food processors or blenders: A strong blender or food processor is key. Look for models with high wattage. This will help blend the ingredients smoothly. Brands like Vitamix or Ninja are great choices. - Portioning tools for serving: Use small ramekins or dessert cups for serving. This makes each portion look lovely. You can also use a piping bag if you want to get fancy with your presentation. {{image_2}} You can make this chocolate avocado mousse even more fun! First, try adding nut butters. Almond or peanut butter adds a rich taste. Just mix in a few tablespoons when you blend the mousse. This gives a nice twist to the flavor. Next, think about spices. A pinch of cinnamon can warm the taste. You might also enjoy a hint of chili powder for a little kick. These spices can change the mousse from simple to exciting. If you want a vegan or gluten-free version, this recipe is already great. Use maple syrup for sweetness and almond milk for creaminess. You can feel good about what you eat. Serving this mousse is where your creativity shines. You could top it with whipped coconut cream for a tropical twist. Fresh berries add color and a bright taste. You can even sprinkle some shaved chocolate on top. Each option makes the dish look and taste amazing. For something different, build a chocolate avocado mousse parfait. Start with a layer of mousse. Then, add your favorite toppings. Repeat until your glass is full. This looks stunning and tastes delicious. You can find the full recipe to guide you through these fun variations! To keep your chocolate avocado mousse fresh, store it in the fridge. Use airtight containers to prevent the mousse from absorbing other smells. It will stay good for up to three days. If you notice any browning, just give it a quick stir. This will blend the flavors back together. Can you freeze mousse? Yes, you can! Freezing chocolate avocado mousse is a great option if you want to save some for later. Just place it in a freezer-safe container. It can last up to a month in the freezer. When you are ready to eat it, move the mousse to the fridge to thaw overnight. After thawing, stir it well before serving. You might want to add a little more almond milk if it seems too thick. Enjoy your creamy treat! Is Chocolate Avocado Mousse healthy? Yes, it is healthy! This mousse uses avocados, which are full of good fats. They help your heart and keep you full. The cocoa powder adds antioxidants that can boost your mood too. How long does it take to set? It takes about 30 minutes to set in the fridge. This time helps the flavors blend. It also makes the mousse nice and creamy. You can wait longer if you want a firmer texture. Can I use other sweeteners? Yes, you can use many sweeteners. Honey, agave, or stevia work well. Just remember to adjust the amount based on how sweet you want it. Taste as you go! What are the benefits of using avocados in desserts? Avocados add creaminess without dairy. They also provide healthy fats, making the dessert rich. Plus, they give vitamins and minerals. This makes your dessert not just tasty but good for you too. How to make it sugar-free To make it sugar-free, use sugar-free sweeteners like erythritol. These sweeteners can replace maple syrup. Start with a small amount and taste as you mix. This way, you get the sweetness you like. Can I make it without almond milk? Yes, you can skip almond milk. You can use any milk you prefer, like soy or coconut milk. If you want a thicker mousse, use less liquid. Just keep blending until it is smooth. This blog post explored how to make a delicious chocolate avocado mousse. We covered the key ingredients, from ripe avocados to cocoa powder and sweeteners. I shared easy preparation steps and tips for a perfect texture. You learned creative variations, storage tips, and answered common questions to boost your confidence. In closing, this mousse is not just tasty; it's a healthy treat. Enjoy making this dessert with your own twists!

Chocolate Avocado Mousse Creamy and Healthy Delight

Are you ready to try a dessert that’s both delicious and good for you? Chocolate Avocado Mousse is rich, creamy,

- 1 medium head of cauliflower, cut into bite-sized florets - 1/2 cup all-purpose flour (or gluten-free flour) - 1/2 cup unsweetened almond milk (or regular milk) - 1/2 cup Sriracha sauce - 1/4 cup honey - 1 teaspoon garlic powder - 1 teaspoon onion powder - 1/2 teaspoon smoked paprika - Salt and pepper to taste - Fresh cilantro, chopped - Sesame seeds These ingredients combine for a bold and tasty snack. The cauliflower acts as a great base. It soaks up all the flavors well. The Sriracha adds heat, while honey gives it a sweet touch. Garlic and onion powders deliver extra depth. Smoked paprika rounds out the taste with a subtle smokiness. Using fresh cilantro and sesame seeds for garnishes adds brightness and crunch. You can use gluten-free flour to fit dietary needs. Almond milk also works well for a dairy-free option. This recipe is simple yet packed with flavor. It’s a fun way to enjoy cauliflower, making it a great choice for snacking. If you're ready to make these bites, check out the Full Recipe for all the steps. Enjoy making this delightful snack! - Preheat your oven to 425°F (220°C). This step is key for crispy bites. - Line a baking sheet with parchment paper. This helps with easy cleanup. - In a large mixing bowl, whisk together: - 1/2 cup all-purpose flour (or gluten-free flour) - 1/2 cup unsweetened almond milk (or regular milk) - 1 teaspoon garlic powder - 1 teaspoon onion powder - 1/2 teaspoon smoked paprika - Salt and pepper to taste - Aim for a smooth batter to coat the cauliflower. - Dip each cauliflower floret into the batter. Make sure each piece is fully coated. - Place the coated florets on the lined baking sheet. Arrange them in a single layer. - Bake the cauliflower for 20-25 minutes. Flip them halfway through for even crispiness. Look for a golden brown color. - While the cauliflower bakes, combine Sriracha and honey in a small saucepan. - Add 1 tablespoon apple cider vinegar and 2 tablespoons olive oil. - Heat the mixture over medium heat. Stir until it is smooth and slightly bubbling. - Remove from heat and set aside. This sauce is the star of the dish. Once your cauliflower bites are crispy, drizzle the Sriracha honey sauce over them. Toss gently to coat each piece evenly. If you want the sauce to caramelize, bake the coated cauliflower for another 5 minutes. For the full recipe, check out the details above. Enjoy your tasty snack! Flipping the cauliflower halfway through baking is key. This ensures even cooking on both sides. If you skip this step, one side may burn while the other remains soft. Aim for nice, crispy edges on all pieces. To achieve the perfect crispiness, bake at 425°F (220°C). This high heat helps to brown the outside while keeping the inside tender. Using parchment paper on your baking sheet also helps prevent sticking and makes cleanup easy. For a fun presentation, serve these bites in a colorful bowl. Drizzle more Sriracha and honey sauce on top. This adds a pop of color and flavor. Using toothpicks makes them easy to grab for guests. Ideal dips include creamy ranch or tangy yogurt sauce. They balance the heat of the Sriracha. Fresh veggies like carrot sticks or cucumber slices can add a refreshing crunch on the side. For a gluten-free option, swap all-purpose flour with gluten-free flour. This keeps the texture while making it safe for those with gluten sensitivities. If you want a vegan dish, use almond milk and maple syrup instead of honey. This keeps the flavor rich and satisfying without animal products. {{image_2}} You can easily change the spice level of your Sriracha honey cauliflower bites. If you want it milder, use less Sriracha. You can also add a touch of honey to balance the heat. For a spicier kick, try a hotter sauce or add red pepper flakes. If you don’t have Sriracha, use other hot sauces like chili garlic sauce or harissa. Each option gives a unique twist to your dish. Adding different spices can enhance the flavor. For a warm, earthy taste, stir in curry powder. If you love smoky flavors, smoked paprika works great too. You can also infuse the bites with fresh lime juice or grated ginger for brightness. These additions create a blend of flavors that keeps your taste buds excited. Sriracha honey cauliflower bites shine as both an appetizer and a main dish. Serve them in a colorful bowl for a fun snack. You can place them on a platter and drizzle extra sauce on top to impress guests. For a casual vibe, use toothpicks for easy eating. This way, everyone can enjoy a bite-sized treat with a burst of flavor. Check out the full recipe for more tips on how to serve these bites perfectly! Store leftover Sriracha honey cauliflower bites in an airtight container. Place the bites in the fridge for up to three days. When you're ready to eat, reheat them in the oven. Set the oven to 350°F (175°C). Bake for about 10 minutes. This keeps them crispy and tasty. For longer storage, you can freeze the bites. Lay them on a baking sheet in a single layer and freeze for about two hours. Once frozen, transfer them to a freezer-safe bag. They can last up to three months in the freezer. To reheat, thaw them overnight in the fridge. Then, bake them again at 350°F (175°C) for about 15-20 minutes. In the fridge, these bites stay fresh for about three days. If frozen, they last up to three months. Always check for any signs of spoilage before eating. Enjoy your flavorful snack! Yes, you can prepare these bites ahead of time. Make the batter and coat the cauliflower. Store the coated florets in the fridge for up to a day. When ready to cook, just bake them as directed. If you have leftovers, let them cool and store them in an airtight container. These bites pair well with many sides. Try serving them with: - Rice or quinoa - Fresh salad - Dipping sauces like ranch or yogurt - Veggie sticks for crunch To make this recipe lighter, consider these swaps: - Use whole wheat flour instead of all-purpose flour. - Replace honey with agave syrup for lower calories. - Opt for air frying instead of baking for less oil. Absolutely! Here’s how to adapt this recipe: - For vegan: Use plant-based milk and maple syrup. - For gluten-free: Substitute gluten-free flour and check your Sriracha. - For nut-free: Swap almond milk with oat or coconut milk. These bites are best fresh but can last in the fridge for about three days. Store them in an airtight container to keep them fresh. If you freeze them, they can last up to three months. Just remember to reheat them well before serving! For the full recipe, check out the detailed instructions to make these flavorful snacks. This blog post covered how to make delicious Sriracha Honey Cauliflower Bites. We looked at the main ingredients, step-by-step instructions, and storage tips. You can easily adjust spice levels and make substitutes to fit your tastes. Remember to store leftovers properly for the best flavor. These bites work great as appetizers or main dishes. Enjoy trying this recipe and making it your own! Simple tweaks can lead to a meal that you and your loved ones will love. Happy cooking!

Sriracha Honey Cauliflower Bites Flavorful Snack Idea

Looking for a snack that packs a punch? Sriracha Honey Cauliflower Bites are your answer! These crispy, flavorful bites combine

Older posts
Newer posts
← Previous Page1 … Page60 Page61 Page62 … Page67 Next →

dsad

© 2025 My Saved Recipe • Built with GeneratePress

Our Policies

  • Copyright Policy
  • Cookie Policy
  • GDPR Policy
  • Privacy Policy
  • Disclaimer
  • Terms Of Use

More Information

  • Home
  • About
  • Contact
  • Appetizers
  • Dessert
  • Dinner
  • Drinks
©2025, My Saved Recipe About Back To Top