Skip to content
DisclaimerTerms Of UseGDPR PolicyCookie Policy

My Saved Recipe

  • Home
  • Drinks
  • Appetizers
  • Dinner
  • Dessert
  • About
  • Contact
  • Privacy Policy
DisclaimerTerms Of UseGDPR PolicyCookie Policy

Savannah

- 1 pound sirloin steak, cut into bite-sized pieces - 2 cups cooked jasmine rice - 1 tablespoon vegetable oil - 2 cloves garlic, minced - 1 teaspoon fresh ginger, grated - 1 cup broccoli florets - 1 carrot, julienned - 1 zucchini, sliced - 2 tablespoons soy sauce - 1 tablespoon teriyaki sauce - 1 teaspoon sesame oil - 2 green onions, sliced (for garnish) - Sesame seeds (for garnish) Gather these ingredients before you start cooking. The sirloin steak gives a rich flavor. It’s tender and juicy, perfect for hibachi bowls. Jasmine rice adds a nice touch with its fragrance. I like to use fresh veggies like broccoli, carrots, and zucchini. They not only taste great but also add color and nutrients. The sauces are key for flavor. Soy sauce brings saltiness, while teriyaki sauce adds sweetness. Sesame oil rounds out the dish with a nutty taste. Green onions and sesame seeds are the perfect finishing touches, giving texture and crunch. Ready to dive into the cooking? Check out the Full Recipe to see how to bring these ingredients together for a delicious meal. - Combine steak with soy sauce, teriyaki sauce, and sesame oil. - Allow to marinate for at least 15 minutes. Marinating the steak adds rich flavor. The soy sauce gives it saltiness, while teriyaki adds a sweet kick. Sesame oil brings a nutty taste. Make sure to coat every piece well. Letting it sit for 15 minutes helps the flavors sink in. You can marinate it longer if you have time. - Heat vegetable oil in a skillet or hibachi grill. - Sauté garlic and ginger until fragrant. Heat your skillet on medium-high. Add the vegetable oil. Once hot, toss in the minced garlic and grated ginger. Stir for about 30 seconds. You want them fragrant, not burnt. This step builds a great base for your veggies. - Stir-fry broccoli, carrot, and zucchini. - Cook marinated steak until browned. - Combine steak and vegetables. Add the broccoli, carrots, and zucchini to your skillet. Stir-fry for about 4 to 5 minutes. You want them tender but still crunchy. Next, add the marinated steak. Cook for about 4 to 6 minutes until browned. Once done, mix the veggies back in. This melds all the flavors together. - Add jasmine rice to serving bowls. - Top with steak and vegetable mixture. - Garnish with green onions and sesame seeds. Scoop some jasmine rice into each bowl. Then, load it up with the steak and veggie mix. Finally, sprinkle sliced green onions and sesame seeds on top. This adds color and crunch. For the full recipe, check out the [Full Recipe]. For the best hibachi steak, I recommend sirloin or ribeye. These cuts are tender and flavorful. When choosing your steak, look for good marbling. This means small white lines of fat in the meat. They make the steak juicy and tasty. To ensure perfect tenderness, let your steak sit at room temperature for about 30 minutes before cooking. This helps it cook evenly and stay soft. Preparing your veggies right makes a big difference. For carrots, peel them first. Then, slice them into thin strips, called julienne. This helps them cook quickly. For zucchini, cut off the ends, then slice it into rounds. Aim for thin slices for even cooking. Cook broccoli florets for about 4-5 minutes. Carrots and zucchini should cook for the same time. This way, they stay crunchy and vibrant. Marinating your steak boosts flavor. To make it even better, add some garlic or a splash of lime juice. Let your steak marinate for at least 15 minutes. You can go longer if time allows. This helps the flavors soak in. Just remember, don’t marinate too long, or it may become mushy. Your steak deserves that perfect balance of taste and texture. For the full recipe, check out the Hibachi Steak Bowls section above. {{image_2}} You can swap out steak for chicken or tofu. Chicken is lighter and cooks faster. Tofu is great for a plant-based meal. If you use chicken, cut it into small pieces. Cook it for about 5-7 minutes until it's no longer pink. For tofu, press it to remove water, then cut and cook for about 3-5 minutes. This way, you can enjoy a tasty bowl with your favorite protein. Feel free to use seasonal vegetables. This adds freshness and flavor to your dish. Try using bell peppers, snap peas, or asparagus. They cook quickly and add color. You can also mix in mushrooms or corn for extra texture. Just chop them into bite-size pieces, so they cook evenly. Experiment with different sauces to change the flavor. You might try spicy marinades if you like heat. Garlic sauce can add a nice kick too. You can make your own sauces or use store-bought ones for convenience. Just remember, a good sauce brings the whole dish together. Check out the Full Recipe for more details on ingredients and flavors. To keep your hibachi steak bowls fresh, store leftovers in the fridge. Use airtight containers to prevent moisture loss. Glass or BPA-free plastic works best. Make sure to let the dish cool before sealing. This helps maintain the flavor and texture. Consume leftovers within three days for the best taste. For reheating, the stovetop is the best option. It keeps the steak tender and the veggies crisp. Place the bowl in a skillet over medium heat. Stir occasionally until heated through. If using the microwave, remove the lid and cover with a damp paper towel. Heat in short bursts. Check often to avoid overcooking. To freeze hibachi steak bowls, pack them tightly in airtight containers. Leave some space for expansion. You can freeze them for up to three months. When ready to eat, thaw in the fridge overnight. To reheat, use the stovetop for the best results, or microwave if short on time. A hibachi steak bowl is a delicious dish with tender steak and fresh veggies. It often includes jasmine rice as the base. You can add a mix of flavors from soy sauce and teriyaki sauce. The dish is quick to make, so it’s great for busy nights. It's colorful and filling, perfect for any meal. To make hibachi steak bowls healthier, use lean cuts of steak. Substitute brown rice for jasmine rice for more fiber. You can also add more veggies like bell peppers or snap peas. Keep portion sizes small to avoid eating too much. Use less oil when cooking and try to grill instead. Yes, you can make hibachi steak bowls in advance! Cook the steak and veggies, then store them in the fridge. Keep the rice separate to avoid sogginess. You can prep up to three days ahead. Just reheat everything in a skillet or microwave when ready to eat. Many Japanese restaurants offer hibachi steak bowls. Look for places that specialize in hibachi or teppanyaki. Popular chains like Benihana serve similar dishes. You can also find them at food trucks or local eateries. Check online reviews to find the best spots near you. You've learned how to make tasty hibachi steak bowls from scratch. We covered key ingredients, step-by-step cooking, and tips to enhance your meal. Remember, you can switch proteins or veggies to suit your taste. Store leftovers properly, and you can enjoy this dish later. Try experimenting with the flavors based on what you like. Making hibachi steak bowls can be fun and rewarding. Enjoy your cooking!

Hibachi Steak Bowls Flavorful and Easy Weeknight Meal

Looking for a quick and tasty dinner idea? Hibachi steak bowls are the answer! You can whip up this flavorful

To make a fresh and tasty Pearl Couscous Chickpea Salad, you need simple and vibrant ingredients. Here is the complete list of what you will need: - 1 cup pearl couscous - 1 can (15 oz) chickpeas, rinsed and drained - 1 red bell pepper, diced - 1 cup cherry tomatoes, halved - 1 cucumber, diced - 1/4 red onion, finely chopped - 1/4 cup fresh parsley, chopped - 1/4 cup feta cheese, crumbled (optional) - 3 tablespoons olive oil - 2 tablespoons lemon juice - 1 teaspoon ground cumin - Salt and pepper to taste These ingredients create a bright and colorful dish. Pearl couscous brings a unique texture, while chickpeas add protein. The red bell pepper and cherry tomatoes offer sweetness and crunch. Cucumber adds a refreshing bite, and red onion gives it a bit of zing. Fresh parsley brightens the flavor, and feta cheese adds creaminess if you choose to include it. The olive oil and lemon juice give the salad a zesty finish. Use salt and pepper to taste for extra flavor. For the full recipe, check out the instructions to see how to bring these ingredients together into a delightful salad. To cook pearl couscous, start by boiling 1.5 cups of water in a medium saucepan. Add 1 cup of pearl couscous and a pinch of salt. Cover the pot and reduce the heat to low. Let it simmer for about 8 to 10 minutes. The couscous should be al dente, which means it will have a slight bite. Once cooked, remove it from the heat and let it cool. This cooling step is vital; it keeps the couscous from getting mushy. While the couscous cools, wash and chop your vegetables. Use a sharp knife for easy cutting. Dice the red bell pepper, cucumber, and onion into small pieces. Halve the cherry tomatoes for a juicy burst in every bite. Place all the chopped veggies in a large mixing bowl with one can of rinsed and drained chickpeas. Add freshly chopped parsley for color and flavor. Mixing all ingredients in one bowl makes it easier to combine later. Creating a zesty dressing is simple. In a small bowl, whisk together 3 tablespoons of olive oil, 2 tablespoons of lemon juice, and 1 teaspoon of ground cumin. Add salt and pepper to taste. This dressing adds a bright flavor that ties the salad together. You can adjust the olive oil and lemon juice for a milder or stronger taste based on your preference. Once the couscous is cool, add it to the bowl with the veggies and chickpeas. Drizzle the zesty dressing over the mixture. Use a large spoon to gently toss everything together. This ensures all flavors blend well. It’s important to chill the salad in the fridge for at least 30 minutes. Chilling helps the flavors meld together, making each bite more delicious. You can sprinkle crumbled feta cheese on top just before serving if you like. For the full recipe, check out the detailed instructions above. To boost the flavor of your Pearl Couscous Chickpea Salad, use fresh herbs. Fresh parsley adds brightness. You can also add mint for a unique twist. For extra zest, consider a splash of vinegar or citrus juice. Adjust seasonings to fit your taste. Start with a pinch of salt, then add more if needed. Taste as you go to find the right balance. You can prepare many ingredients in advance. Chop the vegetables a day before. Store them in airtight containers in the fridge. You can also cook the pearl couscous ahead of time. Let it cool completely before storing it. This will help save time on serving day. Keep all prepped items separate until you're ready to mix and serve. For a fun presentation, layer the salad in a clear bowl. This shows off the colorful ingredients. You could also serve it in lettuce cups for a fresh twist. Pair this salad with grilled chicken or fish for a complete meal. It works well for picnics or potlucks too. You can enjoy it as a light lunch or a hearty side dish. For the full recipe, check the earlier section. {{image_2}} You can swap out chickpeas for other beans. Black beans or white beans work well. They add protein and flavor. For vegetables, try using bell peppers or zucchini. You can even add corn for a sweet crunch. Each swap brings a new twist to the salad. If you want a creamy dressing, try yogurt or tahini. Both give a nice flavor boost. For a herbal twist, mix in fresh basil or mint. These herbs add freshness and aroma. You can also use balsamic vinegar for a different taste. To make the salad vegan, leave out the feta cheese. You can add avocado for creaminess instead. For a gluten-free option, choose gluten-free couscous or quinoa. Both give great texture and taste. Adjust the recipe to fit your needs and enjoy! To keep your salad fresh, use an airtight container. Glass or plastic containers work well. Make sure to store it in the fridge. You can keep it for up to three days. After that, the veggies may lose their crunch. This salad is best enjoyed cold. If you want to warm it up, do so gently. Use a microwave on low heat. Be careful not to overheat, as this can ruin the texture. If it feels dry, drizzle a little olive oil on top before serving. Freezing this salad is not recommended. The texture of the veggies and couscous changes when frozen. If you must freeze it, separate the dressing and veggies first. Store the salad base in a freezer bag. When ready to eat, thaw overnight in the fridge and mix in the dressing. This way, you can revive it without losing too much flavor. Pearl couscous cooks in about 8 to 10 minutes. Boil 1.5 cups of water. Add a pinch of salt. Stir in 1 cup of pearl couscous. Cover and simmer on low heat. It should be al dente when done. Yes, you can make this salad ahead of time. It keeps well in the fridge. I suggest letting it chill for at least 30 minutes before serving. - Calories: About 250 per serving - Protein: Around 9 grams - Fats: Approximately 10 grams - Carbs: Roughly 35 grams This salad is hearty yet light. It's a great option for lunch or dinner. Absolutely! You can skip the feta cheese if you want. The salad will still taste fresh and zesty. Try adding avocado for creaminess instead. To make a warm version, cook the couscous as usual. Sauté the veggies in olive oil. Mix the warm couscous with the cooked veggies. Add the dressing while warm. Serve it right away for a cozy dish. For the full recipe, check the earlier section. Enjoy your cooking! In this blog post, I shared a simple recipe for Zesty Pearl Couscous Chickpea Salad. You learned about the fresh ingredients and step-by-step instructions to prepare it. I also offered tips for enhancing flavor and storage advice. This salad is versatile and easy to customize, making it perfect for any meal. Enjoy trying different ingredients and dressing options. With this recipe, you can create a delicious and healthy dish that suits your taste. Keep it fresh, mix it up, and savor every bite!

Pearl Couscous Chickpea Salad Fresh and Flavorful Dish

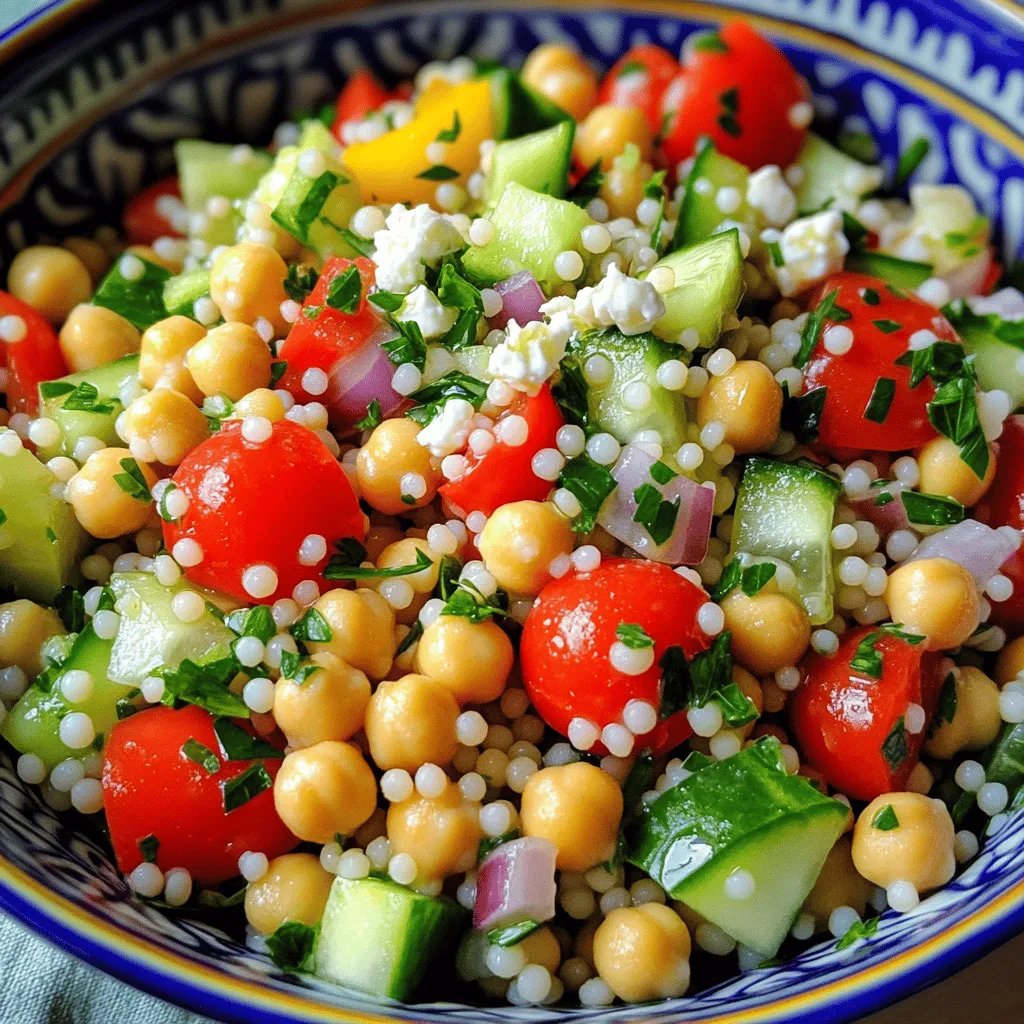
If you’re looking for a fresh and tasty dish, look no further. This Pearl Couscous Chickpea Salad is packed with

- 1 cup glutinous rice - 1 ½ cups coconut milk - 2 ripe mangoes - 2 tablespoons sugar - ¼ teaspoon salt - 2 tablespoons toasted sesame seeds - Steamer - Banana leaves or parchment paper - Saucepan For this tasty treat, the key ingredients set the foundation. Glutinous rice is a must. It gives the rolls their signature texture. The coconut milk adds a rich, creamy flavor. Ripe mangoes bring natural sweetness and a bright color. You also need some extra ingredients. Sugar enhances the sweetness. A pinch of salt balances the flavors. Finally, toasted sesame seeds add a nice crunch on top. For equipment, a steamer is essential. It cooks the rice perfectly. You will also need banana leaves or parchment paper. They help form the rolls. A simple saucepan is key for making the coconut sauce. With these ingredients and tools, you're ready to create sweet mango sticky rice rolls. Check out the Full Recipe for detailed steps to make this delightful dish! Rinse the rice Start by rinsing 1 cup of glutinous rice. Place the rice in a bowl and cover it with cold water. Swirl the rice gently with your hand. Drain the water. Repeat this process until the water runs clear. This step helps remove excess starch and keeps the rice from being too sticky. Soak the rice Next, soak the rinsed rice in clean water. You should soak it for at least 4 hours, but overnight is best. This helps the rice absorb water and cook evenly. When you’re ready, drain the rice again. Steaming instructions To cook the rice, you need a bamboo steamer or a suitable plate. Place the soaked rice in the steamer, lined with cheesecloth. Steam the rice for about 20-25 minutes. The rice should turn translucent and feel tender when done. Preparing the coconut sauce While the rice steams, make the coconut sauce. In a saucepan, mix 1 ½ cups of coconut milk, 2 tablespoons of sugar, and ¼ teaspoon of salt. Heat this mixture over medium-low heat. Stir until the sugar dissolves, but do not let it boil. Mixing rice with coconut sauce Once the rice is cooked, put it in a large bowl. Pour about 1 cup of the coconut sauce over the rice. Stir gently to combine. Let the rice sit for about 30 minutes. This helps the rice soak up the coconut flavor. Adding mango filling Now, lay out banana leaves or parchment paper. Take a handful of the sticky rice and shape it into a rectangle, about ½ inch thick, on the leaf. Place a few strips of ripe mango in the center of the rice rectangle. Rolling technique Carefully fold the banana leaf or parchment paper over the rice and mango. Roll it tightly to seal the filling inside. Repeat this for the rest of the rice and mango. When finished, place the rolls on a platter. Drizzle the remaining coconut sauce on top and sprinkle with toasted sesame seeds for garnish. For the full recipe, check the details provided above. Enjoy your delicious Sweet Mango Sticky Rice Rolls! Soaking the rice is a must. It helps the grains absorb water. I recommend soaking for at least 4 hours, but overnight is best. This step makes the rice soft and sticky. Steaming time is also key. If you steam for too long, the rice can become mushy. Aim for 20 to 25 minutes. You want the rice to be tender and slightly translucent. Adjusting sweetness can make a big difference. You can add more sugar if you like it sweeter. Taste the coconut sauce before mixing it with the rice. This way, you can get it just right for your palate. Don’t be afraid to add other toppings. Toasted sesame seeds add a nice crunch. You can also try shredded coconut or crushed nuts for extra flavor. When serving, arrange the rolls neatly on a platter. Drizzling extra coconut sauce over the top looks great. It adds a nice touch and extra flavor. For garnishing, sprinkle toasted sesame seeds or fresh mint leaves. A little color goes a long way in making your dish pop. {{image_2}} You can swap out mango for other fruits. Consider using ripe bananas, strawberries, or even kiwi. Each fruit adds a unique flavor and texture. Next, think about your coconut sauce. Sweetened coconut sauce adds a rich flavor. Unsweetened sauce offers a more subtle taste. Choose what fits your palate! If you want a vegan option, this recipe is already perfect. All ingredients are plant-based. For gluten-free needs, stick to glutinous rice. It is naturally gluten-free and safe for all diets. For a low-sugar version, reduce the sugar in the coconut sauce. You can also use sugar alternatives like agave or stevia. This keeps the sweetness without the extra sugar. Adding spices can enhance the taste. Try a pinch of cinnamon or a dash of cardamom. These spices pair well with mango and coconut. You can also play with sauces. Consider drizzling a passion fruit syrup over the rolls. This adds a tart and sweet contrast to the creamy coconut. To keep your Sweet Mango Sticky Rice Rolls fresh, store them in an airtight container. Place parchment paper between the rolls to prevent sticking. Refrigerate them for up to 3 days. When you're ready to enjoy them again, reheat the rolls in a steamer. It keeps the rice moist and soft. You can also microwave them for about 20 seconds. Just cover them with a damp paper towel to trap steam. You can freeze these rolls either before or after you assemble them. If you freeze them before, make sure to wrap each roll tightly in plastic wrap. This helps keep the flavors and textures intact. Freeze them for up to a month. When you're ready to eat, thaw them in the fridge overnight. If you freeze them after assembly, let them cool first. Then, follow the same thawing steps before reheating. In the fridge, Sweet Mango Sticky Rice Rolls last about 3 days. After that, they start to lose their fresh taste and texture. Watch for signs of spoilage, like an odd smell or color changes. If the rice feels dry or hard, it's time to toss it. Always trust your senses; if something seems off, it’s best to be safe. Sweet Mango Sticky Rice Rolls come from Thailand. This dish is part of Thai culture and is enjoyed by many. It is often served as a dessert or snack. The main ingredients are sticky rice, coconut milk, and ripe mango. These flavors blend beautifully and create a unique taste. The dish is a popular treat during festivals and celebrations. Many Thai people see it as comfort food. It reminds them of home and joyful moments. No, you cannot use regular rice instead of glutinous rice. Glutinous rice has a high starch content. This makes the rice sticky and chewy when cooked. Regular rice does not have these properties. It will not give you the same texture. This dish relies on that sticky quality for the best flavor. If you want the true taste of Sweet Mango Sticky Rice Rolls, always use glutinous rice. To make this recipe dairy-free, use almond or oat milk. These alternatives work well in place of coconut milk. You can also use a dairy-free coconut cream. Make sure to check the labels for added sugars. This helps keep the flavor balanced. The rolls will still taste great and have a nice texture. Enjoy your Sweet Mango Sticky Rice Rolls without dairy! For the full recipe, follow the steps outlined above. To wrap up, we explored how to make Sweet Mango Sticky Rice Rolls. You learned about key ingredients like glutinous rice, coconut milk, and ripe mangoes. I shared step-by-step instructions and helpful tips for perfect results. You also saw variations, storage options, and addressed common questions. Enjoy making this dish! It’s fun, tasty, and perfect for sharing with friends. Happy cooking!

Sweet Mango Sticky Rice Rolls Easy and Tasty Recipe

Craving something sweet and unique? Let me introduce you to sweet mango sticky rice rolls! This easy and tasty recipe

Mango cheesecake is a creamy delight that combines fresh mangoes and rich cheese. This dessert is perfect for any occasion. You will love the sweet and tangy flavor in each bite. The full recipe provides a simple way to enjoy this tropical treat. Here are the key ingredients you need: - 1 ½ cups graham cracker crumbs - ½ cup unsalted butter, melted - 2 cups cream cheese, softened - 1 cup sugar - 2 ripe mangoes, pureed (reserve some diced for garnish) - 2 teaspoons vanilla extract - 3 eggs - 1 tablespoon fresh lime juice - 1 cup sour cream - ¼ cup gelatin - ¾ cup cold water These ingredients work together to create a smooth and tasty cheesecake. You can add some fun garnishes to enhance your cheesecake. Consider these options: - Diced mango for a fresh touch - Mint leaves for color and flavor - Extra mango puree drizzled on top These garnishes make the cheesecake look beautiful and taste even better. Start by preheating your oven to 325°F (160°C). In a large bowl, mix the graham cracker crumbs and melted butter. Make sure it looks like wet sand. Press this mixture into the bottom of a 9-inch springform pan. Bake for 10 minutes, then take it out to cool. In a separate bowl, beat the softened cream cheese until it is smooth. Gradually add in the sugar while mixing. Next, fold in the mango puree, vanilla extract, lime juice, and sour cream. Blend until everything is smooth. Add the eggs one at a time. Mix gently after each egg, being careful not to overmix. In a small pan, dissolve the gelatin in cold water over low heat. Once melted, let it cool slightly, then stir it into the cheesecake mix. Pour the cheesecake mixture over the cooled crust. Smooth the top with a spatula. Bake in the oven for 50 to 60 minutes. The center should be set but still slightly jiggly. Turn off the oven, crack the door, and let it cool inside for an hour. This helps prevent cracking. After it cools, cover the cheesecake and put it in the fridge for at least 4 hours. For the best results, chill it overnight. Before serving, top with diced mango for a beautiful garnish. To keep your cheesecake smooth, follow a few simple steps. First, do not rush the mixing. Mix the cream cheese slowly to avoid air bubbles. Next, bake it at a lower temperature. A hot oven can cause cracks. After baking, let the cheesecake cool in the oven with the door slightly open. This helps it cool down gradually. Lastly, chill it in the fridge for at least four hours. This step will help firm it up and keep it crack-free. For a creamy mango cheesecake, start with room-temperature cream cheese. Cold cream cheese can lead to lumps. Use a mixer for smooth blending. Add the eggs one by one, mixing gently after each. Overmixing can cause a dense texture. When adding the mango puree, fold it in softly to keep the mixture light. Lastly, the sour cream adds creaminess, so don't skip it. When serving mango cheesecake, presentation matters. Place it on a nice cake stand for a beautiful look. For extra flair, drizzle mango puree on top. Add a few mint leaves for color and freshness. You can also serve it with whipped cream or ice cream. For a crunchy contrast, sprinkle some crushed nuts on the side. This adds a delightful texture that pairs well with the creamy cheesecake. For more details, check the Full Recipe. {{image_2}} If you want a quick dessert, try the no-bake mango cheesecake. This version skips baking and uses gelatin to set. Here’s how to make it: - Ingredients: - 1 ½ cups graham cracker crumbs - ½ cup unsalted butter, melted - 2 cups cream cheese, softened - 1 cup sugar - 2 ripe mangoes, pureed - 2 teaspoons vanilla extract - 1 cup heavy cream - ¼ cup gelatin - ¾ cup cold water 1. Mix the graham cracker crumbs and melted butter. Press into a pan for the crust. 2. In a bowl, blend cream cheese and sugar. Add the mango puree and vanilla. 3. Whip the heavy cream until stiff peaks form. Fold it gently into the cream cheese mix. 4. Dissolve gelatin in cold water and add to the mixture. 5. Pour into the crust, smooth the top, and chill for at least 4 hours. Going vegan? You can make a tasty mango cheesecake using plant-based ingredients. Here’s a simple swap: - Ingredients: - 1 ½ cups almond flour - ¼ cup coconut oil, melted - 2 cups cashews, soaked and blended - ½ cup maple syrup - 2 ripe mangoes, pureed - 2 teaspoons vanilla extract - 1 tablespoon lemon juice - ¼ cup agar-agar powder with water 1. Prepare the crust with almond flour and coconut oil. 2. Blend soaked cashews with maple syrup, mango puree, and vanilla. 3. Cook agar-agar in water until dissolved, then mix it into the cashew blend. 4. Pour into your crust and chill until firm. Love experimenting? You can mix flavors for fun twists on mango cheesecake. Here are some ideas: - Coconut Mango: Add shredded coconut to the filling for a tropical taste. - Passion Fruit: Stir in passion fruit puree for a tangy zing. - Chocolate Mango: Swirl melted chocolate into the mango filling for a rich contrast. These variations make your mango cheesecake even more exciting. Check out the Full Recipe for classic mango cheesecake! To keep your mango cheesecake fresh, store it in the fridge. Use an airtight container to prevent it from drying out. Cover the top with plastic wrap if you don’t have a container. This way, the cheesecake stays moist and tasty for days. Always chill it before serving to enjoy that creamy texture. If you want to save the cheesecake for later, freezing works well. First, let it cool completely. Then, slice it into pieces for easy serving. Wrap each slice in plastic wrap and then in aluminum foil. This double wrapping helps prevent freezer burn. Place the wrapped slices in a freezer bag. They can last up to three months in the freezer. Mango cheesecake stays fresh in the fridge for about five days. After that, it may lose its flavor and texture. Always check for signs of spoilage like an off smell or discoloration. If you freeze it, remember to let it thaw in the fridge overnight for the best taste. Enjoy your Mango Bliss Cheesecake knowing it lasts! Yes, you can use frozen mango. Just thaw it first. Drain any excess water. This helps keep the cheesecake firm. Frozen mango may not taste as fresh, but it still works well. If you use frozen mango, blend it until smooth. This way, your cheesecake stays creamy. Check for a slight jiggle in the center. The edges should be set, but the middle may still move a little. This is normal. The cheesecake firms up while cooling. Remember to turn off the oven and crack the door. Let it cool slowly to avoid cracks. Avoid overmixing the batter. This can add too much air and cause cracks. Make sure all ingredients are at room temperature. Cold ingredients make it hard to mix well. Don’t skip the cooling step in the oven. Quick changes in temperature can lead to cracks. For a perfect result, follow the Full Recipe closely. In this post, we covered how to make a delicious mango cheesecake. You now know the key ingredients, from crust to filling. We explored tips for a smooth texture and how to avoid cracks. I shared variations, like no-bake or vegan options. Proper storage is key for keeping your cheesecake fresh. Mango cheesecake is a sweet treat for any occasion. With practice, you’ll master this dessert. Enjoy making and sharing it with others!

Mango Cheesecake Delight Simple and Irresistible Recipe

If you love sweet, fruity desserts, you are in for a treat! This Mango Cheesecake Delight recipe is simple and

When making Lemon Posset, the right ingredients make all the difference. Here is what you need: - 2 cups heavy cream - 3/4 cup granulated sugar - 1/4 cup freshly squeezed lemon juice - Zest of 2 lemons - Optional garnishes: Fresh berries and mint leaves Each ingredient plays a key role. The heavy cream gives the posset its rich, creamy texture. Sugar balances the tartness of the lemons, creating a sweet and tangy flavor. Fresh lemon juice adds brightness, while lemon zest enhances the aroma. You can also add fresh berries or mint leaves to make your dessert pop. These garnishes add color and freshness. For the Full Recipe, check the detailed steps that will help you create this zesty treat. To make a creamy lemon posset, follow these simple steps. 1. Combine heavy cream and sugar in a saucepan. Start by pouring 2 cups of heavy cream and 3/4 cup of granulated sugar into your medium saucepan. Stir them together gently. 2. Heat until just before boiling, then remove from heat. Place the saucepan on medium heat. Stir the mixture as it warms. You want it hot enough to dissolve the sugar. Once it bubbles a bit, take it off the heat. 3. Stir in lemon juice and zest. Next, add 1/4 cup of freshly squeezed lemon juice and the zest of 2 lemons. Stir well to mix the flavors evenly. 4. Strain the mixture for a smooth texture. To avoid any lumps, strain the mixture using a fine-mesh sieve into a bowl. This step ensures that your posset is silky smooth. 5. Pour into serving glasses and chill until set. Carefully pour the strained mixture into your serving glasses or ramekins. Cover them with plastic wrap and place them in the fridge. Chill for at least 4 hours or overnight for the best results. Now you have a delightful lemon posset ready to enjoy! For the full recipe, check the complete guide. To get the best results, chill your posset for at least four hours. This time helps it set properly. If you can, let it chill overnight. The longer it sits, the creamier it becomes. For the right texture, watch the heat. Heat the cream just until it steams. If it boils, the posset may not set well. Stir the mixture well after adding lemon juice. This helps blend the flavors smoothly. Straining is key for a silky finish. Use a fine-mesh sieve to remove zest. Pour the mixture slowly to avoid any clumps. You want it to be as smooth as possible. This step makes a big difference in texture. These simple tips will elevate your Lemon Posset. They ensure you create a delightful dessert every time. For the full recipe, check the earlier section. Enjoy your cooking! {{image_2}} You can make lemon posset even more fun by adding new flavors. Here are some tasty ideas: - Different citrus flavors: Try lime or orange juice instead of lemon juice for a new taste. Each brings a unique twist and can make your dessert stand out. A mix of citrus can also add a bright, fresh flavor. - Incorporating herbs: Fresh herbs can elevate your posset. Consider adding a touch of basil or thyme to the cream. Just a small amount can add a surprising depth of flavor. It’s a great way to surprise your guests! - Swapping garnishes: Change up your garnishes based on the season. In summer, use bright berries like strawberries or raspberries. In fall, consider sliced apples or pears with a sprinkle of cinnamon. Seasonal garnishes make the dish look and taste great. Experiment with these ideas to find your perfect lemon posset. Each variation brings a new taste that keeps things exciting. You can find the Full Recipe to get started on your own lemon posset adventure. To keep your lemon posset fresh, store it in the fridge. Place the glasses in an airtight container. This helps prevent it from absorbing other smells. You can also cover the glasses with plastic wrap. Lemon posset stays fresh for about three to four days in the fridge. If you want to keep it longer, consider freezing it. To freeze, pour the posset into freezer-safe containers. Make sure to leave space at the top, as it may expand. You can freeze it for up to two months. When ready to eat, thaw it in the fridge overnight. For a quick treat, serve it chilled after thawing. Enjoy your creamy delight! For the full recipe, check the details above. Can I make Lemon Posset ahead of time? Yes, you can make Lemon Posset ahead of time. It needs at least four hours to set. For the best taste, make it the day before. This gives it time to chill and firm up. What can I use as a substitute for heavy cream? If you need a cream substitute, try using coconut cream. It gives a nice flavor and texture. You can also blend milk with butter for a lighter option, but it may not be as rich. How can I make Lemon Posset less sweet? To reduce the sweetness, cut back on the sugar. You can start with half the amount and taste as you go. Adding more lemon juice can also balance the taste. Full Recipe reference: Where to find a detailed Lemon Posset recipe? You can find the full recipe for Lemon Posset [here](#). It includes all the steps and tips for making this treat delicious. Lemon posset is a simple and tasty treat. We covered the key ingredients and a step-by-step guide to make it. Perfect chilling time helps it set just right. You can try different flavors and garnishes for fun twists. Store leftovers in the fridge to keep them fresh. I hope you feel confident to make your own lemon posset. It's a delightful dessert that impresses. Give it a try and enjoy this creamy, tangy treat!

Lemon Posset Dessert Simple and Creamy Delight

Looking for a dessert that’s simple yet impressively creamy? Let me introduce you to Lemon Posset! This light and tangy

To make Summer Berry Mini Galettes, you need a few simple ingredients. Here’s what you'll gather: - 1 ½ cups all-purpose flour - ½ teaspoon salt - 1 tablespoon sugar - ½ cup cold unsalted butter, cubed - 4-5 tablespoons ice water - 1 cup mixed summer berries (blueberries, raspberries, strawberries) - 2 tablespoons sugar (for berries) - 1 tablespoon cornstarch - 1 teaspoon vanilla extract - 1 egg, beaten (for egg wash) - Turbinado sugar for sprinkling These ingredients create a flaky crust and a sweet, fruity filling. The all-purpose flour gives the galettes their structure. Salt and sugar balance the flavor. Cold butter keeps the dough flaky. Ice water helps bind everything without melting the butter. The mixed berries bring freshness and color. Sugar and cornstarch help sweeten and thicken the berry filling. Vanilla adds warmth, while the egg wash gives a lovely golden finish. Lastly, turbinado sugar adds a crunchy texture on top. For the complete process, check out the Full Recipe. You’ll enjoy making these delightful mini galettes! - Mixing dry ingredients: Start by grabbing a large mixing bowl. Whisk together 1 ½ cups of all-purpose flour, ½ teaspoon of salt, and 1 tablespoon of sugar. This blend gives your crust a nice flavor. - Incorporating cold butter: Next, add ½ cup of cold unsalted butter, cut into small cubes. Use a pastry cutter or your fingers to blend until it looks like coarse crumbs. This step is key for a flaky crust. - Forming the dough: Slowly add 4-5 tablespoons of ice water, one tablespoon at a time. Mix gently until the dough comes together. Wrap it in plastic wrap and chill for at least 30 minutes. Chilling helps the gluten relax, making the crust tender. - Combining berries with sugar and cornstarch: In another bowl, toss together 1 cup of mixed summer berries (blueberries, raspberries, strawberries), 2 tablespoons of sugar, and 1 tablespoon of cornstarch. The sugar sweetens the berries, while the cornstarch thickens the juices. - Tossing in vanilla extract: Add 1 teaspoon of vanilla extract to the berry mix. This adds a lovely depth of flavor, making your filling even more delicious. - Rolling techniques: After chilling the dough, it’s time to roll it out. On a floured surface, roll the dough to about 1/8 inch thick. It should be thin but strong enough to hold the filling. - Portioning the filling: Cut the rolled dough into 5-inch circles. Place a heaping tablespoon of the berry mixture in the center of each circle. This gives every galette a fruity heart. - Folding the edges: Gently fold the edges of the dough up over the filling. Leave the center exposed for that rustic look. Pinch the edges to secure them, so the filling doesn’t spill out during baking. - Preheating the oven: Preheat your oven to 375°F (190°C). This ensures that the galettes bake evenly and get golden brown. - Egg wash application: Brush the surface of each galette with a beaten egg. This gives them that beautiful golden shine. Sprinkle some turbinado sugar on top for added crunch and sweetness. - Baking time and temperature: Place the galettes on a parchment-lined baking sheet, making sure they don’t touch. Bake for 25-30 minutes or until they are golden and the berries bubble. The smell will be amazing! For the full recipe, check the ingredients and steps to make these delightful Summer Berry Mini Galettes. - Choosing the right butter: Use cold unsalted butter. It helps the crust stay flaky. I like to cut it into small cubes. This makes mixing easier. - Ensuring the right temperature: Keep everything cold, from the butter to the water. Cold ingredients help create a nice, flaky crust. Chill your dough before rolling it out. - Selecting the best summer berries: Look for ripe, sweet berries. Blueberries, raspberries, and strawberries work great. They burst with flavor as they bake. - Flavor combinations and alternatives: Try adding a splash of lemon juice or zest for brightness. You can mix in some peaches or cherries for a twist. - Presentation ideas: Serve the mini galettes on a rustic wooden board. Dust them with powdered sugar for a fancy touch. Add mint leaves for color and freshness. - Pairing with ice cream or whipped cream: A scoop of vanilla ice cream or a dollop of whipped cream is a perfect match. The creaminess pairs well with the tart berries. Enjoy these tips while making your Summer Berry Mini Galettes! For the complete recipe, make sure to check out the Full Recipe section. {{image_2}} You can get creative with fruit in your galettes. While I love using a mix of blueberries, raspberries, and strawberries, other berries work too. Try blackberries, cherries, or even peaches for a twist. You can also mix fruits together. A blend of peaches and blueberries gives a sweet and tangy taste. You can also use apples with cinnamon for a fall twist. Each fruit brings a unique flavor and texture, so don’t be afraid to experiment. If you need a gluten-free galette, choose the right flour. Almond flour or coconut flour can work well. You will want to blend these with a gluten-free all-purpose flour. This helps keep the right texture. You may need to adjust the water amount, as these flours absorb moisture differently. A fun tip: adding a bit of cornstarch can help with the crispness. You can make these galettes vegan with a few swaps. Use vegan butter instead of regular butter. For the egg wash, brush the dough with plant-based milk. This gives a nice shine to the crust. Instead of an egg, you can use a mixture of flaxseed meal and water. Mix 1 tablespoon of flaxseed with 2.5 tablespoons of water and let it sit. This creates a gel-like texture that binds well. Enjoy the flavors without animal products! For the Full Recipe, see the earlier section. To keep your Summer Berry Mini Galettes fresh, start with refrigeration. Place them in an airtight container. They will stay good for about three days in the fridge. If you want to enjoy them later, consider freezing them. Wrap each galette in plastic wrap, then place them in a freezer bag. They can last up to three months in the freezer. When you are ready to eat, simply thaw them in the fridge overnight. When it's time to enjoy your galettes again, reheating is key. The best way to reheat them is in the oven. Preheat your oven to 350°F (175°C). Place the galettes on a baking sheet and heat for about 10-15 minutes. This method keeps the crust flaky and the filling warm. You can also use a toaster oven for a quick option. Just keep an eye on them to avoid burning. Enjoy each bite with that fresh taste! Yes, you can use frozen berries. Just make sure to thaw and drain them first. This keeps the dough from getting too soggy. Frozen berries work well and are often just as tasty as fresh ones. Look for a golden brown color on the crust. The edges should be crisp, and the filling should bubble slightly. You can also use a toothpick to check the dough. It should feel firm and not doughy. Absolutely! You can prepare the dough a day ahead. Just wrap it tightly in plastic wrap and store it in the fridge. This helps the flavors meld and makes rolling easier. Serve them warm or at room temperature. They taste great on their own, but you can add a scoop of vanilla ice cream or a dollop of whipped cream. A sprinkle of fresh mint adds a nice touch. Mini galettes stay good in the fridge for about three days. Store them in an airtight container to keep them fresh. You can also freeze them for up to a month. Just reheat them in the oven to crisp them back up. This blog post covered how to make mini galettes with summer berries. We discussed the simple ingredients for the crust and filling. I shared step-by-step instructions for preparing, baking, and serving them. From tips on creating the perfect crust to storing leftovers, I aimed to make this easy and enjoyable for you. In conclusion, baking these galettes is a great way to enjoy fresh flavors. Plus, you can customize them to fit your taste. Enjoy your baking adventure!

Summer Berry Mini Galettes Fresh and Flaky Delight

Summer is here, and so are the delightful flavors of fresh berries! Today, I’m excited to share my recipe for

- Chicken breast specifics: Use 1 pound of boneless, skinless chicken breasts. This keeps the meal healthy and tender. - Quinoa and vegetable broth: One cup of quinoa cooked in 2 cups of vegetable broth adds flavor and texture. - Fresh vegetables and toppings: Include a diced cucumber, 1 cup of halved cherry tomatoes, thinly sliced red onion, and Kalamata olives. Top it off with crumbled feta cheese and chopped parsley for color and taste. - Additional spices and herbs: You can add spices like cumin or smoked paprika for more flavor. - Alternative protein options: If you prefer, swap the chicken for salmon or tofu. - Dressings and sauces: Consider a drizzle of tzatziki or a balsamic glaze for extra zest. - Caloric content per serving: Each serving has about 450 calories, making it a balanced meal. - Macronutrient breakdown: The dish provides around 30g of protein, 40g of carbs, and 15g of fat. - Health benefits of the ingredients: This meal is rich in protein and fiber. The fresh veggies offer vitamins and antioxidants, promoting good health. For the complete recipe and detailed instructions, check the Full Recipe. - Ingredients for marination: - 2 tablespoons olive oil - 2 teaspoons dried oregano - 1 teaspoon garlic powder - Salt and pepper to taste To marinate the chicken, mix the olive oil, oregano, garlic powder, salt, and pepper in a bowl. Add the chicken breasts and coat them well. This step adds great flavor. Let the chicken marinate for at least 30 minutes. If you have more time, refrigerate it for up to 2 hours. This makes the chicken juicy and tasty. - Best practices for rinsing quinoa: - Rinse quinoa under cold water to remove bitterness. To cook the quinoa, rinse it well in a fine mesh strainer. This step gets rid of any bitter taste. In a medium pot, bring 2 cups of vegetable broth to a boil. Add 1 cup of rinsed quinoa. Then, reduce the heat to low. Cover and simmer for about 15 minutes. Once the liquid is absorbed, fluff the quinoa with a fork. Set it aside to cool. - Equipment needed for cooking: - Grill or stovetop grill pan Preheat your grill or stovetop grill pan over medium heat. Place the marinated chicken on the grill. Cook it for 6-7 minutes on each side. You want the chicken to reach an internal temperature of 165°F (75°C). A meat thermometer helps with this. After grilling, let the chicken rest for 5 minutes before slicing. This keeps it moist. - Layering ingredients for best presentation: - Start with quinoa, then add chicken and veggies. To assemble the bowls, place a layer of cooked quinoa in each serving bowl. Next, add sliced chicken on top. Then, add diced cucumber, halved cherry tomatoes, thinly sliced red onion, and halved Kalamata olives. Finally, sprinkle crumbled feta cheese on top. - Serving suggestions: Drizzle fresh lemon juice over each bowl. You can also add red wine vinegar for extra flavor. Finish with chopped parsley for a fresh touch. Serve with lemon wedges and a sprig of parsley on the side for a beautiful presentation. For more flavor, consider a scoop of tzatziki sauce on top. Check out the Full Recipe for all the steps! To avoid dry chicken, marinate it well. Use olive oil, oregano, and garlic powder. Let the chicken sit for at least 30 minutes. This helps it soak up flavors and stay moist. Cook it on medium heat. This keeps it juicy and tender. Aim for an internal temperature of 165°F (75°C). For fluffy quinoa, rinse it before cooking. This removes bitter saponins. Use vegetable broth for extra flavor. Bring it to a boil and then reduce the heat. Simmer it for about 15 minutes. Fluff it with a fork after cooking. This adds air and keeps it light. Make-ahead suggestions include cooking chicken and quinoa in advance. Store them in separate containers. You can also chop veggies ahead of time. Keep them fresh in the fridge until ready to serve. This saves time on busy days. For storage tips on leftovers, let the bowls cool first. Transfer them to airtight containers. They can last in the fridge for up to three days. When reheating, add a splash of water to keep the quinoa moist. For an attractive presentation, layer the ingredients neatly in the bowl. Start with quinoa, then add chicken and veggies. Use bright colors to make the bowl pop. Garnish with parsley and lemon wedges. These details make your dish look inviting. Pairing options include serving with tzatziki sauce. This adds creaminess and flavor. You can also enjoy it with a light, crisp white wine. This complements the dish well and enhances the meal experience. For the full recipe, you can refer back to the main recipe section. {{image_2}} You can switch the chicken for other proteins. Salmon, shrimp, or tofu work well. Each option gives a new taste and texture. - Salmon: Grill it with lemon juice for a fresh flavor. - Shrimp: Sauté quickly with garlic for a seafood twist. - Tofu: Marinate and grill for a tasty plant-based choice. For vegetarian needs, use chickpeas or lentils. They add protein and fiber. Spices can change the taste of your bowl. Add paprika for heat or cinnamon for sweetness. - For heat: Try cayenne pepper or red pepper flakes. - For sweetness: Use a dash of honey or cinnamon. You can also use seasonal veggies to keep it fresh. In summer, add zucchini or bell peppers. In winter, try roasted root vegetables. Quinoa is great, but you can swap it out. Rice or couscous are tasty options too. - Rice: Use brown or white rice for a filling base. - Couscous: It cooks quickly and has a nice texture. If you need gluten-free options, try cauliflower rice or lentils. They keep your bowl healthy and satisfying. For the full recipe, check out the complete guide on Greek Chicken Bowls! Greek chicken bowls can last in the fridge for up to four days. To keep them fresh, store the ingredients separately. This way, the flavors stay bright, and the textures remain nice. Place the cooked quinoa in one container and the chicken in another. Keep the veggies in a third container. This method helps maintain crispness and flavor. You can freeze the components of your Greek chicken bowls. First, cool the chicken and quinoa completely. Then, divide them into portions. Use airtight bags or containers for the best results. The chicken and quinoa will last up to three months in the freezer. When you're ready to eat, thaw them in the fridge overnight. To reheat, simply use the microwave or stovetop. To heat your bowls while keeping the texture, use the stovetop. Gently warm the chicken and quinoa in a pan over low heat. Stir frequently to avoid burning. If you use a microwave, cover the bowl with a damp paper towel. This helps keep moisture in. To prevent sogginess, avoid reheating the fresh veggies. Add them in after reheating to keep them crunchy and fresh. To cook quinoa, rinse it well in cold water. This removes any bitter taste. Use a ratio of 1 cup quinoa to 2 cups vegetable broth. Bring the broth to a boil, then add the quinoa. Reduce heat, cover, and simmer for about 15 minutes. Once the liquid is absorbed, fluff it with a fork. This method gives you a light, fluffy texture. Yes, you can use frozen chicken! Thaw the chicken in the fridge overnight for best results. If you need it faster, place the chicken in a sealed bag and submerge it in cold water. After thawing, marinate it as you would fresh chicken. This ensures even flavor and cooking. To add spice, try mixing in a pinch of cayenne pepper or red pepper flakes with the marinade. You could also add diced jalapeños or hot sauce to the bowls. For a smoky flavor, consider using smoked paprika. Adjust the heat to your taste! This article covered how to make delicious Greek chicken bowls. We looked at key ingredients like chicken, quinoa, and fresh veggies. I shared easy steps for marinating, cooking, and assembling the bowls. We discussed tips for storage and meal prep. For your next meal, be creative with flavors and ingredients. Explore different proteins and bases. Enjoy the health benefits while making it your own. These bowls are fun and tasty for everyone.

Greek Chicken Bowls Energetic and Flavorsome Meal

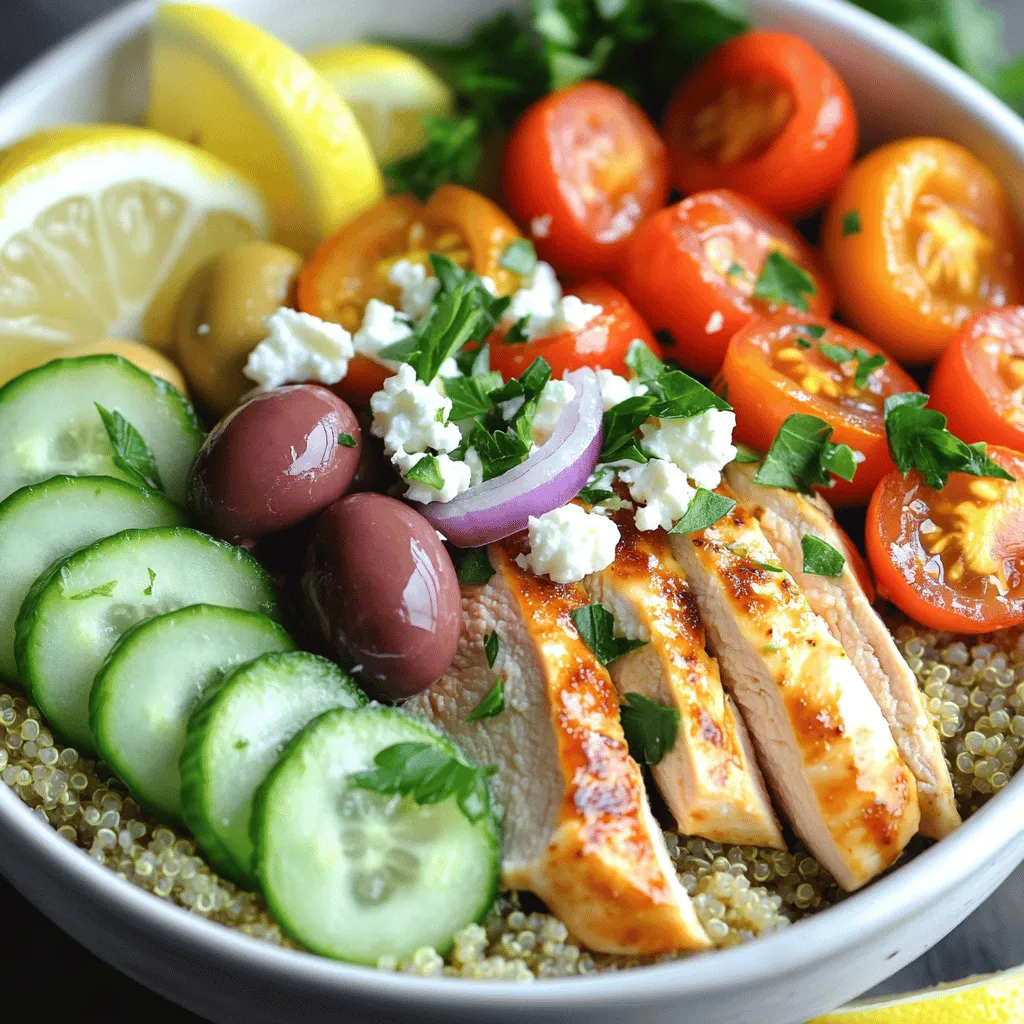
If you’re looking for a vibrant meal bursting with flavor, Greek chicken bowls are the perfect choice! Packed with juicy

- 2 ripe mangoes, julienned - 1 medium cucumber, julienned - 1 red bell pepper, thinly sliced - 1/2 red onion, thinly sliced - 1 carrot, shredded - 1/4 cup fresh cilantro, chopped - 1/4 cup roasted peanuts, roughly chopped - 2 tablespoons fish sauce or soy sauce (vegetarian option) - 1 tablespoon lime juice - 1 tablespoon honey or agave syrup - 1 red chili, minced (adjust to taste) - Salt and pepper to taste - Choosing ripe mangoes: Look for mangoes with a slight give when you press them. They should smell sweet at the stem end. - Selecting fresh vegetables for crunch: Pick cucumbers that are firm and smooth. Bright red bell peppers should feel heavy and have tight skin. - Opting for the best peanuts: Choose roasted peanuts without salt for a rich flavor. They should be crunchy and fresh. When you gather these ingredients, you set the stage for a vibrant dish. Each component adds a unique taste and texture. The sweet mango pairs perfectly with the crisp cucumber and spicy chili. This salad bursts with flavor and color. For the full recipe, check the details above. To start, you need to peel and julienne the mangoes. Hold the mango upright and slice down along the pit on both sides. Then, use a knife to make thin cuts in the flesh. You can cut these into strips for an easy julienne. Next, for the cucumber, slice off the ends. Cut it in half lengthwise, then make thin slices. You can stack the slices and cut them into strips, just like the mango. This technique gives a nice crunch. For the red bell pepper, first remove the seeds. Cut the pepper in half, then slice it thinly. This adds a sweet crunch to your salad. In a large bowl, combine all your fresh produce. Mix the julienned mangoes, cucumber, sliced bell pepper, red onion, and shredded carrot together. This is the base of your salad. Now, let's make the dressing. In a small bowl, whisk together the fish sauce or soy sauce, lime juice, honey, and minced red chili. Taste the dressing and adjust it based on your liking. If you want it sweeter, add more honey. For more spice, add extra chili. Once your dressing is ready, pour it over the salad mixture. Toss gently so that all the ingredients are coated in the dressing. To finish, add chopped cilantro and roasted peanuts on top of the salad. Toss everything once more for an even mix. Let the salad rest for about 10 minutes. This resting time helps the flavors meld together nicely. For serving, present the salad in a large bowl or in individual lettuce cups. This makes it look beautiful and fun to eat. Enjoy your Thai Mango Salad, a refreshing and healthy delight! For more detailed steps, check the Full Recipe. To make the best Thai mango salad, you can adjust the sweetness and spice. If the salad tastes too sweet, add a bit more lime juice. If you want it spicier, add more minced chili. Always taste as you go. That way, you can find the right balance for your taste buds. Letting the flavors meld is very important. Once you mix the salad, let it sit for about 10 minutes. This gives the ingredients time to blend. The longer they sit, the better the taste. Creative ways to serve Thai mango salad can make it more fun. You can serve it in a large bowl or in individual cups. Adding bright colors makes the dish pop. Using lettuce cups is an attractive option. Simply scoop some salad into a lettuce leaf. This makes a great finger food. Plus, it adds a nice crunch! You can prepare the salad in advance. Just chop the veggies and mangoes, then store them separately. Wait to mix in the dressing until just before serving. This keeps everything fresh and crisp. For storing leftovers, keep them in an airtight container. The salad stays good in the fridge for up to two days. However, the mango may get mushy over time. If you notice any off smells or colors, it’s best to toss it. {{image_2}} You can make your Thai mango salad heartier by adding proteins. Grilled chicken, shrimp, or tofu work well. For chicken, grill it until golden. Slice it thin and toss it in. If you choose shrimp, grill or sauté it until it turns pink. Then, mix it in. For a vegan option, use cubed, firm tofu. Cook the tofu until it's crispy, then add it to the salad. This way, you make the salad filling and tasty. The dressing can change the flavor of your salad. While the original dressing is great, try different options. You might swap fish sauce for a sesame dressing or a peanut sauce. If you want a fresher taste, mix in some orange juice. To customize, adjust the sweetness and spice levels. You can add more honey or a pinch of chili to fit your taste. This flexibility makes the salad fun! Seasonal fruits can add a twist to your Thai mango salad. In summer, add diced strawberries or peaches for sweetness. In the fall, try pomegranate seeds for crunch and color. You can also change the nuts or seeds you use. Almonds or sunflower seeds can replace peanuts. This keeps the salad fresh and exciting all year long! For the full recipe, check out the Tropical Thai Mango Salad 🥭. To keep your Thai mango salad fresh, store it in the fridge. Use an airtight container to help maintain its crispness. If you plan to eat it later, keep the dressing separate. This way, the salad stays crunchy and tasty. When stored properly, this salad lasts about 2-3 days in the fridge. After that, the veggies may start to lose their crunch. Look for signs of spoilage, like a sour smell or slimy texture. If you notice these, it’s best to toss it. Reheating isn’t needed for this salad. It’s best enjoyed cold. If you want to warm it, do so gently. Heat it in a pan on low heat. This helps keep the mango soft and the other veggies crisp. If you cannot find ripe mangoes, you can use other fruits. Try using peaches or nectarines instead. They have a sweet taste and similar texture. You can even use canned mango in syrup. Just drain it well before adding to the salad. This way, you still enjoy a fruity flavor. Yes, you can easily make this salad vegan. Instead of fish sauce, use soy sauce or tamari. This change adds a nice umami flavor without animal products. You can also swap honey for agave syrup or maple syrup. These options provide sweetness while keeping it plant-based. To make this salad spicier, add more red chili. You can also use fresh jalapeños or Thai bird chilies. For a different heat, try chili flakes or sriracha in the dressing. Start with a little and taste it. You can always add more to reach your desired spice level. Thai Mango Salad is a lively mix of fresh, colorful ingredients. You learned about selecting ripe mangoes, creating a tasty dressing, and adding protein for a hearty meal. Remember, this salad is versatile and easy to prepare. Try it with seasonal fruits or different dressings to keep it new. Your choice of presentation can elevate the dish. Enjoy the bright flavors and crunch, and feel free to experiment! This salad can become a favorite in your kitchen.

Thai Mango Salad Refreshing and Healthy Delight

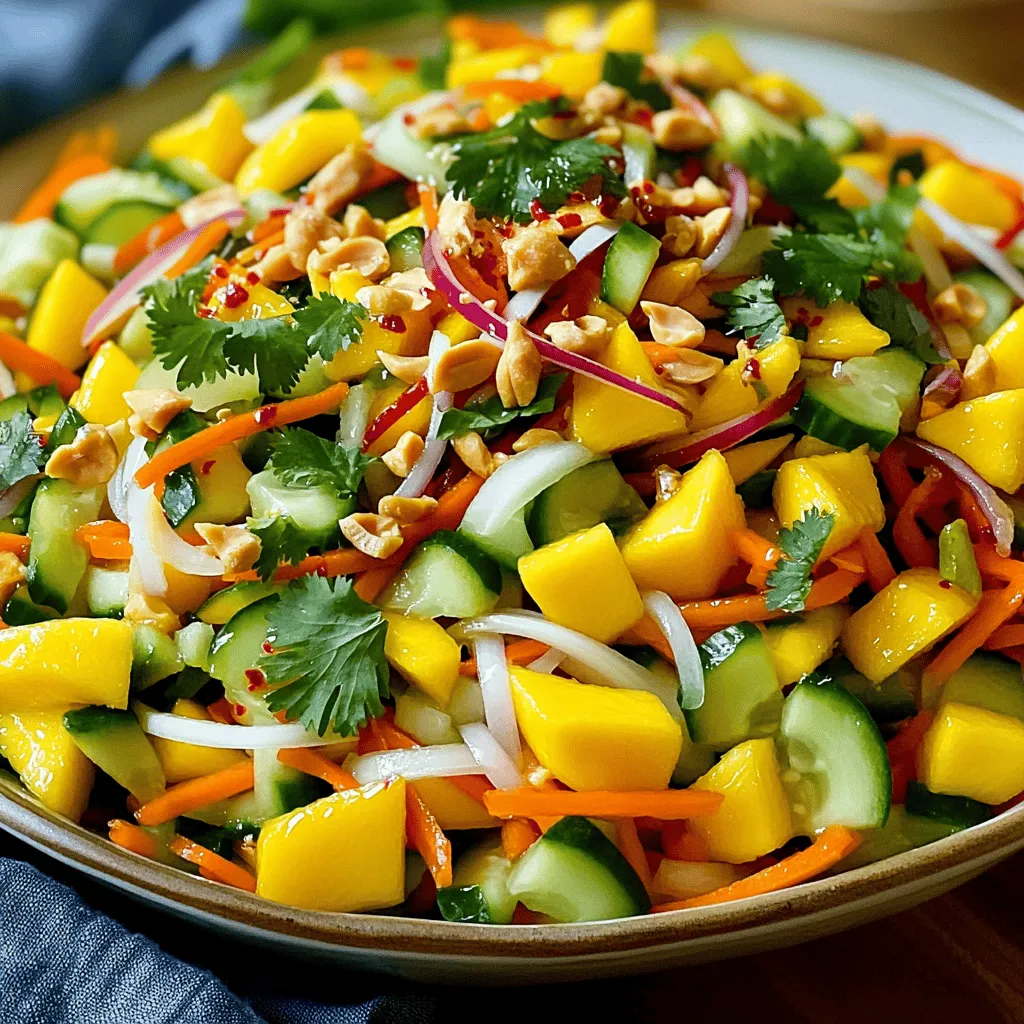
Are you ready to treat your taste buds? Thai Mango Salad, a bright and zesty dish, is a delightful mix

The main ingredients make this dish shine. Here’s what you need: - 4 chicken thighs (bone-in, skin-on) - 2 tablespoons jerk seasoning - 1 tablespoon olive oil - 1 cup long-grain rice - 2 cups chicken broth - 1 can (15 oz) black beans, drained and rinsed - 1 red bell pepper, diced - 1 cup corn kernels (fresh or frozen) - 1 teaspoon garlic powder - 1 teaspoon onion powder - 1 lime, juiced - Salt and pepper to taste - Fresh cilantro, chopped (for garnish) Each ingredient plays a role. The chicken brings protein and flavor. Jerk seasoning adds spice and depth. Rice serves as a hearty base, soaking up all the tasty juices. Want to take your dish up a notch? Try these options: - 1-2 tablespoons of honey for sweetness - 1-2 tablespoons of soy sauce for umami - Sliced scallions for added freshness - Fresh thyme or parsley for herbal notes These extras can add layers to your dish. Honey balances the spice, while soy sauce gives depth. Choosing the right ingredients is key. Here are some tips: - Look for fresh chicken thighs with a good amount of fat. This keeps them juicy. - Choose high-quality jerk seasoning. A mix with fresh spices works best. - For rice, go for long-grain, as it cooks fluffy and separate. - Select vibrant, firm bell peppers and sweet corn for the best taste. Quality ingredients make a big difference. Fresh and flavorful items lead to the best Caribbean Jerk Chicken and Rice. You can find the full recipe above to guide you! To make Caribbean jerk chicken and rice, follow these simple steps. First, gather all your ingredients. This will make cooking easier. Next, marinate the chicken. Coat each thigh with jerk seasoning in a bowl. Let it sit for at least 30 minutes. You can even marinate overnight for more flavor. After marinating, heat olive oil in a skillet. Add the chicken, skin-side down. Sear for 5-7 minutes until golden. Flip and cook the other side for another 5 minutes. Set the chicken aside. Now, it's time to prepare the rice. In the same skillet, add diced red bell pepper. Sauté for about 2-3 minutes until it's soft. Then, stir in the rice and mix it well. This helps the rice soak up the flavors. Pour in chicken broth, black beans, corn, garlic powder, onion powder, lime juice, salt, and pepper. Stir everything together and bring it to a gentle boil. Carefully place the seared chicken on top of the rice. Cover the skillet with a lid. Reduce the heat to low and let it simmer for 20-25 minutes. This helps the chicken cook through and the rice to soften. After that, remove from heat and let it sit for 5 more minutes. Fluff the rice with a fork, and your dish is ready to serve! Marinating is key for great jerk chicken. It allows the flavors to seep into the meat. Use a good jerk seasoning for the best taste. The longer you let it sit, the better it gets. I recommend at least 30 minutes. If you can, let it marinate overnight. This gives the chicken a deep, rich flavor that you will love. Timing is crucial when cooking this dish. Searing the chicken for 5-7 minutes helps lock in juices. Make sure to keep an eye on the heat. If it’s too high, the chicken may burn. When cooking the rice, low heat is best. This allows the rice to absorb the liquid slowly. Covering the skillet keeps the steam in, making the rice fluffy. Following these techniques ensures that your chicken and rice turn out perfect every time! To cook chicken thighs well, start with good seasoning. Use jerk seasoning to make the meat flavorful. Sear the chicken skin-side down in a hot skillet. This helps create a nice golden brown crust. Cook for about 5-7 minutes on each side. The goal is to lock in the juices. Make sure the internal temperature reaches 165°F for safety. Let the chicken rest after cooking. This keeps it moist. For fluffy rice, rinse it before cooking. This removes excess starch and prevents clumping. Use long-grain rice for the best texture. When cooking, use a ratio of 1 cup rice to 2 cups chicken broth. This adds flavor. Bring the broth to a boil before adding rice. Stir once, then cover the pot. Reduce heat to low and let it simmer. Avoid lifting the lid too often. This keeps the steam inside, making the rice fluffy. Garnishing makes your dish look inviting. Fresh cilantro adds a pop of color. Squeeze lime juice over the top for brightness. You can also add lime wedges on the side. Diced red bell peppers add color and crunch. Serve the chicken on a bed of rice and beans. This creates a beautiful plate. A vibrant dish makes it even more delicious. Explore these ideas to impress your guests. For the full recipe, check out the details above. {{image_2}} You can make a tasty vegetarian version of jerk rice. Instead of chicken, use tofu or tempeh. Both options soak up flavors well. Cut the tofu into cubes and marinate it with jerk seasoning. Cook it until golden. Use the same rice and veggies from the original recipe. This keeps the dish colorful and fun. If you want to change up the protein, try shrimp or fish. Shrimp cooks fast and adds a nice touch. Season shrimp with jerk spice and sauté until pink. If you like fish, choose firm types like mahi-mahi. Cook the fish in the skillet until flaky. Both options deliver great taste without missing out on flavor. You can adjust the flavors to fit your taste. Want it spicy? Add more jerk seasoning or some chopped peppers. If you prefer a milder dish, reduce the seasoning. Adding fruits like mango or pineapple offers a sweet twist. Toss in fresh herbs like basil or mint for an extra pop of flavor. Each tweak makes the dish your own. Store leftover Caribbean jerk chicken and rice in an airtight container. Make sure to let it cool down first. This helps keep the flavors fresh. Use within three days for the best taste. Label the container with the date. This way, you won’t forget when you made it. You can freeze the dish for later. Place the chicken and rice in a freezer-safe container. Make sure to separate portions if you want to eat it later. It stays good for about three months. When you're ready, take it out and let it thaw in the fridge overnight. To reheat, use the stove for the best taste. Heat a skillet on low heat. Add a splash of water or broth to keep it moist. Stir gently until heated through. You can also use the microwave. Just cover it and heat in short bursts, stirring in between. This keeps it from drying out. Enjoy every bite of your delicious meal! Jerk chicken is a spicy dish from Jamaica. It uses a special blend of spices called jerk seasoning. This mix often has allspice, thyme, and scotch bonnet peppers. The chicken gets marinated in this tasty mix, giving it a bold flavor. You cook it over a hot grill or in an oven. The result is juicy, smoky chicken with a kick. It is a favorite in Caribbean cuisine. Yes, you can use different types of rice. Long-grain rice works well, but you can try basmati or jasmine rice too. Each type gives a unique taste and texture. Just make sure to adjust the cooking time and liquid needed based on the rice type. Brown rice is another option, but it takes longer to cook. To adjust the spiciness, you can change the amount of jerk seasoning you use. If you like it milder, use less seasoning. You can also mix in some honey or brown sugar to balance the heat. For more spice, add more jerk seasoning or include extra scotch bonnet peppers. Always taste as you go. You can find Caribbean jerk chicken and rice in many Caribbean or Jamaican restaurants. Look for places that specialize in Caribbean cuisine. Food trucks and street vendors also serve this dish. Check local listings or food apps for the best spots near you. Enjoying this dish from a restaurant can inspire your home cooking. If you're curious about making it yourself, refer to the Full Recipe for guidance. Caribbean jerk chicken and rice is a flavorful dish full of spices and ingredients. We covered key ingredients, cooking steps, and tips for a perfect meal. You learned about variations, storage, and how to reheat leftovers. Cooking doesn’t need to be hard. With the right knowledge, you can enjoy this dish at home. Use these tips to create your own tasty version. Embrace your culinary skills, and have fun in the kitchen!

Irresistible Caribbean Jerk Chicken and Rice Delight

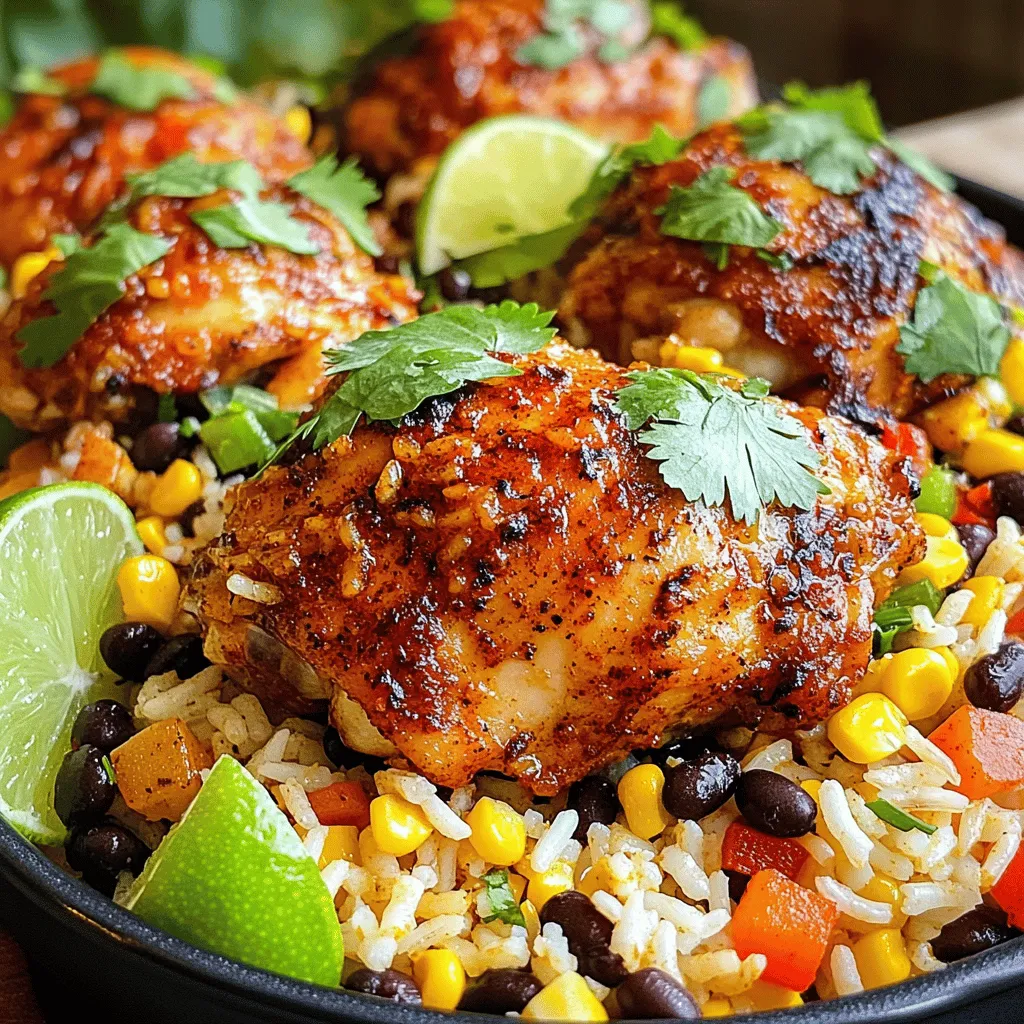
Get ready to spice up your dinner with my Irresistible Caribbean Jerk Chicken and Rice Delight! I’ll guide you through

- 2 cups cooked pasta (penne or rotini) - 1 cup marinara sauce - 1 cup pizza sauce - 1 cup mozzarella cheese, shredded - 1 cup pepperoni slices - 1/2 cup bell peppers, diced (red and green) - 1 teaspoon dried oregano - 1 teaspoon garlic powder - Fresh basil leaves for garnish When making Easy Pizza Pasta Bake, you want to choose your main ingredients wisely. Start with cooked pasta, either penne or rotini. They hold sauces well. Next, marinara sauce adds a rich flavor. Pizza sauce brings in that classic pizza taste. Mix them together to create a base that’s both familiar and comforting. For the best pizza experience, add mozzarella cheese. It melts beautifully and gives that gooey texture we all love. Pepperoni slices add a savory bite. Don't forget the bell peppers. They give color and a sweet crunch. Seasoning is key! Dried oregano and garlic powder enhance the flavor of the dish. Fresh basil leaves add a pop of color and freshness. If you want to make this dish even more exciting, consider adding mushrooms or olives. Now you have the full picture of what goes into this dish. For the complete recipe, check the [Full Recipe]. - Preheat your oven to 350°F (175°C). - In a large bowl, combine the cooked pasta, marinara sauce, and pizza sauce. Stir until mixed well. - Add the cheese, pepperoni, bell peppers, mushrooms, and olives to the pasta. - Season with oregano, garlic powder, salt, and pepper. Mix everything until it looks colorful and tasty. - Transfer the mixture to a greased baking dish. Spread it out evenly. - Cover the dish with aluminum foil and bake for 25 minutes. - Remove the foil and bake for another 10 to 15 minutes, until the cheese is bubbly and golden. This dish is fun to make and tastes great. For the full recipe, check the section above. Enjoy your meal! - Best pasta options for baking: I love using penne or rotini. They hold sauce well and add great texture. These shapes allow for a better mix of flavors and make every bite a delight. - How to achieve golden, bubbly cheese: For the best cheese topping, add a bit more mozzarella before baking. This extra layer gives the dish a nice, golden look. Bake it covered first, then uncover for the last part. This helps the cheese get bubbly and brown without drying out the pasta. - Presentation tips for the dish: Serve the pasta bake right from the dish for a cozy look. Add fresh basil on top for a pop of color. It makes the dish feel special and fresh. - Pairing ideas: This bake goes great with a simple side salad or warm breadsticks. A light salad balances the richness and adds freshness. Breadsticks are perfect for dipping into any extra sauce. - Suggestions for additional toppings: You can spice it up with more toppings. Try adding cooked sausage, fresh spinach, or even jalapeños for heat. Each topping adds a unique twist and makes it your own. - How to customize the recipe to your taste: Don’t hesitate to mix flavors. You can swap out sauces, use different cheeses, or even add veggies you love. Make it fun! The more you personalize it, the more you’ll enjoy your meal. For the full recipe, check out the detailed instructions in the recipe section. {{image_2}} You can easily make this dish vegetarian. Swap the pepperoni for your favorite veggies. Bell peppers, mushrooms, and spinach work great. You can also use alternative cheese options. Try using vegan cheese or ricotta for a creamy touch. For a gluten-free version, use gluten-free pasta. There are many options, like rice or chickpea pasta. Make sure to check the sauce labels too. Some sauces contain gluten, so look for certified gluten-free brands. Want to take it up a notch? You can add different meats. Sausage and chicken are great options. They add richness and depth to the dish. Spice it up with red pepper flakes or Italian seasoning. These add heat and extra flavor. Don't be afraid to mix and match! You can create a new favorite every time you make it. For the full recipe, check [Full Recipe]. To store leftovers properly, let the pasta bake cool down. Place it in an airtight container. This keeps the flavors fresh. Use glass or plastic containers that seal well. You can store it in the fridge for up to three days. Freezing the pasta bake is easy. First, let it cool completely. Then, wrap it tightly in plastic wrap. For best results, cover that with aluminum foil. This helps protect it from freezer burn. You can freeze it for up to three months. When ready to eat, thaw it overnight in the fridge. For reheating, the oven works best. Preheat it to 350°F (175°C). Place the pasta bake in a covered dish. Bake for about 20 minutes. This keeps the texture nice. You can also use the microwave for quick reheating. Just make sure to cover it to avoid dryness. Enjoy your cheesy pizza pasta bake warm and delicious! This dish takes about 15 minutes to prep and around 35 minutes to bake. In total, you will spend about 50 minutes from start to finish. This makes it a great option for busy weeknights or family get-togethers. Yes, you can prepare the Easy Pizza Pasta Bake ahead of time. You can mix the pasta with sauces and toppings. Store it in the fridge for up to 24 hours before baking. Just cover it tightly with foil or plastic wrap. If you want to keep it longer, you can freeze it for up to three months. Just thaw it overnight before baking. If you don’t have marinara sauce, you can use several alternatives. Pizza sauce works well because it adds a nice flavor. You can also try Alfredo sauce for a creamy twist. Another option is pesto, which gives the dish a fresh taste. Just make sure the sauce you choose pairs well with the other flavors. Absolutely! You can make the Easy Pizza Pasta Bake dairy-free. Use dairy-free cheese or skip the cheese altogether. For creaminess, consider adding cashew cream or coconut cream. These options keep the dish rich while catering to dietary needs. Just check the labels to ensure they are dairy-free. You now know how to make an Easy Pizza Pasta Bake. With simple ingredients and easy steps, it’s a dish anyone can master. Customize it to fit your taste with different toppings or sauces. Store leftovers correctly for later enjoyment. This recipe is fun to make and share. I hope you enjoy this dish as much as I do. Happy cooking!

Easy Pizza Pasta Bake Quick and Tasty Family Meal

Looking for a quick and tasty family meal that everyone will love? You’ve come to the right place! My Easy

Older posts
Newer posts
← Previous Page1 … Page6 Page7 Page8 … Page67 Next →

dsad

© 2025 My Saved Recipe • Built with GeneratePress

Our Policies

  • Copyright Policy
  • Cookie Policy
  • GDPR Policy
  • Privacy Policy
  • Disclaimer
  • Terms Of Use

More Information

  • Home
  • About
  • Contact
  • Appetizers
  • Dessert
  • Dinner
  • Drinks
©2025, My Saved Recipe About Back To Top