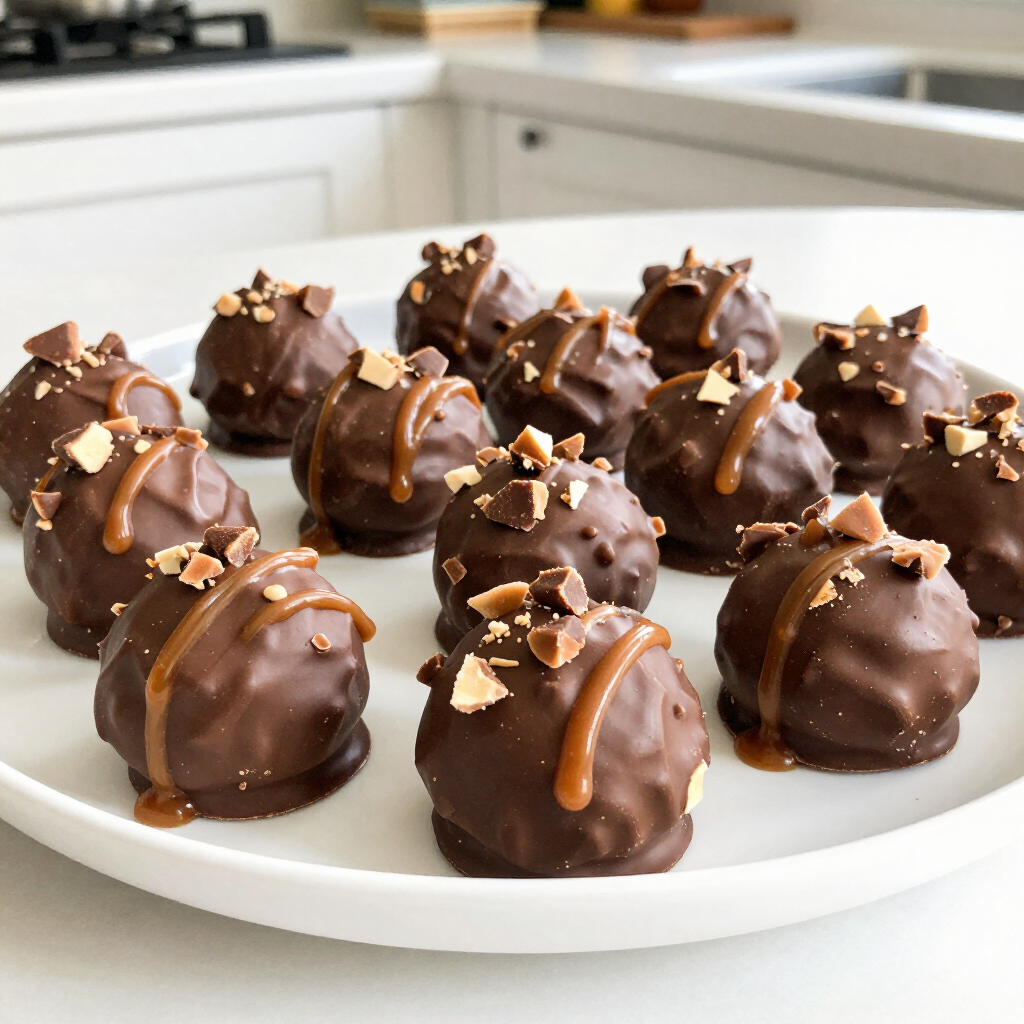
Are you ready to indulge in a sweet treat that's as fun to make as it is to eat? These Caramel Crunch Butterfinger Truffles are simple yet packed with flavor. With just a few ingredients and easy-to-follow steps, you'll create a dessert that has everyone asking for seconds. Join me as we dive into this delicious recipe that turns classic candy into a delightful truffle!
Why I Love This Recipe
- Irresistible Flavor Combination: The mix of creamy cream cheese, crunchy Butterfinger, and rich caramel creates a delightful taste that is hard to resist.
- Easy to Make: This recipe requires minimal cooking skills, making it perfect for beginner bakers or anyone looking to whip up a quick treat.
- Perfect for Any Occasion: These truffles are a hit at parties, holidays, or even as a sweet snack for yourself!
- Customizable: You can easily adapt the recipe by using different types of chocolate or adding nuts for extra crunch.
Ingredients
Complete List of Ingredients
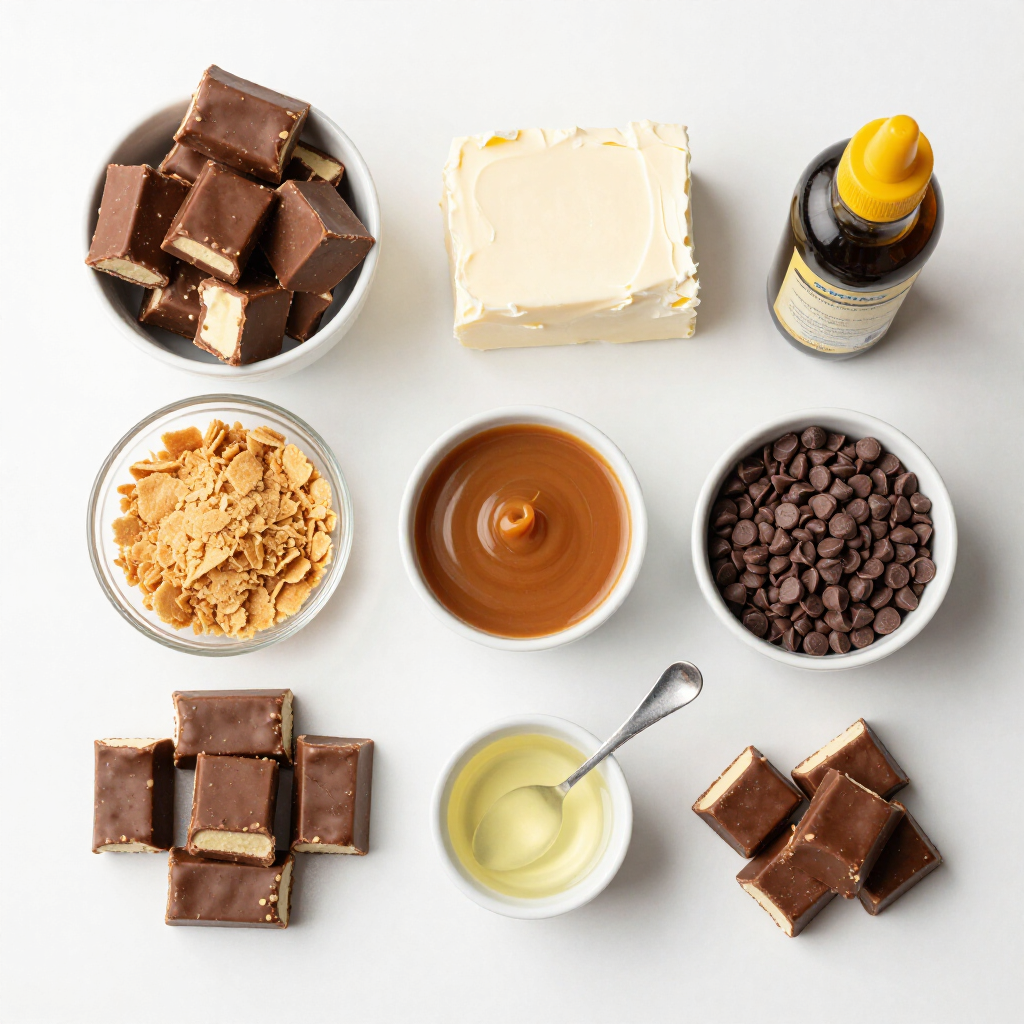
- Crushed Butterfinger candy bars
The star of our truffles is Butterfinger. Its sweet and crunchy layers give a great taste. You need one cup of crushed bars to make these treats pop.
- Vanilla wafer crumbs
Vanilla wafer crumbs add a smooth texture. It helps bind the truffles. One cup is perfect for this recipe.
- Cream cheese and its role
Cream cheese brings creaminess and richness. You need half a cup of softened cream cheese. It makes the truffles soft and easy to bite.
- Caramel sauce specifics
Caramel sauce adds a sweet touch. Use a quarter cup for that gooey goodness. It also helps hold the mixture together.
- Semi-sweet chocolate chips and coconut oil
For coating, use one cup of semi-sweet chocolate chips. Mix in a tablespoon of coconut oil. This mix melts smoothly and gives a nice shine.
Step-by-Step Instructions
Preparation of the Truffle Mixture
Start by gathering your ingredients in a big bowl. You need crushed Butterfinger candy bars, vanilla wafer crumbs, cream cheese, caramel sauce, and vanilla extract. Mix them well until everything is blended. This step is key for the right texture. You want a smooth dough that holds together. If it looks crumbly, keep mixing.
Shaping and Storing the Truffles
Next, take the dough and roll it into small balls. Aim for about 1 inch in size. This helps keep your truffles uniform. Place each ball on a parchment-lined baking sheet. Once all are shaped, pop them in the fridge for about 30 minutes. This helps them firm up, making them easier to coat later.
Melting and Coating the Truffles
While the truffles chill, it’s time to melt the chocolate. Use a microwave-safe bowl. Combine your semi-sweet chocolate chips and coconut oil. Heat in 30-second bursts. Stir after each round until the chocolate is smooth. Once melted, take the truffles from the fridge. Dip each one into the chocolate, covering it fully. Let the excess chocolate drip off before placing them back on the sheet. While the coating is still wet, roll the truffles in more crushed Butterfinger. This adds a nice crunch. Let them sit at room temperature or return them to the fridge for about 15 minutes to harden.
Tips & Tricks
Enhancing Flavor and Texture
When making Caramel Crunch Butterfinger Truffles, you can swap cream cheese for a few options. Use mascarpone cheese for a rich taste. Greek yogurt is a great choice for a lighter option. Both will keep your truffles creamy.
To adjust sweetness, use more or less caramel sauce. If you want them sweeter, drizzle more caramel into the mix. For a less sweet flavor, cut back on the sauce. This lets the chocolate shine more.
Troubleshooting Common Issues
If your chocolate won’t coat the truffles, try warming it slightly. Melt it again for 10 seconds in the microwave. Stir well to ensure it’s smooth. You can also add a bit more coconut oil for easier dipping.
Getting the right consistency for rolling is key. If your dough feels too sticky, chill it for 10 minutes. This makes it easier to shape. If it’s too dry, add a little cream cheese or caramel sauce. Mix well until it’s smooth.
Pro Tips
- Chill for Perfect Coating: Ensure that your truffles are cold before dipping them in chocolate. This helps the chocolate to set quickly and creates a nice, smooth coating.
- Use Quality Chocolate: Opt for high-quality semi-sweet chocolate chips for melting. This will enhance the flavor of your truffles and give them a beautiful shine.
- Customize the Coating: Experiment with different coatings! Try using white chocolate or milk chocolate for a different flavor profile, or add sprinkles for a fun twist.
- Storage Tips: Store your truffles in an airtight container in the refrigerator. They can last up to a week, making them perfect for a make-ahead dessert.
Variations
Flavor Alterations
You can change the flavors of your Caramel Crunch Butterfinger Truffles to suit your taste. Here are some ideas:
- Adding different candy bar crumbles: Try mixing in crumbled Snickers or Milky Way bars. This gives a new twist and adds different textures.
- Incorporating flavored extracts: Use almond or mint extract instead of vanilla. This small change can create a whole new flavor profile. Experiment and find what you love!
Dietary Adjustments
If you or your guests have dietary needs, you can still enjoy these truffles.
- Making it gluten-free or dairy-free: Use gluten-free vanilla wafer crumbs. You can also swap cream cheese for a dairy-free cream cheese. This will keep the flavor while making it safe for those with allergies.
- Vegan alternatives for cream cheese: Look for vegan cream cheese brands. They work well and keep the truffles creamy and delicious without dairy.
These simple swaps make your truffles fit various diets without losing flavor or fun. Enjoy playing with these variations!
Storage Info
Proper Storage Techniques
To keep your Caramel Crunch Butterfinger Truffles fresh, store them in an airtight container. Use parchment paper to separate layers if you stack them. This keeps them from sticking together. The ideal temperature is between 60°F and 70°F. In this range, they will stay good for up to a week. If you live in a warm area, refrigerate them to avoid melting.
Freezing Instructions
If you want to save your truffles for later, freezing is great. Place them in a single layer on a baking sheet. Freeze them for about an hour until they are solid. Then, transfer them to a freezer bag. Make sure to remove as much air as possible. They can last up to three months in the freezer.
When you are ready to eat them, move them to the fridge for a few hours to thaw. Avoid using the microwave, as it can change the texture. Enjoy your truffles fresh and tasty!
FAQs
Common Questions About Caramel Crunch Butterfinger Truffles
Can I use another type of candy? Yes, you can use other candies like Snickers or Reese's. Each candy will change the flavor. Just make sure to crush them like the Butterfingers.
How long do the truffles last? These truffles can last up to one week in the fridge. Keep them in an airtight container to stay fresh.
Is it possible to make these truffles in advance? Absolutely! You can make them a day or two ahead. Just store them in the fridge until ready to serve.
Substitutions and Modifications
What are the best substitutes for chocolate? If you need a substitute, use white chocolate or dark chocolate. Each will give a unique taste. You could even try carob for a different twist.
Can I use homemade caramel sauce? Yes, homemade caramel sauce works great! Just make sure it’s thick enough to hold its shape.
Serving Suggestions
Best accompaniments for serving truffles Serve these truffles with fresh fruit like strawberries or apples. They also pair well with a glass of milk or coffee.
How to present truffles for special occasions For a fancy look, place the truffles on a nice plate. Drizzle extra caramel sauce on top. Add a sprinkle of crushed Butterfinger for a pop of color.
Creating Caramel Crunch Butterfinger Truffles is simple and fun. You learned about the key ingredients, preparation steps, and how to store them.
These truffles offer many ways to adjust flavors or make them fit special diets. Ensure you follow the tips to troubleshoot any issues. Enjoy sharing these tasty treats at your next event. They are a crowd-pleaser! Happy making!