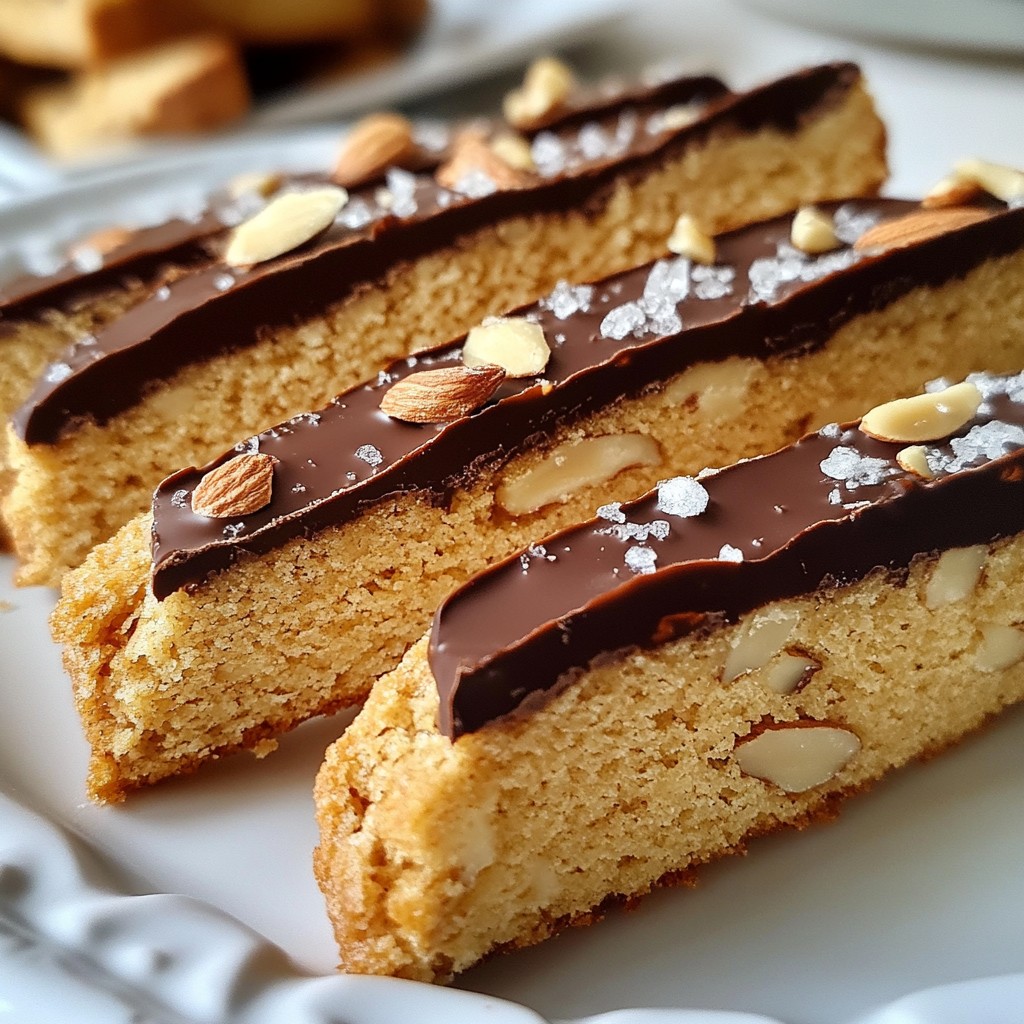
Craving a treat that's both crunchy and chocolatey? Look no further! My Chocolate Dipped Almond Biscotti blends rich flavors and satisfying textures into one delightful snack. Perfect with coffee or enjoyed standalone, this recipe uses simple ingredients like flour, dark chocolate, and whole almonds. Ready to impress your taste buds and friends? Let’s get started on crafting this delicious biscotti that you’ll love to share.
Why I Love This Recipe
- Delicious Flavor Combination: The rich chocolate paired with the nutty flavor of almonds creates a delightful taste experience.
- Perfect for Dipping: This biscotti is designed for dunking in coffee or tea, enhancing your beverage time.
- Great for Gifting: These biscotti make a thoughtful homemade gift, beautifully packaged they’ll impress anyone.
- Easy to Make Ahead: They store well, making them perfect for preparing in advance for gatherings or personal snacking.
Ingredients
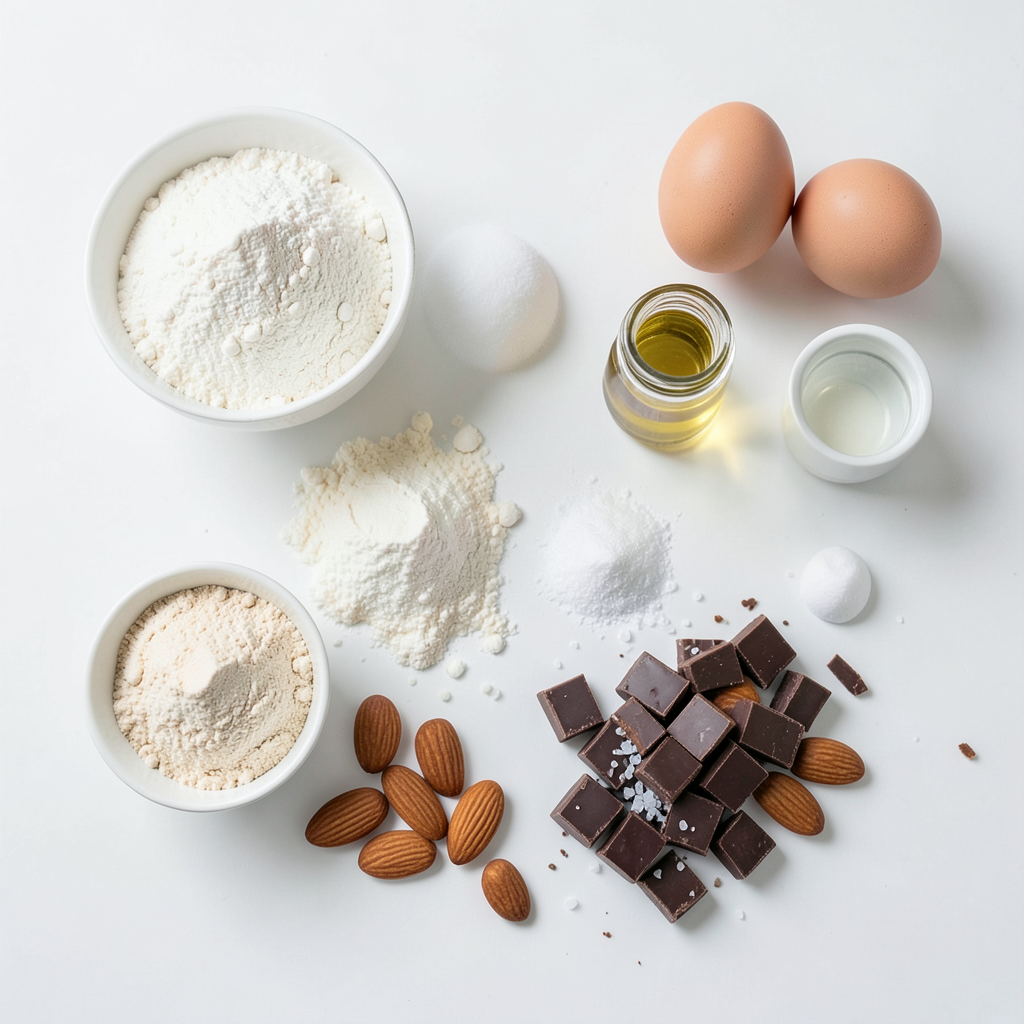
To make Chocolate Dipped Almond Biscotti, you need these simple ingredients:
- 1 cup all-purpose flour
- 1 cup almond flour
- 1 cup granulated sugar
- 2 large eggs
- 1 teaspoon vanilla extract
- 1 teaspoon almond extract
- 1 teaspoon baking powder
- 1/4 teaspoon salt
- 1 cup whole almonds, toasted
- 6 oz dark chocolate, chopped (for dipping)
- Sea salt flakes (for garnish, optional)
Each ingredient plays a key role in creating a delightful flavor and texture. The all-purpose flour adds structure, while almond flour brings a nutty taste. Sugar sweetens the biscotti, and eggs bind everything together.
Vanilla and almond extracts give the biscotti a rich aroma and flavor. Baking powder helps the dough rise, making it light and crunchy. Whole almonds provide a lovely crunch and nutty depth.
Dark chocolate adds a luscious finish. Dipping the biscotti elevates them from good to great. Sea salt flakes are optional but offer a nice contrast to the sweet chocolate.
Using fresh ingredients yields the best results. Always check the quality of your chocolate, as it enhances the final treat. Happy baking!
Step-by-Step Instructions
Preheating and Preparing
First, preheat your oven to 350°F (175°C). This step is vital for even baking. Next, line a baking sheet with parchment paper. This keeps the biscotti from sticking.
Mixing Dry Ingredients
In a large bowl, mix together these dry ingredients:
- 1 cup all-purpose flour
- 1 cup almond flour
- 1 cup granulated sugar
- 1 teaspoon baking powder
- 1/4 teaspoon salt
Whisk the dry ingredients until they blend well. This ensures a smooth dough.
Incorporating Wet Ingredients
In another bowl, beat together two large eggs. Add in:
- 1 teaspoon vanilla extract
- 1 teaspoon almond extract
Mix these wet ingredients until smooth. This adds flavor to your biscotti.
Forming the Biscotti Dough
Now, slowly combine the wet ingredients into the dry mix. Stir until a thick dough forms. Fold in 1 cup of toasted almonds. This gives your biscotti a nice crunch and nutty taste.
Baking and Slicing
Shape the dough into a log, about 12 inches long and 3 inches wide. Place it on the lined baking sheet. Bake for 25-30 minutes. The log should be golden and firm. After baking, let it cool for 10 minutes. Lower the oven to 325°F (165°C). Once cool, slice the log diagonally into 1/2 inch thick pieces. Place them cut-side up on the baking sheet. Bake again for 10-15 minutes until they turn golden.
Dipping in Chocolate
While they cool, melt 6 oz of dark chocolate in a microwave-safe bowl. Heat in 30-second bursts, stirring until smooth. Dip one end of each biscotti into the melted chocolate, letting the excess drip off. Place them on parchment paper. If you like, sprinkle with sea salt flakes for a touch of flavor. Allow the chocolate to set fully before serving.
Tips & Tricks
Achieving the Perfect Biscotti Texture
To get the best biscotti, focus on dough consistency. The dough should feel thick but not too dry. If it's too sticky, add a little flour. Proper baking time is key. Bake at 350°F for 25-30 minutes. After cooling, slice and bake again at 325°F for 10-15 minutes. This helps them crisp up.
Chocolate Melting Tips
Melting chocolate can be tricky. Use a microwave-safe bowl for ease. Heat the chocolate in 30-second bursts. Stir in between each burst. This method keeps the chocolate from burning. Once smooth, it's ready for dipping.
Presentation Enhancements
Garnish makes your biscotti look special. After dipping in chocolate, sprinkle sea salt flakes on top. This adds flair and a nice salty contrast. You can also use crushed nuts or edible flowers for a pop of color. These little touches make a big difference!
Pro Tips
- Use fresh almonds: Toasting fresh almonds enhances their flavor and gives the biscotti a delightful crunch.
- Perfecting the slice: Use a serrated knife for clean cuts; this helps prevent the biscotti from crumbling while slicing.
- Timing is key: Keep an eye on the second bake to achieve the perfect crispiness without over-baking.
- Chocolate dipping tips: Allow the melted chocolate to cool slightly before dipping for a smoother finish and fewer drips.
Variations
Different Types of Chocolate Coatings
You can switch up the chocolate you use for dipping. Milk chocolate makes the biscotti sweeter. It adds a creamy touch that many love. White chocolate can also shine here. It brings a lovely contrast to the almond flavor. Try both types for fun and variety. Each option gives a unique taste and look.
Additional Ingredients for Flavor
You can add extra flavors to your biscotti. Candied orange peel adds a bright citrus note. It pairs well with almonds and chocolate. Dried fruits like cranberries or cherries can bring a sweet chewiness. You can even mix in spices like cinnamon for warmth. These additions make each bite more exciting and tasty. Be creative and find your favorite mix!
Gluten-Free Alternatives
If you want a gluten-free version, you can easily swap flours. Use almond flour as your base. Add a little gluten-free all-purpose flour to help with texture. This mix keeps your biscotti crunchy and light. Just make sure all other ingredients are gluten-free too. Enjoying biscotti without gluten is possible and delicious!
Storage Info
Best Practices for Storing Biscotti
To keep your biscotti fresh, use an airtight container. Glass or metal containers work well. Store them at room temperature, away from light. This helps maintain their crunch and flavor.
How Long Do They Last?
Homemade biscotti can last for about two weeks. If you store them properly, they stay tasty and crisp. After that, they may lose their crunch, but they are still edible.
Freezing Biscotti
Freezing biscotti is a great way to keep them longer. To freeze, place them in a freezer-safe bag. Remove as much air as possible to prevent freezer burn. When you're ready to enjoy, thaw them at room temperature. You can also re-crisp them in the oven for a few minutes.
FAQs
How do you know when biscotti is done baking?
You can tell biscotti is done by checking its color and texture. Look for a light golden color on the outside. The biscotti should feel firm to the touch. If it feels soft or gives when pressed, it needs more time. A good rule is to bake it for about 25-30 minutes. After the first bake, slice the log and bake again until golden and crispy. This second bake is key for that nice crunch.
Can I use other nuts instead of almonds?
Yes, you can use other nuts if you want. Hazelnuts, pecans, or walnuts work well. Each nut adds its own flavor, so feel free to experiment. You can also mix different nuts for a fun twist. Just make sure to toast them first to enhance their taste. This gives your biscotti a unique touch.
Is it possible to make a vegan version?
You can make a vegan version of biscotti! Replace the eggs with flaxseed meal or applesauce. Use 1 tablespoon of flaxseed mixed with 2.5 tablespoons of water for each egg. For the dairy, choose plant-based milk or cream. You can also use vegan chocolate for dipping. These swaps keep your biscotti tasty and suitable for everyone.
In this post, I shared a detailed guide to making delicious biscotti. You learned about the essential ingredients, step-by-step instructions, and helpful tips for the perfect texture. I also covered fun variations and smart storage options. Remember, biscotti should be crisp but not dry. Customize your recipe to suit your taste and try different chocolate coatings. With these insights, you can impress your friends, family, or just treat yourself! Enjoy your baking journey and make those biscotti shine!