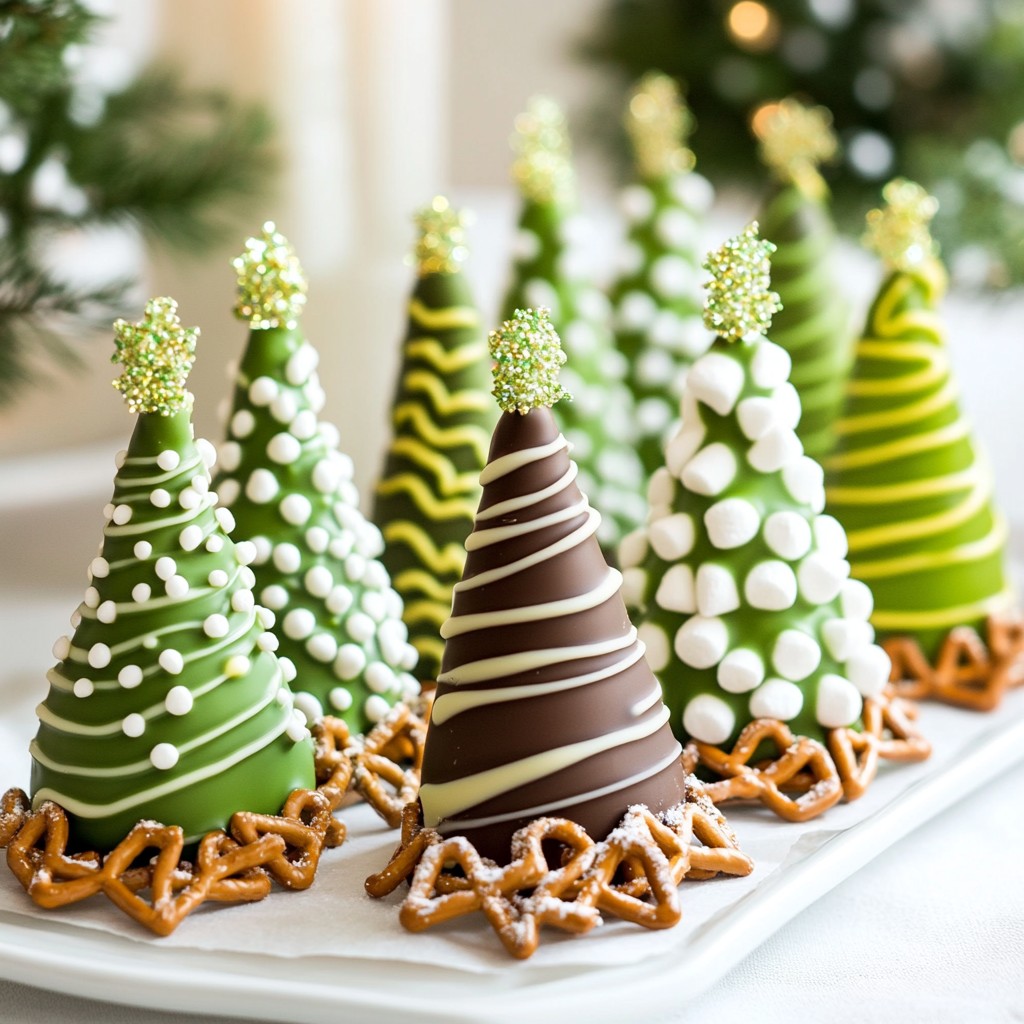
Get ready to impress your loved ones with Christmas Chocolate Trees, a delightful holiday treat! These tasty, fun creations are perfect for gifts or to brighten up your festive table. You’ll learn the right ingredients, step-by-step instructions, and handy tips for a perfect finish. Join me on this sweet journey and make your holiday season extra special with these charming chocolate masterpieces!
Why I Love This Recipe
- Festive Presentation: These chocolate trees are not only delicious but also make for a stunning centerpiece at any holiday gathering.
- Customizable Decor: You can get creative with decorations, using different toppings to suit your taste or theme.
- Fun Activity: This recipe is a great way to involve kids in the kitchen, allowing them to help with decorating their own chocolate trees.
- Delicious Layers: The combination of dark chocolate, green candy melts, and white chocolate drizzle creates a perfect balance of flavors.
Ingredients
Essential Ingredients for Christmas Chocolate Trees
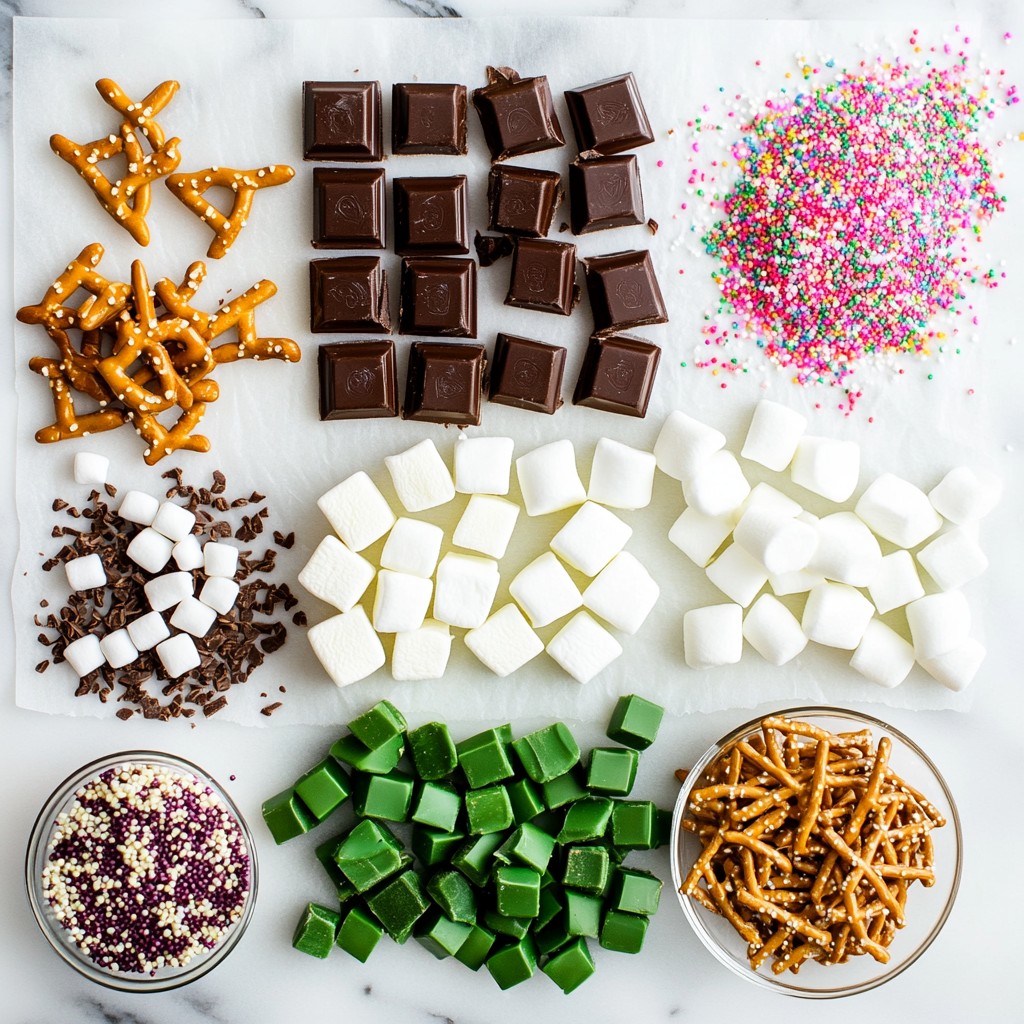
To make Christmas chocolate trees, you need the following key ingredients:
- 200g dark chocolate (at least 70% cocoa)
- 100g white chocolate
- 1 cup green candy melts
- 1 cup miniature marshmallows
- 1 cup crushed pretzels (for the base)
- Parchment paper
These ingredients create a rich taste and fun texture. The dark chocolate gives a deep flavor. The white chocolate adds a sweet touch. Green candy melts make the trees look festive.
Optional Decorative Ingredients
You can make your chocolate trees even more special with these items:
- Edible glitter or gold dust (for decoration)
- Sprinkles (optional, for added decoration)
These extras add a festive flair. Edible glitter gives a sparkly look. Sprinkles add color and fun.
Tips for Choosing the Best Chocolate
When choosing chocolate, quality matters. Here are some tips:
- Look for dark chocolate with at least 70% cocoa. This ensures a rich taste.
- Choose white chocolate that has real cocoa butter for smooth melting.
- Avoid chocolate with too many additives. Pure chocolate works best.
Using high-quality chocolate makes your trees taste amazing. It also helps with melting and shaping.
Step-by-Step Instructions
Melting and Preparing Dark Chocolate
Start by breaking the dark chocolate into small pieces. Place the pieces in a heatproof bowl. Use a microwave to melt the chocolate. Heat it in 30-second bursts. Stir the chocolate after each time. Keep melting until it is smooth and shiny.
Shaping and Setting the Chocolate Trees
Grab a piping bag or a small spoon. Pour the melted dark chocolate onto parchment paper. Shape it into tree silhouettes. Make different sizes for fun. Start with a thick base, then taper it toward the top. Once you shape the trees, place the parchment on a baking sheet. Refrigerate for 15-20 minutes. This will help the trees harden.
Coating and Decorating with Candy Melts and White Chocolate
While the dark chocolate sets, melt the green candy melts. Use the same microwave method as before. Once melted, dip each chocolate tree into the green candy melts. Let excess candy drip off and place them back on parchment paper. Next, melt the white chocolate in a separate bowl. Drizzle it over the green-coated trees for a snowy look.
Final Touches and Serving Instructions
While the white chocolate is warm, add toppings. Place miniature marshmallows and crushed pretzels at the base. For sparkle, sprinkle edible glitter or gold dust over the trees. Refrigerate again for 10 minutes to set everything. Finally, gently remove the trees from the parchment paper. Arrange them on a festive platter and enjoy!
Tips & Tricks
Common Mistakes to Avoid
- Not Tempering Chocolate: If you skip tempering, your chocolate may not shine. Always melt chocolate carefully and stir well.
- Overheating Chocolate: Heat chocolate in short bursts. Overheating can cause it to seize and become unusable.
- Skipping the Chill Time: Letting chocolate set is key. If you skip this, your trees may not hold their shape.
How to Achieve a Perfect Finish
- Use Quality Chocolate: Choose dark chocolate with at least 70% cocoa. This gives a rich taste and great texture.
- Piping Bag vs. Spoon: Use a piping bag for neat tree shapes. A spoon can make the process messy.
- Layer Your Decorations: Add the white chocolate drizzle while it’s warm. This helps toppings stick better.
Storing and Transporting Chocolate Trees
- Store in a Cool Place: Keep chocolate trees in a cool, dry spot. Avoid direct sunlight and heat.
- Use Airtight Containers: Place trees in an airtight container to keep them fresh. Line the bottom with parchment paper.
- Transport with Care: If you need to move them, use a sturdy box. Add padding to prevent breaking during travel.
Pro Tips
- Use Quality Chocolate: The quality of chocolate directly affects the taste and texture of your trees. Choose high-quality dark and white chocolates for the best results.
- Control the Temperature: Make sure to melt the chocolates at low power in the microwave to prevent burning. Stirring frequently helps maintain a smooth consistency.
- Experiment with Shapes: Feel free to create different shapes and sizes for your chocolate trees. Use cookie cutters for uniformity or go freehand for a more rustic look.
- Customize Decorations: Get creative with your toppings! Instead of pretzels and marshmallows, try nuts, dried fruits, or even candy canes for a festive twist.
Variations
Creative Flavor Combinations
You can add unique flavors to your chocolate trees. Try mixing in some zest. Lemon or orange zest gives a nice twist. A dash of peppermint extract adds a fun holiday touch. If you love nuts, consider crushed almonds or hazelnuts. They add a nice crunch and flavor. For a richer taste, you can use flavored chocolate. Look for caramel or raspberry varieties. These will make your trees stand out.
Alternative Decorations Ideas
Get creative with decorations! Instead of marshmallows, use mini candy canes for a festive look. You can also try dried fruits like cranberries or apricots. They add color and a sweet flavor. Edible glitter is a must for sparkle. If you want a snowy effect, use shredded coconut. It gives a great texture. Use different colored sprinkles to match your holiday theme. The more colors, the more fun!
Theme-Based Chocolate Trees for Different Occasions
You can make chocolate trees for many occasions. For a winter theme, use all white chocolate and silver decorations. Spring calls for pastel colors and floral toppings. For Halloween, make dark chocolate trees with orange and black sprinkles. You can even create birthday trees with bright colors and fun toppings. Just think about the theme and let your creativity flow!
Where to Buy Pre-Made Chocolate Trees
Finding pre-made Christmas chocolate trees can make your holiday stress-free. You have many options to choose from.
Top Online Retailers for Chocolate Trees
Online shopping offers great convenience. Here are some top retailers to check:
- Amazon: They have many styles, sizes, and prices.
- Etsy: Find unique, handmade chocolate trees from different sellers.
- Williams Sonoma: They offer high-quality gourmet options.
- Harry & David: Their chocolate trees make lovely gifts.
These sites often have user reviews, helping you decide.
Local Shops and Bakeries Offering Custom Options
Local shops can provide a personal touch. Many bakeries create custom chocolate trees. Look for:
- Local Chocolatiers: They often have seasonal items.
- Specialty Bakeries: Many focus on holiday treats.
- Farmers' Markets: You might find unique local sellers.
Call ahead to see what they offer. Custom options can add a special flair to your holiday table.
Price Ranges for Pre-Made Chocolate Trees
Prices vary based on size and design. Here’s a quick guide:
- Small Trees: $10-$20 for simple designs.
- Medium Trees: $20-$50 for more detailed work.
- Large Trees: $50 and up for elaborate creations.
These prices can change based on the seller. Always check for sales during the holiday season to save money.
FAQs
How long can I store Christmas Chocolate Trees?
You can store Christmas Chocolate Trees for up to two weeks. Keep them in a cool, dry place. Avoid direct sunlight to prevent melting. If you live in a warm area, refrigerate them. Just remember to let them come to room temperature before serving. This keeps the texture nice and smooth.
Can I use milk chocolate instead of dark chocolate?
Yes, you can use milk chocolate! It will give your trees a sweeter taste. Just melt it the same way as dark chocolate. Keep in mind, milk chocolate has less cocoa. This means the flavor will be different. It may also melt faster, so watch it closely.
What is the best way to ship chocolate trees as gifts?
To ship chocolate trees, first let them set completely. Wrap each tree in bubble wrap for protection. Use a sturdy box to keep them safe during transit. Add padding, like crumpled paper, to fill empty spaces. This prevents movement. Mark the box as "Fragile" to ensure careful handling.
Making Christmas chocolate trees can bring joy to your holiday fun. We explored the many essential ingredients you need and options for extra decorations. I showed you step-by-step how to melt chocolate, shape the trees, and add the final touches. You learned tips to avoid mistakes and how to keep your creations fresh. Finally, I outlined fun variations and where to buy ready-made trees. With these skills, you can create beautiful treats that delight everyone. Enjoy your holiday baking!


