
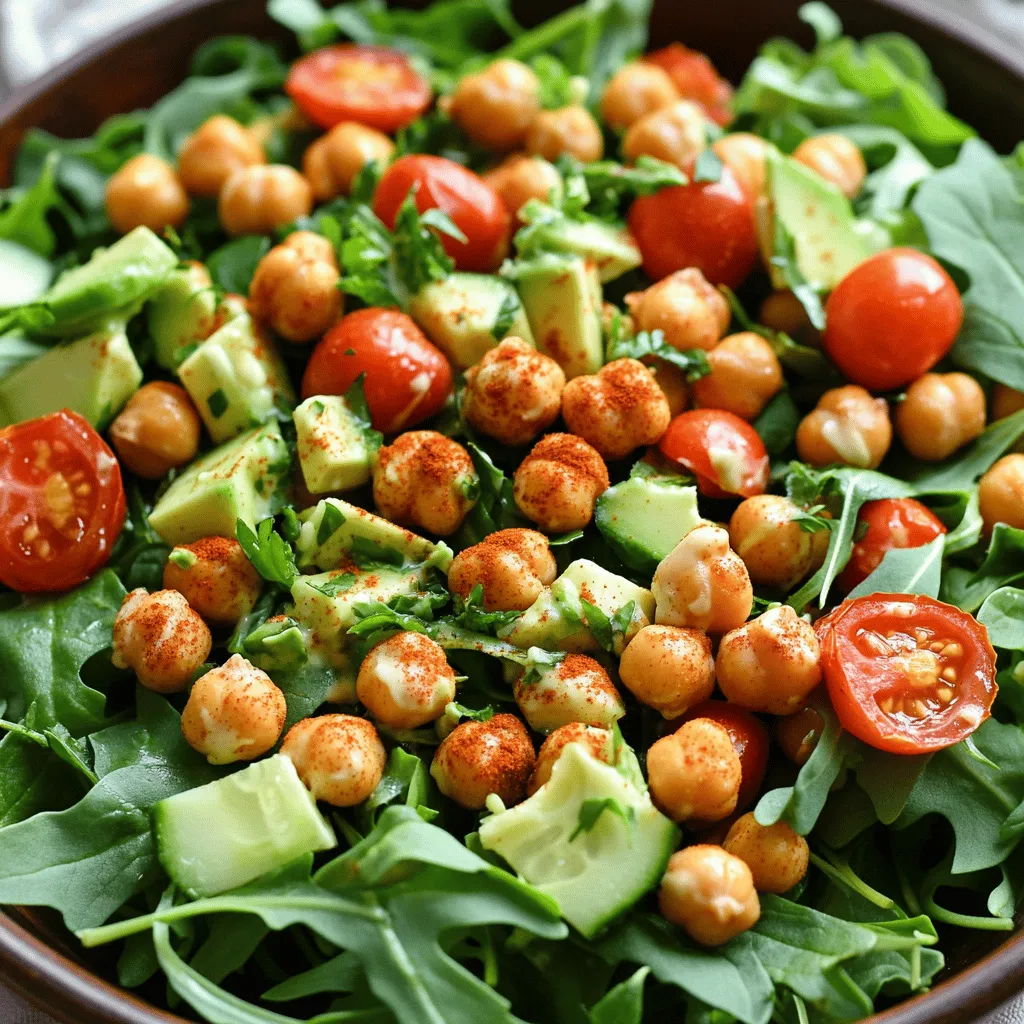
Looking for a dish that is tasty and healthy? This Crispy Chickpea Salad is your answer! Packed with flavor and nutrients, it’s simple to make and perfect for any meal. You’ll love how the crunchy chickpeas contrast with fresh veggies. In this post, I’ll guide you step-by-step to create this delightful salad, along with tips and fun variations. Let’s dive in and whip up something delicious!
Ingredients
Main Ingredients for Crispy Chickpea Salad
To make a tasty crispy chickpea salad, you need some key ingredients:
- 1 can (15 ounces) chickpeas, drained and rinsed
- 2 tablespoons olive oil
- 1 teaspoon smoked paprika
- 1 teaspoon garlic powder
- Salt and pepper to taste
- 4 cups mixed salad greens (arugula, spinach, and romaine)
- 1 cup cherry tomatoes, halved
- 1 cucumber, diced
- 1 small red onion, thinly sliced
- 1 avocado, diced
These ingredients create a base that is both crunchy and fresh. The chickpeas provide protein, while the veggies add vitamins.
Dressing Ingredients
A good salad needs a great dressing. Here’s what you need:
- Juice of 1 lemon
- 2 tablespoons tahini
- 1 tablespoon honey or maple syrup (optional)
This dressing ties the salad together. The tahini gives it a nutty taste while the lemon adds a bright touch.
Optional Add-ins for Variation
You can switch things up with some fun add-ins:
- Feta cheese for creaminess
- Nuts like almonds or walnuts for extra crunch
- Avocado for added creaminess and healthy fats
These options let you customize the salad based on what you enjoy.
Step-by-Step Instructions
Preparing the Chickpeas
To start, you want to preheat your oven to 400°F (200°C). This step is key for crispy chickpeas. Next, grab a mixing bowl and add one can of drained and rinsed chickpeas. Pour in two tablespoons of olive oil. Now, sprinkle in one teaspoon of smoked paprika and one teaspoon of garlic powder. Add salt and pepper to taste. Toss everything together until the chickpeas are well coated. This mixture will give a nice flavor to your chickpeas.
Spread the chickpeas out on a baking sheet in a single layer. This helps them get crispy. Roast them in the preheated oven for 25-30 minutes. Remember to shake the pan halfway through for even roasting. When they turn golden, they are ready!
Making the Salad Base
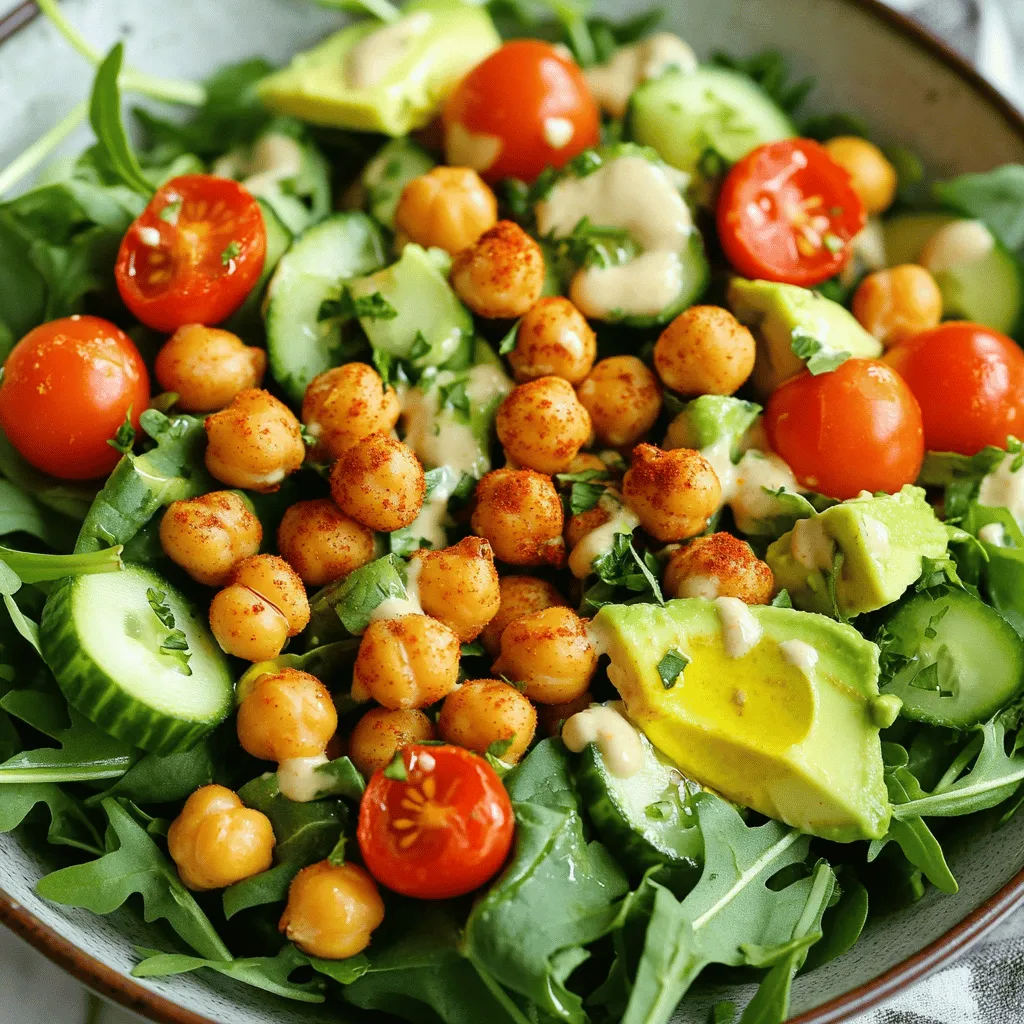
While the chickpeas are roasting, it’s time to prepare the salad base. Grab a large bowl and add four cups of mixed salad greens. I like a mix of arugula, spinach, and romaine for great taste and texture. Next, chop one cucumber and add it to the greens. Slice one small red onion thinly and toss that in, too. Halve one cup of cherry tomatoes and add these colorful bites to your bowl. Lastly, dice one avocado for creaminess and richness.
Combining Ingredients and Dressing
After the chickpeas cool slightly, it’s time to combine everything. Add the warm, crispy chickpeas to the salad. This adds a nice contrast to the cool veggies. Now, let’s whip up the dressing. In a small bowl, mix the juice of one lemon with two tablespoons of tahini. If you like a touch of sweetness, add one tablespoon of honey or maple syrup. Season with salt and pepper to taste, then whisk until smooth.
Drizzle the tahini dressing over your salad and toss gently to combine. This will coat each ingredient with flavor. Serve the salad right away, garnished with fresh parsley. Enjoy this crispy chickpea salad as a delicious and nutritious dish!
Tips & Tricks
Achieving Perfectly Crispy Chickpeas
To get your chickpeas crispy, start with dry ones. Drain and rinse them well. After that, pat them dry with a clean towel. This step removes extra moisture. The drier your chickpeas, the crispier they will be. Toss them with olive oil and seasonings. I love using smoked paprika and garlic powder for a great taste. Spread them out on a baking sheet. Make sure they are not touching. This allows heat to circulate around them. Roast at 400°F for 25 to 30 minutes. Shake the pan halfway to ensure even cooking. When you hear a nice crunch, you know they are ready.
Serving Suggestions
I enjoy serving this salad with extra crispy chickpeas on top. It adds a fun crunch. You can also serve it with a side of lemon wedges. The lemon adds a fresh burst of flavor. For a heartier meal, try adding grilled chicken or shrimp. This makes it filling and satisfying. Pairing it with whole grain bread is also a great option. It gives a nice texture contrast.
Flavor Pairing Tips
This salad shines with the right flavor pairings. The creamy avocado balances the crispness of the chickpeas. Fresh herbs like parsley enhance the dish’s taste. If you want more spice, add some red pepper flakes. They bring a nice kick without overpowering. You can also mix in some feta cheese for a salty touch. For a sweet note, try adding sliced strawberries or apples. They brighten the salad and create a nice contrast.
Variations
Vegan Version of Crispy Chickpea Salad
This salad is already vegan! The chickpeas, greens, and veggies all fit. You can also add more plant-based toppings. Try sunflower seeds or pumpkin seeds for crunch. You might enjoy adding fresh herbs, like cilantro or basil, for extra flavor.
Gluten-Free Options
Crispy Chickpea Salad is naturally gluten-free. The main ingredients, like chickpeas and fresh veggies, are safe. Check your tahini and any dressings to ensure they are gluten-free. You can swap honey with maple syrup for a sweet touch.
Seasonal Ingredient Ideas
Change the salad with the seasons! In spring, add fresh radishes for a crisp bite. In summer, toss in sweet corn or bell peppers for color. Fall is great for roasted squash or apples. Winter greens, like kale or Swiss chard, add a hearty touch. Use what’s fresh to keep your salad exciting and tasty!
Storage Info
How to Store Leftovers
To store your crispy chickpea salad, place it in an airtight container. This keeps flavors fresh. You can keep it in the fridge for up to three days. If you want the chickpeas to stay crispy, store them separately from the salad.
Best Practices for Reheating Chickpeas
If you have leftover chickpeas, you can reheat them for a warm touch. Preheat your oven to 375°F (190°C). Spread the chickpeas on a baking sheet. Bake them for about 10 minutes or until crispy again. Avoid using the microwave, as it can make them soggy.
Shelf Life of Ingredients
Most ingredients in this salad have a good shelf life. Here’s a quick guide:
- Chickpeas: Canned chickpeas last for 2-3 years if unopened.
- Mixed greens: Use within 3-5 days for freshness.
- Cherry tomatoes: Best if eaten within a week.
- Cucumber: Lasts about a week in the fridge.
- Avocado: Best to eat within 1-2 days after cutting.
- Tahini: Can last for 6 months if stored properly.
FAQs
Can I use canned chickpeas for this recipe?
Yes, you can use canned chickpeas. They save time and are easy to use. Just drain and rinse them well before cooking. This step removes extra salt and makes them taste fresher. Using canned chickpeas helps you make this Crispy Chickpea Salad quickly.
What can I substitute for tahini?
If you need a tahini substitute, try nut butter or sunflower seed butter. These options give a similar creamy texture. You can also use plain yogurt for a tangy twist. Each choice will add its own flavor, so pick what you like best.
How do I make the salad spicier?
To add spice, use red pepper flakes or hot sauce. Both options bring heat and flavor to your salad. You can also mix in diced jalapeños or fresh chili peppers. Start with a little, then taste and adjust to your liking.
This blog post covered how to make a tasty crispy chickpea salad. You learned about the key ingredients and step-by-step guides. I shared tips to make your chickpeas crispy and gave serving suggestions. You can also explore different variations based on your needs. Remember to store leftovers correctly for best flavor.
Crispy chickpea salad is fun to make and eat. Try it with your favorite ingredients! You’ll enjoy this recipe for meals all week.


Leave a Reply