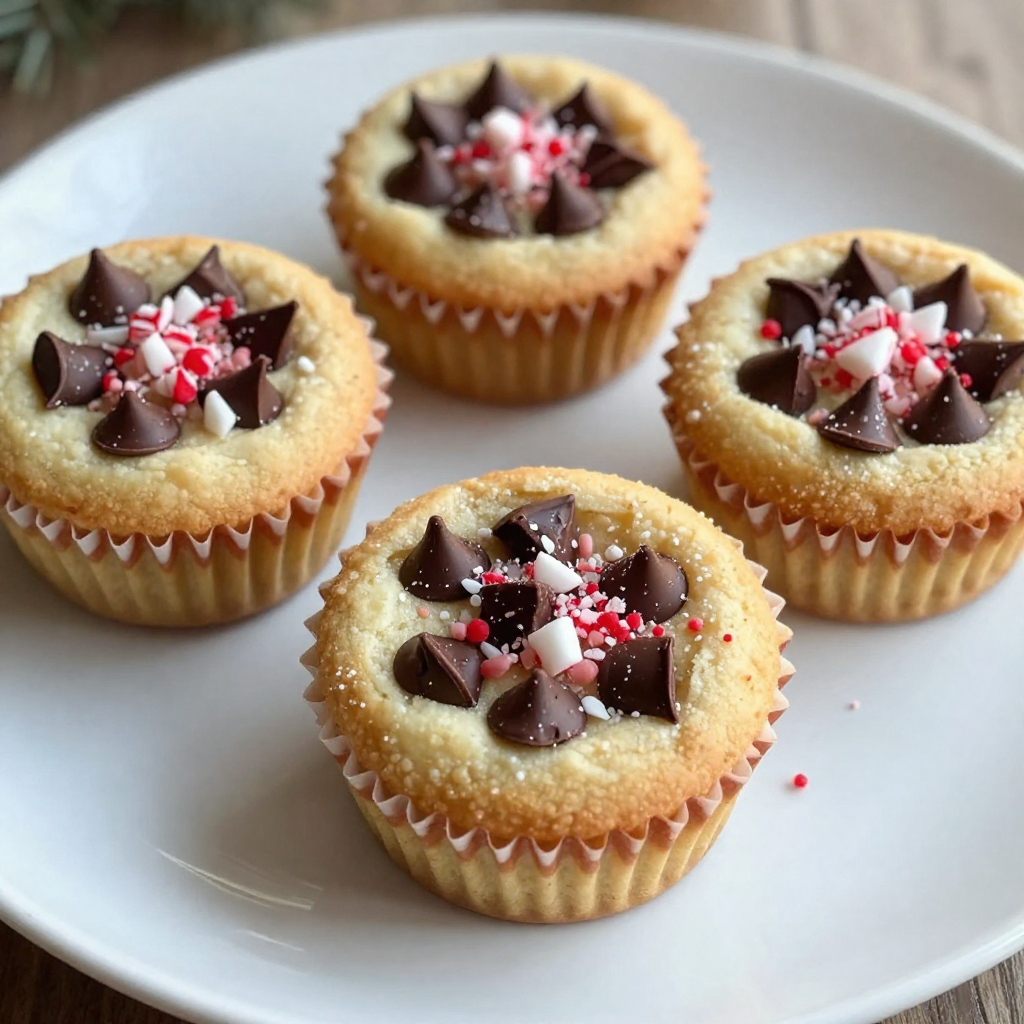
Ready to spread some cheer this season? Holiday Cookie Cups are fun, easy, and perfect for sharing! With a few simple ingredients and just a bit of time, you can create these delicious treats that wow your friends and family. From classic recipes to fun variations, I’ll guide you through each step. Let’s make this holiday season tasty and bright with these festive cookie cups!
Why I Love This Recipe
- Festive Flavors: The combination of chocolate and peppermint creates a delightful holiday flavor that is both nostalgic and refreshing.
- Easy to Make: This recipe is straightforward and quick, making it perfect for busy holiday baking sessions.
- Perfect for Sharing: These cookie cups are bite-sized treats that are great for sharing at holiday parties or gifting to friends and family.
- Customizable: You can easily modify the recipe by adding your favorite mix-ins or toppings to make it your own.
Ingredients
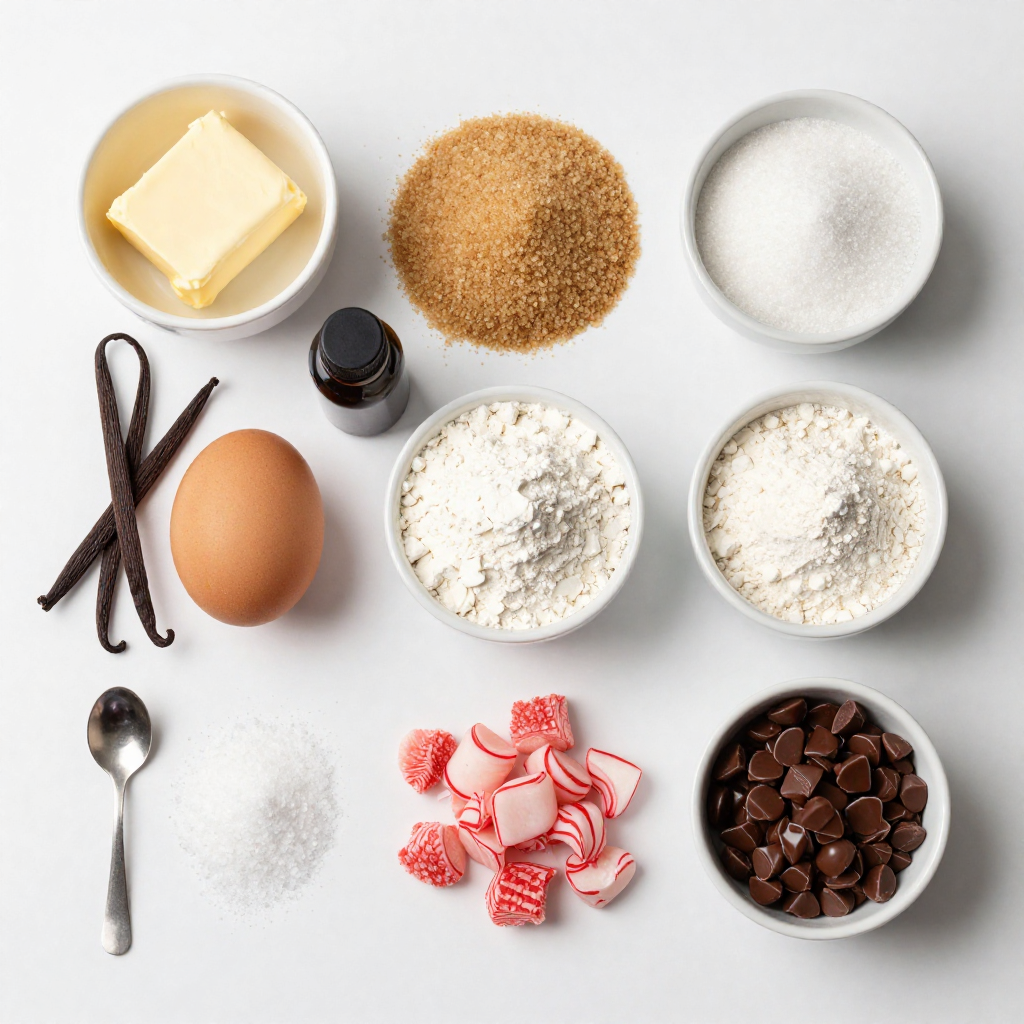
Main Ingredients for Holiday Cookie Cups
To make Holiday Cookie Cups, you will need these main ingredients:
- 1 cup unsalted butter, softened
- 1 cup brown sugar, packed
- 1/2 cup granulated sugar
- 1 large egg
- 2 teaspoons vanilla extract
- 3 cups all-purpose flour
- 1 teaspoon baking soda
- 1/2 teaspoon salt
- 1 cup chocolate chips (dark or semi-sweet)
- 1 cup crushed peppermint candies
These ingredients create a rich and delicious cookie cup. The butter gives it a smooth texture. The sugars add sweetness and depth. The egg helps bind everything together, while the flour provides structure. The baking soda makes them rise, and the salt balances the sweetness. Finally, the chocolate chips and peppermint candies add festive flavors.
Suggested Substitutions and Alternatives
If you want to switch things up, here are some ideas:
- Use coconut oil instead of butter for a dairy-free option.
- Swap brown sugar for coconut sugar for a lower glycemic index.
- Try almond extract instead of vanilla for a unique twist.
- Use gluten-free flour instead of all-purpose flour to make it gluten-free.
- Replace chocolate chips with white chocolate or butterscotch chips for different tastes.
These swaps keep the spirit of the recipe alive while catering to your needs.
Special Dietary Considerations
When baking, consider these dietary needs:
- For vegan cookie cups, use flax egg (1 tbsp ground flaxseed + 2.5 tbsp water) in place of the egg.
- Use dairy-free chocolate chips to keep it vegan.
- If nut allergies are a concern, ensure your chocolate is nut-free.
- Always check that your sugar and baking soda are gluten-free if needed.
Keeping these options in mind means everyone can enjoy your Holiday Cookie Cups!
Step-by-Step Instructions
Prepping the Oven and Muffin Tin
First, set your oven to 350°F (175°C). This temperature is perfect for baking cookie cups. Next, grab a muffin tin. You can grease this tin with butter or use paper liners. Greasing helps the cookie cups come out easily. Paper liners add a fun touch and look great.
Mixing the Dough: Tips for Creaming Butter and Sugars
In a large bowl, start with your butter. It should be softened for easy mixing. Add in brown sugar and granulated sugar. Use a mixer to cream these together. Mix until the blend is light and fluffy. This step is key for soft cookie cups. Next, add one large egg and two teaspoons of vanilla extract. Beat these in until they are well combined.
In another bowl, whisk together three cups of flour, one teaspoon of baking soda, and half a teaspoon of salt. Gradually mix this dry blend into the wet mix. Stir until just combined. Avoid over-mixing; this keeps your cookie cups soft. Lastly, fold in one cup of chocolate chips and one cup of crushed peppermint candies. This gives your cookie cups a festive crunch.
Baking Time and Temperature: What to Look For
Now, it’s time to fill your muffin tin. Use a tablespoon or cookie scoop to fill each cup about three-quarters full. Place the tin in the preheated oven. Bake for about 12 to 15 minutes. Look for lightly golden edges and set centers. They should not be too soft when you take them out. Let them cool for about five minutes in the pan. Then, move them to a wire rack to cool completely. Enjoy the delightful scent while they cool!
Tips & Tricks
How to Achieve Perfectly Shaped Cookie Cups
To make cookie cups that are just right, use a greased muffin tin. This helps the cookie cups come out easily. When you fill each cup with dough, leave some space at the top. The dough will rise as it bakes. Bake them until the edges turn light brown. This gives them a nice shape. Let them cool for a few minutes before removing them from the tin. This helps keep their form.
Flavor Variations and Add-ins
You can change up the flavors of your cookie cups. Try using white chocolate chips or butterscotch chips for a twist. You can also add nuts like chopped walnuts or pecans for crunch. If you want a more holiday feel, mix in some cinnamon or nutmeg. You can even use dried fruit like cranberries. Adjust the amount of add-ins to fit your taste.
Decorating Suggestions for Festive Presentation
To make your cookie cups look festive, sprinkle some crushed peppermint on top. This adds color and a fun crunch. You can also fill them with whipped cream or chocolate ganache. A drizzle of melted chocolate can give a nice touch too. Use colorful sprinkles for a fun look. Get creative with how you decorate, and make each cookie cup unique.
Pro Tips
- Chill the Dough: For a firmer dough that’s easier to scoop, chill the cookie dough in the refrigerator for at least 30 minutes before filling the muffin tin.
- Use Parchment Paper: Line your muffin tin with parchment paper for easy removal of the cookie cups and to prevent sticking.
- Experiment with Mix-Ins: Feel free to swap out the chocolate chips and peppermint for other mix-ins like nuts, dried fruit, or different types of chocolate to suit your taste.
- Don’t Overbake: Keep an eye on the cookie cups while baking. They should be lightly golden at the edges and set in the center for the perfect chewy texture.
Variations
Different Chocolate Options: Dark, Milk, or White Chocolate
You can change the type of chocolate in your cookie cups. Dark chocolate gives a rich taste. Milk chocolate adds a sweet and creamy flavor. White chocolate offers a smooth, sweet touch. Each type brings its own charm to the cookie cups. You can mix and match them too. Try using dark chocolate with milk chocolate for a fun twist.
Seasonal Flavor Twists: Pumpkin Spice or Eggnog
Want to add more holiday cheer? Try pumpkin spice or eggnog flavors. For pumpkin spice, mix in pumpkin puree and add spices like cinnamon and nutmeg. This gives your cookie cups a warm, cozy taste. If you choose eggnog, use eggnog instead of vanilla extract. This creates a festive flavor that sings of holiday cheer.
Alternative Fillings: Fruit or Nut Options
You can also play with the filling. Instead of chocolate chips, use dried fruit or nuts. Chopped walnuts or pecans add a nice crunch. Dried cranberries or cherries give a burst of flavor and color. These options make your cookie cups unique and fun. Experiment with your favorite fruits or nuts for tasty surprises inside!
Storage Info
Best Practices for Storing Cookie Cups
To keep your cookie cups fresh, store them in an airtight container. This helps keep them moist and soft. You can layer them with parchment paper to prevent sticking. Place the container in a cool, dry place. Avoid sunlight and heat, which can dry them out.
Freezing Instructions for Longer Shelf Life
If you want to save some cookie cups for later, freezing works well. First, let the cookie cups cool completely. Then, wrap them in plastic wrap. Place the wrapped cups in a freezer bag. Press out as much air as possible before sealing. You can freeze them for up to three months. When you're ready to eat, thaw them in the fridge overnight.
How to Keep Cookie Cups Fresh
To keep cookie cups fresh, avoid stacking them directly on top of each other. If you stack them, use parchment paper between layers. Also, try not to expose them to air for too long. If you notice them getting dry, you can add a slice of bread in the container. The bread will help keep the cookies soft. Enjoy your cookie cups for days!
FAQs
Can I make Holiday Cookie Cups in advance?
Yes, you can make Holiday Cookie Cups in advance. Prepare the dough and store it in the fridge for up to three days. This method keeps it fresh and flavorful. You can also bake the cookie cups ahead of time. After baking, let them cool and store them in an airtight container. They stay tasty for about a week.
What can I use instead of peppermint candies?
If peppermint candies are not your thing, try other options. You can use crushed toffee or chocolate candies for a sweet twist. Chopped nuts, like walnuts or pecans, add a nice crunch. You might also enjoy using dried fruit, such as cranberries or cherries, for a fruity flavor.
How do I keep my cookie cups from sticking to the tin?
To prevent sticking, grease your muffin tin well before adding the dough. Use butter or cooking spray to coat each cup. If you prefer, line the tin with paper liners for easy removal. After baking, let the cookie cups cool for a few minutes before removing them. This helps them release easily from the tin.
We explored how to make tasty holiday cookie cups. You learned about key ingredients and fun substitutes. With easy step-by-step instructions, you can bake them perfectly. I shared tips for shaping and decorating your cookie cups. Variations like seasonal flavors add fun twists. Plus, I covered best storage methods to keep them fresh. Enjoy trying these recipes and sharing them with loved ones during the holidays. Happy baking!