Are you tired of boring breakfasts? Homemade breakfast hot pockets are the perfect solution! In this guide, I'll show you how to whip up quick and tasty hot pockets that are fun to eat and easy to make. With simple ingredients, step-by-step instructions, and tasty filling options, you'll make breakfast exciting again. Let’s dive into this delicious recipe and get your mornings back on track!
Why I Love This Recipe
- Convenient and Portable: These hot pockets are perfect for busy mornings, allowing you to enjoy a homemade breakfast on the go.
- Customizable Fillings: With a variety of ingredients, you can tailor the fillings to your taste, whether you prefer sausage, ham, or veggies.
- Homemade Goodness: Made from scratch, these hot pockets are free from preservatives and packed with fresh ingredients.
- Fun to Make: Rolling out the dough and filling the pockets is a fun activity that can be enjoyed with family or friends.
Ingredients
List of ingredients for the dough
- 2 cups all-purpose flour
- 1 teaspoon salt
- 1 teaspoon baking powder
- ½ cup unsalted butter, cold and cubed
- ½ cup cold water
List of ingredients for the filling
- 4 large eggs
- 1 cup cooked sausage or diced ham
- 1 cup shredded cheddar cheese
- 1 cup finely chopped bell peppers
- ½ cup diced onions
- 1 teaspoon garlic powder
- Salt and pepper to taste
Optional garnishes
- Fresh herbs (like chives or parsley)
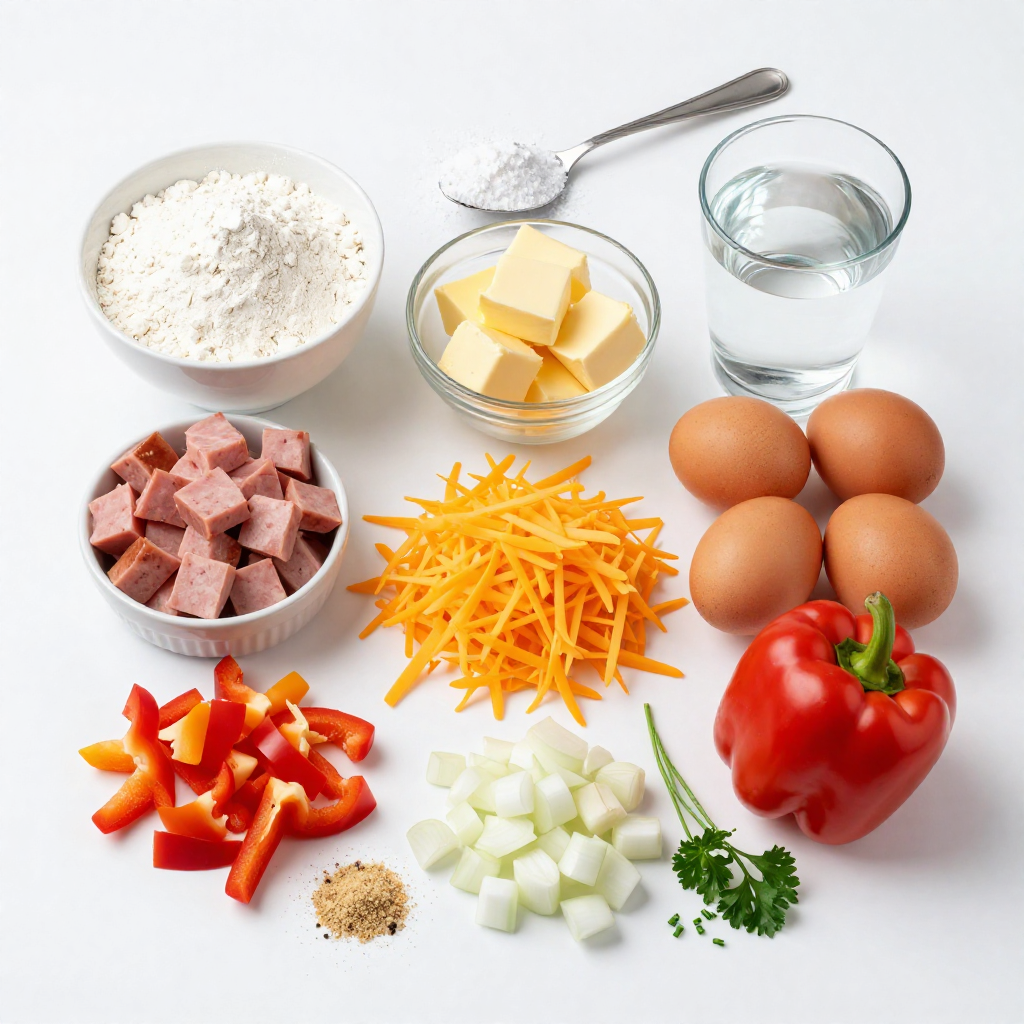
When making homemade breakfast hot pockets, the ingredients are key. The dough is simple yet effective. The filling is where you can get creative. I love using a mix of eggs, meats, and veggies. The taste is rich and satisfying.
For the dough, start with the basics: flour, salt, and baking powder. The cold butter adds flakiness, while cold water helps bind it together.
For the filling, I choose cooked sausage or ham for protein. The cheddar cheese adds a nice meltiness. Bell peppers and onions give color and crunch. Garlic powder and seasoning elevate the flavor.
Optional garnishes like fresh herbs can make a big difference. They add a pop of color and freshness. You can even use salsa or hot sauce for a fun twist. These ingredients come together to create a warm and delicious breakfast treat.
Step-by-Step Instructions
How to prepare the dough
To make the dough, start by mixing 2 cups of all-purpose flour, 1 teaspoon of salt, and 1 teaspoon of baking powder in a large bowl. Next, add ½ cup of cold, cubed unsalted butter. Use your fingers or a pastry cutter to mix until you see coarse crumbs. Slowly add ½ cup of cold water while mixing until the dough sticks together. Wrap the dough in plastic wrap and chill it in the fridge for 30 minutes.
Cooking the filling
In a skillet over medium heat, sauté ½ cup of diced onions and 1 cup of finely chopped bell peppers. Cook them until they are soft. Then, add 1 cup of cooked sausage or diced ham and stir for a couple of minutes until heated through. In a separate bowl, whisk 4 large eggs, then pour them into the skillet. Scramble the eggs until they are just set, and add 1 teaspoon of garlic powder, salt, and pepper to taste. Remove the skillet from heat and let the filling cool slightly.
Assembling and sealing the hot pockets
Now it’s time to assemble! Preheat your oven to 400°F (200°C). On a floured surface, roll out the chilled dough to about ¼ inch thick. Cut it into rectangles, about 5x7 inches each. Place a spoonful of the egg and meat mixture in the center of each rectangle. Sprinkle 1 cup of shredded cheddar cheese on top of the filling. Fold the dough over to create a pocket. Press the edges firmly to seal them. For extra security, use a fork to crimp the edges.
Baking instructions
To bake, line a baking sheet with parchment paper. Place the assembled hot pockets on the sheet. Bake them for about 20 to 25 minutes, or until they turn golden brown. Once done, remove the hot pockets from the oven and let them cool for a few minutes before serving. Enjoy your homemade breakfast hot pockets with a side of salsa or hot sauce for a delicious touch!
Tips & Tricks
How to achieve the perfect dough texture
To get the right dough texture, start with cold ingredients. Cold butter is key. When you mix the butter with flour, aim for coarse crumbs. This helps keep the pockets flaky. After mixing, let the dough chill for 30 minutes. Chilling firms up the butter, making it easier to roll. This step is vital for the best results.
Suggestions for filling variations
You can get creative with your filling! Try using different meats like bacon or turkey. For a vegetarian twist, use spinach and feta cheese. You can also mix in different veggies such as mushrooms or zucchini. Want some spice? Add jalapeños or hot sauce. The choice is yours, so have fun with it!
Baking shortcuts for quicker prep
If you're short on time, use store-bought dough instead of making your own. This can cut your prep time in half! Another tip is to prep your filling in advance. You can cook and cool it the night before. Just store it in the fridge until you’re ready to assemble. These shortcuts help you enjoy homemade hot pockets faster!
Pro Tips
- Chill the Dough: Make sure your butter is cold and refrigerate the dough before rolling it out. This helps create a flaky texture in the crust.
- Customize Your Fillings: Feel free to switch up the meats and vegetables based on your preferences or what you have on hand. Spinach, mushrooms, and different cheeses can work beautifully!
- Sealing Technique: For a better seal, brush the edges of the dough with a bit of water before folding over. This ensures that the pockets don't open while baking.
- Serve with Dipping Sauces: Enhance your hot pockets by serving them with a side of salsa, ranch, or hot sauce for an extra kick of flavor.
Variations
Vegetarian options for the filling
If you want a tasty vegetarian hot pocket, try these ideas. You can swap the meat for more veggies. Use ingredients like spinach, mushrooms, or zucchini. Add in some black beans for protein. You could also mix in some feta cheese for a salty, tangy twist. Try adding herbs like basil or oregano for fresh flavors.
Making gluten-free hot pockets
To make gluten-free hot pockets, use gluten-free flour. Mix it with salt and baking powder as usual. You can use butter or a dairy-free option. Keep the water cold for the best dough. For the filling, stick with the same ingredients. Just make sure any cheese or meat is gluten-free. These hot pockets still taste great!
Flavor combinations (spicy, cheesy, etc.)
You can create fun flavor combos based on your taste. For a spicy kick, add jalapeños or hot sauce to your filling. If you love cheese, try adding mozzarella or pepper jack. You can even mix cheeses for a unique taste. Consider using seasonings like cumin or smoked paprika for deeper flavors. The options are endless, so feel free to experiment!
Storage Info
Best practices for storing leftovers
To keep your homemade breakfast hot pockets fresh, let them cool down. Once cool, wrap each hot pocket in plastic wrap or foil. Store them in an airtight container. This helps maintain their taste and texture. Make sure they are in the fridge within two hours after baking.
Freezing and reheating instructions
You can freeze hot pockets for later. Wrap them well in plastic wrap and then in foil. Label them with the date for easy tracking. To reheat, remove the wrapping and place them in the oven at 350°F (175°C) for 20-25 minutes or until heated through. You can also microwave them, but they may get soggy.
Shelf life of homemade hot pockets
Homemade breakfast hot pockets last about 3-4 days in the fridge. If you freeze them, they can last up to three months. For the best taste, eat them within one month. Always check for any signs of spoilage before eating.
FAQs
Can I make the dough ahead of time?
Yes, you can make the dough ahead of time. After mixing, wrap it well in plastic. Store it in the fridge for up to two days. This saves time on busy mornings.
What other fillings can I use for breakfast hot pockets?
You can get creative with the fillings! Try these options:
- Spinach and feta cheese
- Bacon and avocado
- Mushrooms and swiss cheese
- Scrambled eggs with salsa
Mix and match to find your favorite flavor!
How long do homemade hot pockets last in the fridge?
Homemade hot pockets last about three to four days in the fridge. Store them in an airtight container. Reheat them before enjoying for breakfast or a snack.
Can I bake these instead of frying them?
Absolutely! Baking is a great option. Preheat your oven to 400°F (200°C). Bake for 20-25 minutes until golden brown. This method keeps them crispy without extra oil.
You now have all the tools to make delicious hot pockets. We covered the ingredients, steps, and tips you need. You can experiment with flavors and make them your own. Don't forget about storage and reheating for later. These tasty treats are perfect for any meal. With simple steps, anyone can enjoy hot pockets at home. Happy cooking!