Craving something sweet and simple? These No-Bake Oreo Bars are the perfect fix! With just a few easy steps, you can whip up a tasty treat that everyone will love. Whether you're a beginner or a pro in the kitchen, I'll guide you through each part, from the crust to the cream cheese filling. Let's dive into this fun, no-bake recipe that will satisfy your sweet tooth!
Why I Love This Recipe
- Easy to Make: This recipe requires no baking, making it perfect for quick preparation without the fuss of an oven.
- Rich and Creamy: The combination of cream cheese and whipped topping creates a luscious texture that melts in your mouth.
- Oreo Lover's Dream: If you love Oreos, this dessert is packed with them, giving you that classic cookie taste in every bite.
- Perfect for Any Occasion: Whether it’s a party, picnic, or just a treat for yourself, these bars are sure to impress everyone.
Ingredients for No-Bake Oreo Bars
List of required ingredients
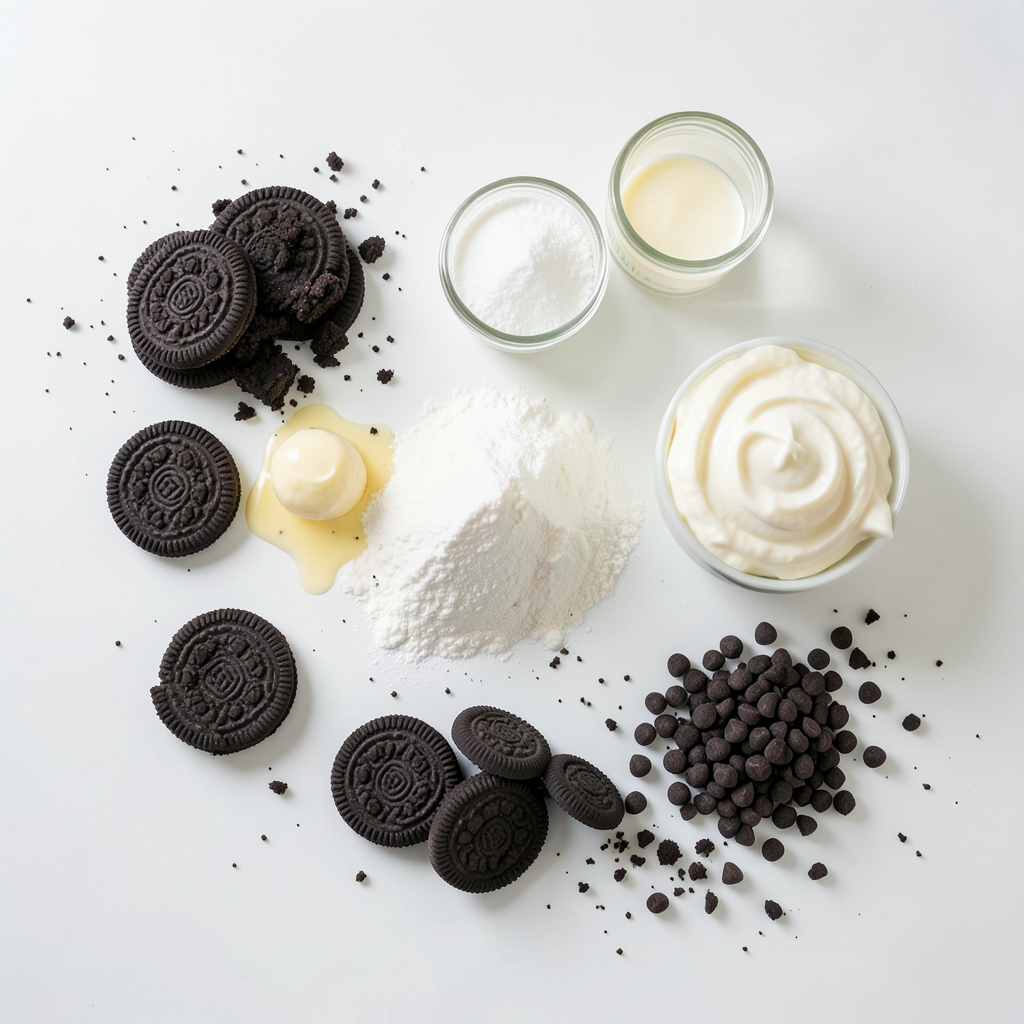
To make No-Bake Oreo Bars, you need these key ingredients:
- 24 Oreo cookies, crushed
- ½ cup unsalted butter, melted
- 1 ½ cups cream cheese, softened
- 1 cup powdered sugar
- 1 teaspoon vanilla extract
- 1 cup whipped topping (like Cool Whip)
- ½ cup chocolate chips (semi-sweet or dark)
- Additional crushed Oreo cookies for topping
These ingredients combine to create a creamy, rich treat that everyone loves.
Optional ingredients for customization
You can switch things up by adding some optional ingredients:
- ½ cup peanut butter for a nutty flavor
- 1 teaspoon almond extract for a different taste
- Chopped nuts or sprinkles for extra crunch
- Different cookie types, like chocolate or vanilla
These add-ons let you make the recipe your own. Feel free to mix and match!
Equipment needed for preparation
To prepare your No-Bake Oreo Bars, you will need:
- A large mixing bowl
- A 9x9-inch baking dish
- A spoon or spatula for mixing
- A plastic wrap to cover the dish
Having the right tools makes the process easier. Enjoy the fun of making this tasty treat!
Step-by-Step Instructions
Preparing the crust
To start, gather your crushed Oreo cookies and melted butter. In a large bowl, mix them well. You want the crumbs coated with butter. Once mixed, press this mixture into the bottom of a greased 9x9-inch baking dish. Use the back of a spoon to pack it tightly. This forms your crust and gives it a solid base.
Making the cream cheese filling
Next, grab another mixing bowl. Beat the softened cream cheese, powdered sugar, and vanilla extract together until smooth. This step creates a creamy filling. Make sure it’s well-mixed, with no lumps. Then, gently fold in the whipped topping. Be careful not to deflate the mixture. You want it light and fluffy.
Assembling the bars
Now it’s time to assemble! Spread the cream cheese mixture evenly over your crust. This adds a rich layer on top. Then, sprinkle the chocolate chips and additional crushed Oreo cookies over the cream cheese layer. Press them down lightly to ensure they stick. Finally, cover your dish with plastic wrap and refrigerate for at least 4 hours. This helps the bars set. Once they are firm, cut them into squares and serve chilled. Enjoy your delicious treat!
Tips & Tricks
How to achieve the best texture
To get the best texture, start with crushed Oreos. Use a food processor for even crumbs. Mix in melted butter until all the crumbs look wet. Press the mixture firmly into the pan. This helps create a strong crust. The cream cheese mix should be soft, but not runny. Folding in the whipped topping gently keeps it light.
Common mistakes to avoid
One common mistake is not crushing the Oreos enough. If they are too chunky, the crust won't hold. Another mistake is overmixing the cream cheese filling. This can make it too loose. Also, don’t skip refrigerating. The bars need time to set, or they’ll fall apart. Lastly, remember to pack the crust tightly. This step is key for a good bite.
Serving suggestions
These Oreo bars are best served cold. Cut them into squares for easy sharing. You can add a drizzle of chocolate sauce on top for extra flair. If you like, serve with fresh fruit or ice cream. The bars also pair well with coffee or milk. This makes them a great dessert for any gathering.
Pro Tips
- Crushing Oreos: Use a food processor for a finer crumble, or place them in a zip-top bag and crush with a rolling pin for a hands-on approach.
- Softening Cream Cheese: For best results, let your cream cheese sit at room temperature for about 30 minutes before using to ensure a smooth mixture.
- Whipped Topping: For a more stable filling, consider using a thicker whipped topping or folding in a bit of melted chocolate before mixing.
- Setting Time: Allowing the bars to set overnight will enhance the flavors and make cutting easier, so plan ahead if you can!
Variations
Flavorful additions (e.g., Nutella, peanut butter)
You can add a twist to your Oreo bars. Try mixing in Nutella or peanut butter. Just swirl in about half a cup when you blend the cream cheese. This adds a rich flavor. It makes the bars even more tasty and fun.
Substitutions for dietary preferences (gluten-free, vegan)
If you want gluten-free bars, use gluten-free Oreo cookies. They taste great and work well in this recipe. For a vegan option, swap the cream cheese for a plant-based cream cheese. Use a vegan whipped topping too. These changes keep the bars rich and creamy.
Creative toppings and mix-ins
Get creative with toppings! You can add crushed nuts for crunch. Try sprinkles for color or mini marshmallows for fun. You can also drizzle melted chocolate over the top. Each topping gives a new taste and look to your bars. Don't be afraid to mix and match!
Storage Information
How to store leftovers properly
To keep your Oreo bars fresh, place them in an airtight container. Make sure to layer parchment paper between the bars. This helps prevent sticking and keeps them neat. Store the container in the fridge. The bars will stay good for up to five days.
Freezing tips for Oreo bars
You can also freeze these bars for later. First, cut them into squares. Wrap each square in plastic wrap. Then, place all wrapped squares in a freezer-safe bag. Be sure to remove as much air as possible. They can last up to three months in the freezer. When you want to enjoy them, take them out and let them thaw in the fridge.
Best practices for serving after storage
When serving your chilled Oreo bars, let them sit at room temperature for about 10 minutes. This helps soften them slightly and enhances the flavor. Cut them into neat squares if you haven’t done so already. You can garnish with extra crushed Oreo cookies or chocolate chips for a nice touch.
FAQs
How long do no-bake Oreo bars last?
No-bake Oreo bars can last in the fridge for about five days. Make sure to store them in an airtight container. This keeps them fresh and tasty. If you freeze the bars, they can last up to three months. Just wrap them well to avoid freezer burn.
Can I use different cookies for the crust?
Yes, you can use different cookies for the crust. A chocolate sandwich cookie works well. You might also try graham crackers for a different taste. Just crush them finely and mix with melted butter. This will give you a nice base.
Is it possible to make these bars ahead of time?
Absolutely! You can make these bars a day or two ahead. Just prepare them and store them in the fridge. This makes them great for parties or gatherings. You will have a tasty treat ready to serve without last-minute stress.
What are some common substitutions for this recipe?
You can substitute the cream cheese with a dairy-free option if needed. Use a vegan cream cheese for a similar taste. If you want less sugar, try using a sugar substitute in the filling. For a chocolate kick, add cocoa powder to the cream cheese mix.
No-bake Oreo bars are easy and delicious. We covered the ingredients, steps, and tips. You can customize with flavors and toppings. Don’t forget the storage tips for freshness. With the right prep, you will make perfect bars every time. Enjoy experimenting with the recipe. Trust me, your friends and family will love these treats! Now it’s your turn to make your own no-bake Oreo bars!