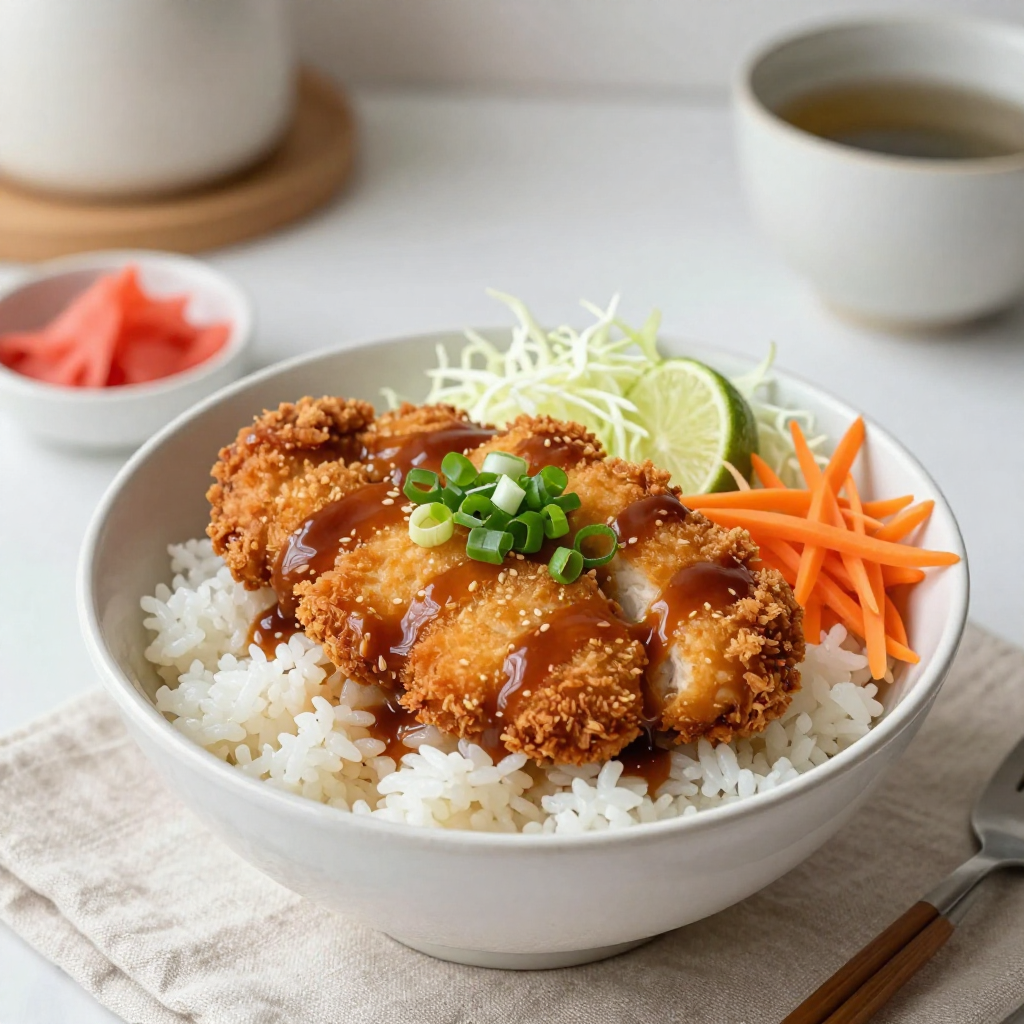
Craving something crisp, savory, and packed with flavor? Let me introduce you to Japanese Chicken Katsu Bowls! This dish combines tender chicken with a crunchy breading and a bed of sticky rice, topped with fresh veggies and tangy sauce. It’s easy to make and delicious to eat. In this article, I’ll guide you through a simple recipe that will impress your family and friends. Let’s get cooking!
Why I Love This Recipe
- Deliciously Crispy: The panko breadcrumbs create an irresistibly crunchy coating that contrasts perfectly with the juicy chicken inside.
- Quick to Prepare: This recipe is straightforward and can be made in about 40 minutes, making it perfect for busy weeknights.
- Customizable Bowls: You can easily add your favorite vegetables or toppings to the bowls, making it a versatile dish for everyone.
- Perfect for Sharing: These chicken katsu bowls make a fantastic meal to share with family or friends, bringing everyone together for a delicious feast.
Ingredients
Main Ingredients
- 2 boneless, skinless chicken breasts
- 1 cup panko breadcrumbs
- 1/2 cup all-purpose flour
- 2 large eggs, beaten
- Salt and pepper, to taste
- 1 teaspoon garlic powder
- 1 teaspoon onion powder
- Vegetable oil, for frying
- 2 cups cooked Japanese short-grain rice
Toppings and Garnishes
- 1 cup finely shredded cabbage
- 1/4 cup shredded carrots
- 1/4 cup sliced scallions
- Tonkatsu sauce, for drizzling
- Pickled ginger, for serving
Recommended Kitchen Tools
- Meat mallet or rolling pin
- Three bowls for breading station
- Large skillet for frying
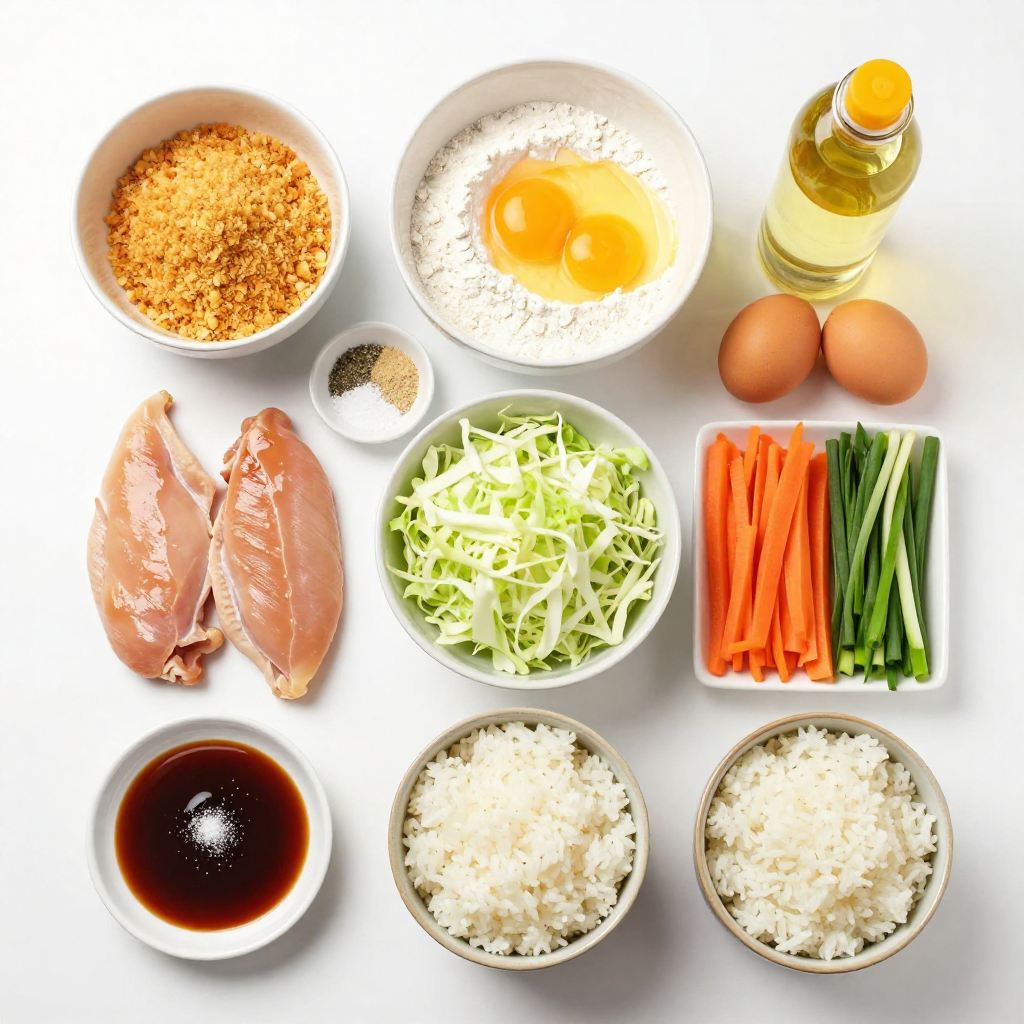
To make chicken katsu bowls, you need fresh ingredients. Start with chicken breasts. They should be boneless and skinless. I like using panko breadcrumbs for a crispy texture. All-purpose flour helps the breading stick. You will also need eggs, salt, and pepper for seasoning. Garlic and onion powder add great flavor.
For the base of your bowl, use Japanese short-grain rice. It has the right stickiness and taste.
Don't forget the toppings! Shredded cabbage adds crunch, while carrots give color. Sliced scallions bring a fresh taste. Tonkatsu sauce is a must for drizzling. Lastly, serve with pickled ginger for a zesty kick.
Gather these kitchen tools to make your cooking easier. A meat mallet or rolling pin helps flatten the chicken. You need three bowls: one for flour, one for eggs, and one for panko. A large skillet is best for frying.
With these ingredients and tools, you are ready to create tasty chicken katsu bowls!
Step-by-Step Instructions
Preparing the Chicken
- First, pound chicken breasts to even thickness. This helps them cook evenly.
- Next, season both sides with salt, pepper, garlic powder, and onion powder. This adds great flavor.
Breading Process
- Now, set up a breading station. Use three bowls: one for flour, one for beaten eggs, and one for panko.
- Dredge each chicken breast in flour first. Then dip it in the egg, and finally coat it in panko. Press the breadcrumbs on well.
Cooking the Chicken
- Heat about 1/2 inch of vegetable oil in a large skillet.
- When the oil is hot, carefully add the breaded chicken breasts. Fry them for about 4-5 minutes on each side. They should turn golden brown and cook through.
Assembling the Bowls
- While the chicken rests, prepare your bowls. Start by dividing the cooked rice among the bowls.
- Next, add the finely shredded cabbage and sliced carrots on top of the rice.
- Slice the fried chicken into strips and place them on the rice and veggies.
- Finally, drizzle the chicken katsu with tonkatsu sauce. Garnish with sliced scallions and add some pickled ginger on the side for a pop of flavor.
Tips & Tricks
Perfecting the Breading
To get a crispy texture for your chicken katsu, use panko breadcrumbs. They are lighter than regular breadcrumbs and create a crunchier coating. Here are some tips:
- Season the flour. Add salt and pepper to the flour for flavor.
- Press the panko. After coating, press the panko firmly onto the chicken. This helps it stick better.
- Avoid moisture. Keep the chicken dry before breading. This prevents sogginess.
Frying Tips
Frying chicken katsu takes care and attention. Maintaining the right oil temperature is key. The oil should be around 350°F (175°C). Here’s how to check:
- Breadcrumb test. Drop a few breadcrumbs in the oil. If they sizzle, it’s ready.
- Cook time. Fry each piece for 4-5 minutes per side. The chicken should be golden brown.
- Check doneness. Use a meat thermometer. The chicken should reach 165°F (74°C) inside.
Serving Suggestions
Serving chicken katsu bowls can be fun and creative. Here are some ideas:
- Add toppings. Consider avocado, sesame seeds, or seaweed for extra flavor.
- Use colorful garnishes. Bright veggies make the dish pop.
- Presentation tips. Serve with chopsticks and a side of tonkatsu sauce. A lime slice adds a nice touch.
Pro Tips
- Pound the Chicken Evenly: This ensures even cooking and prevents the chicken from being dry or undercooked in the thickest parts.
- Use Fresh Panko Breadcrumbs: Fresh panko provides a lighter, crispier texture compared to older breadcrumbs, enhancing the overall crunch!
- Control the Oil Temperature: Maintaining the right oil temperature is key; too hot will burn the coating, while too cool will make it greasy.
- Serve Immediately: For the best texture, serve the chicken katsu right after frying to ensure it remains crispy!
Variations
Alternative Proteins
You can swap chicken for other proteins. Pork is a popular choice. Just cut pork into thin slices. Tofu also works well for a vegetarian option. Press the tofu to remove excess moisture. Then, follow the same breading steps. This way, you can enjoy a katsu bowl that fits your taste.
Ingredient Substitutes
If you need gluten-free options, use gluten-free breadcrumbs. You can also use almond flour or crushed rice crackers. These substitutes keep the crunch while being gluten-free. For flour, try gluten-free all-purpose flour. These small changes help everyone enjoy this dish.
Flavor Enhancements
To boost flavor, add spices or marinades. Try a bit of cayenne pepper for heat. Marinating chicken in soy sauce adds depth. You can also mix in sesame oil for a nutty flavor. Experiment with your favorite spices to make it unique. This is your chance to get creative!
Storage Info
How to Store Leftovers
To store your chicken katsu bowls, place them in an airtight container. Separate the chicken from the rice and veggies. This keeps the chicken crispy. You can store them in the fridge for up to three days.
Reheating Methods
To reheat, use an oven or air fryer. Preheat to 350°F. Place the chicken on a baking sheet. Heat for about 10 minutes until warm. This method keeps the katsu crispy. Avoid microwaving, as it can make the chicken soggy.
Freezing Guide
You can freeze chicken katsu bowls for up to three months. Wrap each chicken piece tightly in plastic wrap. Place it in a freezer bag. For the rice and veggies, store them in separate bags. When ready to eat, thaw in the fridge overnight before reheating.
FAQs
What is the origin of chicken katsu?
Chicken katsu comes from Japan. It is a popular dish that blends Western and Japanese cooking. The word "katsu" means "cutlet" in Japanese. It became famous during the Meiji period. This dish shows Japan's love for fried foods. People often eat it with rice and salad. It is more than just a meal; it is a comfort food for many.
Can I make chicken katsu ahead of time?
Yes, you can make chicken katsu in advance. To save time, prepare the chicken and breading first. You can store the breaded chicken in the fridge for a few hours. Just remember to cover it well. For longer storage, freeze the breaded chicken. When you are ready to cook, fry it straight from frozen. This way, you will have a quick meal ready in no time.
What to serve with chicken katsu bowls?
You can serve many sides with chicken katsu bowls. Here are some great ideas:
- Miso soup for a warm starter
- Edamame for a healthy snack
- Seaweed salad for a refreshing crunch
- Pickled vegetables for tangy flavor
These sides will add variety and taste to your meal.
How do I make homemade Tonkatsu sauce?
Making tonkatsu sauce at home is simple. Here is a quick recipe:
- 1/4 cup ketchup
- 2 tablespoons Worcestershire sauce
- 1 tablespoon soy sauce
- 1 tablespoon sugar
- 1 teaspoon Dijon mustard
Mix all the ingredients in a small bowl. Taste and adjust if needed. This sauce is sweet and tangy. It pairs perfectly with your chicken katsu.
In summary, this blog post covered the key steps to make chicken katsu bowls. We went over the main ingredients needed, from the chicken to the toppings. I provided tips for perfecting the breading and cooking the chicken. We also explored variations and storage options to keep leftovers fresh. These bowls are fun to make and taste great. I hope you enjoy trying this recipe and impressing your friends and family with your cooking skills!