Ready to flip your breakfast routine? Mini Pancake Poppers are the perfect blend of fun and flavor! These bite-sized treats are not just fun to make; they are also a hit with kids and adults alike. With simple ingredients and quick steps, you can whip up a delicious breakfast that even picky eaters will love. Let’s dive in and learn how to create these tasty poppers that can bring joy to your mornings!
Why I Love This Recipe
- Fun to Make: These mini pancake poppers are a delightful cooking activity that can involve kids or friends, making breakfast a fun experience.
- Customizable: With options to add chocolate chips, fruits, or even nuts, you can tailor them to your taste preferences for a new twist every time.
- Quick to Prepare: Ready in just 20 minutes, they are perfect for busy mornings or spontaneous brunches without sacrificing taste.
- Perfectly Portable: These bite-sized pancakes are easy to grab and go, making them a great option for breakfast on the run or a fun snack anytime!
Ingredients
To create delicious mini pancake poppers, gather the following simple ingredients:
- 1 cup all-purpose flour
- 2 tablespoons sugar
- 1 teaspoon baking powder
- 1/2 teaspoon baking soda
- 1/4 teaspoon salt
- 1 cup buttermilk
- 1 large egg
- 2 tablespoons melted butter
- 1/2 teaspoon vanilla extract
- 1/2 cup mini chocolate chips (optional)
- Maple syrup or honey for drizzling
- Fresh fruit for garnish (strawberries, blueberries, or banana slices)
These ingredients are easy to find. The buttermilk gives the poppers a fluffy texture. You can skip the mini chocolate chips for a healthier option. Fresh fruit adds color and flavor, making your dish even more fun. Trust me, each ingredient plays a role in making these poppers tasty and exciting for breakfast.

Step-by-Step Instructions
Preparation Steps
- First, grab a large bowl. Add 1 cup of all-purpose flour, 2 tablespoons of sugar, 1 teaspoon of baking powder, 1/2 teaspoon of baking soda, and 1/4 teaspoon of salt. Mix them well.
- In a different bowl, mix 1 cup of buttermilk, 1 large egg, 2 tablespoons of melted butter, and 1/2 teaspoon of vanilla extract. Stir it until smooth.
- Now, pour the wet mixture into the dry mixture. Stir gently. Don’t overmix! A few lumps are okay, and they will cook out. If you want some sweetness, fold in 1/2 cup of mini chocolate chips.
Cooking Instructions
- Preheat your mini donut maker or a non-stick skillet over medium heat. Lightly grease the surface with cooking spray or a little butter.
- Use a tablespoon or a small cup to pour the batter into the mini molds or onto the skillet. Make small, round pancakes.
- Cook for about 1-2 minutes. You will see bubbles on the surface, and the edges will look set. Flip them and cook for another 1-2 minutes until golden brown.
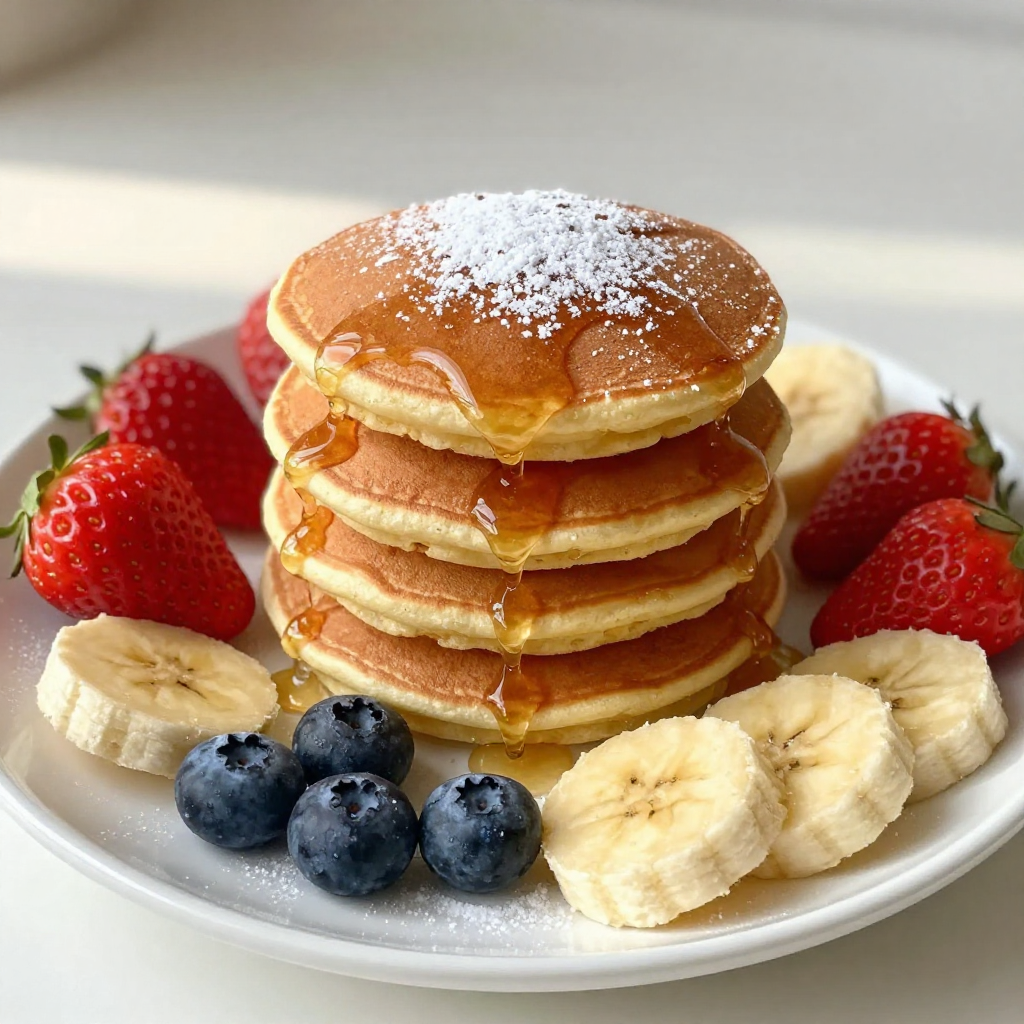
- Once done, take them off the heat and place the pancake poppers on a plate. Drizzle with maple syrup or honey. Add fresh fruit on top, like strawberries, blueberries, or banana slices. Enjoy your delicious treat!
Tips & Tricks
Cooking Tips
To make the best mini pancake poppers, keep these tips in mind:
- Use fresh ingredients: Fresh baking powder and buttermilk make a big difference.
- Mix carefully: Stir the batter until just combined. A few lumps are okay.
- Preheat the cooking surface: This helps the poppers cook evenly and rise well.
- Grease lightly: Use cooking spray or butter on your skillet or mini donut maker.
- Watch the bubbles: Cook for about 1-2 minutes. Look for bubbles on top.
- Check for doneness: The edges should look set and golden brown when ready.
Presentation Tips
Presentation is key to making your pancake poppers look great:
- Arrange with care: Stack them high on a platter for a fun display.
- Garnish for flair: Add fresh fruit like strawberries or bananas on top.
- Add a dusting: A sprinkle of powdered sugar can make them look fancy.
- Serve with syrup: Place a small bowl of maple syrup or honey on the side for easy dipping.
Pro Tips
- Perfectly Fluffy Poppers: To ensure your pancake poppers are light and fluffy, avoid overmixing the batter. A few lumps are perfectly fine!
- Flavor Variations: Experiment with different mix-ins like berries, nuts, or spices to customize the flavor of your pancake poppers.
- Optimal Cooking Temperature: If using a skillet, make sure it’s preheated to medium heat. You can check the temperature by sprinkling a few drops of water on the surface; they should sizzle and evaporate quickly.
- Serving Suggestions: For an impressive presentation, stack the pancake poppers high and drizzle with syrup just before serving. Fresh fruit on top adds color and flavor!
Variations
Flavor Variations
You can add fun flavors to your mini pancake poppers. One easy way is by adding fruit. Blueberries and bananas work great. They give a burst of flavor and make the poppers even more tasty. Simply mix in the fruit after you combine the wet and dry ingredients. It’s that simple!
Another option is to use different sweeteners or toppings. You can swap regular sugar for honey or maple syrup. This change can add a new twist to the taste. For toppings, try yogurt, nut butter, or coconut flakes. These options make breakfast fun and sweet!
Dietary Modifications
If you need gluten-free options, you can use gluten-free flour. This swap makes the mini pancake poppers safe for those with gluten allergies. Just make sure the other ingredients, like baking powder, are also gluten-free.
For dairy-free alternatives, use almond milk or coconut milk instead of buttermilk. You can also replace butter with coconut oil or a dairy-free spread. These changes keep the flavor while making it suitable for different diets. Enjoy your tasty treats!
Storage Info
Storing Leftovers
To keep your mini pancake poppers fresh, store them in an airtight container. You can put parchment paper between layers to prevent sticking. They stay good in the fridge for about three days. If you need to keep them longer, freeze them. Place the pancake poppers in a freezer-safe bag. They can last up to two months in the freezer.
Reheating Instructions
To reheat mini pancake poppers, use a microwave or an oven. If using the microwave, heat them for about 15-20 seconds. Check if they're warm enough, and add more time if needed. For the oven, preheat to 350°F (175°C) and place them on a baking sheet. Heat for about 5-7 minutes. This keeps them soft and tasty, just like when you first made them. Enjoy your delicious breakfast treat again!
FAQs
Common Questions
Can I make mini pancake poppers ahead of time? Yes, you can make mini pancake poppers ahead of time. Just cook them, let them cool, and store them in an airtight container in the fridge. They will stay fresh for about two days. When you’re ready to eat, just reheat them in the microwave or on a skillet.
What type of pan is best for making mini pancake poppers? A non-stick skillet or a mini donut maker works best. A non-stick skillet helps prevent sticking and makes flipping easier. If you use a mini donut maker, it gives you perfect round shapes every time.
How can I make mini pancake poppers healthier? To make them healthier, you can use whole wheat flour instead of all-purpose flour. You can also reduce sugar and add mashed bananas or applesauce for sweetness. Adding in fresh fruits like blueberries or strawberries boosts nutrition too.
Troubleshooting
What should I do if my batter is too thick? If your batter is too thick, add a splash of buttermilk. Mix it in slowly until the batter reaches your desired consistency. A thinner batter creates lighter pancake poppers.
Why are my pancake poppers sticking to the pan? If your pancake poppers stick, the pan may not be greased enough. Make sure to use enough cooking spray or butter. Also, give them time to cook before flipping. If they are not ready, they will stick.
We covered how to make mini pancake poppers from start to finish. You learned about the ingredients, step-by-step cooking, and tips for perfect results. We also explored fun flavor variations and dietary adjustments. Storing and reheating tips keep leftovers fresh. With these insights, you can enjoy tasty, homemade mini pancake poppers anytime. Embrace your creativity, try new flavors, and have fun serving these delights. Enjoy your cooking journey!