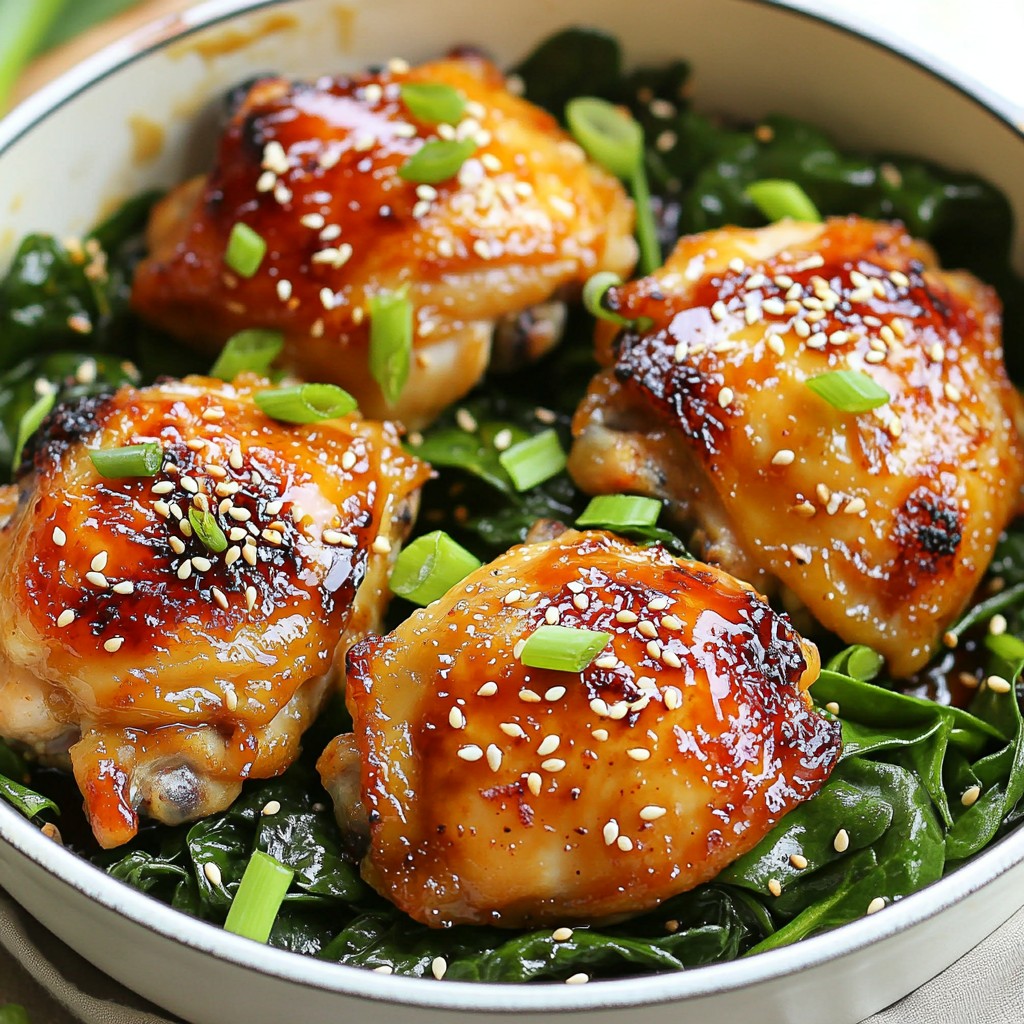
Are you ready to wow your family at dinner? This One-Pan Honey Garlic Chicken Thighs recipe is a true game-changer! With just a few simple ingredients, you can create a sweet and savory meal that’s easy to make and clean up. Whether you're a busy parent or just want a quick meal, this recipe will satisfy your cravings. Let's dive into this delicious dish that’s sure to impress!
Why I Love This Recipe
- Quick and Easy: This dish comes together in just 45 minutes, making it perfect for busy weeknights.
- One-Pan Wonder: With everything cooked in one skillet, cleanup is a breeze, and you get all the flavors mingling together.
- Flavor Packed: The combination of honey, garlic, and soy sauce creates a deliciously sweet and savory sauce that complements the chicken perfectly.
- Healthy Spinach Boost: Adding baby spinach not only enhances the dish's nutrition but also adds a fresh, vibrant color to your plate.
Ingredients
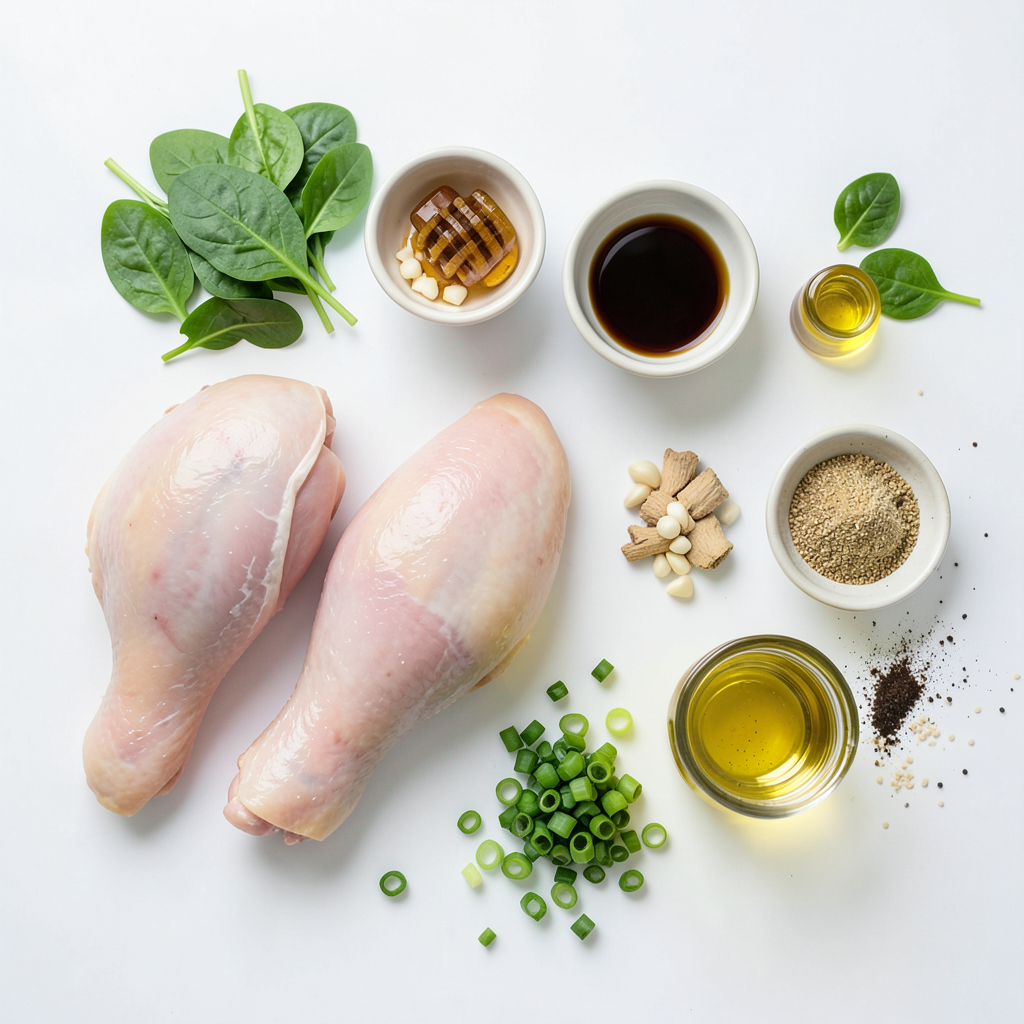
To make One-Pan Honey Garlic Chicken Thighs, gather these key ingredients:
- 4 bone-in, skin-on chicken thighs
- 3 tablespoons honey
- 4 cloves garlic, minced
- 2 tablespoons soy sauce
- 1 tablespoon apple cider vinegar
- 1 teaspoon ground ginger
- 1 teaspoon sesame oil
- 1 tablespoon olive oil
- Salt and pepper to taste
- 1 cup low-sodium chicken broth
- 2 cups baby spinach
- 1 tablespoon sesame seeds (for garnish)
- Sliced green onions (for garnish)
Main Ingredients List
The chicken thighs give this dish a juicy and rich flavor. Bone-in and skin-on work best. The honey and garlic create a sweet and savory sauce. You need honey, minced garlic, and soy sauce for this.
For the marinade, apple cider vinegar adds a tangy kick. Ground ginger and sesame oil enhance the dish's flavor profile. Olive oil helps to sear the chicken, making it crispy.
Finally, low-sodium chicken broth adds moisture. Baby spinach provides color and nutrition, while sesame seeds and green onions make for a beautiful garnish.
These ingredients together create a simple yet delicious meal that shines on any table.
Step-by-Step Instructions
Preparation Steps
1. Preheating and seasoning the chicken
Start by preheating your oven to 400°F (200°C). This helps the chicken cook evenly. While the oven heats, season the chicken thighs with salt and pepper. Make sure to coat both sides well.
2. Creating the honey garlic sauce
In a small bowl, whisk together the honey, minced garlic, soy sauce, apple cider vinegar, ground ginger, and sesame oil. This sauce will give your chicken a sweet and savory flavor. Mix until all the ingredients are well combined.
3. Searing and roasting the chicken
In a large oven-safe skillet, heat the olive oil over medium-high heat. Once the oil is hot, add the chicken thighs skin-side down. Sear them for about 5-7 minutes until the skin is golden brown and crispy. After that, flip the chicken thighs over. Pour the honey garlic sauce evenly over them. Then, pour the chicken broth around the thighs in the skillet. This broth will keep the chicken juicy.
Final Cooking Steps
1. Adding broth and spinach
Transfer the skillet to your preheated oven. Roast the chicken for 20-25 minutes. You want the chicken to reach an internal temperature of 165°F (74°C). Once cooked, take the skillet out of the oven and stir in the baby spinach. Cook it for another 2-3 minutes until it wilts.
2. Garnishing before serving
Finally, garnish your dish with sesame seeds and sliced green onions before serving. This adds a nice touch and enhances the flavor. You can serve the chicken directly from the skillet for a rustic look or transfer it to a platter, drizzling extra sauce over the top.
Tips & Tricks
Cooking Tips
- Ensuring crispy skin on chicken thighs
Start with bone-in, skin-on thighs. Pat them dry with paper towels first. This helps remove extra moisture. Season the skin with salt and pepper. Heat olive oil in a hot skillet. Place the chicken skin-side down. Sear it for 5-7 minutes. Look for a golden-brown color. This step makes the skin crispy and tasty.
- Adjusting sweetness level with honey
Honey adds a sweet touch. If you want it sweeter, add more honey. Start with 3 tablespoons. If you prefer less sweetness, cut it down to 2 tablespoons. Whisk the honey with garlic and soy sauce. Taste it before pouring it over the chicken. Adjust to your liking for the best flavor.
Serving Suggestions
- Plating and presentation ideas
You can serve this dish straight from the skillet. It gives a cozy feel. For a fancier look, transfer chicken to a platter. Add spinach around the chicken. Drizzle extra sauce over the top. Sprinkle sesame seeds and green onions for color. This makes the dish eye-catching and inviting.
- Pairing options with sides
This chicken goes well with rice or quinoa. The sauce tastes great when soaked up. Try serving with steamed vegetables or a fresh salad. These sides balance the meal. They add color and nutrients, making your plate pop.
Pro Tips
- Rest the Chicken: After cooking, let the chicken rest for 5 minutes before serving. This helps retain its juices and ensures moist, flavorful meat.
- Customize the Sauce: Feel free to adjust the sweetness or saltiness of the sauce. Add more honey for a sweeter glaze or extra soy sauce for more depth of flavor.
- Use Fresh Ingredients: Whenever possible, use fresh garlic and ginger for the best flavor. Fresh ingredients can elevate the dish significantly.
- Serve with Sides: This dish pairs wonderfully with rice or quinoa. Create a complete meal by adding steamed vegetables or a fresh salad on the side.
Variations
Ingredient Substitutions
You can swap chicken thighs for chicken breasts if you prefer leaner meat. Tofu is also a great choice for a plant-based option. Just remember to adjust cooking times. For sweeteners, honey shines in this dish, but you can use maple syrup for a different taste. Both options will give you that sweet flavor you crave.
Flavor Enhancements
Adding herbs and spices can level up your dish. Try fresh thyme or rosemary for a fragrant touch. A pinch of red pepper flakes can add a nice kick. You can also toss in seasonal vegetables like bell peppers or zucchini. They will cook nicely in the oven and add color to your plate. Mixing these ingredients will create a unique twist on the classic honey garlic chicken thighs.
Storage Info
Storing Leftovers
To keep leftovers fresh, place the chicken in an airtight container. Store it in the fridge for up to four days. If you want to save it longer, you can freeze it. Wrap the chicken tightly in plastic wrap or foil and place it in a freezer bag. It will last for three months in the freezer.
Reheating Recommendations
When reheating, I suggest using the oven or stovetop. Both methods keep the chicken juicy. Preheat your oven to 350°F (175°C). Place the chicken in an oven-safe dish and cover it with foil to keep moisture in. Heat for about 15-20 minutes or until warm. If using the stovetop, add a splash of chicken broth in a pan. Heat on medium until warm. This way, you keep the flavors intact and enjoy a tasty meal again.
FAQs
Common Questions
Can I use boneless chicken thighs? Yes, you can use boneless chicken thighs. They will cook faster. Keep an eye on them to avoid overcooking.
What can I substitute for apple cider vinegar? You can use white vinegar or lemon juice instead. Both give a nice tang. Adjust the amount to taste.
How do I know when the chicken is fully cooked? Use a meat thermometer. The chicken should reach 165°F (74°C) inside. The juices should run clear, not pink.
Cooking Technique FAQs
Can I make this dish in a slow cooker? Yes, you can. Brown the chicken first for flavor. Then add the sauce and cook on low for 6-8 hours.
How can I make this dish gluten-free? Use gluten-free soy sauce. This keeps the flavor while making it safe for gluten-free diets. Always check labels to be sure.
We covered the main ingredients, steps, tips, variations, and storage for your dish. You learned to make a sweet and savory honey garlic chicken. Remember to choose the right ingredients and follow the steps carefully. Don't hesitate to get creative with flavors and variations. This dish can shine on any table. Enjoy leftovers and keep them fresh with proper storage. With these tips, you'll impress your family and friends every time. Happy cooking!