Latest & Greatest
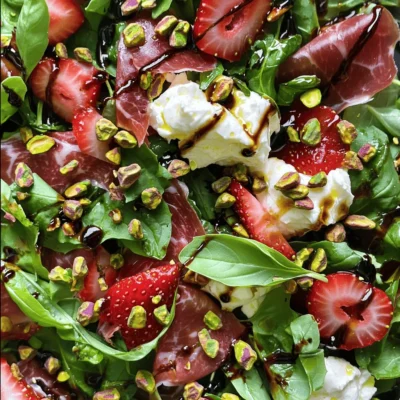
Prosciutto Strawberry Burrata Salad Fresh Delight
Are you ready to create a dish that dazzles the taste buds? My Prosciutto Strawberry Burrata Salad is a fresh
Read more…
Mini Lemon Blueberry Cheesecakes Irresistible Treat
If you’re craving a sweet, zesty treat, you’re in the right place! Mini lemon blueberry cheesecakes are a perfect blend
Read more…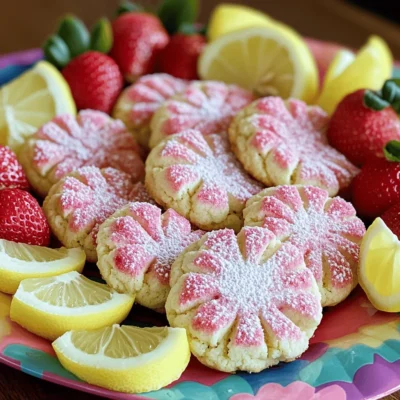
Strawberry Lemonade Cookies Refreshing Sweet Treat
Craving a sweet and tangy treat? You’re in for a delight! My Strawberry Lemonade Cookies blend juicy strawberries and zesty
Read more…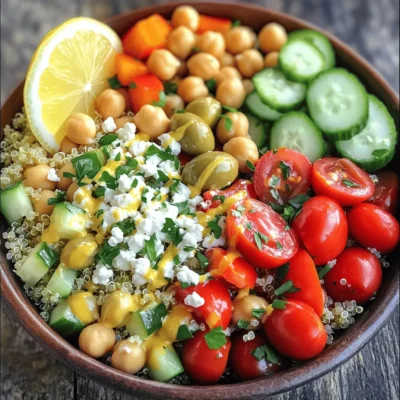
Mediterranean Salad Bowl Fresh and Flavorful Delight
Are you ready for a fresh, tasty adventure? My Mediterranean Salad Bowl is packed with vibrant veggies, hearty quinoa, and
Read more…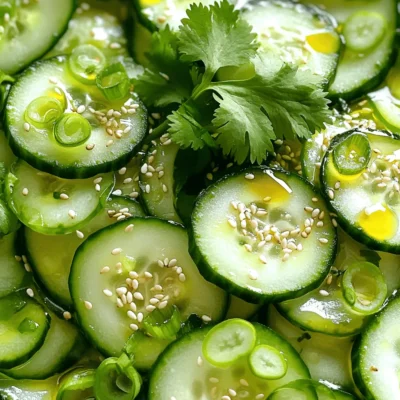
Japanese Cucumber Salad Delicious and Simple Recipe
Japanese cucumber salad is simple, fresh, and bursting with flavor. With just a handful of ingredients like crisp cucumbers, rice
Read more…
Lemon Basil Sorbet Fresh and Flavorful Delight
Looking for a refreshing treat that’s both unique and delicious? Lemon Basil Sorbet is the perfect blend of zingy lemon
Read more…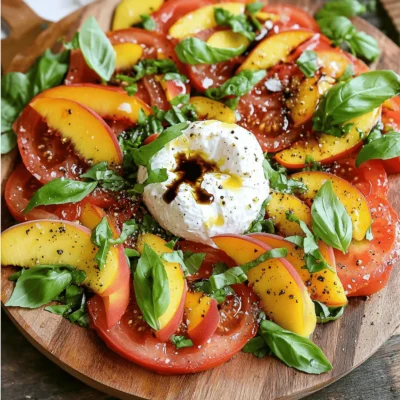
Tomato Peach Burrata Salad Fresh and Tasty Delight
Looking for a fresh and tasty salad that shines in summer? My Tomato Peach Burrata Salad combines ripe peaches, juicy
Read more…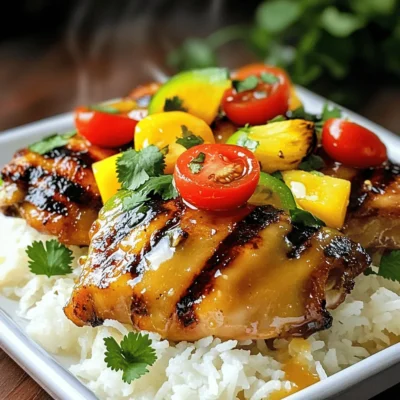
Hawaiian Chicken with Coconut Rice Flavorful Delight
Are you ready to take your taste buds on a tropical trip? In this article, I’ll show you how to
Read more…browse recipes


Yellow Squash Tots Crunchy and Flavorful Snack Recipe
Are you ready to transform your snack game? Yellow Squash Tots are a crunchy, flavorful treat that’s easy to make! With just a few…
My Latest Desserts

Cream Soda Donut Holes Delightful Dessert Recipe
Are you ready to enjoy a fun twist on a classic treat? Cream Soda Donut Holes are sweet, fluffy, and Read Full Recipe-
Cookie Dough Bars Delightful Recipe for a Sweet Treat
If you’ve ever craved the rich, sweet goodness of cookie dough, then you’re in for a treat! My recipe for Read Full Recipe -
Chocolate Covered Cherries with Pistachio Dust Delight
Get ready to treat your taste buds with my “Chocolate Covered Cherries with Pistachio Dust Delight.” This sweet snack combines Read Full Recipe -
Peach Plum Crumble Bars Irresistible Sweet Treat
Are you ready for a dessert that combines the sweetness of peaches and plums? My Peach Plum Crumble Bars are Read Full Recipe -
Watercolor Buttercream Cupcakes Delightful Recipe Guide
Are you ready to bring some color to your baking? In this guide, I’ll show you how to make stunning Read Full Recipe -
No-Bake Peach Icebox Cake Simple and Refreshing Treat
If you’re seeking a sweet, cool treat that’s simple to make, it’s time to try my No-Bake Peach Icebox Cake. Read Full Recipe -
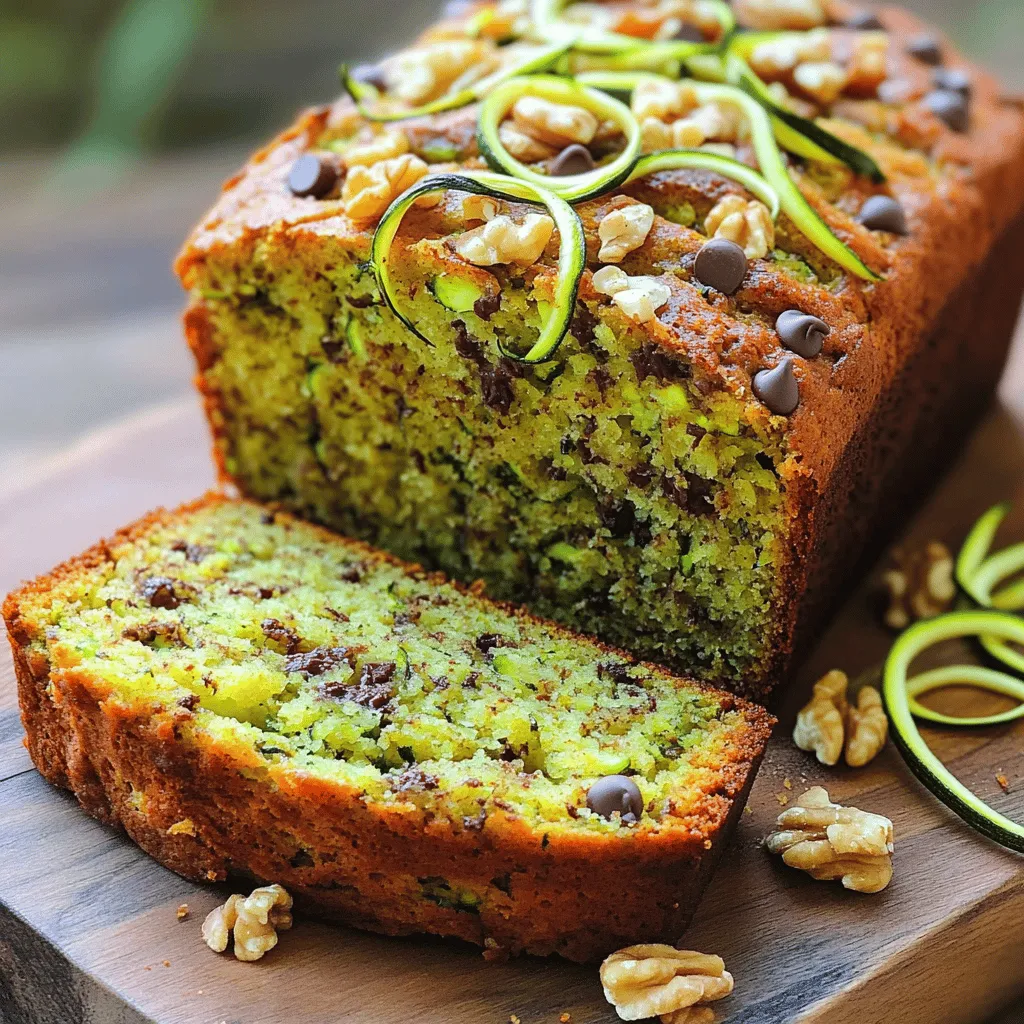
The Best Zucchini Bread Irresistible and Easy Recipe
Are you ready to bake the best zucchini bread that’s both irresistible and easy? This simple recipe combines fresh, grated Read Full Recipe -
Peach Cobbler Pancakes Delicious and Simple Recipe
Are you ready to bring a burst of flavor to your breakfast table? Peach Cobbler Pancakes are the perfect blend Read Full Recipe -
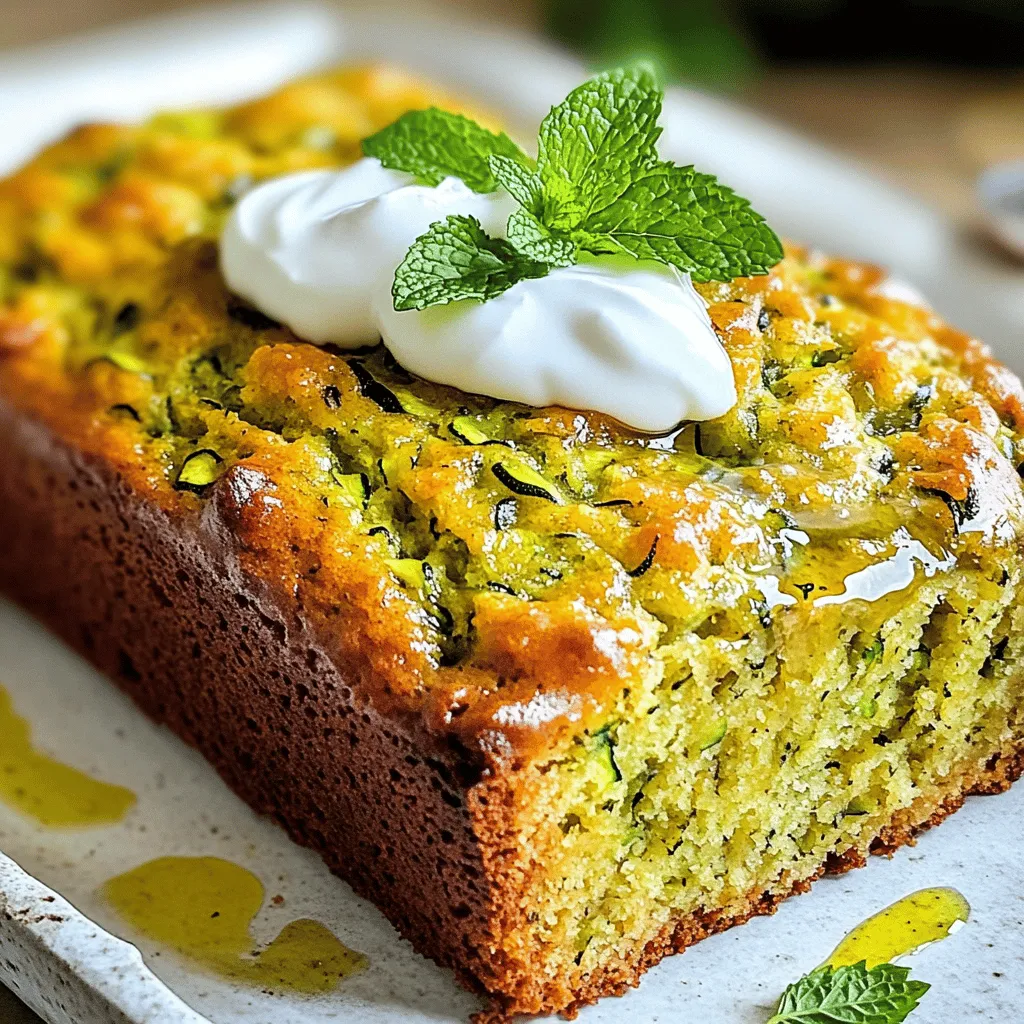
Olive Oil Zucchini Bread Moist and Flavorful Recipe
Welcome to your new favorite treat: Olive Oil Zucchini Bread! This recipe gives you a moist, flavorful loaf that’s perfect Read Full Recipe -
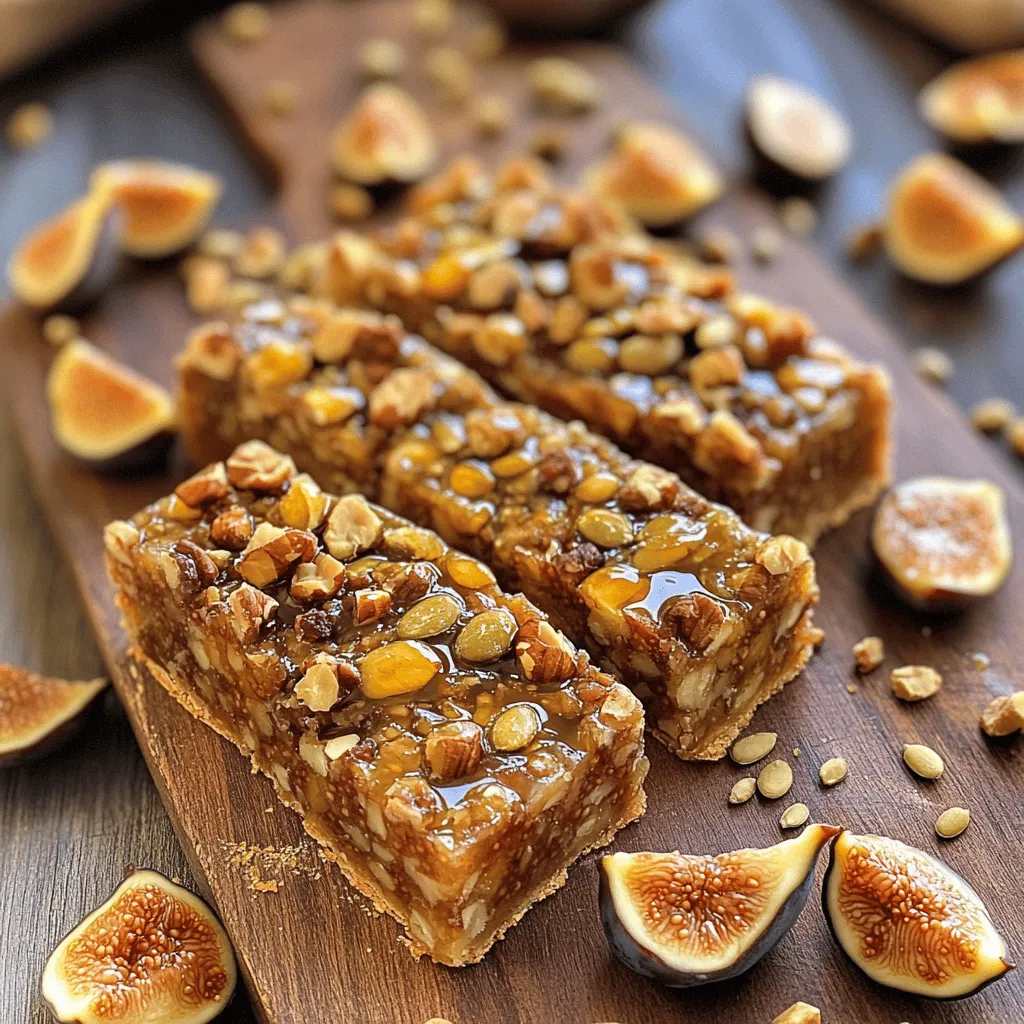
Fig and Walnut Bars Healthy and Flavorful Snack
If you’re searching for a tasty yet healthy snack, Fig and Walnut Bars are a perfect choice! Packed with nutritious Read Full Recipe


My Latest Recipes

hey,
i’m !
I’m so happy you’re here!
Food is my passion, and perfecting each dish is my craft. I can’t wait for you to try them let’s dive into this delicious journey side by side.


![- Firm tofu - Broccoli - Red bell pepper - Yellow bell pepper - Carrot - Snap peas - Soy sauce - Sesame oil - Olive oil - Garlic - Ginger - Sesame seeds - Chopped green onions - Salt - Pepper To make this dish, you need a block of firm tofu. I prefer firm tofu because it holds its shape well when cooked. For the veggies, I choose broccoli, red and yellow bell peppers, a carrot, and snap peas. They add color and crunch. You will also need some sauces and oils. Soy sauce gives it a savory kick. Sesame oil adds a nice nutty flavor, while olive oil helps with cooking. You can add extra seasonings to boost flavor. Garlic and ginger work well. Sesame seeds make a great topping. Don't forget salt and pepper for seasoning. For the full recipe, check out the [Full Recipe]. First, you need to press the tofu. Wrap the block in paper towels. Then place a heavy object on top. This helps remove extra moisture. Let it sit for about 15 minutes. After that, cut the tofu into neat cubes. Next, marinate the tofu in soy sauce. In a medium bowl, mix the cubed tofu with 1 tablespoon of soy sauce. Let it sit for about 10 minutes. This step adds flavor to the tofu. Now it's time to sauté the tofu. Heat olive oil in a large skillet over medium-high heat. Add the marinated tofu cubes to the pan. Cook them until they turn golden brown on all sides. This should take about 8 to 10 minutes. Once done, remove the tofu from the skillet and set it aside. In the same skillet, add sesame oil. Toss in minced garlic and grated ginger. Sauté them for about 30 seconds. This will fill your kitchen with a wonderful aroma. After that, add the broccoli, bell peppers, carrots, and snap peas. Stir-fry these vegetables for about 5 to 7 minutes. You want them to be tender but still crisp. Now it’s time to bring everything together. Return the cooked tofu to the skillet with the vegetables. Add the remaining soy sauce and mix everything well. Cook for an additional 2 to 3 minutes to heat through. Finally, season with salt and pepper to taste. Before serving, sprinkle sesame seeds and chopped green onions on top. Enjoy your colorful veggie tofu stir-fry! For the full recipe, check out the details above. How to achieve perfect tofu texture Tofu can be soft or firm. I prefer using firm tofu for stir-fry. Start by pressing the tofu. Wrap it in paper towels and place a heavy object on top. This step removes extra moisture, helping the tofu get crispy. Let it press for about 15 minutes. After that, cut it into cubes. Marinate the cubes in soy sauce for at least 10 minutes. This adds flavor and helps brown the tofu. Stir-frying tips for vegetable crispness For crisp vegetables, use high heat. Preheat your skillet or wok before adding oil. Use a mix of sesame oil and olive oil for flavor. Add garlic and ginger first for fragrance. Then, toss in the vegetables. Stir-fry them quickly, about 5 to 7 minutes. Keep them moving to avoid steaming. You want them to be tender but still bright and crisp. Ideas for additional sauces or spices While soy sauce is great, try adding hoisin sauce or oyster sauce for extra depth. A splash of rice vinegar can brighten up the dish. For a kick, add a dash of chili sauce or sriracha. You can also sprinkle in some five-spice powder for a unique twist. Suggestions for adjusting spice levels If you like heat, add sliced fresh chili or red pepper flakes. To tone it down, skip the chili sauce. You can also add a bit of honey or sugar to balance out the spice. Adjusting these flavors can make your stir-fry just right for your taste. For the full recipe, check out the Colorful Veggie Tofu Stir-Fry. {{image_2}} You can change the vegetables in your stir-fry each time you make it. Using seasonal vegetables can add freshness and flavor. For example, try zucchini in summer or pumpkin in fall. Different colors also make the dish more fun. You can also experiment with other greens. Spinach and kale add a nice touch. They cook fast and bring a lot of nutrients. Just add them at the end so they stay bright and green. If you want to switch up your protein, tempeh or seitan are great choices. Tempeh has a nutty taste and good texture. You can cut it into cubes and stir-fry just like tofu. Seitan is chewy and packed with protein. It can absorb flavors well, making it a tasty option. Incorporating legumes is another way to boost protein. Chickpeas or black beans can add heartiness. Just rinse and add them to the stir-fry. They fill you up and add fiber. You can mix and match these options to keep meals interesting. For the full recipe, check [Full Recipe]. To keep your stir-fry fresh, store it in an airtight container. Place it in the fridge. It will last for about three to four days. For longer storage, you can freeze it. Use freezer-safe bags or containers. Make sure to remove as much air as possible. This helps prevent freezer burn. The stir-fry can stay good in the freezer for up to three months. When reheating, the goal is to keep the texture nice. You can use a microwave or stovetop. If using a microwave, heat in short bursts. Stir it every minute to warm evenly. For stovetop, place the stir-fry in a skillet over low heat. Add a splash of water or oil to keep it moist. Stir often until heated through. This method helps maintain the veggies' crunch. Enjoy your delicious meal again! For the full recipe, don’t forget to check the detailed steps! What is the best tofu for stir-frying? I recommend using firm tofu for stir-frying. It holds its shape well and absorbs flavors nicely. Silken tofu is too soft and may fall apart. Make sure to press it first to remove excess moisture. This helps it get crispier when cooked. How long can I store vegetable stir-fry leftovers? You can store vegetable stir-fry leftovers in the fridge for up to three days. Make sure to keep it in an airtight container. For longer storage, you can freeze it for about two months. Just remember that freezing may change the texture of the veggies. Caloric content and health benefits A serving of this vegetable stir-fry with tofu has about 300 calories. It's packed with vitamins and minerals from the veggies. Tofu adds protein, making this meal satisfying and nutritious. It's a great option for a healthy diet. Protein and carbohydrate counts per serving Each serving contains around 20 grams of protein from the tofu. The carbohydrates from the vegetables are about 30 grams. This balance makes it a good meal for energy and muscle health. What to serve with vegetable stir-fry? I love pairing this stir-fry with jasmine or brown rice. The rice absorbs the flavors well. You can also serve it with quinoa for a nutty taste. Ideal side dishes and pairings for a complete meal Consider adding a simple salad or steamed dumplings. They complement the stir-fry nicely and add variety. You could also offer a light soup to start the meal for extra warmth. For more ideas, check out the Full Recipe. This blog post guides you through making a tasty vegetable stir-fry with tofu. You learned about key ingredients, preparation steps, and cooking techniques. I shared tips for perfect texture and flavor. Feel free to adjust with your favorite veggies or proteins. Lastly, proper storage and reheating keep your dish fresh. Enjoy cooking this simple, healthy meal that you can easily customize.](https://mysavedrecipe.com/wp-content/uploads/2025/05/4026e871-b59b-492f-8f49-74e3e66c7070-300x300.webp)
Chocolate Avocado Pudding Creamy and Healthy Delight
Are you ready to treat yourself to a dessert that’s both creamy and healthy? Chocolate avocado pudding is a perfect blend of rich flavor…