


Latest & Greatest
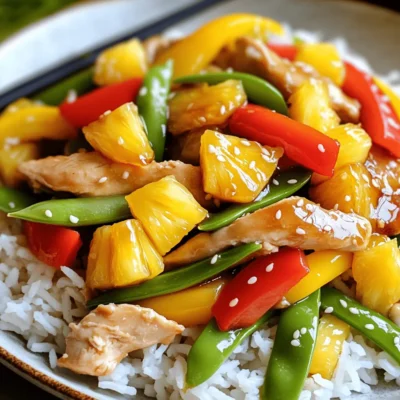
Pineapple Chicken Stir Fry Flavorful and Easy Dinner
Looking for a quick and tasty dinner? Pineapple Chicken Stir Fry is your answer! This dish combines tender chicken, vibrant
Read more…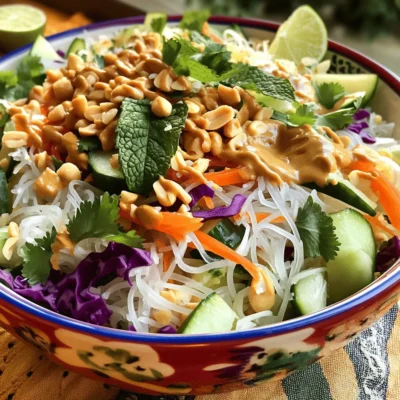
Spring Roll Salad with Peanut Sauce Fresh and Tasty
If you’re craving a fresh, vibrant dish, you’re in the right place! This Spring Roll Salad with Peanut Sauce is
Read more…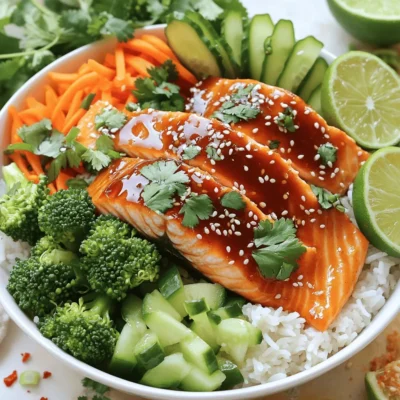
Honey Sriracha Salmon Bowls Flavorful and Easy Meal
Are you ready to elevate your dinner game? My Honey Sriracha Salmon Bowls are a colorful and tasty meal that
Read more…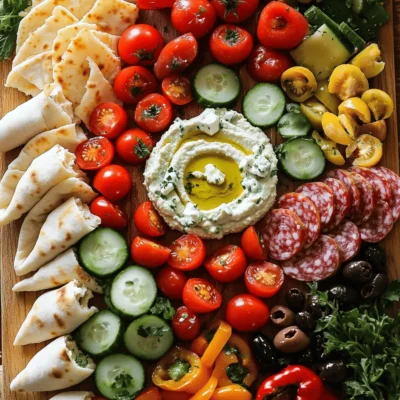
Mediterranean Brunch Board Flavorful and Fresh Spread
Looking to impress your friends with a delicious and vibrant brunch? My Mediterranean Brunch Board is packed with fresh flavors
Read more…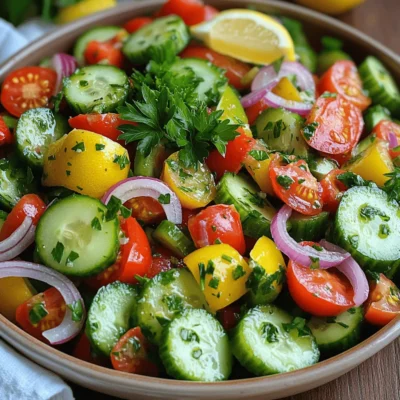
Easy Cucumber Tomato Onion Salad Fresh and Zesty Dish
Looking for a simple and refreshing dish? This Easy Cucumber Tomato Onion Salad is your answer! Bursting with fresh flavors,
Read more…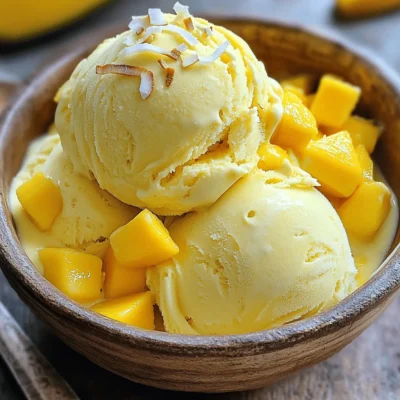
Creamy Mango Ice Cream Delightful and Easy Recipe
Craving a refreshing treat that bursts with flavor? You’re in for a delicious surprise! In this article, I’ll share my
Read more…
Korean BBQ Meatballs with Spicy Mayo Delight
Are you ready for a flavor explosion? My Korean BBQ Meatballs with Spicy Mayo are a must-try! These savory meatballs
Read more…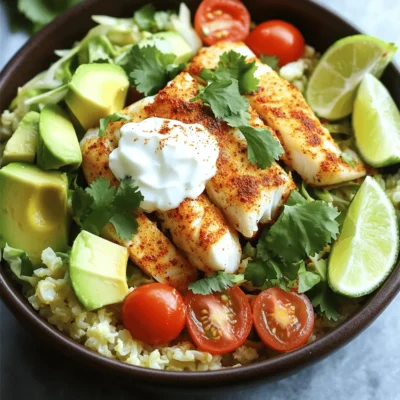
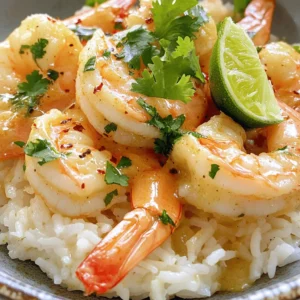
Low-Carb Fish Taco Bowl Fresh and Flavorful Delight
If you’re looking for a fresh and tasty meal that fits a low-carb lifestyle, you’ve come to the right place!
Read more…browse recipes

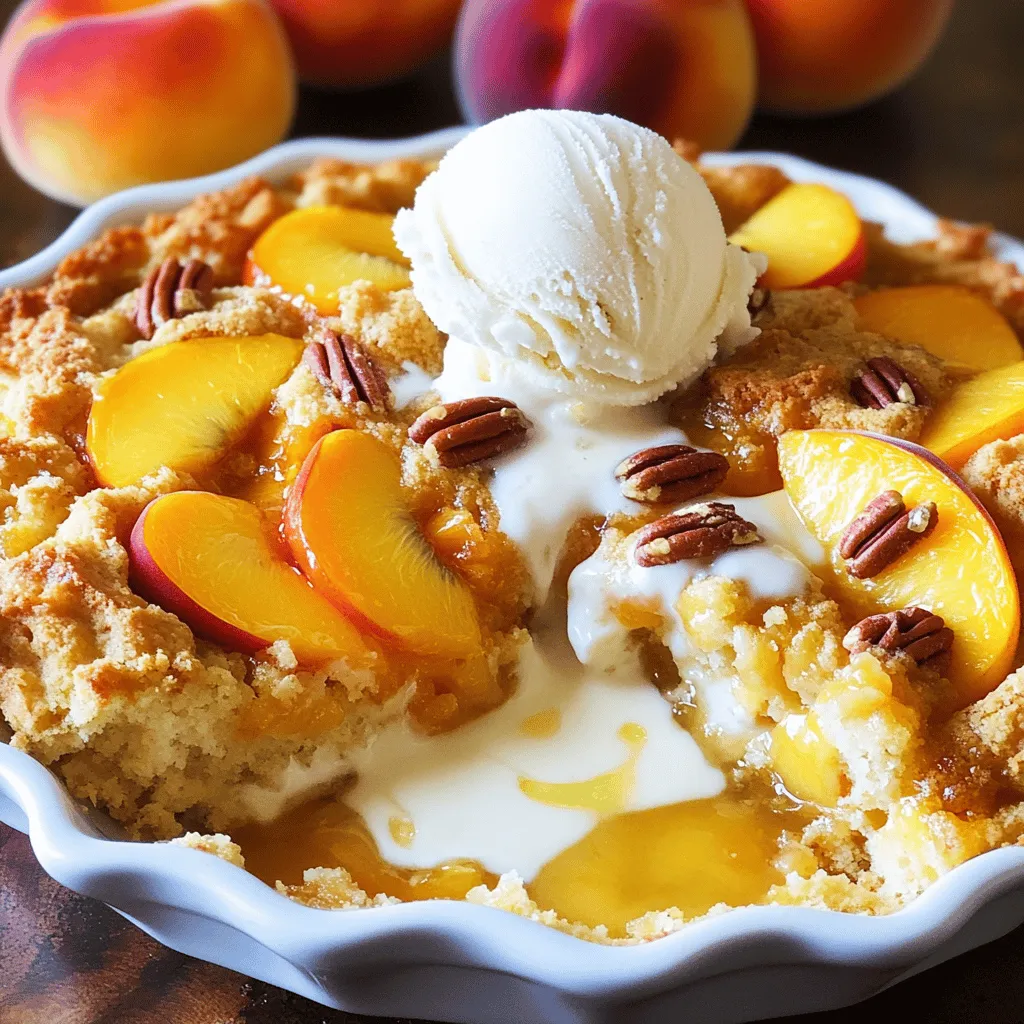
Peach Cobbler Dump Cake Delicious and Easy Dessert
Are you ready to indulge in a warm, fruity treat that’s super easy to make? My Peach Cobbler Dump Cake is a delightful dessert…
My Latest Desserts

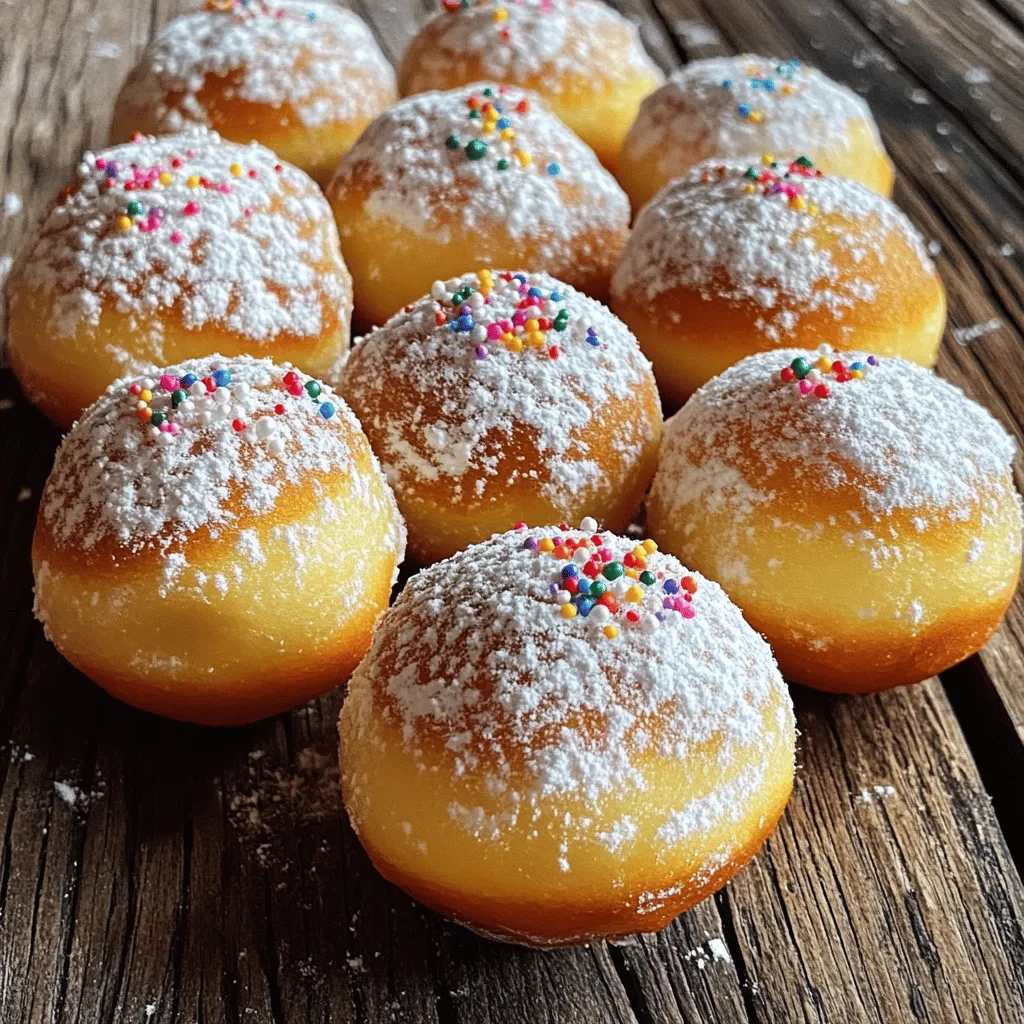
Cream Soda Donut Holes Delightful Dessert Recipe
Are you ready to enjoy a fun twist on a classic treat? Cream Soda Donut Holes are sweet, fluffy, and Read Full Recipe-
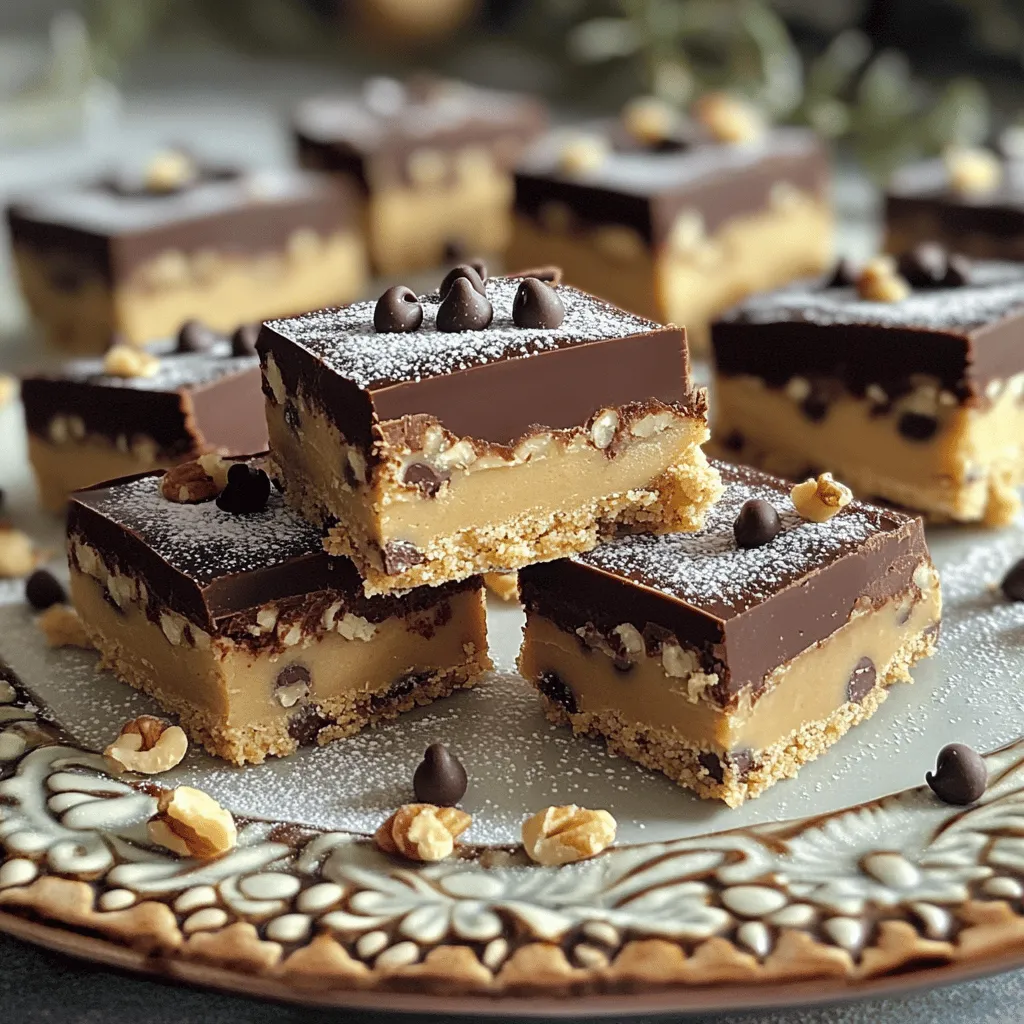
Cookie Dough Bars Delightful Recipe for a Sweet Treat
If you’ve ever craved the rich, sweet goodness of cookie dough, then you’re in for a treat! My recipe for Read Full Recipe -
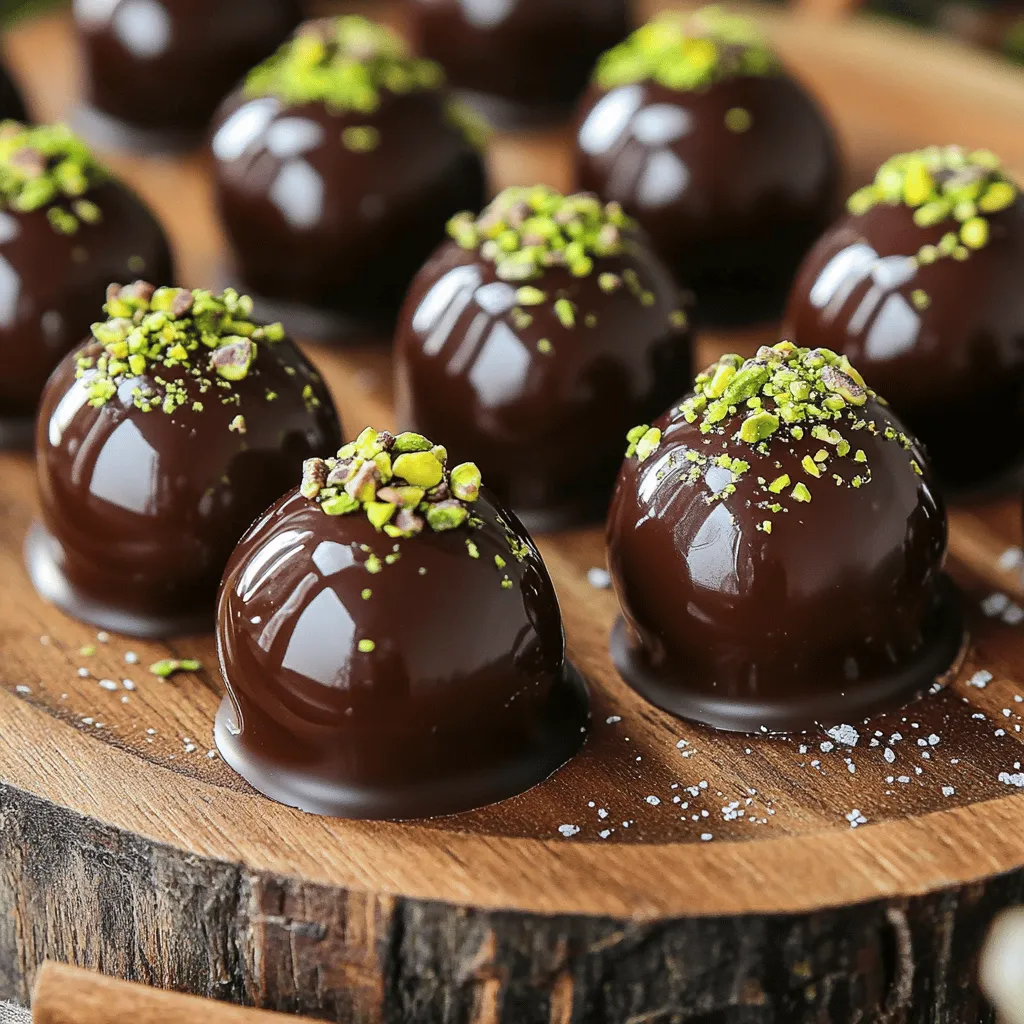
Chocolate Covered Cherries with Pistachio Dust Delight
Get ready to treat your taste buds with my “Chocolate Covered Cherries with Pistachio Dust Delight.” This sweet snack combines Read Full Recipe -
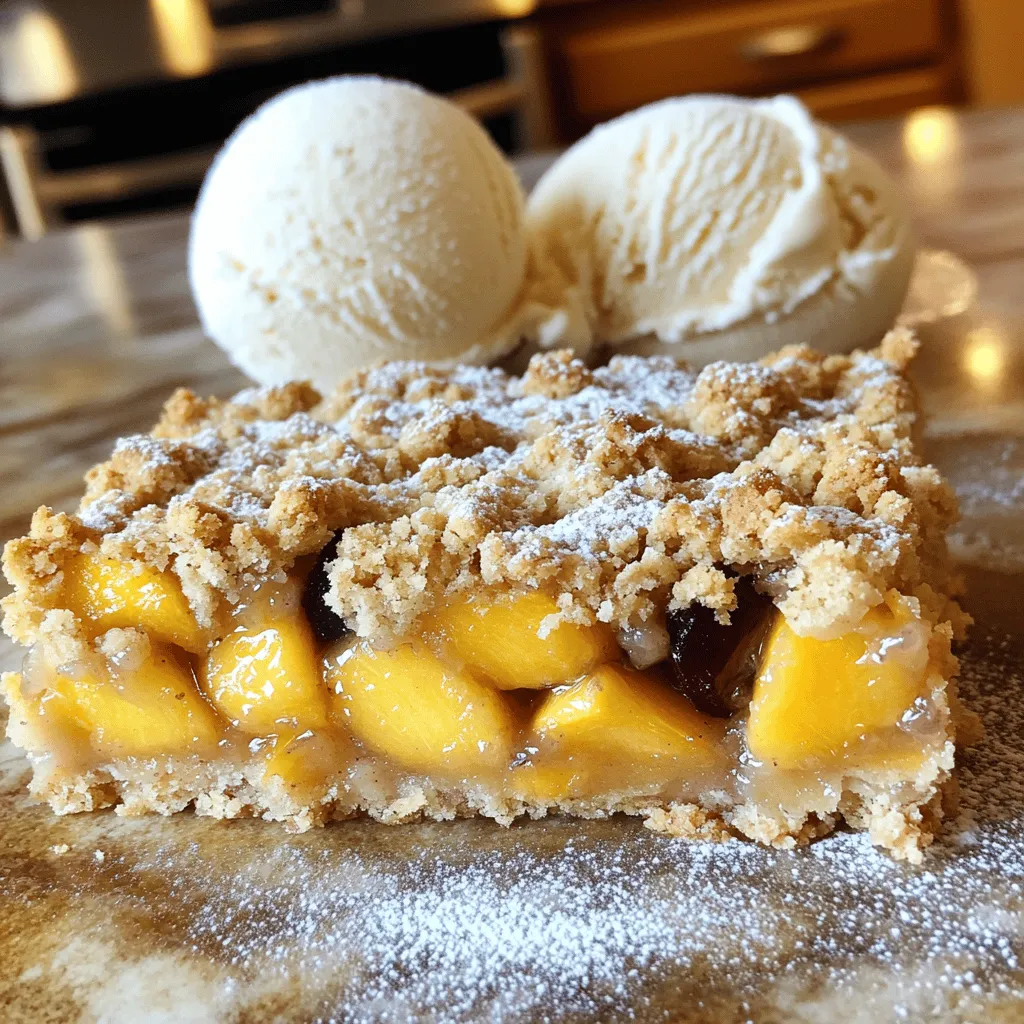
Peach Plum Crumble Bars Irresistible Sweet Treat
Are you ready for a dessert that combines the sweetness of peaches and plums? My Peach Plum Crumble Bars are Read Full Recipe -
Watercolor Buttercream Cupcakes Delightful Recipe Guide
Are you ready to bring some color to your baking? In this guide, I’ll show you how to make stunning Read Full Recipe -
No-Bake Peach Icebox Cake Simple and Refreshing Treat
If you’re seeking a sweet, cool treat that’s simple to make, it’s time to try my No-Bake Peach Icebox Cake. Read Full Recipe -
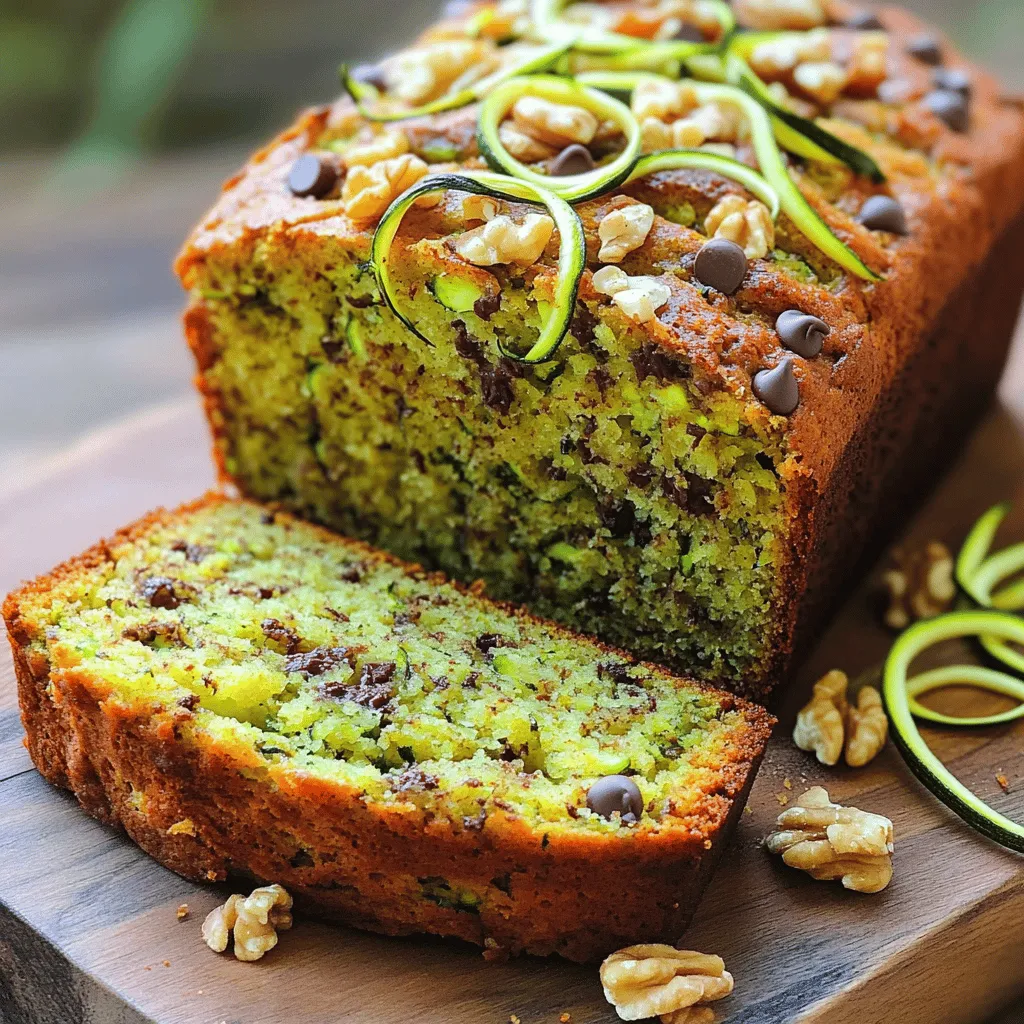
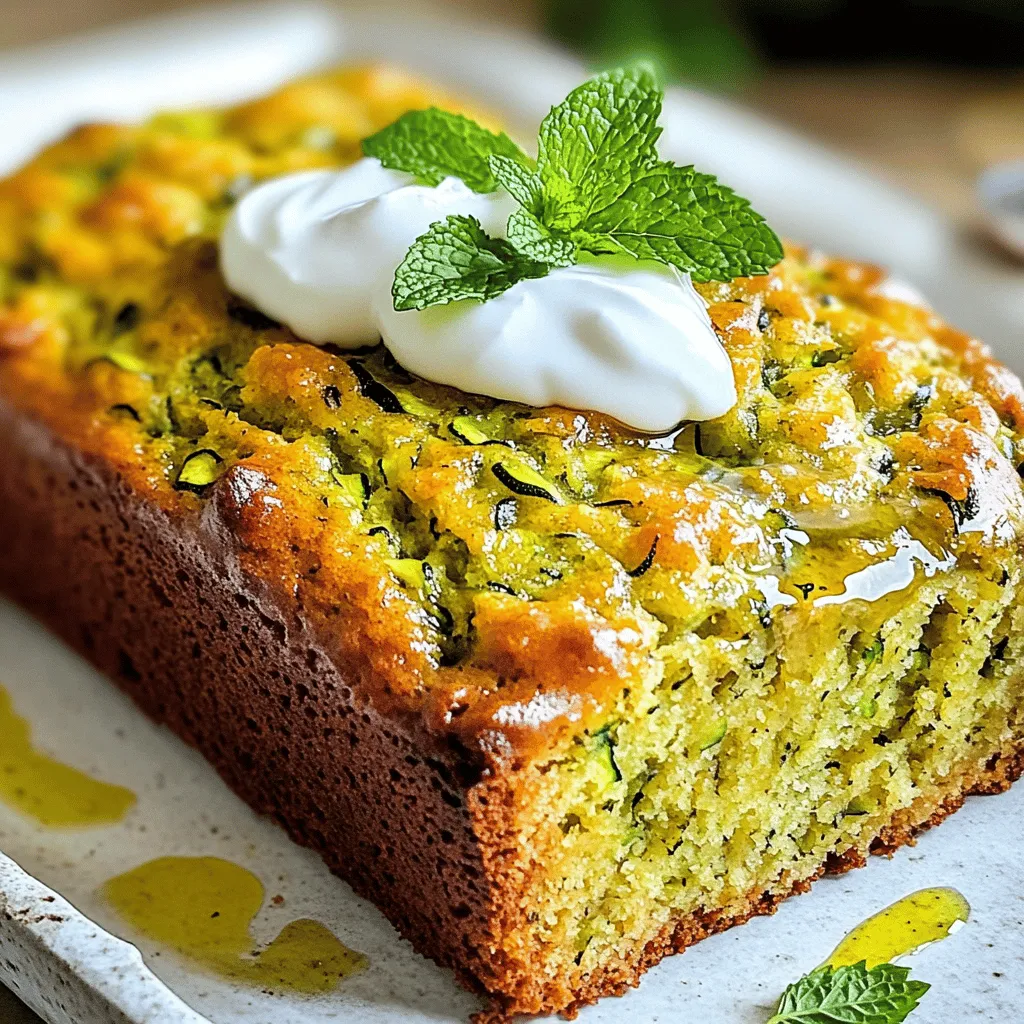
The Best Zucchini Bread Irresistible and Easy Recipe
Are you ready to bake the best zucchini bread that’s both irresistible and easy? This simple recipe combines fresh, grated Read Full Recipe -
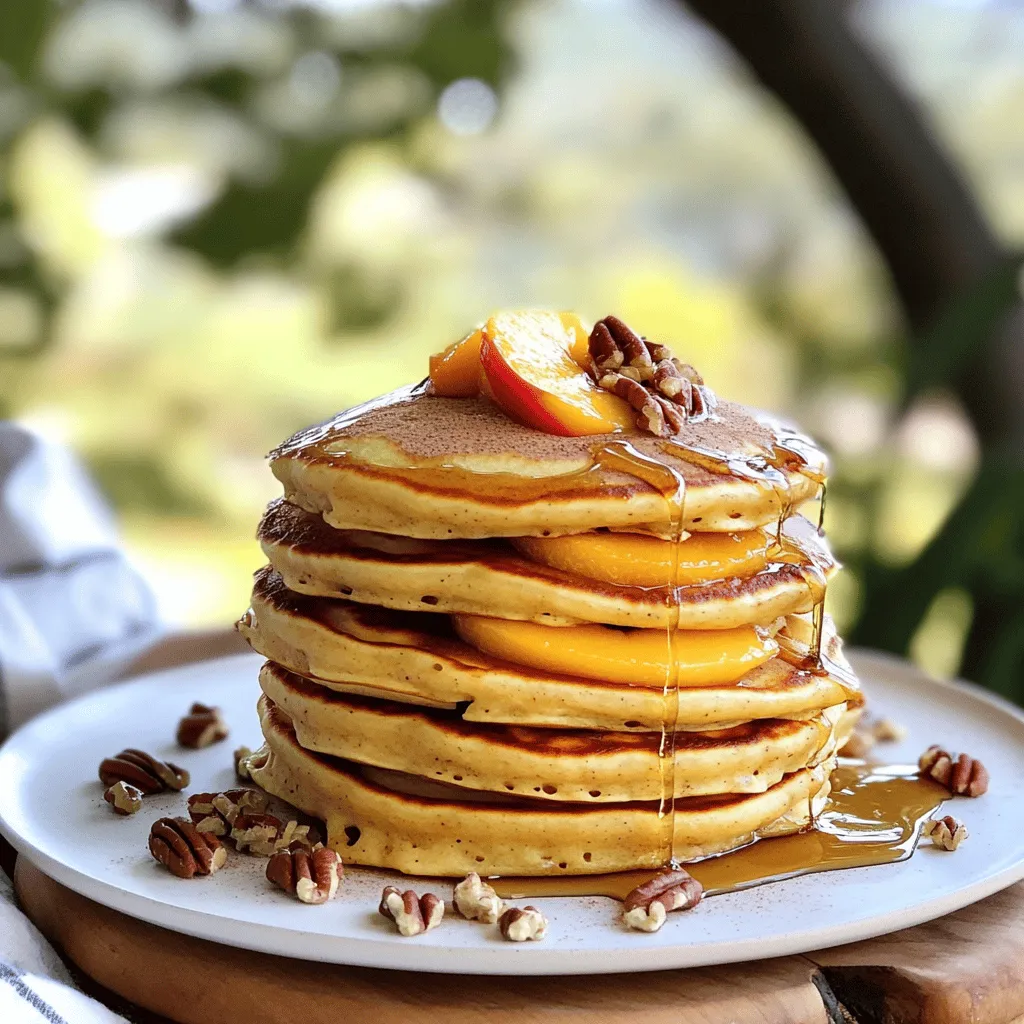
Peach Cobbler Pancakes Delicious and Simple Recipe
Are you ready to bring a burst of flavor to your breakfast table? Peach Cobbler Pancakes are the perfect blend Read Full Recipe -
Olive Oil Zucchini Bread Moist and Flavorful Recipe
Welcome to your new favorite treat: Olive Oil Zucchini Bread! This recipe gives you a moist, flavorful loaf that’s perfect Read Full Recipe -
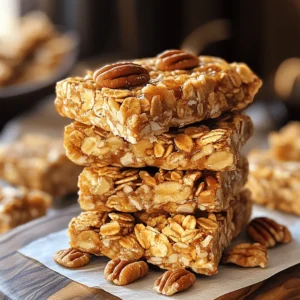
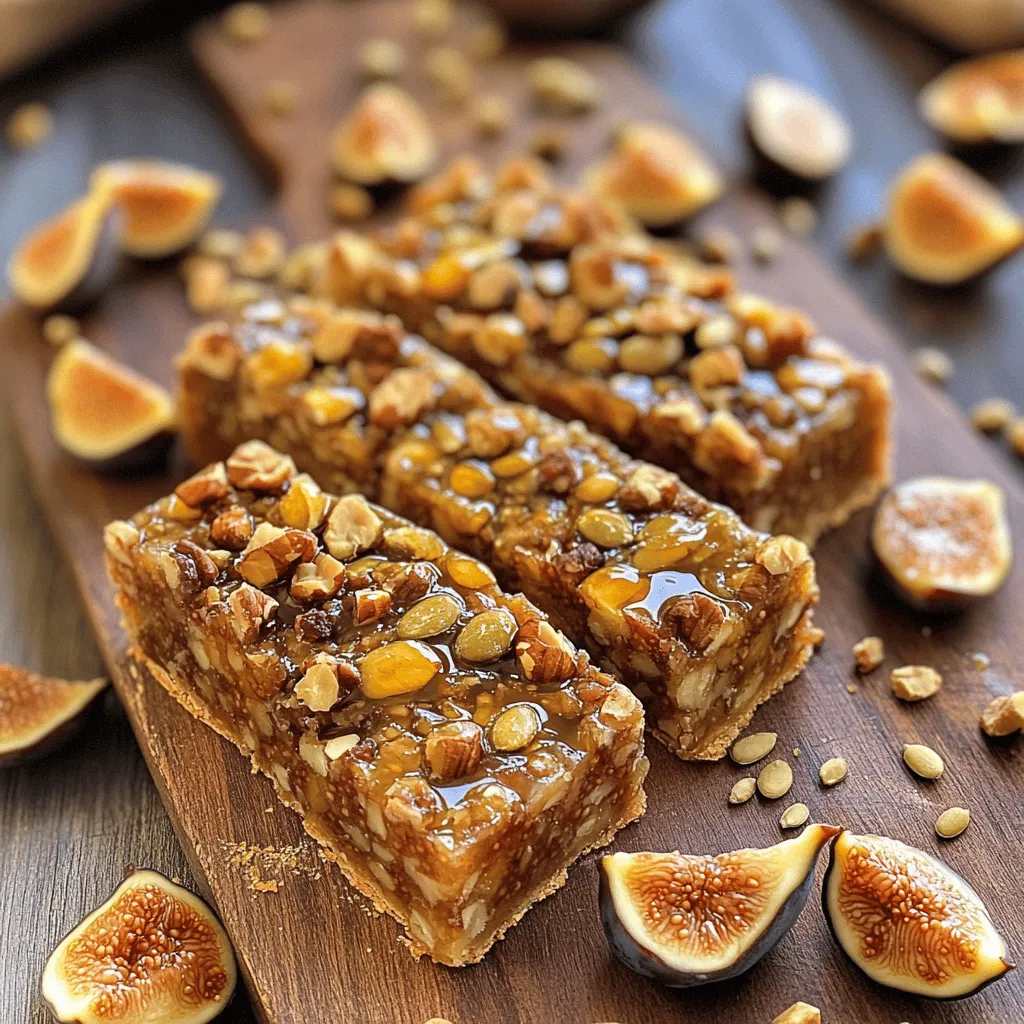
Fig and Walnut Bars Healthy and Flavorful Snack
If you’re searching for a tasty yet healthy snack, Fig and Walnut Bars are a perfect choice! Packed with nutritious Read Full Recipe


My Latest Recipes

hey,
i’m !
I’m so happy you’re here!
Food is my passion, and perfecting each dish is my craft. I can’t wait for you to try them let’s dive into this delicious journey side by side.
. After making your Peach Cobbler Dump Cake, let it cool. Once cool, cover it with plastic wrap or aluminum foil. Store it in the fridge. It will stay fresh for up to four days. If you want to enjoy it later, proper storage is key. To reheat, use the microwave or oven. If using the microwave, place a slice on a plate and cover it with a paper towel. Heat for 30 seconds to 1 minute. For the oven, cover the cake with foil and heat at 350°F for about 15 minutes. This keeps it warm without drying it out. To freeze, let the cake cool completely. Cut it into individual slices. Wrap each slice in plastic wrap, then in foil. Place the wrapped slices in a freezer bag. They can last for up to three months in the freezer. When ready to eat, thaw in the fridge overnight and reheat as needed. Enjoy your Peach Cobbler Dump Cake whenever you want! For more details, check the Full Recipe. Yes, you can use fresh peaches. Just peel and slice them first. Make sure they are ripe for the best flavor. Fresh peaches give a nice texture and taste. You may need to add a little sugar if they are not sweet enough. Peach Cobbler Dump Cake lasts about 3 to 5 days in the fridge. Store it in an airtight container to keep it fresh. You can also cover it with plastic wrap. The cake might lose some crispness over time, but it will still taste good. Yes, you can prepare the layers ahead. Just assemble everything in the baking dish, then cover it. Store it in the fridge for up to a day. When you are ready, bake it as usual. This saves time when you have guests. You can serve it warm with vanilla ice cream or whipped cream. Ice cream melts slightly and adds creaminess. Whipped cream is light and fluffy on top. You can also add fresh peach slices or a sprinkle of cinnamon for extra flavor. For the full recipe, check out the earlier section. Peach Cobbler Dump Cake is easy and fun to make. You learned about key ingredients, steps, and handy tips. Using different fruits can improve your cake. Don't forget to store leftovers for future treats. This dessert is great for gatherings or cozy nights. With practice, you'll master this recipe and impress others. Enjoy every bite as you share this warm, fruity delight!](https://mysavedrecipe.com/wp-content/uploads/2025/05/d3717c14-90c6-49d6-a982-7117d0988247-300x300.webp)

![- 1 large head of cauliflower, cut into bite-sized florets - 2 tablespoons olive oil - 1 teaspoon smoked paprika - 1 teaspoon cumin - 1/2 teaspoon garlic powder - 1/2 teaspoon onion powder - Salt and pepper to taste - 8 small corn or flour tortillas - 1 avocado, sliced - 1 cup red cabbage, finely shredded - 1/2 cup fresh cilantro, chopped - 1 lime, cut into wedges - Hot sauce (optional, for serving) The heart of these tacos is the cauliflower. It brings a nice texture and flavor. The olive oil and spices add depth. Smoked paprika and cumin work well together. They give a warm, earthy taste that you will love. If you want to switch things up, you can use different tortillas. Try lettuce wraps for a low-carb option. You can also use whole wheat tortillas for a healthier choice. For toppings, get creative! Add pickled jalapeños for heat or fresh mango for sweetness. Cauliflower is a low-calorie vegetable packed with health benefits. It is high in fiber, which helps digestion. This veggie is also rich in vitamins C and K. These nutrients support your immune system and promote strong bones. Eating cauliflower can boost your overall health while you enjoy these tasty tacos. For the Full Recipe, check the section above. Start by cutting the cauliflower into bite-sized florets. Make sure they are even in size for even cooking. Place the florets in a large bowl. Next, drizzle the florets with olive oil. Use about 2 tablespoons to coat them well. Now, add your spices. Include 1 teaspoon of smoked paprika, 1 teaspoon of cumin, 1/2 teaspoon of garlic powder, and 1/2 teaspoon of onion powder. Sprinkle salt and pepper to taste. Toss everything together until all the florets are well coated. This step adds great flavor. Preheat your oven to 425°F (220°C). This high heat helps the cauliflower become golden brown. Spread the seasoned cauliflower on a baking sheet lined with parchment paper. Make sure they are in a single layer. Roast the cauliflower for about 25-30 minutes. Stir halfway through to ensure even cooking. The florets should be tender and golden brown when done. Keep an eye on them to avoid burning. This roasting process brings out a nice, sweet flavor. While the cauliflower roasts, warm your tortillas. Heat a skillet over medium heat. Place each tortilla in the skillet for about 30 seconds on each side. This makes them soft and easy to fold. Now it’s time to assemble. Take a warm tortilla and add a generous amount of roasted cauliflower on top. Then, layer on the avocado slices, shredded red cabbage, and chopped cilantro. This adds fresh flavor and color to your tacos. Serve with lime wedges and hot sauce on the side for an extra kick. For the complete Vegan Cauliflower Tacos recipe, check out [Full Recipe]. To boost the flavor of your vegan cauliflower tacos, try adding extra spices. Consider these options: - Chili powder for a smoky kick. - Cayenne pepper for heat. - Coriander for a bright, citrusy note. To adjust heat levels, start with a small amount of cayenne. You can always add more if you want it spicier. Remember, balance is key. For a stunning dish, arrange your tacos on a large platter. Add a garnish of fresh cilantro and lime wedges. This makes your tacos pop! Pair these tacos with sides like: - Refried beans for protein. - Mexican rice for a hearty option. - Chips and salsa for crunch. For drinks, consider serving with: - Agua fresca for a refreshing option. - Light beer for a classic pairing. You can store cooked cauliflower for later use. Just place it in an airtight container. It stays fresh in the fridge for about three days. To prepare ingredients in advance, do the following: - Cut cauliflower florets and store them in water to keep them crisp. - Mix your spices in a jar for easy access. - Warm tortillas just before serving to keep them soft. These tips help you save time and enjoy delicious tacos anytime! For the full recipe, check the detailed instructions above. {{image_2}} You can enjoy vegan cauliflower tacos in different ways. First, think about soft or crispy tacos. Soft tacos use warm tortillas, which are easy to fold. They hold the flavors well. Crispy tacos come from frying or baking tortillas until golden. This adds a nice crunch to each bite. Another fun idea is to use lettuce wraps instead of tortillas. Crisp leaves like romaine or iceberg work well. They add freshness and a nice crunch. Plus, it cuts down on carbs. You get the same great flavors while changing the texture. You can also customize your tacos with various toppings. For a Mexican twist, consider using pico de gallo, guacamole, or vegan sour cream. These toppings add color and flavor. Fresh ingredients make your dish pop. If you want to experiment, try fusion-style variations. For example, add kimchi for a spicy kick or use curry sauce for an Asian flair. These ideas create unique flavor profiles while keeping the dish plant-based. If you're gluten-free, you can still enjoy these tacos! Use corn tortillas, which are naturally gluten-free. They provide a great base for your toppings and roasted cauliflower. You can also boost the protein in your tacos. Add beans, lentils, or chickpeas. These options not only increase protein but also add more texture. You can mix and match based on what you have at home. Explore these variations to find the perfect fit for your taste buds. You can make vegan cauliflower tacos your own! For the complete recipe, check out the Full Recipe above. To keep roasted cauliflower fresh, place it in an airtight container. This stops moisture from ruining its crispness. You can store it in the fridge for up to four days. For tortillas, wrap them in foil or plastic wrap. This helps keep them soft and prevents them from drying out. To reheat the cauliflower, an oven or air fryer works best. Heat it at 350°F (175°C) for about ten minutes. This method keeps the texture nice and crispy. You can also use a skillet over medium heat if you prefer. For repurposing leftovers, try adding the cauliflower to salads or grain bowls. This way, you add flavor and nutrition to other meals. If you want to freeze roasted cauliflower, make sure to cool it completely first. Then, place it in a freezer-safe bag. Try to remove as much air as you can. This helps prevent freezer burn. For thawing, simply place it in the fridge overnight. You can also reheat it straight from the freezer if you're in a hurry. Enjoy your Vegan Cauliflower Tacos anytime! For the full recipe, check out the earlier section. Vegan Cauliflower Tacos can last for about 3 to 4 days in the fridge. Store them in an airtight container to keep them fresh. It is best to keep the filling and tortillas separate. This way, the tortillas won’t get soggy. When you want to eat them, just warm up the filling and tortillas separately. Yes, you can use frozen cauliflower. Frozen cauliflower is convenient and saves time. It may have a slightly softer texture after cooking. To use it, thaw the cauliflower and pat it dry before seasoning. This helps avoid excess moisture. If you like a firmer bite, fresh cauliflower is a better option. There are many tasty toppings for vegan tacos. Here are some popular choices: - Sliced avocado - Finely shredded red cabbage - Chopped fresh cilantro - Diced tomatoes - Lime wedges - Hot sauce You can also try adding corn, black beans, or pickled onions for extra flavor. Yes, you can meal prep these tacos easily! Prepare the roasted cauliflower ahead of time and store it in the fridge. You can also chop the toppings and keep them ready. Assemble the tacos just before serving to keep everything fresh. This makes it quick to enjoy a healthy meal during busy days. For the complete Vegan Cauliflower Tacos recipe, check out the [Full Recipe]. Vegan Cauliflower Tacos are easy to make and delicious. We covered key ingredients and step-by-step instructions. I shared tips for flavor and presentation. You now know about nutritious benefits and how to store leftovers. These tacos fit many diets and can suit your taste. Enjoy experimenting with flavors and textures. You can create a healthy meal that’s fun to eat. Try them soon, and share your favorite version!](https://mysavedrecipe.com/wp-content/uploads/2025/05/bdde5c42-4f9a-4b96-9ecd-8b0a165d1c92-300x300.webp)
Air Fryer Chicken Tenders Crunchy and Delicious Recipe
You deserve delicious meals that are easy to make. Today, I’ll show you how to whip up crunchy and mouthwatering Air Fryer Chicken Tenders…
![- 1 lb chicken breast, cut into strips - 1 cup buttermilk - 1 cup all-purpose flour - 1 cup breadcrumbs (panko for extra crunch) - 1 teaspoon garlic powder - 1 teaspoon onion powder - 1 teaspoon paprika - 1 teaspoon dried oregano - Salt and pepper, to taste - Cooking spray (optional) Using these ingredients gives you a tasty base. The chicken breast is lean and full of protein. Buttermilk adds moisture and flavor. Flour gives the chicken a good coating. The breadcrumbs, especially panko, create that desired crunch. The seasoning ingredients add depth. Garlic powder and onion powder boost the flavor. Paprika gives the chicken a nice color and a hint of spice. Oregano adds a fresh note. Salt and pepper enhance everything. If you want even less sticking, use cooking spray. It helps the tenders crisp up nicely in the air fryer. This list will help you prepare for a fun cooking session. For the full recipe, check out the detailed steps to create these crunchy chicken tenders. Start by taking your chicken strips and placing them in a bowl. Add one cup of buttermilk to the chicken. Mix well to coat each piece. This step is key for flavor and moisture. Let the chicken marinate for at least 30 minutes. You can even let it sit overnight for extra flavor. While the chicken marinates, set up your breading stations. In one bowl, mix one cup of flour with garlic powder, onion powder, paprika, oregano, salt, and pepper. Stir it well to combine the spices and flour. In another bowl, place one cup of breadcrumbs. I recommend using panko for that extra crunch. Preheat your air fryer to 400°F (200°C) for about five minutes. After the chicken has marinated, take it out of the buttermilk. Let any excess liquid drip off. Now, dredge each chicken strip in the flour mixture. Make sure to coat it well. Then dip it back into the buttermilk and finally coat it with breadcrumbs. This double coating gives you a great crunch. Next, lightly spray the air fryer basket with cooking spray to prevent sticking. Arrange the chicken tenders in a single layer in the basket. Don't overcrowd; work in batches if needed. Air fry the chicken tenders at 400°F for 10-12 minutes. Flip them halfway through cooking. They should turn golden brown and be fully cooked. Enjoy your crispy air fryer chicken tenders! For the complete recipe, check [Full Recipe]. To boost flavor, add some spices. Here are my top picks: - Cayenne pepper for heat. - Italian seasoning for a herb mix. - Lemon zest for a fresh taste. - Parmesan cheese in the breadcrumbs for a cheesy kick. You can blend these spices into your flour mix. This adds layers of flavor to every bite. Panko breadcrumbs are key for crunch. Here’s how to use them well: 1. Double coat your chicken. After the flour, dip in buttermilk, then coat in panko. This adds that extra layer of crunch. 2. Press firmly on the chicken when coating. This helps the panko stick better. 3. Air fry in batches. Avoid overcrowding the basket. This ensures each piece gets hot air and stays crispy. For a fun presentation, serve your chicken tenders on a wooden platter. Here are some garnish ideas: - Fresh parsley for color. - Lemon wedges for a zesty touch. - Pickles for a tangy crunch. Pair your chicken with dipping sauces like: - Honey mustard for sweetness. - Barbecue sauce for a smoky flavor. - Ranch dressing for a classic choice. These additions make your meal not just tasty but visually appealing too. {{image_2}} You can change the coating for your chicken tenders. Instead of regular breadcrumbs, try coconut flakes for a tropical twist. They add a nice crunch and sweetness. Crushed cornflakes also work great. They give a crispy texture and a fun flavor. You can mix and match these options for different tastes. Changing the flavor is easy with marinades and spices. Try using hot sauce in the buttermilk for a spicy kick. You can also add lemon juice for a fresh taste. For a sweet option, mix honey into the buttermilk. When mixing the flour, add more spices like cumin or chili powder for warmth. Experiment with different herbs too, like thyme or rosemary, to find your favorite flavor. If you don’t have an air fryer, don’t worry! You can bake the chicken tenders. Preheat your oven to 425°F (220°C). Place the coated chicken strips on a baking sheet. Bake for about 20-25 minutes, flipping halfway through. For frying, heat oil in a pan over medium heat. Fry the chicken tenders in batches until golden brown. This way, you can still enjoy crispy chicken tenders, even without an air fryer. Check out the Full Recipe for more details! To keep your chicken tenders fresh, place them in an airtight container. This helps to lock in moisture. If you plan to store them for a long time, consider freezing them. Wrap each tender in plastic wrap before placing them in a freezer bag. This will prevent freezer burn. When reheating, avoid using the microwave. Instead, use the air fryer to keep them crispy. Preheat the air fryer to 350°F (175°C). Place the tenders in a single layer and heat for about 5-7 minutes. This method helps maintain their crunchy texture. You can also use an oven at the same temperature for better results. Cooked chicken tenders will last in the fridge for 3-4 days. If you freeze them, they can last up to 2-3 months. Just make sure to label the bags with the date. This makes it easy to track how long they have been stored. Enjoy your crispy chicken tenders later with the Full Recipe! You can use frozen chicken breasts for this recipe. However, fresh chicken works better. If you choose frozen, be sure to thaw them fully first. This helps the chicken marinate well in buttermilk. Proper marination ensures the meat stays juicy and flavorful. Just remember, cooking time might change slightly. Always check for doneness to be safe. To check if your chicken is done, use a meat thermometer. The center should reach 165°F (75°C). If you don’t have one, cut into a tender. Make sure the juices run clear and there’s no pink meat. Cooking times may vary based on the size of your strips. Flipping halfway helps ensure even cooking. Dipping sauces can elevate your chicken tenders. Here are my top picks: - Honey mustard - Barbecue sauce - Ranch dressing - Buffalo sauce - Sweet and sour sauce Each sauce adds a different flavor and flair. Feel free to mix and match to find your favorite! For an extra touch, garnish with herbs or fresh veggies. Enjoy exploring different tastes! In this blog post, we explored how to make delicious chicken tenders from scratch. We covered the main ingredients, the steps for preparing and cooking, and ways to enhance flavor. We also discussed storage tips to keep your tenders fresh. Remember, experimentation is key. Feel free to try new spices or cooking methods. Your kitchen is your playground. Enjoy your tasty chicken tenders with your favorite sauces.](https://mysavedrecipe.com/wp-content/uploads/2025/06/c5be8f72-db5e-4335-9ab7-cab3ec23900f.webp)
