Latest & Greatest

Simple Yellow Squash Curry Flavorful Home Dish
Are you ready to elevate your dinner with a delicious dish? This Simple Yellow Squash Curry is packed with flavor
Read more…
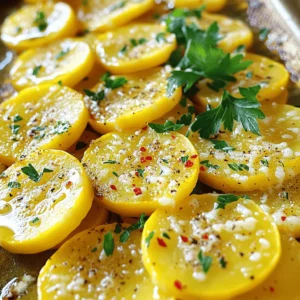
Easy Sauteed Yellow Squash Healthy and Simple Recipe
Looking for a quick and tasty way to enjoy yellow squash? I’ve got you covered! This Easy Sautéed Yellow Squash
Read more…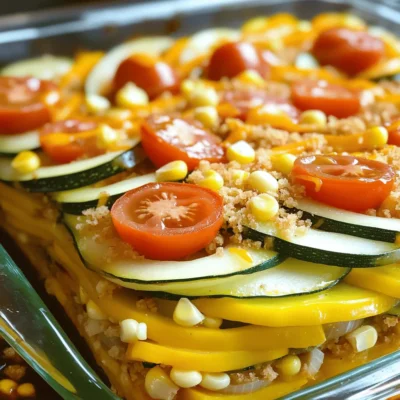
Healthy Summer Squash Casserole Easy and Tasty Dish
Looking for a healthy, tasty dish to brighten your summer meals? This Healthy Summer Squash Casserole is packed with fresh
Read more…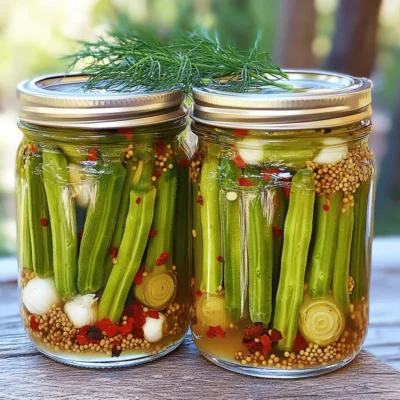
Quick Pickled Okra Flavorful and Simple Recipe
If you’re hungry for a crunchy snack with a zest, quick pickled okra is your answer. This easy recipe brings
Read more…
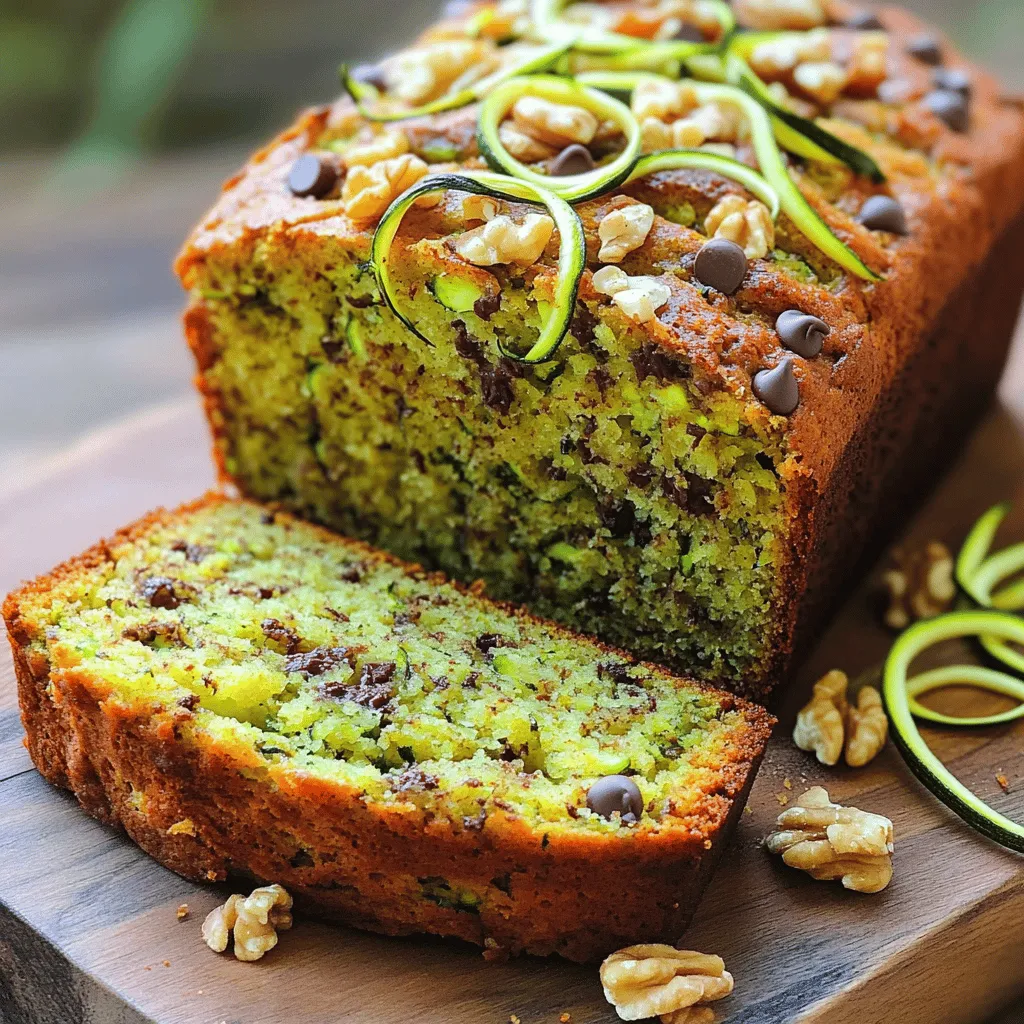
The Best Zucchini Bread Irresistible and Easy Recipe
Are you ready to bake the best zucchini bread that’s both irresistible and easy? This simple recipe combines fresh, grated
Read more…
Easy Cheesy Zucchini Bake Simple and Delicious Dish
Looking for a tasty way to enjoy summer’s bounty? My Easy Cheesy Zucchini Bake is here to help! This simple
Read more…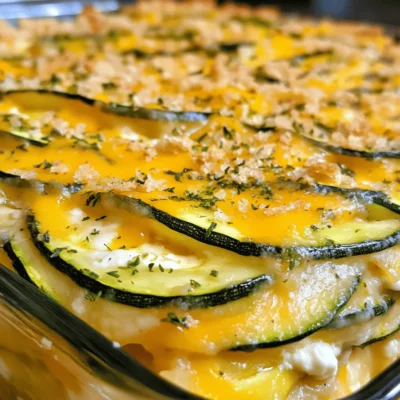
Cheesy Zucchini Casserole Delightful and Easy Recipe
Are you looking for a simple and delicious way to enjoy zucchini? Then this Cheesy Zucchini Casserole is perfect for
Read more…
Peach Cobbler Pancakes Delicious and Simple Recipe
Are you ready to bring a burst of flavor to your breakfast table? Peach Cobbler Pancakes are the perfect blend
Read more…browse recipes


Zesty Lime Grilled Shrimp Flavorful and Easy Recipe
Get ready to fire up your grill with my Zesty Lime Grilled Shrimp recipe! This flavorful dish is packed with vibrant lime and savory…
My Latest Desserts

No-Bake Peach Icebox Cake Simple and Refreshing Treat
If you’re seeking a sweet, cool treat that’s simple to make, it’s time to try my No-Bake Peach Icebox Cake. Read Full Recipe-
The Best Zucchini Bread Irresistible and Easy Recipe
Are you ready to bake the best zucchini bread that’s both irresistible and easy? This simple recipe combines fresh, grated Read Full Recipe -
Peach Cobbler Pancakes Delicious and Simple Recipe
Are you ready to bring a burst of flavor to your breakfast table? Peach Cobbler Pancakes are the perfect blend Read Full Recipe -
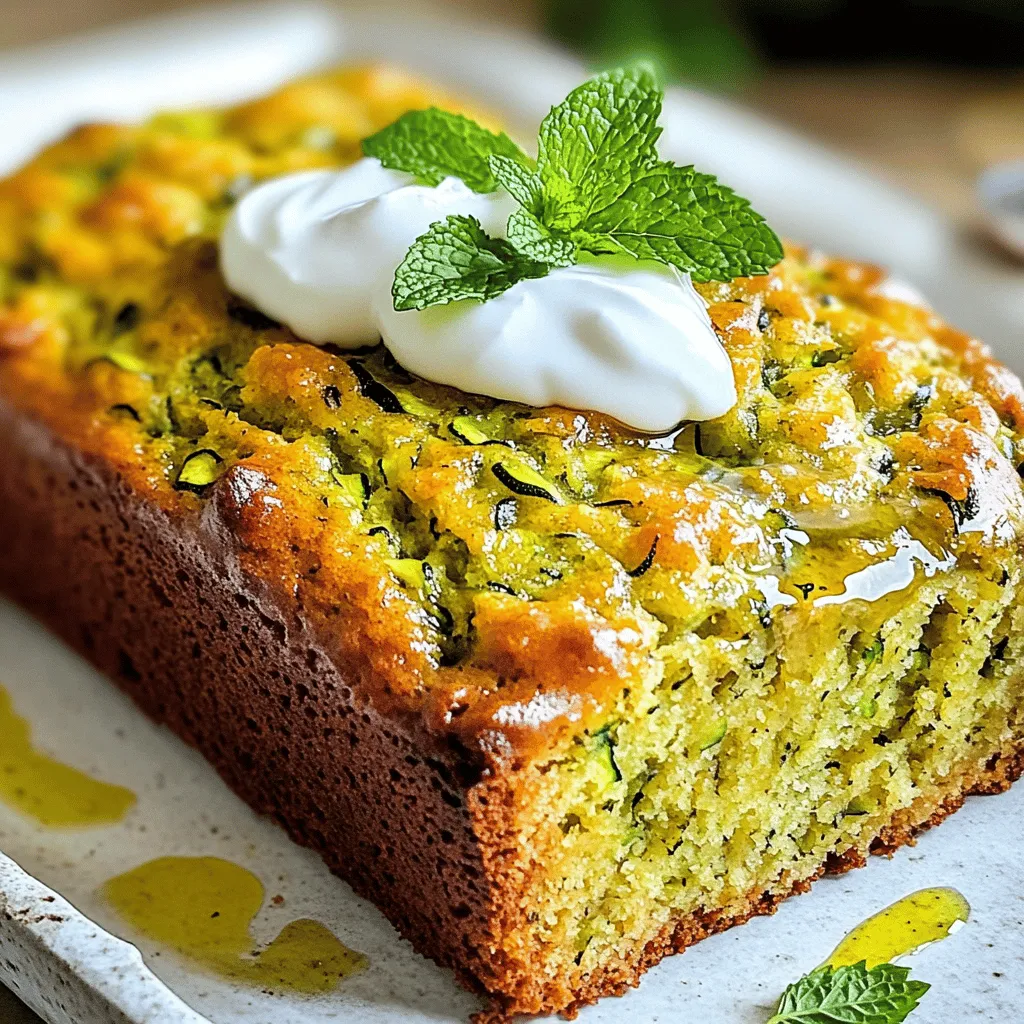
Olive Oil Zucchini Bread Moist and Flavorful Recipe
Welcome to your new favorite treat: Olive Oil Zucchini Bread! This recipe gives you a moist, flavorful loaf that’s perfect Read Full Recipe -
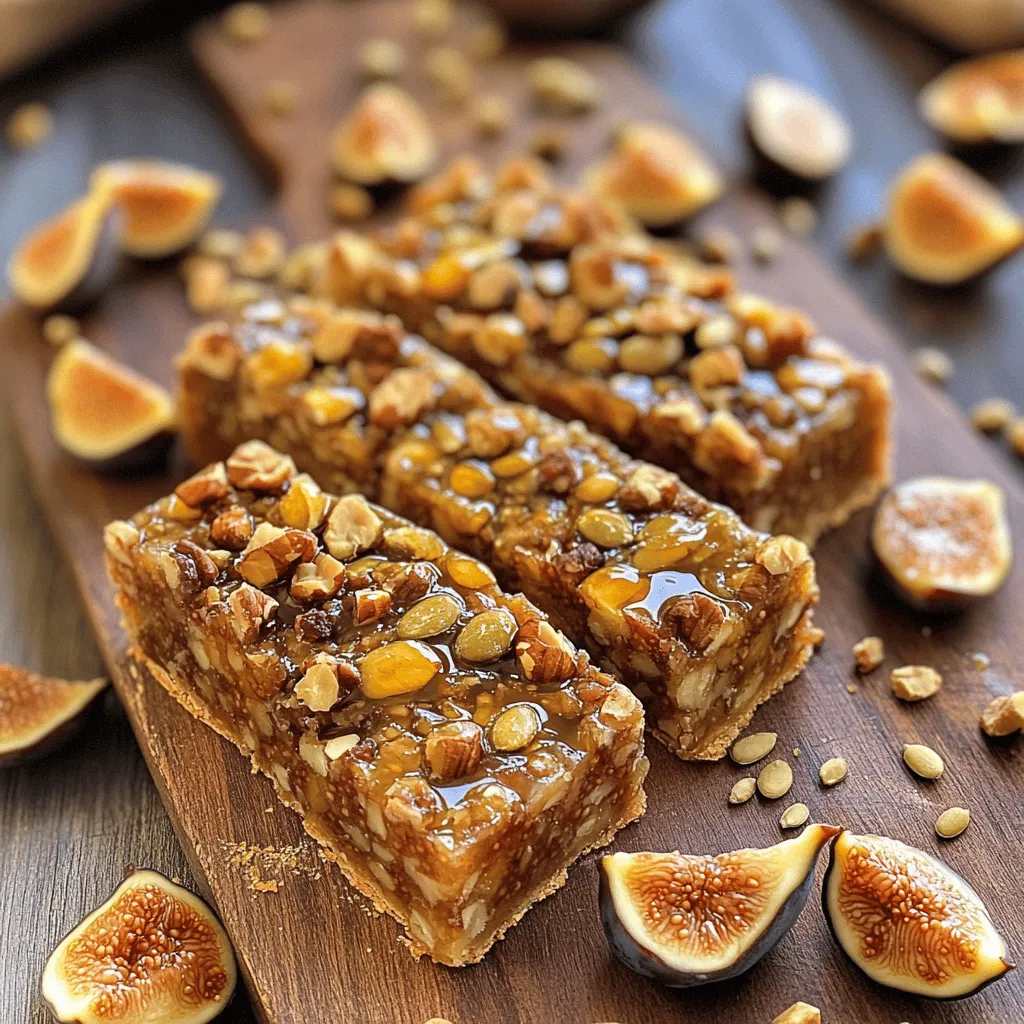
Fig and Walnut Bars Healthy and Flavorful Snack
If you’re searching for a tasty yet healthy snack, Fig and Walnut Bars are a perfect choice! Packed with nutritious Read Full Recipe -
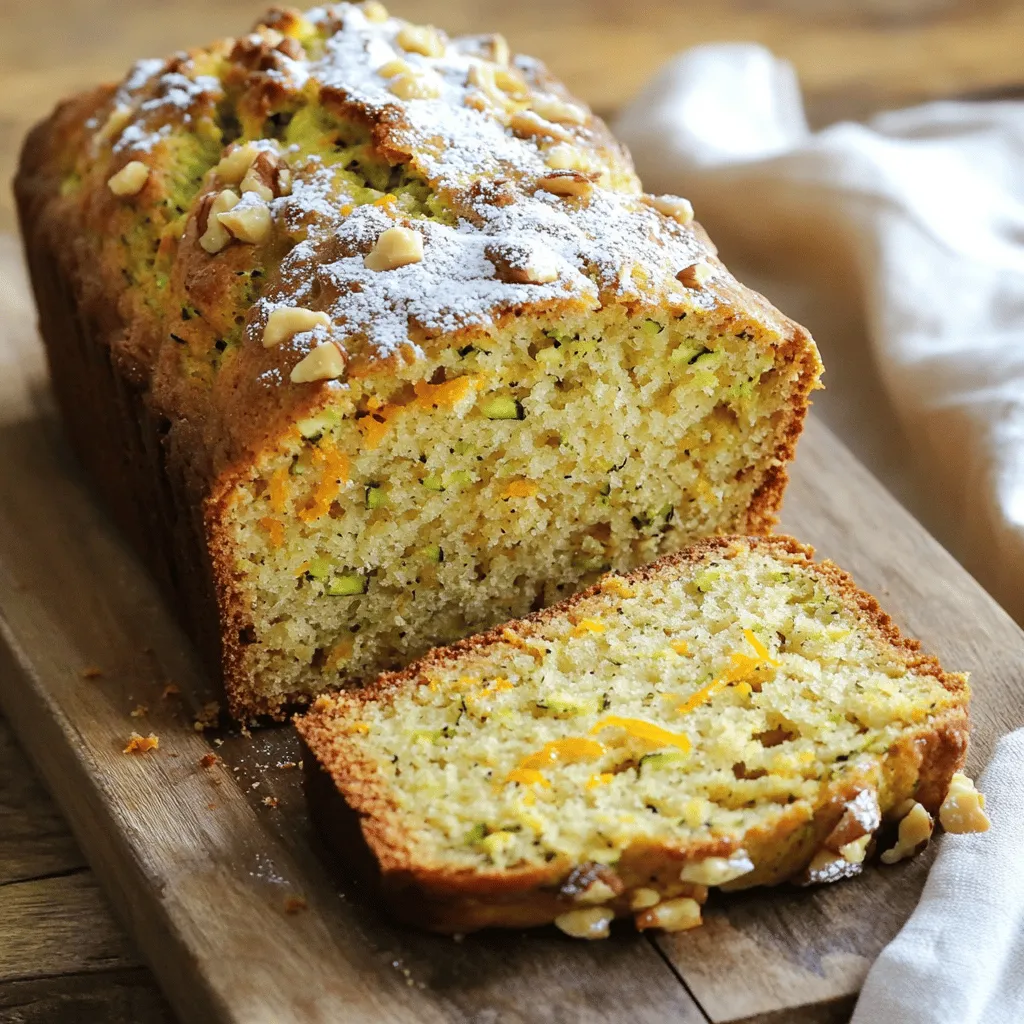
Zucchini Orange Bread Delightful and Easy to Bake
Are you ready to bake something truly delightful? This Zucchini Orange Bread combines fresh zucchini and bright orange zest for Read Full Recipe -
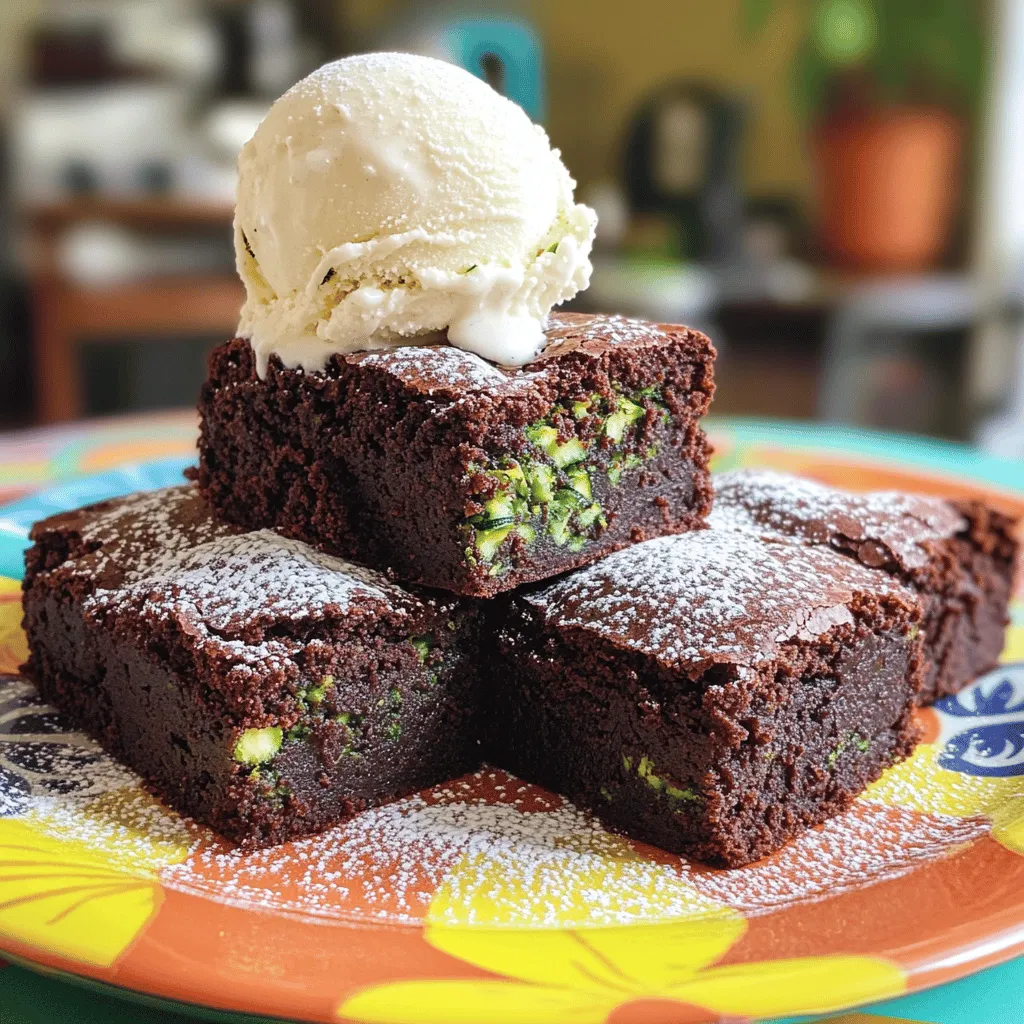
Zucchini Brownies for Kids Healthy and Tasty Delight
Are you looking for a new treat that kids will love while sneaking in some veggies? Look no further! These Read Full Recipe -
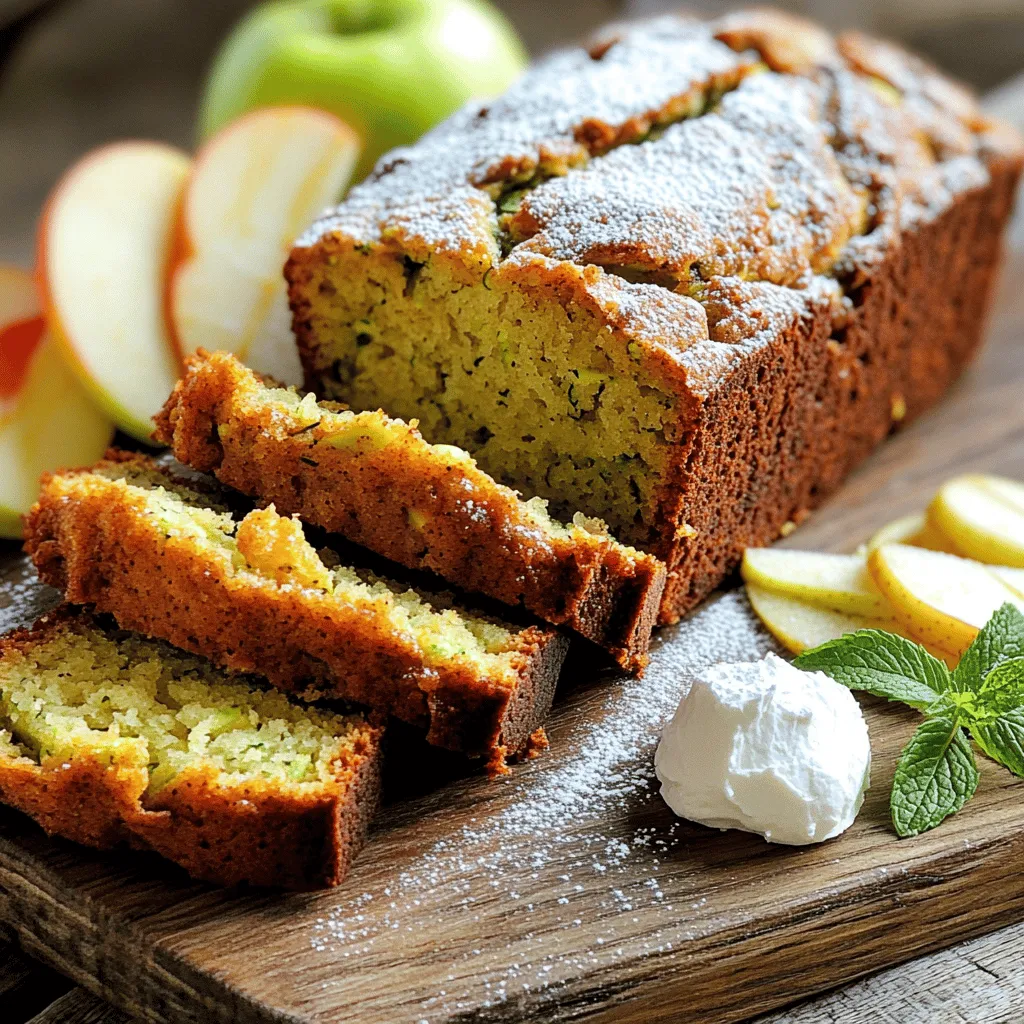
Apple Zucchini Bread Irresistibly Moist Delight
If you love baking delicious bread, you’re in for a treat! This Apple Zucchini Bread is not just within reach; Read Full Recipe -
Peach Cobbler Cheesecake Delightful Flavor Awaits
Are you ready to indulge in a dessert that combines the best of two worlds? This Peach Cobbler Cheesecake brings Read Full Recipe -
Lemon Zucchini Bread Fresh and Flavorful Delight
If you’re craving a tasty, moist loaf that brightens up your day, you’ve found it! My Lemon Zucchini Bread is Read Full Recipe


My Latest Recipes

hey,
i’m !
I’m so happy you’re here!
Food is my passion, and perfecting each dish is my craft. I can’t wait for you to try them let’s dive into this delicious journey side by side.
![To make a great savory herb roasted chicken, you need some key ingredients. Here’s what you’ll need: - 1 whole chicken (about 4-5 lbs) - 2 tablespoons olive oil - 1 tablespoon Dijon mustard - 1 lemon, zested and juiced - 4 cloves garlic, minced - 2 teaspoons fresh rosemary, chopped - 2 teaspoons fresh thyme, chopped - 2 teaspoons fresh sage, chopped - Salt and pepper to taste - 1 onion, quartered - 2 carrots, chopped - 2 potatoes, cubed These ingredients work together to create a flavorful meal. The chicken is the star, while the herbs and veggies add depth. Herbs make a big difference in this dish. I love using fresh herbs for their bright taste. Here’s what I recommend: - Rosemary: It gives a pine-like flavor. - Thyme: Adds an earthy note. - Sage: Offers a warm, savory taste. These herbs blend well and elevate the chicken. You can also mix them or use your favorites. Feel free to add extra ingredients for more flavor. Here are some suggestions: - Lemon slices: They add brightness and moisture. - Garlic cloves: Whole cloves can roast and sweeten. - Bell peppers: They add color and sweetness to the dish. Using these options can make your dish even more special. Experiment with different ingredients to find what you love! To see how to cook this dish step-by-step, check out the Full Recipe. Start with a whole chicken that weighs about 4-5 lbs. First, remove any giblets inside the cavity. Pat the chicken dry with paper towels. This helps the skin crisp up later. Place the chicken in a roasting pan, ready for flavor. In a small bowl, mix together: - 2 tablespoons olive oil - 1 tablespoon Dijon mustard - 1 lemon, zested and juiced - 4 cloves garlic, minced - 2 teaspoons fresh rosemary, chopped - 2 teaspoons fresh thyme, chopped - 2 teaspoons fresh sage, chopped - Salt and pepper to taste This marinade makes the chicken taste great. Carefully lift the skin on the breast and thighs. Rub about half of the marinade underneath the skin. Use the rest to coat the outside of the chicken. Stuff the cavity with: - 1 onion, quartered - 2 carrots, chopped - 2 potatoes, cubed This will add flavor as the chicken cooks. Preheat your oven to 425°F (220°C). Roast the chicken for about 1 hour and 15 minutes. Check the internal temperature; it should reach 165°F (75°C). Halfway through cooking, baste the chicken with the pan juices. This keeps it moist and adds more flavor. After roasting, let the chicken rest for 10-15 minutes before carving. Serve it with the roasted vegetables. Enjoy your delicious meal! For the full recipe, check out the instructions I provided above. To get that crispy skin on your chicken, start by drying the skin well. Use paper towels to pat it dry. This helps remove moisture, which can make it soggy. Next, rub olive oil all over the skin. This adds flavor and helps it crisp up nicely in the oven. Make sure to season the skin with salt. Salt draws out moisture during cooking, leading to a golden, crispy result. Basting your chicken is key to keeping it moist. Halfway through cooking, open the oven and use a spoon to scoop up the juices from the pan. Drizzle these juices over the chicken. This adds flavor and keeps the meat juicy. You can baste every 20 minutes or so for the best results. Just be careful not to let too much heat escape from the oven. A meat thermometer is a must-have for perfect chicken. Insert the thermometer into the thickest part of the thigh, avoiding the bone. You want the temperature to reach 165°F (75°C) for safe eating. This tells you when the chicken is done and juicy. If it’s not there yet, put it back in the oven and check again in a few minutes. This simple tool helps ensure your chicken is cooked just right. For the full recipe and detailed steps, check the [Full Recipe]. {{image_2}} You can change the flavor of your savory herb roasted chicken by using different herbs. Try using tarragon for a hint of anise. Parsley can lighten the taste and add freshness. For a spicy kick, use oregano or basil. Each herb offers a unique twist. You can even mix herbs for a more complex flavor. Just remember, fresh herbs usually give the best taste. When it comes to side dishes, many options work well with roasted chicken. Classic choices include roasted vegetables like carrots, potatoes, and onions. You can also serve a fresh salad with a light vinaigrette. For something hearty, consider creamy mashed potatoes or fluffy rice. Adding a sauce can enhance the dish. Think about a tangy lemon sauce or a garlic butter drizzle. You can cook savory herb roasted chicken in different ways. The oven gives crispy skin and golden color. It usually takes about 1 hour and 15 minutes at 425°F. If you prefer a slow cooker, it’s easy and great for busy days. Cooking in a slow cooker takes about 4 to 6 hours on low. The chicken will be tender and juicy but won’t have the same crispy skin. Choose the method that fits your time and taste best. After enjoying your savory herb roasted chicken, store leftovers in an airtight container. Place the chicken in the fridge within two hours of cooking. This helps keep it fresh and safe to eat. It can last for about three to four days in the fridge. If you have leftover vegetables, store them in a separate container. When you’re ready to enjoy your leftovers, I recommend reheating in the oven. Preheat your oven to 350°F (175°C). Place the chicken in a baking dish and cover it with foil. Heat for about 20-25 minutes or until warmed through. This keeps the skin crispy and the meat juicy. You can also use a microwave, but it may not keep the skin crisp. Heat in short intervals, checking often. If you want to save your chicken for later, freezing is a great option. Let the chicken cool completely before wrapping. Wrap each piece tightly in plastic wrap or foil. Place the wrapped pieces in a freezer-safe bag or container. It can last for up to three months in the freezer. When you’re ready to eat, thaw it in the fridge overnight before reheating. This way, your savory herb roasted chicken will taste just as great! For the full recipe, check out the detailed instructions above. The best temperature for roasting chicken is 425°F (220°C). This heat helps the skin get crispy and brown. It cooks the meat evenly and keeps it juicy. Roasting at this temperature also reduces cooking time. Aim for about 1 hour and 15 minutes. Yes, you can use dried herbs instead of fresh. Dried herbs have a stronger flavor. Use about one-third the amount of dried herbs. For example, if a recipe calls for 2 teaspoons of fresh rosemary, use only about 1 teaspoon of dried. Make sure to crush the dried herbs before adding them. This helps release their flavor. To check if the chicken is fully cooked, use a meat thermometer. Insert it into the thickest part of the thigh without touching the bone. The temperature should reach 165°F (75°C). If you don’t have a thermometer, cut into the thickest part. The juices should run clear, not pink. After cooking, let the chicken rest for a few minutes before carving. This allows the juices to settle. For more tips and ideas, check out the Full Recipe. In this post, we explored how to make savory herb roasted chicken. We covered essential ingredients, fresh herbs, and optional flavors. You learned step-by-step instructions, tips for crispy skin, and how to store leftovers. Cooking can be fun and rewarding. Enjoy trying different herbs and side dishes. Remember, practice makes perfect. You’ll impress your family and friends with your delicious chicken.](https://mysavedrecipe.com/wp-content/uploads/2025/06/1814e9b4-3987-4302-ae63-3ba9edb997b8-300x300.webp)

![To make Lemon Basil Chicken Skewers, you will need: - 1 lb (450g) boneless chicken breast, cut into 1-inch cubes - 2 tablespoons olive oil - Zest and juice of 2 lemons - 1 teaspoon honey - 1 tablespoon Dijon mustard - 1 clove garlic, minced - 1 cup fresh basil leaves, chopped - Salt and pepper to taste - Wooden or metal skewers (if using wooden skewers, soak them in water for 30 minutes to prevent burning) If you don’t have some ingredients, you can swap them out. Use chicken thighs instead of breast for more flavor. You can replace olive oil with any neutral oil. If you want less acidity, use lime juice instead of lemon. Try maple syrup in place of honey for a different sweetness. You can also use dried basil if fresh is not available, but use less since dried is stronger. Want to make your skewers even better? Add cherry tomatoes, bell peppers, or zucchini to the skewers. These veggies add color and flavor. You could also sprinkle some red pepper flakes for a bit of heat. If you love cheese, feta crumbles make a great topping after grilling. For a tangy kick, drizzle some balsamic glaze over the finished skewers. Check the [Full Recipe] for more details on cooking these tasty treats! To start, gather your ingredients. In a large bowl, mix olive oil, lemon zest, lemon juice, honey, Dijon mustard, minced garlic, and chopped basil. Stir until everything blends well. This marinade is key for great flavor. The zest brings a bright taste, while the basil adds freshness. Next, cut your chicken breast into 1-inch cubes. Add these cubes to your marinade, tossing gently. Make sure each piece is well coated. Now, season with salt and pepper to your liking. Cover the bowl and let the chicken marinate in the fridge. Aim for at least 30 minutes, but longer, like 1 to 2 hours, will deepen the flavors. When you’re ready to grill, preheat your grill or grill pan to medium-high heat. If using wooden skewers, don’t forget to soak them for 30 minutes. Thread the marinated chicken onto the skewers, leaving space between pieces. This helps them cook evenly. Place the skewers on the grill once it’s hot. Grill for about 10 to 12 minutes, turning them often. Check the internal temperature; it should reach 165°F (75°C). After grilling, let them rest for a few minutes. This helps keep the chicken juicy and tender. For the full recipe, check out the complete list of steps to ensure a tasty grilled delight! To make the best marinade, use fresh ingredients. Fresh basil gives a bright taste. Use ripe lemons for zest and juice. The honey adds a touch of sweetness. Mix all the marinade ingredients well. Make sure the chicken cubes are fully coated. Marinate for at least 30 minutes. If you can, let it sit for 1-2 hours. This helps the flavors blend deeply into the chicken. Grill marks make your dish look great. Start with a hot grill to get those nice lines. Place the skewers on the grill and don't move them right away. Let them cook for about 3-4 minutes before turning. This helps form that perfect char. Use tongs to flip them gently. You want even cooking and nice marks on all sides. Always ensure your chicken is safe to eat. The internal temperature should reach 165°F (75°C). Use a meat thermometer to check this easily. If you see pink inside, it needs more time. Let the skewers rest for a few minutes after grilling. This helps the juices settle back into the meat. Enjoy your meal knowing it is safe and delicious! For the complete recipe, check out the Full Recipe. {{image_2}} You can switch the chicken for other proteins. Shrimp works well and cooks fast. Just marinate for about 15 minutes. You can also use cubed beef or pork. Choose lean cuts, like tenderloin, for the best results. Tofu is another great option if you want something plant-based. Firm tofu soaks up flavors well. For a tasty vegetarian skewer, use bell peppers, zucchini, and mushrooms. Cut them into bite-sized pieces. You can also add cherry tomatoes for a pop of color. Marinate these veggies in the same lemon basil mix. This gives them a bright flavor. Feel free to mix in some halloumi cheese for a bit of saltiness. To make the skewers even better, try adding spices. A pinch of red pepper flakes adds heat. You can also add a splash of soy sauce for a savory kick. Fresh herbs like parsley or cilantro can brighten the dish. Experiment with different citrus fruits, like lime or orange. Each one brings a unique taste to your meal. After cooking, let the skewers cool down. Place them in an airtight container. You can store them in the fridge for up to three days. If you have extra marinade, keep it separate. It can add flavor to your next meal. To reheat, use a microwave or an oven. If using a microwave, heat for one to two minutes. Check to make sure they are hot all the way through. If using an oven, preheat it to 350°F. Bake for about 10 minutes. This keeps the chicken juicy. You can freeze leftover skewers. Wrap them tightly in plastic wrap, then in foil. They will stay fresh for up to three months. When you are ready to eat, thaw them in the fridge overnight. Reheat as mentioned above. Enjoy your Lemon Basil Chicken Skewers again! For the full recipe, check out the details already provided. You should marinate the chicken for at least 30 minutes. For the best flavor, aim for 1 to 2 hours. This time allows the chicken to soak up the lemon and basil flavors. If you have time, marinating overnight works great too. Yes, you can use different herbs. Try parsley, cilantro, or oregano. Each herb brings a unique taste. If you change the herbs, adjust the other flavors to match. Experiment and find your favorite mix! These skewers pair well with many sides. A fresh summer salad is a great choice. Tzatziki sauce also works well for dipping. You can also serve them with grilled veggies or rice for a complete meal. Check the chicken's internal temperature. It should reach 165°F or 75°C. You can cut a piece in half to check for doneness. The meat should be white and juices should run clear. This ensures your chicken is safe and tasty. For the full recipe, check the [Full Recipe]. This article covered all you need for perfect Lemon Basil Chicken Skewers. We looked at ingredients, marinade prep, grilling tips, and storage info. You also learned about substitutions and variations. Enjoy making these skewers! You can adapt the flavors and keep leftovers fresh. Now, you’re ready to try new proteins or even vegetarian options. Cooking can be fun, so get creative!](https://mysavedrecipe.com/wp-content/uploads/2025/05/988767de-aa0a-4967-889b-04ae41a21474-300x300.webp)

Honey Butter Biscuits Delicious and Simple Recipe
Craving something sweet and buttery? Honey butter biscuits are the perfect treat! They’re simple to make and oh-so-delicious. In this blog post, I’ll guide…