Latest & Greatest

browse recipes

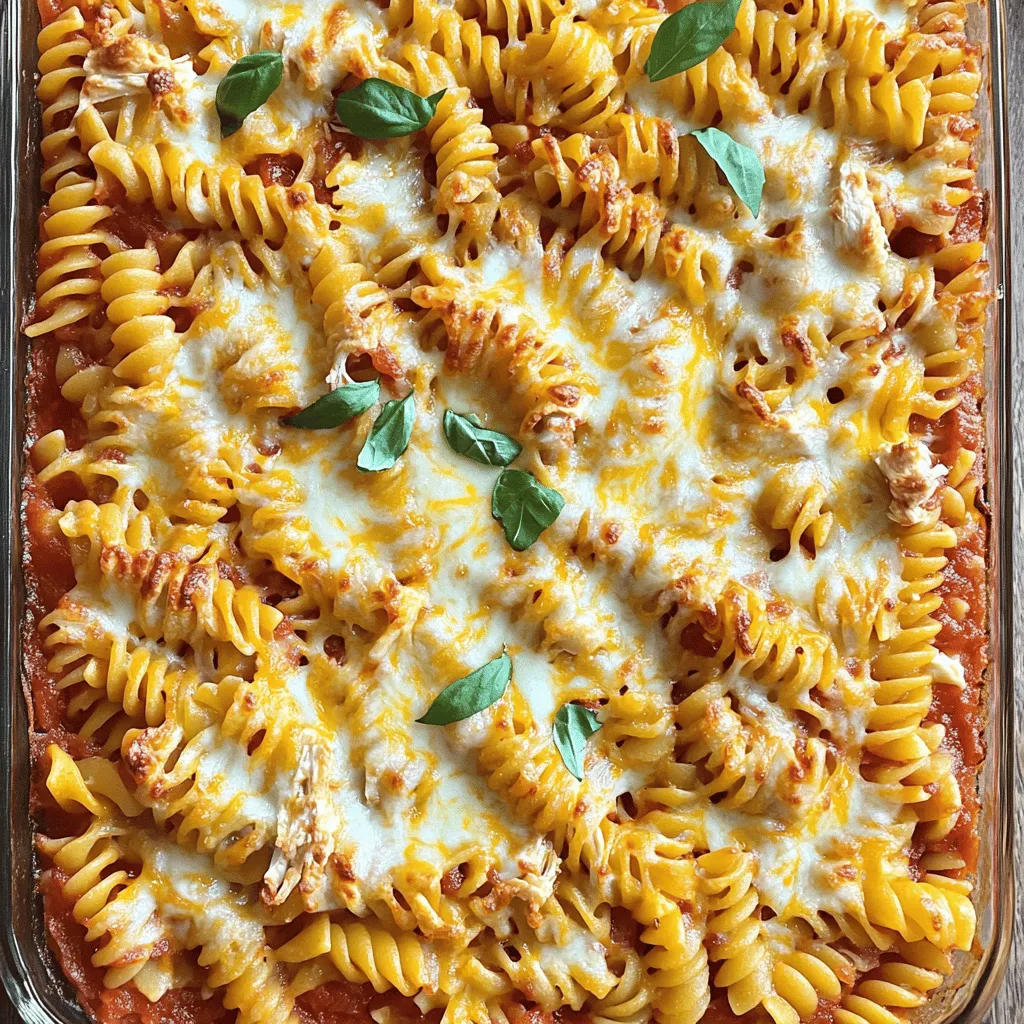
To make a tasty Parmesan Chicken Pasta Bake, you'll need: - 2 cups rotini or penne pasta - 2 cups cooked chicken, shredded - 1 cup marinara sauce - 1 cup ricotta cheese - 1 ½ cups mozzarella cheese, shredded - ¾ cup Parmesan cheese, grated - 1 teaspoon garlic powder - 1 teaspoon Italian seasoning - Salt and pepper to taste - Fresh basil for garnish (optional) These ingredients work together to create a creamy, cheesy dish that your family will love. The pasta serves as a great base, while the chicken adds protein and flavor. You can make this dish your own by adding: - Spinach or kale for extra veggies - Bell peppers or mushrooms for more flavor - Different cheeses like gouda or cheddar - A splash of heavy cream for creamier sauce Feel free to swap out or add any of these ingredients. They can enhance the taste and nutrition of your meal. Each serving of the Parmesan Chicken Pasta Bake has about: - Calories: 450 - Protein: 30g - Carbohydrates: 40g - Fat: 20g This dish packs a punch of nutrients while still being comforting and satisfying. Enjoy it as a hearty family meal that balances taste and health nicely. For the complete cooking details, check out the Full Recipe. To start, gather all your ingredients. You need: - 2 cups rotini or penne pasta - 2 cups cooked chicken, shredded - 1 cup marinara sauce - 1 cup ricotta cheese - 1 ½ cups mozzarella cheese, shredded - ¾ cup Parmesan cheese, grated - 1 teaspoon garlic powder - 1 teaspoon Italian seasoning - Salt and pepper to taste - Fresh basil for garnish (optional) First, preheat your oven to 375°F (190°C). This step helps cook your dish evenly. Next, boil water in a pot. Add the pasta and cook it until it is al dente. This usually takes around 8-10 minutes. Drain the pasta and set it aside. In a large bowl, combine the shredded chicken, marinara sauce, ricotta cheese, garlic powder, Italian seasoning, and half of the mozzarella cheese. Mix everything well. This mix gives a rich flavor to your dish. Then, add the cooked pasta. Stir until the pasta is coated in that tasty mixture. Don’t forget to season with salt and pepper to taste. Next, transfer the pasta mix into a greased 9x13 inch baking dish. Make sure it spreads evenly. Finally, sprinkle the remaining mozzarella and Parmesan cheese on top. This will create a lovely, cheesy crust. Now, it’s time to bake. Place the dish in the oven and bake for 25-30 minutes. Keep an eye on it. You want the cheese to become bubbly and golden brown. To check if it’s done, look for that golden color on the cheese. If it looks perfect, take it out. After baking, let it sit for 5 minutes before serving. This helps everything set up nicely. When serving, try to plate it in a way that shows off the melted cheese. A sprinkle of fresh basil can add a nice touch and color. You can pair this dish with a crisp green salad or some garlic bread. These sides balance the meal and add freshness. Enjoy your tasty family dinner! To make this dish shine, avoid some common mistakes. First, do not overcook the pasta. Cook it just until al dente. This keeps it firm during baking. Second, be careful with the spices. Too much garlic or Italian seasoning can overpower the dish. Taste as you mix! You can customize flavors easily. Want it spicy? Add crushed red pepper flakes to the sauce. For a fresh twist, mix in some lemon zest. You can also swap marinara sauce for a creamy alfredo. This gives a new flavor profile. Preparing ingredients ahead saves time. Cook and shred the chicken a day before. You can also cook the pasta and store it in the fridge. Just toss it with a bit of oil to prevent sticking. For freezing, assemble the dish in a freezer-safe container. Cover it tightly before freezing. You can bake it directly from frozen. Just increase the baking time to about 40-45 minutes. You can switch up proteins easily. Use turkey or beef instead of chicken. For a lighter option, try shrimp. If you prefer cheese, use feta or goat cheese instead of ricotta. For vegetarian options, add more veggies like spinach or bell peppers. You can use lentils for protein. This way, you keep all the flavors without meat. {{image_2}} To keep leftovers fresh, let the dish cool first. Place it in an airtight container. Glass or plastic containers work great. If you have a lot, use smaller containers. This helps with portion control and quick access. To reheat without losing texture, use an oven. Preheat it to 350°F (175°C). Place the pasta bake in a safe dish and cover it with foil. Bake for about 20 minutes. This keeps the cheese nice and melty. You can also use a microwave, but the oven is best for crispiness. In the fridge, this dish lasts about 3 to 4 days. If you freeze it, it can last up to 3 months. Just make sure to wrap it well to avoid freezer burn. When you're ready, thaw it in the fridge overnight before reheating. What can I substitute for chicken in Parmesan Chicken Pasta Bake? You can use turkey, tofu, or chickpeas. These options provide great flavor. They also add protein to your dish. How do I make this recipe gluten-free? Use gluten-free pasta in the recipe. Many types are available in stores. Also, ensure your sauces and cheeses are gluten-free. Can I prepare this dish ahead of time? Yes! You can mix the ingredients and store them in the fridge. Bake it when you're ready to eat. Can I use different types of pasta for this recipe? Absolutely! You can try farfalle, fusilli, or even whole wheat pasta. Just cook it al dente for the best texture. How do I know when the dish is done baking? Look for bubbly cheese and a golden top. A knife should slide in easily. This means your dish is ready. What is the best way to shred chicken? Using two forks works well. You can also use a stand mixer on low speed. This saves time and gives you perfect shreds. How to prevent the cheese from burning while baking? Cover the dish with foil for the first 15 minutes. This keeps the cheese from burning. Remove the foil later for a golden finish. This dish takes about 15 minutes to prep and 30 minutes to bake. You can serve six people with this tasty meal. It is perfect for family dinners or a cozy night in. To get the full details, you can check out the Full Recipe. I encourage you to try making Parmesan Chicken Pasta Bake. It is simple and fun to cook! You will love how cheesy and satisfying it tastes. Enjoy your cooking adventure! In this blog, we covered the tasty Parmesan Chicken Pasta Bake. We discussed essential and optional ingredients, along with their measurements. I shared nutritional info and detailed step-by-step instructions for preparation and cooking. You learned useful tips for perfecting the dish and meal prep suggestions to make it easier. Finally, I provided storage and reheating details. Now, it's time to make this flavorful meal for yourself. Enjoy cooking and sharing this dish with your loved ones!

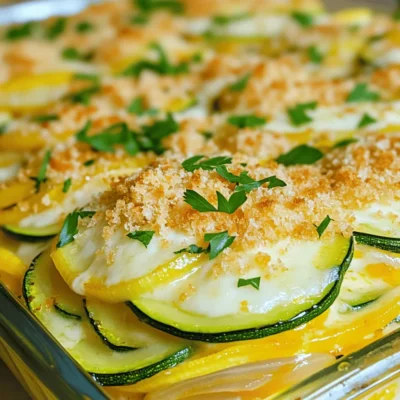
Parmesan Chicken Pasta Bake Tasty Family Dinner

Are you looking for a quick, tasty dinner that the whole family will love? This Parmesan Chicken Pasta Bake is just what you need!…

My Latest Desserts

My Latest Recipes

hey,

i’m !

I’m so happy you’re here!

Food is my passion, and perfecting each dish is my craft. I can’t wait for you to try them let’s dive into this delicious journey side by side.

Crispy Chickpea Tacos Flavorful and Satisfying Meal

Are you tired of the same old taco night? Get ready to switch things up with crispy chickpea tacos! These tacos pack bold flavors,…
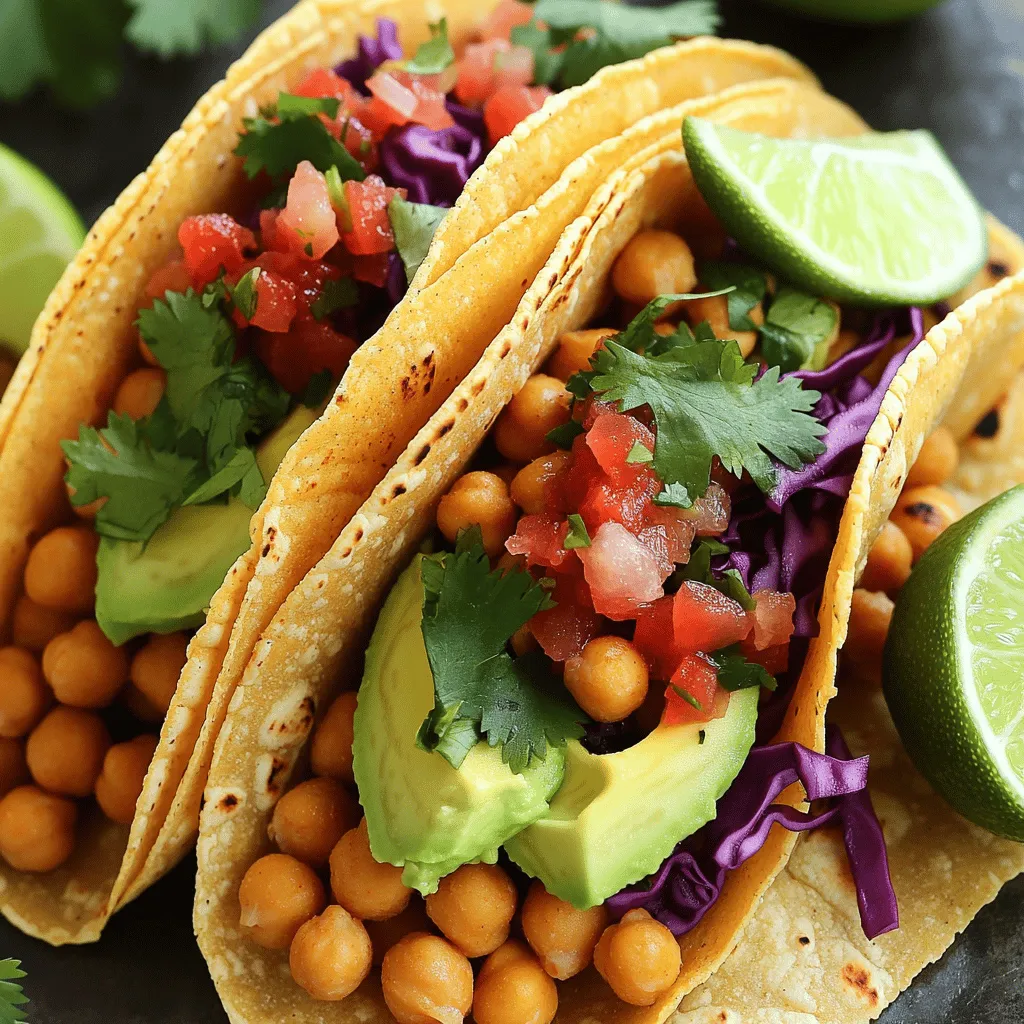
Let’s go over what you need to make these tasty crispy chickpea tacos. Each ingredient plays a vital role in building flavor and texture. Here’s the list: - 1 can (15 oz) chickpeas, drained and rinsed - 1 tablespoon olive oil - 1 teaspoon smoked paprika - 1 teaspoon cumin - 1/2 teaspoon garlic powder - 1/2 teaspoon onion powder - Salt and pepper to taste - 8 small corn or flour tortillas - 1 avocado, sliced - 1 cup shredded red cabbage - 1/2 cup pico de gallo (store-bought or homemade) - Fresh cilantro, for garnish - Lime wedges, for serving Using canned chickpeas is quick and easy. Rinsing them removes excess salt. Olive oil adds richness and helps the spices stick. Smoked paprika and cumin give that warm, earthy flavor. Garlic and onion powders add depth. For the tacos, you can choose between corn or flour tortillas. Both work well, but corn has a nice crunch. Don’t forget the toppings! Creamy avocado, crunchy cabbage, and fresh pico de gallo bring the dish together. Cilantro adds a fresh note, and lime juice brightens the flavors. For the full recipe, check out the details to make your tacos a hit! - Preheat the oven to 400°F (200°C). - Rinse and dry the chickpeas. - Mix chickpeas with olive oil and spices. To start, I preheat my oven to 400°F (200°C). This step is key for crispy chickpeas. Next, I rinse the chickpeas under cold water. After draining, I pat them dry with a paper towel. Removing moisture helps them crisp up nicely. In a bowl, I mix the chickpeas with olive oil and spices. I use smoked paprika, cumin, garlic powder, onion powder, salt, and pepper. This blend adds a great flavor. - Spread chickpeas on a baking sheet. - Roast for 25-30 minutes, stirring halfway. Next, I spread the chickpeas on a baking sheet. They should be in a single layer. Then, I roast them for 25 to 30 minutes. I stir them halfway through to ensure even cooking. When they are done, they should be golden brown and crispy. The aroma fills the kitchen, making it hard to wait! - Warm tortillas and fill with crispy chickpeas. - Add toppings and serve. While the chickpeas roast, I warm up my tortillas. I can use a skillet or a microwave. A quick minute on each side in a skillet works well. Once warm, I fill each tortilla with a scoop of crispy chickpeas. I top them with sliced avocado, shredded red cabbage, and pico de gallo. Fresh cilantro adds a nice touch. A squeeze of lime on top enhances the flavor. Enjoy these tacos as a vibrant and tasty meal! To make perfect crispy chickpeas, start by drying them well. Wet chickpeas won’t get crunchy in the oven. Use a paper towel to pat them dry. This step is key for great texture. Next, roast the chickpeas at 400°F (200°C). This hot temperature helps them get crispy. Roast them for about 25-30 minutes. Be sure to stir them halfway through. This ensures even cooking and browning. When done, they should be golden brown and crunchy. Spices can take your chickpeas to the next level. Try smoked paprika for a smoky taste. Cumin adds warmth, while garlic and onion powders boost flavor. Feel free to mix and match spices based on your taste. You can also use different oils for added flavor. Olive oil is great, but avocado or coconut oil works too. Each oil adds its own unique taste. Experiment to find your favorite combination! These tacos pair well with fresh sides. A simple salad or some rice can complement them nicely. You might also enjoy them with a side of beans. If you have leftovers, get creative! Use the crispy chickpeas in salads or grain bowls. You can even add them to soups for extra crunch. The possibilities are endless! For the full recipe, check out the main article. {{image_2}} You can switch up the protein in these tacos. Black beans make a great choice. They add a rich texture and taste. Lentils work well too. They are packed with nutrients and flavor. Tofu is another option. It adds protein and absorbs flavors well. Don't be afraid to get creative with sauces and toppings. Try spicy salsa or creamy dressing. You can also use seasonal veggies for a fresh twist. Think sweet corn in summer or roasted squash in fall. Each season brings new flavors to explore. If you need gluten-free options, try lettuce wraps. They add a nice crunch. You can also use different sizes of tortillas. Mini tortillas are fun for small bites. Bigger ones work well for generous fillings. Mix and match to find your favorite! To keep your leftover tacos fresh, store the crispy chickpeas and toppings separately. This helps maintain their texture. Use airtight containers for best results. Place the chickpeas in one container, and the avocado, cabbage, and pico de gallo in others. Store everything in the fridge. This way, your tacos stay tasty for up to three days. When reheating crispy chickpeas, use an oven or an air fryer. Set the oven to 350°F (175°C). Spread the chickpeas on a baking sheet and warm them for about 10 minutes. This keeps them crunchy. For tortillas, warm them in a skillet over medium heat for about 30 seconds on each side. You can also use a damp paper towel in the microwave for 20 seconds. Both methods work well without drying them out. Yes, you can freeze the chickpeas! Spread them on a baking sheet and freeze until solid. After that, transfer them to a freezer bag. This keeps them fresh for about three months. When you're ready to eat, reheat directly from frozen. Just add a few extra minutes to the oven time. Keep in mind, tortillas do not freeze well. It’s best to prepare them fresh. Yes, you can make these tacos in advance. Prep the chickpeas and store them. Roast them just before serving. Keep all toppings separate. This way, your tacos stay fresh and crunchy. Yes, these tacos work great for meal prep. The chickpeas last about five days in the fridge. Keep the tortillas and toppings separate. This helps them stay fresh longer. Absolutely! Canned chickpeas are perfect for this recipe. They save time and still taste great. Just make sure to rinse and dry them well. This helps get that crispy texture. If you don’t have avocado, try hummus or vegan sour cream. Both options add creaminess to the tacos. You can even use tahini for a unique taste. Yes, this recipe can be gluten-free. Look for corn tortillas or gluten-free flour tortillas. Brands like Mission and Udi's offer good options. Always check the labels for gluten-free certification. We explored how to create delicious crispy chickpea tacos. You learned about the key ingredients, preparation steps, and ways to enhance flavor. I shared tips for achieving the perfect crunch and ideas for storing leftovers. You have options, too! You can switch proteins, add seasonal veggies, or choose different tortillas. Enjoy making this nutritious meal that fits your lifestyle. These tacos are fun to prepare and even easier to share!