


Latest & Greatest
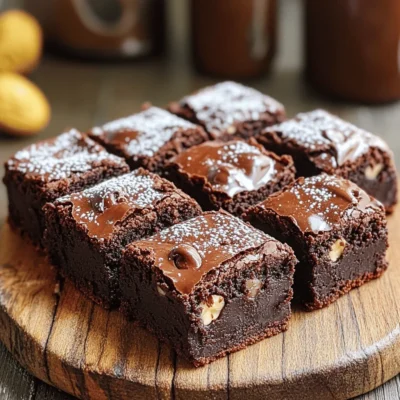
Decadent Ultimate Chocolate Fudge Brownies Recipe
Are you ready to make the ultimate chocolate fudge brownies? This recipe brings you rich, gooey goodness that’s hard to
Read more…
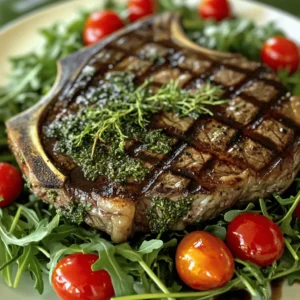
Sheet Pan Teriyaki Salmon Flavorful and Simple Dish
Looking for a quick and tasty dinner? This Sheet Pan Teriyaki Salmon is both simple and packed with flavor. With
Read more…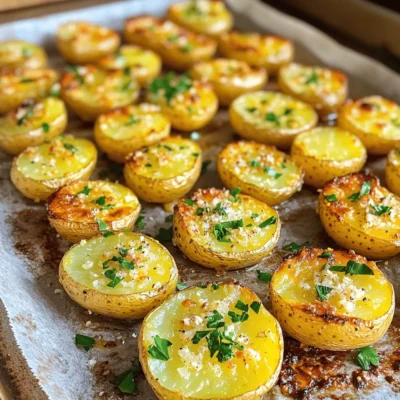
Garlic Parmesan Roasted Potatoes Crispy and Tasty Dish
If you crave a tasty side dish, Garlic Parmesan Roasted Potatoes are for you! This simple recipe gives you crispy,
Read more…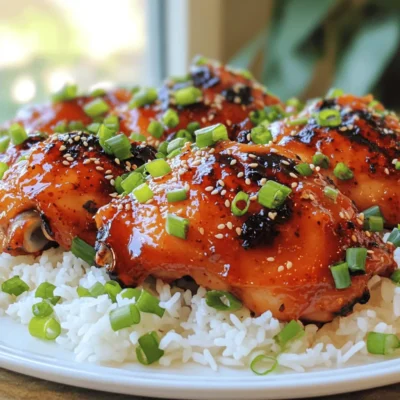
Spicy Korean Chicken Flavorful and Easy Recipe
If you crave bold flavors and easy cooking, you’re in the right place! This Spicy Korean Chicken recipe packs a
Read more…
Easy Chicken Enchiladas Quick and Tasty Meal
Looking for a quick and tasty meal? Try these Easy Chicken Enchiladas! They come together fast, making dinner stress-free. With
Read more…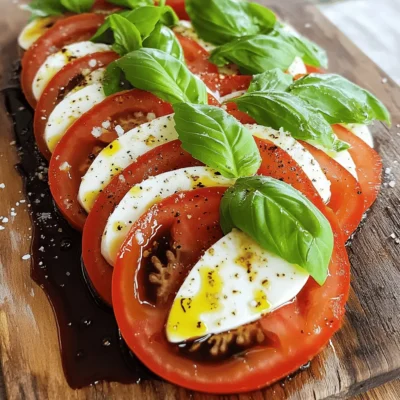
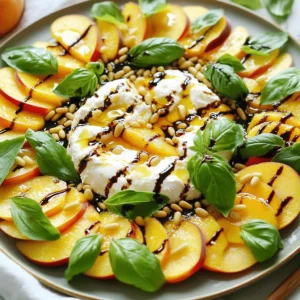
Simple Caprese Salad Delight for Fresh Flavors
If you love fresh flavors, you’ll adore my Simple Caprese Salad Delight! This easy recipe showcases ripe tomatoes, creamy mozzarella,
Read more…
Air Fryer Chicken Wings Crispy and Flavorful Recipe
Are you ready to make the best Air Fryer Chicken Wings you’ve ever tasted? This quick and easy recipe will
Read more…
Buffalo Cauliflower Bites Crunchy and Flavorful Snack
Are you ready to try a snack that’s crunchy, flavorful, and delightfully healthy? Buffalo Cauliflower Bites are the perfect treat
Read more…browse recipes


Easy Cream Cheese Chicken Enchiladas Tasty and Quick Recipe
Looking for a tasty and simple dinner idea? These Easy Cream Cheese Chicken Enchiladas will hit the spot! With creamy filling and a crispy…
My Latest Desserts

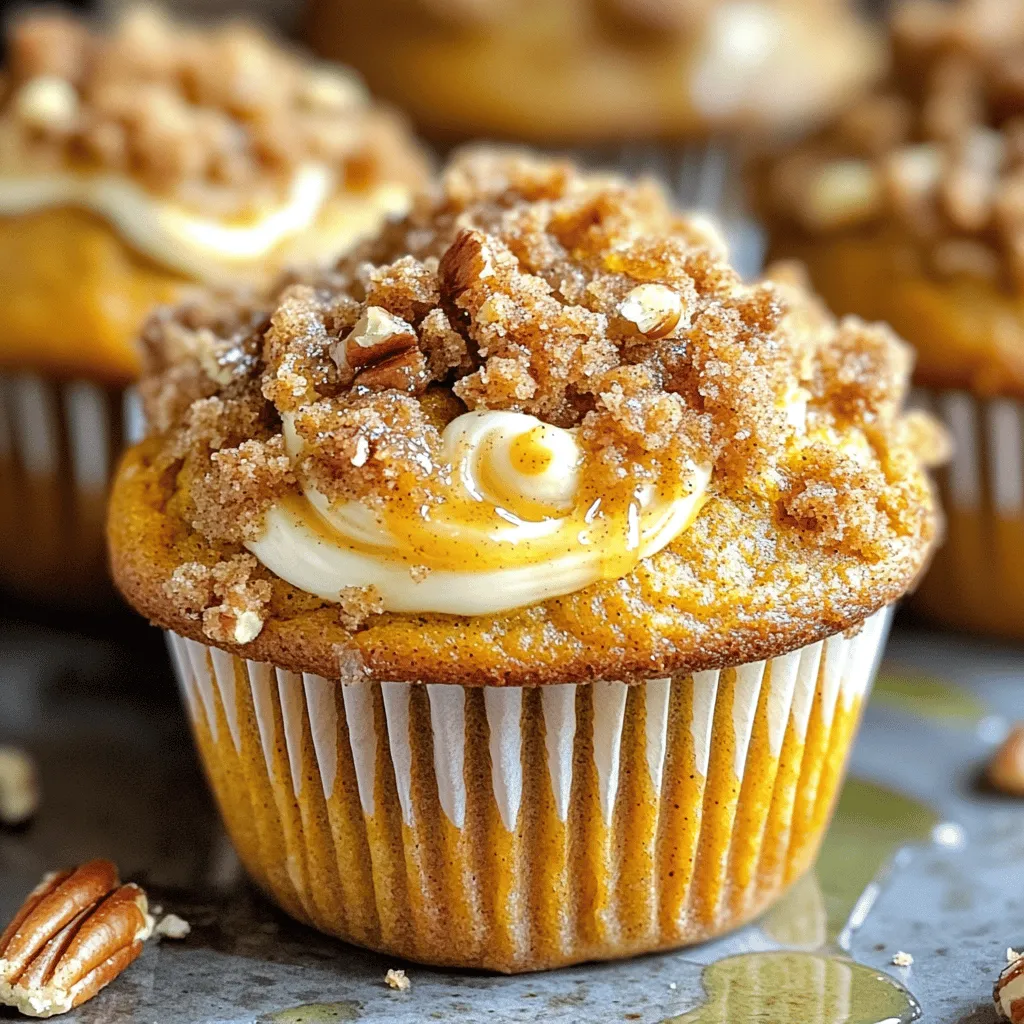
Chocolate Chip Pumpkin Cream Cheese Muffins Delight
If you love the cozy flavors of fall, you’re in for a real treat! Chocolate Chip Pumpkin Cream Cheese Muffins Read Full Recipe-
Streusel Pumpkin Cream Cheese Muffins Delightful Treat
If you love pumpkin flavors, you will adore these Streusel Pumpkin Cream Cheese Muffins. They mix rich pumpkin with creamy Read Full Recipe -
Easy Pumpkin Cream Cheese Muffins Tasty Fall Treat
Fall is here, and that means it’s time for warm, cozy treats! You’ll love these Easy Pumpkin Cream Cheese Muffins. Read Full Recipe -
Pumpkin Cream Cheese Muffins Delightful and Simple Recipe
Get ready to enjoy a treat that combines the warmth of pumpkin with creamy cheese! This simple recipe for pumpkin Read Full Recipe -
Pumpkin Pie Crinkle Cookies Charming Autumn Treat
Get ready to embrace autumn with a delightful twist on a classic favorite! Pumpkin Pie Crinkle Cookies combine the warm Read Full Recipe -
Pumpkin Cheesecake Cookies Irresistible Fall Treat
Welcome to the season of cozy flavors and pumpkin delights! If you crave a treat that combines the rich taste Read Full Recipe -
Chocolate Chip Pumpkin Cookies Flavorful Fall Treat
Are you ready to bake something special this fall? Chocolate chip pumpkin cookies blend sweet chocolate with warm pumpkin spice Read Full Recipe -
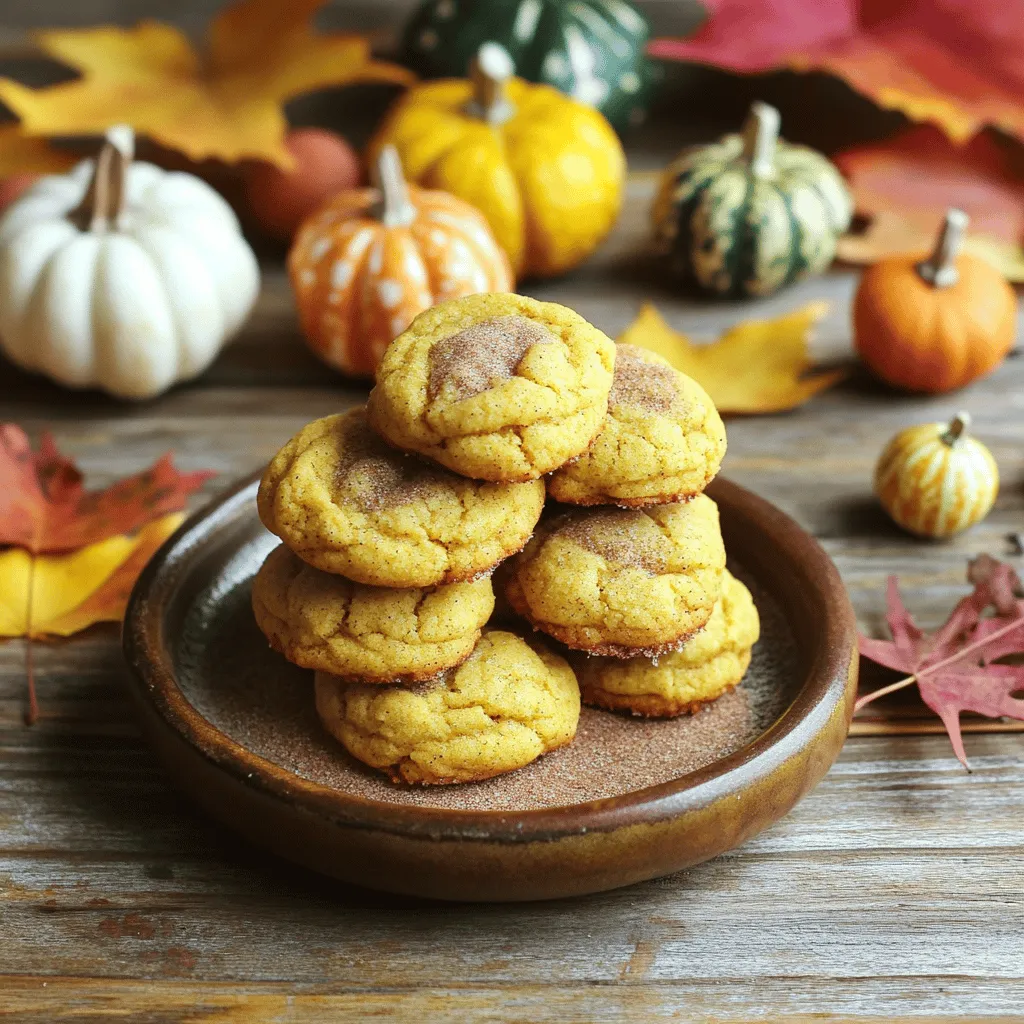
Pumpkin Butter Snickerdoodles Irresistible Cookie Treat
Looking for a new fall favorite? These Pumpkin Butter Snickerdoodles are the perfect cookie treat! With soft centers and a Read Full Recipe -
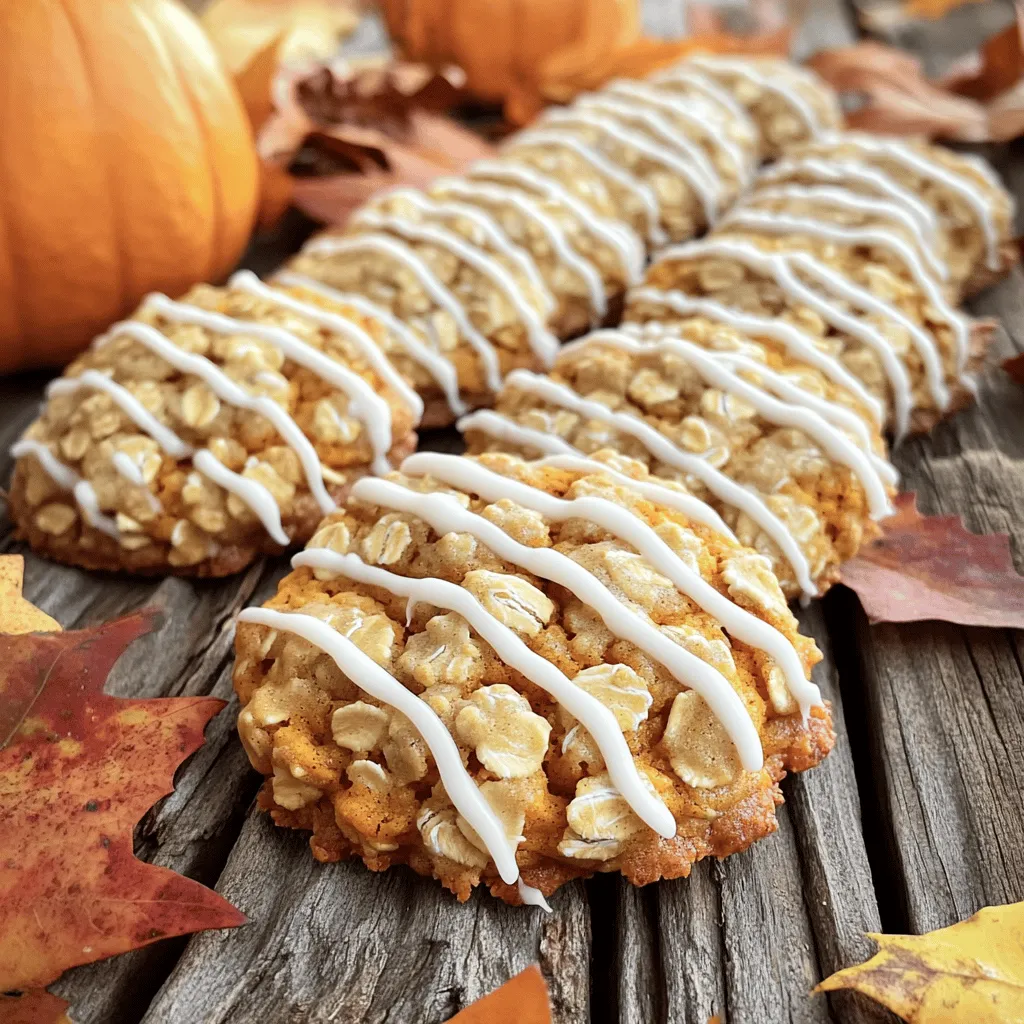
Pumpkin & Oatmeal Cookies with Icing Delight
If you’re looking for a delightful treat that combines the warm flavors of fall, you’re in the right place! In Read Full Recipe -
Pumpkin Churro Bites Tasty and Easy Dessert Treat
Are you ready to take your dessert game to the next level? These Pumpkin Churro Bites are here to impress! Read Full Recipe


My Latest Recipes

hey,
i’m !
I’m so happy you’re here!
Food is my passion, and perfecting each dish is my craft. I can’t wait for you to try them let’s dive into this delicious journey side by side.
![To make a tasty Cheesy Broccoli Rice Casserole, you need some key ingredients. Each one plays a big role in flavor and texture. Here’s what you will need: - 2 cups of cooked white or brown rice - 3 cups of fresh broccoli florets - 1 cup of shredded sharp cheddar cheese - 1 cup of cream of mushroom soup - 1/2 cup of milk - 1/2 teaspoon garlic powder - 1/2 teaspoon onion powder - 1/4 teaspoon black pepper - 1/2 teaspoon salt - 1/2 cup of breadcrumbs - 2 tablespoons melted butter - Optional: 1/4 cup grated Parmesan cheese for an extra cheesy topping Using the right amounts is key to a great casserole. Here are the suggested measurements for each ingredient: - Rice: Use 2 cups of cooked rice to form the base. - Broccoli: Three cups of broccoli adds color and nutrients. - Cheddar cheese: One cup gives that creamy, cheesy goodness. - Cream of mushroom soup: One cup adds moisture and flavor. - Milk: Half a cup helps blend everything together. - Spices: Use half a teaspoon of garlic powder and onion powder for depth. - Black pepper and salt: Add 1/4 teaspoon and 1/2 teaspoon, respectively, for seasoning. - Breadcrumbs and butter: Half a cup of breadcrumbs mixed with two tablespoons of butter creates a crispy topping. - Parmesan cheese: Add a quarter cup for extra flavor if you like. Sometimes, you might need to swap out ingredients. Here are some ideas: - Rice: Try quinoa or cauliflower rice for a low-carb option. - Cheese: Use dairy-free cheese for a vegan version. - Cream of mushroom soup: Swap with a homemade or store-bought vegan cream soup. - Milk: Almond or oat milk works well for dairy-free needs. - Breadcrumbs: Gluten-free breadcrumbs are great for those avoiding gluten. These substitutions can help you enjoy this dish no matter your dietary needs. For the full recipe, check the detailed instructions that follow. Start by gathering all your ingredients. You need cooked rice, broccoli, cheese, soup, and spices. In a large bowl, mix the cooked rice with the broccoli florets. Add the cheddar cheese, cream of mushroom soup, and milk next. Sprinkle in garlic powder, onion powder, black pepper, and salt. Stir everything well until it looks smooth. This step makes sure every bite is tasty. Now, pour the mixture into a greased baking dish. Spread it out evenly to avoid uneven cooking. This dish should be about 9x13 inches for the best results. Preheat your oven to 375°F (190°C). This ensures your casserole cooks evenly. Once the oven is ready, cover your baking dish with aluminum foil. Bake for 25 minutes to let all the flavors blend. After that, remove the foil to let the top brown. Bake for another 10-15 minutes until the top is golden and bubbly. This step gives the casserole a nice crunch on top. Once baked, take the casserole out and let it cool for a few minutes. This helps the dish set and makes it easier to serve. For a fun touch, you can add extra cheese or fresh parsley on top before serving. Serve it straight from the baking dish for a cozy feel. This cheesy broccoli rice casserole is sure to be a hit at your table. For the complete recipe, refer to the Full Recipe section. To boost the taste of your Cheesy Broccoli Rice Casserole, try adding spices. A pinch of cayenne can add warmth. A splash of lemon juice brings brightness. Fresh herbs like thyme or parsley can make it fresh. You can also use a mix of cheeses for more depth. If you have some garlic cloves, sauté them before adding to the mix. This can bring a rich, savory flavor to every bite. One common mistake is not cooking the rice fully. If it’s undercooked, the casserole can turn out hard. Overbaking is another issue; keep an eye on it after you remove the foil. You want the top golden, not burnt. Not seasoning enough can leave the dish bland. Always taste your mixture before baking. Lastly, don't skip the breadcrumbs. They add a nice crunch that balances the creamy texture. Serve this casserole hot from the oven. It pairs well with grilled chicken or fish. A fresh green salad can add a nice crunch. You can even serve it as a side dish for a holiday meal. For something simple, a slice of crusty bread works great too. If you want to make it special, drizzle some balsamic glaze on top. This will give the dish a sweet and tangy twist. For the full recipe, check out the [Full Recipe]. {{image_2}} You can make this dish gluten-free with a few simple swaps. Replace regular breadcrumbs with gluten-free breadcrumbs. You can find these in most grocery stores. Ensure your cream of mushroom soup is also gluten-free. Many brands offer this option. If you want to make your own soup, you can use cornstarch instead of flour as a thickener. This keeps your casserole creamy and delicious. Adding protein to your Cheesy Broccoli Rice Casserole boosts flavor and nutrition. You can use cooked chicken, tofu, or ham. If using chicken, shred or chop it into small pieces. For tofu, press it to remove water, then cube it. If you choose ham, diced pieces work best. Mix your protein choice into the casserole before baking. This makes it heartier and more filling. If you love spicy food, add some heat to your casserole. You can mix in diced jalapeños or red pepper flakes. Both add a nice kick. If you want a smoky flavor, try adding chipotle peppers in adobo sauce. Chop them finely and mix them in. This adds depth to the taste. Adjust the amount based on your heat preference. Enjoy exploring these spicy options! To keep your cheesy broccoli rice casserole fresh, let it cool first. Once cool, place it in an airtight container. This step helps stop moisture loss and keeps flavors locked in. Make sure to cover it well before storing it in the fridge. Leftovers can stay fresh for up to four days. If you want to save some for later, freezing is a great option. Divide the casserole into smaller portions. Use freezer-safe containers or bags for easy storage. You can freeze it for up to three months. When ready to eat, thaw it in the fridge overnight. Reheat in the oven at 350°F (175°C) until heated through, about 20-25 minutes. You can also microwave individual servings for quick meals. The shelf life of cheesy broccoli rice casserole depends on how you store it. In the fridge, it lasts about four days. If you freeze it, it can last up to three months. Always check for any off smells or changes in texture before eating. This way, you ensure your meal is both safe and delicious. You can prepare this casserole ahead of time. First, follow the recipe steps until you get to the baking part. Instead of baking, cover the dish and refrigerate it. You can store it for up to 24 hours. When ready to bake, heat your oven to 375°F (190°C). Bake the casserole for about 30-35 minutes, or until hot and bubbly. This makes it easy for busy nights. Yes, you can use frozen broccoli! It is a great option when fresh broccoli is not available. Just make sure to thaw and drain the frozen broccoli before mixing it into the casserole. You want to avoid excess water in the dish. This small step helps keep your casserole creamy and tasty. This casserole works well with many side dishes. Here are some ideas: - Grilled chicken or fish - A fresh garden salad - Roasted vegetables - Garlic bread These sides add variety and make your meal more complete. Yes, this casserole is vegetarian-friendly. It uses broccoli, rice, cheese, and soup, all of which are plant-based. If you want to keep it vegetarian, ensure your cream of mushroom soup does not contain meat products. This dish is a great choice for family dinners or potlucks. You can make a few simple swaps to make it healthier. Consider these options: - Use brown rice instead of white for more fiber. - Swap out regular cheese for low-fat cheese. - Use a low-sodium soup to cut down on salt. - Add more veggies like carrots or bell peppers for extra nutrients. These changes can help you enjoy this comfort food while keeping it nutritious. For the detailed recipe, check out the Full Recipe. This blog post shared all you need for a tasty Cheesy Broccoli Rice Casserole. We covered the must-have ingredients, helpful cooking steps, and fun tips to boost flavor. You learned about tasty variations like gluten-free or spicy options. Proper storage keeps your leftovers fresh and tasty. Remember, this dish is great for any meal. With these tips, you can enjoy a warm and comforting casserole any time. Keep experimenting and share your favorite twists!](https://mysavedrecipe.com/wp-content/uploads/2025/06/f9861f18-b882-4ceb-b632-9514e8ae1915-300x300.webp)
![- Skirt steak (1 lb) - Olive oil (2 tablespoons) - Fresh lemon juice (2 tablespoons) - Lemon zest (from 1 lemon) - Garlic (2 cloves, minced) - Smoked paprika (1 teaspoon) - Salt and pepper to taste - Couscous (1 cup) - Vegetable broth (1 ¼ cups) - Cherry tomatoes (1 cup, halved) - Cucumber (½ cup, diced) - Fresh parsley (¼ cup, chopped) - Fresh mint (¼ cup, chopped) - Cumin (½ teaspoon) - Extra lemon wedges for serving The main ingredients for your grilled skirt steak are simple yet full of flavor. The skirt steak, rich and tender, is the star of the dish. The olive oil helps the meat grill nicely, while lemon juice and zest add brightness. Minced garlic and smoked paprika bring depth, creating a tasty marinade. For the couscous, the key is using vegetable broth. It gives the couscous a lovely flavor. The cherry tomatoes and cucumber add freshness, while parsley and mint create a vibrant herb mix. Finally, a touch of cumin ties everything together, giving it warmth. Using fresh ingredients makes a big difference. Choose ripe tomatoes and crisp cucumbers. Fresh herbs elevate the dish, making it bright and inviting. This combination of flavors and textures creates a delightful meal that’s easy to make. Check out the Full Recipe for detailed instructions on how to prepare this delicious dish. To start, gather your marinade ingredients. You will need olive oil, fresh lemon juice, lemon zest, garlic, smoked paprika, salt, and pepper. Mix these well in a bowl. Then, take your skirt steak and place it in a resealable plastic bag or a shallow dish. Pour the marinade over the steak, ensuring it gets fully coated. Seal the bag or cover the dish tightly. Now, refrigerate it for at least 30 minutes. For deeper flavor, let it sit for up to 2 hours. Next, let’s prepare the lemon herb couscous. In a medium saucepan, bring the vegetable broth to a boil. Once boiling, remove it from the heat. Stir in the couscous and cover the pan. Let it sit for about 5 minutes. After that, fluff the couscous with a fork to break up any clumps. Now, it’s time to grill the steak. Preheat your grill or grill pan over medium-high heat. Remove the steak from the marinade, discarding any leftover marinade. Place the steak on the grill. Grill it for about 3-4 minutes on each side for medium-rare. If you prefer it more done, leave it on a bit longer. After grilling, let the steak rest for 5 minutes before slicing. Slice the steak thinly against the grain for the best texture. Arrange it on a plate, placing a generous portion of lemon herb couscous beside it. For a fresh touch, garnish your dish with extra lemon wedges. This will add a burst of flavor and a lovely look to your meal. Enjoy your grilled skirt steak with lemon herb couscous delight! For more details, check the Full Recipe. To make a great marinade, you can add spices like chili powder or cumin. These spices boost the flavor of the steak. For best results, let the steak marinate for at least 30 minutes. If you have time, two hours works even better. This helps the flavors soak in, making your steak taste amazing. When grilling skirt steak, avoid overcooking it. Keep an eye on the grill and check the time. A good tip is to use a meat thermometer. For medium-rare, aim for 130°F. If you want it more done, cook it a bit longer. This way, you ensure a tender and juicy steak. To get couscous just right, follow the cooking instructions closely. Let it sit for five minutes after boiling. Then use a fork to fluff it gently. This helps separate the grains and gives it a nice texture. If you prefer, you can also cook couscous in a rice cooker. It’s easy and saves time. {{image_2}} You can switch up the marinade to keep things fun. Try using lime juice or orange juice instead of lemon. Each citrus gives a unique taste to the skirt steak. If you want some heat, add chili powder or a splash of hot sauce. This kick can take your dish to a new level. Instead of couscous, you could use quinoa or rice. Both are great bases and bring their own flavors. You can also add seasonal vegetables to the couscous. Peppers, zucchini, or asparagus can add color and nutrients. This makes your meal even better. Pair your grilled skirt steak with a fresh salad. A simple green salad with a lemon vinaigrette works well. If you want something special, try a tabbouleh salad for a Middle Eastern twist. When serving wine, a light red like Pinot Noir complements the steak nicely. A crisp white like Sauvignon Blanc also goes well with the couscous. Explore these variations to make your grilled skirt steak with lemon herb couscous even more delightful! For a full recipe, check the details above. After enjoying your grilled skirt steak and lemon herb couscous, store any leftovers in the fridge. Place the steak in an airtight container to keep it fresh. The couscous should also go in a separate airtight container. This keeps both items from drying out. You can store the leftovers for up to three days. Can you freeze grilled steak? Yes, you can freeze grilled steak! Wrap it tightly in plastic wrap or aluminum foil, then place it in a freezer bag. This will help prevent freezer burn. When you are ready to eat it, just thaw it in the fridge overnight. To keep the flavor and texture, reheat the steak gently. The best method is to use a skillet or grill. Heat it on low, adding a splash of broth or water to keep it moist. You can also use the microwave, but be careful! Heat in short bursts to prevent overcooking. Always check the steak's temperature. It should reach at least 165°F to ensure safety. When reheating couscous, add a little water to keep it fluffy. Stir it gently while heating. For fresh ingredients, the general rule is: - Grilled skirt steak: 3-4 days in the fridge - Lemon herb couscous: 3 days in the fridge Look for signs of spoilage. If the steak has an off-smell or slimy texture, it’s best to throw it away. For couscous, if it looks dry or has mold, it is no longer safe to eat. Enjoy your delicious dish while keeping food safety in mind! For the full recipe, check out the recipe section. The best way to cook skirt steak is on a grill or grill pan. These methods give it a nice char and keep it juicy. - Preheat your grill to medium-high heat. - Cook the steak for about 3-4 minutes on each side for medium-rare. - Use a meat thermometer to check for doneness. Aim for 130-135°F. Grilling enhances the natural flavors of the steak. Plus, it adds a smoky taste that pairs well with the couscous. Yes, you can use other cuts of steak if needed. Flank steak or ribeye work well too. - Flank steak is lean and has a similar texture to skirt steak. - Ribeye is fattier, which makes it very tender and flavorful. Keep in mind that cooking times may vary. Adjust them based on the thickness of the steak you choose. To make this dish gluten-free, swap couscous with quinoa. Quinoa is a great alternative and packs protein. - Use gluten-free vegetable broth for cooking. - Check sauces and condiments for hidden gluten. You still get a tasty and filling dish without the gluten. Yes, you can prepare the marinade ahead of time. This saves you time and enhances flavor. - Mix all marinade ingredients in a bowl. - Store it in the fridge in an airtight container. You can marinate the skirt steak for up to 2 hours before grilling. This allows the flavors to soak in well. Check the [Full Recipe] for exact measurements and more details. Grilling skirt steak and pairing it with lemon herb couscous is simple and rewarding. You learned how to marinate the steak, prepare flavorful couscous, and grill to perfection. With tips on variations and storage, you can easily enjoy this dish multiple ways. Whether you're hosting or cooking for yourself, this meal offers fresh flavors that impress. Embrace the cooking process, experiment with spices, and enjoy your delicious creation. With easy steps and variations, you’re set for success in your kitchen!](https://mysavedrecipe.com/wp-content/uploads/2025/06/a74c4ac3-0e04-4461-ad06-bc8ba443e6fc-300x300.webp)

Garlic Butter Shrimp Pasta Flavorful and Easy Recipe
If you crave a tasty meal that’s quick to make, this Garlic Butter Shrimp Pasta recipe is for you. I’ll guide you through every…
![For a great Garlic Butter Shrimp Pasta, you'll need these main items: - 8 oz (225g) spaghetti or linguine - 1 lb (450g) shrimp, peeled and deveined - 4 tablespoons unsalted butter - 4 cloves garlic, minced - 1 teaspoon red pepper flakes, adjust to taste - 1 lemon, juice and zest - 1/2 cup cherry tomatoes, halved - 1/4 cup fresh parsley, chopped - Salt and pepper to taste These main ingredients bring together rich flavors. The shrimp adds protein, while garlic and butter create a tasty sauce. The lemon brightens the dish, and cherry tomatoes add sweetness. You can boost the taste of your dish with some optional ingredients. Consider adding: - Grated Parmesan cheese, for serving - A splash of white wine, for depth - Fresh basil, for a twist - Spinach or arugula, for greens These extras enhance the dish. Parmesan cheese gives creaminess, while white wine adds complexity. Fresh herbs like basil make it fresh and fragrant. Leafy greens add nutrients and balance. Pair your Garlic Butter Shrimp Pasta with these tasty sides: - A crisp green salad with vinaigrette - Garlic bread for dipping - Steamed vegetables like broccoli or asparagus These accompaniments round out the meal. A salad adds crunch, while garlic bread soaks up sauce. Steamed veggies bring more color and health. Check out the Full Recipe for all the details on making this delicious dish! Start by boiling a large pot of salted water. Add 8 oz of spaghetti or linguine. Cook according to the package instructions until the pasta is al dente. This usually takes about 8 to 10 minutes. Remember to reserve 1 cup of pasta water before draining. Set the pasta aside once done. In a large skillet, melt 2 tablespoons of butter over medium heat. Once it’s melted, add 4 cloves of minced garlic and 1 teaspoon of red pepper flakes. Sauté for about 1 minute. You want to smell that garlic! Now, raise the heat to medium-high. Add 1 pound of peeled and deveined shrimp to the skillet. Season with salt and pepper. Cook for about 2 to 3 minutes on each side. The shrimp should turn pink and opaque. Remove the shrimp from the skillet and set them aside. In the same skillet, add the remaining 2 tablespoons of butter. Toss in 1/2 cup of halved cherry tomatoes, 1 tablespoon of lemon juice, and the zest of 1 lemon. Sauté everything for about 3 to 4 minutes. The tomatoes should become soft and burst a bit. This adds great flavor! Return the cooked shrimp to the skillet. Now, add the drained pasta. Toss everything together. If it seems dry, add a bit of the reserved pasta water. Mix until the pasta is well-coated in the sauce. You’ll want a nice, creamy consistency. Remove the skillet from heat. Stir in 1/4 cup of chopped fresh parsley. Taste the dish and adjust the seasoning with more salt, pepper, or lemon juice if needed. Serve the pasta on plates. If you like, sprinkle some grated Parmesan cheese on top. Enjoy your Garlic Butter Shrimp Pasta! For the full recipe, check the full details above. To get the best shrimp, choose fresh or frozen shrimp. I prefer shrimp that are large and easy to cook. When cooking, do not overdo it. Cook shrimp for 2-3 minutes on each side. They should turn pink and opaque. If you see them curling, they are done. Overcooked shrimp become tough and rubbery. Seasoning is key for this dish. I use salt and pepper, but you can add more. For a spicy kick, increase the red pepper flakes. Lemon juice and zest brighten up the sauce. Taste as you go. If you like more lemon, add it! You can also sprinkle in fresh herbs like basil or thyme for extra flavor. Use a large skillet for cooking shrimp. A non-stick skillet works best. This helps prevent sticking and burning. A big pot is great for boiling pasta. Remember to keep a cup of pasta water. This water helps to create a creamy sauce later. Always have a spatula handy for stirring. For this dish, a serving bowl is nice for presentation. For the full recipe, check back to the start! {{image_2}} You can boost this dish's nutrition by adding vegetables. Spinach, broccoli, or bell peppers work well. Simply sauté them with the shrimp. Add the veggies right after the garlic. They will cook quickly and add both flavor and color. You can also toss in peas or zucchini for extra crunch. This not only makes the dish healthier but also more vibrant. While I love spaghetti or linguine, you can use other types of pasta. Penne, fettuccine, or even whole wheat pasta can be great choices. Each type brings a unique texture. Just remember to adjust cooking times based on the pasta you choose. You can even try gluten-free pasta for a different twist. It will taste great with the garlic butter sauce. Feel free to experiment with seasonings and sauces. Try adding fresh herbs like basil or thyme for depth. You can also swap out red pepper flakes for chili powder. For a creamier sauce, add a splash of heavy cream or cream cheese. Adding a bit of white wine while cooking can enhance the flavor too. It brings out the shrimp's natural sweetness. For the full recipe, check out the Garlic Butter Shrimp Pasta . To store your Garlic Butter Shrimp Pasta, let it cool first. Place it in an airtight container. This keeps the dish fresh. You can store it in the fridge for up to three days. If you want to keep it longer, freezing is a great option. When you're ready to eat, reheating is easy. You can use a microwave or a skillet. If using a microwave, place the pasta on a plate. Heat it on medium power for 1-2 minutes. Stir halfway to heat evenly. If using a skillet, add a splash of water or broth. Heat over medium until warm, about 5 minutes. This helps keep the pasta moist and tasty. Freezing is a smart choice for leftovers. To freeze, pack the cooled pasta in a freezer-safe container. It can last up to three months. When you’re ready to eat, thaw it in the fridge overnight. Reheat it as mentioned before. Remember, shrimp can lose some texture after freezing, but the flavor stays great. For the full recipe, check out the main article. The best shrimp for this recipe are medium to large ones. I prefer wild-caught shrimp for flavor. They hold up well during cooking and provide a nice bite. Look for shrimp labeled as "peeled and deveined" to save time. Fresh or frozen shrimp both work well. Just make sure to thaw frozen shrimp properly before cooking. Yes, you can use gluten-free pasta. There are many good options available, like brown rice or chickpea pasta. These options cook well and taste great with the garlic butter sauce. Just follow the cooking instructions on the package to get the best results. To spice up this dish, add more red pepper flakes to the garlic butter sauce. You can also stir in some diced jalapeños or a splash of hot sauce. Adjust the heat to fit your taste. Just remember, it’s easier to add heat than to take it away, so start small. Yes, you can prepare parts of this recipe ahead of time. Cook the pasta and shrimp in advance. Store each in separate containers in the fridge. When ready to eat, reheat them in a skillet with some extra butter and lemon juice. This keeps the dish fresh and tasty. Great side dishes include a simple green salad or garlic bread. You can also serve steamed vegetables like broccoli or asparagus. These sides add color and nutrients. They complement the pasta well and make your meal balanced and delicious. For the complete recipe, check out the [Full Recipe]. This blog taught you how to make delicious garlic butter shrimp pasta. You learned essential ingredients and how to cook each part step-by-step. Tips can help you get the right shrimp texture and add flavor. You also discovered tasty variations to enhance your dish. Finally, I covered storage and reheating methods. Enjoy your tasty pasta! Remember to try new things and make it your own. Happy cooking!](https://mysavedrecipe.com/wp-content/uploads/2025/05/56e09446-ebd9-4f5f-a80a-51a06c9eab60.webp)
