Latest & Greatest
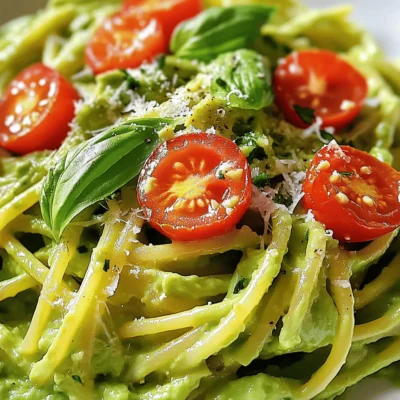
Creamy Avocado Pasta Flavorful and Simple Dish
Looking for a quick and tasty meal? Creamy Avocado Pasta is your answer! This dish is not only easy to
Read more…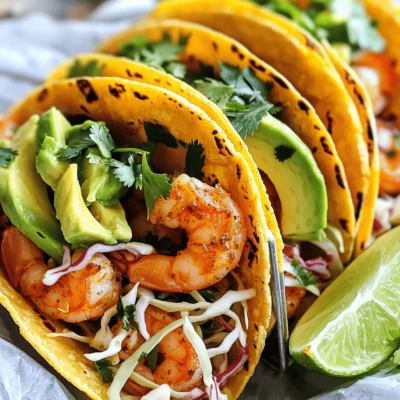
Spicy Garlic Shrimp Tacos Flavorful and Easy Recipe
Get ready to spice up taco night with my quick and tasty Spicy Garlic Shrimp Tacos! This easy recipe combines
Read more…
Vegan Chocolate Chip Cookies Delicious and Simple Recipe
Are you ready to bake the best vegan chocolate chip cookies? This simple recipe gives you soft, gooey treats that
Read more…
Buffalo Cauliflower Bites Crispy and Flavorful Snack
If you’re craving a crispy and flavorful snack, look no further than Buffalo Cauliflower Bites! These bites are easy to
Read more…
Pan-Seared Scallops Simple and Flavorful Recipe
If you’ve ever wished to impress family and friends with a fancy dish, this pan-seared scallops recipe is for you.
Read more…
One-Pan Honey Pineapple Chicken Flavorful Delight
Looking for a simple yet tasty dinner idea? One-Pan Honey Pineapple Chicken brings sweet and savory together in one dish!
Read more…
Mini Cheesecake Desserts Delightful and Easy Recipe
If you love cheesecakes but want a bite-sized treat, you’re in the right place! I’ll show you how to make
Read more…
Savory Louisiana Gumbo with Sausage & Shrimp Recipe
Welcome to a taste of Louisiana! In this blog post, you’ll discover how to make a spicy and savory gumbo
Read more…browse recipes


![To make a tasty veggie pizza, you need some key ingredients. Here’s what you need: - 2 cups all-purpose flour - 1 packet (2 ¼ teaspoons) active dry yeast - ¾ cup warm water (110°F/45°C) - 1 tablespoon olive oil - 1 teaspoon sugar - ½ teaspoon salt - 1 cup pizza sauce - 1 cup shredded mozzarella cheese These ingredients create a soft and chewy crust, perfect for holding all your toppings. Choosing the right toppings makes your pizza shine. Here are some great veggie options: - ½ cup sliced bell peppers (mixed colors) - ½ cup sliced red onions - ½ cup sliced mushrooms - ½ cup black olives, sliced Feel free to mix and match your favorites! You can also add spinach, zucchini, or artichokes for extra flavor. Adding garnishes and seasonings can take your pizza to the next level. Here are some ideas: - 1 teaspoon Italian seasoning - Fresh basil leaves for garnish (optional) Sprinkling Italian seasoning brings an aromatic touch. Fresh basil adds color and flavor just before serving. For the full recipe, check the [Full Recipe]. Enjoy making your delicious veggie pizza! To start, you need to make the dough. In a small bowl, mix warm water, sugar, and active dry yeast. Let it sit for about 5-10 minutes. You will see bubbles form on the top. This shows the yeast is alive. Next, in a large bowl, combine flour and salt. Make a well in the center and add the yeast mixture and olive oil. Stir until a soft dough forms. Now it's time to shape the pizza. Sprinkle some flour on your surface. Turn the dough out onto that floured surface. Knead it for about 5-7 minutes. You want the dough to be smooth and elastic. Once it feels right, place it in a greased bowl. Cover it with a kitchen towel and let it rise in a warm spot. This should take about 1 hour or until it doubles in size. After it rises, punch it down. Roll it out into a 12-inch circle or rectangle to fit your baking sheet or pizza stone. Preheat your oven to 475°F (245°C). Once your pizza is shaped, place it on your baking sheet or stone. Spread the pizza sauce evenly over the base. Leave a small border around the edges. Next, sprinkle mozzarella cheese on top. Add the sliced bell peppers, red onions, mushrooms, and black olives. Finish with a sprinkle of Italian seasoning. Bake the pizza in the preheated oven for 12-15 minutes. You want the crust to be golden and the cheese bubbly. When done, let it cool for a few minutes. Then, slice and enjoy! You can find the full recipe above if you want to refer back. To make a great crust, focus on the dough. Use cold water instead of warm water for a flakier texture. Knead the dough well, as this builds gluten and helps it rise. Let it rest for at least an hour. This resting time allows the gluten to relax, making it easier to roll out. You can boost your pizza’s flavor in many ways. Try adding fresh herbs like oregano or thyme directly into the dough. Use a mix of cheeses for depth. A blend of mozzarella and provolone works well. For a spicy kick, sprinkle some crushed red pepper on top. You can also add a drizzle of olive oil before baking for richness. Baking time and temperature are key. Preheat your oven to 475°F (245°C) for a crispy crust. Place your pizza in the center of the oven for even cooking. Bake for 12-15 minutes, but keep an eye on it. The cheese should be bubbly and golden. If the edges brown too quickly, cover them lightly with aluminum foil. These tips can help you create a delicious veggie pizza that impresses everyone. For the complete process, check the Full Recipe. {{image_2}} You can enjoy veggie pizza even if you avoid gluten. Start with gluten-free flour. Many brands offer a mix that works well. You can also use cauliflower crust or chickpea flour. Both options taste great and are easy to make. Just follow the same steps for the dough. Mix and match toppings to find your favorite. Here are some ideas: - Spinach and feta for a Greek twist - Artichokes and sun-dried tomatoes for a Mediterranean vibe - Pesto and goat cheese for a rich flavor - Zucchini and fresh herbs for a light option Feel free to get creative! The more colors you add, the better it looks and tastes. While pizza sauce is classic, you can try other sauces too. Here are some fun ideas: - Pesto for a fresh, herby taste - Barbecue sauce for a smoky flavor - Alfredo sauce for a creamy base - Hummus for a unique, healthy twist Each sauce gives your pizza a new flavor. Experiment with these options to keep things exciting. For the full recipe, check out the Delicious Veggie Pizza section. You can store leftover veggie pizza in a few easy steps. First, let the pizza cool down. Then, wrap each slice in plastic wrap or foil. You can also use an airtight container. Store it in the fridge for up to three days. This keeps the pizza fresh and tasty. To reheat your leftover veggie pizza, you have a few options. The oven works best for crispiness. Preheat your oven to 375°F (190°C). Place the pizza on a baking sheet. Heat it for about 10 to 15 minutes. This way, the crust stays crunchy. You can also use a microwave for quick heating. Place a slice on a microwave-safe plate. Heat for about 30 seconds. But, the crust may get soft. If you want to keep the crunch, stick with the oven. Freezing veggie pizza is a great way to save it for later. First, let the pizza cool completely. Then, wrap each slice tightly in plastic wrap. You can also use freezer bags. Make sure to remove as much air as possible. Label the bags with the date. This way, you’ll know how long it has been in the freezer. You can freeze the pizza for up to two months. When you are ready to eat, just thaw it in the fridge overnight. Then, reheat as mentioned earlier. Enjoy your frozen veggie pizza just like fresh! To make the dough rise faster, you can use warm water. The water should be around 110°F (45°C). This warmth helps the yeast work better. You can also place the bowl in a warm spot, like near a sunny window or on top of a warm stove. A good tip is to cover the bowl with a towel. This keeps the heat in and helps the dough rise faster. The best veggies for veggie pizza include: - Bell peppers (mixed colors) - Red onions - Mushrooms - Black olives - Spinach - Zucchini - Artichokes These veggies add great flavor and color. You can mix and match your favorites. Use fresh veggies for the best taste. Each veggie brings its own unique flavor, making your pizza more exciting. Yes, you can use store-bought dough for this recipe. It saves time and is still tasty. Just follow the package instructions for rolling and baking. This option works great for busy days. You can still add all your favorite toppings. Store-bought dough makes it easy to enjoy a delicious veggie pizza at home. For detailed steps, check out the Full Recipe. Making veggie pizza is fun and easy. We discussed the key ingredients, like dough and toppings. You learned to prepare, roll, and bake your pizza to perfection. I shared tips for a flaky crust and tasty flavors. We also explored fun variations, like gluten-free options and different sauces. Finally, you now know how to store and reheat leftovers easily. Enjoy creating your perfect veggie pizza and share it with friends and family!](https://mysavedrecipe.com/wp-content/uploads/2025/05/deaa3714-a51b-4a51-b042-6e70e85a4153.webp)
Delicious Veggie Pizza Easy and Flavorful Recipe
Craving a tasty veggie pizza that’s easy to make? You’ve come to the right place! I’ll guide you through a simple recipe that bursts…
My Latest Desserts

Chocolate Thumbprint Cookies Irresistible Treat Recipe
If you’re craving a sweet treat, you’ll love chocolate thumbprint cookies! These soft, chewy cookies are easy to make and Read Full Recipe-
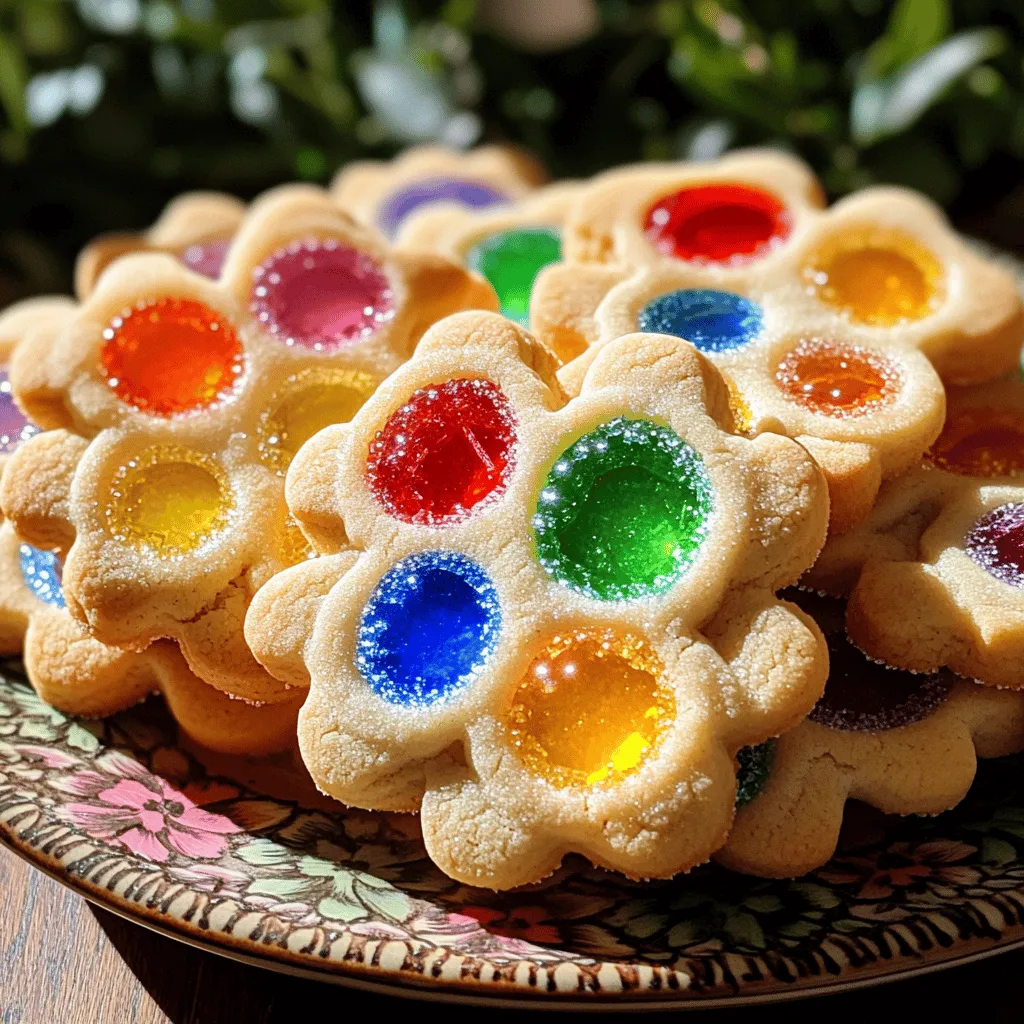
Easy Stained Glass Cookies Simple and Fun Recipe
Get ready to create some beautiful treats with my Easy Stained Glass Cookies! This simple recipe is perfect for kids Read Full Recipe -
Halloween Chex Mix Fun and Festive Snack Idea
Get ready for a sweet and spooky delight with my Halloween Chex Mix! This fun snack combines crispy Chex cereal, Read Full Recipe -
Pumpkin Cheesecake Dip Delightful and Easy Recipe
Fall is here, and nothing screams comfort like my Pumpkin Cheesecake Dip! This delightful treat is easy to make, packed Read Full Recipe -
Pumpkin Spice Energy Bites Healthy Power Snack
Looking for a delicious and healthy snack? Pumpkin Spice Energy Bites are the answer! These tasty treats blend fiber-rich oats, Read Full Recipe -
Pumpkin Pie Overnight Oats Flavorful and Nutritious Meal
Looking for a healthy yet tasty breakfast? Pumpkin Pie Overnight Oats combine rich pumpkin flavor with creamy oats. Packed with Read Full Recipe -
Pumpkin Cheesecake Brownies Delightful Dessert Recipe
Ready to treat yourself? Let’s dive into these Pumpkin Cheesecake Brownies. This recipe blends rich brownies with creamy pumpkin cheesecake, Read Full Recipe -
Chocolate Chip Pumpkin Cream Cheese Muffins Delight
If you love the cozy flavors of fall, you’re in for a real treat! Chocolate Chip Pumpkin Cream Cheese Muffins Read Full Recipe -
Streusel Pumpkin Cream Cheese Muffins Delightful Treat
If you love pumpkin flavors, you will adore these Streusel Pumpkin Cream Cheese Muffins. They mix rich pumpkin with creamy Read Full Recipe -
Easy Pumpkin Cream Cheese Muffins Tasty Fall Treat
Fall is here, and that means it’s time for warm, cozy treats! You’ll love these Easy Pumpkin Cream Cheese Muffins. Read Full Recipe


My Latest Recipes

hey,
i’m !
I’m so happy you’re here!
Food is my passion, and perfecting each dish is my craft. I can’t wait for you to try them let’s dive into this delicious journey side by side.

![To make Vegan Chocolate Avocado Mousse, you need a few key ingredients. Each one plays an important role in creating that creamy delight. Here’s a detailed list of what you’ll need: - Ripe Avocados: You need 2 ripe avocados. They give the mousse its creamy base and healthy fats. - Unsweetened Cocoa Powder: Use 1/2 cup. This adds rich chocolate flavor without added sugar. - Maple Syrup or Agave Nectar: Choose 1/2 cup of either. This natural sweetener balances the cocoa’s bitterness. - Almond Milk or Non-Dairy Milk: Add 1/4 cup. It helps blend everything into a smooth texture. - Vanilla Extract: You need 1 teaspoon. This adds a warm, sweet note to the mousse. - Sea Salt: Just a pinch enhances the flavors and richness. - Optional Garnishes: Fresh berries and mint leaves add color and freshness on top. These ingredients combine to create a dessert that feels indulgent but is also healthy. For the full recipe details, follow along! How to Prepare the Avocados Start with two ripe avocados. Cut them in half and remove the pit. Use a spoon to scoop out the green flesh. Place the avocado in your food processor. Ripe avocados are key for a creamy mousse. They should feel soft but not mushy. Blending the Ingredients Together Next, add the unsweetened cocoa powder, maple syrup, almond milk, vanilla extract, and a pinch of sea salt. Blend everything on high speed. Keep blending until it’s smooth and creamy. You may need to scrape the sides to mix well. This step is crucial for a perfect texture. Adjusting Sweetness and Flavor After blending, taste the mousse. If it needs more sweetness, add a bit more maple syrup. Blend again briefly to mix. You want a nice balance of chocolate and sweetness. Adjusting flavors is part of making it your own. Chilling the Mousse Once the mousse is smooth and sweet, transfer it to bowls or glasses. Chill in the fridge for at least 30 minutes. This helps the flavors come together and sets the mousse. It’s worth the wait! You can enjoy it after it’s chilled and ready to serve. For the full recipe, check out the [Full Recipe]. To make the best vegan chocolate avocado mousse, focus on a few key points. First, for soothing creaminess, use ripe avocados. They should feel soft when you press them. This ensures a smooth blend. Next, check your sweetness levels. Start with half a cup of maple syrup. After blending, taste the mousse. If it is not sweet enough, add a bit more syrup. Blend again. This helps create a balanced flavor. Lastly, use high-quality cocoa powder. This makes a big difference in taste. Look for unsweetened cocoa with a rich flavor. Avoid low-quality brands for the best results. When it comes to serving, think about what pairs well with your mousse. Fresh berries add a bright touch. They bring a nice contrast to the rich chocolate flavor. Mint leaves also lend a fresh aroma. For creative serving ideas, try using small glasses or bowls. Layer the mousse with fresh fruit or granola for added texture. You can also serve it in a jar for a fun look. Consider making a chocolate sauce to drizzle on top, too. This adds extra flair and flavor. {{image_2}} You can make this mousse even better with a few fun add-ins. - Adding Nut Butter for Extra Richness A spoonful of almond butter or peanut butter brings a creamy touch. This adds flavor and richness. Just blend it in with the other ingredients. You will love the nutty twist! - Infusing with Espresso or Coffee Flavors Want a coffee kick? Add a shot of espresso or instant coffee. This gives the mousse a deep, bold flavor. Mix it in while blending for a delicious taste boost. If you have special diet needs, don't worry! You can adjust the recipe easily. - Sugar-Free Options For a sugar-free treat, use stevia or monk fruit sweetener. These options keep the mousse sweet without sugar. Just swap in place of maple syrup. - Nut-Free Variants If you have nut allergies, use oat milk instead of almond milk. This keeps the mousse creamy without nuts. Enjoy a tasty dessert without worry! Feel free to explore these variations to suit your taste. Each option adds a unique twist to the classic Vegan Chocolate Avocado Mousse. Check out the Full Recipe for the base you can customize! To keep your Vegan Chocolate Avocado Mousse fresh, store it in the fridge. Use an airtight container to prevent any odors from other foods. The mousse will stay good for about three days. If you have extra mousse, you can freeze it. Pour the mousse into a freezer-safe container. Leave some space at the top, as it may expand when frozen. You can freeze it for up to three months. When you’re ready to eat it, take it out and thaw in the fridge overnight. If you want it faster, place the container in cool water for about an hour. Once thawed, stir it gently to restore its creamy texture. Make sure to check the mousse for any changes in texture or smell before serving. Enjoy your creamy delight again! For the full recipe, check the previous section. Can I use ripe bananas instead of avocados? No, ripe bananas won't give the same creamy texture. Avocados have healthy fats that make this mousse rich and smooth. How long can I store leftover mousse? You can keep leftover mousse in the fridge for up to three days. Just cover it well to keep it fresh. Is this Vegan Chocolate Avocado Mousse gluten-free? Yes, this mousse is gluten-free. All the ingredients are naturally free from gluten. What can I use instead of maple syrup? You can use agave nectar or even date syrup. Both options add sweetness and flavor, just like maple syrup. Can I make this recipe nut-free? Yes, you can. Simply use oat milk or coconut milk instead of almond milk. These options keep it nut-free. How can I make this mousse fluffier? To make it fluffier, whip some aquafaba (chickpea brine) until stiff peaks form. Fold it into the mousse before chilling. What are the health benefits of avocados in desserts? Avocados are packed with healthy fats, vitamins, and minerals. They make desserts creamy while adding nutrients and fiber. This mousse is a tasty way to enjoy the benefits of avocados. This blog post covered how to make a tasty vegan chocolate avocado mousse. We looked at the key ingredients like ripe avocados, cocoa, and maple syrup. You learned the steps to make it creamy and flavorful, and I shared tips to perfect the texture. We discussed fun variations and how to store leftovers. For a delicious dessert, this mousse hits the mark. Now, enjoy making it your way! You've got this!](https://mysavedrecipe.com/wp-content/uploads/2025/05/83149676-adc7-4b9f-9b69-e4eb6a93ed43-300x300.webp)
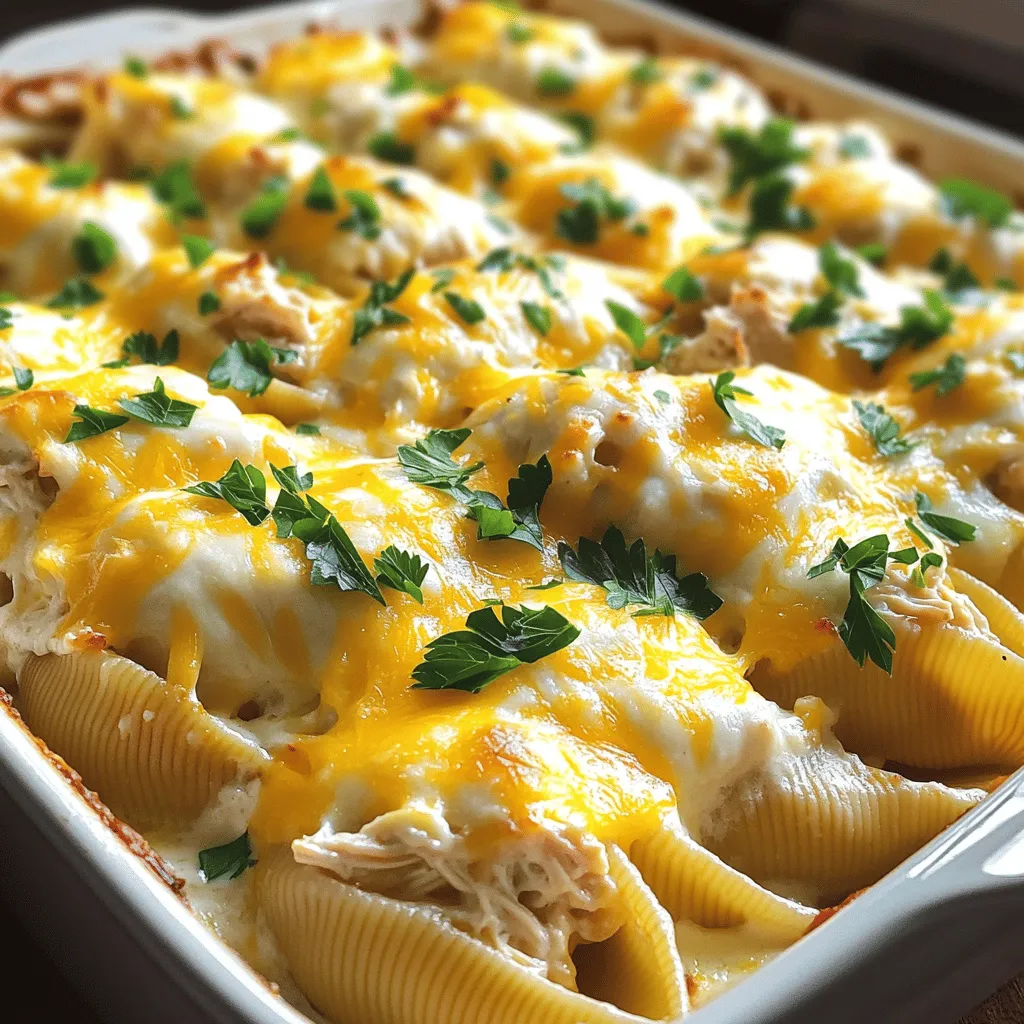
Savory Chicken Alfredo Stuffed Shells Comfort Dish
Looking for a comforting dish that warms the soul? My Chicken Alfredo Stuffed Shells are just what you need! This creamy, cheesy delight takes…